
September 7, 2020 updated by
Leave a reply »
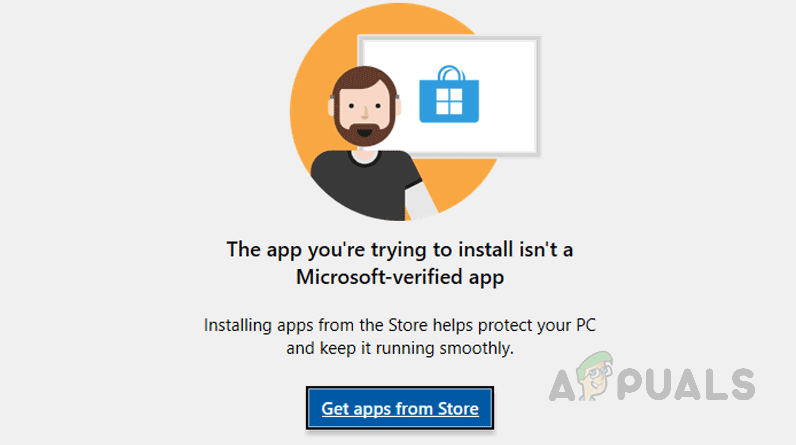
When you try to install an app or program in Windows 10, you may get the warning “The app you’re trying to install isn’t a Microsoft-verified app“.
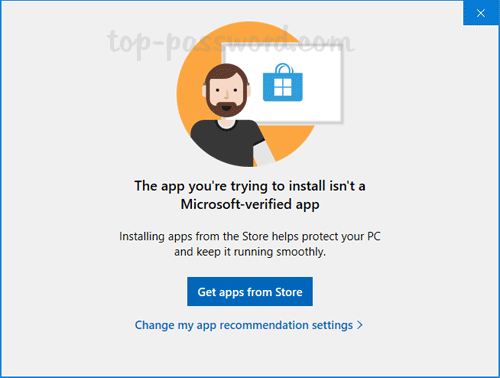
Starting with Windows 10 build 15042, Microsoft has added a new setting which allows installing apps from Windows Store only. To get rid of the warning “The app you’re trying to install isn’t a Microsoft-verified app“, here are 3 methods to turn off app recommendations in Windows 10.
Method 1: Turn off App Recommendations via Settings
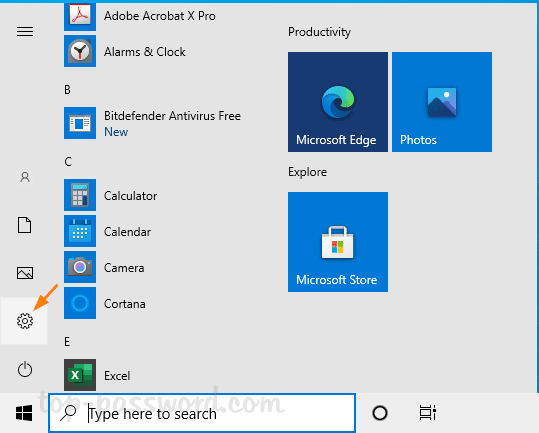
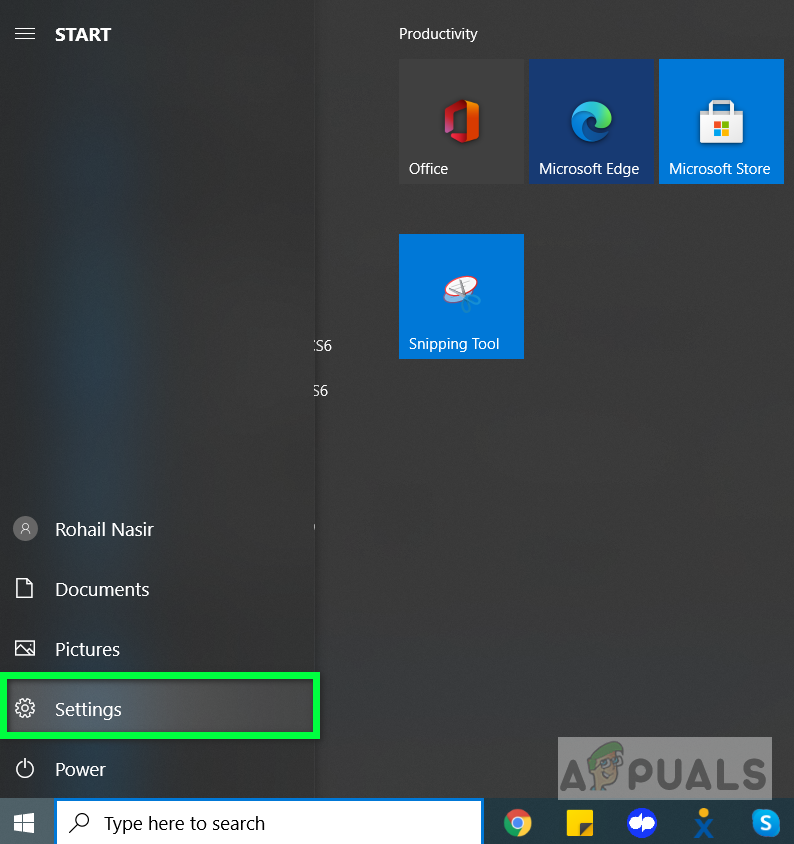
- Click the Start button and then click the gear icon to open the Settings app.

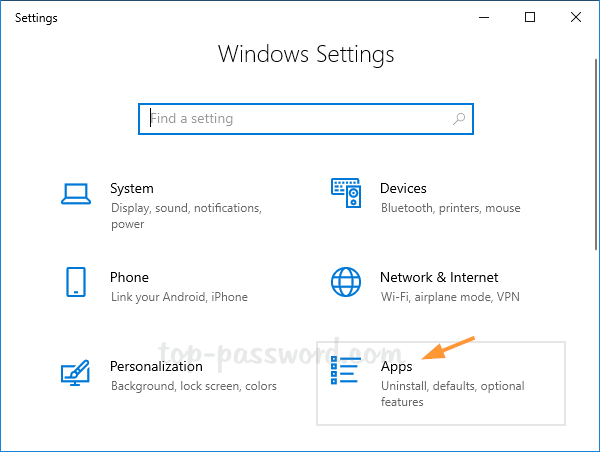
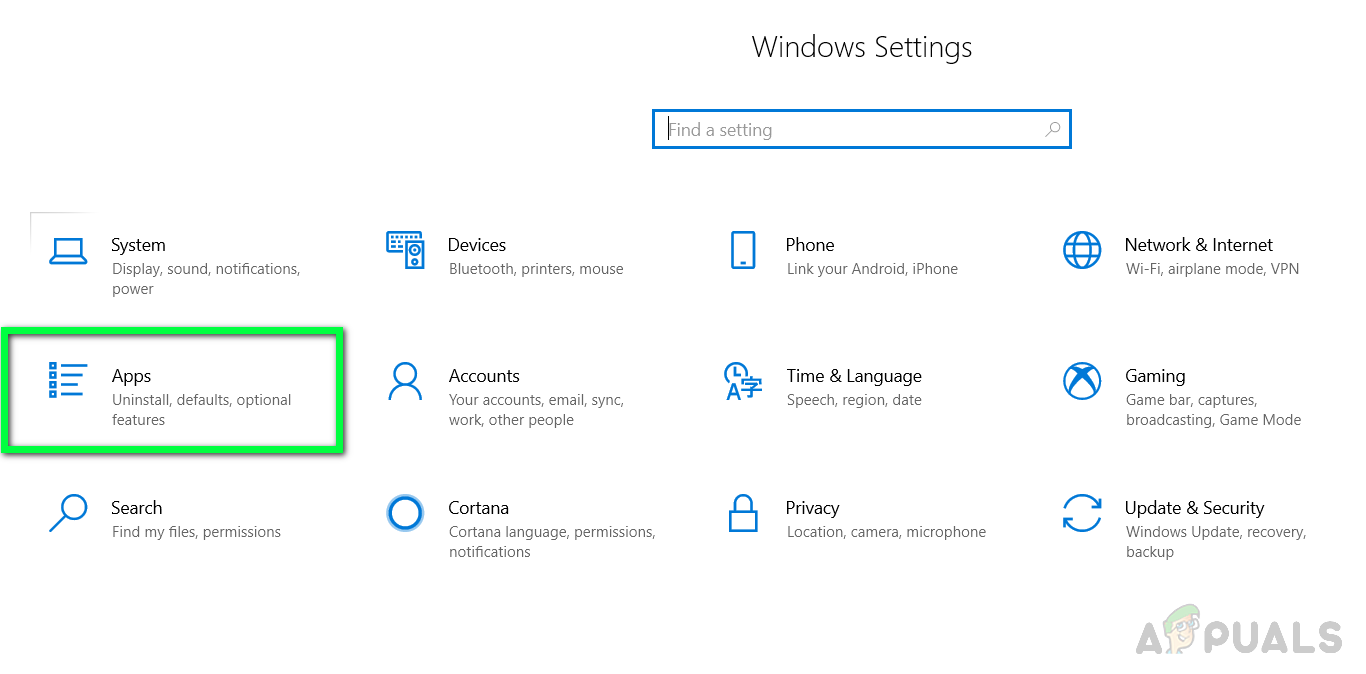
- Next, choose the Apps category.

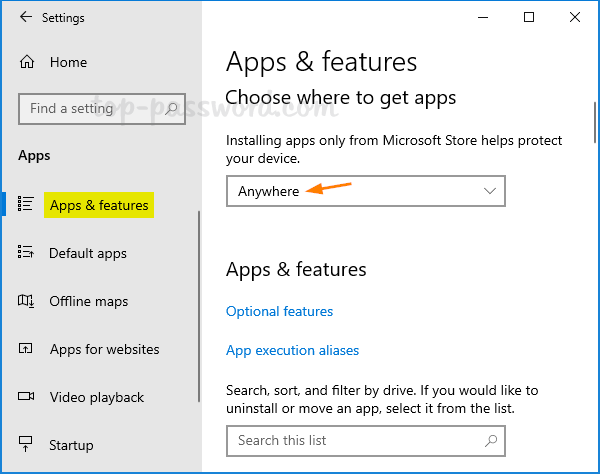
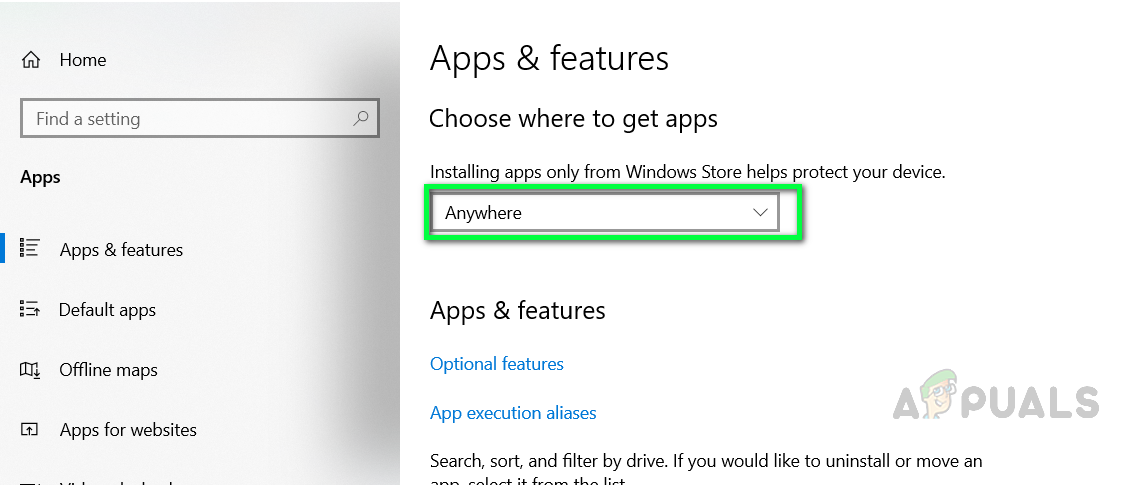
- On the right side, click the “Choose where to get apps” drop-down list and change it from “The Microsoft Store only (Recommended)” to “Anywhere“.

- Close the Settings app and the warning will be gone away.
If the “Choose where to get apps” drop-down list is grayed out or missing, try to adjust the app installation policy using one of the following methods.
Method 2: Turn off App Recommendations via Group Policy
- Open Local Group Policy Editor and browse to: Computer Configuration -> Administrative Templates -> Windows Components -> Windows Defender SmartScreen -> Explorer.
- On the right pane, double-click on the “Configure App Install Control” policy to edit it.

- Select Enabled and then pick up the “Turn off app recommendations” setting from the drop-down list.

- Click Apply and then OK. Restart your PC and Windows 10 should never prevent you from installing third-party apps or softwares.


Method 3: Turn off App Recommendations via Registry Editor
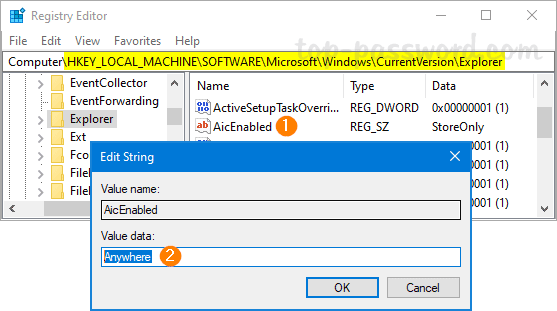
- Open Registry Editor and navigate to:
HKEY_LOCAL_MACHINE\SOFTWARE\Microsoft\Windows\CurrentVersion\Explorer. Look for a string named AicEnabled on the right pane, then double-click it and change its value from “StoreOnly” to “Anywhere”.
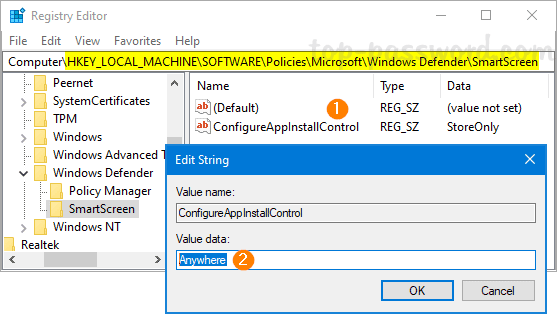
- Next, navigate to another key:
HKEY_LOCAL_MACHINE\SOFTWARE\Policies\Microsoft\Windows Defender\SmartScreen. On the right side, double-click the string ConfigureAppInstallControl and change its value from “StoreOnly” to “Anywhere”.
- Close Registry Editor and reboot Windows 10 to apply the changes. The warning “The app you’re trying to install isn’t a Microsoft-verified app” will never appear again on the screen while you are installing any third-party software.
- Previous Post: How to Disable Edge Swipe Gesture on Touch Screen in Windows 10
- Next Post: Easy Ways to Change Windows Password from Remote Desktop Session
Readers help support Windows Report. We may get a commission if you buy through our links.
Read our disclosure page to find out how can you help Windows Report sustain the editorial team. Read more
One of the most common problems with installing apps on Windows 11 is that you may get an error message saying that the app you are trying to install is not a Microsoft verified app. This can happen if the app was downloaded from a source that is not trusted by your device.
Downloading from any other source means that these apps may not be compatible with your version of Windows. Still, the Microsoft Store doesn’t have all apps you may need, so you need to bypass this error, and we show you how in this article.
Why can’t I install apps that aren’t Microsoft verified?
Microsoft has strict policies for what apps can be installed on a device and how they should work. Also, Microsoft verified apps are regularly updated to fix known bugs and provide enhanced features.
However, the restrictions go beyond updates and bug fixes. Some of the reasons why Microsoft restricts third-party apps include:
- Privacy issues – Many apps don’t have privacy policies, which means that they don’t have any way of protecting your data from being shared or stolen by other people.
- Security issues – Microsoft has a rigorous process for ensuring all applications are safe and secure. This cannot be said for other third-party sites.
- Performance – All of the applications on the Microsoft Store have been tested extensively to ensure that they perform well on your device and meet your expectations.
- Incompatible firmware – The firmware of your device may be incompatible with the latest version of an app, or it might require a special version of the operating system.
- Certification – If you have an app that isn’t certified by Microsoft, it might not use the most recent versions of its framework or libraries and could contain bugs or vulnerabilities.
What can I do if the app I’m trying to install isn’t a Microsoft verified app?
Before you proceed to the slightly advanced solutions, we recommend the following:
- Ensure you’re running a legitimate copy of Windows.
- Make sure you’re not on a trial version of Windows and that your license is up-to-date. Some features may be greyed-out in copies of Windows that are yet to be activated.
- Ensure that your firewall is not blocking programs.
- Aside from Windows Defender, ensure you have a reliable third-party antivirus, as downloading applications from other sites could put your system at risk.
1. Disable app recommendation via Settings
- Hit the Windows key and click on Settings.

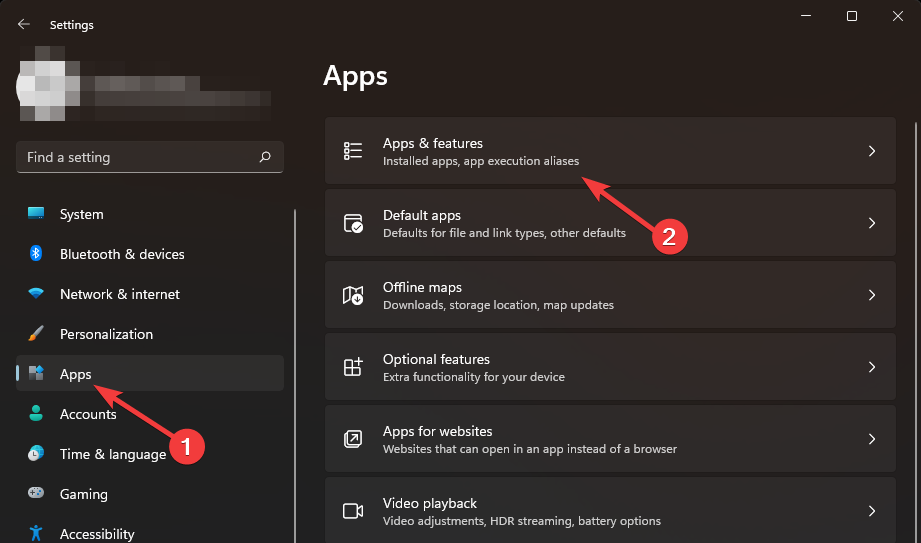
- Click on Apps on the left pane, then select Apps & features on the right pane.

- Select the drop-down menu under Choose where to get apps, then select Anywhere.


2. Disable app recommendation via Group Policy
- Hit the Windows + R keys to open the Run command.
- Type gpedit.msc in the dialog box and hit Enter to open the Group Policy Editor.
- Navigate to the following location:
Computer Configuration/Administrative Templates/Windows Components/Windows Defender SmartScreen/Explorer - Double-click on Configure App Install Control.

- Check the Enabled checkbox then in the drop-down menu, select Turn off app recommendations.

- Now click Apply and OK to save the changes.
- Restart your PC for the changes to take effect.


- Microsoft pushes Windows 11, but this project wants you to switch to Linux instead
- Windows 11 Search will soon let you install your favorite apps from Microsoft Store
3. Disable app recommendation via Registry Editor
- Hit the Windows + R keys to open the Run command.
- Type regedit in the dialog box and hit Enter to open the Registry Editor.
- Navigate to the following location:
HKEY_LOCAL_MACHINE\SOFTWARE\Microsoft\Windows\CurrentVersion\Explorer - Locate AicEnabled, double-click on it and under Value data, change from StoreOnly to Anywhere.

- Navigate to the following location:
HKEY_LOCAL_MACHINE\SOFTWARE\Policies\Microsoft\Windows Defender\SmartScreen - Locate ConfigureAppInstallControl double-click on it, and under Value data, change from StoreOnly to Anywhere.
- Close the Registry Editor and restart your PC.

Registry editing is one of those things that can make your system unstable and even crash your computer. If you delete or modify files, this can be a problem because it will have to re-create them from scratch instead of just replacing them with new ones.
However, if it is extremely important and there is no other alternative, consider using registry cleaners or creating a restore point first. This will allow you to roll back to a previous state if necessary.
How do I run an app that is not Microsoft verified?
Microsoft has a list of approved software and hardware partners who are able to provide their software or hardware to customers on Microsoft’s Volume Licensing (ML) program. Users can find the approved software on the Microsoft Store or other Microsoft platforms.
When you run a non-Microsoft app, you’re running an installer. The installer for your non-Microsoft app will look slightly different from the one for a Microsoft app. It will have an apk file extension and may be in a different folder on disk.
Luckily, you can run and install apks in Windows 11. You can also sideload Android apps using the WSA tool, which makes it easier to install non-Microsoft apps. When running these apps, some antivirus programs may detect some of these apps as malware and block them from running properly.
You may have to edit the permissions to allow these apps through the firewall, but be careful, as some contain malicious code.
Before you leave, we have a great guide on how to fix This app package is not supported for installation by app installer, so don’t miss it.
That’s all we had for this article, but be sure to let us know of any additional tips you may have in the comment section below.
Claire Moraa
Windows Software Expert
Claire has a knack for solving problems and improving the quality of life for those around her. She’s driven by rationality, curiosity, and simplicity, and always eager to learn more about Microsoft’s products.
With a background in teaching and reviewing, she breaks down complex topics into easily understandable articles, focusing mostly on Windows 11, errors, and software.
Users get this message when they download and try to install an application from somewhere other than Microsoft App Store. Microsoft has added a new feature starting from Windows 10 build 15042 in which they introduced a new setting that restricts users to install applications only from Windows Store.
This notification is similar to the Windows SmartScreen filter which designed to keep your computers safe from malware and viruses. It is recommended that instead of downloading applications from other places try to search for similar applications on Windows Store and if you don’t find it then you can disable this security feature and install the application. Please see the below method for step-by-step instructions.
Method 1: Change the Microsoft Store Settings
In this method, we will change the Windows Settings so that it allows the applications that have been downloaded from sources other than Microsoft Store can be installed on the system. It is possible that these settings might not be available on your version of Windows if it is not versioned 1909 or above.
- Click the Start Menu button and open the settings (click on the gear icon)

Go to the settings - Click on Apps icon

Click on Apps - At the top where it says Installing apps only from Windows Store helps protect your device click the dropdown and select the option Anywhere

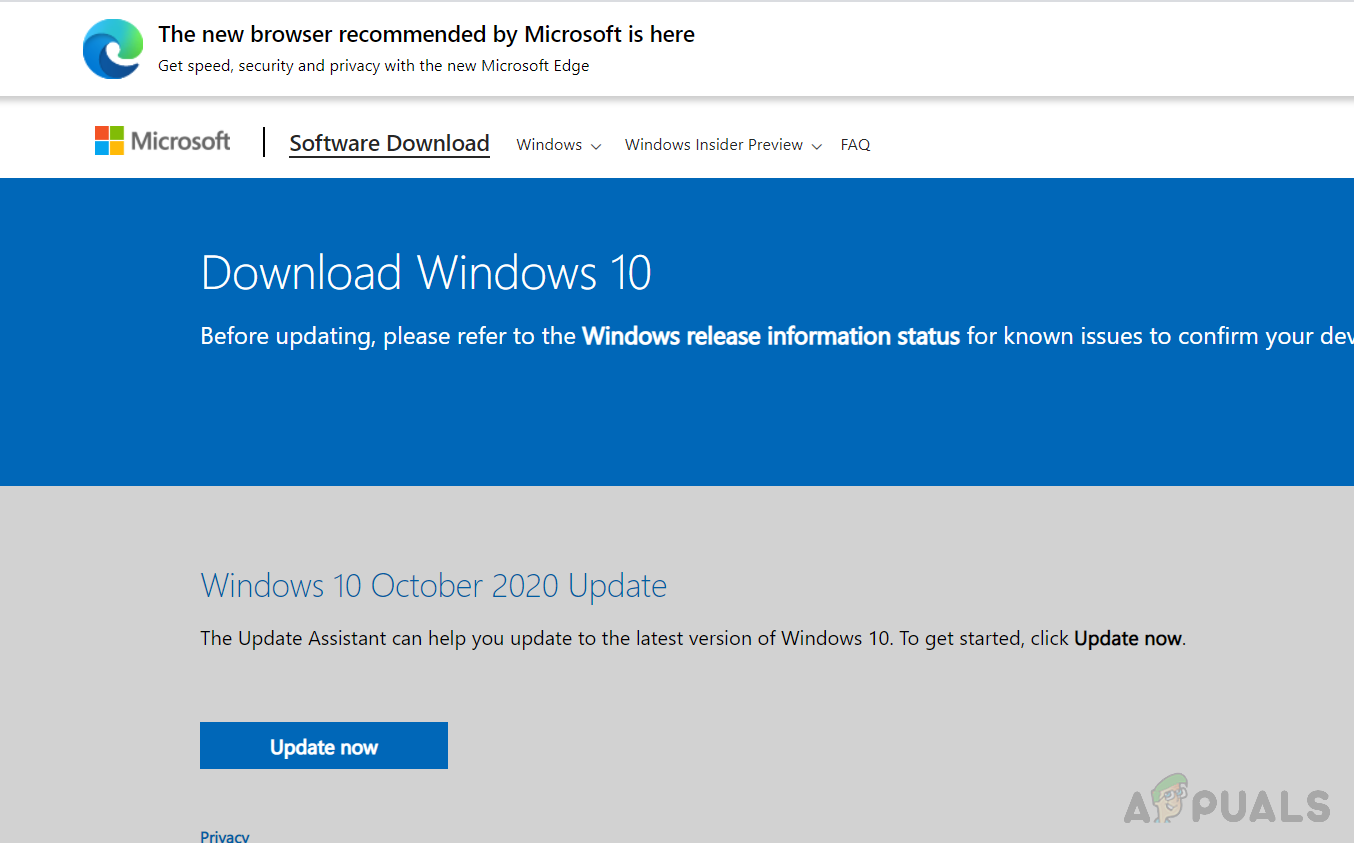
click the dropdown and select the option “Anywhere” - If you do not see that feature then you might be running a different version of Windows, click this link and click on Update now to get the updated version of Windows and then repeat the above steps.

Click update now
Method 2: Switch Out Of Home S Mode
Windows S mode is a more secure version of Windows Home edition with increased security that only allows you to download applications from the Microsoft Store. If your version of Windows is Home S instead of just Home then you will need to switch your mode to Home to be able to download and install applications from other places besides Microsoft Store.
- Click the Start Menu button and open the settings (click on the gear icon)
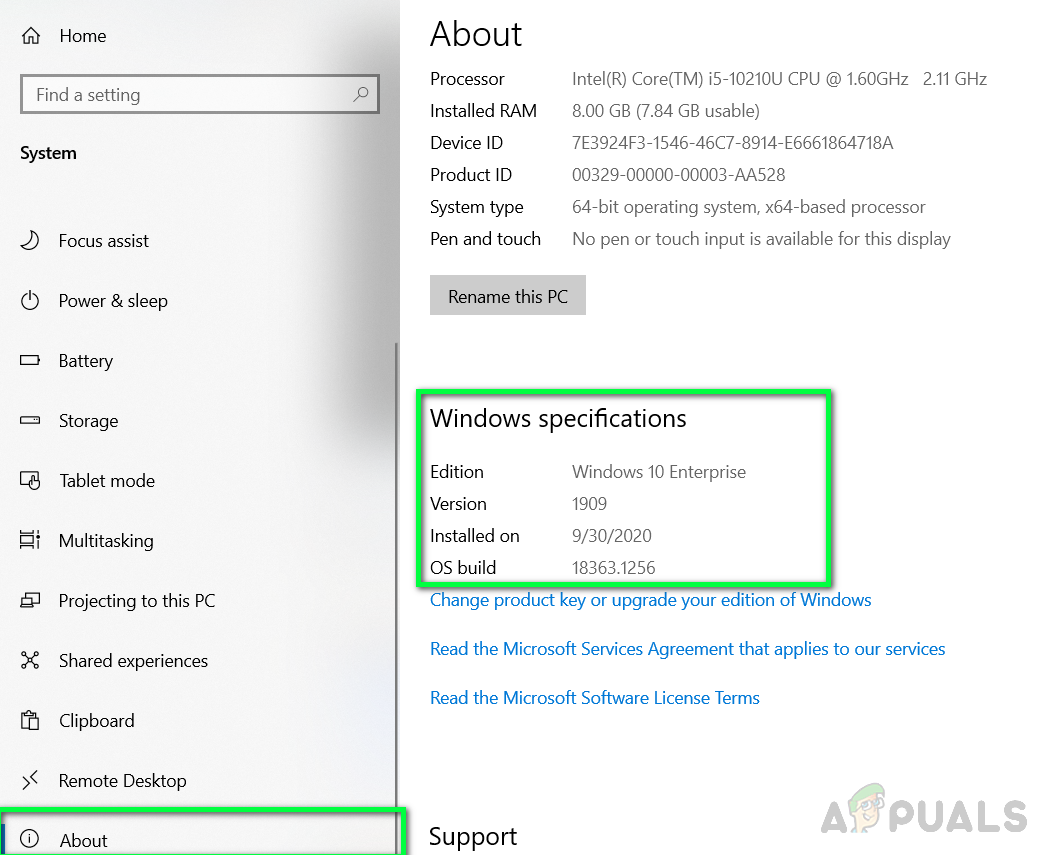
- Click on the System icon and go to the About section
- Find out your current version of Windows and note if it is a Home or Home S?

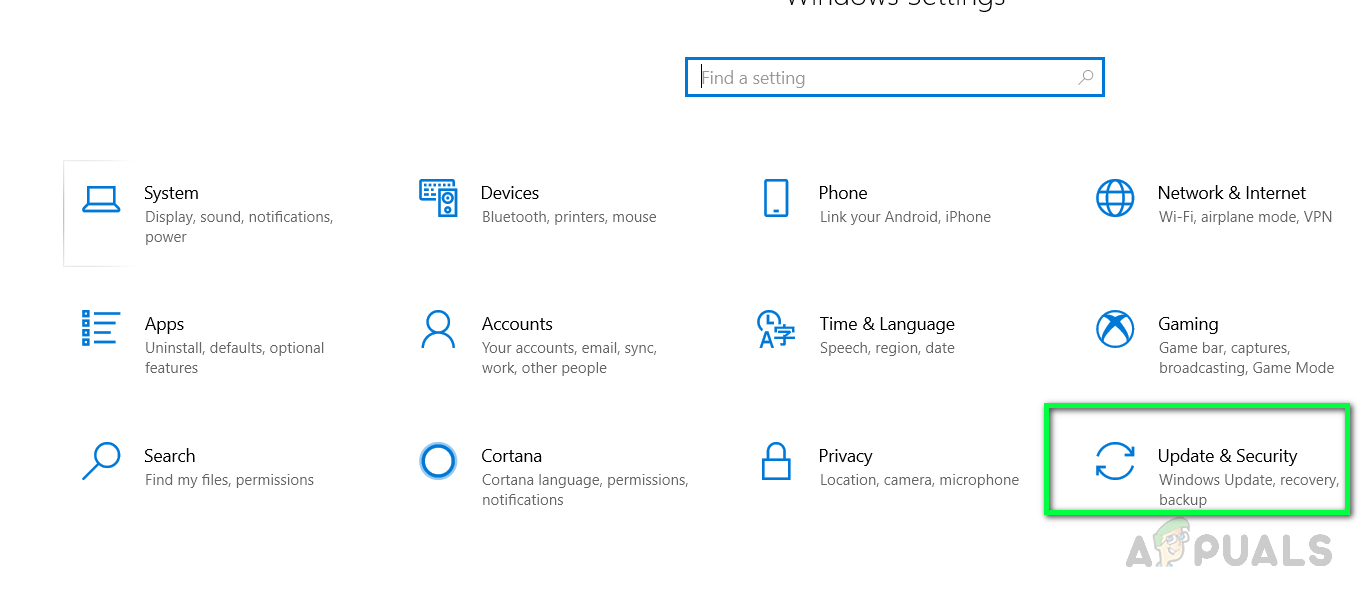
Click System and then click About Section - If it is Home S then Go to the Settings > Update & Security > Activation

Select Updates and Security - Click on Go to the Store link
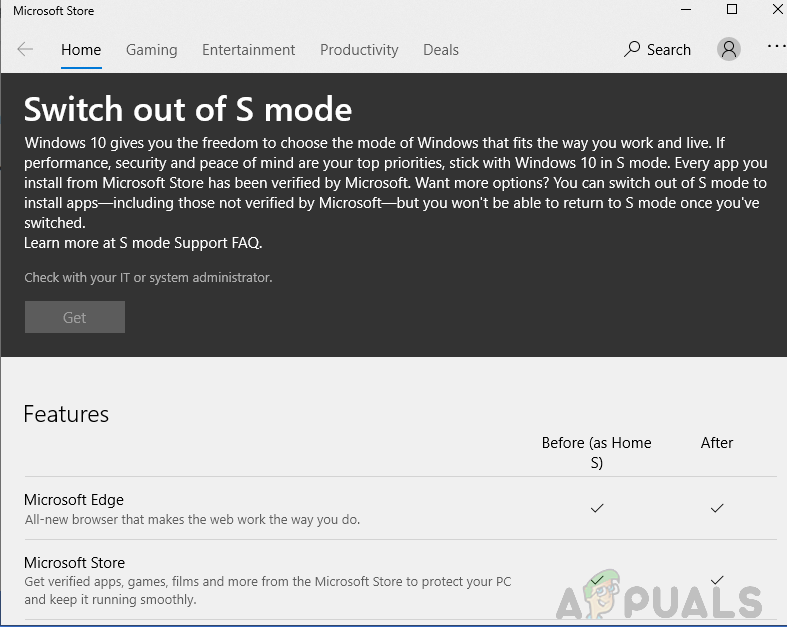
- When you click the link it will take you to the Store where it will show you a page that says Switch Out of S Mode.
- Click on the Get button and then click Install, It will ask Have you saved all your files, click Yes

Switch out of S mode - Once the feature has been installed go back to the About section in System and you will see that you have now switched out of Home S edition to normal Home edition.
- Try to Install the application and see if that works
Method 3: Use Command Line To Install The Application
In this method, we will try to install the application using the Windows Command Prompt. Microsoft Command Prompt is a very powerful interface that allows users to perform enhanced operations that are otherwise not possible to accomplish using the regular Graphical Interface.
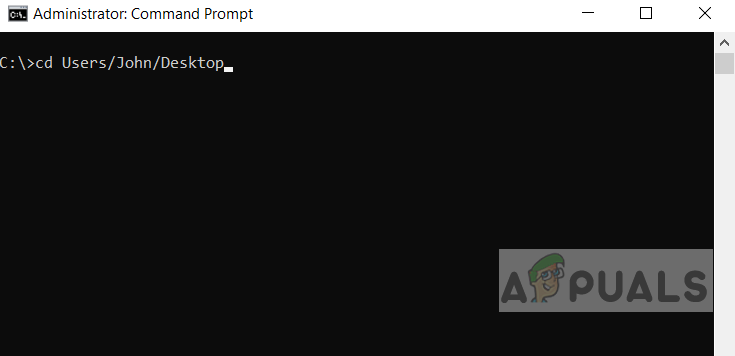
- Click the Start Menu button and search for cmd
- Right-click on it and open it as administrator

Open command prompt as administrator - Type cd followed by the full path of the folder where the installation file exists, for example, if the file is on the desktop then:
cd C:\users\john\desktop

Navigate to the Installation directory - Now type the name of the setup file, for example, if it is a .exe file then you will type filename.exe and press Enter

Kevin Arrows
Kevin Arrows is a highly experienced and knowledgeable technology specialist with over a decade of industry experience. He holds a Microsoft Certified Technology Specialist (MCTS) certification and has a deep passion for staying up-to-date on the latest tech developments. Kevin has written extensively on a wide range of tech-related topics, showcasing his expertise and knowledge in areas such as software development, cybersecurity, and cloud computing. His contributions to the tech field have been widely recognized and respected by his peers, and he is highly regarded for his ability to explain complex technical concepts in a clear and concise manner.
A choice in the Advanced app settings section can be changed to allow you to add apps from anywhere you’d like
Published on September 14, 2023
What to Know
- Go to Settings > Apps > Advanced app settings. Select Anywhere next to Choose where to get apps.
- Or, disable Configure App Install Control in the Local Group Policy Editor.
- To use Registry Editor, edit the AicEnabled value data to be Anywhere.
This article describes what to do if you can’t install an app and instead see the message «The app you’re trying to install isn’t a Microsoft-verified app» in Windows 11. Completing these steps will turn off the requirement that apps you install have to be Microsoft-verified.
Use the Settings App
The Settings app provides the easiest method to bypass this warning message so you can install third-party apps.
-
Open Settings. One easy way to get there is to press WIN+i.
-
Select Apps from the left side, and then Advanced app settings from the right side.
-
Select the menu next to Choose where to get apps, and pick Anywhere.
If this option is greyed out, and you see a message that reads, «Some of these settings are managed by your organization,» follow the Group Policy directions below.
Use Group Policy Editor
The Local Group Policy Editor is another way to get around the warning that the program you want to install isn’t a Microsoft-verified app. This works if you have Windows 11 Pro.
-
From the Run dialog box (open it with WIN+R), enter this command, and then select OK to open the Local Group Policy Editor:
gpedit.msc -
Use the folders on the left to go here:
Computer Configuration > Administrative Templates > Windows Components > Windows Defender SmartScreen > Explorer -
Double click Configure App Install Control on the right.
-
Select Not Configured or Disabled, and then press OK.
Change the Windows Registry
You can also edit the Windows Registry if the app you’re trying to install isn’t a Microsoft-verified app, but you want to install it anyway.
I highly recommend you make a backup of the registry before proceeding. It’s straightforward to do and will save you several headaches later should you need to undo any accidental changes you make during these steps. On that note, pay close attention to the following, and only go where the instructions say to go.
-
Open Registry Editor.
-
Copy the path below, paste it into the text box at the top of Registry Editor, and press Enter to jump there. If you prefer, you can browse to this key manually.
HKEY_LOCAL_MACHINE\SOFTWARE\Microsoft\Windows\CurrentVersion\Explorer -
Double-click AicEnabled from the right pane.
-
Change the value data to Anywhere, and then press OK. The change should take effect immediately; restart your computer if it doesn’t.
Use Command Prompt
Your final option is to edit the registry from Command Prompt.
-
Open an elevated Command Prompt.
-
Copy this exactly as it’s written here:
reg add HKEY_LOCAL_MACHINE\SOFTWARE\Microsoft\Windows\CurrentVersion\Explorer /v AicEnabled /t REG_SZ /d Anywhere -
Right-click in the Command Prompt black space to paste all that text, and then press Enter.
If AicEnabled already exists in your registry, you’ll see a question about overwriting the value. Type Y and then press Enter.
What Does ‘The App You’re Trying to Install Isn’t a Microsoft-Verified App’ Mean?
This is a harmless message that doesn’t mean much. Seeing it might make you think the app should rightfully be blocked because it’s malicious or somehow dangerous.
You see this message because Windows 11 is set up to be extra cautious. This is most likely due to a policy change set up by your administrator, or if you’re a home user, it’s because of a setting you changed.
Is It Safe to Disable?
One could argue that bypassing this prompt makes your computer less secure because you’re opening up the possibility for third-party programs laden with viruses to infiltrate your computer.
That is technically true, but installing all the software you want will be hard unless you ease this restriction. Microsoft doesn’t even lock down installations like this by default.
To feel safer after following the above steps, make sure you know how to download and install software on your PC safely and ensure that your antivirus software is running and up to date.
Windows
Thanks for letting us know!
Get the Latest Tech News Delivered Every Day
Subscribe

In Windows 10, there is protection against the installation of third-party applications that have not passed Microsoft verification. In fact, this is a very useful feature designed to protect the user’s computer from installing malware. However, there are cases when a user wants to install a certain app and he or she is sure that it is absolutely safe. To fix “The app you’re trying to install isn’t a Microsoft verified app” error, do the following:
Step 1: Google Chrome
- Open the Settings App (gear icon on your Start menu)
- Go to Apps.
- On that page, under “Installing apps only from Microsoft Store helps protect your device” choose “Anywhere”
- Close the window and try to install your app again
