
Windows PowerShell is a great feature in Windows to execute advanced cmdlets. Whether it is the matter re-registering apps or running Windows Defender scans or is the case of installing specific Windows Updates, PowerShell works great in all departments. But sometimes PowerShell may not be working properly and crash with following message:
Page Contents
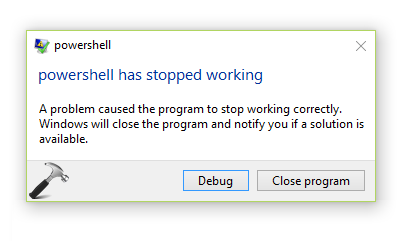
powershell has stopped working
A problem caused the program to stop working correctly. Windows will close the program and notify you if a solution is available.
If you’re also facing this problem frequently, here is how to deal with it.
FIX : Windows PowerShell Has Stopped Working In Windows 10/8/7
FIX 1 – General Suggestions
Since this issue may be caused due to variety of factors, the resolution also requires different approaches such as:
1. Most common cause may be the recent updates or simply corruption of files. So try the System Restore to go back to last good configuration and see if it helps.
2. This could also be due to heavy memory usage on the machine. You can review this in the Task Manager, while Windows PowerShell is in the play. To resolve, try increasing the paging file size as mentioned here.
3. Another reason might be corrupted user profile. Create a new user account and verify if PowerShell works fine on that.
4. Sometimes third-party antivirus or security suite installed on your machine may conflict PowerShell from working correctly. Temporary removal of such software may solve this issue. Making a clean boot will help you to check which 3rd-party software is culprit and thus you can remove them to finally fix up this problem.
5. Try the Autoruns tool and review the list of programs running at startup. If there is any program which is not digitally signed, you must remove that program and check status of issue.
FIX 2 – Via Optional Features
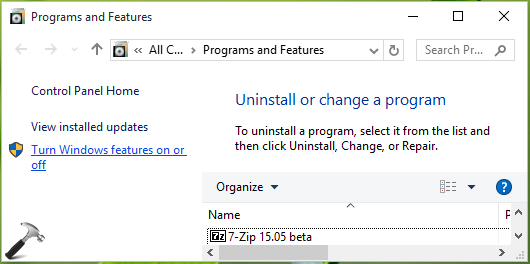
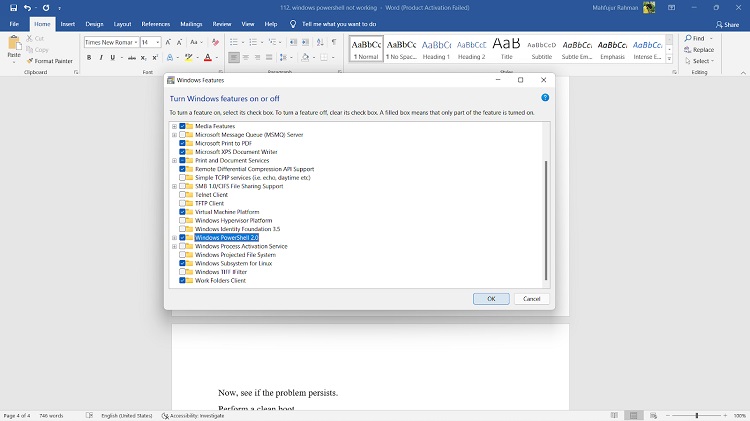
1. Open Control Panel and go to Program and Features. In the left pane, click Turn Windows features on or off link.
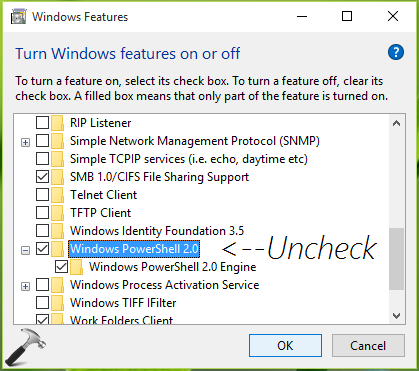
2. In the Windows Features window, uncheck Windows PowerShell 2.0 option and click OK.
3. Let Windows apply this change and click Close.
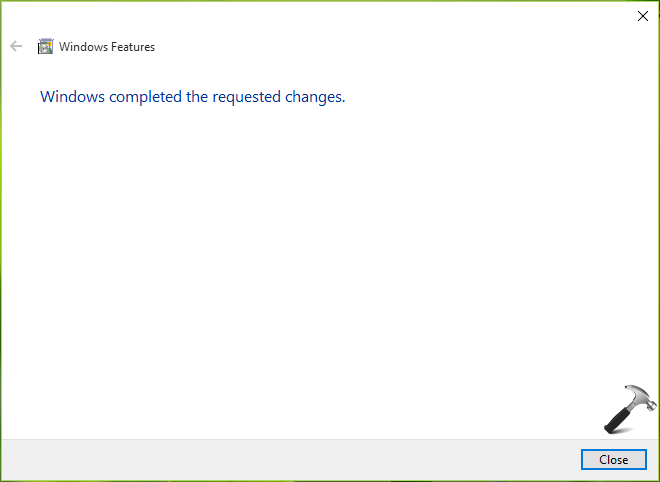
You should now get rid of stopped working message for PowerShell.
Hope this helps!
RELATED ARTICLES
January 27, 2017
Readers help support Windows Report. We may get a commission if you buy through our links.
Read our disclosure page to find out how can you help Windows Report sustain the editorial team. Read more
XINSTALL BY CLICKING THE DOWNLOAD
FILE
Powershell not working is one of the most common issues with the command line tool. If you’re dealing with this problem, follow the steps below. We figured out a few ways to get rid of this error.
Just follow the easy steps below:
What can I do if PowerShell has stopped working?
1. Disable and re-enable Windows PowerShell
- Press Windows + R to open Run, enter appwiz.cpl in the text field, and click OK.

- From the left panel of the main window, click on Turn Windows features on or off.

- Scroll down, locate the Windows PowerShell entry, uncheck the option and then click OK.

- Restart the computer for the changes to come into effect.
- Once the PC turns on, head back to the Windows Features window, tick the checkbox for Windows PowerShell, and click OK to re-enable it.
- Wait for it to install.


After re-enabling the feature, check if the Windows Powershell stopped working issue is resolved.
2. Check your antivirus
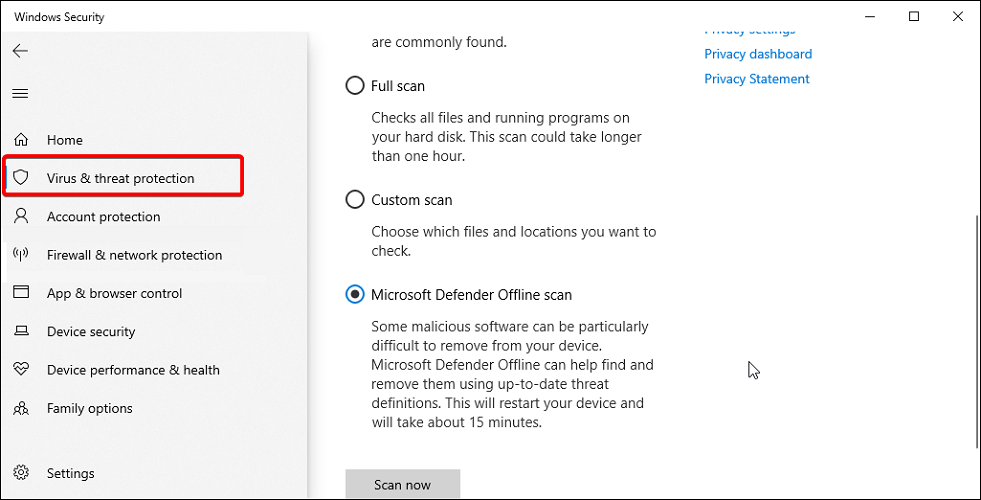
2.1. Perform a full system scan
- Open Windows Defender or your third-party antivirus.
- Perform a full system scan.

- Locate and remove any suspicious files or apps.
Chances are you got infected with Poweliks, a malware that interferes with PowerShell. The file associated with this virus are dllhost.exe *32 or dllhst3g.exe *32 and can usually be stopped from Task Manager.
2.2. Temporarily disable your antivirus
It’s also possible that your antivirus is overzealous and tries to stop apps and processes that aren’t harmful.
That could be the case with Powershell. To test if this is true, disable your antivirus, and try opening Powershell again. If that’s the case, consider adjusting antivirus settings or upgrading to a better antivirus.
3. Perform a clean boot
- Press the Windows + R to open the Run command, type msconfig, and click OK.
- From System Configuration, go to the General tab, and uncheck the Load startup items field under Selective startup.

- Next, switch to the Services tab, check the Hide all Microsoft services checkbox and afterward click on Disable all.
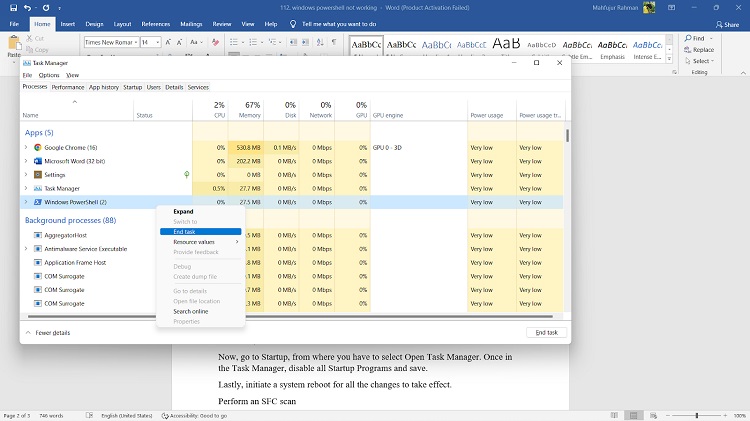
- Now, switch to the Startup tab and click on the Open Task Manager link.
- Select the programs listed here individually and click on Disable at the bottom.

- Now, head back to the System Configuration window, and click on OK.
- Click Restart in the prompt that appears.


By initiating a clean boot, you can see if a software conflict is causing Windows PowerShell malfunctions. In this way, you can start the Windows 10 system only with default features.
If the Windows PowerShell has stopped working error is not displayed after the clean boot is performed it means that there is a software conflict, so you need to remove the program responsible for this issue.
- PowerShell module cannot be loaded? Try these simple fixes
- How to use the Windows Update reset script in Windows 10
- PowerShell history is not working? Check out these solutions
4. Create a new Microsoft account
Tip
Remember to back up your data before completing this process. You might have to import your personal files and app under the new account.
- Press Windows + I to launch Settings, select Accounts from the navigation pane, and then click on Family & other users.

- Click the Add account button next to Add other user.
- Provide the required information and follow the on-screen instructions to complete the process.


Your account might be corrupted (due to various reasons), and that’s why you still get the Windows PowerShell has stopped working error. So, try to create a new account, and the problem should be fixed.
5. Reset PowerShell to default
- Press Windows + E to launch File Explorer, paste the following path in the address bar while replacing Username with the one on your device, and hit Enter:
C:\Users\Username\AppData\Roaming\Microsoft\Windows\Start Menu\Programs\Windows PowerShell - Now, select the Windows PowerShell entry, and hit the Del key to delete it. Choose the appropriate response in case a confirmation prompt show up.

- Now, create a new user account on the same computer, head down the same path, and copy the PowerShell shortcut to a USB drive.
- Next, go back to the initial account, navigate to the Windows PowerShell folder, and paste the PowerShell shortcut here.

That’s it! PowerShell has now been reset to the factory settings, and any changes made will automatically be removed.
Why is Powershell not working?
Windows PowerShell may not open due to corrupted system files, conflicting third-party apps, or if it’s accidentally disabled. Many users find that clicking “Run as administrator” does nothing, often due to system corruption.
This can also affect Command Prompt, and you might see the “PowerShell is not recognized” error.
Wrapping up
Hopefully, the error message is gone now. If you have questions about the troubleshooting solutions from above, contact our team. You can get in touch with us by using the comments field below.
Also, if you come across other solutions to fix this error, list the troubleshooting steps in the comments, and we’ll update this guide accordingly.
Andrew Wafer
Andrew is not just trying to bring you closer to Windows, but he’s truly interested in this platform. He just happens to be passionate about sharing that knowledge with our readers and that’s what makes his presence here, at WindowsReport, such a valuable one.
He specializes in writing about the best products for this operating system and Windows 10 fixes. Determined and creative, Andrew also loves coffee, country music, and Sunday mornings.
Although atypical, Windows PowerShell can sometimes go nuts, opening and closing on what seems to be an endless loop. Unfortunately, there’s no definite guide on how to fix this issue, the reasons being so diverse in nature. However, tracking down and removing PowerShell from the startup menu is a good place to start.
Slowly move to more complex solutions like disabling and re-enabling Windows PowerShell or changing the manifest settings. These are proven ways to deal with issues due to which Windows PowerShell opens and closes.
Why Does PowerShell Keep Opening and Closing?
A scheduled task trying to install a mal Chrome extension is the most probable cause behind Windows PowerShell misbehaving. If you cannot find the task and delete it, PowerShell will keep opening and closing.
Other possible reasons include Windows PowerShell somehow ending up in the Windows Start-up folder. Besides, it might be due to its startup status being enabled. Either way, removing Windows PowerShell from the startup folder will help eradicate the annoyance.
How Do I Stop Windows PowerShell From Opening and Closing?
Try using Task Manager to simply terminate the program if it has been running in the background. However, if that does not do the trick, check the Windows startup folder to see if there’s a PowerShell shortcut. Remove any such shortcuts if found.
Use the tricks below if the issue persists.
Disable and Re-Enable Windows PowerShell
Open the Task Manager app using the Ctrl + Shift + Esc shortcut and look for Windows PowerShell. Upon finding it, select it by clicking on it. Next, hover over to the End task button and press it. Doing so will terminate the PowerShell program. You can now close the Task Manager window.
After that, press Windows + R to open the Run dialog box. Type ‘optionalfeatures’ in the text field and press Enter to open a new window called Windows Features.
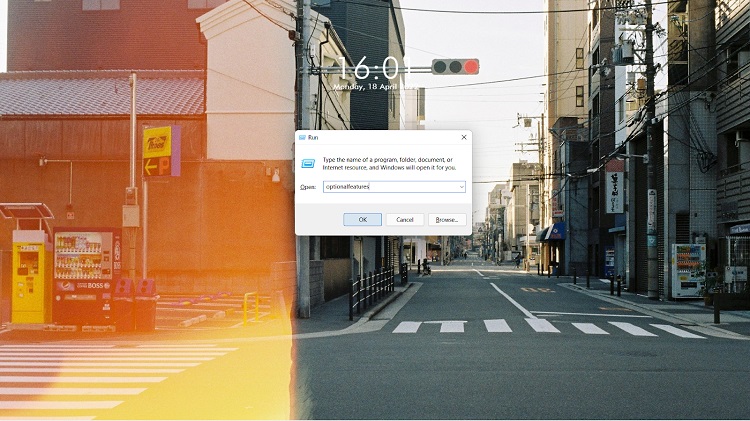
Next, scroll down to find Windows PowerShell and disable it using the checkbox on its left.

Press OK and close the window. A system reboot is then required so that the changes get updated.
Now, follow the above steps again until the point where you locate Windows PowerShell from the Windows Features menu. That is because we want to enable PowerShell this time. So, tick the box again and see if that solved the issue.
Change PowerShell $Manifest Settings
Press Ctrl + Shift + Esc to open the Task Manager. Then, click on File and select Run New Task.

A new window named Create new task will pop up with an empty text field.
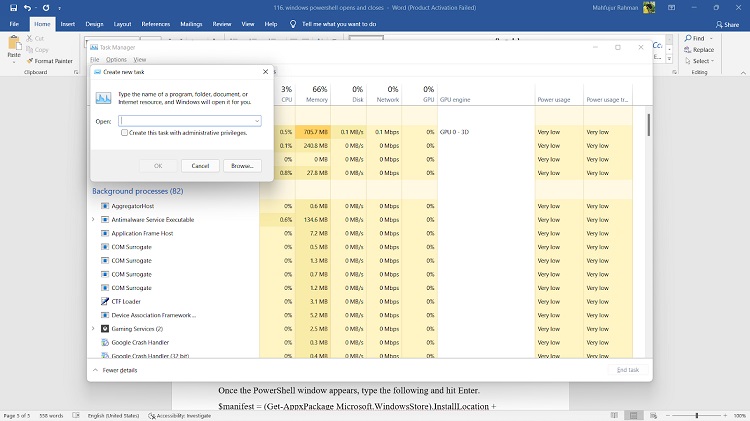
Inside the text field, type PowerShell.
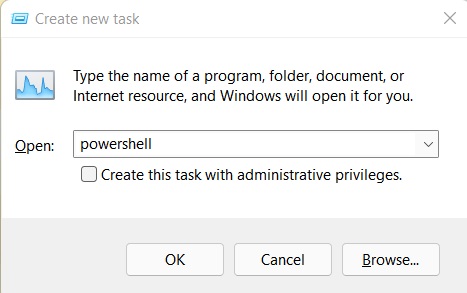
Below that, you will find a check box next to Create this task with administrative privileges. Check the box and press OK.

Once the PowerShell window appears, type the following and hit Enter.
$manifest = (Get-AppxPackage Microsoft.WindowsStore).InstallLocation + ‘\AppxManifest.xml’; Add- AppxPackage -DisableDevelopmentMode -Register $manifest
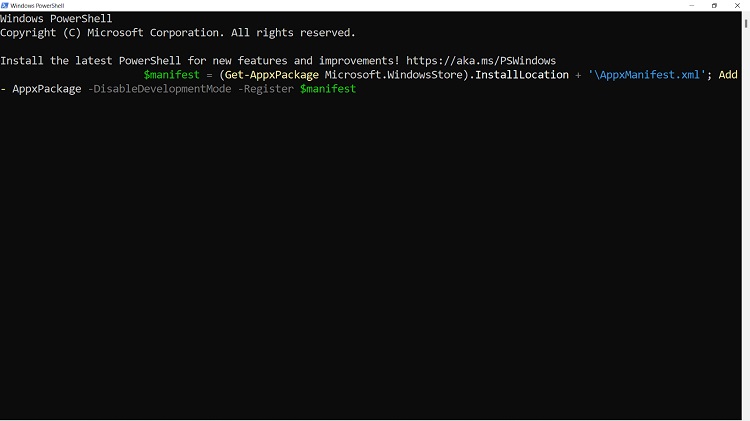
After that, close the PowerShell window and restart your computer. It should solve the PowerShell opening and closing problem.
Conclusion
If none of the above methods work, there might be corrupted system files on your computer. In that case, you can try refreshing your user account on the pc. But before that, you have to log in using a user set as an administrator for the pc. Also, don’t forget to keep the necessary backups.
Subscribe to our newsletter
& plug into
the world of technology
Draft and Proofreader Literature buff. Working with words is right up my alley. Technology, gadgets and audio devices attract me. Hence I am with Tech Dimension. Books, and a cup of coffee, are the ideal winter night for me.

Updated May 2025: Stop these error messages and fix common problems with this tool. Get it now at this link
- Download and install the software.
- It will scan your computer for problems.
- The tool will then fix the issues that were found.
Windows PowerShell errors in Windows 10 don’t appear very often. So, if you get the “Powershell has stopped working” error message, you should try some effective methods to fix it.
The appearance of the “Powershell has stopped working” error means that something has stopped the execution process on your Windows 10 computer, but there are no other details about what caused the problem. So, how to fix the “Powershell has stopped working” error in Windows 10? Read the following paragraphs prepared by IR Cache to learn about the methods.
Table of Contents:
What is the cause of the “Powershell has stopped working” problem in Windows

The “Powershell has stopped working” error is caused by two recurring factors. In the first case, the error message may be caused by a Trojan horse called Poweliks. It works like a regular Trojan horse: it can disable you from your email account, run memory-intensive CPO tasks such as dllhost.exe *32 or dllhst3g.exe *32, which directly affect PC performance and cause blue screen of death and frequent error messages.
On the other hand, the “Windows Powershell stopped working” error may be the result of Microsoft security update KB3163245 for Windows 7 and Vista systems. Windows 10 users are less likely to encounter this error through the update.
Updated: May 2025
This tool is highly recommended to help you fix your error. Plus, this tool offers protection against file loss, malware, and hardware failures, and optimizes your device for maximum performance. If you already have a problem with your computer, this software can help you fix it and prevent other problems from recurring:
- Step 1 : Install the PC Repair and Optimizer Tool. (Windows 10, 8, 7, XP, Vista).
- Step 2 : Click Start Scan to determine what problems you are experiencing with your computer.
- Step 3 : Click Repair Allto resolve all problems.

Initiate a clean restart
You can determine if a software conflict is causing Windows PowerShell to fail by initiating a restart. This way, you can restart your Windows 10 system with only the default features.
- Press the Win+R shortcut to launch the startup window.
- There, type MSConfig and press Enter.
- In the system configuration, switch to the General tab.
- Under Selective startup, deselect the field for items to be loaded.
- Then switch to the Services tab.
- Select the Hide all Microsoft services checkbox, and then click Disable all.
- Now switch to the Startup tab and click the Open Task Manager link.
- In Task Manager, disable all startup programs.
- Save your changes and close these windows.
- Reboot your Windows 10 system.
If the “Windows PowerShell stopped working” error does not appear after restarting, then there is a software conflict. You should uninstall the program that caused the problem.
Create a new Microsoft account
- Click on the Windows Start icon.
- Select Settings, then go to Accounts.
- From there, select Family and Other Users.
- Click on Add someone else to this PC.
- Just follow the instructions on the screen to continue this process.
Tip: Remember to back up your data before completing this process – you may have to import personal files and applications under your new account.
Your account may be corrupted (for a variety of reasons), so you always get the Windows PowerShell stopped working error. So try creating a new account and then see if the problem persists or not.
Deactivating and reactivating Windows PowerShell
- Press the Win+X key combination and select Control Panel.
- In the Control Panel, navigate to a category.
- In the list that appears, select Uninstall located in the Programs section.
- On the left side of the main window, click Enable or disable Windows features.
- Scroll down and find the Windows PowerShell entry.
- Disable the PowerShell feature.
- Save and apply the changes.
- Restart your Windows 10 computer.
- Then repeat the previous steps and re-enable the Windows PowerShell feature.
Perform a full system scan
In some situations, Windows PowerShell may be caused by a malware attack. Therefore, the first thing you should do is run a security scan.
You may be infected with Poweliks, a malicious program that disrupts PowerShell. The files associated with this virus are dllhost.exe *32 or dllhst3g.exe *32 and can usually be stopped via Task Manager.
In this case, you should use an antivirus tool and scan your Windows 10 system for possible infected files. The security tool should find and remove the malware automatically.
Tip: It is recommended to run the security scan in Safe Mode – in this mode, third-party applications and processes are disconnected from the Windows 10 platform.
APPROVED: To fix Windows errors, click here.
Frequently Asked Questions
In some situations, Windows PowerShell may not work properly because of a malware attack. You may have been infected with Poweliks, a malicious program that infects PowerShell. The files associated with this virus are dllhost.exe *32 or dllhst3g.exe *32 and can usually be stopped via Task Manager.
- Perform a full system scan. In some situations, Windows PowerShell may be caused by a malware attack.
- Start a reboot.
- Shut down Windows PowerShell and bring it back online.
- Create a new Microsoft account.
- Restart the program.
- Run the program in compatibility mode.
- Run the program as an administrator.
- Configure the data execution prevention settings.
- Scan for viruses and malware.
- Recover Windows system files.
- Update device drivers.
- Reinstall the program.
- Click Start, type PowerShell, and then click Windows PowerShell.
- From the Start menu, click Start, select All Programs, select Accessories, select the Windows PowerShell folder, and then select Windows PowerShell.
In this blog post, we will cover the fix for the issues we experience when Windows PowerShell Launching and Closing abruptly. Let’s start with Issue description and then proceed to solutions.
Contents
Issue Description
When attempting to launch PowerShell on a Windows 10/11 device, I encountered a flashing PowerShell window that closed automatically. PowerShell ISE (Integrated Scripting Environment) also fails to launch on the device.
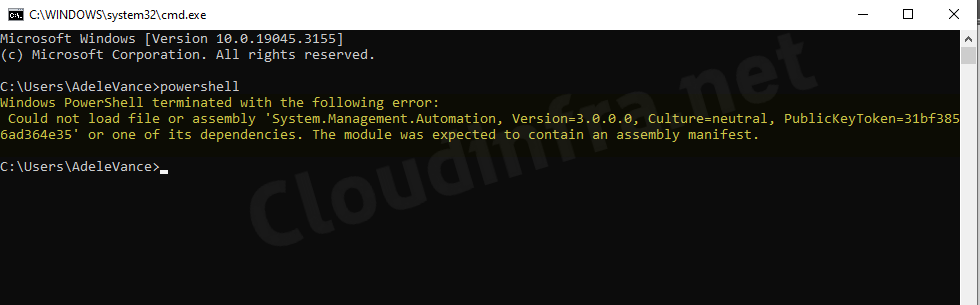
Even after multiple restarts of the device, the issue remains unresolved. Attempts to launch PowerShell through the Windows Command Prompt have also resulted in the following error:
Windows PowerShell terminated with the following error: Could not load file or assembly ‘System.Management.Automation, Version=3.0.0.0, Culture=neutral, PublicKeyToken=31bf3856ad364e35’ or one of its dependencies. The module was expected to contain an assembly manifest.
Root Cause
If you encounter this error, the issue may stem from a corrupted system file or module called System.Management.Automation.dll. This file is typically located at C:\Windows\Microsoft.NET\assembly\GAC_MSIL\System.Management.Automation\v4.0_3.0.0.0__31bf3856ad364e35.
Solution
1. Take Ownership of System.Management.Automation.dll
Take Ownership of System.Management.Automation.dll file
takeown /f C:\Windows\Microsoft.NET\assembly\GAC_MSIL\System.Management.Automation\v4.0_3.0.0.0__31bf3856ad364e35\System.Management.Automation.dll

2. Grant Administrators full control of the System.Management.Automation.dll
Grant Administrators full control of the System.Management.Automation.dll
icacls "C:\Windows\Microsoft.NET\assembly\GAC_MSIL\System.Management.Automation\v4.0_3.0.0.0__31bf3856ad364e35\System.Management.Automation.dll" /GRANT ADMINISTRATORS:F

3. Copy System.Management.Automation.dll from a Working PC
- Now, log in on another Windows 10/11 device where Powershell works fine.
- Go to the folder C:\Windows\Microsoft.NET\assembly\GAC_MSIL\System.Management.Automation\v4.0_3.0.0.0__31bf3856ad364e35\ and copy System.Management.Automation.dll file.
- Now return to the device where Powershell is not working. Paste this file somewhere on the device, for example, C:\Temp.
- Open the Command prompt as administrator.
- Execute the below command to replace the faulty System.Management.Automation.dll file.
Execute this command to paste System.Management.Automation.dll file
copy C:\Temp\System.Management.Automation.dll "C:\Windows\Microsoft.NET\assembly\GAC_MSIL\System.Management.Automation\v4.0_3.0.0.0__31bf3856ad364e35\System.Management.Automation.dll"

- Restart your device and test Powershell; this time, it should launch perfectly fine.
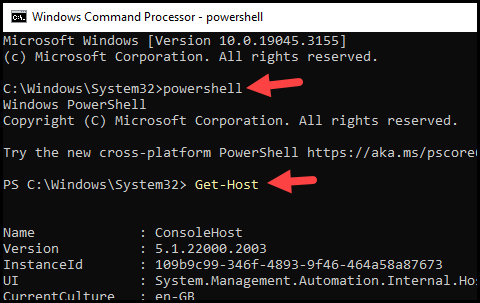
- Previously, there were issues when attempting to switch to the console within the Command Prompt. Those issues have also been resolved. You can initiate PowerShell from the Windows Command Prompt, which has been confirmed to work correctly after replacing the DLL file.
Other Solutions
While the provided solution addresses a specific error message, if you’re experiencing a similar issue where the PowerShell console crashes or behaves unexpectedly, there may be alternative solutions to explore.
1. Uninstall and Re-Install PowerShell
To resolve issues with a corrupted PowerShell feature, you can try uninstalling and reinstalling it, which should replace any corrupted files. You can do this through the command prompt or the GUI. Here are the steps:
Disable Powershell feature
Dism /online /Disable-Feature /FeatureName:"MicrosoftWindowsPowerShellV2Root"
Enable Powershell feature
Dism /online /Enable-Feature /FeatureName:"MicrosoftWindowsPowerShellV2Root"
To uninstall the PowerShell feature using the GUI, follow these steps:
- Press the Win + R to open the Run dialog box.
- Type appwiz.cpl and press Enter.
- Click the Turn Windows features on or off link on the left-hand side in the Programs and Features window.
- Scroll down the list to locate Windows PowerShell 2.0.
- Uncheck the selection next to Windows PowerShell 2.0.
- Click OK to confirm and begin the uninstallation process.
- Restart your device after the feature is uninstalled.
2. Run the System file checker tool
You can use the System File Checker (SFC) tool to address issues with corrupted system files. Here’s the process, which involves running the Deployment Image Servicing and Management (DISM) tool before using SFC:
Run DISM Tool:
- Open Command Prompt with administrator privileges.
- Type the following command and press Enter:
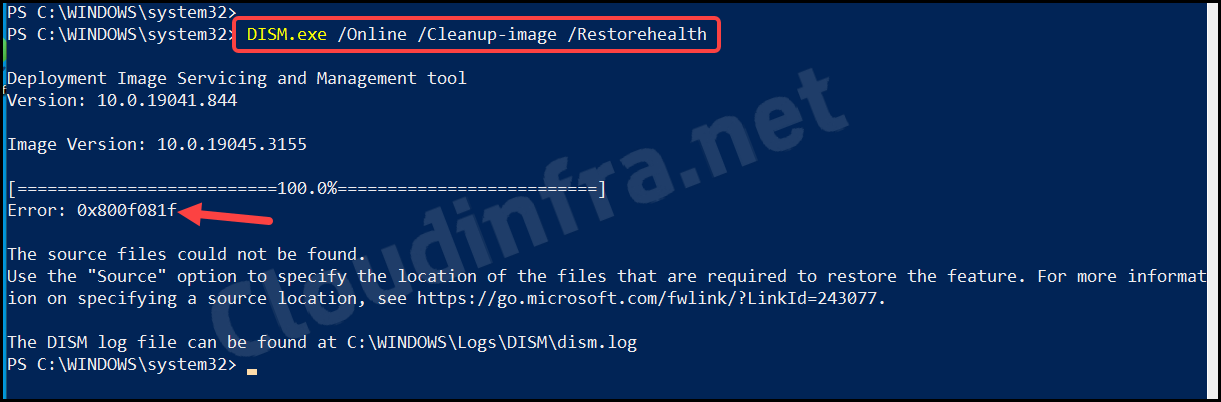
DISM.exe /Online /Cleanup-image /Restorehealth
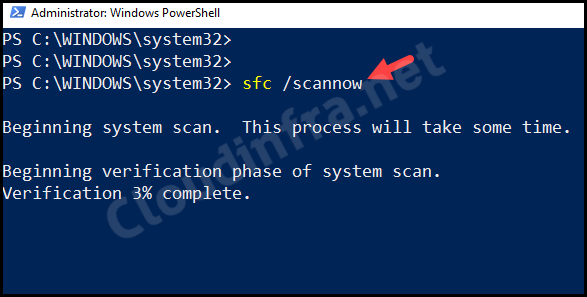
Run SFC Tool:
- After the DISM tool has finished, run the System File Checker (SFC) tool.
- In the same Command Prompt window, enter the following command and press Enter:
sfc /scannow
Troubleshooting
1. Error code: 0x800f081f
After executing the DISM.exe /Online /Cleanup-image /Restorehealth command, you may get this error code.
The source files could not be found.
Use the Source option to specify the location of the files that are required to restore the feature. For more information on specifying a source location, see https://go.microsoft.com/fwlink/?LinkId=243077.Note
This could be because of a lack of internet connection or a firewall issue. You could try an offline restore method by copying the Windows folder from a working Windows computer to a faulty computer and providing it as a source to restore the files.
DISM Offline Windows System files repair
DISM.exe /Online /Cleanup-Image /RestoreHealth /Source:C:\RepairSource\Windows /LimitAccess
The LimitAccess parameter in DISM instructs the tool not to check Windows Update or Windows Server Update Services for the capability source files.
After completing a Windows repair using DISM Command, run the System file checker tool to scan all protected system files and replace corrupted files with a cached copy in a compressed folder at C:\Windows\System32\dllcache.
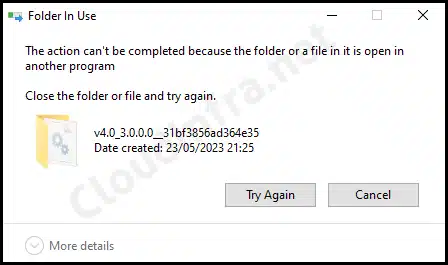
2. Error while Copying System.Management.Automation.dll
While it’s straightforward to copy the System.Management.Automation.dll file from a functioning Windows device, you might encounter the following error message when attempting to paste it onto the destination device: The action can’t be completed because the folder or a file in it is open in another program. Close the folder or file and try again.
This Issue can be resolved by taking ownership of the System.Management.Automation.dll file and grant administrators full control of the dll. The steps for taking ownership of this file are provided in the previous section of this post.
Conclusion
This blog post explores methods for resolving PowerShell launch errors, primarily by replacing corrupted DLL files. We’ve also discussed running the system checker tool to repair corrupted system files. If the issue persists despite following the steps outlined in this post, you can consider backing up your data and performing a device reset, which will replace and fix any corrupted files.
Read Next