Quick Links
-
What is the Ultimate Performance Power Plan?
-
How to Enable the Ultimate Performance Power Plan
-
What to Do if You Don’t See the Ultimate Performance Plan
Summary
- The Ultimate Performance power plan in Windows 10 is designed to optimize high-power systems and reduce micro-latencies associated with power management.
- This power plan allows hardware to consume all the power it needs and disables power-saving features to improve performance.
- Enabling this plan may increase power consumption, so it is recommended to use it only when plugged in, and it may not provide significant benefits for gaming rigs.
Microsoft’s «Ultimate Performance» power scheme — introduced in 2018 — is built upon the High-Performance power scheme but tries to eke out every little bit of performance possible. Here’s how to enable it.
What is the Ultimate Performance Power Plan?
The Ultimate Performace power plan is designed to give an extra boost to high-power systems (think workstations and servers) by optimizing the High-Performance power plan. It’s geared toward reducing or eliminating micro-latencies associated with fine-grained power management techniques. A micro-latency is just the slight delay between when your OS recognizes that a piece of hardware needs more power and when it delivers that power. Although this may only be a fraction of a second, it can make a difference.
The Ultimate Performance plan eliminates the polling of hardware to see if it needs more juice and lets the hardware to consume all the power it needs. Also, any power-saving features are disabled to improve performance even more. Because of this, machines that operate on battery power aren’t given this option by default, as it can consume more power and kill your battery much faster.
While you may be thinking this would be great for gaming rigs, don’t get your hopes up.
The Ultimate Performance plan improves speed on systems where hardware continually goes to and from an idle state. But when you’re running a game, all your hardware already works together to populate the environment around you. The only real improvement might come upon initial startup, and you might only see a boost of a couple of frames per second. However, if you are running video editing or 3D design software that are putting occasional heavy loads on your hardware, you might see more of an improvement.
There is an important caveat here. Enabling this plan will increase the amount of power your system consumes, so if you do plan on using this profile on your laptop, make sure you are plugged in at all times.
How to Enable the Ultimate Performance Power Plan
Hit Windows+I to open the Settings app and then click the «System» category.
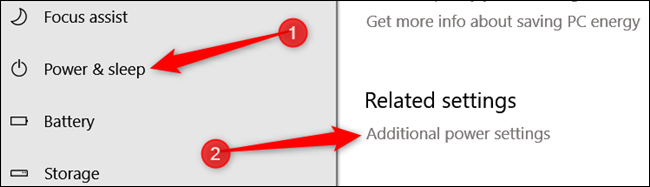
On the System page, click the «Power & Sleep» tab on the left. On the right, click the «Additional Power Settings» link under the «Related Settings» section.
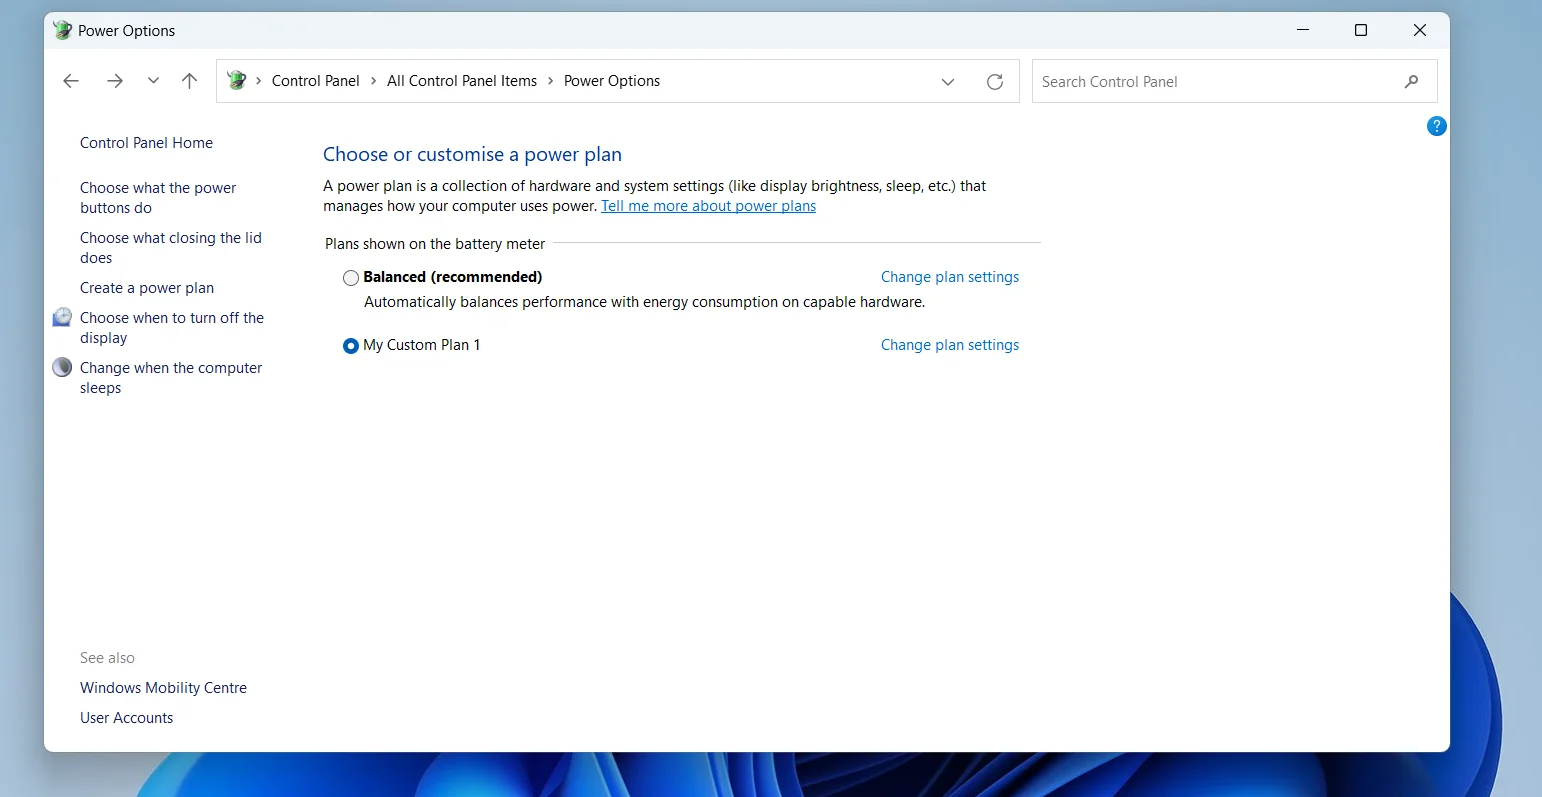
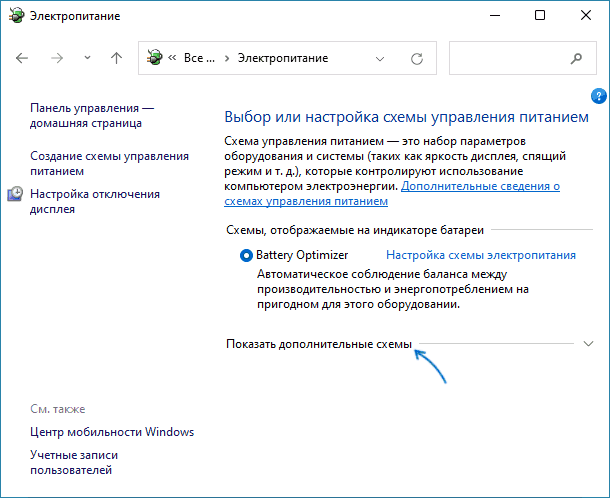
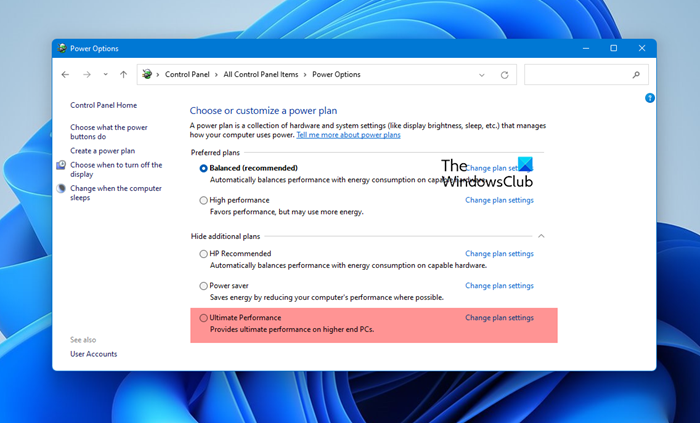
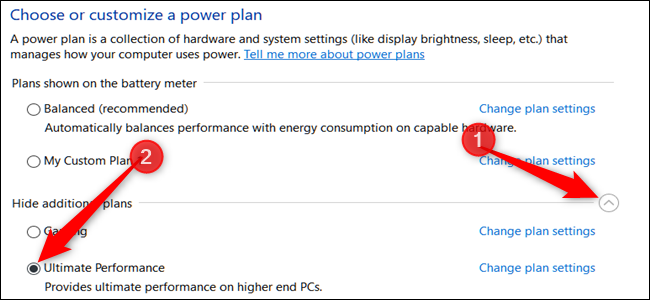
In the window that pops up, click «Show Additional Plans» and then click the «Ultimate Performance» option.
If you’re using a laptop, this option may not appear under this section.
What to Do if You Don’t See the Ultimate Performance Plan
On some systems (mostly on laptops, but also on some desktops), you might not see the Ultimate Performance plan in your settings app. If you don’t, you can add it with a quick Command Prompt or PowerShell command. The command is the same for either shell, so use whichever one you want.
You’ll need to open the Command Prompt or PowerShell with administrative privileges. For Command Prompt, hit Start, type «cmd» into the search box, right-click the Command Prompt result, and choose «Run As Administrator.» For PowerShell, hit Windows+X and choose the «Windows PowerShell (Admin) option.»
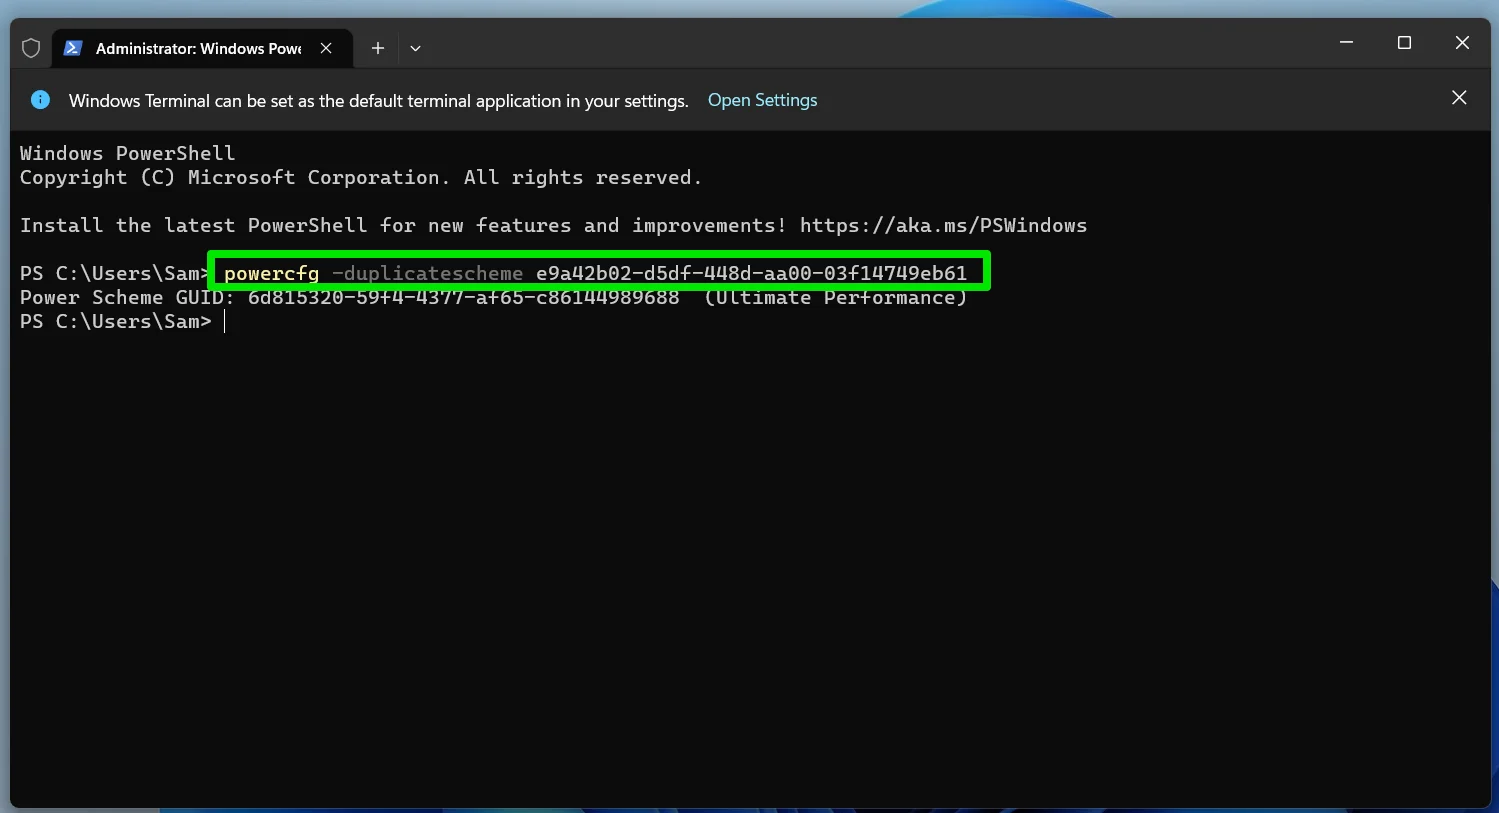
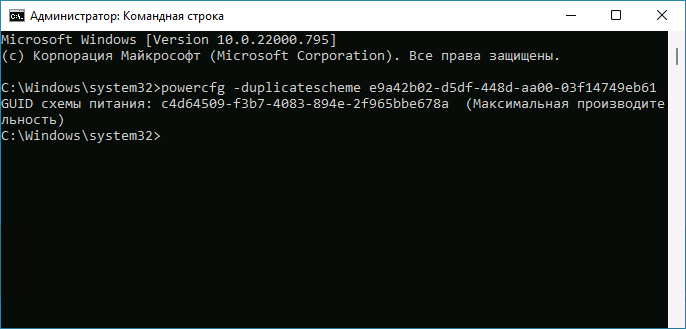
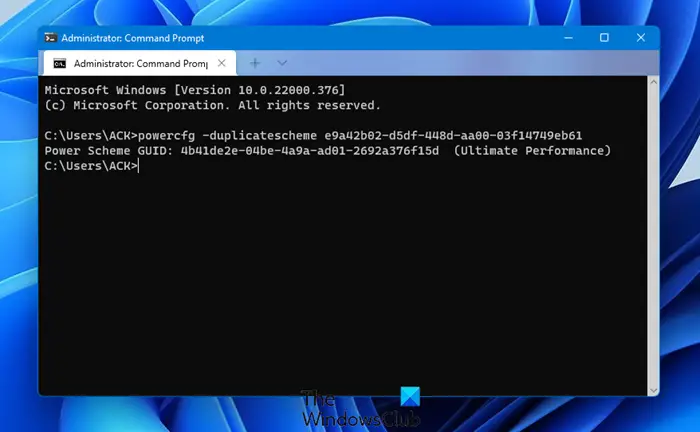
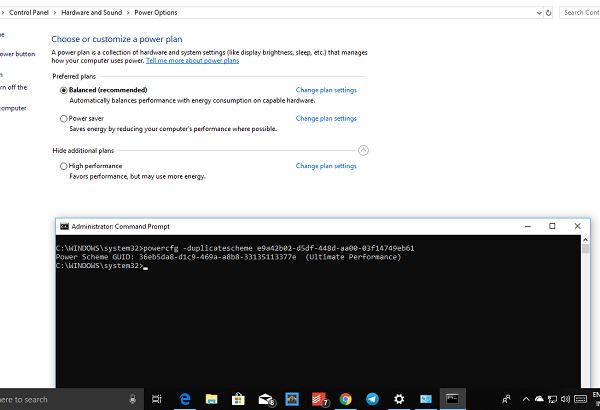
At the prompt, type (or copy and paste) the following command and then hit Enter:
powercfg -duplicatescheme e9a42b02-d5df-448d-aa00-03f14749eb61

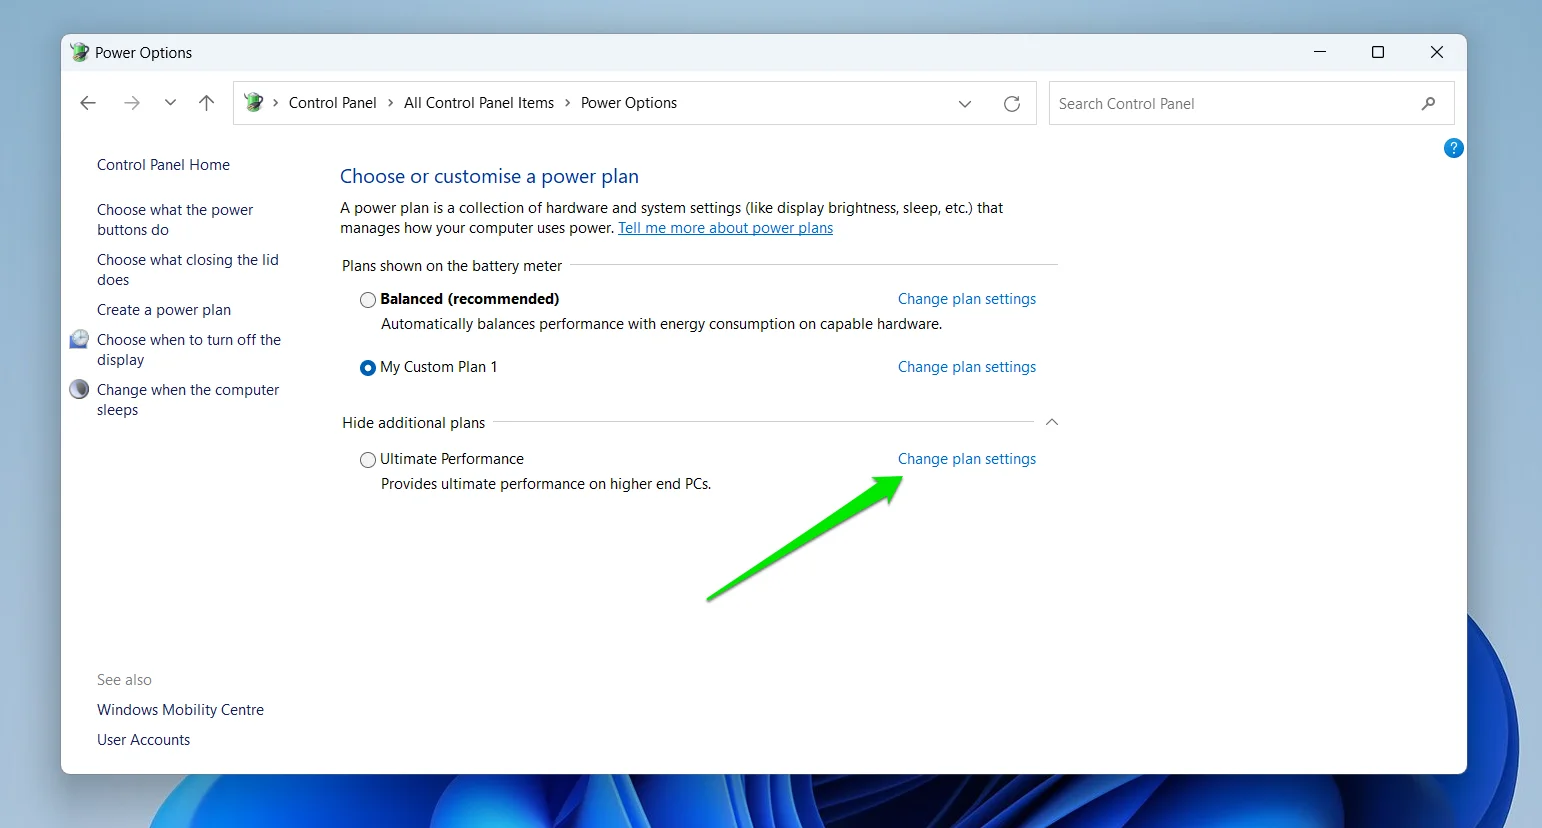
If you already have the Power Options window open, you might have to close and reopen it before you see the plan appear, but it should be there.
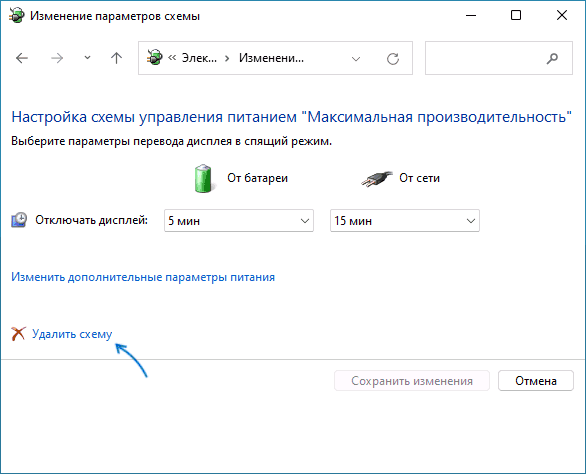
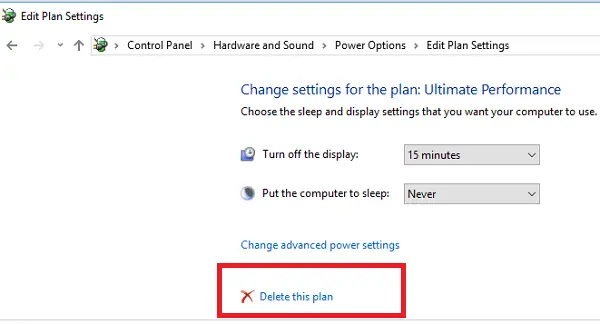
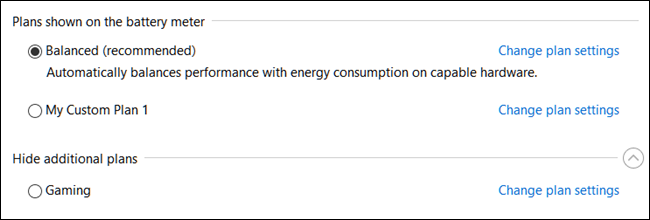
If you don’t want to see the plan anymore, you can remove it from the Settings app. First, switch to a different plan. If you try to delete a plan you’re currently using, you can run into errors.
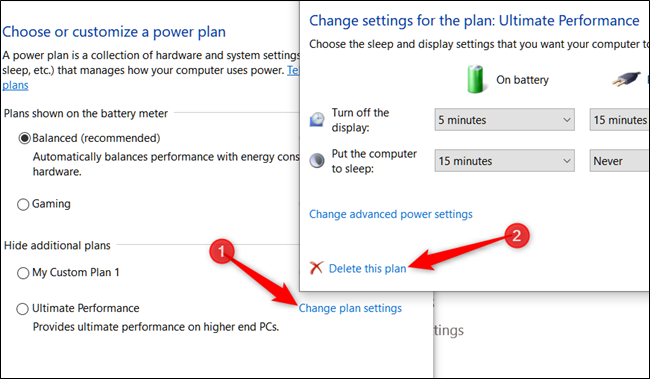
Next, click the «Change Plan Settings» link to the right of the plan and then click «Delete This Plan.»
The Ultimate Performance plan is only really useful in specific cases, but it can make a difference if you’re trying to squeeze every last bit out of your system.

Are you looking to boost your computer’s performance? Adding the high performance power plan in Windows 10 and 11 can help you maximize your system’s potential. In this guide, I’ll walk you through two simple methods to add this missing power plan to your Windows settings.
Key Takeaways
- The high performance power plan can be added through the Control Panel or PowerShell.
- This power plan maximizes system performance at the cost of higher energy consumption.
- If one method doesn’t work, you can try the alternative approach.
Method 1: Using Control Panel
Access Power Options
- Click on the Start button and search for “Control Panel”.
- Open the Control Panel app.

- Change the view settings to either small or large icons.
- Locate and click on “Power Options”.

Create High Performance Plan
- If the high performance plan is missing, click on “Create a power plan”.

- Choose “High performance” from the available options.
- Name the plan “High Performance” (or any name you prefer).
- Click “Next”.

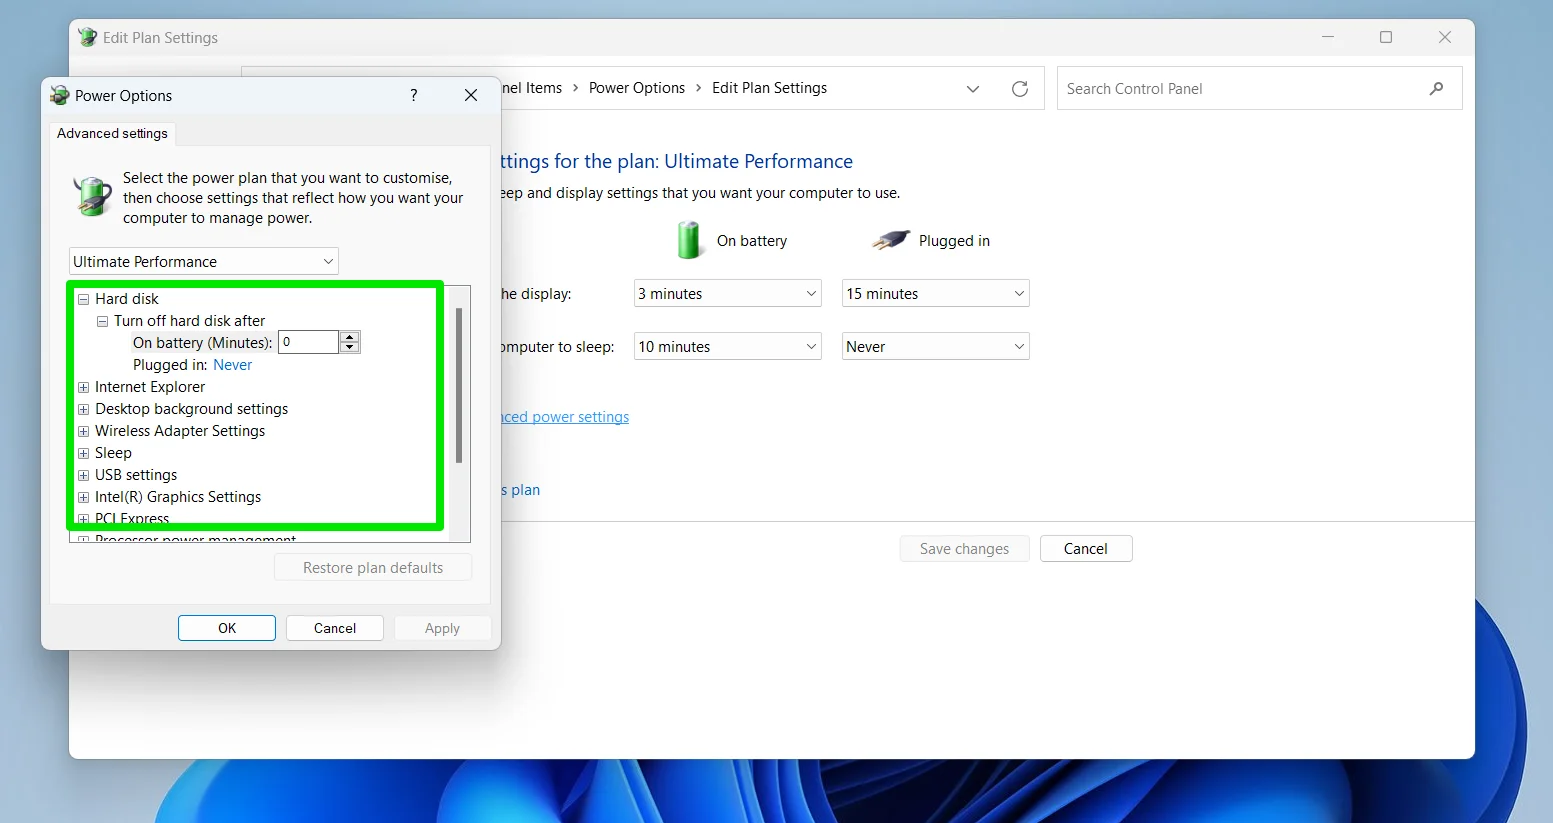
Customize Plan Settings
- Adjust the plan settings according to your preferences.
- I typically set all options to “Never” for maximum performance.
- Click “Create” to finalize the plan.

Method 2: Using PowerShell
If the first method doesn’t work or you prefer using command-line tools, try this PowerShell method.
Open PowerShell as Administrator
- Click the Start button and search for “PowerShell”.
- Right-click on “Windows PowerShell” and select “Run as administrator”.

Add High Performance Plan
- Copy the following command:
powercfg -duplicatescheme 8c5e7fda-e8bf-4a96-9a85-a6e23a8c635c
- Paste the command into PowerShell (right-click or press Ctrl+V).
- Press Enter to execute the command.

Verify the New Power Plan
- Return to the Control Panel and open Power Options.
- You should now see the High Performance power plan in the list.

Conclusion
Adding the high performance power plan to Windows 10 and 11 is a simple process that can potentially boost your system’s performance. Whether you prefer using the graphical interface through Control Panel or the command-line approach with PowerShell, you now have the tools to customize your power settings. Remember, while this plan maximizes performance, it also increases power consumption, so use it wisely based on your needs.
In addition to the High Performance power plan, you can also add and activate the Ultimate Performance plan on Windows 10 and Windows 11.
Frequently Asked Questions (FAQ)
What is the high performance power plan?
The high performance power plan is a Windows power setting that prioritizes system performance over energy efficiency. It keeps your CPU running at higher speeds and prevents components from entering low-power states.
Why isn’t the high performance plan showing up in my power options?
Some Windows installations, especially on laptops, may not show the high performance plan by default to conserve battery life. You can add it manually using the methods described in this guide.
Will using the high performance plan drain my laptop’s battery faster?
Yes, the high performance plan typically consumes more power. It’s best used when your laptop is plugged in or when you need maximum performance for resource-intensive tasks.
Can I customize the high performance plan after adding it?
Absolutely! After adding the plan, you can modify its settings in the Power Options menu to fine-tune performance and power usage according to your needs.
Is it safe to use PowerShell to add the high performance plan?
Yes, using PowerShell to add the high performance plan is safe. The command simply creates a copy of an existing power plan schema, which is a standard Windows operation.
Table of contents
- What is the Ultimate Performance Plan?
- What are the Advantages of the Ultimate Performance Power Plan?
- Should You Use the Ultimate Performance Mode?
- How to Enable Ultimate Performance in Windows
- How to Add the Ultimate Performance Plan if it Is Unavailable
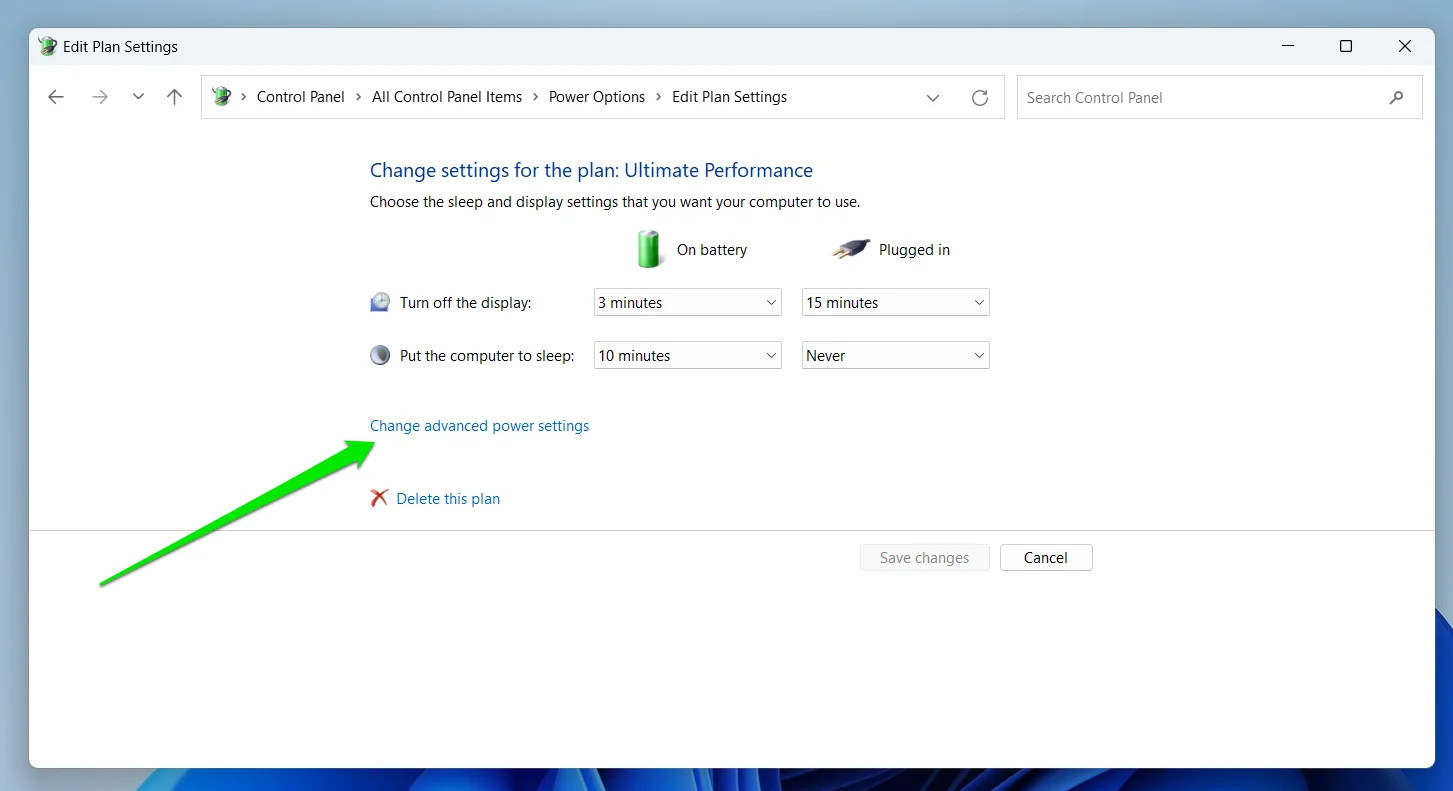
- Customizing the Ultimate Performance Plan
- Deleting the Ultimate Performance Plan
- Conclusion
- FAQ
Many users get frustrated when their supposedly powerful computers fail to consistently hit expected speed levels. This let-down is mostly the cause of restrictive power and performance settings imposed on PC owners by manufacturers and software companies. Windows users had to resort to alternative methods to get the best out of their PCs. That’s because even the High-Performance power option couldn’t always push high-end computers to their maximum speeds. Microsoft decided to change things when it introduced the Windows 10 Ultimate Performance mode in its April 2018 Update. It is a power policy setting that takes the pre-existing High-Performance mode to a new level by removing every performance-related restriction imposed on every piece of hardware on your PC, from your CPU to your screen. In this article, we’ll talk about the Ultimate Performance power plan , whether you need it, and how to enable it.
What is the Ultimate Performance Plan?
The Ultimate Performance power plan is a Windows Operating system power scheme that is designed to allow computer devices to maintain maximum performance by using all the power they need. It is Microsoft’s answer to users who were constantly looking for ways to speed up their Windows 10 and Windows 11 computers. Performance is tied to power because every component on a computer requires more electrical juice to perform at the highest level. That is why the operating system’s power schemes are designed to regulate how each hardware device receives power to prolong battery life or maintain a balance between performance and energy efficiency. With the Ultimate Performance plan Windows 11 and Windows 10 removes every restriction and allows every computer component to take as much power as they need to boost performance. It means CPUs and GPUs are allowed to use their maximum clock speeds and even engage in aggressive multithreading to utilize all their cores at once. The system memory will be allowed to provide every available space, and the hard drive will always be powered to standby for instant data access.
Also Read: Do More CPU Cores Mean Better Performance?
What are the Advantages of the Ultimate Performance Power Plan?
The obvious advantage of the performance plan is better performance
. You’ll be able to experience your computer work using its full capabilities, especially when you want to get through heavy tasks such as video editing and complex computational calculations in excel.
Here’s how Microsoft’s approach to ultimate performance helps users:
- Reduced/eliminated micro-latency: Micro-latency refers to extremely small delays or lag that occur in various computing processes. These delays might be measured in microseconds or milliseconds, but they can have a significant impact on work performance and productivity. With high-end computers, the ultimate performance plan will eliminate micro-latency and ensure smooth operation.
- Optimized background processes: While the plan prioritizes foreground tasks, it still ensures that background processes receive adequate resources, guaranteeing smooth operations.
- Fast storage access: Other power plans often restrict power access to hard drives while the ultimate power plan allows drives to consistently draw power, which means they are always available for data access. This can lead to faster loading times for applications and files, contributing to a smoother user experience.
- Customization: You can always tweak the Ultimate Performance power plan to suit your specific needs. This way, they can strike the preferred balance between performance and power consumption.
Should You Use the Ultimate Performance Mode?
The power plan is best suited for users who engage in tasks and activities that demand maximum computational power, consistent high performance, and high-level reliability from their hardware. You will benefit from the plan if you do 3D designs, edit videos, design graphics and animations, run scientific simulations, run high-end CAD software, and do demanding programming work. Most of these tasks require different pieces of hardware to be at maximum performance, and with other power settings, they might be restricted. However, running a game might be a different scenario. Every hardware likely works together to render a game, especially if your gaming PC game mode activates. As such, you may only see slight FPS and startup improvements
.
On the flip side, the ultimate performance mode stands against everything you believe if you’re an advocate of conserving power and energy efficiency.
Your system’s battery will die faster in this mode, and your computer will likely drive up your energy bill. You will also experience overheating, especially during long hours of gaming.
So, you have to weigh the benefits and cons as they apply to you before deciding if you should activate the plan.
How to Enable Ultimate Performance in Windows
As mentioned earlier, the Ultimate Performance mode is a step up from the High-Performance option that shows up whenever you try to create a new power plan. The former is a preconfigured plan that you can select and edit. The following steps will show you how to get ultimate performance on your PC:
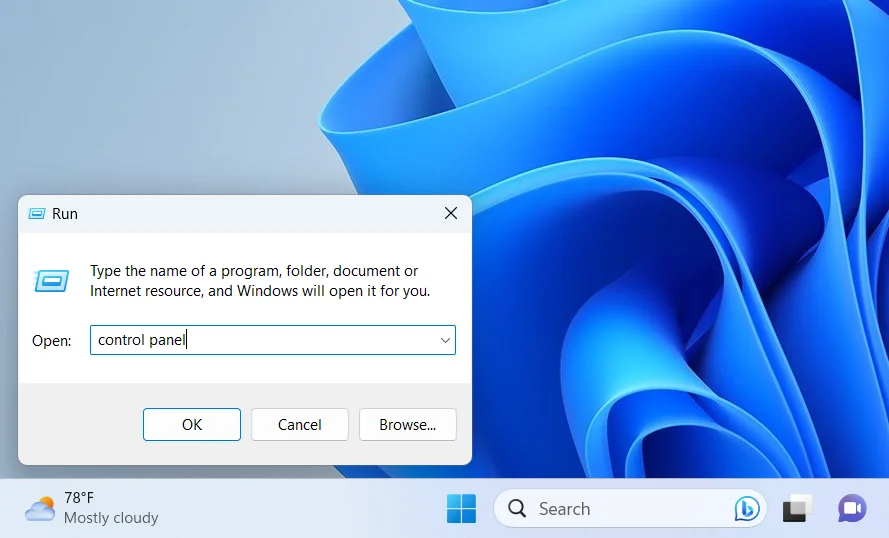
- Right-click the Start button on your Windows 10 or Windows 11 computer and select Run.

- Type
Control Panelinto the Run dialog‘s text box and pressEnter.
- When the Control Panel window appears, go to the top-right corner, expand the View by drop-down menu, and click on Large Icons.
- Select Power Options once the large icons show up.
- You can also select Hardware & Sound in the default Control Panel home screen and then select Power Options. Another alternative is to open Settings (press
Windows + I) go to System > Power & Sleep and select Additional power settings. - Click on the Show Additional Plans arrow (go to the next section if you don’t see this option) once the Power Options screen appears.
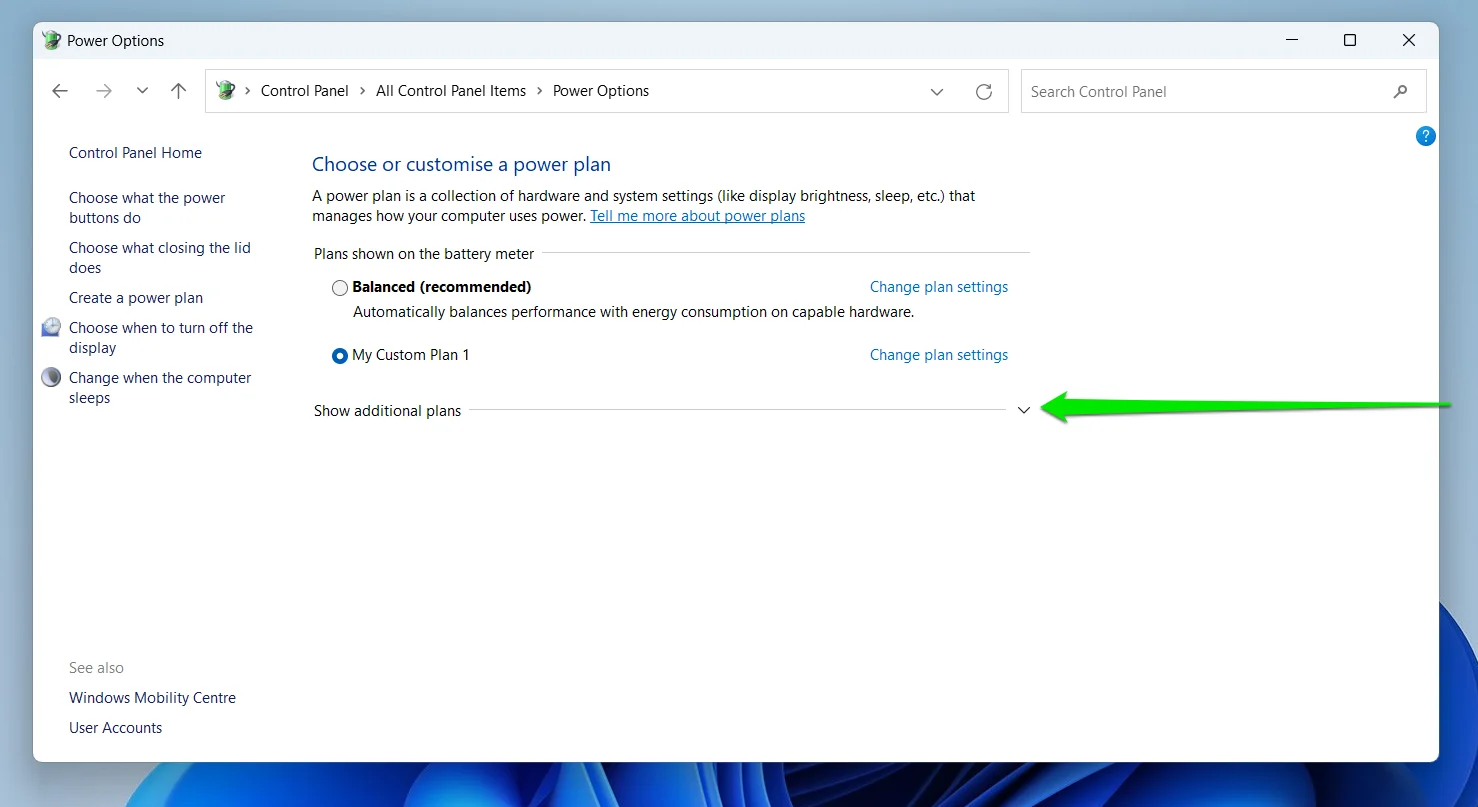
- Now, select Ultimate Performance.