
Applies ToWindows 11 Windows 10
Прежде чем вы начнете рассматривать различные возможности устранения неполадок, убедитесь в том, что у вас установлены последние обновления.
Проверка наличия обновлений
Примечания:
-
Если вам нужна помощь по настройке внешних мониторов, см . статью Использование нескольких мониторов в Windows.
-
Если у вас возникли проблемы с настройкой нескольких мониторов в Surface, см. статью Устранение неполадок с подключением к Surface второго экрана.
Устранение неполадок, связанных с настройкой внешних мониторов
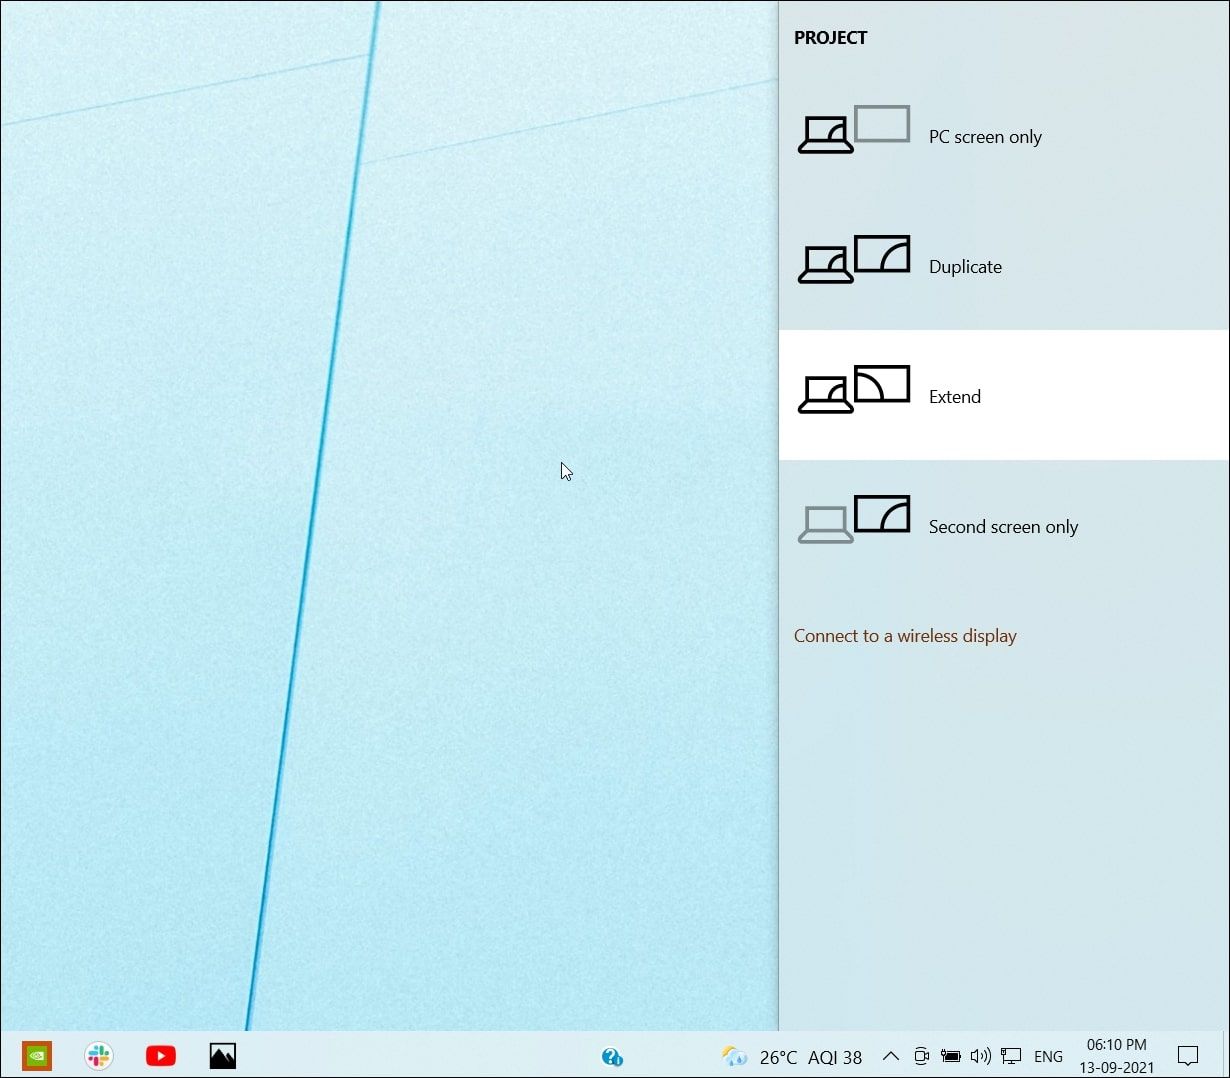
Если вы хотите настроить внешний монитор и он не работает, нажмите клавишу Windows+P, чтобы убедиться, что выбран параметр Расширение. Если параметр Расширение выбран, попробуйте применить следующие советы по устранению неполадок.
Если вас не устраивает изображение на внешнем мониторе, начните с базовых процедур устранения неполадок с оборудованием.
-
Отключите все периферийные устройства от компьютера. Подключенные док-станции, аппаратные ключи, адаптеры и другие устройства могут вызывать конфликты.
-
Убедитесь, что кабель, соединяющий компьютер с внешним монитором, подключен надежно.
-
Попробуйте сменить кабель, соединяющий компьютер с внешним монитором. Если новый кабель работает, это означает, что предыдущий был неисправен.
-
Попробуйте подключить внешний монитор к другой системе. Это поможет определить, связана ли проблема с монитором или исходной системой.
Если это не помогло, попробуйте следующее.
-
Если ваша система оснащена несколькими видеовыходами, попробуйте подключить внешний монитор к одному из других видеовыходов. Типичные порты: HDMI, VGA, DVI и DisplayPort.
-
Если система оснащена несколькими видеоадаптерами (графическая плата), попробуйте изменить системный видеоадаптер по умолчанию. Например, в некоторых системах можно щелкнуть рабочий стол правой кнопкой мыши и выбрать программу, связанную с дополнительным видеоадаптером. Действия для изменения видеоадаптера по умолчанию зависят от устройства, поэтому обратитесь к производителю за дополнительной информацией.
Во-первых, убедитесь, что с вашей системой работает один внешний монитор, для чего изучите представленные выше сведения об использовании одного внешнего монитора.
Если вы можете использовать один внешний монитор, но у вас возникли проблемы с несколькими, возможно, что видеоадаптер (графическая плата) не поддерживает несколько мониторов. Для получения сведений о том, сколько мониторов поддерживает ваш видеоадаптер, обратитесь к его производителю.
Примечание: Если вы пытаетесь использовать разделитель дисплея для расширения дисплея на несколько внешних мониторов, вы не сможете это сделать. Разделитель дублирует исходный сигнал, а не создает два независимых сигнала.
Если в вашем устройстве только один видеовыход, оно по умолчанию поддерживает только один внешний монитор. Вам потребуется следующее для поддержки нескольких внешних мониторов:
-
Док-станция — чтобы узнать, имеются ли док-станции для вашего компьютера, обратитесь к его производителю.
-
USB-адаптер — если у вас есть USB-порт, возможно, вам удастся воспользоваться USB-адаптером, чтобы устроить дополнительный видеовыход для вашего устройства.
Устранение неполадок, связанных с существующими конфигурациями
Если ваша настройка работает хорошо, то вдруг остановилась, вот несколько вещей, которые вы можете попробовать.
В некоторых случаях для сброса графического драйвера можно сбросить графический драйвер с помощью клавиш Windows + CTRL + SHIFT + B . Если это не поможет, попробуйте перезапустить устройство.
Чтобы перезапустить устройство, нажмите кнопку Пуск, а затем выберите Power > Перезапустить.
Если это не по силам, нажмите кнопку Пуск, а затем выберите Power > Завершение работы. Затем снова включите устройство.
Если вы столкнулись с проблемами после обновления, возврат или откат к предыдущей версии видеодрайвера может устранить проблему. Откат драйвера:
-
В поле поиска на панели задач введите Диспетчер устройств.
-
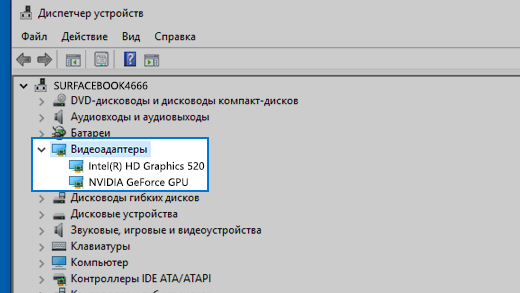
В списке выберите пункт Диспетчер устройств, чтобы открыть его. Щелкните стрелку, чтобы развернуть раздел Видеоадаптеры .
-
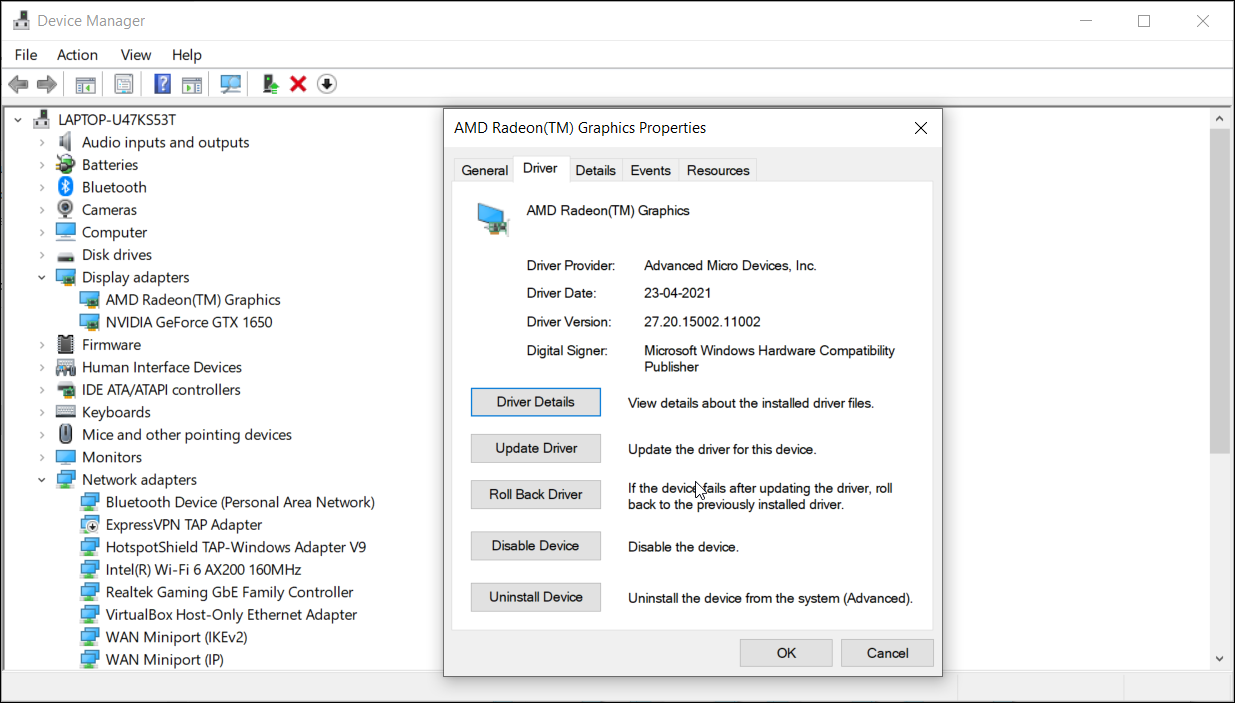
Щелкните правой кнопкой мыши видеоадаптер и выберите Свойства, откройте вкладку Драйвер , а затем выберите Откатить. Если вам не предлагается вариант отката, переустановите драйвер.
Если предыдущие действия не устранят проблему, переустановите видеодрайвер. Ниже рассказывается, как это сделать.
-
В поле поиска на панели задач введите Диспетчер устройств.
-
В списке выберите пункт Диспетчер устройств, чтобы открыть его. Щелкните стрелку, чтобы развернуть раздел Видеоадаптеры .
-
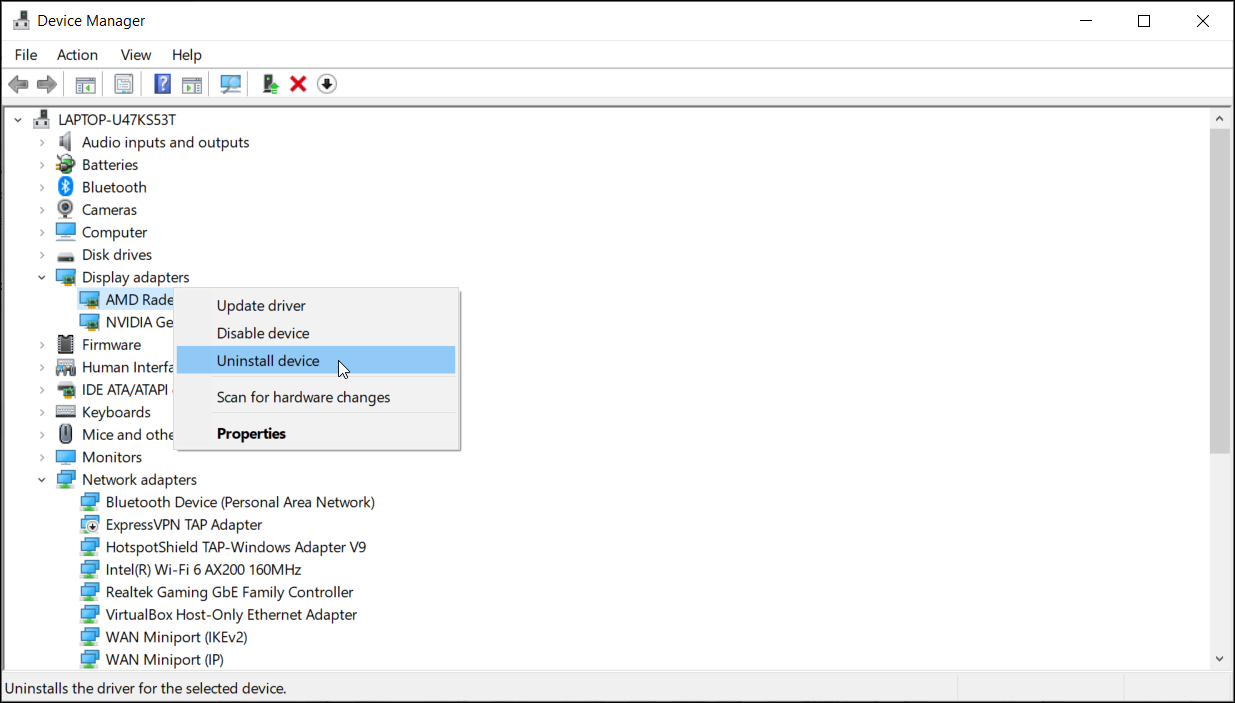
Щелкните правой кнопкой мыши видеоадаптер, а затем выберите Удалить устройство и Попытаться удалить драйвер для этого устройства, а затем выберите Удалить.
-
Вам может быть предложено перезапустить компьютер. Запишите остальные инструкции перед перезагрузкой.
-
Снова откройте Диспетчер устройств и разверните раздел Видеоадаптеры.
-
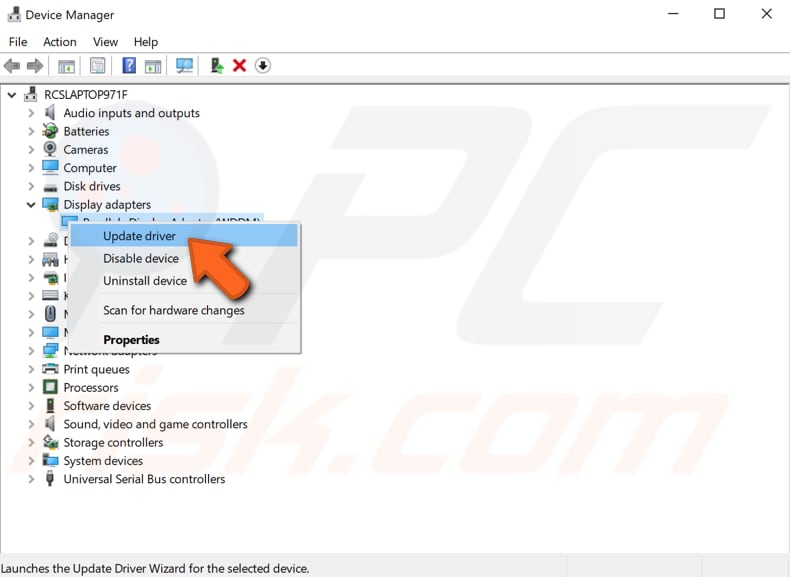
Щелкните правой кнопкой мыши видеоадаптер и выберите Обновить драйвер.
-
Выберите Автоматический поиск обновленных драйверов и следуйте инструкциям по установке.
-
В поле поиска на панели задач введите Диспетчер устройств.
-
В списке выберите пункт Диспетчер устройств, чтобы открыть его. Щелкните стрелку, чтобы развернуть раздел Видеоадаптеры .
Вы увидите название производителя и название адаптера или адаптеров.
Проблемы не устранены?
Если вы попробовали действия, описанные в этой статье или не нашли решение проблемы, используйте Центр отзывов о Windows, чтобы сообщить об ошибке.
Опишите действия, которые вы выполняли перед возникновением проблемы. Войдите в Центр отзывов и следуйте инструкциям для изложения сути и деталей проблемы. Сначала выберите категорию, а затем добавьте достаточно дополнительных сведений, чтобы можно было воспроизвести проблему. Такая информация поможет корпорации Майкрософт определить основную причину проблемы.
Открытие Центра отзывов
Нужна дополнительная помощь?
Нужны дополнительные параметры?
Изучите преимущества подписки, просмотрите учебные курсы, узнайте, как защитить свое устройство и т. д.
Время на прочтение3 мин
Количество просмотров136K
Гайд для новичков. «Windows 10» не удается обнаружить второй подключенный монитор? В этой статье я расскажу какие проблемы могут возникнуть при подключении второго монитора и методы их решения: переустановка драйверов, принудительное обнаружение, подключение беспроводного дисплея.

Иногда, система «Windows 10» не может обнаружить второй монитор из-за проблем с оборудованием или драйвером. И если подобная ситуация произошла, то существует ряд шагов, чтобы быстро устранить проблему с подключением второго монитора.
Проверяем аппаратную часть
Если «Windows 10» не может обнаружить второй монитор, то для начала выполните следующие действия:
- Перезагрузите компьютер.
- Убедитесь, что выбран правильный вход.
- Проверьте кабельное соединение между монитором и видеокартой.
- Отсоедините кабель с обоих концов, подождите несколько секунд и снова подключите его.
- Используйте другой кабель, так как проблема может заключаться в контактах разъема или поврежденном кабеле.
- Если монитор и видеокарта имеют несколько портов, попробуйте переключить порты.
- Подключите монитор к другому компьютеру, чтобы определить, что проблема не в мониторе.
- Подключите другой рабочий монитор, исправность которого достоверно известна, чтобы проверить работоспособность видеокарты.
Настройте 2-ой монитор в параметрах системы
Если вы удостоверились, что аппаратных проблем нет, физическое подключение осуществлено верно, все элементы цепи соединения исправны и их работоспособность полностью проверена. Теперь проверим настройки в приложении «Параметры».
Принудительное обнаружение второго дисплея
Для этого переходим в «Пуск» — «Параметры» — «Система». В левой боковой панели открывшейся страницы системного окна перейдите в раздел «Дисплей».
Теперь в правой боковой панели «Изменение расположения экранов» нажмите на «Обнаружить».
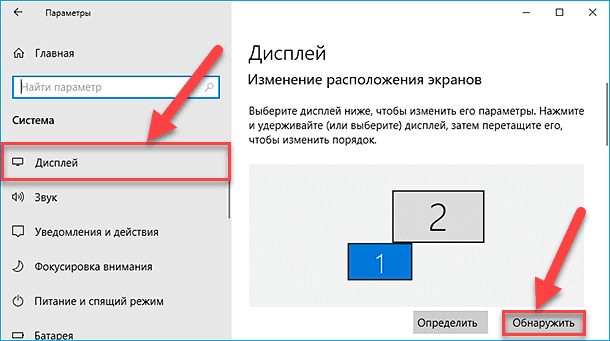
После чего монитор должен быть обнаружен, а потом его можно будет настроить.
Подключение беспроводного дисплея
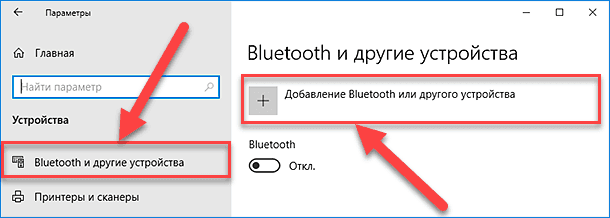
Открываем «Пуск» — «Параметры» — «Устройства». Потом на панели слева кликаем на раздел «Bluetooth и другие устройства». Затем в правой части нажмите на кнопку «Добавление Bluetooth или другого устройства».
Далее в новом окне «Добавить устройство» выбираем раздел «Беспроводной дисплей или док-станция».
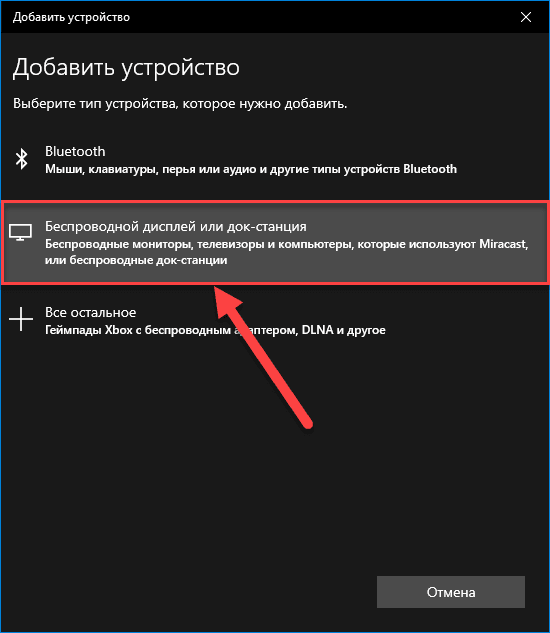
Убедитесь, что беспроводной дисплей включен и доступен для обнаружения. Выберите требуемый монитор из списка. Продолжайте следовать указаниям на экране и второй дисплей появится в списке в качестве второго.
Обновите драйвера видеокарты до последней версии
Поврежденные, неисправные или устаревшие драйвера препятствуют нормальной работе компьютера, поэтому их периодически приходится переустанавливать или обновлять.
Обновить их можно вручную или через Диспетчер устройств, так же можно выполнить принудительное обновление.
1 способ. Чтобы обновить их вручную, перейдите на сайт производителя видеокарты, в строке поиска введите точную модель своей видеокарты (посмотреть ее можно с помощью программы CPU-Z? например). Перейдите на страницу товара — поддержка и скачайте последнюю версию драйвера под вашу ОС. Далее устанавливаем драйвер перезагружаем ПК.
2 способ. Открываем «Пуск» — «Средства администрирования Windows» — «Управление компьютером».
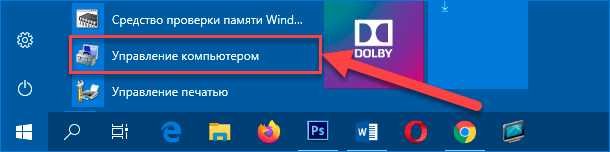
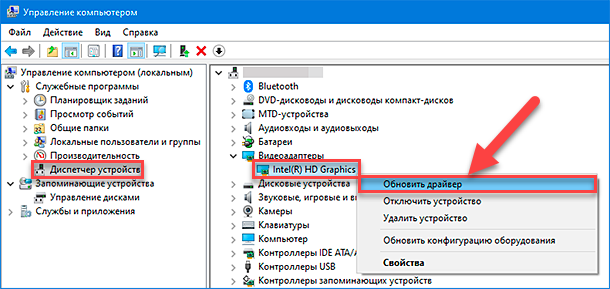
В левой части окна «Управление компьютером» кликаем по разделу «Диспетчер устройств», а в правой части кликаем ПКМ по надписи «Видеоадаптеры».

Из выпадающего списка выбираем «Обновить драйвер».
Далее выбираем «Автоматический поиск обновленных драйверов»
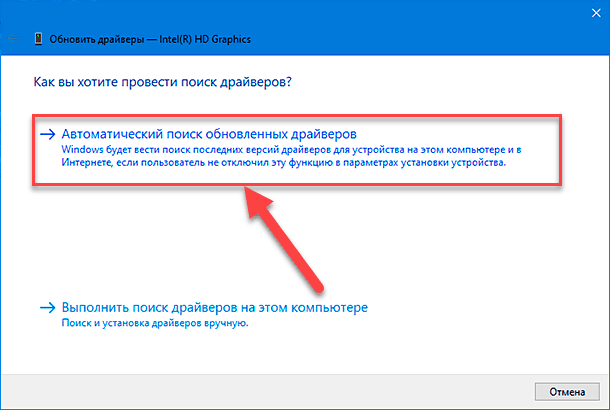
Ждем завершения процесса и перезагружаем ПК.
3 способ. Чтобы переустановить драйвер видеокарты в принудительном поряд, его нужно удалить из диспетчера устройств. Нажимаем «Поиск» — вводим «Диспетчер устройств» — кликаем по иконке ПКМ — «Запуск от имени администратора». Кликаем ПКМ по записи «Видеоадаптеры», в меню выбираем «Удалить устройство».
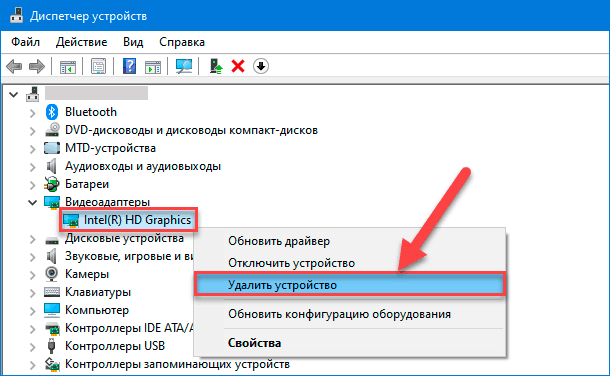
Подтверждаем удаление и перезагружаем ПК, после чего ОС заново определит устройство установит драйвер.
Полную версию статьи со всеми дополнительными видео уроками смотрите в источнике. А также зайдите на наш Youtube канал, там собраны более 400 обучающих видео.
External monitors are some of the easiest peripherals to set up with any PC. It doesn’t matter if you’re running Linux, Windows, or even on a Mac. In most cases you only need to connect a cable or two to get the job done. That said, there are always exceptions. If your external monitor isn’t detected when you plug it in, you will have to examine both hardware and software to fix the problem. Here are a few things you can try.
Basic checks
Make sure that;
- The monitor is plugged in and turned on. Some monitors have soft power keys while others have hard ones. They may be located at the front or along the side or hidden in the bevel of the screen. Consult your monitor’s manual to make sure you’ve turned it on.
- Make sure that you’re using the correct cable to connect your laptop or your desktop to the monitor. It should be pushed all he way in and it should be connected to the correct port.
- When you turn a monitor and do not connect it to any video source, it still has a backlight on the screen that indicates the screen is on and working. If the backlight won’t turn on, it likely indicates a hardware problem.
If you’ve bought the monitor second hand or have taken it out of storage and are using it for the first time, you should make sure that it is still working and not damaged in some other way. If everything checks out, try the following fixes.
Enable second display
Windows 10 should automatically start showing your desktop when you connect a monitor to your system. This holds true if you’re connecting a primary or a secondary monitor. Use the Win+P keyboard shortcut to open the Projection panel. Make sure the Extend Display option is selected.
Force detect display
Open the Settings app and go to the System group of settings. Select the Display tab. If Windows 10 has detected the monitor, you should see it listed there next to your primary screen. If it isn’t appearing there, click the Detect button and it should appear.
Check for shadow monitors
It is possible that you have shadow monitors installed on your system. They don’t appear in the Settings app but they may interfere when you try to connect a real monitor on your system. We’ve covered how you can remove shadow monitors on Windows 10. Follow the guide and then check to see if your monitor is detected.
Install drivers
Monitors are generally plug and play devices. If you have a monitor with special features, you might need to install a driver to benefit from its extra features but it should still display your desktop even if you haven’t installed said drivers. Windows 10 installs generic drivers that enable the monitor so your screen shouldn’t be blank. That said, check for driver updates that may be pending a system restart, check if any graphics driver updates are available, and if there is a specific app or driver that is meant to be used with the monitor, install it.
Display Mode & Ports
Monitors connect to PCs/laptops in one of three ways; HDMI, VGA, and DVI. Each type has its own port and when a cable is connected, it automatically detects it. That said, some monitors may not automatically detect it. In this case, look at your monitor for a settings panel. Use it either to set the display/connection mode to Auto, or to the one that you’re using.
Check brightness and contrast
External monitors have their own brightness and contrast controls. These are controlled by a set of buttons on the monitor. They should be near the power button but check your monitor’s manual to be sure. Use the buttons to make sure the brightness and contrast have not been reduced to 0, or to a point where the desktop is not visible.
Hubs, connectors, and wireless displays
If the connection to your monitor is a simple one i.e., the cable is connected directly to your PC and the monitor, there are fewer chances of things going wrong. If you’re using a display hub, a connector, a converter, or are connecting a wireless display, you have several other factors to contend with.
For wireless displays, make sure that Windows 10 supports it. You might need to install driver updates or even update your OS to get a wireless display to work.
For hubs and connectors, if you can do without them, connect the monitor directly. If it works, there might be a problem with the hub or the monitor itself may not work unless it has a direct connection to a PC or laptop. If you have a VGA port and you’re using a VGA to HDMI converter, that might be the problem. These converters don’t always works and it’s best to use the ports you have.

Fatima Wahab
Fatima has been writing for AddictiveTips for six years. She began as a junior writer and has been working as the Editor in Chief since 2014.
Fatima gets an adrenaline rush from figuring out how technology works, and how to manipulate it. A well-designed app, something that solves a common everyday problem and looks
Windows 10 Can’t Detect Second Monitor? Find Out How to Fix It
Connecting a second monitor is useful when, for example, you want to boost productivity or improve your gaming experience. If your computer is not detecting your second monitor, this article will help you fix that.
Having a second monitor connected to your computer is like having additional workspace and is useful when there is a need to monitor spreadsheets and have both visible simultaneously. If you are a gamer, multiple displays can expand your game world.
It also allows you to switch between applications quickly. Rather than using keyboard shortcuts such as Alt+Tab, you can navigate the mouse to the other monitor.
Despite these advantages, problems with second monitors can be frustrating, especially if you use multiple displays as part of your regular computing activities. This can decrease productivity or diminish the gaming experience.
Often, this is not a complex problem and can be fixed easily. Computers are commonly unable to detect the second monitor due to faulty, outdated, or corrupted video drivers. If this is the case, Windows is unable to extend the desktop using the second display.
The article below addresses the problem of a second monitor not being detected and describes some possible fixes.
Video on How to Fix Windows 10 Not Detecting Second Monitor:
Table of Contents:
- Introduction
- Use Keyboard Shortcut
- Roll Back Your Monitor and Display Drivers
- Update Your Monitor and Display Drivers
- Reinstall Your Display Drivers
- Try Detecting Second Display Manually
- Re-enable Your Display Adapter
- Video on How to Fix Windows 10 Not Detecting Second Monitor
Download Computer Malware Repair Tool
It is recommended to run a free scan with Combo Cleaner — a tool to detect viruses and malware on your device. You will need to purchase the full version to remove infections. Free trial available. Combo Cleaner is owned and operated by Rcs Lt, the parent company of PCRisk.com read more.
Use Keyboard Shortcut
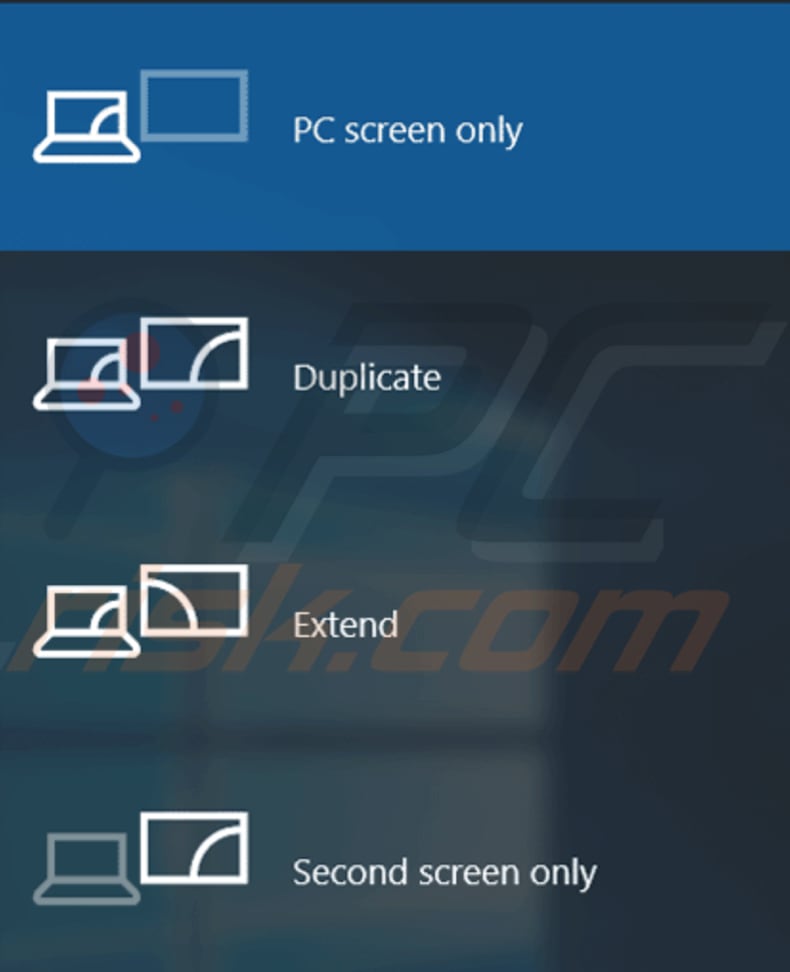
First, try a Windows key (Win key) + P keyboard shortcut. This allows you to choose (or switch) the display mode. It enables you to access and switch between external displays and thus use more than one monitor. There are usually four options provided: PC screen only, Duplicate, Extended and Second screen only.
The first is self-explanatory — the Duplicate option allows you to «clone» the screen to your connected secondary display, monitor, or projector. The Extend option expands the desktop and makes room for additional windows. The last, Second screen only, turns off the first/primary screen and leaves only the second screen turned on.
Try to use the Win + P keyboard shortcut and choose the preferred option. See if this solves the problem. If not, try to restart the computer and choose project mode again.
[Back to Table of Contents]
Roll Back Your Monitor And Display Drivers
The Roll Back Driver feature allows you to uninstall the currently installed driver of a hardware device and then install the previously installed driver. This feature is typically used when the latest or newer drivers are not working properly.
The latest/updated drivers are usually better than previous versions and include certain improvements. Some updated drivers can, however, actually cause problems rather than fix them. The Roll Back Driver feature allows you to simply uninstall the current driver and replace it with the previous version within a few mouse clicks.
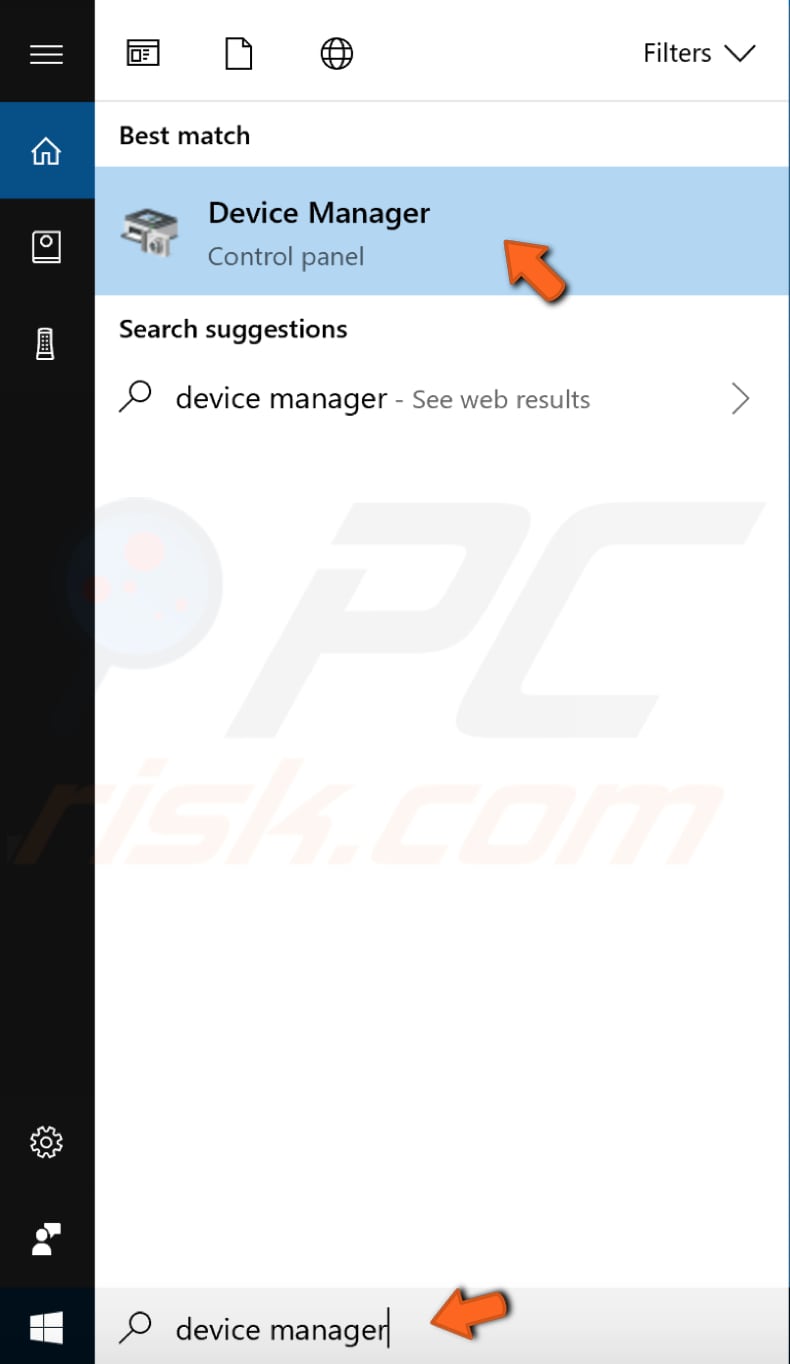
To roll back monitor and video drivers, first access Device Manager by typing «device manager» in Search and click the «Device Manager» result to open it.
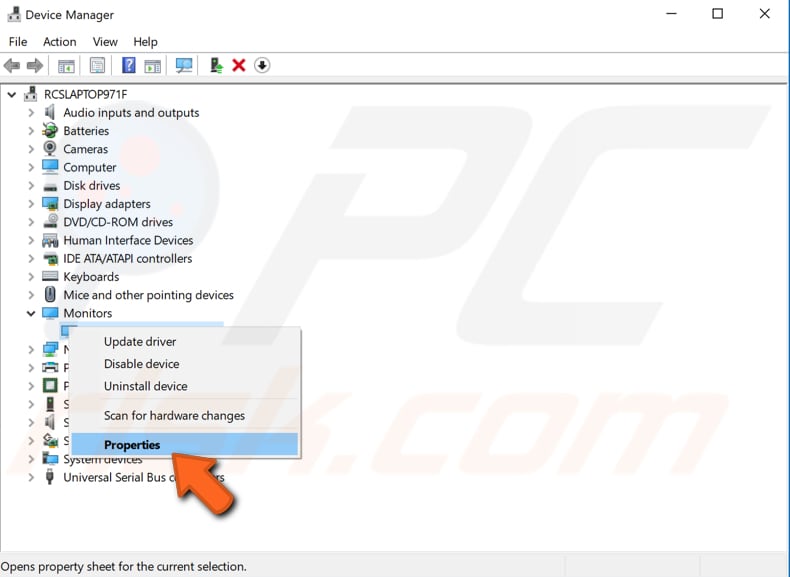
In the Device Manager window, you will see a list of hardware attached to your computer. Find «Display adapters» and expand it, right-click on the display device software, and select «Properties» from the contextual menu.

In the display adapter properties window, go to the «Driver» tab and click the «Roll Back Driver» button. Follow the instructions. If the button is greyed and you cannot click it, a previous driver version has not been installed for this device.
Return to the Device Manager window, find «Monitors», and expand it. Right-click the second monitor and select «Properties» from the contextual menu.
In the second monitor properties window, go to the «Driver» tab and click the «Roll Back Driver» button. Follow the instructions. If the button is greyed and you are not able to click it, a previous driver version has not been installed for this device.
[Back to Table of Contents]
Update Your Monitor And Display Drivers
If rolling back the drivers for the monitor and display has not solved the problem, this problem might be caused by faulty or incorrect drivers. In most cases, computers are not able to send and receive data correctly without drivers. If the appropriate driver is not installed, the device might not function properly, if at all. A faulty driver might need updating or a reinstall.
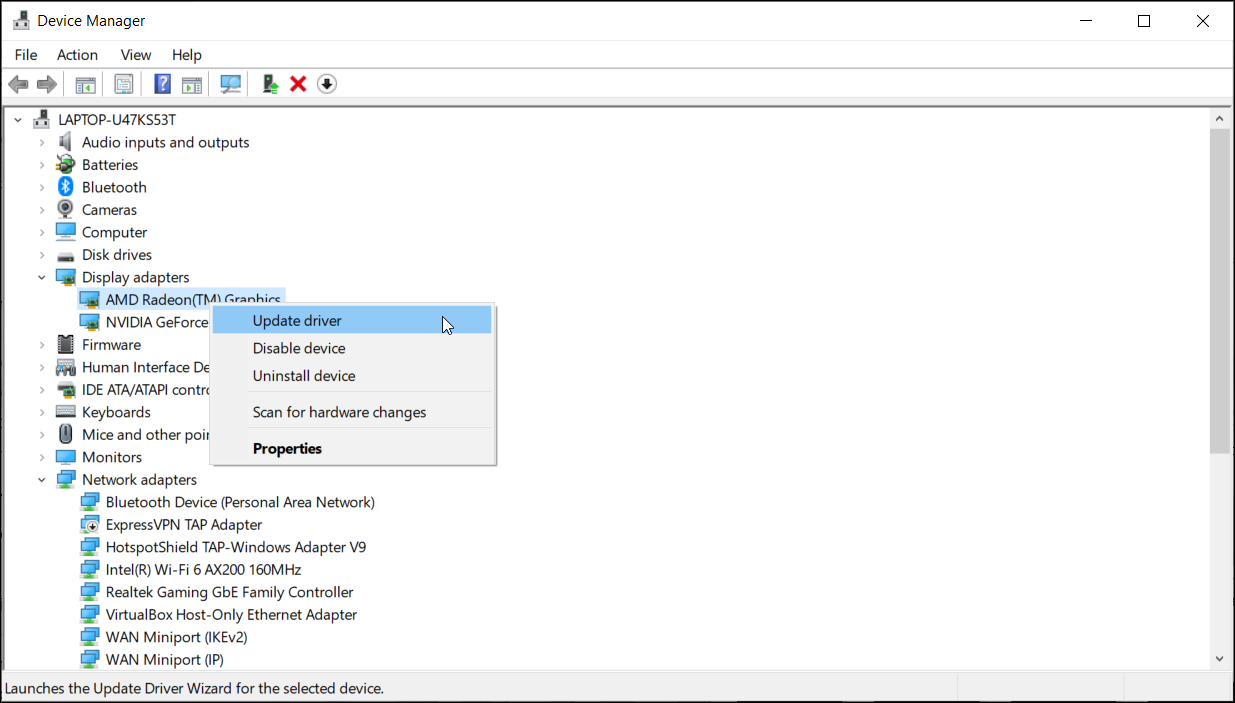
To update your drivers go to Device Manager, type «device manager» in Search, and click the «Device Manager» result. Find «Display adapters» and expand it. Right-click on the display device software and select «Update driver» from the contextual menu.
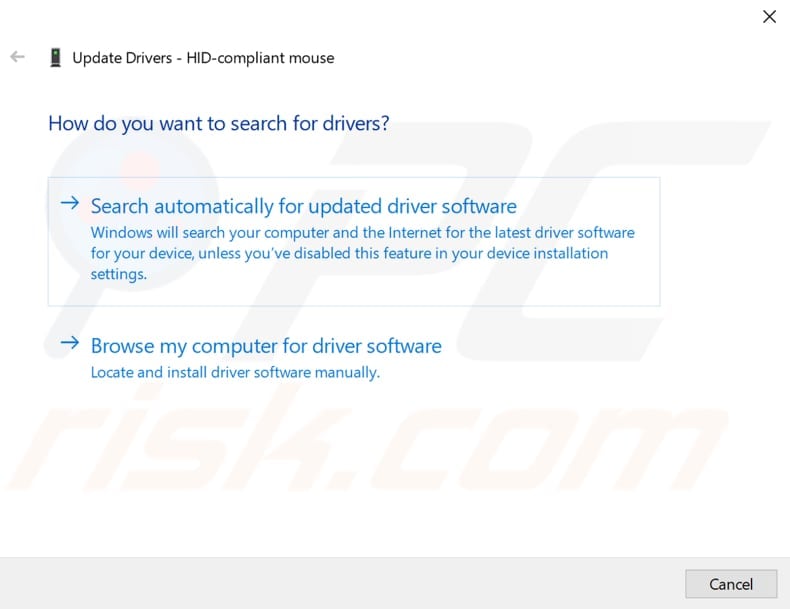
You will be asked to search for updated driver software automatically or to browse your computer for driver software. If you select the first option, Windows will search the computer and Internet for the latest driver software for the device.
If you select the second option, you must locate and install the drivers manually — using this option requires you to have downloaded a driver on the computer or a USB flash drive.
Return to the main Device Manager window, find «Monitors», expand its section, and right-click the second monitor. Select «Update driver» from the contextual menu.
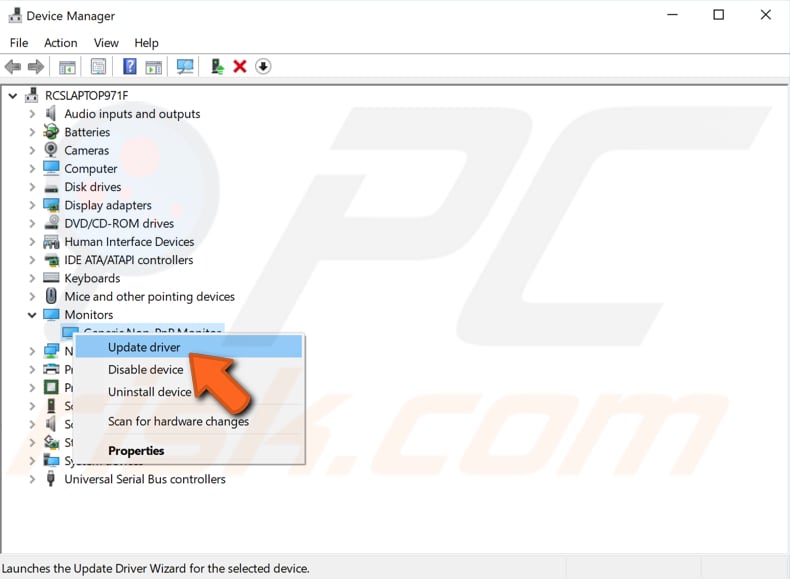
You will be asked whether you want to search for updated driver software automatically or to browse your computer for driver software. If you select the first option, Windows will search your computer and the Internet for the latest driver software for the device. If you select the second option, you must locate and install the drivers manually. Using this option requires you to have a downloaded driver on the computer or a USB flash drive.
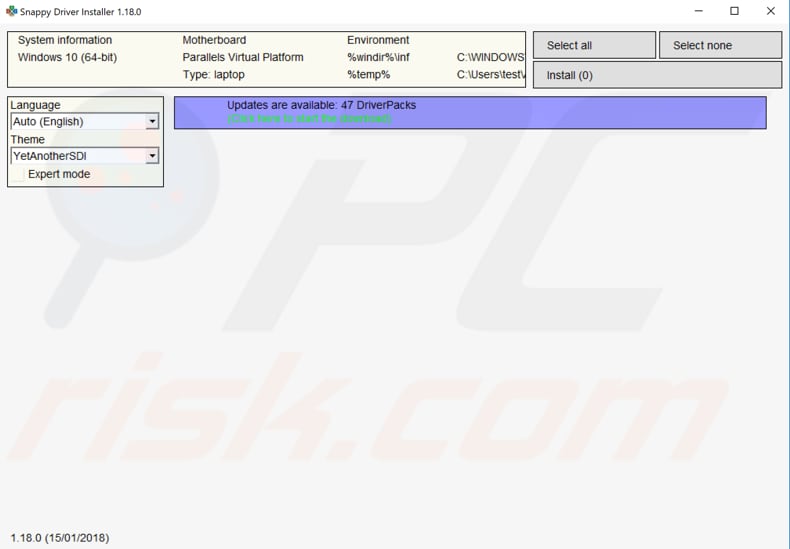
Another way to update or install new drivers for devices is by using third-party software such as Snappy Driver Installer. Snappy Driver Installer (SDI) is a powerful free driver updater tool for Windows that can store its entire collection of drivers offline. You can download the Snappy Driver Installer from here.
[Back to Table of Contents]
Reinstall Your Display Drivers
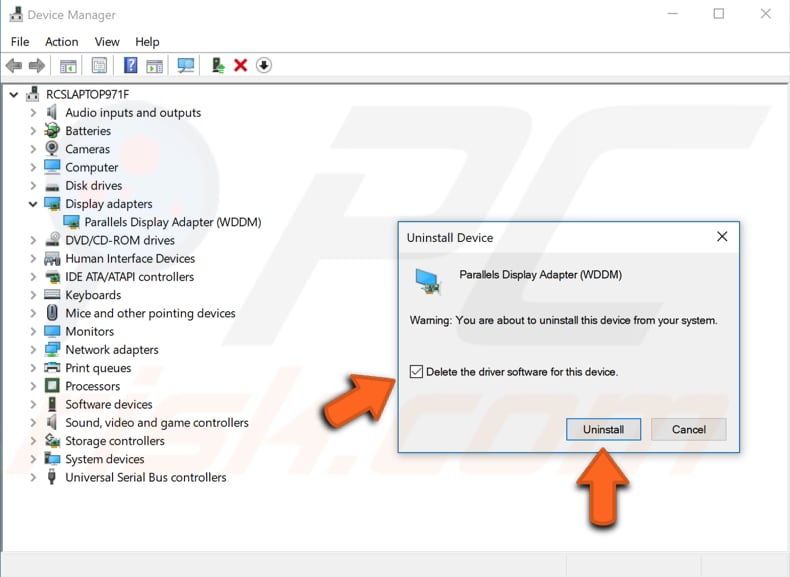
If rolling back and updating the drivers has not solved the problem, you might want to try uninstalling and reinstalling them. To do this, open Device Manager, find «Display adapters» and expand it. Then, right-click on the display device’s software and select «Uninstall device» from the contextual menu.
You will receive a warning saying that you are about to uninstall this device from the system. Mark the «Delete the driver software for this device» checkbox and click «Uninstall».
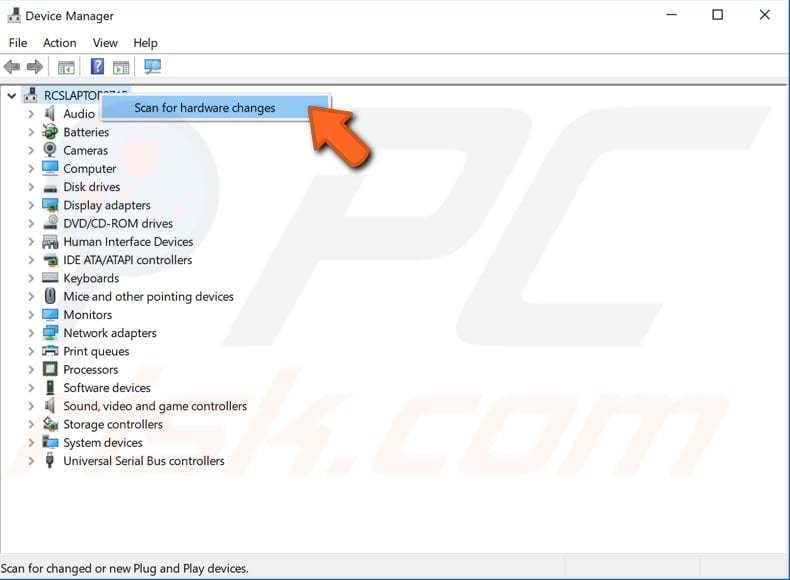
Restart the computer, and Windows should automatically install the missing display and monitor drivers for you. If it does not, go to Device Manager and right-click the computer name, select «Scan for hardware changes». See if this solves the problem.
[Back to Table of Contents]
Try Detecting Second Display Manually
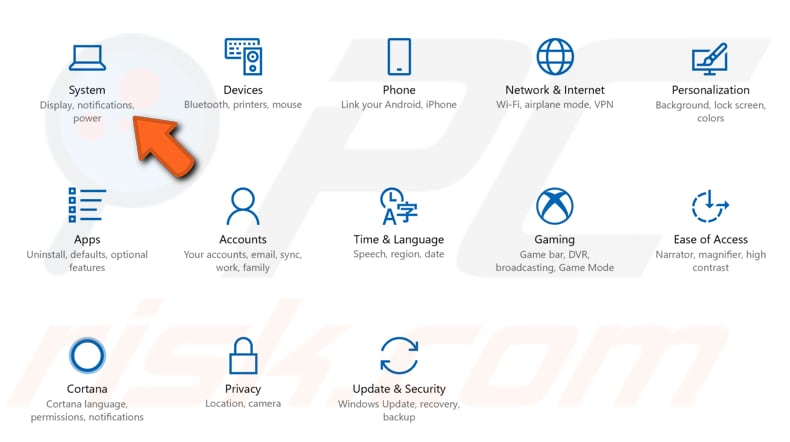
To force the Windows operating system to detect multiple displays connected to the computer, go to Windows Settings and click «System». Older displays might not always connect automatically.
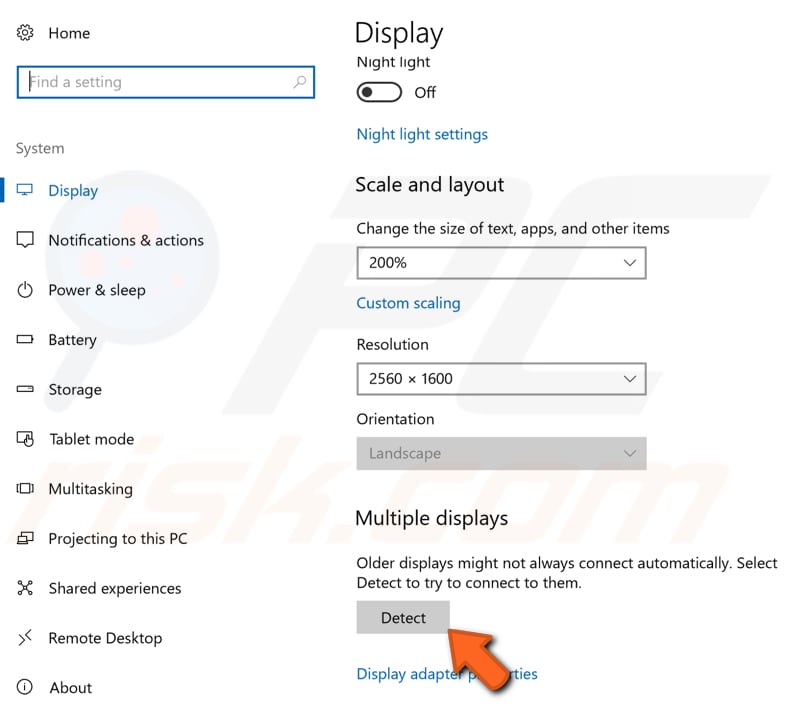
Select «Display» on the left pane, find the «Detect» button under Multiple displays and click it. See if it detects a second monitor connected to your computer.
[Back to Table of Contents]
Re-enable Your Display Adapter
You can to try to disable and re-enable the display adapter. To do this, open Device Manager, find «Display adapters» and expand it, right-click on the display device software and select «Disable device» from the contextual menu.

Then right-click the display device software again and select «Enable device» from the contextual menu. See if this solves the problem.
We hope that one of these methods solves the problem and you can now use both monitors connected to the system. If you know of other ways to solve this problem not mentioned in this article, please share them with us by leaving a comment in the section below.
[Back to Top]
Windows 10 makes it easy to connect a secondary monitor to your setup to boost productivity. However, sometimes your system may fail to detect the second monitor due to hardware or software reasons.
Fortunately, troubleshooting this problem is easy. Let’s explore the multiple ways to help you troubleshoot external monitor connection issues in Windows 10.
Basic Troubleshooting Tips to Fix When the Secondary Monitor Is Not Detected
More often than not, it’s the basic things that prevent your PC from detecting a secondary monitor. So before we delve into the more technical troubleshooting aspects of this guide, follow these tips to see if you have done the basics right.
- Perform a quick system restart to fix issues occurring due to temporary glitches.
- Click on the Action Center at the bottom right, then click on Project and ensure you have selected, Duplicate, or Extend.
- Check if your monitor is connected to a power source and turned on. The power button is usually located on the bottom right-hand side.
- Make sure the cable is connected firmly on both ends. You may also want to disconnect the HDMI or DisplayPort cable, wait for a few seconds, and reconnect.
- Check your signal cable for wear and tear. You may also want to check the Display or HDMI port for any issues.
- Change and connect to a different input/output port if your system has multiple ports available.
- Connect your monitor to another computer to determine if the issue is with your computer or monitor.
If you have followed all the steps and still the secondary monitor is not working, follow the additional steps outlined below.
1. Configure the Multiple Display Settings in Windows 10
Windows 10 can automatically detect all the displays connected to your system. However, you have to activate the displays manually from settings.
As discussed in the basic troubleshooting part, click on Project in the action center and select the Extend or Duplicate option to activate your secondary display.
Alternatively, go to Settings > System > Display. Scroll down to the multiple displays section, click the drop-down menu and select the Duplicate or Extend option.
If it is already set to Extend or Duplicate, change the settings to something else and then revert the changes to see if that helps.
2. Force Detect Older Displays
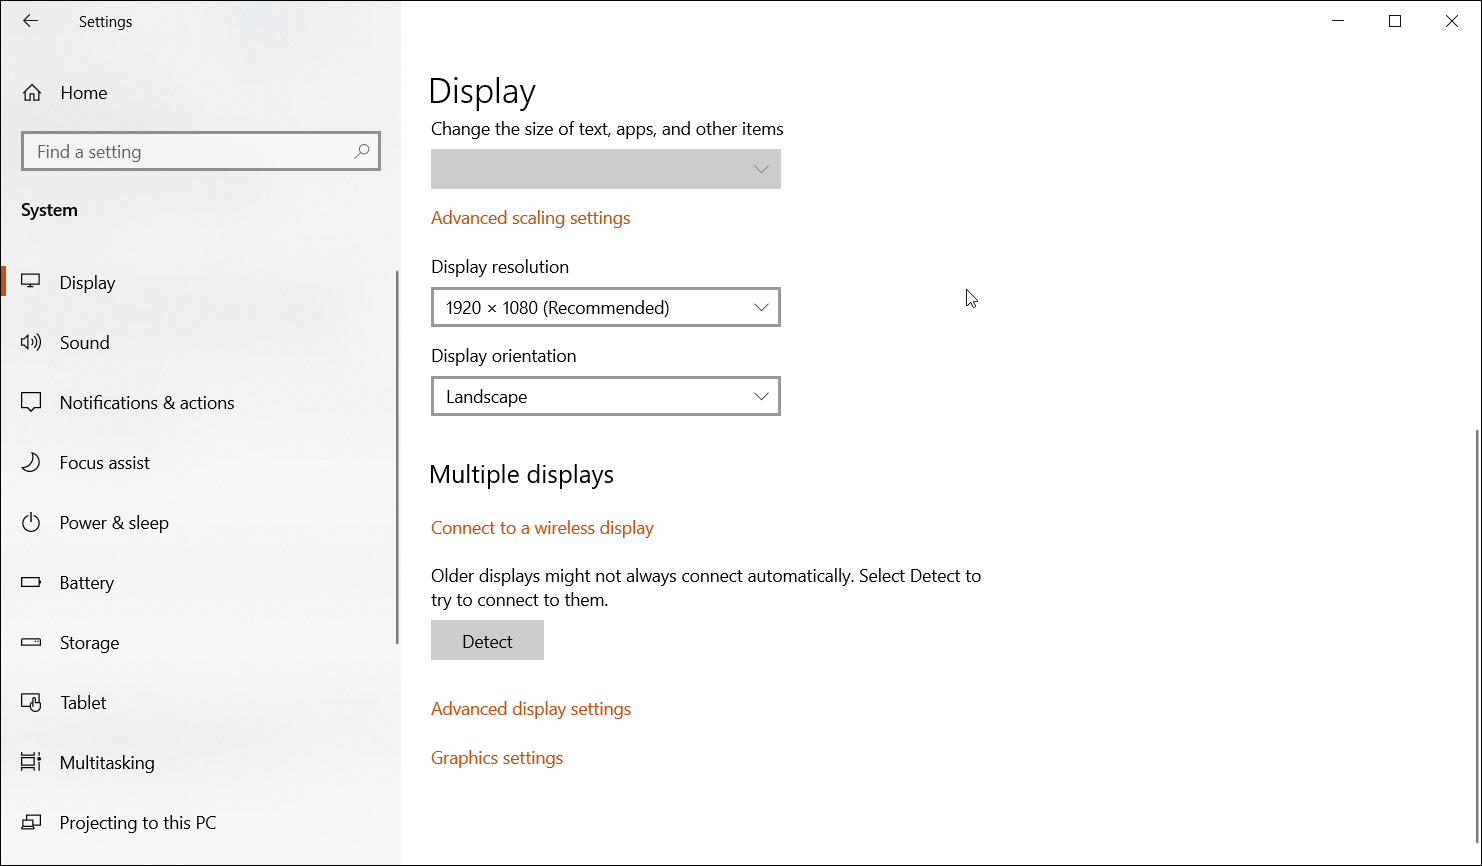
Older displays are not always good with the auto-detection feature. Fortunately, Microsoft offers a force detect feature in Windows 10 to help you find and activate connected displays.
To force detect multiple displays:
- Press Win + I to open Settings.
- Open System and then click on the Display tab in the left pane.
- Scroll down to the multiple displays section and click the Detect button.
- Windows will scan for any connected but undetected display and show it under the Display section.
Once detected, make sure the Multiple display drop-down is set to Extend these displays or Duplicate these displays. If you set it to Show only on 2 or Show only on 1, only one of your displays will be active.
If you see a message that reads «Didn’t detect another display,» move on to the next step.
3. Scan for Hardware Changes in Device Manager
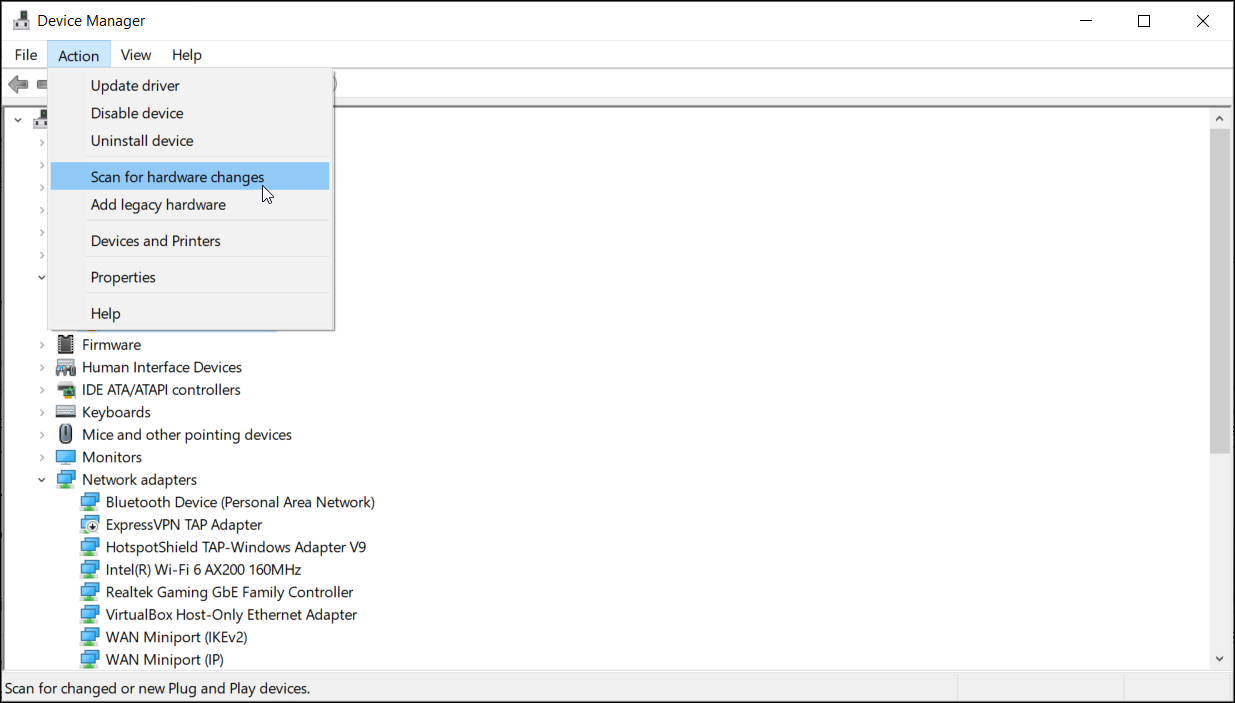
Windows 10 often automatically detects and installs drivers for a newly installed device. However, if, for some reason, the detection fails, you can manually scan for installed devices in the Device Manager.
To scan for hardware changes:
- Press Win + R to open Run.
- Type devmgmt.msc in the Run box and click OK.
- In Device Manager, click on Action and select Scan for hardware changes.
Windows will scan your system for connected devices and install the necessary drivers. Once done, your secondary monitor will detect and work without any issues.
4. Update Display Adapter Driver
Your system may fail to detect the second monitor if you run an outdated version of the display adapter drivers.
New and OS upgraded computers come with a generic display adapter. This is a temporary setup to allow you to install the pending driver updates after setting up your PC.
To get necessary updates, go to Settings > Updates & Security > Windows Update. Download and install all the pending Windows and third-party updates. You can also update display drivers from the Device Manager.
To update display adapter driver:
- Type device manager in the Windows search bar and open the app.
- In the Device Manager, expand the Display adapters section.
- Depending on the processor and GPU you are using, you may see multiple options—Intel UHD Graphics, AMD Radeon Graphics, and Nvidia RTX/GTX graphics.
- Right-click on the available display adapter and choose Update driver.
- Click on Search automatically for driver. Windows will scan for pending driver updates and prompt you to install them.
- Repeat the steps for other device entries under the Display adapters section.
- Reboot the computer to apply the changes and check for any improvements.
If Windows didn’t find any updates via the Device Manager, there are other ways to update your graphic driver/display adapter in Windows 10. Make sure to follow the guide and install the latest graphics drivers available for your system.
How to Reinstall Display Adapter Drivers on Windows 10
If updating the graphics drivers did not help, you can reinstall the display adapter to fix the issue. Here’s how to do it.
- Open Device Manager and expand the Display adapters section.
- Right-click on your display adapter and select Uninstall device.
- Click on Uninstall. Click Yes to confirm the action if prompted by UAC.
- Restart your computer and check if Windows automatically detects the monitor.
- If not, open Device Manager, click on Action, and select Scan for hardware changes. Then, follow on-screen instructions to complete the installation, if applicable.
How to Rollback Graphics Driver on Windows 10
Newer updates bring bug fixes and performance improvements. However, installing glitchy graphics updates can mess up your system’s display functionality. If you determine the problem appeared after installing an update, try performing a driver rollback.
To rollback graphics driver update:
- In Device Manager, right-click on your display adapter.
- Select Properties.
- In the Properties window, open the Driver tab.
- Click on the Roll Back Driver button and follow on-screen instructions to complete the rollback. If the rollback driver option is grayed out, download and install the previous version of the graphics driver to perform a manual rollback.
5. Enable Activate All Display in the Nvidia Control Panel
Incorrect 3D settings of your Nvidia graphics card can prevent your Windows PC from detecting the secondary monitor. Fortunately, you can resolve this issue by changing the SLI configuration and enabling Activate all displays.
To activate all displays:
- Right-click on your desktop and click on NVIDIA Control Panel.
- In the Nvidia Control Panel, expand the 3D Settings section and select Configure SLI, Surround and PhysX.
- Under SLI configuration, select Activate all displays.
- Click Apply and OK to save the changes.
6. Set up Eyefinity on AMD Radeon Software
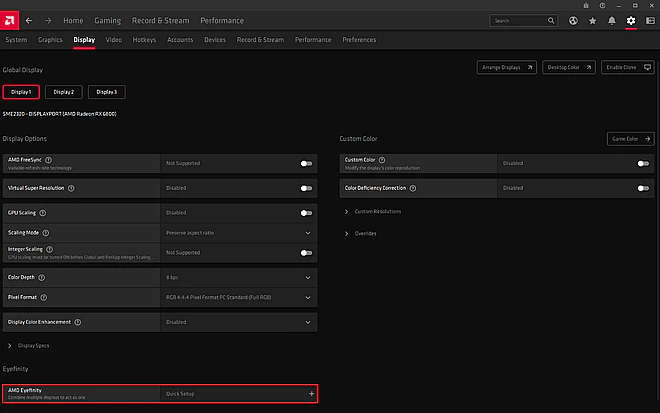
Like Nvidia, AMD’s proprietary software allows you to configure and control the video, display, and graphics settings. If your system is running an AMD discrete graphics card, perform a quick setup for the Eyefinity feature to activate all displays.
To set up AMD Eyefinity:
- Right-click on the Desktop and select AMD Radeon Software.
- Open Settings (Gear icon).
- Open the Display tab and locate the AMD Eyefinity option.
- Click on the Quick setup option and follow on-screen instructions to complete the process.
- Once done, you should have all the monitors up and running.
Troubleshooting the Secondary Monitor Not Detected Issue
Microsoft Windows offers plug-and-play support to set up and work with multiple monitors. However, if you find the secondary monitor is not working, make sure you have activated it in the Multiple displays section. Missing or outdated display adapter drivers are also a common cause of display-related issues and can be resolved easily.
Additionally, check the AMD Radeon Software and NVIDIA Control Panel display properties to enable all connected displays.