
How To Connect Galaxy Buds To Laptop? (Explained In Simple Steps)
Updated on August 7, 2023
Earbuds
Samsung is a world-renowned brand famous for its high-end smartphones, tablets, TVs, and other electronics. Galaxy buds are one of the many flagship products from Samsung to hit the market.
These stylish wireless Bluetooth earbuds allow you to listen to music or answer calls on any smart device. They have impressive built-in features and produce hard-hitting bass with crisp notes for an immersive audio experience.
The best part about these wireless earphones is that they are compatible with non-Samsung devices so long as they support Bluetooth technology. You can connect your Galaxy buds to your laptop for added convenience.
This guide explains how to connect Galaxy buds to your laptop for an enhanced user experience.
Key Takeaways
- Galaxy buds only function with devices approved by the Bluetooth SIG. Your laptop must support Bluetooth connectivity to work with Samsung Galaxy buds.
- Ensure you partially or fully charge your Galaxy buds before pairing and connecting them to your laptop lest you experience connectivity issues.
- Unpair your Galaxy buds from other connected devices before connecting them to your laptop. Galaxy buds cannot connect to multiple devices simultaneously.
- Some Galaxy buds do not automatically pair with laptops and TVs. You must pair them to your computer manually before establishing any connection.
Galaxy Buds
Connecting Galaxy Buds to Laptop
Even though Galaxy buds work with other non-Samsung devices, connecting them to a laptop is not as straightforward as it seems.
First, your computer must support Bluetooth connectivity to work with these wireless earphones. Then again, you must pair your earbuds with the laptop before they can connect and transfer signals.
Here are the steps to connect your Galaxy buds to computers with different operating systems:
Connecting Galaxy Buds to a Windows Laptop
- Unpair your Galaxy buds from other devices like your phone or TV.
- Turn off Bluetooth on the previously connected device.
- Place the Galaxy buds in their charging case, then close the lid and wait for 5 to 10 seconds.
- Open the charging case lid.
- Check if the power light is ON (indicates the earbuds are in pairing mode).
- If the power light is OFF, you must put the earbuds in pairing mode manually by fitting them in your ears, then pressing both touchpads until you hear a series of beeps.
How to Manually Put Galaxy Buds into Pairing Mode
Galaxy Buds: How to Put into Pairing Mode -2 Ways (Won’t Pair or Find? FIXED)
- Toggle Bluetooth on your PC by clicking the Bluetooth icon on the system bar.
- Right-click the Start/Windows button on your laptop.
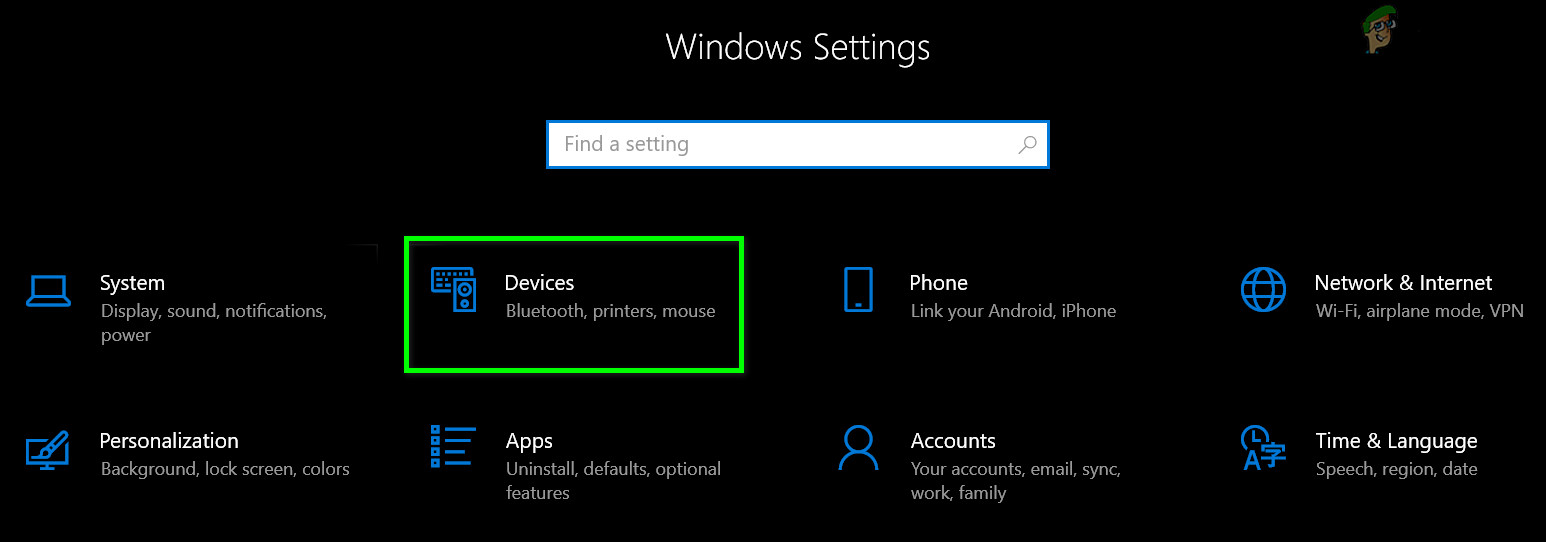
- Click Settings.
- Go to Devices.
- Click Bluetooth & other devices.
- Click Add Bluetooth or other devices.
- Select Bluetooth (your laptop will start searching for nearby devices).
- Select Samsung Galaxy Buds to connect them to your laptop.
How to Connect Samsung Galaxy Buds to a Windows 10 Laptop
How to connect your Galaxy Buds to a PC using Bluetooth | Samsung US
How to Connect Samsung Galaxy Buds 2 Pro to a Windows 11 Laptop
Connecting Galaxy Buds to a Mac Laptop
- Check if your Galaxy buds have been paired with other devices and unpair them.
How to Unpair Galaxy Buds
How to Unpair Samsung Galaxy Buds Live from Android Phone
- Turn off Bluetooth on other devices.
- Insert the Galaxy buds in their charging case, then close the lid.
- Wait for 5 to 10 seconds.
- Open the charging case lid and check if the battery light is ON.
- The battery light indicates the earbuds are in pairing mode.
If the battery/power light is OFF, you must manually put the earbuds in pairing mode. Fit them in your ears, then press both touchpads simultaneously until you hear a series of high-pitched beeps followed by a low-pitched sound.
- Toggle Bluetooth on your PC (click Apple menu > System Settings, then select Bluetooth in the sidebar).
- Go to the Devices list and find your Galaxy buds.
- Click Connect next to your earbuds.
- Your Galaxy buds will automatically connect to your Mac laptop.
How to Connect Galaxy Buds to a MacBook
Galaxy Bud Connect to MacBook — How to Pair Samsung Galaxy Buds+ to MacBook Air and MacBook Pro
Troubleshooting Galaxy Buds Connectivity Issues
Sometimes, you might experience challenges connecting your Galaxy buds to your laptop. Even if you previously managed to connect your Galaxy buds to your computer, it might act up and disappear from the list of connected Bluetooth devices.
Fortunately, you don’t have to panic. Here are a few tips for troubleshooting Galaxy buds connectivity issues.
Troubleshooting Galaxy Buds Pairing Issues – Quick Fixes
Fix Galaxy Buds Not Connecting / Pairing Issue
Unpair Previously Connected Devices
If you cannot pair your earbuds with your PC, check whether they are connected to a different device. Samsung Galaxy Buds cannot connect to multiple devices simultaneously. You must unpair them from one device before connecting them to your laptop.
Here are the steps:
- Open Bluetooth settings on your phone, tablet, or another connected device.
- Select your Galaxy buds from the list of paired devices.
- Tap or click Unpair/Forget/Delete.
- Turn off Bluetooth on the previously connected device.
- Pair your earbuds with your laptop using the steps outlined in the previous section.
Check the Battery Status
Galaxy buds might develop connectivity issues because of low battery power. They cannot pair or connect to your laptop unless you charge them appropriately.
You can confirm the battery status of your Galaxy buds by checking the power light on the charging case.
Here are the steps:
- Insert the Galaxy buds into the charging case.
- Close the lid for a few seconds.
- Open the charging case lid.
- Check the power/battery light.
- If the battery light is ON, the Galaxy buds have adequate power.
- If the light is OFF, you must recharge the earbuds for at least ten minutes to start the pairing process (Insert the buds in the charging case and close the lid to charge them)
Check Bluetooth Status
Your earbuds might develop connectivity issues because Bluetooth is disabled on your laptop. You, therefore, need to check if your computer supports Bluetooth and activate it through the quick settings menu on the taskbar or via the system settings option.
Check Compatibility
Even though Galaxy earbuds work with non-Samsung devices, some older computers or operating systems might have compatibility issues, causing the buds not to connect.
Galaxy buds only function with devices approved by the Bluetooth SIG. Check if your laptop is supported by visiting the Bluetooth Special Interest Group website.
Pair Earbuds Manually
Some Galaxy buds do not automatically pair with laptops, especially if the earbuds were previously paired to another device. You must pair them to your computer manually before establishing any connection.
Follow these steps to pair your Galaxy buds to your laptop manually:
- Fit the earbuds into your ears.
- Locate the touchpads on the sides.
- Press the touchpads simultaneously.
- Wait to hear a series of high-pitched beeps followed by a low-pitched sound.
- Release the touchpads.
- Enable Bluetooth on your laptop and follow the steps outlined above.
Frequently Asked Question
- Question: Why is my laptop not finding my Galaxy Buds?
- Answer: Your laptop might not find your Samsung Galaxy buds because of compatibility issues. Galaxy earbuds only work with devices approved by the Bluetooth SIG. If your computer is compatible, it might not find your earbuds because Bluetooth is disabled. Ensure you turn on Bluetooth on your PC before activating pairing mode on your Galaxy earbuds.
- Question: How do I put my Galaxy Buds plus in pairing mode?
- Answer: Putting Galaxy Buds plus in pairing mode is straightforward. Fit the buds in your ears, then tap and hold the touchpads simultaneously on both earbuds. The earbuds will enter pairing mode after you hear short high-pitched beeps followed by a low-pitched sound. Your Galaxy Buds plus may also enter pairing mode automatically when you open the charging case.
- Question: Can Samsung Galaxy buds connect to a PC?
- Answer: Yes. Samsung Galaxy buds can easily connect to a PC with built-in Bluetooth capability. But first, you must unpair the earbuds from other connected devices before connecting them to your computer. Place the Galaxy buds back in their charging case and wait for about 10 seconds. Open the lid of the case and wait for the power light to turn on as the buds enter pairing mode. You can now connect it to your PC by activating Bluetooth.
- Question: Do Galaxy Buds work with Windows 10?
- Answer: Galaxy Buds work with Windows 10 so long as your computer supports Bluetooth connectivity. Go to settings on your Windows computer and select devices to start the pairing process. Select Bluetooth & other devices, then click “Bluetooth and other device.” Under Add a device, choose Bluetooth to pair your Galaxy buds to your computer.
- Question: Why won’t my Galaxy Buds show up on Bluetooth?
- Answer: Your Galaxy buds might not show on your Bluetooth because they are off or undiscoverable. You must charge your Galaxy earbuds before connecting them to your Bluetooth devices. They may also fail to show on your device if they are already paired to another device. Galaxy buds do not support multipoint connections, meaning you must unpair them from other connected gadgets before pairing them with a new phone, PC, or tablet.
Conclusion
Galaxy buds are the epitome of wireless technology. These next-generation earbuds have premium features, such as noise-canceling, voice detection, and automatic volume adjustments, allowing you to immerse yourself in high-quality sound like never before. However, connecting Galaxy buds to your laptop for the first time can be an issue if you don’t know how to go about it. Use this guide to learn to pair your Galaxy buds with your computer.
Was this article helpful?
YesNo
About The Author
Steve Guttenberg
Hi, I’m Steve Guttenberg, founder and editor at AudioGrounds.com.
On my website, you will find tips on how to handle your audio gear, how to fix it, and how to get the best gear for your money.
Whether you’re looking for a new Bluetooth speaker, stereo speaker set, headphones, earbuds, home theater system, AV receiver, stereo amplifier, audio cable, car speakers, or anything else even remotely related to audio, this is the place to be.
If you have any questions, you can fill out the contact form on my website or contact me via e-mail steve@audiogrounds(dot)com or via my LinkedIn profile. I’ll do my best to answer your questions promptly.
Your Galaxy Buds may fail to connect to your computer if the system drivers or Windows of your system is not updated to the latest build. Moreover, the wrong configuration of the system services may also cause the error under discussion.
The user encounters the issue when he tries to connect the Galaxy Buds with his PC but fails to do so (although some users were successfully connecting before). In some cases, the user’s PC fails to find the buds, whereas, in other cases, the pairing was successful but no sound from the buds. The issue is not limited to a specific version of the Galaxy Buds.
Before moving on with the solutions to connect your Galaxy buds to your PC, check the Galaxy Buds and your PC can connect to other Bluetooth devices without issues. Moreover, the Galaxy Buds are known to have issues if used with a device that is using a Bluetooth 5.0 protocol, so try to use the buds with a compatible device (if possible). Last but not least, make sure no other device is causing any type of Bluetooth interference for the PC or buds (especially, your phone).
Solution 1: Update Windows and Device Drivers
Microsoft and 3rd party vendors keep on updating their products to pace with the latest technological advancements and patch known bugs. You may fail to connect the Galaxy Buds to your PC if the Windows and system drivers are outdated as it can create incompatibility between the devices. In this scenario, updating Windows and device drivers to the latest build may solve the problem.
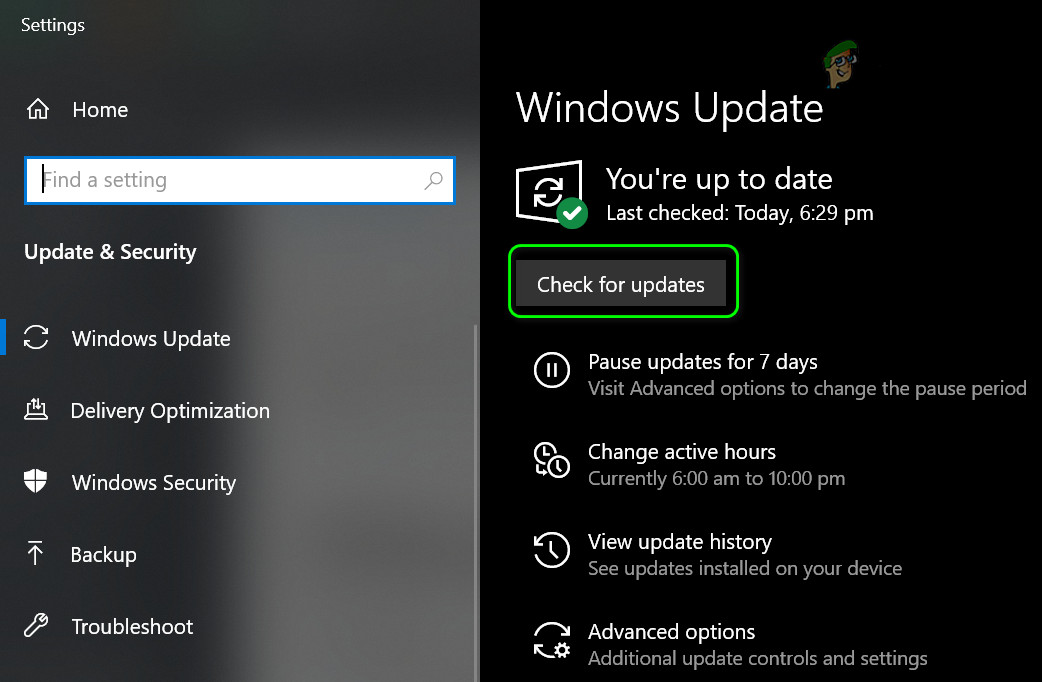
- Manually update Windows and device drivers of your system to the latest build. If you are using any update utility like Dell Support Assistant, then use it to update the drivers.

Check for Windows Updates - Then check if the Galaxy Buds are working fine.
Solution 2: Re-Pair the Galaxy Buds
The issue at hand could be a result of a temporary glitch in the Bluetooth modules. The glitch can be cleared by re-pairing the buds.
- Unpair the buds from your PC and then power-cycle the devices.
- Now make sure that the Bluetooth of your PC is enabled and then put the buds in your ears.
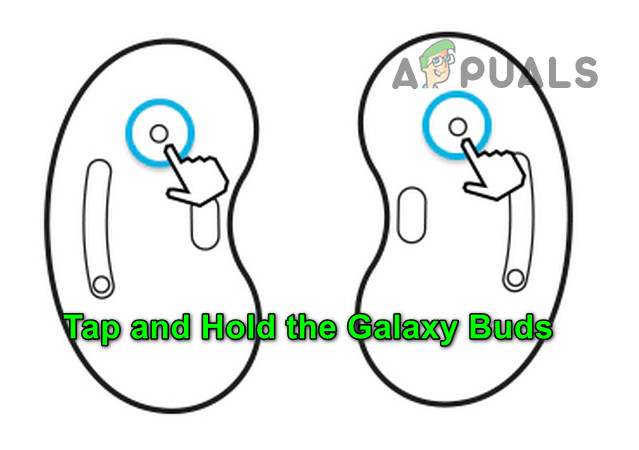
- Now tap and hold both buds for few seconds and then check if the Galaxy buds’ issue is resolved.

Tap and Hold the Galaxy Buds - If not, then unpair the devices and power-cycle them.
- Now put the buds in their case and with the open lid of the case, check if the Galaxy Buds can be connected successfully.
Connect the Galaxy Buds to Your PC With the Case Lid Open
Solution 3: Select the Galaxy Buds as a Playback Device
You may fail to connect the Galaxy Buds to your PC if the playback device is not set to the buds. In this context, setting the buds as the playback device may solve the problem.
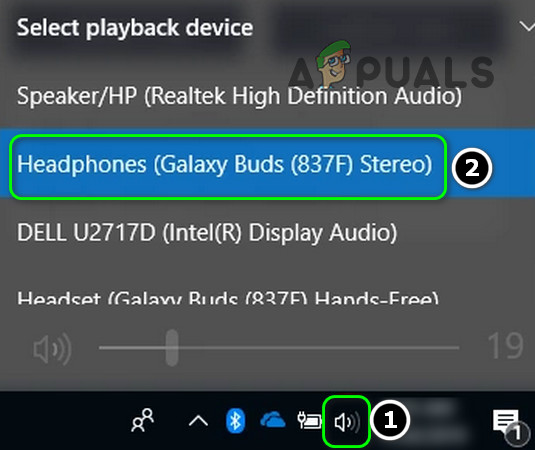
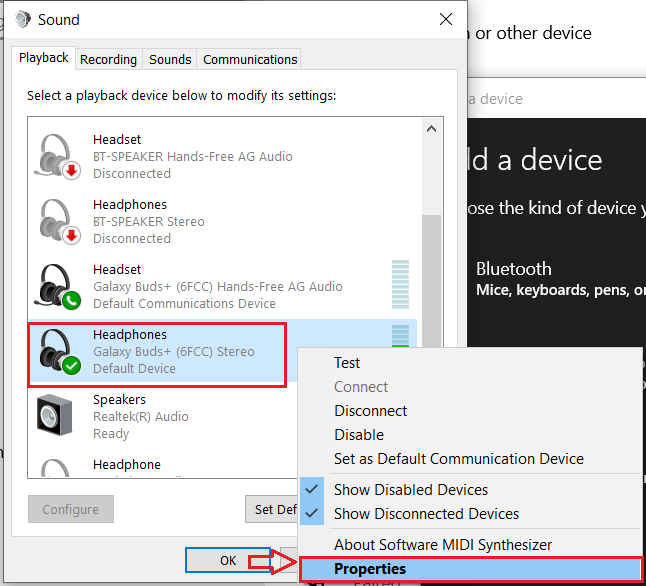
- Click on the speaker icon in the system’s tray to open the Select Playback device menu.
- Now select the Galaxy buds and check if the issue is resolved.

Set the Galaxy Buds as the Playback Device
Solution 4: Set Startup Type of Bluetooth Support Service to Automatic
The Bluetooth Support Service is essential for the completion of the operation of the Galaxy buds and if it is not configured properly, it may cause the error at hand. In this context, setting the startup type of the Bluetooth Support Service to Automatic may solve the problem.
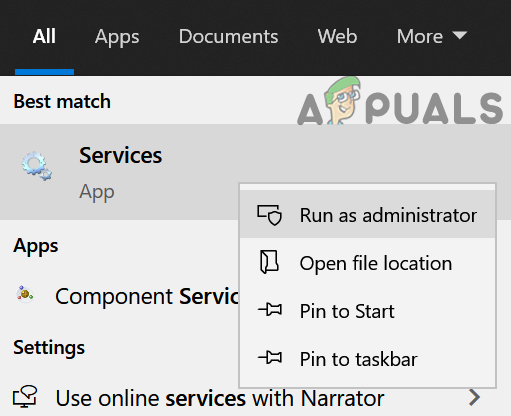
- Hit the Windows key and in the Windows Search box, type Services. Now, in the results shown, right-click on Services and choose Run as Administrator.

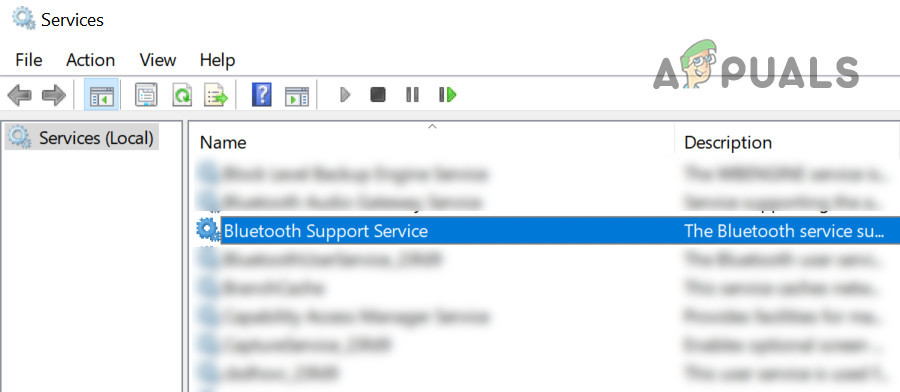
Open Services as Administrator - Then double click on Bluetooth Support Service and open the dropdown of Startup type.

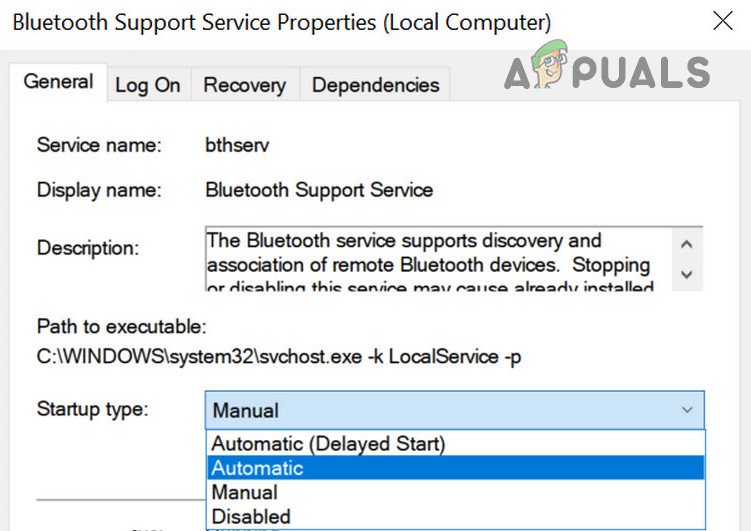
Open the Bluetooth Support Service - Now, select Automatic and click on Apply/OK.

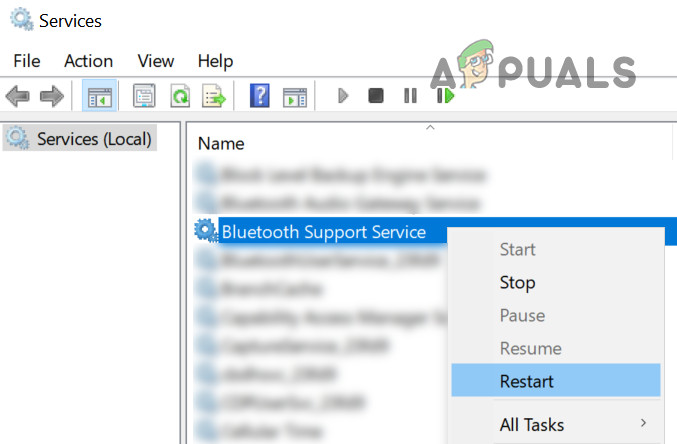
Set the Startup Type of Bluetooth Support Service to Automatic - Then right-click on Bluetooth Support Service and choose Restart.

Restart the Bluetooth Support Service - Upon restart, check if the Galaxy Buds can be connected successfully.
Solution 5: Enable the Audio Sink Service for The Galaxy Buds
The Galaxy Buds fail to connect to your system if the Audio Sink service (required for the proper operation of the buds) is not enabled. In this case, enabling the Audio Sink Service may solve the problem.
- Hit the Windows key and open Settings. Now open Devices.

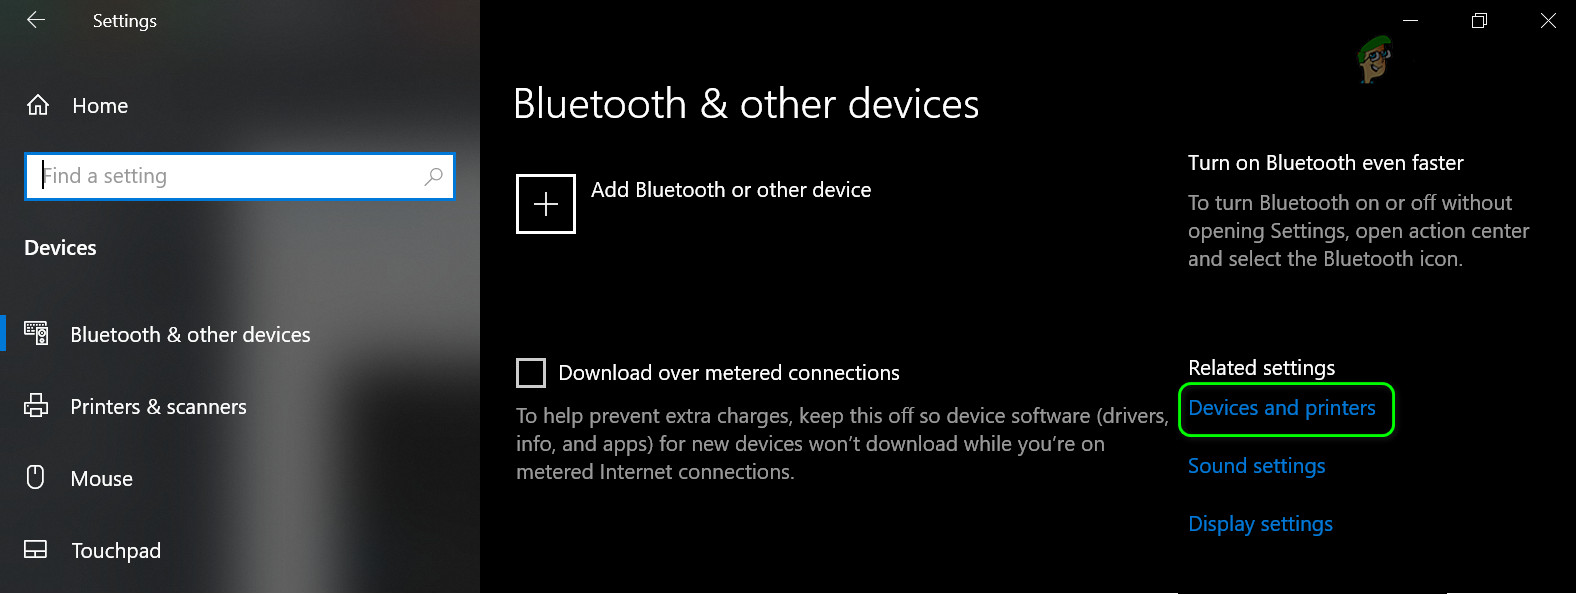
Open Devices in Windows Settings - Then, in the right pane, click on Devices & Printer (under Related Settings) and right-click on the Galaxy Buds.

Open Devices and Printers Under Related Settings - Now select Properties and then navigate to the services tab. Then checkmark the option of the Audio Sink and save your changes.
- Now check if the Galaxy Buds issue is resolved.
- If not, then open the Galaxy Buds properties and navigate to the Hardware or Services tab.
- Now install drivers for each of the functionality like AVCRP, Handsfree, etc. (you may ignore BTIS and SAMSUNGDEVICE). First, try to use Microsoft Drivers and if these drivers fail, then try manually selecting the drivers.
Enable the Services of the Galaxy Buds - Then check if the Galaxy Buds issue is resolved.
Solution 6: Reinstall the Bluetooth Drivers
You may encounter the issue at hand if the Bluetooth drivers of your system are corrupt or not properly configured. In this case, reinstalling the Bluetooth drivers may solve the problem. Before proceeding, make sure to download the latest version of the Bluetooth drivers (either internal or external) of your system.
- Unpair the Galaxy buds and your system. Then right-click on the Windows button to open the Power User menu and then select Device Manager.
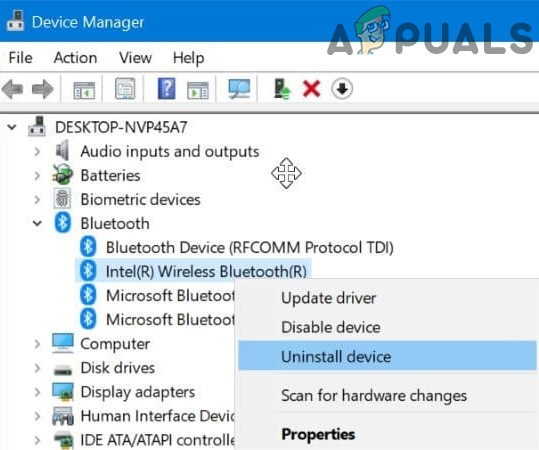
Open Device Manager - Now, expand Bluetooth and right-click on any of the Bluetooth devices.
- Then select Uninstall Device and then checkmark the option of Delete the Driver Software of this Device.

Uninstall the Bluetooth Device in the Device Manager - Then click on the Uninstall button and then wait for the completion of the uninstallation. Now repeat the same to uninstall all the Bluetooth devices and the Galaxy Buds. Then reboot your PC.
- Upon reboot, check if the Galaxy Buds issue is resolved (Windows will try to install its default drivers).
- If not, then check if installing the latest OEM drivers resolves the issue.
- If that did not do the trick, open the Device Manager (step 2) and right-click on the Galaxy buds (you may have to expand Bluetooth, Sound, Video, and Game Controllers or Other Devices). In the menu shown, select Update Driver.
- Then select ‘Browse My Computer for Drivers’ and check if using the Microsoft Bluetooth Avrcp Transport Driver resolves the issue (You may have to uncheck the “Show compatible hardware” checkmark).
- If not, then check if using the Handsfree Audio Gateway Service driver resolves the issue.
If the issue persists, then check if using a 3rd party utility (like Galaxy Buds Manager) resolves the issue. If not, then get your buds checked for any hardware issue (if possible, replace under warranty) or buy another Bluetooth dongle (having BT 5.0).
Kevin Arrows
Kevin Arrows is a highly experienced and knowledgeable technology specialist with over a decade of industry experience. He holds a Microsoft Certified Technology Specialist (MCTS) certification and has a deep passion for staying up-to-date on the latest tech developments. Kevin has written extensively on a wide range of tech-related topics, showcasing his expertise and knowledge in areas such as software development, cybersecurity, and cloud computing. His contributions to the tech field have been widely recognized and respected by his peers, and he is highly regarded for his ability to explain complex technical concepts in a clear and concise manner.
Samsung Galaxy Buds lets you enjoy ambient music, so you can immerse in your favorite tunes regardless of where you are. You can connect your Galaxy Buds earphones to your mobile phone, tablet, smartwatch, smart TV, or laptop/desktop computer using a Bluetooth connection. That way, you can enjoy solitary listening to podcasts and songs in any device you use.
However, some users found it difficult to connect their Samsung Galaxy Buds earbuds to their Windows 10 PC. The Galaxy Buds connects and pairs to Bluetooth automatically. However, an error appears when Windows 10 PC cannot locate or find the Galaxy Buds for device pairing. The earbuds is not working or not showing up in the list of available devices.
How to Fix Samsung Galaxy Buds Earbuds Can’t Connect or Not Showing Up on Windows 10 PC
If you face the same issue with your Samsung Galaxy Buds, and you won’t be able to find it or can’t connect to your earbuds, there are several ways to resolve the problem. You can follow each solution below and retry connecting your Samsung Galaxy Buds to your Windows 10 PC to see if it works. This method works for Galaxy Buds Pro, Galaxy Buds Live, and Galaxy Buds+.

#1 – Restart your Windows 10 PC
Sometimes, a quick reboot of your devices will help refresh their system processes and connections. It fixes some problems that may disrupt your activities and cause your device not to work properly. Exit all apps on your computer and restart them. Once done, try to reconnect your Samsung Galaxy Buds earbuds.
#2 – Turn Bluetooth On and Off

If a reboot does not work, you can restart your Bluetooth connection. Try to disable and enable it again to troubleshoot the issue.
- Launch the Settings menu.
- Go to Devices.
- Select Bluetooth & other devices.
- Look for the Bluetooth option.
- Toggle the button to Off.
- Then, toggle it back to On.
#3 – Rediscover your Galaxy Buds on Bluetooth
- Open the Settings menu and go to Devices.
- Select Bluetooth & other devices.
- Next to the Add Bluetooth or other device, click the Plus sign.
- Choose Bluetooth.
- Now, place your Samsung Galaxy Buds inside its charging case.
- Close the lid and wait for at least 5 seconds.
- Open the case and turn on your Galaxy Buds.
- Your PC will begin to discover your Samsung Galaxy Buds.
#4 – Re-Pair Samsung Galaxy Buds with Windows 10 Computer
- First, unpair your Galaxy Buds.
- Go to the Settings menu and click Devices.
- Choose Bluetooth & other devices.
- Look for your Samsung Galaxy Buds, usually under Audio.
- Click to expand the menu.
- Click Remove device.
- Now, pair it again to your Windows 10 PC.
- Under Bluetooth & other devices, click the Plus sign.
- Select Bluetooth.
- It will start to discover your Galaxy Buds.
#5 – Run Windows 10 Hardware and Device Troubleshooter
- Navigate to the Settings menu.
- Select Update & Security.
- Click Troubleshoot in the left panel.
- Click Additional troubleshooters.
- Select Bluetooth.
- Click Run the troubleshooter.
Did any of the methods above fix your Galaxy Buds error? If not, do you have other solutions that can repair the Bluetooth issue? You can share your answers below to help other users with their Samsung Galaxy Buds connection problems on PC.
Windows Dispatch is a website supported by its readers & community. Some pages may contain affiliate links which may allow us to earn a little money when you buy through them.
Eddie Mendoza Jr
Eddie has a degree in Information Technology with a natural inclination towards troubleshooting devices. With more than 10 years of blogging experience in different niches, he has found it most satisfying when writing easy-to-follow guides and simplified articles related to computers, smart TVs, mobile devices and Internet-based services.
Connecting Galaxy Buds to Windows 10 can enhance your audio experience while working or streaming. With a few simple steps, you can easily pair your Galaxy Buds with your Windows 10 computer and enjoy high-quality sound without the hassle of tangled wires.
To connect your Galaxy Buds to Windows 10, first, ensure that Bluetooth is enabled on your computer. Then, open the Bluetooth settings and put your Galaxy Buds into pairing mode. Once they appear on the list of available devices, click on them to establish the connection. Now, you can enjoy your favorite music or take calls wirelessly while using your Windows 10 computer.
To connect your Galaxy Buds to Windows 10, follow these steps:
- On your Windows 10 PC, open the Settings menu.
- Select «Devices,» then click on «Bluetooth & other devices.»
- Make sure Bluetooth is turned on, then click on «Add Bluetooth or other devices.»
- Select «Bluetooth» from the options.
- Open the Galaxy Buds case and press and hold the «Pairing» button on the back until the light starts flashing.
- Your Galaxy Buds will appear in the list of available devices on your Windows 10 PC. Click on them to connect.

Troubleshooting Connectivity Issues with Galaxy Buds on Windows 10
Connecting your Galaxy Buds to a Windows 10 device can enhance your audio experience and provide wireless convenience. However, sometimes you may encounter connectivity issues that prevent a seamless connection between your Galaxy Buds and Windows 10. In this guide, we will explore troubleshooting steps to help you resolve these issues and successfully connect your Galaxy Buds to Windows 10.
1. Check Bluetooth Compatibility
Before connecting your Galaxy Buds to Windows 10, ensure that your computer has Bluetooth capabilities. Not all Windows 10 computers come with built-in Bluetooth, so you may need to purchase a Bluetooth adapter if yours doesn’t have one. Make sure the Bluetooth adapter is compatible with Windows 10 to avoid any compatibility issues.
Once you have confirmed your computer’s Bluetooth compatibility, make sure the Bluetooth feature is enabled. You can do this by going to the Windows 10 settings, clicking on «Devices,» and then selecting the «Bluetooth & other devices» tab. Toggle the Bluetooth switch to the «On» position if it’s turned off.
If you’re still having trouble connecting your Galaxy Buds after confirming Bluetooth compatibility and enabling the Bluetooth feature on your Windows 10 computer, proceed to the next troubleshooting step.
1.1 Update Bluetooth Drivers
Outdated or incompatible Bluetooth drivers can also cause connectivity issues with your Galaxy Buds on Windows 10. To update your Bluetooth drivers:
- Open the Windows 10 Device Manager by pressing the Windows key + X and selecting «Device Manager.»
- Expand the «Bluetooth» category by clicking on the arrow next to it.
- Right-click on the Bluetooth adapter and select «Update driver.»
- Choose the option to search automatically for updated driver software.
- If Windows finds an updated driver, follow the on-screen instructions to install it.
After updating the Bluetooth drivers, try connecting your Galaxy Buds to Windows 10 and see if the connectivity issues have been resolved.
1.2 Remove Conflicting Bluetooth Devices
If you have multiple Bluetooth devices connected to your Windows 10 computer, conflicting connections can interfere with the pairing process between your Galaxy Buds and the computer. To remove conflicting Bluetooth devices:
- Go to the Windows 10 settings, click on «Devices,» and select the «Bluetooth & other devices» tab.
- Locate the Bluetooth device that may be causing conflicts and click on it.
- Select «Remove device» to disconnect it from your computer.
Once you have removed all conflicting Bluetooth devices, try connecting your Galaxy Buds again.
If you’re still experiencing connectivity issues, move on to the next troubleshooting step.
2. Reset Galaxy Buds
If your Galaxy Buds are not connecting to your Windows 10 computer, resetting the buds may help resolve the issue. To reset your Galaxy Buds:
- Place your Galaxy Buds in the charging case.
- Close the lid of the charging case.
- Wait for at least 7 seconds.
- Open the lid of the charging case.
- Press and hold the setup button on the back of the charging case for at least 3 seconds.
- Release the setup button when the indicator light on the charging case flashes purple.
After resetting the Galaxy Buds, try connecting them to your Windows 10 computer again.
2.1 Update Galaxy Buds Firmware
If resetting the Galaxy Buds didn’t resolve the connectivity issues, it’s worth checking for any available firmware updates for your Galaxy Buds. To update the firmware:
- Ensure that your Galaxy Buds are connected to your Windows 10 computer.
- Open the Galaxy Wearable app on your computer.
- Navigate to the «About earbuds» or «About device» section.
- Click on «Update earbuds software» or «Update device software.»
- Follow the on-screen instructions to update the firmware.
Once the firmware update is complete, attempt to connect your Galaxy Buds to Windows 10 again.
3. Enable Bluetooth Audio Service
If you’re still facing connectivity issues with your Galaxy Buds on Windows 10, check if the Bluetooth Audio service is enabled. To enable the service:
- Press the Windows key + R to open the Run dialog box.
- Type «services.msc» and press Enter to open the Services window.
- Scroll down and locate the «Bluetooth Audio Gateway Service» in the list of services.
- Right-click on the service and select «Properties.»
- Set the startup type to «Automatic» and click «OK.»
- Right-click on the service again and select «Start.»
Restart your Windows 10 computer and attempt to connect your Galaxy Buds once again.
3.1 Restart Audio Services
If enabling the Bluetooth Audio service didn’t resolve the issue, restarting the audio services on your Windows 10 computer might help. To do this:
- Press the Windows key + R to open the Run dialog box.
- Type «services.msc» and press Enter to open the Services window.
- Scroll down and locate the «Windows Audio» and «Bluetooth Support Service» in the list of services.
- Right-click on each service and select «Restart.»
After restarting the audio services, try connecting your Galaxy Buds to Windows 10 once again.
Setting Up Automatic Connection for Galaxy Buds on Windows 10
If you want your Galaxy Buds to automatically connect to your Windows 10 computer every time they’re in range, follow these steps:
1. Turn on Bluetooth
Make sure the Bluetooth feature is enabled on your Windows 10 computer by going to the settings, selecting «Devices,» and then choosing «Bluetooth & other devices.» Toggle the Bluetooth switch to the «On» position if it’s turned off.
1.1 Activate Automatic Connection
To activate automatic connection for your Galaxy Buds:
- Go to the Windows 10 settings, click on «Devices,» and select the «Bluetooth & other devices» tab.
- Click on the name of your Galaxy Buds from the list of available devices.
- Check the box next to «Connect to this device automatically» to enable automatic connection.
From now on, whenever your Galaxy Buds are in range of your Windows 10 computer with Bluetooth enabled, they will automatically connect without requiring manual intervention.
2. Set Default Audio Device
To ensure that your Galaxy Buds are the default audio device for your Windows 10 computer:
- Right-click on the speaker icon in the system tray and select «Open Sound settings.»
- Under the «Output» section, click on the drop-down menu and select your Galaxy Buds as the default audio device.
- Repeat the same process under the «Input» section to set your Galaxy Buds as the default microphone device.
Now, your Windows 10 computer will automatically use your Galaxy Buds for audio output and input when connected.
In Conclusion
Connecting your Galaxy Buds to Windows 10 can enhance your audio experience and provide wireless convenience. By following the troubleshooting steps in this guide, you can overcome connectivity issues and successfully connect your Galaxy Buds to Windows 10. Additionally, setting up automatic connection and configuring the default audio device can streamline the process for future usage. Enjoy the wireless freedom and high-quality sound of your Galaxy Buds while using your Windows 10 computer!
Connecting Galaxy Buds to Windows 10
To connect your Galaxy Buds to your Windows 10 device, follow these simple steps:
- 1. Open the Settings app on your Windows 10 device.
- 2. Click on «Devices» and then select «Bluetooth & other devices.»
- 3. Turn on Bluetooth if it isn’t already enabled.
- 4. Press and hold the touchpad on your Galaxy Buds to put them in pairing mode.
- 5. On your Windows 10 device, click on «Add Bluetooth or other device.»
- 6. Select «Bluetooth» from the list of device types.
- 7. Your Galaxy Buds should appear in the list of available devices. Click on them to connect.
Once connected, you can enjoy your music, answer calls, and use other features of your Galaxy Buds on your Windows 10 device.
Key Takeaways — How to Connect Galaxy Buds to Windows 10
- Make sure your Galaxy Buds are charged and in pairing mode.
- Open the Windows 10 «Settings» menu and go to «Devices.»
- Select «Bluetooth & other devices» and click on the «Add Bluetooth or other device» button.
- Choose the «Bluetooth» option and wait for Windows to detect your Galaxy Buds.
- Select your Galaxy Buds from the list of available devices and click «Connect.»
Frequently Asked Questions
Connect your Galaxy Buds to Windows 10 seamlessly with these quick and easy steps. The following frequently asked questions will guide you through the process:
1. How do I pair my Galaxy Buds with Windows 10?
To connect your Galaxy Buds to Windows 10, follow these steps:
1. Open the Bluetooth settings on your Windows 10 device. You can access this by clicking on the Bluetooth icon in the taskbar or going to Settings > Devices > Bluetooth & other devices.
2. On your Galaxy Buds, put them in pairing mode by opening the charging case and pressing and holding the pairing button located on the back until the LED light flashes.
3. In the Bluetooth settings on your Windows 10 device, click on «Add Bluetooth or other device» and select «Bluetooth».
4. Windows will search for available devices. When you see your Galaxy Buds in the list, click on them to begin the pairing process.
5. Follow the on-screen instructions to complete the pairing process. Once connected, you can enjoy your Galaxy Buds with Windows 10.
2. Why can’t I find my Galaxy Buds in the Bluetooth settings?
If you can’t find your Galaxy Buds in the Bluetooth settings on Windows 10, try the following solutions:
1. Make sure your Galaxy Buds are in pairing mode. Open the charging case, press and hold the pairing button on the back of the case until the LED light flashes.
2. Restart your Windows 10 device and try again.
3. Check if Bluetooth is enabled on your Windows 10 device. You can do this by going to Settings > Devices > Bluetooth & other devices and ensuring that the Bluetooth toggle is turned on.
4. Move your Galaxy Buds and Windows 10 device closer together to ensure a strong Bluetooth connection.
5. If none of the above steps work, try resetting your Galaxy Buds. To do this, put them back in the charging case and press and hold the pairing button for 15 seconds until the LED light turns red. Then, repeat the pairing process with Windows 10.
3. Can I use my Galaxy Buds as a microphone on Windows 10?
Yes, you can use your Galaxy Buds as a microphone on Windows 10. However, please note that the microphone functionality may vary depending on the specific model of your Galaxy Buds.
To enable the microphone on your Galaxy Buds in Windows 10, follow these steps:
1. Connect your Galaxy Buds to Windows 10 using the steps mentioned earlier.
2. Once connected, right-click on the speaker icon in the taskbar and select «Open Sound settings».
3. In the Sound settings, under the «Input» section, select your Galaxy Buds as the default microphone device.
4. Adjust the microphone volume as desired.
Now you can use your Galaxy Buds as a microphone for voice calls, recording audio, and more on your Windows 10 device.
4. Can I control music playback on Windows 10 using my Galaxy Buds?
Yes, you can control music playback on Windows 10 using your Galaxy Buds. Here’s how:
1. Connect your Galaxy Buds to Windows 10 using the steps mentioned earlier.
2. Once connected, play music on your Windows 10 device using your preferred music player.
3. Double-tap on either Galaxy Bud to play or pause the music.
4. To skip to the next track, triple-tap on the right Galaxy Bud. To go back to the previous track, triple-tap on the left Galaxy Bud.
5. Adjust the volume by either tapping and holding on the left Galaxy Bud to decrease the volume or tapping and holding on the right Galaxy Bud to increase the volume.
Enjoy convenient music playback control with your Galaxy Buds on Windows 10.
5. Can I use the Galaxy Buds app on Windows 10?
Currently, the Galaxy Buds app is not available for Windows 10. The app is primarily designed for mobile devices like smartphones and tablets. However, you can still use your Galaxy Buds with Windows 10 for audio playback, microphone usage, and basic Bluetooth functionality. Keep in mind that certain features and settings offered in the app may not be accessible on Windows 10.
For further customization and firmware updates for your Galaxy Buds, it is recommended to use the Galaxy Wearable app on supported mobile devices.
In conclusion, connecting your Galaxy Buds to Windows 10 is a simple process that allows you to enjoy a seamless audio experience. By following the steps outlined in this article, you can easily pair your Galaxy Buds with your Windows 10 device and start enjoying your favorite music, podcasts, and more.
Remember to make sure that your Windows 10 device has Bluetooth capabilities and that your Galaxy Buds are fully charged. Once you have successfully connected your Galaxy Buds to Windows 10, you can use them for calls, media playback, and even voice commands with virtual assistants like Cortana.
For many of us, Samsung Galaxy earbuds have become an essential part of our daily routine, so what happens if Galaxy Buds not playing audio on your Windows 10/11 device? Many Galaxy Buds users have faced this issue, and several potential causes exist. I’ll explore why your Galaxy Buds can’t be playing audio on your Windows device and offer ways to assist you to fix the issue.
The ways to fix this issue include rebooting your device, turning Bluetooth Off/On, updating the audio driver, setting the playback device, and running windows troubleshooter. These methods work for Galaxy Buds Pro, Galaxy Buds Live, and Galaxy Buds+.
Firstly, you need to check if the headphone speaker is muted; in many cases, you accidentally unmute the headphone speaker.
Step 1: Right-click the speaker icon on the system. Select Open Volume Mixer.
Step 2: Check if the device item is in the mute state. If yes, customize it to unmute.
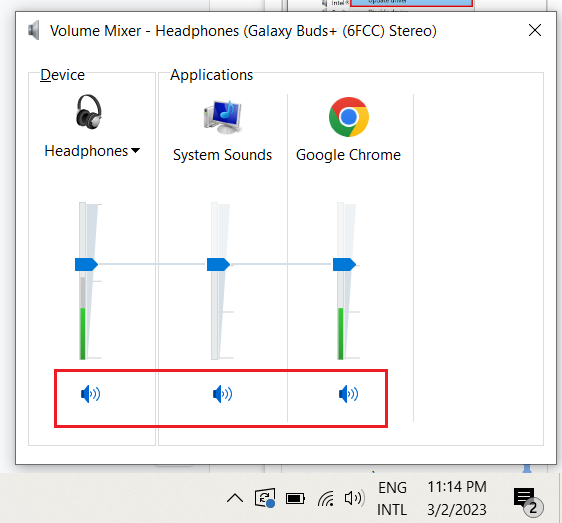
If all speakers are enabled, then continue with the next step.
- Restart your computer/laptop.

Restarting the computer is the fastest and simplest way to clear the cache and fix most errors and problems, including sound loss.
- Turn Bluetooth Off, then turn it On.
You can reset your Bluetooth connection if a reboot does not work. To fix the issue, try disabling and re-enabling it.
Step 1: Go to the “Settings” option and Select Bluetooth and other devices.
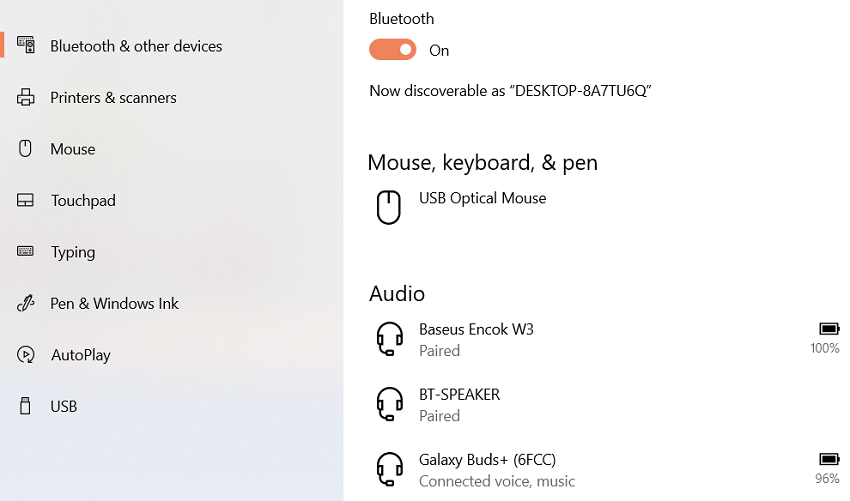
Step 2: Find your Samsung Galaxy Buds, usually in the Audio section > Click Disconnect, then Remove device.

Step 3: Then turn off Bluetooth and turn Bluetooth back on.

Step 4: Now connect the headset to your Windows 10/11 computer again. Under Bluetooth and other devices, click the Plus icon. Select Bluetooth. The system will automatically start detecting your Galaxy earbuds.

- Update the audio driver.
Too old audio drivers can also be the cause of loss of sound. So, Try updating to the latest version to fix the error. But first, you must ensure your computer is fully connected to the network to download the new version.
- Step 1: Press Windows + R key combination, then type “devmgmt.msc” and press OK or enter.

- Step 2: When the window of Device Manager appears, choose “Sound, video, and game controllers” by clicking the arrow symbol.

- Step 3: Right-click the audio driver. Select Update driver to update.

- Step 4: You will have two options. Select “Search automatically for updated driver” if you want to find the automatically updated driver for your device. Select “Browse my computer for driver” to update the available driver you have downloaded.

Check the other person’s microphone again if the conversation is not audible. Check if the microphone works to ensure the fault is not with the microphone.
- Set the Playback Device.
You will hear no music through the earphones if you haven’t selected your Samsung Galaxy Buds as the playback device. To make your Galaxy earphones the playback device with these steps:
Step 1: Enter “Change system sound” in the search box on the Start Menu. Click to open the list of results.

Step 2: On the Sound window that appears, select the “Playback” tab. Select the output device you want to set as the default and click “Set Default” in the bottom corner. Then select OK to save changes.

- Change back to another audio file format.
To change the audio file format, access the “Playback” tab in the “Change system sound” box. Next, right-click the audio output device that is having trouble playing sound. Select Properties.
Find and select the “Advanced” tab. Then select the audio file format from the Menu. It works well for finding the corresponding audio file format. Finally, Click OK.

- Update or Re-install Bluetooth Driver.
You could even experience more issues in the future if your Windows 10 or Windows 11 computer is using outdated Bluetooth software. It is always suggested that you keep all drivers current. How to upgrade the Bluetooth software on your computer is as follows:
Step 1: Click on the Search bar, type Device Manager, and hit the enter button.

Step 2: Find Bluetooth options.

Step 3: Expand Bluetooth options, then right-click on the Bluetooth driver. Next, select Update driver.

Step 4: Tap on Search automatically for drivers.

Windows will automatically check for updated Bluetooth software versions. Your computer will install the most recent Bluetooth driver if it is available. After the new driver is installed, check if the problem is fixed. If there’s a problem with the new Bluetooth driver, uninstalling it might help. Don’t worry. Windows will automatically re-install the driver.
To uninstall a driver: Open Device Manager < Expand Bluetooth options < Right-click on the Bluetooth driver < Select Uninstall device.

- Run Windows Troubleshooter.
Windows has an inbuilt troubleshooter, which is good enough to solve fundamental problems. It instantly detects and resolves any problems or conflicts. Here’s how you can use Windows Troubleshooter to fix Bluetooth-related issues:
Step 1: Click on the Search bar, type “Troubleshoot settings,” and open it.
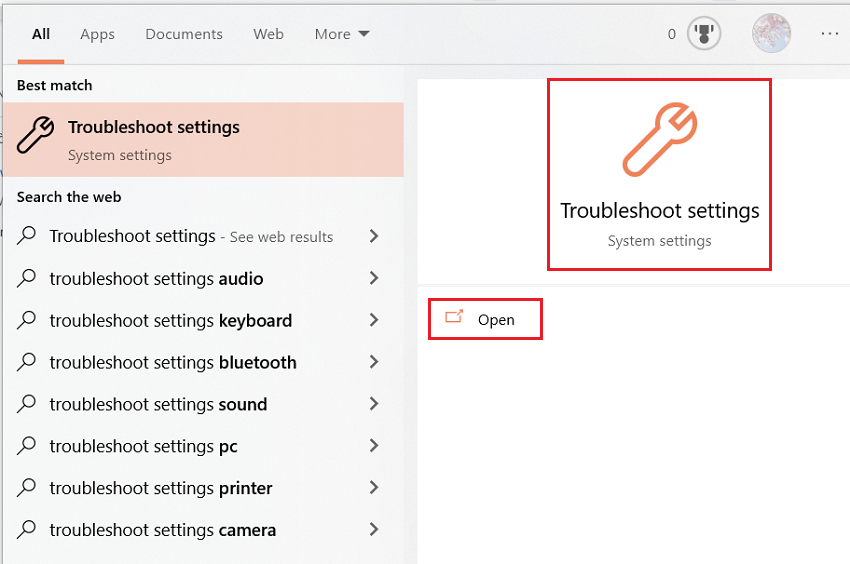
Step 2: In the “Troubleshoot settings,” open “Aditional troubleshooters”

Step 3: Tap on Run next to the Bluetooth option. Windows will automatically search for problems. If it discovers any, it will immediately implement the best solution.

Why Do My Galaxy Buds Stop Playing Sound on Windows 10/11
It could be caused by the low battery, Audio Enhancements feature, Bluetooth connectivity issues, and the wrong audio output device selected. These instances can lead to a complete disconnect between the audio source ( your earbuds) and the drivers of your PC.
- Low battery.
If the battery level of your earbuds is low, it can affect the sound quality or cause the earbuds to stop playing sound altogether. To fix this, charge the Galaxy Buds in the charging case for at least 15 minutes before using them again. If you frequently experience low battery issues, consider purchasing a charging case with a higher capacity or replacing your earbuds’ battery altogether.
- Outdated audio drivers.
The second most common cause is that the audio driver is too old and no longer compatible with the Windows 10/11 operating system. This issue is because the audio driver’s act as the interface between the hardware components of your computer that produce sound and the operating system which controls them.
Additionally, installing new hardware or software that interacts with your computer’s audio system can cause conflicts that result in a loss of sound.
- The audio format is incompatible with the computer hardware settings.
It is because the hardware components responsible for producing sound on a computer (such as the sound card or audio driver) have specific technical specifications and requirements for processing audio signals.
If the audio format of a media file does not match these requirements, the hardware can not be able to process the audio signal properly, resulting in loss of sound. It can happen if the audio format needs to be lowered in terms of bit rate, sample rate, or other technical parameters that affect audio quality and compatibility. The solution now is to change the compatible audio file format.
- Audio Enhancements Features.
Audio Enhancements are built into Windows 10 and from third-party packages to improve your sound system. However, many users have had problems hearing or hearing the sound too low because of “Audio Enhancements.”
To solve this problem, you need to disable this feature:
Choose the “Playback” tab in “Change System Sound” settings > Right-click the audio output device you want to turn off Audio Enhancements > Access “Properties“> Switch to the Enhancements tab > Disable all enhancements.

Note: you can not see the Audio Enhancements option because not all hardware supports it. If not, you should skip this section.
- Choose the wrong audio output device.
Output device means the device used to output audio. On a normal laptop, there will be at least two output devices, the computer speakers or the speakers on your headphones. So accidentally choosing the wrong output device will make you unable to hear the sound.
Conclusion
To wrap things up, this article has explored some reasons and offered solutions for Galaxy Buds not playing audio on your Windows 10/11 device. These include rebooting your device, turning Bluetooth off/on, updating the audio driver, setting the playback device, changing the audio file format, updating or re-installing the Bluetooth driver, and running the Windows troubleshooter.
By following these methods, you can repair the problem and enjoy listening to music through your Galaxy Buds again.
Hi, I’m Nhi Nguyen. I am a technical engineer and have many years of experience as a content writer. I’m hoping that my blog will serve as a resource for anyone else interested in learning more about technology equipment.