
Resource Monitor App is a powerful tool that helps users identify what processes are consuming resources and adjust their settings accordingly. But in some cases, the Resource Monitor app stopped working on the Windows 11 operating system.
The main reason for the problem is the corrupted Windows system files as it conflicts with the system resources and stops the Resource Monitor App from functioning properly.
Additionally, outdated drivers, incorrect registry entries, incompatible hardware and software, virus or malware infections, or insufficient system resources can also cause the problem.
Fortunately, there are some solutions that help you to resolve the issue quickly and efficiently.
To repair corrupted Windows system files, we recommend Advanced System Repair:
This software is your one stop solution to fix Windows errors, protect you from malware, clean junks and optimize your PC for maximum performance in 3 easy steps:
- Download Advanaced System Repair rated Excellent on Trustpilot.
- Click Install & Scan Now to install & scan issues causing the PC problems.
- Next, click on Click Here to Fix All Issues Now to fix, clean, protect and optimize your PC effectively.
Solution 1: Restart the Computer
Restarting a PC can help to fix the discussed issue because when the system is restarted, it is brought back to a clean slate and all the programs and applications that were running in the background are closed and re-initialized. This can help in freeing up any resources that may have been locked up by a non-responsive program or application.
- Go to Desktop by clicking on the Windows and D keys
- Now, tap on the Alt+ F4 keys on your keyboard.
- The Shut Down Windows will open as follows.
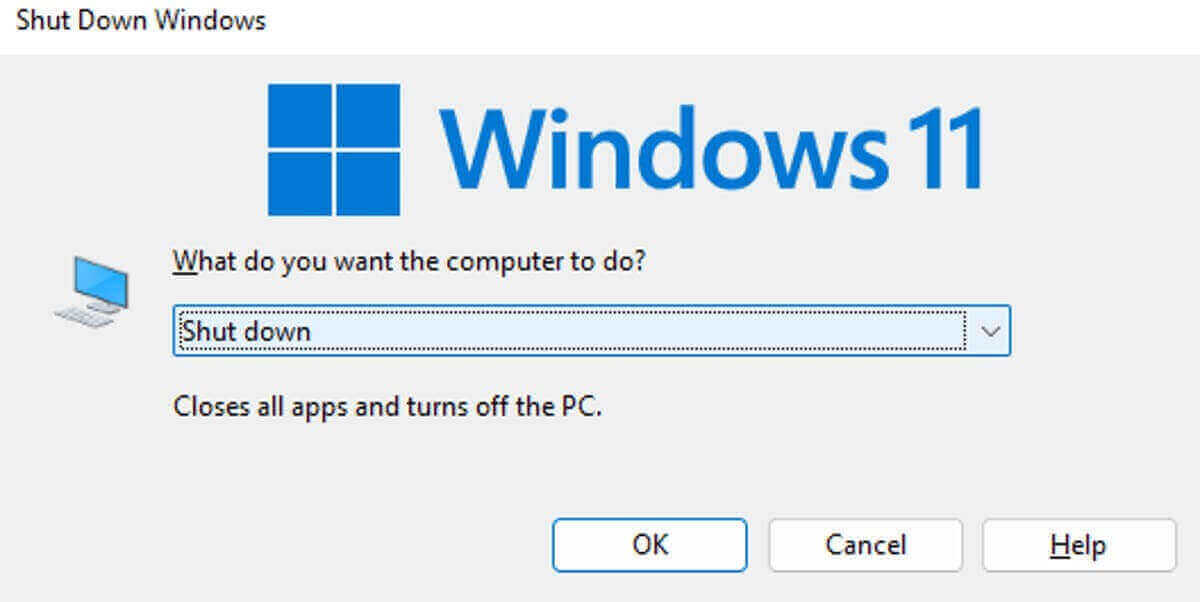
- Next, from the list of options, press the Restart option.
- At last, click on Enter key or press the OK button to reboot your system.
Solution 2: Enable Transparency Effects
Transparency effects enable the system to use fewer resources, which can help to free up resources for other tasks, such as monitoring. Additionally, transparency effects can also help to reduce lag and improve the overall responsiveness of the system, which can help to improve the performance of Resource Monitor. Therefore, enabling transparency effects can help to fix Resource Monitor not working issue.
- Right-click on Desktop and press Personalize.
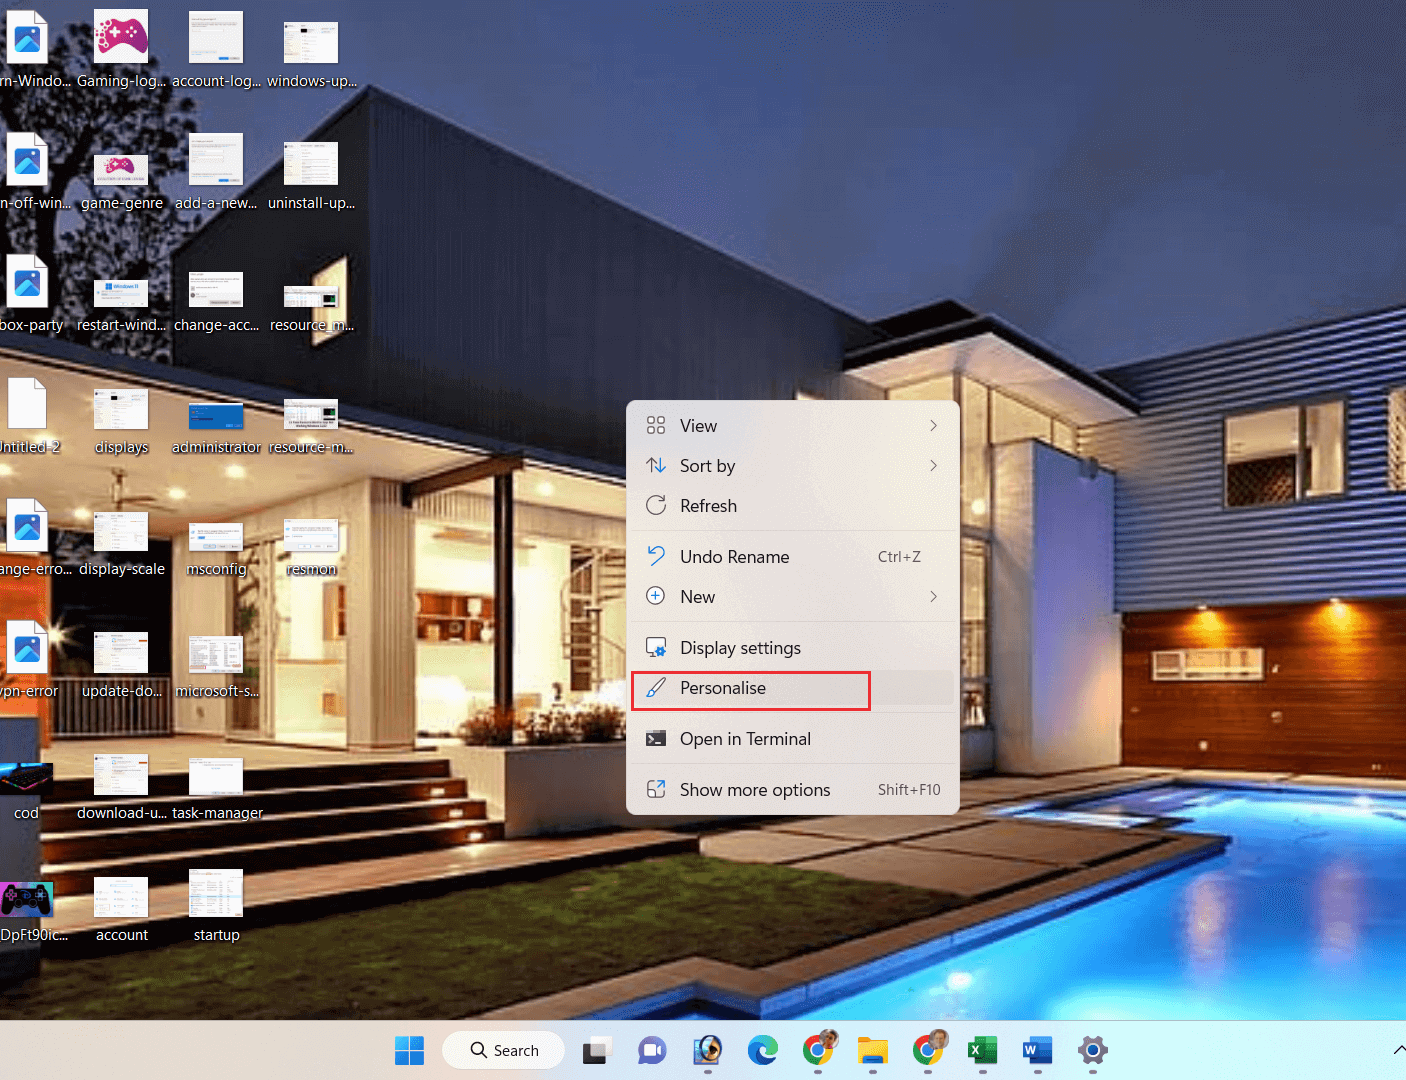
- Then, click on Colors in the left pane.
- Go to More Options and enable Transparency effects.
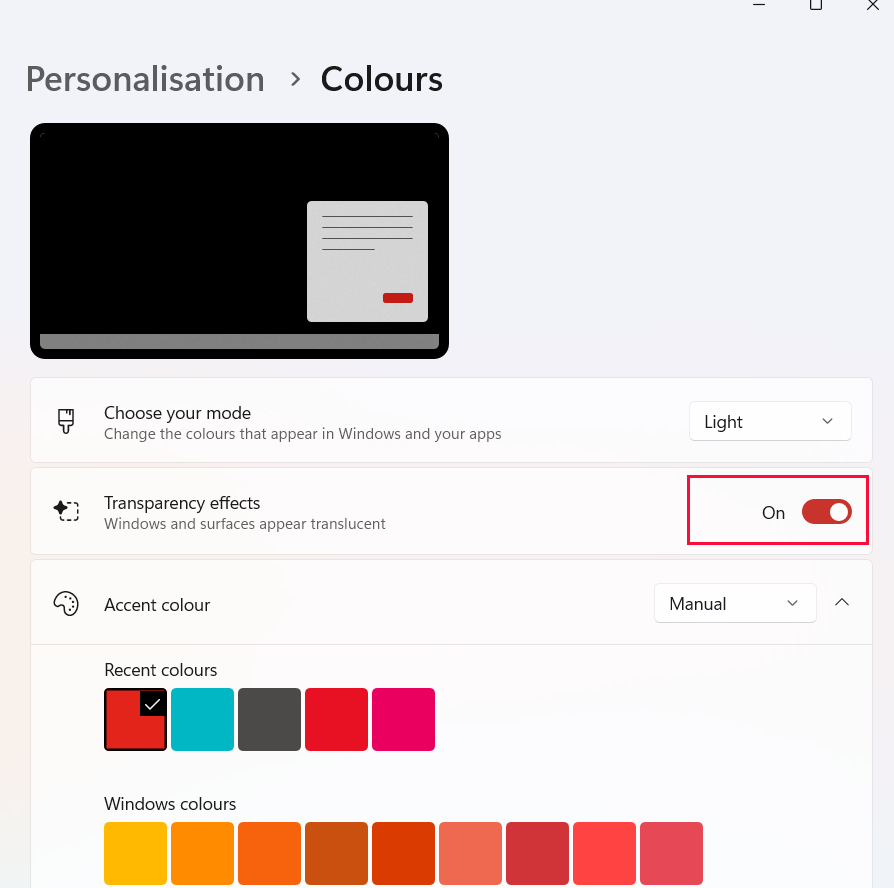
Check if this helps to fix your issue.
Solution 3: Run Resource Monitor Manually
Running Resource Monitor manually can help to identify the source of the problem and provide insight into what may be causing the issue. Additionally, it can help to identify any hardware or software issues that may be causing the issue.
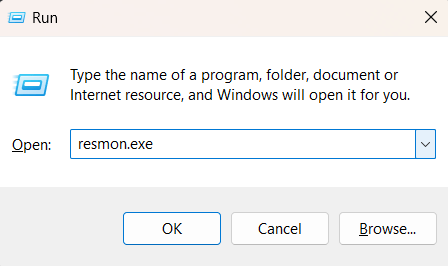
- Click on the Windows and R keys
- Now, type resmon.exe and press OK to launch the Resource Monitor.
- If you find, you still cannot access the Resource Monitor on your Windows 11 PC, then follow the below solutions to fix the issue.
Solution 4: Change the DPI Settings
The DPI scaling settings in Windows 11 affect how programs and Windows are displayed on the screen. If these settings are incorrect, some programs may not run correctly, or may not load at all. Changing the DPI settings can help fix the issue with Resource Monitor in Windows 11, as it allows the program to be displayed correctly on the screen.
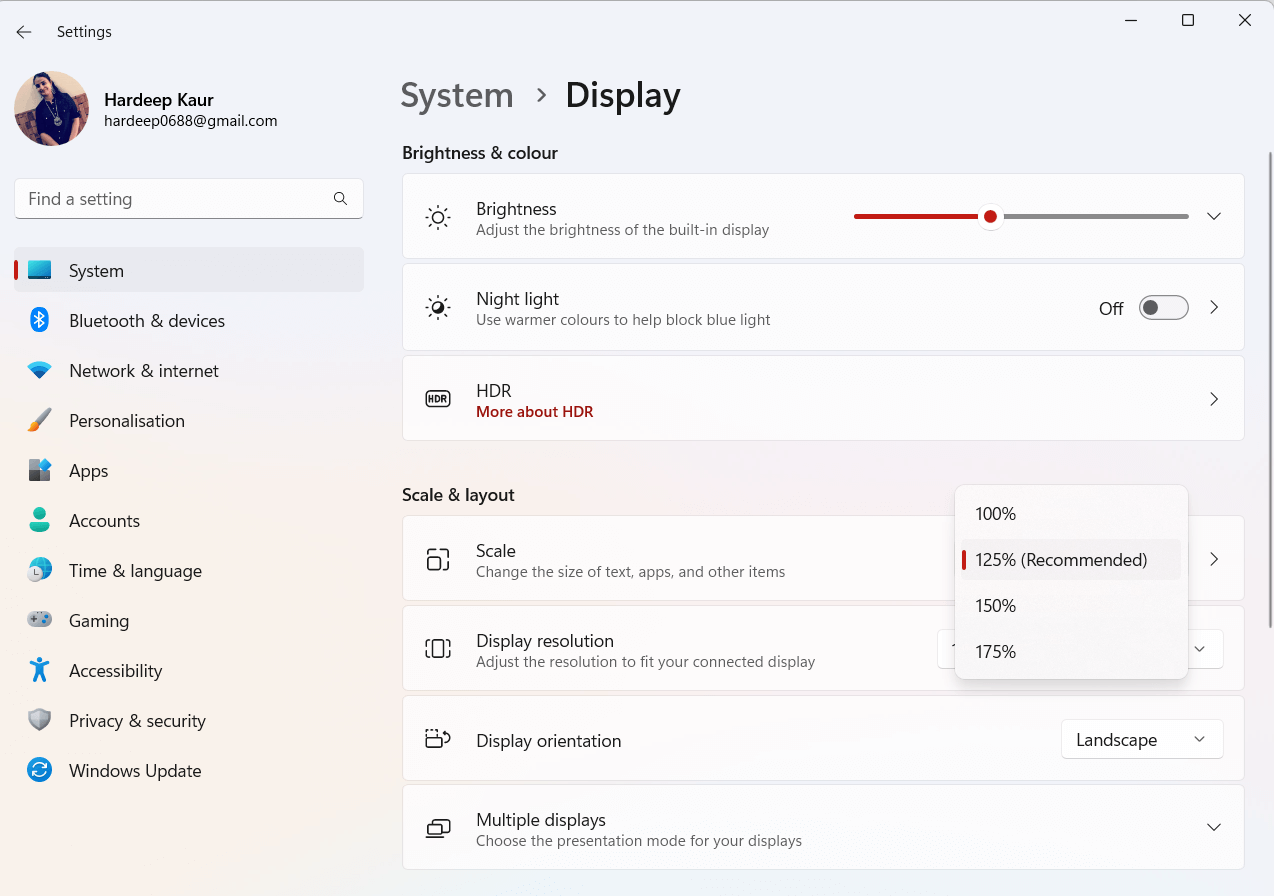
- Go to the Windows Settings by pressing the Windows + I keys
- Then, tap on System and click on the Display option.
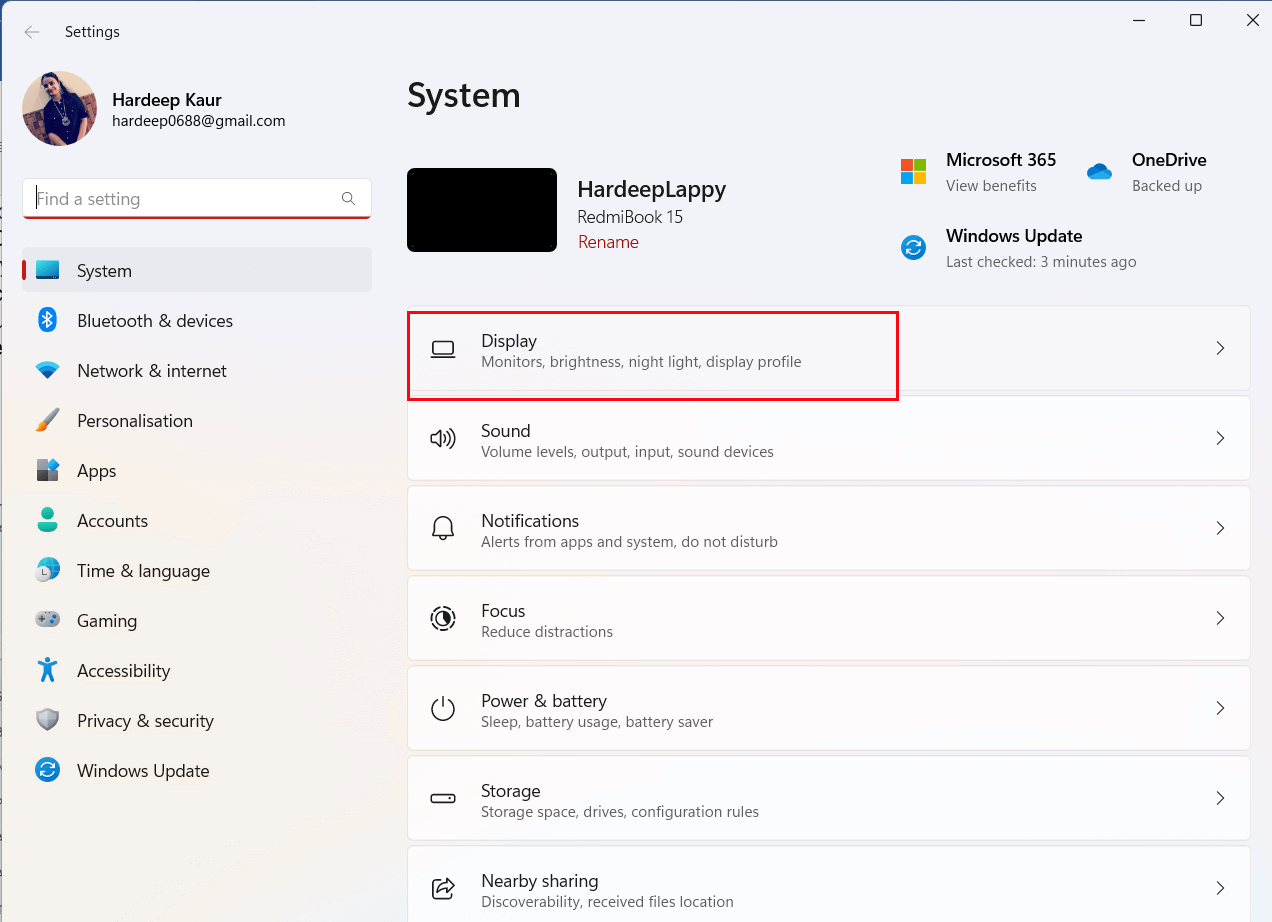
- Next, navigate to the Scale & Layout section, and change the Scale to the Recommended value.
- Follow and implement the same steps for all the displays connected to your device.
Check if you can access the Resource Monitor app without any issues.
Solution 5: Run the System File Checker/DISM
The SFC (System File Checker) and DISM (Deployment Image Servicing and Management) utilities are both useful tools for repairing corrupted system files in Windows. These tools allow the repair of any corrupted system files that may be causing the issue.
- Click on the Windows + R key to open the Run dialogue box.
- Then in the Run box, type cmd and hit Enter.
- When the command prompt opens type sfc/scannow and hit Enter.
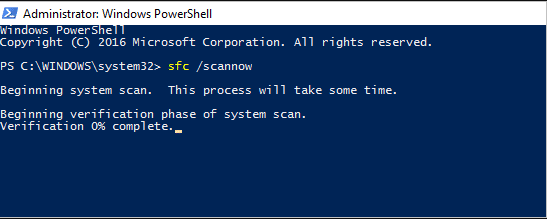
- Wait until the scanning process to complete. It takes around 15 minutes approximately.
- Once the scanning process is completed, check if the issue in Resource Monitor App is resolved. If you still face the error, then run the DISM command in the command prompt.
- Launch the command prompt and type dism.com/online/cleanup-image/restorehealth and hit Enter.
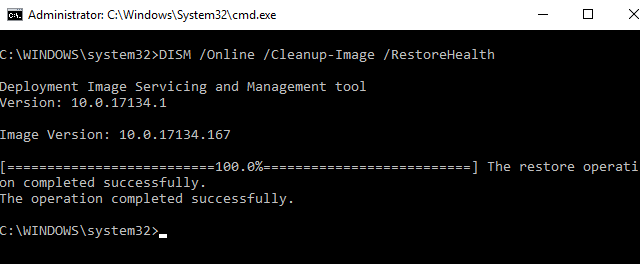
- Wait until the scanning process to complete. It takes around 30 minutes approximately.
- Check if the issue is resolved now after restarting your PC.
Solution 6: Check for Windows Updates
By updating Windows, you can ensure that your computer is running the most recent version of the operating system, which can fix bugs and issues that were present in the previous version. This can help to fix issues with the Resource Monitor not working, as the most recent version of Windows may have fixed the issue that was preventing it from working.
If your Windows 11 computer is not up-to-date, follow the below-listed steps to update it.
- Click on the Windows + I keys together to open Settings.
- Click on the Windows Update option in the left pane.
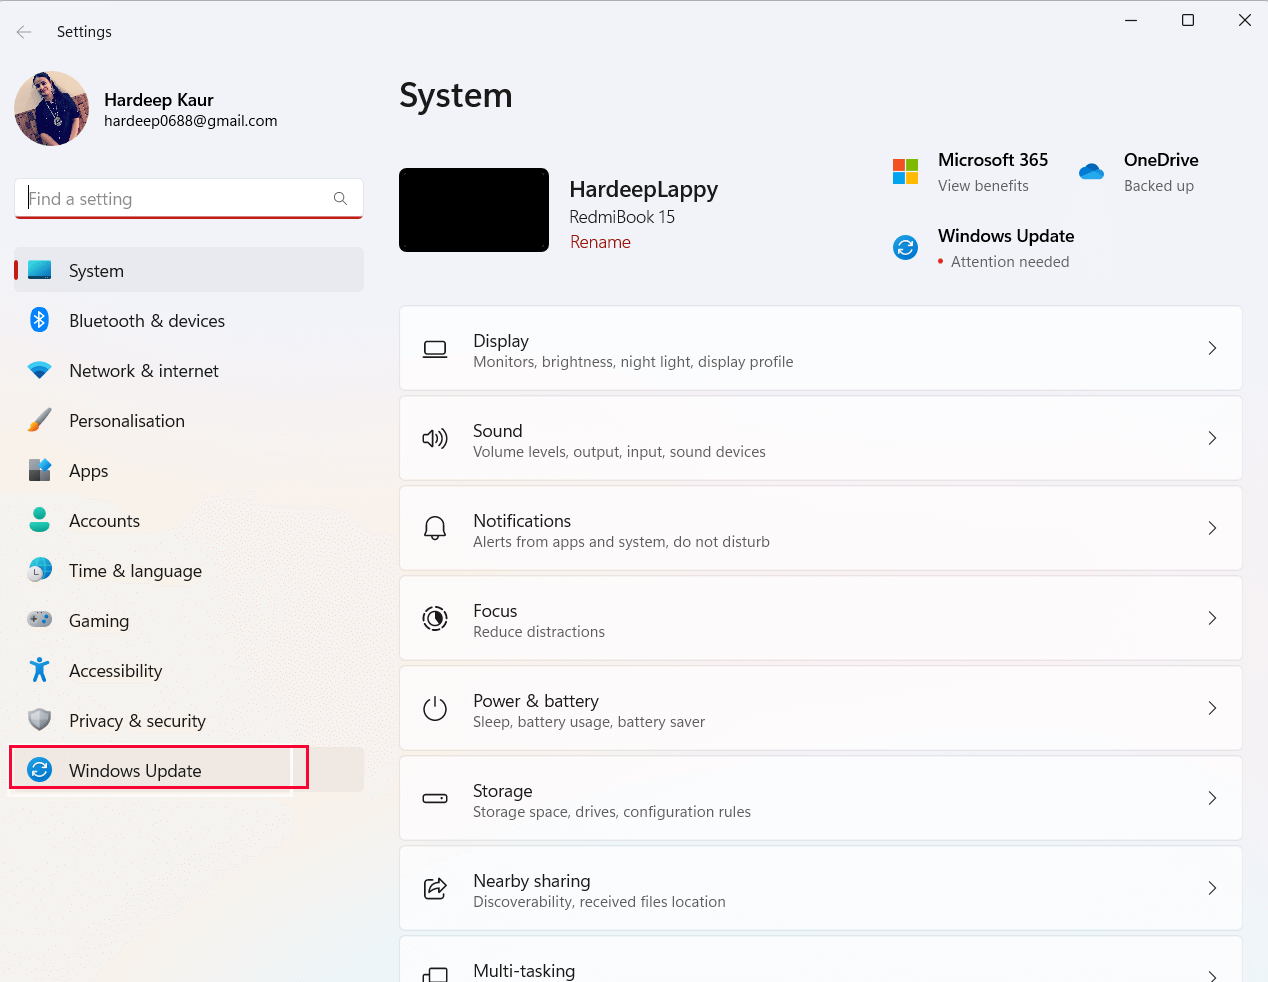
- On the right screen, click on Check for updates.
- If you find an update available, click on the Download & Install All option to update to the new version.
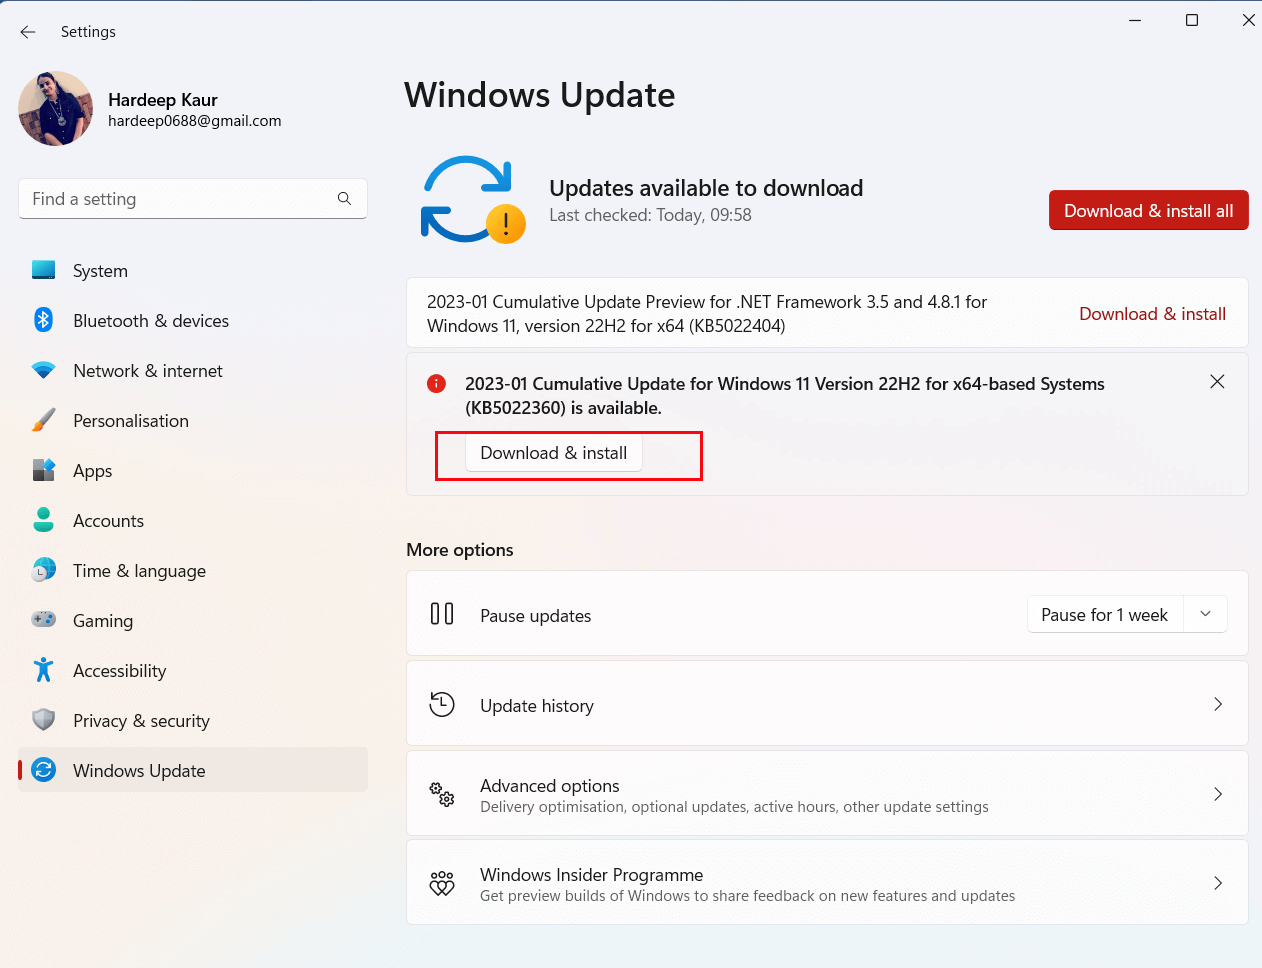
- If the Windows 11 OS is already updated, you will get You’re up to date
- After updating the device, restart your PC and check if the issues with the Resource Monitor are resolved on your system.
Solution 7: Uninstall the Latest Windows Updates
Uninstalling recent updates can help to fix the discussed issue on your Windows system because updates can sometimes introduce errors, or overwrite certain files or settings that are necessary for the Resource Monitor to operate properly. Uninstalling the update can revert any changes made, allowing the Resource Monitor to work properly.
- Press Win + I to open Windows Settings.
- Then, click on Windows Update in the left pane.
- Scroll down to the right screen and press the Update history
- Now, in the upcoming window, click on Uninstall updates
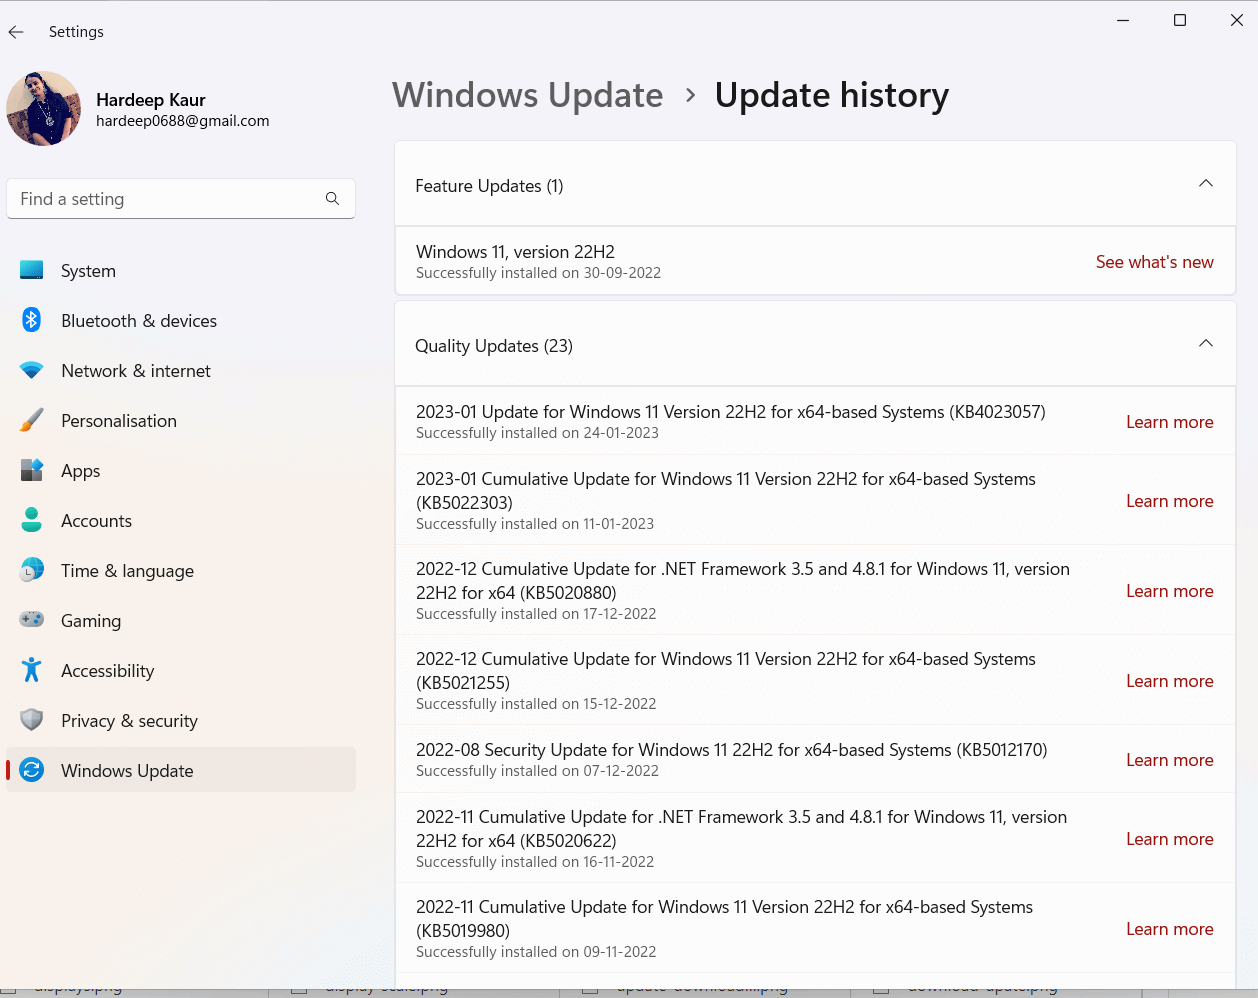
- Then, select the most recent update from the list available and press the Uninstall
- Follow the upcoming instructions to finish the process and restart your PC. Now, check if you can fix the issues with the Resource Monitor are resolved or not.
Solution 8: Create a New User Account
Creating a new user account can help fix the discussed issue because the new account will have all the default settings, including any settings related to the Resource Monitor. Additionally, creating a new user account will give the user a fresh start and may help resolve any potential conflicts or problems the user may have been encountering.
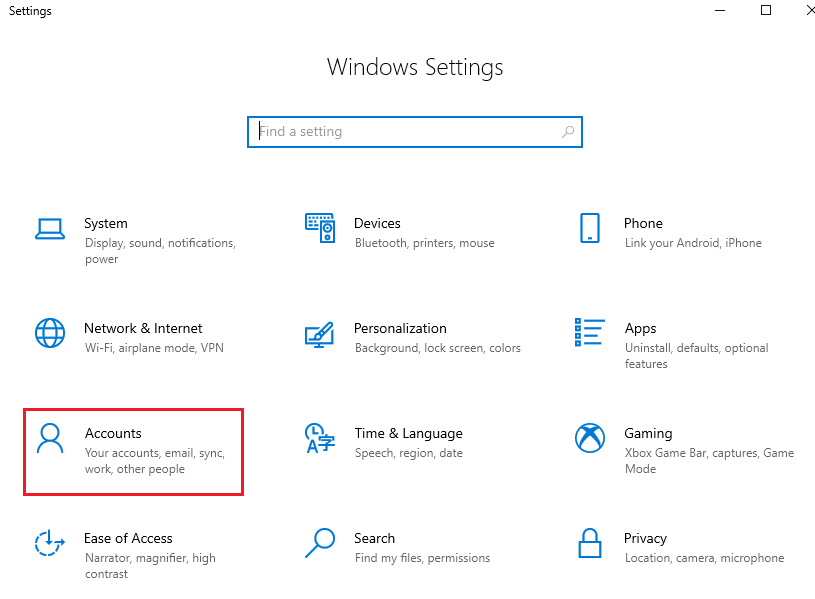
- Go to Windows Settings by pressing Windows and I keys
- Then, click on the Accounts option as shown.
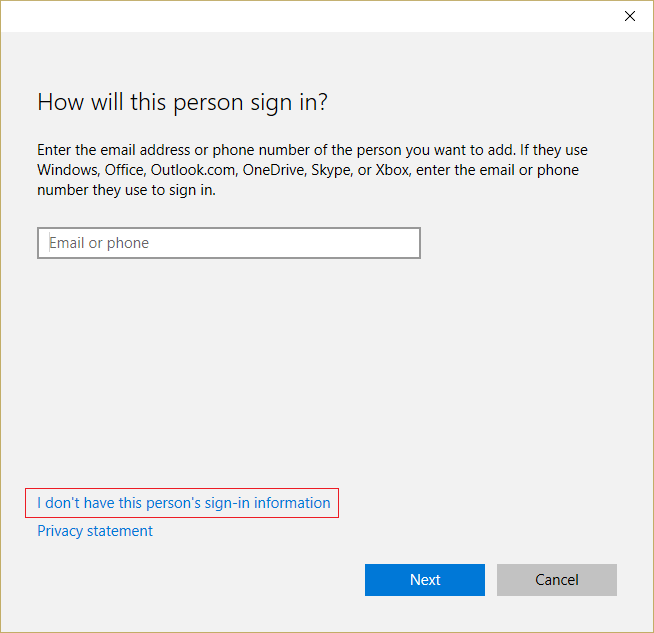
- Next, click on the Family & other users or Other users on the left screen and click on Add someone else to this PC.
- In the next screen, click on the I don’t have this person’s sign-in information option.
- Then, click on the Add a user without a Microsoft account option.
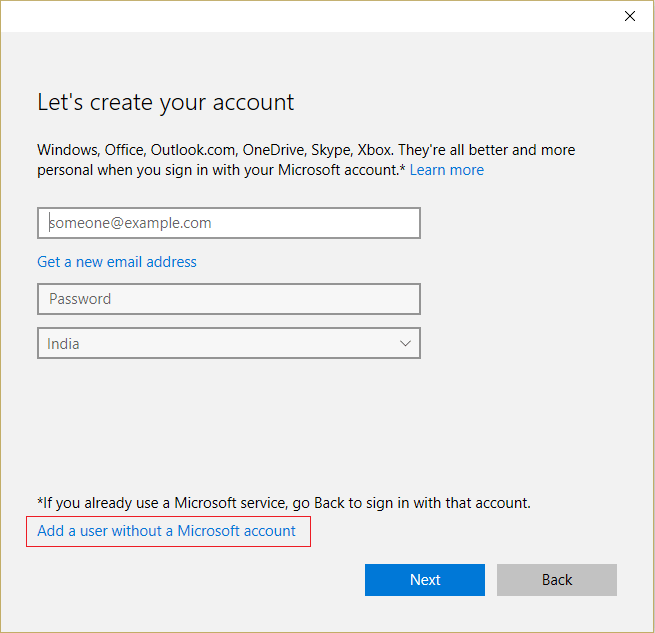
- Next, type a username, and password (fill in the security questions) and click on Next Now, you have created a local account. If you want to assign admin credentials to this account, follow the below-listed instructions.
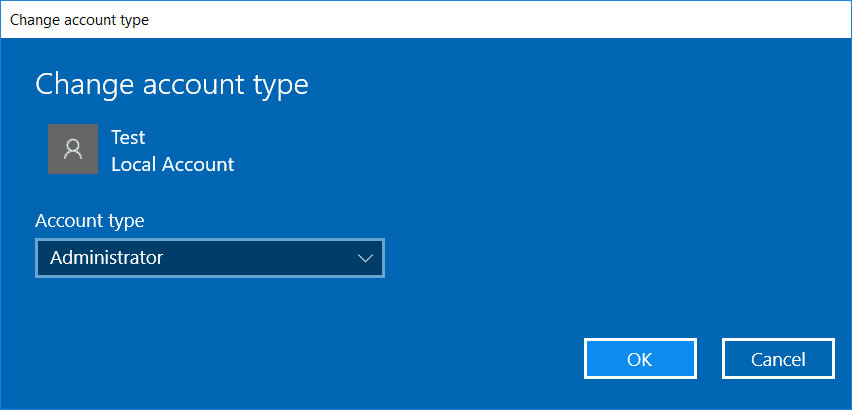
- Then, click on the Family & other people or other users option in the left pane and click on the Change account type option under your local account.
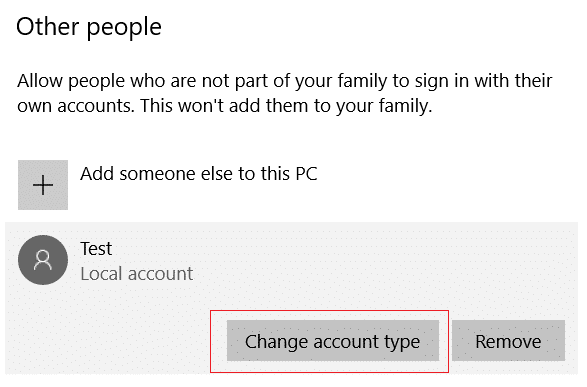
- Then, click on the Administrator option under Account type and click on Enter.
- Now, sign out from your current account and log in to this new admin account.
- Copy & paste all the files and folders from your old account to your newly created account.
- Launch the app in the new admin account created now and check if the issue is resolved now or not.
Solution 9: Troubleshoot in Clean Boot State
When a computer is running in a clean boot state, non-essential applications, services and drivers are disabled. This helps to fix any software conflicts that may be causing the issue. Additionally, a clean boot state allows the user to test the system with minimal drivers and startup programs, making it easier to identify the cause of the issue.
- Click on the Win + R keys simultaneously to launch the Run dialog box.
- Then, type msconfig in the window and tap the Enter
Note: On the next screen, you will be prompted with User Account Control (UAC) popup, click on Yes and type your credentials.
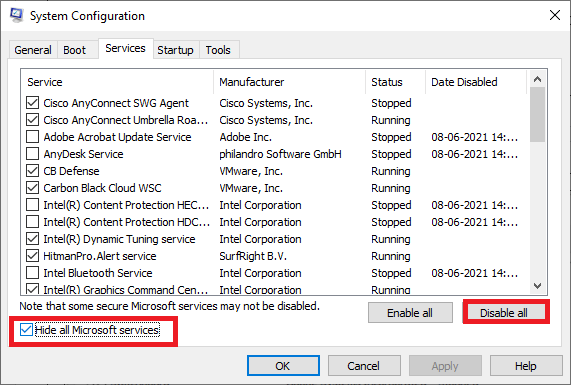
- Now, go to the Services tab and select the Hide all Microsoft services box as shown in the below picture.
- Now, click on the Disable all button as shown. Yet, any Microsoft service crucial for the OS will not be disabled when you do this.
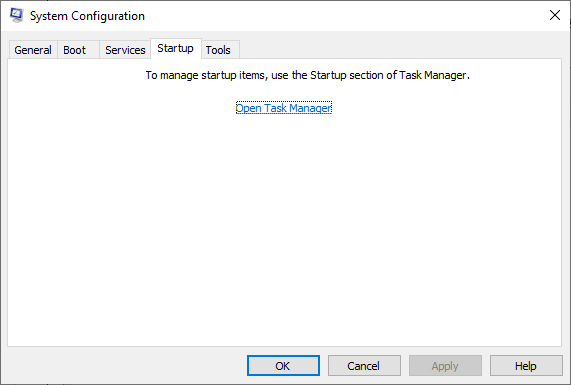
- Then, click on the Startup tab and press the Open Task Manager.
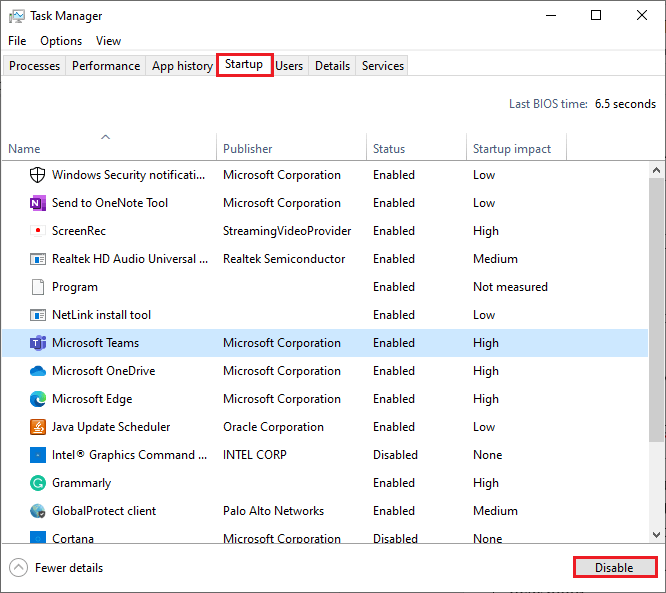
- Doing so will take you to the Task manager. Switch to the Startup tab in the Task Manager screen.
- Now, click on each third-party startup service that seems to be unnecessary and press the Disable button in the bottom right corner of the screen.
- Repeat these steps until there are no startup services that start over every time you restart your PC.
- Next, restart your PC and ensure you can launch the game without any issues. If you can do it successfully, then uninstall the conflicting service or app that triggered the trouble.
Recommended Solution- Fix Various PC Issues & Errors
If your Windows PC/laptop system is running slow or showing various issues and errors, then scan your system with the PC Repair Tool. This is a powerful repair tool that, just by scanning once, detects and fixes various Windows issues and errors.
The tool fixes common PC errors like system file corruption and protects from file loss, malware, hardware failure, BSOD error, and more.
Final Words
So, these are the effective solutions that work for several users to resolve Resource Monitor App Not Working on Windows 11/10.
Follow the step-by-step solutions listed carefully and make the resource monitor app work again on Windows.
If there is anything I missed out or you have any queries, then please drop them on our Facebook Page. Also, don’t forget to follow us on our social media handles to get more interesting guides and helpful tips to keep your computer safe from errors and issues.
Good Luck..!
Hardeep has always been a Windows lover ever since she got her hands on her first Windows XP PC. She has always been enthusiastic about technological stuff, especially Artificial Intelligence (AI) computing. Before joining PC Error Fix, she worked as a freelancer and worked on numerous technical projects.
Монитор ресурсов — инструмент, позволяющий оценить использование процессора, оперативной памяти, сети и дисков в Windows. Часть его функций присутствуют и в привычном диспетчере задач, но если вам требуется более подробная информация и статистика, лучше воспользоваться описываемой здесь утилитой.
В этой инструкции подробно рассмотрим возможности монитора ресурсов и на конкретных примерах посмотрим, какую информацию с помощью него можно получить. См. также: Встроенные системные утилиты Windows, о которых полезно знать.
Другие статьи на тему администрирования Windows
- Администрирование Windows для начинающих
- Редактор реестра
- Редактор локальной групповой политики
- Работа со службами Windows
- Управление дисками
- Диспетчер задач
- Просмотр событий
- Планировщик заданий
- Монитор стабильности системы
- Системный монитор
- Монитор ресурсов (эта статья)
- Брандмауэр Windows в режиме повышенной безопасности
Запуск монитора ресурсов
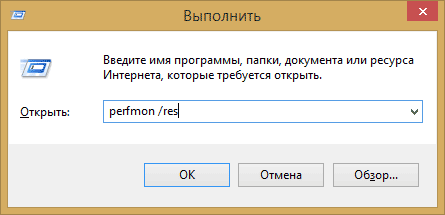
Способ запуска, который одинаково будет работать и в Windows 10 и в Windows 7, 8 (8.1): нажмите клавиши Win + R на клавиатуре и введите команду perfmon /res
Еще один способ, который так же подойдет для всех последних версий ОС — зайти в Панель управления — Администрирование, и выбрать там «Монитор ресурсов».
В Windows 8 и 8.1 вы можете использовать поиск на начальном экране для запуска утилиты.
Просмотр активности на компьютере с помощью монитора ресурсов
Многие, даже начинающие пользователи, сносно ориентируются в диспетчере задач Windows и умеют найти процесс, который тормозит систему, или который выглядит подозрительным. Монитор ресурсов Windows позволяет увидеть еще больше подробностей, которые могут потребоваться для решения возникших с компьютером проблем.
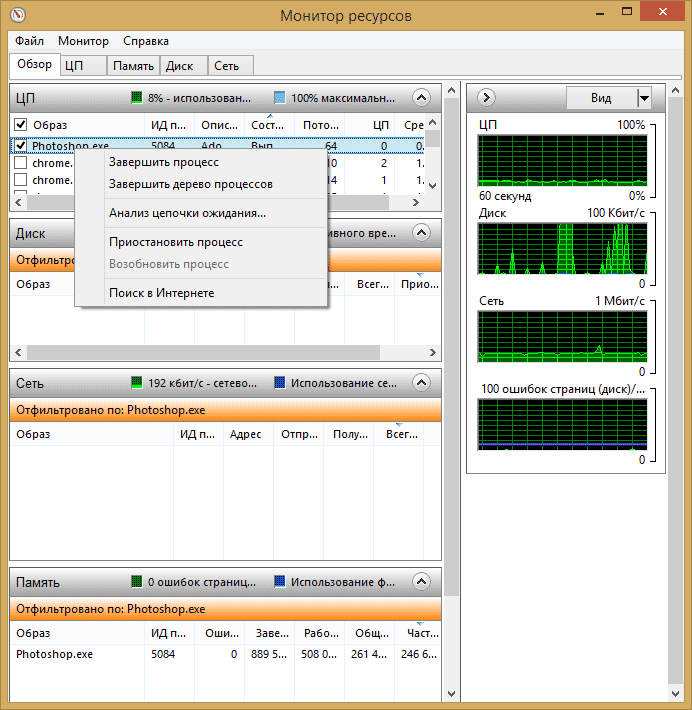
На главном экране вы увидите список запущенных процессов. Если отметить любой из них, внизу, в разделах «Диск», «Сеть» и «Память» отобразятся активности только выбранных процессов (используйте кнопку со стрелкой для того, чтобы открыть или свернуть любую из панелей в утилите). В правой части находится графическое отображение использования ресурсов компьютера, хотя на мой взгляд, лучше свернуть эти графики и опираться на цифры в таблицах.
Нажатие правой кнопкой мыши по любому процессу позволяет завершить его, а также все связанные процессы, приостановить или же найти информацию о данном файле в Интернете.
Использование центрального процессора
На вкладке «ЦП» вы можете получить более подробную информацию об использовании процессора компьютера.

Также, как и в главном окне, вы можете получить полные сведения только об интересующей вас запущенной программе — например, в разделе «Связанные дескрипторы» отображается информация об элементах системы, которые использует выбранный процесс. И, если к примеру, файл на компьютере не удаляется, так как занят каким-либо процессом, вы можете отметить все процессы в мониторе ресурсов, ввести имя файла в поле «Поиск дескрипторов» и узнать, какой именно процесс его использует.
Использование оперативной памяти компьютера
На вкладке «Память» в нижней части вы увидите график, отображающий использование оперативной памяти RAM на вашем компьютере. Обратите внимание, что если вы увидите «Свободно 0 мегабайт», не стоит переживать по этому поводу — это нормальная ситуация и в действительности, память, отображенная на графике в графе «Ожидание» — это тоже своего рода свободная память.

В верхней части — все тот же список процессов с подробной информацией по использованию ими памятью:
- Ошибки — под ними понимаются ошибки, когда процесс обращается к оперативной памяти, но не находит там чего-то, что нужно, так как информация была перемещена в файл подкачки из-за недостатка RAM. Это не страшно, но если вы видите много таких ошибок, следует задуматься об увеличении количества оперативной памяти на компьютере, это поможет оптимизировать скорость работы.
- Завершено — эта колонка показывает, какой объем файла подкачки был использован процессом за все время его работы после текущего запуска. Цифры там будут достаточно большие при любом количестве установленной памяти.
- Рабочий набор — количество памяти, используемое процессом в настоящий момент времени.
- Частный набор и общий набор — под общим объемом подразумевается тот, который может быть освобожден для другого процесса, если ему станет не хватать RAM. Частный набор — память, строго отведенная конкретному процессу и которая не будет передана другому.
Вкладка Диск
На данной вкладке вы можете просмотреть скорость операций чтения записи каждого процесса (и суммарный поток), а также увидеть список всех запоминающих устройств, а также свободного места на них.

Использование сети

С помощью вкладки «Сеть» монитора ресурсов вы можете просмотреть открытые порты различных процессов и программ, адреса, по которым они обращаются, а также узнать, разрешено ли данное соединение брандмауэром. Если вам кажется, что какая-то программа вызывает подозрительную сетевую активность, кое-какую полезную информацию можно почерпнуть именно на этой вкладке.
Видео об использовании монитора ресурсов
На этом завершаю статью. Надеюсь, для тех, кто не знал о существовании данного инструмента в Windows, статья будет полезной.
When using Windows operating systems, managing system resources becomes essential for optimal performance. Resource Monitor is an integrated tool that allows users to monitor various system resources such as CPU, memory, disk, and network usage. However, many users have reported issues with Resource Monitor not working properly on Windows 10 and Windows 11. This article aims to delve into the common reasons why Resource Monitor may malfunction, explore potential troubleshooting steps, and provide solutions to fix the problem.
Understanding Resource Monitor
Resource Monitor is a powerful utility in Windows that provides detailed information about the hardware resources and their usage in real-time. This includes:
- CPU Usage: Shows the overall CPU usage as well as the usage of individual processes.
- Memory Usage: Displays how much RAM is being utilized by applications and system processes.
- Disk Activity: Monitors disk read and write activity for all processes.
- Network Activity: Tracks the network usage of applications, including the amount of data sent and received.
Since Resource Monitor is built into Windows, its functionality is dependent on multiple system components working together seamlessly. When issues arise, they can hinder your ability to efficiently manage system resources.
Common Reasons for Resource Monitor Not Working
-
Corrupted System Files: Windows relies on a series of core files to function efficiently. Damage to these files can lead to unpredictable behavior, including issues with Resource Monitor.
-
Windows Updates: Occasionally, Windows updates may not install correctly. An incomplete or failed update can lead to system instability and prevent utilities like Resource Monitor from working properly.
-
Background Processes and Third-Party Software: Some third-party applications, particularly those that manage system resources (like antivirus software or system optimizers), may conflict with the operations of Resource Monitor.
-
User Profile Corruption: A corrupted user account can cause various applications and services to malfunction, including Resource Monitor.
-
Services Not Running: Resource Monitor relies on several system services. If essential services are disabled or not running, this tool might fail.
Initial Troubleshooting Steps
Before diving into more advanced fixes, users can take some initial troubleshooting steps:
1. Restart Resource Monitor
Sometimes, simply restarting the program can resolve temporary glitches. Close Resource Monitor and reopen it:
- Press
Ctrl + Shift + Escto open Task Manager. - Click on «More Details» if Task Manager isn’t already expanded.
- Find «Resource Monitor» under the Performance tab and click on it, or run
resmonin the Run dialog (Win + R).
2. Restart Windows
Restarting the entire operating system can often resolve many issues. Save your work and perform a system reboot.
3. Check for Windows Updates
Outdated systems may have unresolved bugs that are addressed in newer updates:
- Go to Settings > Update & Security > Windows Update.
- Click Check for updates to ensure your system is up to date.
Advanced Troubleshooting
If Resource Monitor is still unresponsive after the initial troubleshooting steps, here are more in-depth methods to resolve the issue.
1. Run System File Checker (SFC)
Running the System File Checker can help repair corrupted system files:
- Open Command Prompt as an administrator:
- Type
cmdin the Start menu, right-click on Command Prompt, and select Run as administrator.
- Type
- Type the command
sfc /scannowand press Enter. - Wait for the process to complete. If any issues are found, follow the prompts to repair them.
2. Use the DISM Tool
If SFC doesn’t resolve the issue, the Deployment Image Servicing and Management (DISM) tool can repair the Windows image:
- Open Command Prompt as an administrator.
- Type the following commands one at a time, pressing Enter after each:
DISM /Online /Cleanup-Image /CheckHealth DISM /Online /Cleanup-Image /ScanHealth DISM /Online /Cleanup-Image /RestoreHealth - Allow the tool to run to completion. Restart your computer afterward.
3. Check Background Processes
Some applications or services running in the background can interfere with Resource Monitor:
- Open Task Manager (Ctrl + Shift + Esc) and look for any third-party applications that may be using a lot of CPU or memory.
- End tasks that you believe could be conflicting, especially resource-heavy applications or system optimizers.
4. Perform a Clean Boot
A clean boot starts Windows with a minimal set of drivers and startup programs. This helps eliminate software conflicts:
- Press
Win + R, typemsconfig, and press Enter. - In the System Configuration window, select Selective startup and uncheck Load startup items.
- Switch to the Services tab, check Hide all Microsoft services, and click Disable all.
- Click OK and restart your computer.
After the clean boot, try accessing Resource Monitor again. If it works, re-enable startup services one by one to identify the conflicting software.
5. Create a New User Profile
If your user profile is corrupted, creating a new one can often resolve issues:
- Go to Settings > Accounts > Family & other users.
- Under Other users, click on Add someone else to this PC.
- Follow the prompts to create a new user account.
- Log out of your current profile and log in to the new one. Test Resource Monitor to see if it functions correctly.
6. Reset Windows
If all else fails, consider resetting your Windows installation. This option reinstalls Windows and can help eliminate any underlying issues. Ensure you back up your data before proceeding:
- Go to Settings > Update & Security > Recovery.
- Under Reset this PC, click Get started and choose your preferred option (keep files or remove everything).
- Follow the instructions to reset Windows.
Conclusion
While experiencing issues with Resource Monitor in Windows 10 or 11 can be frustrating, several troubleshooting methods can help resolve the problem. By understanding the common reasons for malfunction and applying step-by-step solutions like checking for system updates, running repair tools, and potentially creating a new user profile or resetting the system, you can restore functionality to Resource Monitor.
Managing your system’s resources is crucial for maintaining performance and ensuring a smooth computing experience. Armed with these insights and solutions, you can efficiently address and resolve issues with Resource Monitor as they arise, keeping your system running optimally.
Распознавание голоса и речи на C#
UnmanagedCoder 05.05.2025
Интеграция голосового управления в приложения на C# стала намного доступнее благодаря развитию специализированных библиотек и API. При этом многие разработчики до сих пор считают голосовое управление. . .
Реализация своих итераторов в C++
NullReferenced 05.05.2025
Итераторы в C++ — это абстракция, которая связывает весь экосистему Стандартной Библиотеки Шаблонов (STL) в единое целое, позволяя алгоритмам работать с разнородными структурами данных без знания их. . .
Разработка собственного фреймворка для тестирования в C#
UnmanagedCoder 04.05.2025
C# довольно богат готовыми решениями – NUnit, xUnit, MSTest уже давно стали своеобразными динозаврами индустрии. Однако, как и любой динозавр, они не всегда могут протиснуться в узкие коридоры. . .
Распределенная трассировка в Java с помощью OpenTelemetry
Javaican 04.05.2025
Микросервисная архитектура стала краеугольным камнем современной разработки, но вместе с ней пришла и головная боль, знакомая многим — отслеживание прохождения запросов через лабиринт взаимосвязанных. . .
Шаблоны обнаружения сервисов в Kubernetes
Mr. Docker 04.05.2025
Современные Kubernetes-инфраструктуры сталкиваются с серьёзными вызовами. Развертывание в нескольких регионах и облаках одновременно, необходимость обеспечения низкой задержки для глобально. . .
Создаем SPA на C# и Blazor
stackOverflow 04.05.2025
Мир веб-разработки за последние десять лет претерпел коллосальные изменения. Переход от традиционных многостраничных сайтов к одностраничным приложениям (Single Page Applications, SPA) — это. . .
Реализация шаблонов проектирования GoF на C++
NullReferenced 04.05.2025
«Банда четырёх» (Gang of Four или GoF) — Эрих Гамма, Ричард Хелм, Ральф Джонсон и Джон Влиссидес — в 1994 году сформировали канон шаблонов, который выдержал проверку временем. И хотя C++ претерпел. . .
C# и сети: Сокеты, gRPC и SignalR
UnmanagedCoder 04.05.2025
Сетевые технологии не стоят на месте, а вместе с ними эволюционируют и инструменты разработки. В . NET появилось множество решений — от низкоуровневых сокетов, позволяющих управлять каждым байтом. . .
Создание микросервисов с Domain-Driven Design
ArchitectMsa 04.05.2025
Архитектура микросервисов за последние годы превратилась в мощный архитектурный подход, который позволяет разрабатывать гибкие, масштабируемые и устойчивые системы. А если добавить сюда ещё и. . .
Многопоточность в C++: Современные техники C++26
bytestream 04.05.2025
C++ долго жил по принципу «один поток — одна задача» — как старательный солдатик, выполняющий команды одну за другой. В то время, когда процессоры уже обзавелись несколькими ядрами, этот подход стал. . .
Все способы:
- Способ 1: Меню «Пуск»
- Способ 2: Диалоговое окно «Выполнить»
- Способ 3: «Диспетчер задач»
- Способ 4: «Проводник»
- Способ 5: «Панель управления»
- Способ 6: «Командная строка»
- Вопросы и ответы: 0
Способ 1: Меню «Пуск»
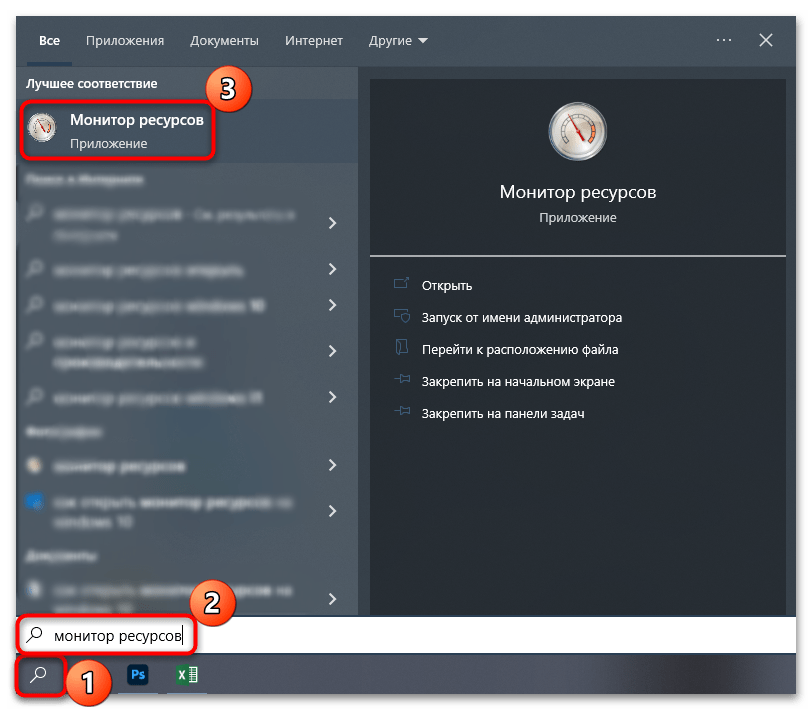
Самый простой способ открыть «Монитор ресурсов» в Windows 10 – это использовать поиск в «Пуске». Достаточно вызвать это меню, затем начать вводить запрос «Монитор ресурсов». В процессе набора отобразится совпадение, которое и выберите.
Когда надо запустить средство с расширенными правами, в окне справа выберите пункт «Запуск от имени администратора».
Все средства администрирования располагаются в соответствующем разделе главного меню. Найти «Монитор ресурсов» там не слишком сложно — достаточно нажать на кнопку «Пуск» на нижней рабочей панели, отобразить «Все приложения», затем отыскать папку «Средства администрирования Windows» и развернуть ее. Появится список инструментов, где есть и искомый.
Способ 2: Диалоговое окно «Выполнить»
Открытие «Монитора ресурсов» доступно и через диалоговое окно «Выполнить». Для этого нужно знать специальную команду, которая запускает окно встроенного средства.
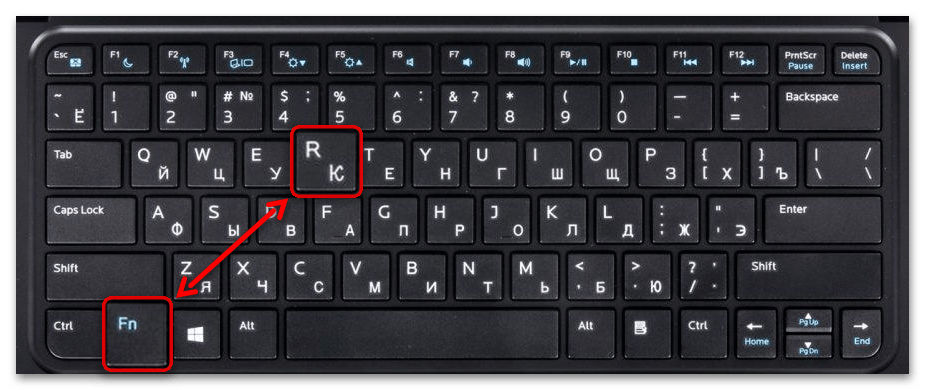
- Одновременно зажмите клавиши «Win + R».
- Появится окно «Выполнить» — в строку «Открыть» вставьте команду
perfmon /resи нажмите на клавишу «Enter».
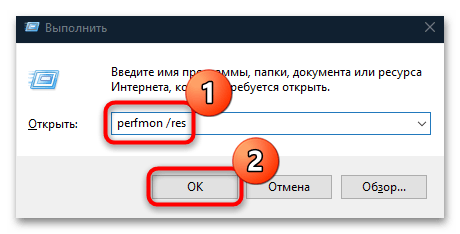
Также можно использовать и команду resmon.exe, аналогичным образом прописав ее в строке окна «Выполнить». Эту же команду можно написать и в «Пуске», вместо названия приложения.
Способ 3: «Диспетчер задач»
Перейти в «Монитор ресурсов» в Windows 10 можно напрямую из интерфейса «Диспетчера задач», представляющего собой информационную утилиту, которая визуализирует сведения о работающих службах и процессах, а также потреблении ресурсов, производительности и другой информации.
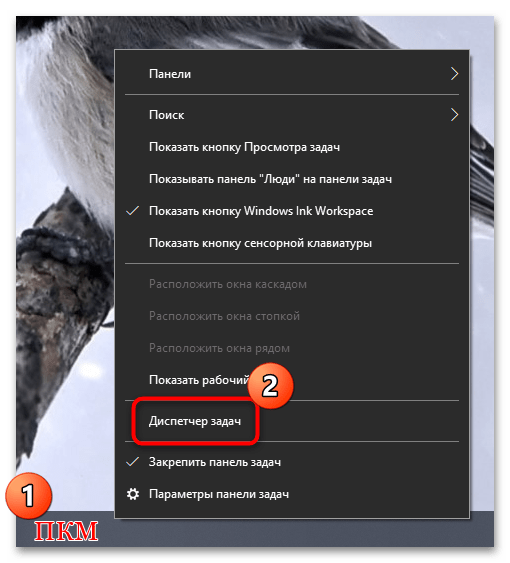
- Кликните по рабочей панели правой кнопкой мыши и из меню выберите пункт «Диспетчер задач».
- Перейдите на вкладку «Производительность» и кликните по ссылке «Открыть монитор ресурсов», расположенной внизу.
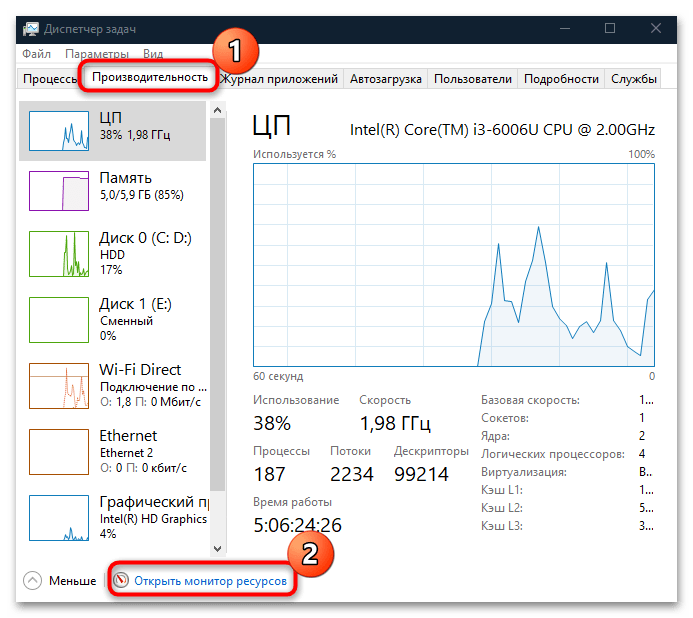
Если «Диспетчер задач» изначально открылся в свернутом виде, нажмите на кнопку «Подробнее», чтобы отобразились все вкладки утилиты.
Читайте также: Методы запуска «Диспетчера задач» в Windows 10
Способ 4: «Проводник»
Исполняемые файлы сторонних и встроенных средств Windows 10, а также некоторых их ярлыков располагаются в папках на локальных дисках. Системные средства – в разделе, на котором установлена система, чаще всего это «Локальный диск (C:)». Средства администрирования, в том числе «Монитор ресурсов» — не исключение.
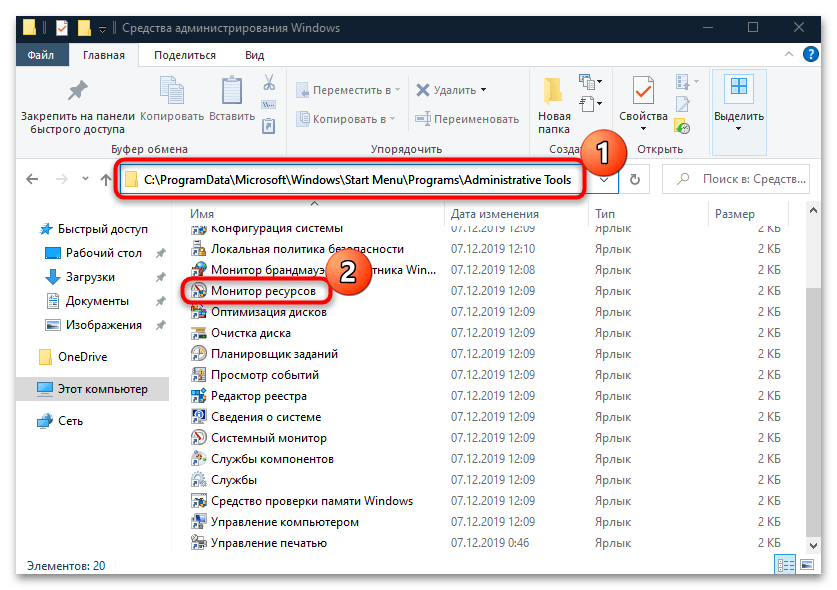
Запустите «Проводник», вставьте в адресную строку путь C:\ProgramData\Microsoft\Windows\Start Menu\Programs\Administrative Tools и нажмите клавишу «Enter». Отобразится список ярлыков средств администрирования, где отыщите «Монитор ресурсов» и запустите его двойным нажатием левой кнопкой мыши.
Способ 5: «Панель управления»
Следующий способ открыть «Монитор ресурсов» на Windows 10 – это «Панель управления», в которой собраны средства настройки операционной системы. Через ее интерфейс можно совершить быстрый переход в папку, которая была рассмотрена в предыдущем способе.
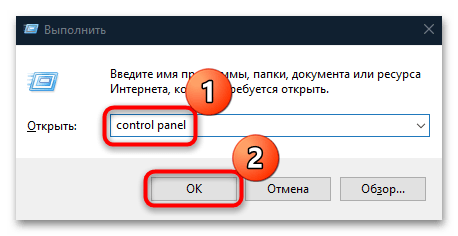
- Вызовите диалоговое окно «Выполнить» с помощью сочетания клавиш «Win + R». В строке напишите
control panelи кликните по «ОК». - Вверху разверните меню «Просмотр», чтобы выбрать формат отображения и задайте крупные или мелкие значки. В появившемся перечне щелкните по разделу «Администрирование».
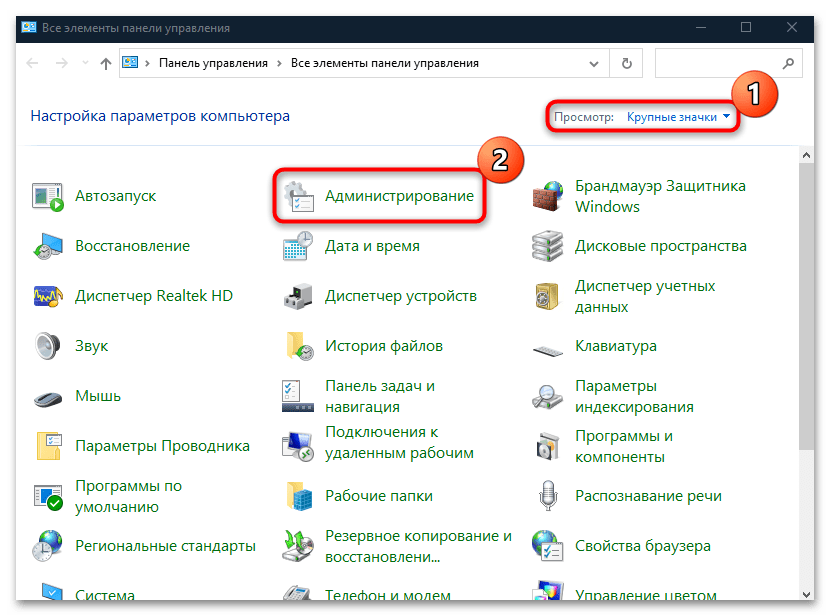
После выбора раздела откроется окно «Проводника» с инструментами Windows 10. Найдите «Монитор ресурсов» и запустите его.
Читайте также: Открытие «Панели управления» на компьютере с Windows 10
Способ 6: «Командная строка»
Если ни один способ не подошел (например, в работе «Проводника» или рабочей панели произошли системные ошибки), можете воспользоваться функциями консоли «Командная строка», через которую доступен запуск приложений и различных штатных средств. Чтобы открыть «Монитор ресурсов» таким образом, нужно знать только команду:
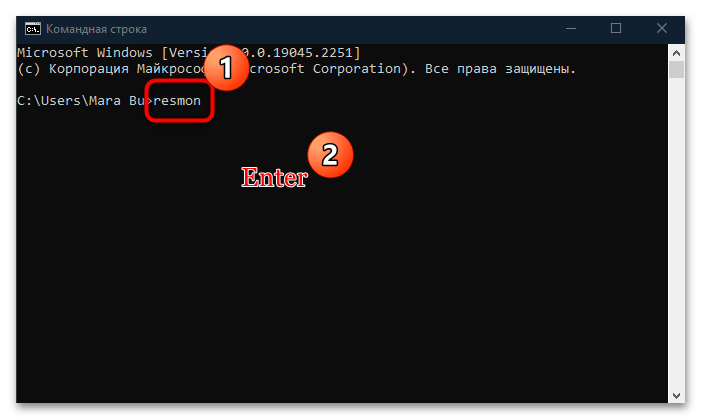
- Откройте «Командную строку», отыскав ее в «Пуске» по названию.
- В строку введите
resmonи нажмите на клавишу «Enter» для подтверждения.

Если вы запускаете консоль от имени администратора, то и все средства, открытые через нее, будут с расширенными правами.
После этого отобразится окно «Монитор ресурсов». В Windows 10 вместо «Командной строки» также можно использовать и аналогичную консоль – Windows PowerShell, где принцип запуска утилиты такой же.
Читайте также: Открытие «Командной строки» в Windows 10
Наша группа в TelegramПолезные советы и помощь