
Applies ToWindows 11 Windows 10
Установочный носитель, например USB-устройство флэш-памяти, можно использовать для установки новой копии Windows, выполнения чистой установки Windows или переустановки Windows.
Чтобы создать установочный носитель, перейдите на веб-сайт загрузки программного обеспечения, где можно найти пошаговые инструкции. На этом веб-сайте можно выбрать версию Windows и создать установочный носитель на USB-накопителе. Кроме того, можно создать ISO-файл для использования на виртуальных машинах или записи установочного носителя на DVD-диске:
-
Перейдите на сайт скачать Windows 11.
-
В разделе Создание установочного носителя Windows 11 выберите Скачать. Скачан инструментMediaCreationTool.exe .
-
Запустите MediaCreationTool.exe. Средство создания носителя содержит инструкции по созданию установочного носителя.
Важно: Создайте резервную копию файлов перед установкой и переустановкой Windows на компьютере. Узнайте, как это сделать.
Для создания установочного носителя требуются следующие элементы:
-
Компьютер с надежным подключением к Интернету. Время загрузки зависит от подключения к Интернету.
-
USB-устройство флэш-памяти. Пустое USB-устройство флэш-памяти не менее 8 ГБ. Рекомендуется использовать пустое USB-устройство флэш-памяти, так как все содержимое на диске удаляется. Для виртуальных машин USB-устройство флэш-памяти не требуется. Вместо этого можно создать ISO-файл для использования на виртуальных машинах. Iso-файл также можно использовать для создания установочного носителя на DVD-диске.
-
Ключ продукта. Может потребоваться 25-значный ключ продукта (не требуется для цифровых лицензий). Сведения о поиске ключа продукта см. в статье Поиск ключа продукта Windows. Многие современные устройства содержат ключ продукта, встроенный в встроенное ПО устройства. Если ключ продукта внедрен в встроенное ПО устройства, его не нужно вводить вручную. Вместо этого, если ключ продукта в встроенном ПО соответствует устанавливаемой версии и выпуску Windows, ключ продукта применяется автоматически.
После создания установочного носителя Windows можно сбросить или переустановить. Дополнительные сведения см. в статье Параметры восстановления в Windows.
Нужна дополнительная помощь?
Нужны дополнительные параметры?
Изучите преимущества подписки, просмотрите учебные курсы, узнайте, как защитить свое устройство и т. д.
Способ 1: UltraISO
В качестве первого варианта рассмотрим бесплатную версию программы UltraISO, поскольку это решение является самым популярным среди остальных. За пример мы взяли формат ISO, ведь образы дисков чаще всего распространяются именно так. В Windows 10 взаимодействие с данным инструментом осуществляется следующим образом:
Скачать UltraISO
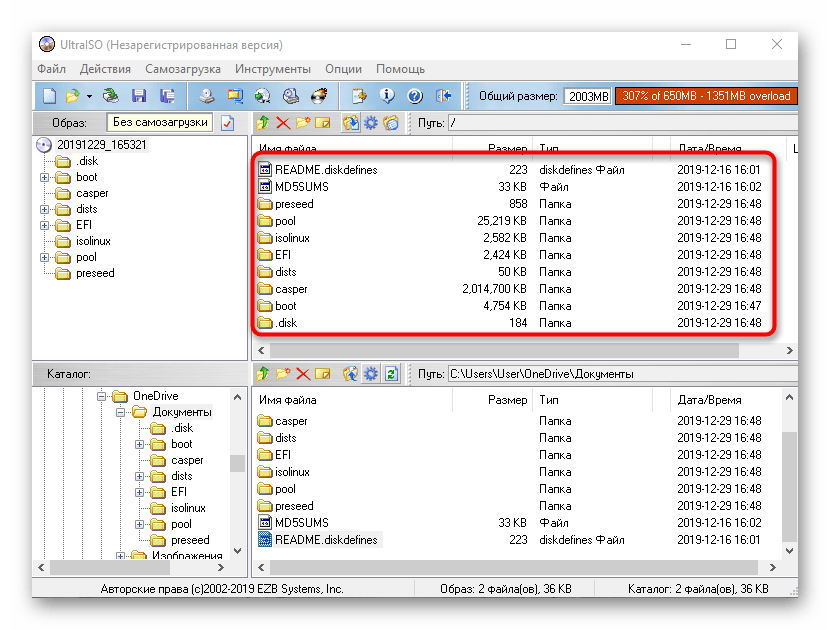
- Перейдите по указанной выше ссылке, чтобы загрузить и установить UltraISO. После запуска воспользуйтесь встроенным обозревателем для перемещения всех необходимых файлов в образ.
- Убедитесь в том, что все директории и отдельные элементы, которые должны входить в ISO-образ, успешно перенесены в верхнюю часть приложения.
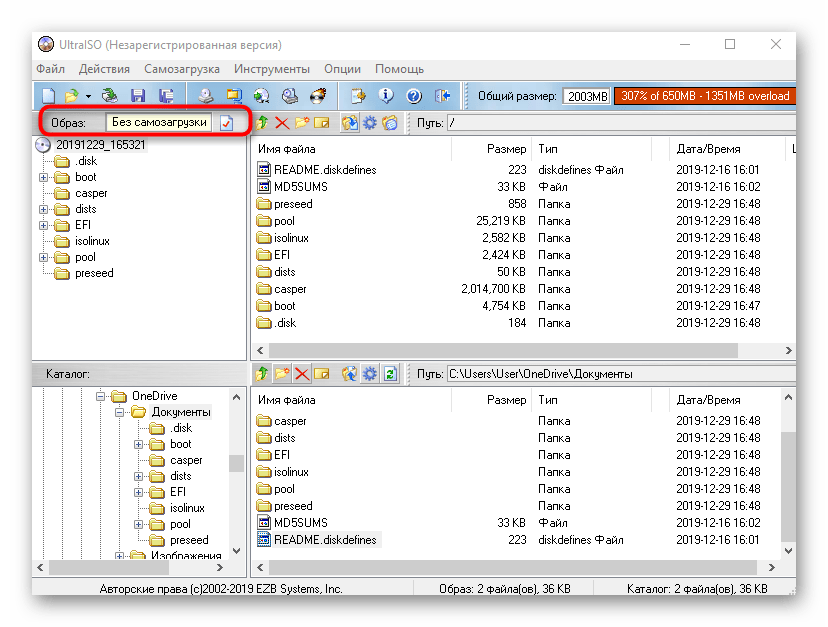
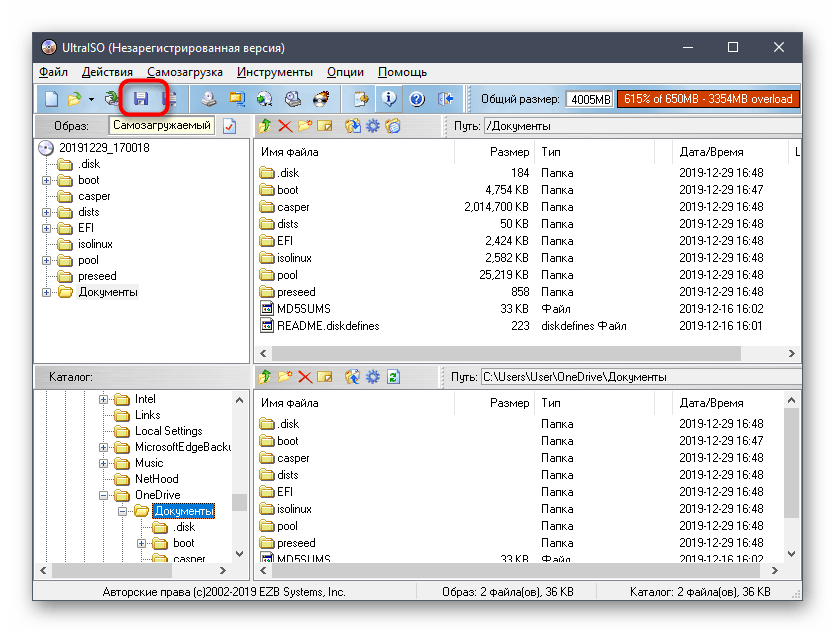
- Нажмите на кнопку сохранения или надпись «Без самозагрузки», чтобы приступить к записи готового образа.
- Подтвердите свои намерения сохранить внесенные изменения.
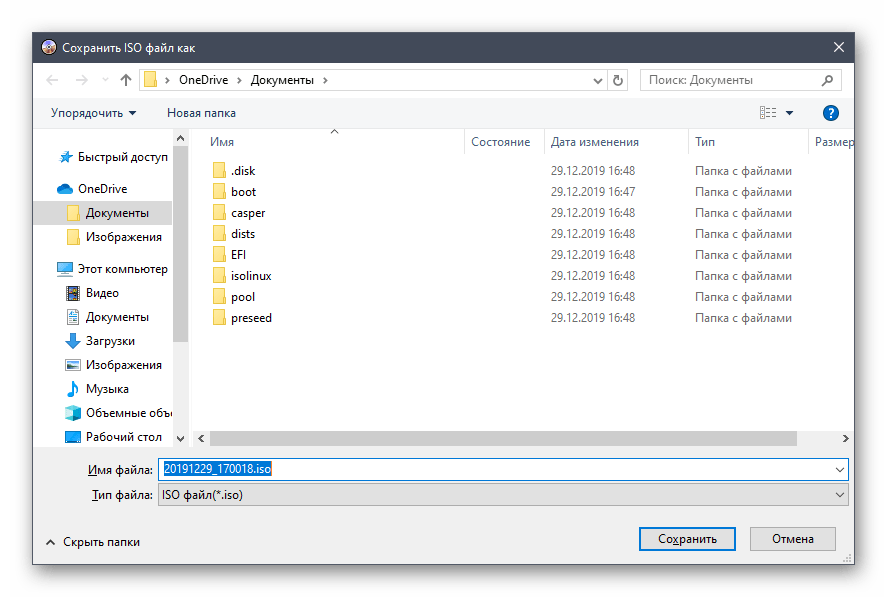
- Откроется стандартный «Проводник» операционной системы. Здесь выберите место для ISO-образа и задайте ему подходящее название, после чего нажмите на «Сохранить».
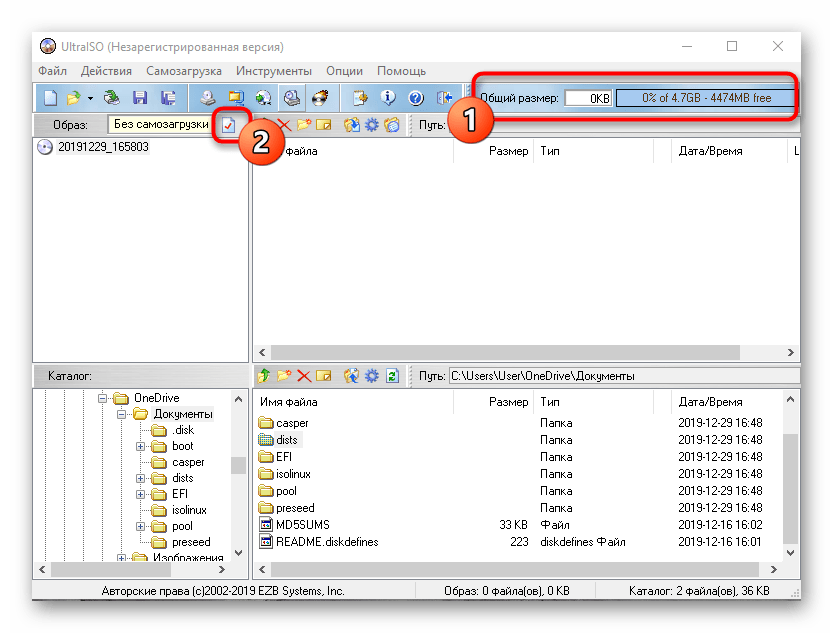
- Если вы получили уведомление о том, что размер образа превышает допустимые границы, значит, в качестве виртуального диска выбрана модель с маленьким объемом пространства, что видно вверху возле надписи «Общий размер». Изменяется эта характеристика в свойствах диска.
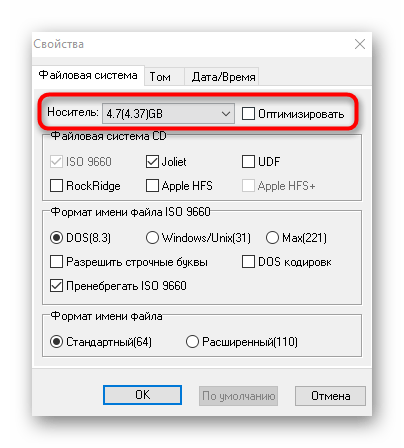
- В открывшемся окне разверните список «Носитель» и выберите подходящий пункт.
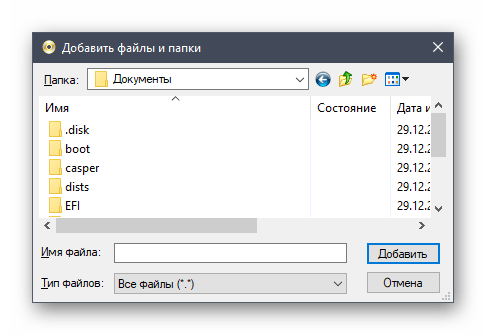
- Дополнительно отметим, что вы можете добавлять сразу все файлы из каталога, нажав на кнопку «Извлечь».
- При появлении подсказки подтвердите добавление.
- После этого можно щелкнуть на кнопку «Сохранить».
- Повторно задайте расположение образа и его название, поскольку предыдущие настройки были сбиты, если сохранение произвести не удалось.


Как видим, в управлении UltraISO нет ничего сложного. Сразу же после сохранения перейдите в указанную папку, чтобы проверить образ диска, например, подключив его к виртуальному приводу через стандартное средство ОС или ту же используемую ранее программу.
Способ 2: PowerISO
PowerISO — еще одно популярное ПО, которое имеет пробную версию, позволяющую создавать образы дисков без каких-либо ограничений. Именно ей мы и предлагаем воспользоваться, если предыдущее решение вам по каким-либо причинам не подошло.
Скачать PowerISO
- После успешной инсталляции и запуска PowerISO в главном меню на верхней панели отыщите кнопку «Добавить».
- Через нее открывается встроенный обозреватель. Отыщите там необходимые файлы и директории, выделите их, а затем кликните на «Добавить».
- Изначально образ может хранить в себе только 700 МБ информации, поскольку выбран тип CD. Измените эту характеристику из всплывающего списка, который открывается нажатием по кнопке в правом нижнем углу программы.
- После успешного добавления всех объектов в образ остается только сохранить его, щелкнув левой кнопкой мыши по соответствующей кнопке на верхней панели.
- В появившемся окне выберите место расположения образа, его формат и название.
- Дождитесь завершения операции. Она может занять определенное время, что зависит от размера итогового ISO.


В PowerISO присутствует русский язык интерфейса, а принцип управления будет максимально понятен даже начинающим пользователям, поэтому никаких трудностей с созданием образа здесь возникнуть не должно.
Способ 3: CDBurnerXP
CDBurnerXP — последний инструмент нашего сегодняшнего материала, распространяющийся бесплатно. Мы рекомендуем ознакомиться с ним тем юзерам, кто не желает загружать пробные версии перечисленных выше решений. Принцип создания образа в Windows 10 через CDBurnerXP выглядит так:
Скачать CDBurnerXP
- В приветственном окне следует выбрать первый пункт «Диск с данными».
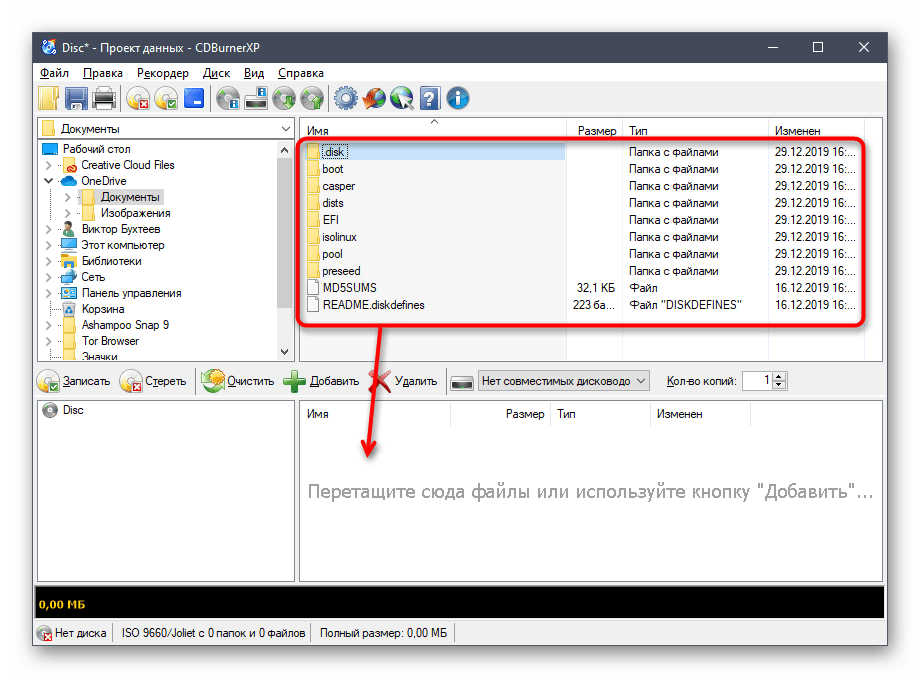
- Затем используйте встроенный обозреватель, чтобы перетащить файлы в соответствующую область.
- Это же можно сделать через стандартный «Проводник», кликнув на «Добавить».
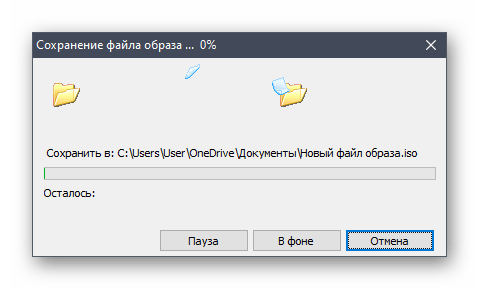
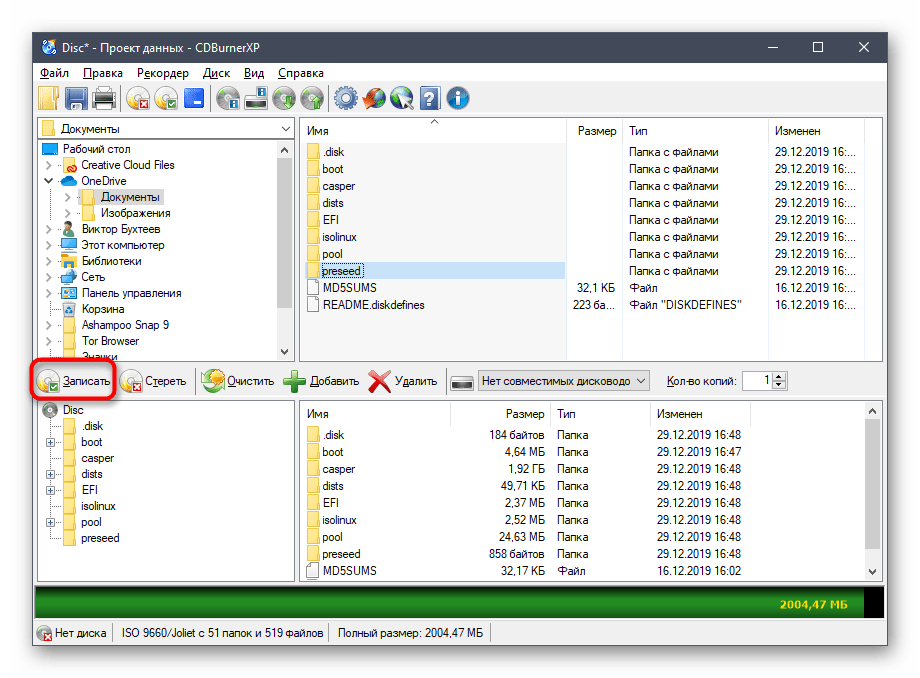
- Если хотите сохранить образ сразу на подключенный диск, нажмите на «Записать» и дождитесь окончания процедуры.
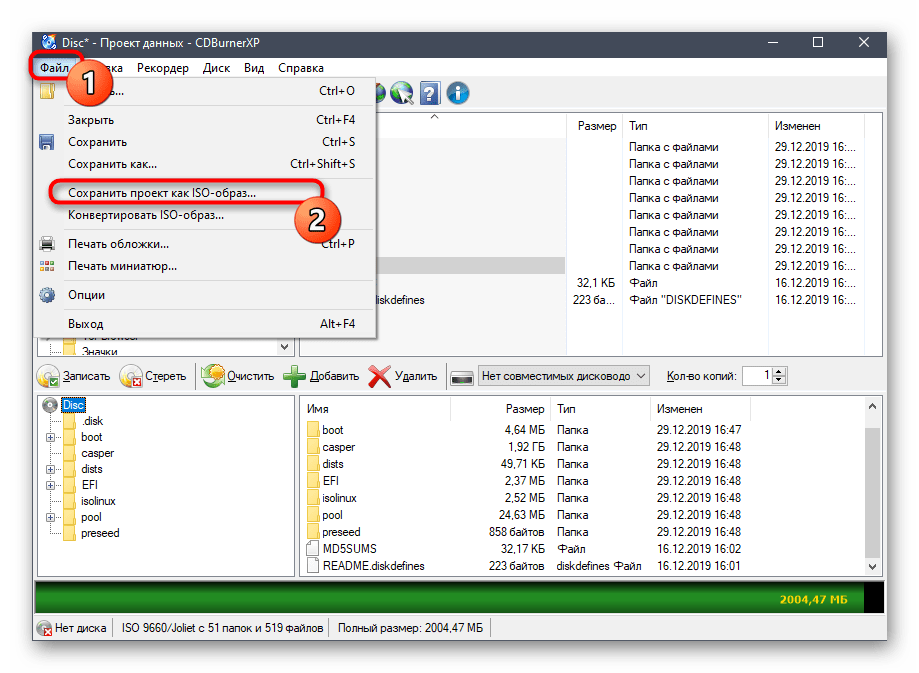
- Для сохранения образа ISO в разделе «Файл» нажмите на «Сохранить проект как ISO-образ».
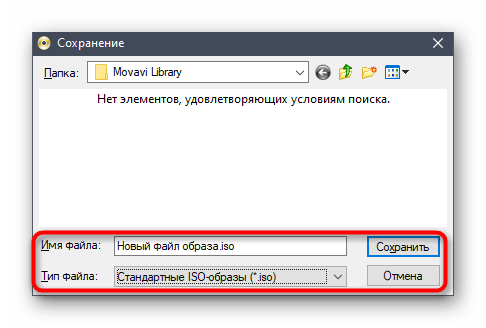
- Через «Проводник» задайте название файлу и выберите место для его расположения.


В завершение сегодняшней статьи хотим отметить, что для Windows 10 существует еще множество программ, предназначенных для создания образов дисков из имеющихся файлов. Если ни один из приведенных выше вариантов вам не подошел, обратите внимание на статью по ссылке ниже. Там вы найдете детальные обзоры на всех популярных представителей подобного софта и точно подберете оптимальное для себя решение.
Подробнее: Программы для создания образа диска
Наша группа в TelegramПолезные советы и помощь
This article published by MiniTool corporation teaches you three methods to convert Windows existing installation into portable ISO. It also introduces you to how to make use of the created ISO file and the benefits of using an ISO file.
About Create Windows 10/11 ISO Image from Existing Installation
ISO image here is a file that contains all operating system-related items. It includes everything that needed to boot up a computer or install the OS. To create a Win10/11 ISO image from the existing installation means to make a system image file based on the current Windows 10/11 OS.
Then, how to create Windows 10 ISO from existing installation? There are several methods.
Usually, you have to rely on a professional and powerful tool to create a system ISO. Such tools can pick up everything needed to build an image file from your computer and make sure the created ISO image is bootable. Below will take MiniTool ShadowMaker for example to show you how to make a bootable iso of existing windows installation.
MiniTool ShadowMaker TrialClick to Download100%Clean & Safe
Step 1. Download, install, and launch MiniTool ShadowMaker on your computer. If it pops up asking you for purchase, click Keep Trial to keep using it freely.
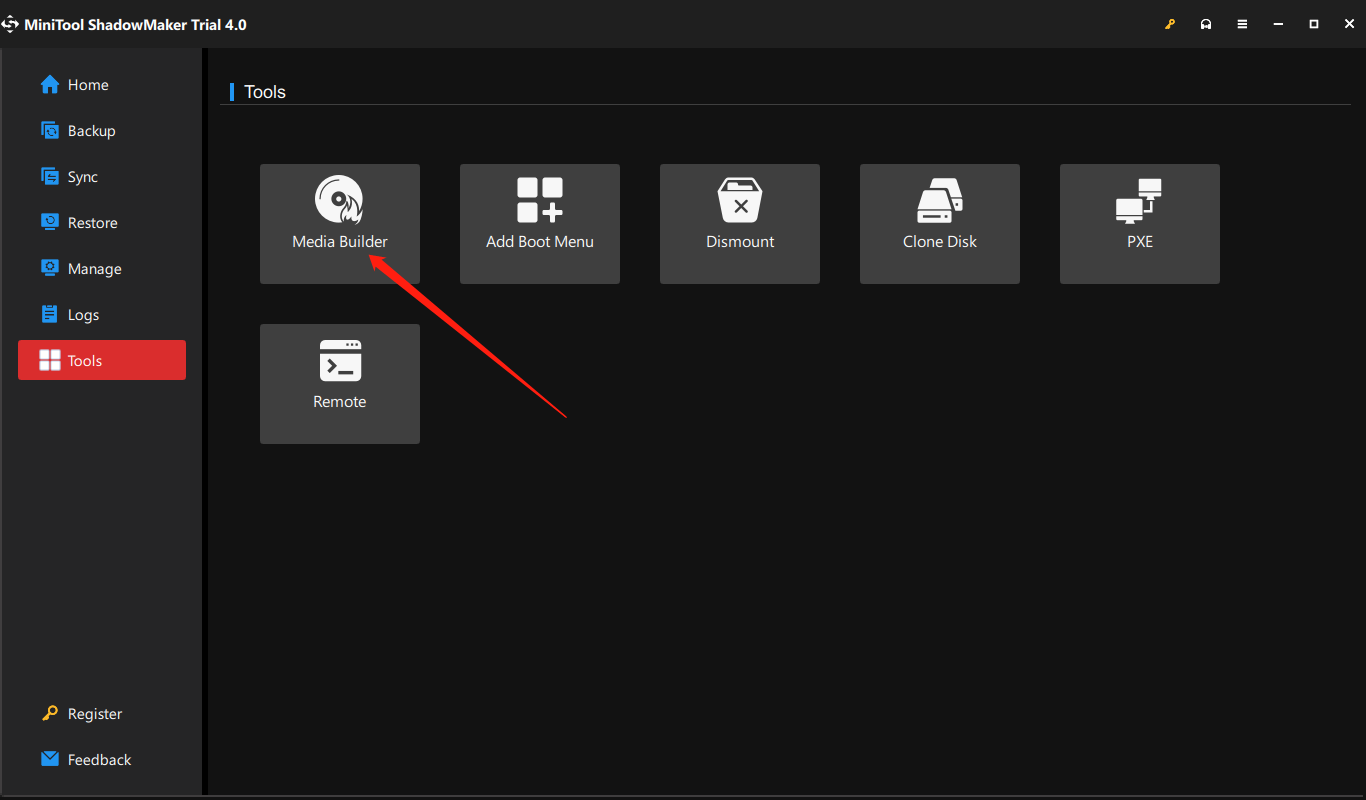
Step 2. When entering the main interface of the program, select the Tools option.
Step 3. In the Tools tab, choose Media Builder.
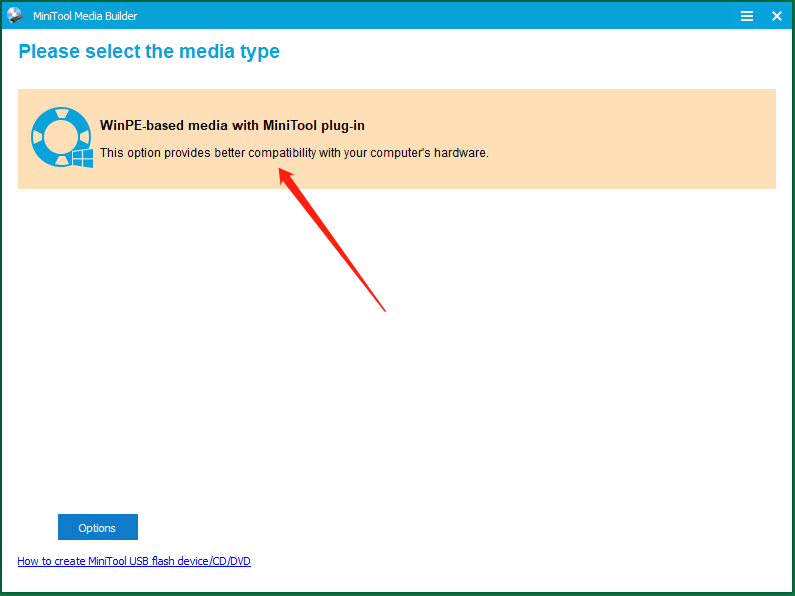
Step 4. In the pop-up new window named MiniTool Media Builder, click on WinPE-based media with MiniTool plug-in to select it.
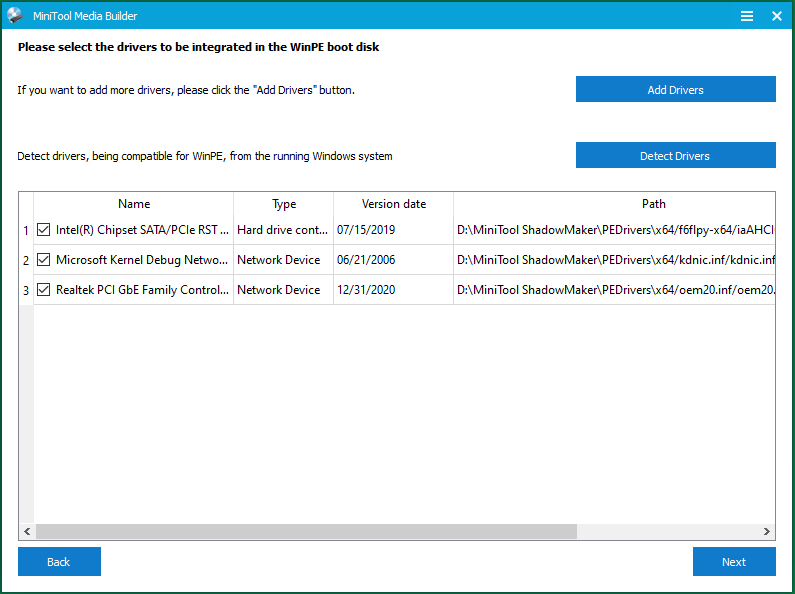
Step 5. There is an Options button in the lower-left for you to specify which drivers to be included in the Windows 10/11 ISO image.
Add Drivers – To manually add drivers on your computer into the upcoming ISO file.
Detect Drivers – To automatically detect drivers that are compatible with WinPE from the running Windows.
Step 6. Next, select ISO File and choose a local location to save the ISO. It will start to create the Windows ISO immediately after you pick up a storage address.
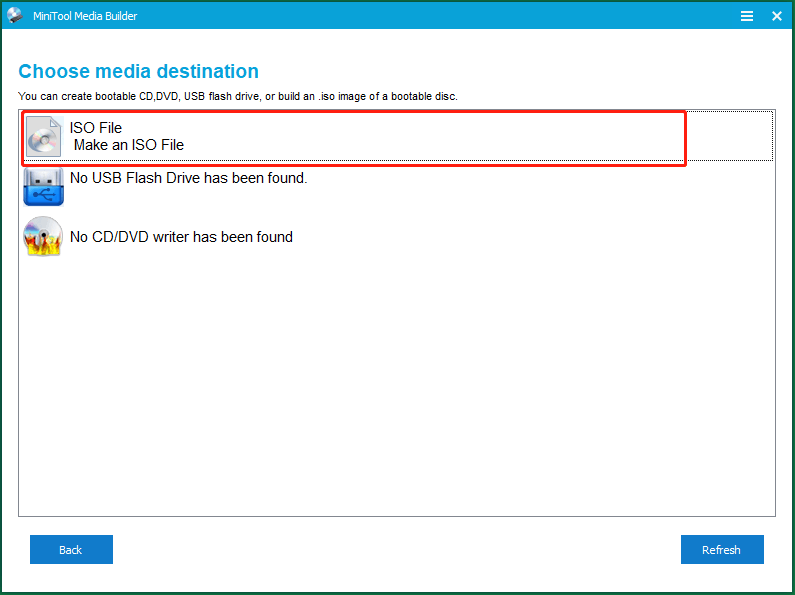
Besides creating ISO files, MiniTool ShadowMaker also allows you to create bootable USB flash drives, CDs, or DVDs.
Step 7. Wait until the process finishes. It won’t take too long (usually within 10 minutes). Or, you can do your other business during the task is processing.
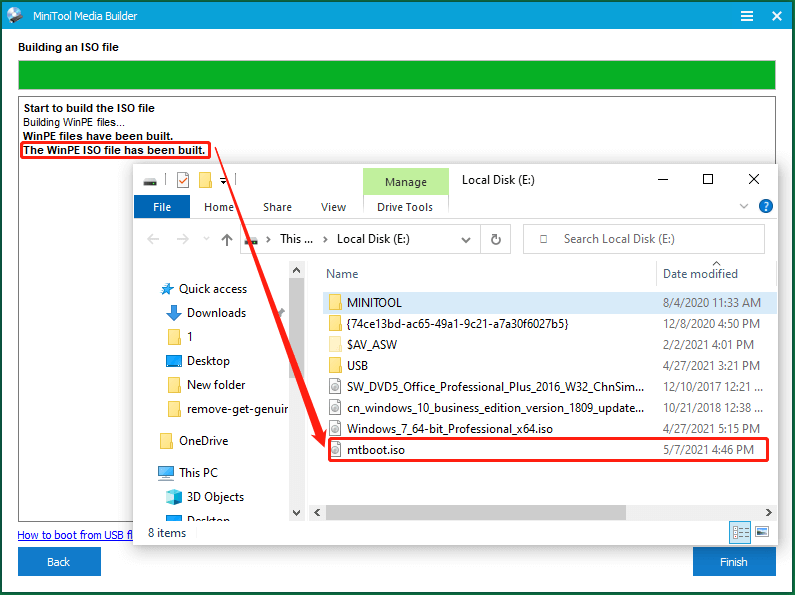
Finally, you can see the crated Windows 10/11 ISO image in the location you choose.
Besides creating a Windows ISO image from the existing installation, MiniTool ShadowMaker also enables you to back up files/folders, partitions/volumes, system, and hard disk drives. Actually, MiniTool ShadowMaker is more a data backup app than a bootable media creator.
The Windows Media Creation Tool is specially designed for building installation media or upgrading the system to Windows 10/11. As for the installation media, you can use it to install Windows 10/11 on a different PC, a new copy, a clean installation, or just reinstallation.
Before starting, you are required to have a license to install Windows 10/11 with the Windows media you are going to create. Then, you can firstly download Windows Media Creation Tool on your computer.
Step 1. Click on the downloaded MediaCreationTool20H2.exe file to run it.
Step 2. Select Accept to agree to the applicable notices and license terms to continue.
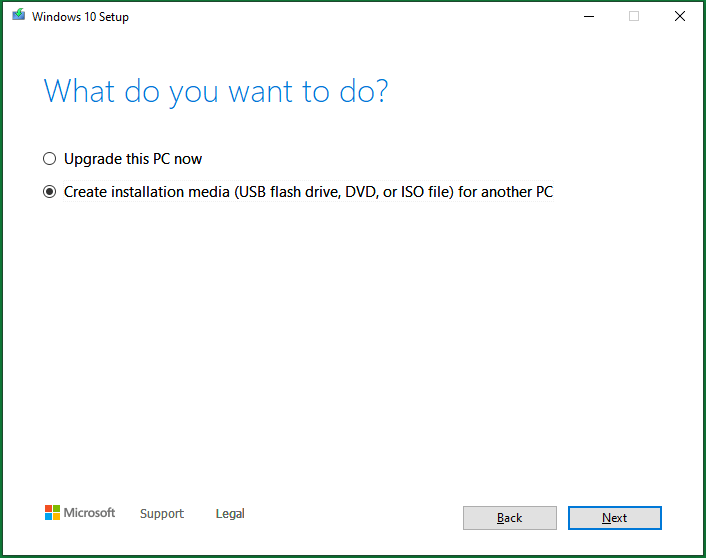
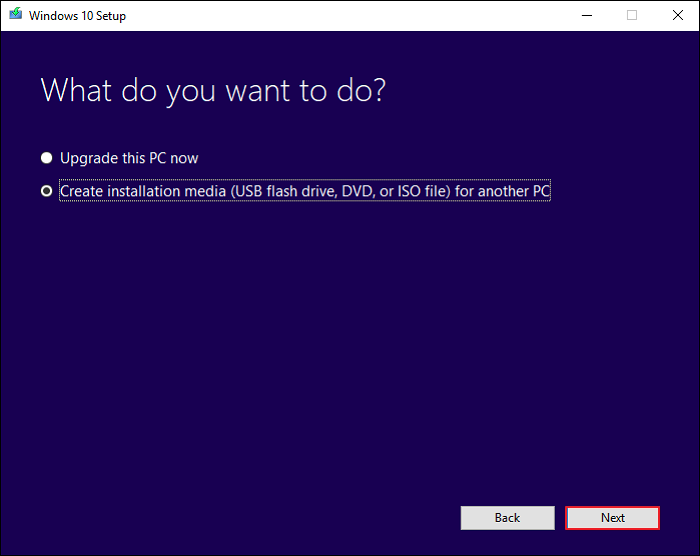
Step 3. Choose to Create installation media (USB flash drive, DVD, or ISO file) for another PC in the What do you want to do screen.
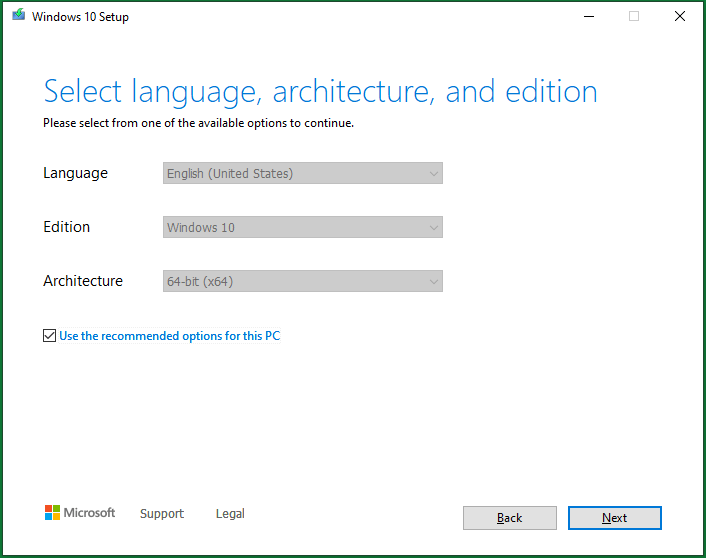
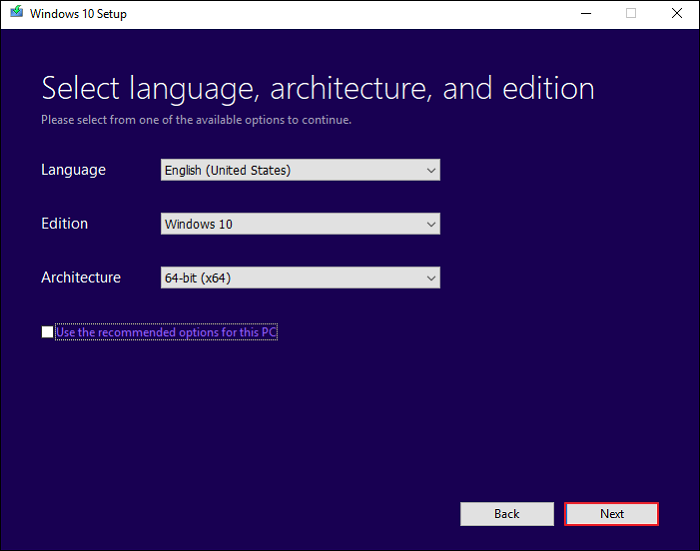
Step 4. Select language, architecture, and edition for the Windows media. It will detect your current settings and select them as default for you. If you would like to change those options, just uncheck the Use the recommended options for this PC and specify new settings for the Windows media.
Step5. Choose ISO file in the Choose which media to use screen. Then, click Next to select a location on your local machine to save the Windows 10/11 ISO image.
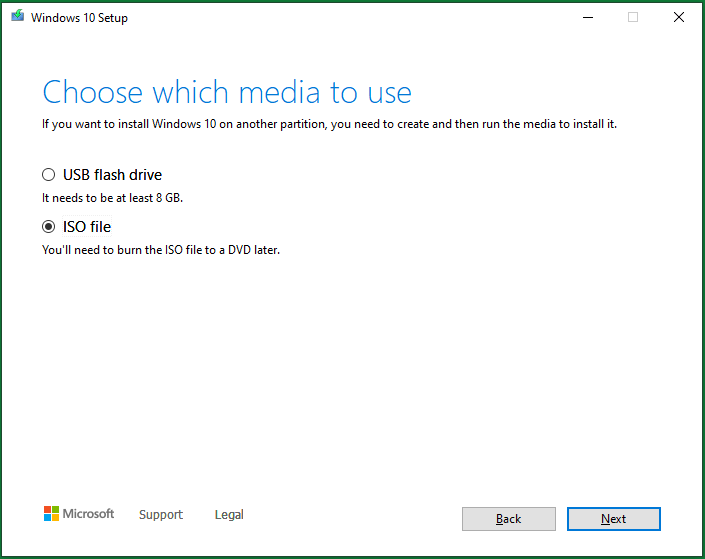
You will need to burn the ISO file to a DVD later before making use of it to install the system.
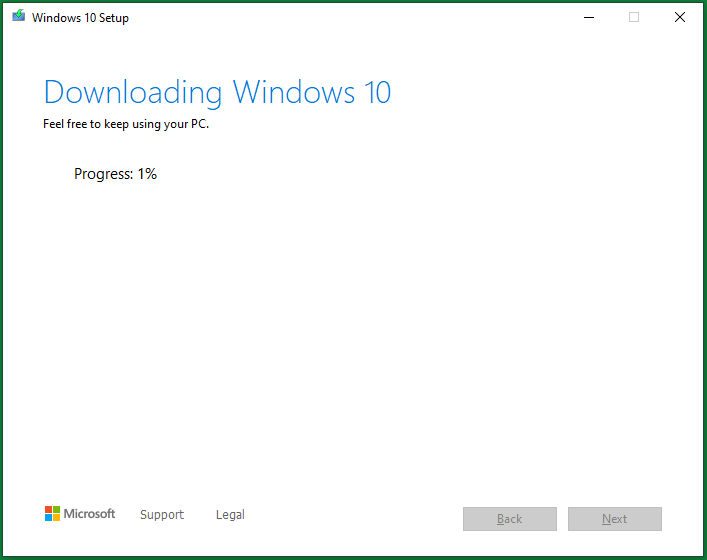
Step 6. Wait until the system image creation completes. It will take a certain period of time depending on the different versions of Windows 10/11. For me, it costs me about 35 minutes to finish the task. Yet, you can work on your other business during the task with only a slower computer performance.
When it finishes, you can continue to use this tool to burn the created ISO file to a DVD. The detailed guide will be described below.
Besides the MiniTool ShadowMaker mentioned above, the MiniTool Media Builder is also embedded in MiniTool Partition Wizard. Therefore, you can also rely on MiniTool Partition Wizard to build Windows 10/11 ISO images from an existing installation.
MiniTool Partition Wizard DemoClick to Download100%Clean & Safe
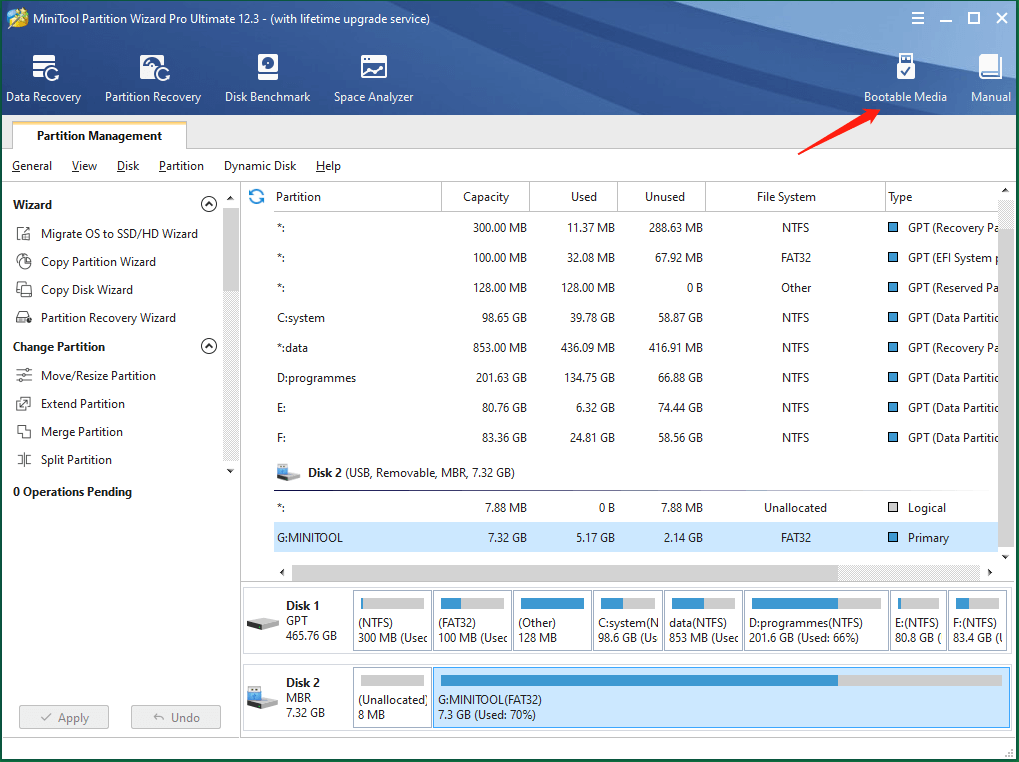
The way to make system ISO on MiniTool Partition Wizard is similar to that of with MiniTool ShadowMaker. First of all, download and install MiniTool Partition Wizard on your computer. Next, open the program and click the Bootable Media icon on the upper right. Then, the MiniTool Media Builder window will pop up and just follow the guide in Way 1.
Wonderful, I have learned all 3 ways to build Windows 10/11 ISO images from existing installation! All of them are easy to operate and workable!Click to tweet
Use the Windows 10/11 ISO Image Created from Existing Installation
In general, there are two ways you can make use of the Win10/11 ISO image file.
Case 1. Burn ISO file into CD/DVD/USB
No matter in which way you create the Win10/11 ISO, you can burn it into a CD, DVD, or USB and then rely on the DVD, CD, or USB to install Windows 10/11 or something like that.
You will need a professional ISO burner. The Windows Media Creation Tool itself is also an ISO burner. So, you can continue to use it to burn the created Windows 10/11 ISO to a DVD or USB.
For the first place, insert a USB or DVD into your machine. The target disc will be overwritten and the data on it will be deleted. So, make sure you have moved out all important files before using it to store the ISO image. A blank disc is recommended here.
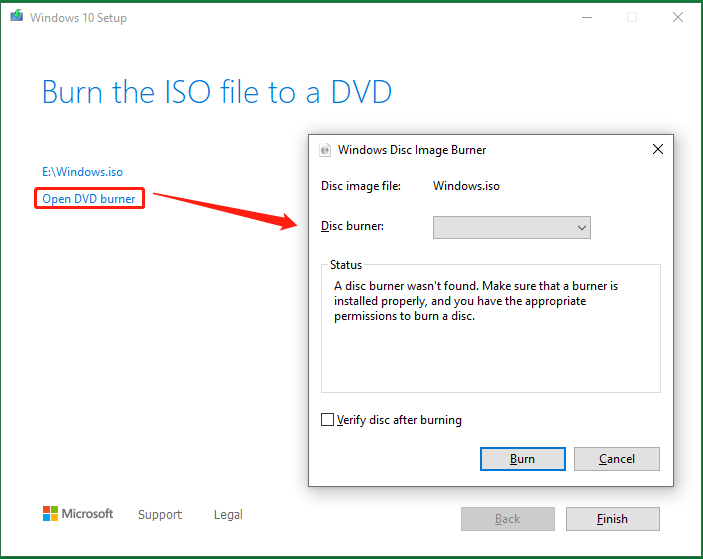
Actually, when the media creation task completes, Windows Media Creation Tool will provide you two options, one for opening the location where the created ISO is stored and one for launching the DVD burner. Just click the Open DVD burner option, select the target disc in the new Windows Disc Image Burner window, and click Burn to start the task.
Tip:
- You can check the integrity of the burned disc by ticking the Verify disc after burning.
- If you are informed that the disc image file is too large while burning a DVD from an ISO file, you will need to use Dual Layer (DL) DVD Media.
You can also access the Windows Disc Image Burner by right-clicking on the created Windows ISO file in its saved location and select Burn disc image. If you cannot see the option, you should first go to the ISO file Properties, and change the Open with app of the ISO file to Windows Explorer in the General tab. You need to click Apply to save the changes.
You can also use other applications to burn the created Windows ISO to CD/DVD such as UltraISO. Also, you are able to burn the ISO image into a USB disk with third-party tools like Rufus.
After burning the bootable disc, you need to change computer boot order settings to switch from the current boot disk to the new burned media, restart your computer to boot it from the bootable media, and enter the Windows installation. In the Install Windows screen, personalize your language, time, and keyboard preferences, select Next, and click Install Windows.
Case 2. Mount Windows 10/11 ISO Image
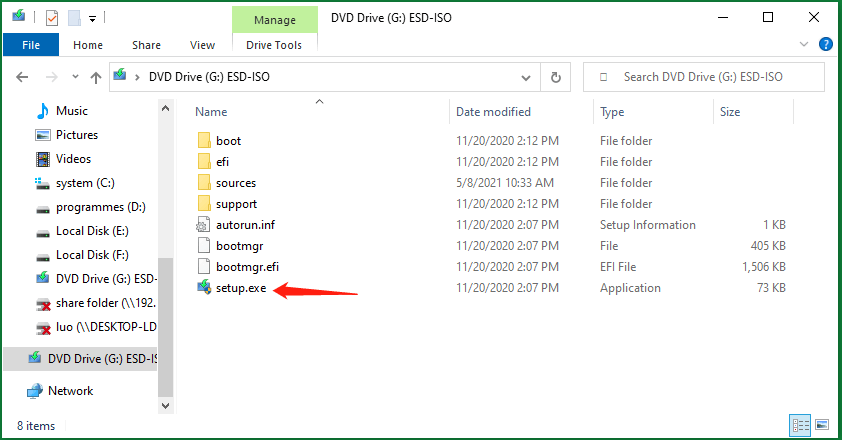
Besides, you can directly make use of the created system ISO. Easily, right-click on the ISO file and choose Mount. Within the mounted DVD drive, double-click the setup.exe to trigger the Windows 10/11 Setup. Then, follow the on-screen guidance to finish upgrading to Windows 10/11.
Actually, you can directly create a bootable CD/DVD/USB with the software above. Doing that, you do not need to further burn the ISO image into a physical disc or USB.
Why Need to Create Windows 10/11 ISO Image from Existing Installation?
Just as mentioned in the above content, the Windows ISO image file can be used to install a system or boot up dead computers. Compared with the bootable USBs, CDs, or DVDs, which has the same function as the ISO files, ISO images have the following advantages.
- No need for extra devices like CD, DVD, or USB.
- You can view its contents by mounting it as a virtual drive.
- You can run the ISO file on a virtual machine.
To install Windows 10/11, you can also make a system backup image and restore it to its original location (reinstallation) or another computer (clean installation) with MiniTool ShadowMaker. Yet, an ISO file is better than a backup image file for:
- Easier to be deployed on any computer.
- You can view its contents by mounting it as a virtual drive.
Remove, Disable, Clear, Turn off, Unpin, Stop Quick Access Windows 11
What’s quick access in Win1? How to remove, disable, clear, turn off, unpin, or stop quick access? How to add, enable, turn on, pin, or start quick access?
Read More
OK, that is all I want to share about creating ISO images from Windows build. If you have other methods that can achieve the same purpose, please share them with our readers. Or, if you have anything want to say about this topic, feel free to leave a message in the below comment zone. And, if you encounter any problem while using MiniTool products, just contact our support team at [email protected].
PS: Most of the contents of this article apply to Windows 7, Windows 8, and Windows 8.1. Surely, you can create Windows 7 ISO image from existing installation by MiniTool ShadowMaker or MiniTool Partition Wizard.
В этом гайде мы разберемся как создать собственный установочный образ с Windows 10/11 с предустановленными программами, необходимыми файлами, другими настройками среды и приложений. Превалирующий сейчас подход предполагает развертывания чистого образа Windows, после чего на компьютер устанавливаются необходимые программы: через GPO, командами загрузки и установки приложений в
AutoUnattend.xml
или в скрипте
%WINDIR%\Setup\Scripts\SetupComplete.cmd
, логон скриптами Windows, средствами автоматизации (SCCM, Intune, Ansible, и пр). Однако в некоторых случаях особенности бизнеса требуют, чтобы на компьютер сразу разворачивался готовый образ Windows со всеми необходимыми программами.
Содержание:
- Подготовка эталонного образа Windows с установленными программами
- Захват настроенного образа Windows с помощью DISM
- Замена оригинального образа Windows (Install.wim) на USB флешке
Процесс создания собственного установочного образа Windows с предустановленным софтом будет состоять из следующих этапов:
- Развертывание чистой Windows на эталонном компьютере (виртуальной машине);
- Вход в режим аудита, установка необходимых приложений, настройка окружения;
- Загрузка в среде WinPE и захват WIM образа Windows с помощью DISM;
- Замена оригинального install.wim на установочной USB флешке (ISO образе).
Если вы развертываете Windows на компьютеры в корпоративной сети, удобнее использовать MDT, который позволяет добавлять/обновлять программы в установочный процесс без модификации каждый раз установочного WIM образа.
Подготовка эталонного образа Windows с установленными программами
На первом этапе вы должны создать эталонный образ Windows со всем необходимым набором программ, файлов и настроек. Для этого нужно выполнить чистую установку Windows на виртуальную машину или компьютер
Итак, начните с получения оригинального установочного образа Windows 10/11 в виде ISO файла или сразу запишите его на загрузочную USB флешку с помощью Media Creatin Tool или Rufus.
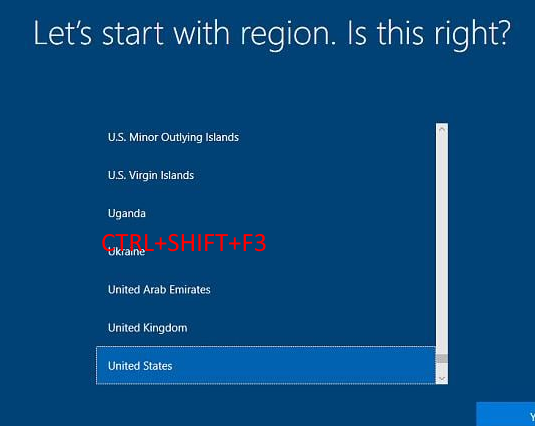
Выполните ручную установку Windows и на этапе OOBE (когда вам предлагают выбрать региональные настройки и создать учетную запись), нажмите
CTRL + SHIFT + F3
. Это переведет компьютер в режим аудита (Audit Mode), в котором будет выполнен автоматический вход под встроенной учётной записью Administrator.
После появления рабочего стола, сверните окно утилиты sysprep (не закрывая его) и можете приступить к установке программ, обновлений, настройке нужных параметров Windows.
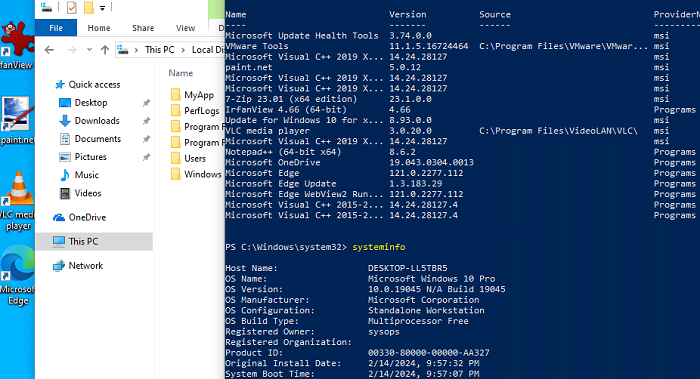
В этом примере я воспользуюсь пакетным менеджером WinGet для установки программ в Windows:
winget install --id=7zip.7zip -e ; winget install --id=Notepad++.Notepad++ -e ; winget install --id=VideoLAN.VLC -e ; winget install --id=WinDirStat.WinDirStat -e ; winget install --id=dotPDNLLC.paintdotnet -e ; winget install --id=IrfanSkiljan.IrfanView -e ; winget install --id=Microsoft.PowerToys -e
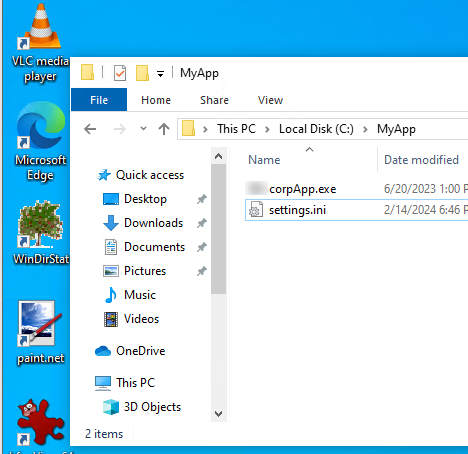
Дополнительно я вручную создал каталоги и скопировал файлы для некоторых корпоративных приложений.
Настройте ярлыки на рабочем столе, плитки в меню Start, фоновые рисунки, заставки, цветовые схемы и прочее. Настройте параметры локальной групповой политики с помощью редактора
gpedit.msc
. Эти настройки в дальнейшем будут применены ко всем пользователям на компьютерах, которые вы развернете из вашего образа.
После того, как вы завершили настройку операционной и приложений, нужно выполнить очистку Windows для уменьшения итогового размера образа.
Удалите имеющиеся теневые копии и точки восстановления:
vssadmin delete shadows /All /Quiet
Очистите неиспользуемые файлы компонентов и обновлений в папке WinSxS:
Dism.exe /Online /Cleanup-Image /StartComponentCleanup /ResetBase
Удалите загруженные файлы обновлений Windows:
del %windir%\SoftwareDistribution\Download\*.* /f /s /q
Для очистки папок Temp, Downloads и кэша в профиле пользователя можно использовать этот PowerShell скрипт.
Выполните очистку диска с помощью утилиты cleanmgr:
Cleanmgr /sagerun:1
Очистите логи Windows:
for /F "tokens=*" %1 in ('wevtutil.exe el') DO wevtutil.exe cl "%1"
Очистите корзину:
Clear-RecycleBin -Force
Чтобы применить настройки текущего пользователю к шаблонному пользователю Default, создайте файл ответов unattend.xml в каталоге C:\Windows\System32\Sysprep:
<?xml version="1.0" encoding="utf-8"?>
<unattend xmlns="urn:schemas-microsoft-com:unattend">
<settings pass="specialize">
<component name="Microsoft-Windows-Shell-Setup" processorArchitecture="amd64" publicKeyToken="31bf3856ad364e35" language="neutral" versionScope="nonSxS" xmlns:wcm="http://schemas.microsoft.com/WMIConfig/2002/State" xmlns:xsi="http://www.w3.org/2001/XMLSchema-instance">
<CopyProfile>true</CopyProfile>
</component>
</settings>
</unattend>
Осталось подготовить ваш настроенный образ Windows к развертыванию с помощью утилиты sysprep.exe. Разверните окно sysprep и выберите в ней опции:
- Enter System Out-of-Box Experience (OOBE)
- Generalize
- Shutdown
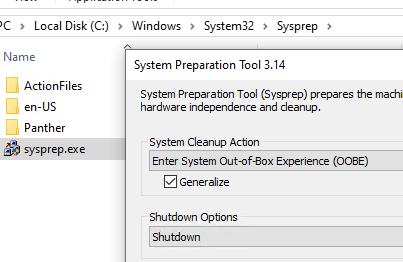
После завершения этой операции, компьютер выключиться автоматически.
Захват настроенного образа Windows с помощью DISM
На этом этапе нужно выполнить офлайн захват образа установленной Windows в WIM файл и поместить его на отдельный диск (мы подключили отдельный диск емкостью 60 Гб к компьютеру)
Загрузите компьютер с эталонной версией Windows с загрузочного диска в среде WinPE (WinRE). Можно загрузиться с установочной USB флешки с Windows и на этапе начала установки нажать
Shift+F10
, чтобы открыть командную строку.
Вам нужно идентифицировать буквы диска, которые назначены разделу с Windows и чистому разделу, куда будет скопирован WIM файл. Выполните команды:
diskpart
list disk
exit
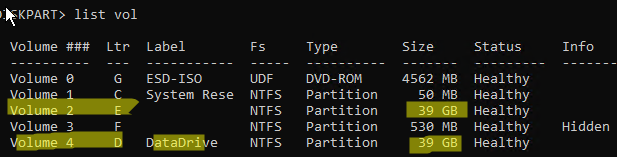
В нашем примере диску с Windows присвоена бука E:, а чистому диску – буква D:.
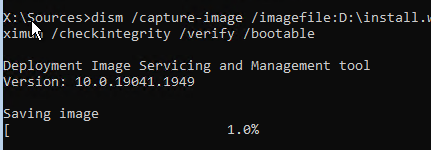
Чтобы выполнить захват офлайн образа Windows на диске E и поместить полученный WIM образ на D, выполните команду:
dism /capture-image /imagefile:D:\install.wim /capturedir:E:\ /ScratchDir:D:\ /name:"MyWinImage" /compress:maximum /checkintegrity /verify /bootable
В моем случае захват образа длился около 30 минут.
Замена оригинального образа Windows (Install.wim) на USB флешке
После того, как вы захватили ваш настроенный образ Windows, вы можете заменить файл с оригинальным установочным образов install.wim или install.esd (ESD это формат с максимальным сжатием образа WIM) на установочной USB флешке (каталог
\sources
).
В моем случае, я переименовал старый образ в install.esd_bak и скопировал на флешку новый образ install.wim.
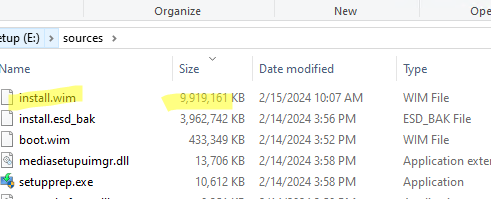
Обратите внимание, что размер WIM образа с предустановленными программами существенно увеличился (с 4 до 10 Гб).
Если у вас USB флешка с FAT32 для установки Windows на UEFI компьютерах, вы не сможете разместить файл больше 4 Гб на этой файловой системе. В этом случае большой WIM файл нужно разбить на несколько мелких SWM:
Dism /Split-Image /ImageFile:D:\sources\install.wim /SWMFile:c:\tmp\install.swm /FileSize:3500
В данном случае DISM создаст четыре файла install.swm, install2.swm, install3.swm, install4.swm, которые нужно скопировать в папку
\sources
. Установщик Windows сам соберет SWM файлы при развертывании операционной системы.
Теперь вы можете с USB флешки развернуть на любой компьютере созданный вами образ Windows. После завершения установки Windows убедитесь, что все предустановленные программы доступны:
Get-Package
Недостаток такого подхода с развёртыванием преднастроенного образа Windows в том, что для обновления любого приложения в образе вам придется пересобрать его заново.
What Is ISO Image & What Can It Do for You?
An ISO image is a file containing operating system-related items. An ISO image is also known as an ISO file. It includes everything needed to boot up a computer or install the operating system (OS). Creating a Windows ISO image from the existing OS means making a system image file based on the current Windows OS.
It is vital to back up your operating system. Therefore, when your system crashes, you can quickly get it back to the state where the backup was taken. If the backup is an ISO image, you can enjoy some benefits compared with other image backup formats:
- The ISO image is bootable, so you can use it to restore your computer when you have boot issues.
- It is easy and convenient to deploy it to other computers.
- It can be standalone from backup tools or cloud services.
- You can run the ISO image on a virtual machine.
How to Create Rescue Media via Bootable Media Creator
The primary purpose of creating an ISO image from the current operating system is to make a bootable recovery drive or deploy the system to a different computer. Therefore, you can create a system backup or a bootable media to help you achieve this purpose. At this time, professional backup software, such as EaseUS Todo Backup, comes in handy.
EaseUS Todo Backup Free is a practical tool that helps you create a system image on a USB drive and put ISO on a USB drive. It allows for automatic backup, so you can set it up to run a backup regularly. It can automatically backup files to external hard drive. This is extremely helpful if you want to keep the backups up-to-date.
EaseUS Todo Backup lets you create Windows bootable media with the Windows ISO file. Just download and try it to create a rescue media in case of a system crash or hard drive failure. Now, let us see how to use EaseUS Todo Backup to create rescue media for your Windows computer.
Step 1. Prepare a USB drive which can be written and read.
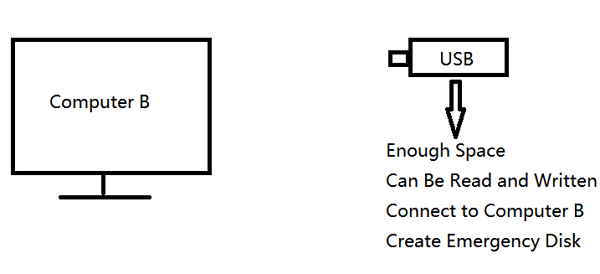
Step 2. Launch and install EaseUS Todo Backup on the Computer B.
Step 3. Find and click «Tools» and choose «Create Emergency Disk«.

Step 4. Choose the Boot disk location. You can create an ISO file, a bootable USB or CD/DVD disc.

Step 5. Then click «Create» to start.
📃More articles related to creating ISO image:
Create a Windows 10 ISO Image with Windows 10 Media Creation Tool
Microsoft recommends that Windows computer users create an ISO image of their Windows 10 using the Windows Media Creator Tool. Windows 10 computer users can download this tool for free from Microsoft’s official site. You can use the tool to create a bootable Windows 10 USB stick easily and quickly, create ISO file Windows 10, or create the Windows 10 ISO image.
The following are the detailed steps for creating a Windows 10 ISO image.
Step 1. Download the Windows 10 Media Creation Tool from Microsoft’s official website and follow the instructions to get to the following page. Then, select Create installation media (USB flash drive, DVD, or ISO file) for another PC, and click on Next.
Step 2. Select the Language, Windows Edition, and Architecture you want to use for creating the installation media. Then click on Next.
Step 3. Select what kind of media storage device. Here, I take a USB drive as an example. Select USB flash drive and then click on Next.
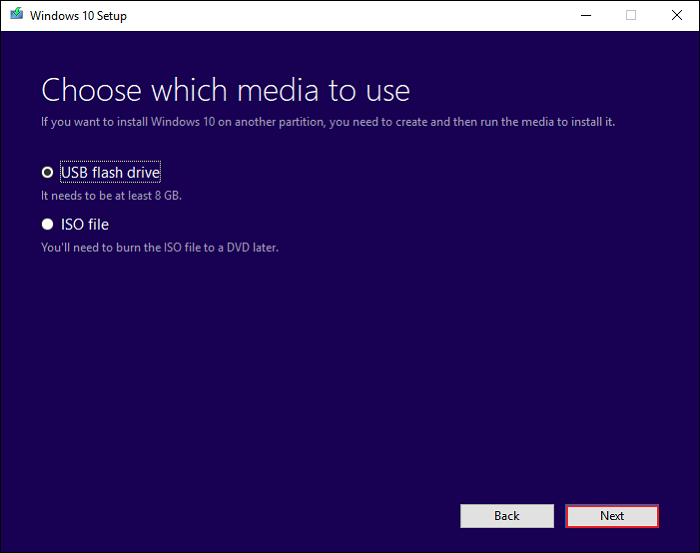
Note: The USB flash drive needs to be at least 8GB.
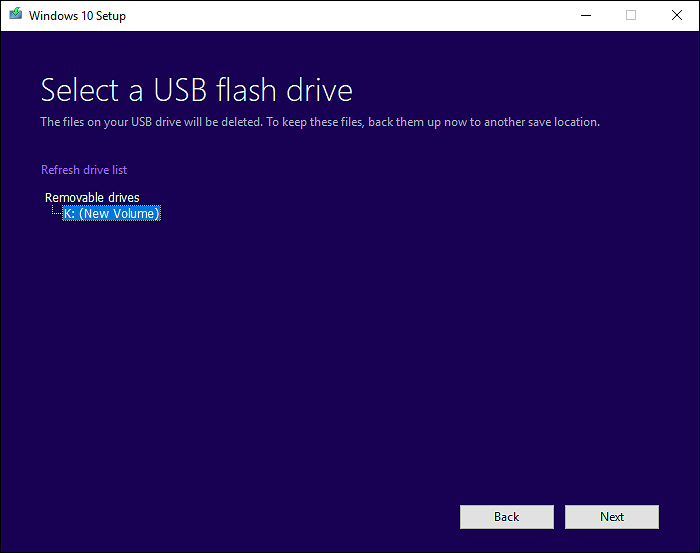
Step 4. Choose the USB drive for creating Windows 10 installation media and click on Next.
Step 5. Then Microsoft Media Creation Tool will start downloading the Windows 10 installation files on your computer.
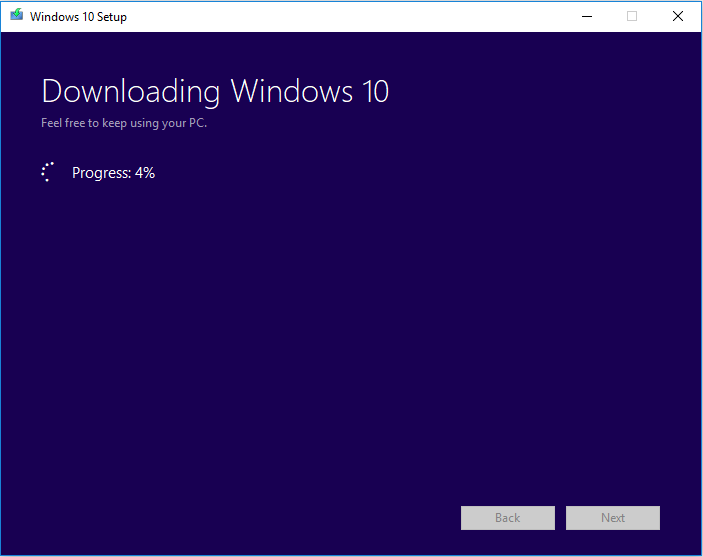
Step 6. When the download is done, it will start to create Windows 10 media.
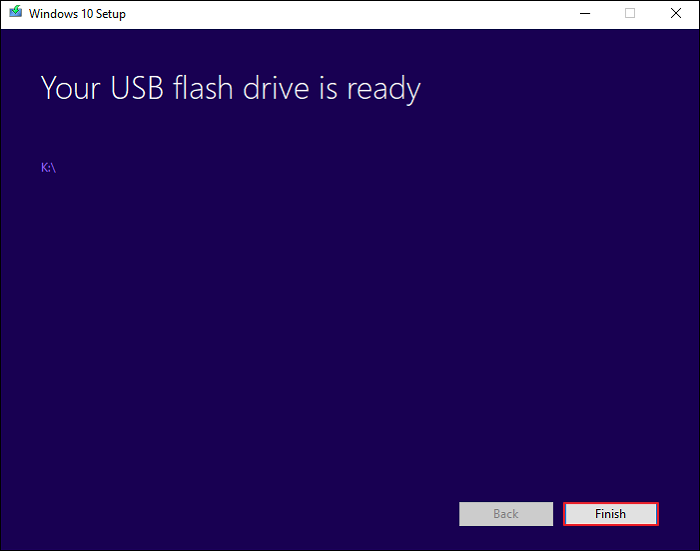
Step 7. When it is completed, click on Finish, and then you can use the USB drive to boot up the computer and install Windows 10.
Share this article on your social media to help more people create an ISO image from the operating system.
Final Thoughts
Creating an ISO image of your Windows system is beneficial for backing up before a significant system upgrade. An ISO image for Windows 10 can simplify computer deployment and installation. In short, you can use the Windows 10 Media Creation Tool to do a Windows 10 ISO Image.
We recommend you use the EaseUS Todo Backup to create a rescue media to help you boot your computer in case something goes wrong with your computer. In addition, you can also use it to do many other things. EaseUS Todo Backup is a good tool for creating rescue media for your Windows computers.
1. Can WinRAR make ISO files?
After WinRAR’s associations have been set, an ISO can be created. Select a file you would like burned as an ISO file format and select «Add», then select the «RAR» format under Archive type. Your newly created RAR can be burned as an ISO file in your DVD-burning suites such as WinDVD, Nero, or ImgBurn.
2. Is an ISO file bootable?
An ISO file combines all Windows computer installation files into a single uncompressed file. If you try to download an ISO file, you can accordingly create a bootable file from a USB or DVD drive, then copy the Windows ISO file onto your drive and run the Windows USB/DVD Download Tool.
3. What is the importance of creating ISO file?
Creating an ISO file from discs can make a digital backup of your physical discs. You can use the files by mounting them on new computers that do not have an optical drive. You can also use the files in the future to burn another copy of your disc. You can also share that ISO with other people.