
This is the second part in a 2-part series on how to install Microsoft Windows 10 IoT Core on an Internet-of-Things (IoT) device. Part 1 described how to install Windows 10 IoT Core on a Raspberry Pi 3 device. This article will focus on the steps required to install Windows 10 IoT Core on an x86/x64 device.
What is Windows 10 IoT Core?
Windows 10 IoT Core is a version of Microsoft’s Windows 10 operating system that has been optimized for smaller devices that can run on either ARM or x86/x64 devices. These devices can run with or without a display device.
When we talk about the different IoT devices, the processor type needs some explanation. ARM devices are called Advanced RISC Machines, with RISC standing for Reduced Instruction Set Computer. What this means is that the processor has been slimmed down to only include a reduced set of commands it can process. While this means that the processor can’t do certain things, it requires a low amount of power to execute what it can do, so that translates to increased battery life. The Raspberry Pi is classified as an ARM device.
Devices with the x86/x64 architecture are classified as CISC processors, which stands for Complex Instruction Set Computer. These processors do not have their instruction sets slimmed down, so they can perform more complex operations, at the cost of increased power consumption (and therefore lower battery life). Intel’s Baytrail devices running the Intel Atom processor E3800 is an example of an x64 device.
https://www.intel.com/content/www/us/en/embedded/products/bay-trail/overview.html
Prerequisites
For certain x86/x64 device you can use IoT Core Dashboard to run through the installation process. However, since the process is similar using IoT Core Dashboard (which I already covered in Part 1), I am going to go through the installation process steps using the Windows ADK IoT Core Add-Ons.
You will need an IoT device to install on – here are some options that Microsoft supports:
https://docs.microsoft.com/en-us/windows/iot-core/learn-about-hardware/socsandcustomboards
We will be using the Intel Atom E3800 (aka Baytrail) built on an industrial PC for examples in this article. Typically we would need a micro SD card for storage but since the industrial PC comes with onboard memory storage, we do not need an SD card.
For software, we will need to install the following on the PC we build the image on:
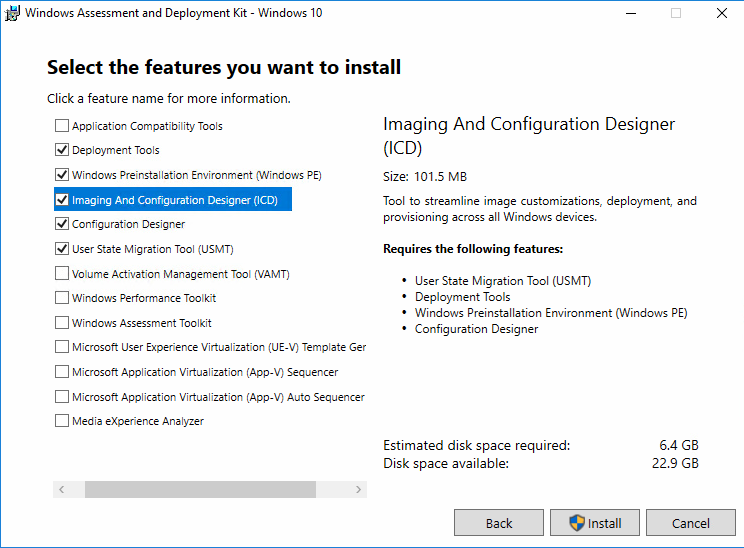
- Windows Assessment and Deployment Kit (Windows ADK)
- Make sure you install the following:
- Windows Driver Kit (WDK) 10
- Windows 10 IoT Core Packages
- Download the OS packages for custom and commercial FFUs
- Install the .msi for the architecture you are using (ARM/x86/x64)
- IoT Core ADK Add-Ons
- Github repository – clone or download ZIP file
- This article assumes you installed this to C:\IoT-ADK-AddonKit
- A Board Support Package (BSP)
- Baytrail BSP for Windows 10 IoT Core is located here
Installation Steps
Once you have the prerequisites installed, you are now ready to begin the installation process. We will be building a basic image, which involves combining the Windows IoT Core packages along with a board support package for the target hardware (Baytrail device) into a flashable file (FFU file).
First off, you need to set your OEM name, which will help you distinguish your created packages from packages other manufacturers have created. Edit the setOEM.cmd file, located at C:\IoT-ADK-AddonKit and set the OEM_NAME variable accordingly. Please note you can only use alphanumeric characters.
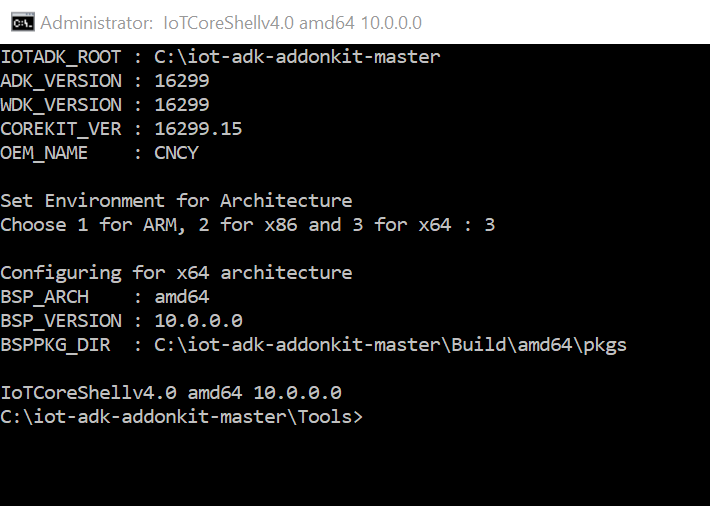
You should now open the IoTCoreShell.cmd file, which is a specialized command-line window that you will be doing a lot of the work for building the image. This file is located in the directory where you installed the IoT Core ADK Add-Ons (C:\IoT-ADK_AddonKit). Open an administrator-elevated privilege command window and navigate to the C:\ IoT-ADK_AddonKit directory. Type in IoTCoreShell.cmd to open the IoT Core Shell. This application will prompt you to select the architecture you are working with (1 for ARM, 2 for x86, 3 for x64). We are creating an x64 image so select x64.
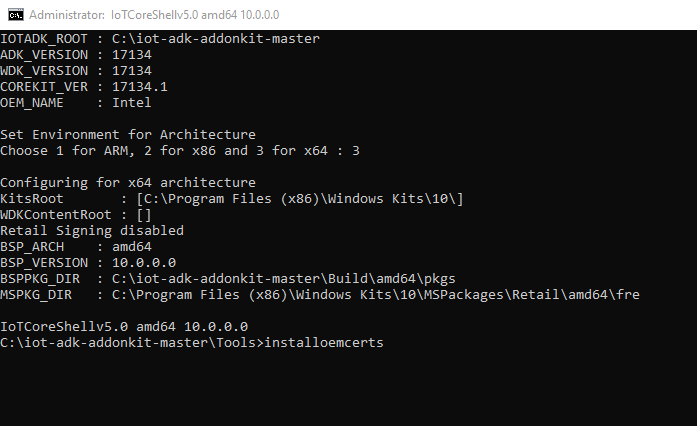
At this point, you need to install certificates which will be used to sign the package binaries. Since this article is focused on a test image, you can run the installoemcerts.cmd command to install test certificates in the root certificate store of the PC you are building the image on. This only needs to be done the first time you are building an image.
The next step is to extract the board support package (BSP) files for the device you are building an image for, and run the buildpkg.cmd command to build the package files used in creating the image. You can download and extract this BSP zipfile and copy to C:\IoT-ADK-AddonKit\Source-x64\BSP directory to begin using for building an image.

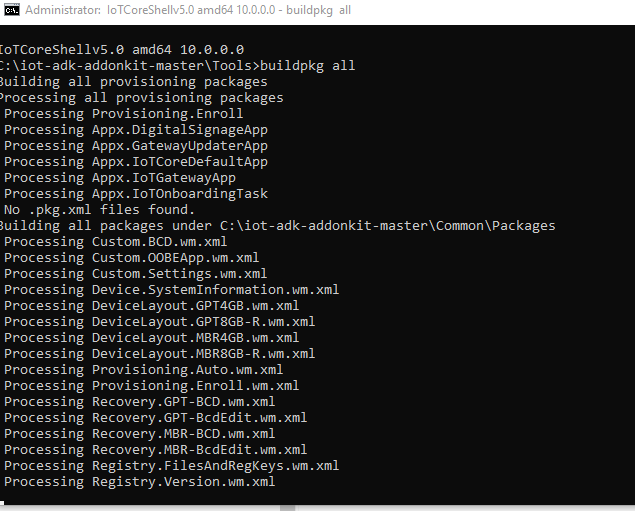
You can now begin to create the packages and build the FFU image for the Baytrail x64 device. Go back to the IoTCoreShell.cmd command window and enter buildpkg all which will build the .cab files for all the BSP directories the program sees under C:\IoT-ADK-AddonKit\Source-x64\BSP. Please note that if you had selected x86 when you ran the IoTCoreShell.cmd, running this command to build all the packages would look in the C:\IoT-ADK-AddonKit\Source-x86\BSP to build any BSP files located there.
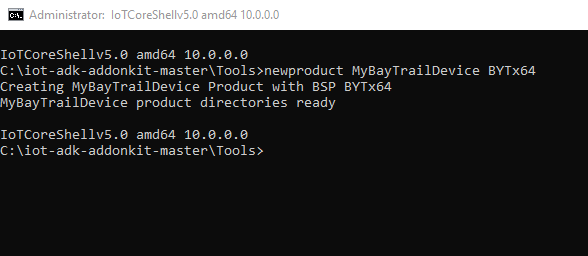
Once the program finishes building all the BSP packages, you can now create a new project by entering the following, where Product_Name and BSP_Name are the name of the product you would like and the BSP name, respectively.
newproduct <Product_Name> <BSP_Name>
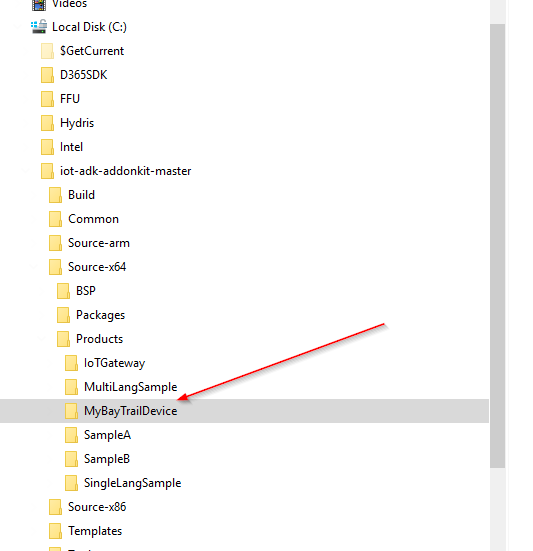
So, for example, entering newproduct MyBayTrailDevice BYTx64 will create a project and its files under C:\IoT-ADK-AddonKit\Build\amd64\MyBayTrailDevice for the BYTx64 board support package files.
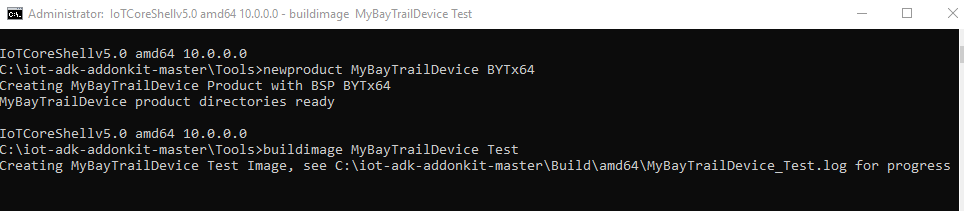
You are now ready to build the actual FFU flashable image file. This can be done by entering buildimage <Product_Name> Test, replacing Product_Name with your product name (MyBayTrailDevice in our example). The second parameter specifies whether you are building a Test or Retail image. This process takes about 20-30 minutes to complete and once finished you will have a file named flash.ffu created under the C:\IoT-ADK-AddonKit\Build\amd64\ MyBayTrailDevice\Test subdirectory.
If you encounter any errors, the buildimage process will error out and specify a log file that has detailed information on the error.
Now that you have a flashable FFU image file, you will need to flash it onto the IoT device you are working with. For our example, this is the Baytrail device and since it has onboard storage space we need to use a bootable USB thumbdrive with the FFU file on it. In order to create this, we will use Windows PE to create a bootable disk and then copy the flash.ffu file onto it. Here are instructions to create a bootable WinPE thumbdrive:
WinPE will boot up and open a command window for you at the x: drive. Change to the d: drive and enter dir to see your flash.ffu file. WinPE comes with DISM, the Deployment Image Servicing and Management tool and we will be using this to flash the FFU file onto the IoT device. Enter the following in the command line to flash the FFU file:
dism.exe /apply-image /ImageFile:Flash.ffu /ApplyDrive:\\.\PhysicalDrive0 /skipplatformcheck
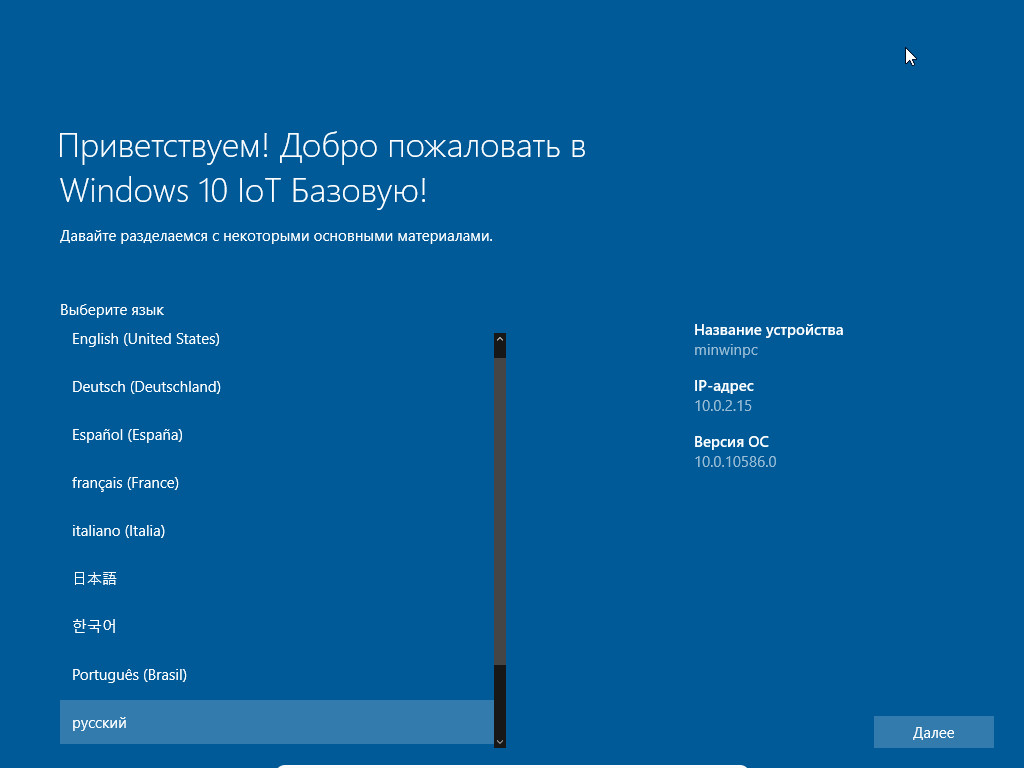
Once DISM has successfully completed the flashing process, you can power down the IoT device and remove the USB thumbdrive. Turn on the IoT device and have it boot normally off its storage. After a few minutes you should see the Windows 10 IoT Core startup screen and it should prompt you to select a language and whether you want Cortana activated. Once you make these selections the default application will appear.
Congratulations! You have successfully installed Windows 10 IoT Core on a x64 IoT device! Future steps can now be to modify the image to have it include your custom application or you can add drivers to the image if you need other functionality (such as Bluetooth or serial communications).
Enjoy!
Item Preview

Windows-10-IoT-Core-v1607-Device-info.jpg
1,908
Views
10
Favorites
DOWNLOAD OPTIONS
Uploaded by
TedezaRize
on
SIMILAR ITEMS (based on metadata)
Copilot is your AI companion
Always by your side, ready to support you whenever and wherever you need it.

These are the Windows 10 IoT Core Packages that enable the user to build a Windows 10 IoT Core runtime image.
Important! Selecting a language below will dynamically change the complete page content to that language.
-
File Name:
14393.67.160804-2231.rs1_release_amd64fre_IOTCORE_PACKAGES.iso
These are the Windows 10 IoT Core Packages that enable the user to build a Windows 10 IoT Core runtime image. Windows 10 IoT Core is an edition of Windows 10 designed for building smart things that’s optimized for cost, resources and is available at no cost for all device makers. It’s built to power intelligent edge devices with either no displays like IoT gateways or with displays such as micro-kiosks.
Learn more about Windows 10 IoT Core here.
-
Supported Operating Systems
Windows 10
Operating system
• Windows 10 (Build 10140 or higher)Learn about other system requirements here.
-
- Click the Download button on this page to start the download.
- Click Save to save this program to disk.
This is the second part in a 2-part series on how to install Microsoft Windows 10 IoT Core on an Internet-of-Things (IoT) device. Part 1 described how to install Windows 10 IoT Core on a Raspberry Pi 3 device. This article will focus on the steps required to install Windows 10 IoT Core on an x86/x64 device.
What is Windows 10 IoT Core?
Windows 10 IoT Core is a version of Microsoft’s Windows 10 operating system that has been optimized for smaller devices that can run on either ARM or x86/x64 devices. These devices can run with or without a display device.
When we talk about the different IoT devices, the processor type needs some explanation. ARM devices are called Advanced RISC Machines, with RISC standing for Reduced Instruction Set Computer. What this means is that the processor has been slimmed down to only include a reduced set of commands it can process. While this means that the processor can’t do certain things, it requires a low amount of power to execute what it can do, so that translates to increased battery life. The Raspberry Pi is classified as an ARM device.
Devices with the x86/x64 architecture are classified as CISC processors, which stands for Complex Instruction Set Computer. These processors do not have their instruction sets slimmed down, so they can perform more complex operations, at the cost of increased power consumption (and therefore lower battery life). Intel’s Baytrail devices running the Intel Atom processor E3800 is an example of an x64 device.
https://www.intel.com/content/www/us/en/embedded/products/bay-trail/overview.html
Prerequisites
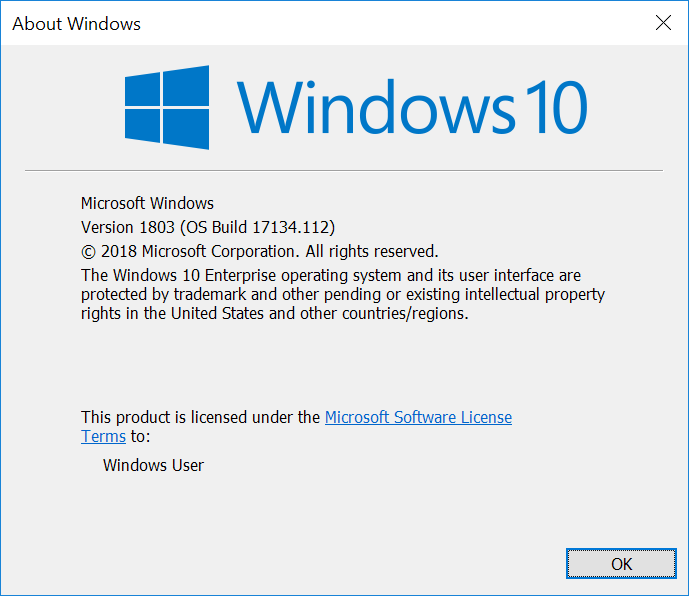
Before you can install on an x86/x64 device, you need to make sure you have a PC that is running Windows 10 1507 (version 10.0.10240) or higher. You can find out what version you are running by clicking on the search box (next to the Start button) and typing ‘winver’. This will display a dialog as shown here:

For certain x86/x64 device you can use IoT Core Dashboard to run through the installation process. However, since the process is similar using IoT Core Dashboard (which I already covered in Part 1), I am going to go through the installation process steps using the Windows ADK IoT Core Add-Ons.
You will need an IoT device to install on – here are some options that Microsoft supports:
https://docs.microsoft.com/en-us/windows/iot-core/learn-about-hardware/socsandcustomboards
We will be using the Intel Atom E3800 (aka Baytrail) built on an industrial PC for examples in this article. Typically we would need a micro SD card for storage but since the industrial PC comes with onboard memory storage, we do not need an SD card.
For software, we will need to install the following on the PC we build the image on:
- Windows Assessment and Deployment Kit (Windows ADK)
- Make sure you install the following:
-

- Windows Driver Kit (WDK) 10
- Windows 10 IoT Core Packages
- Download the OS packages for custom and commercial FFUs
- Install the .msi for the architecture you are using (ARM/x86/x64)
- IoT Core ADK Add-Ons
- Github repository – clone or download ZIP file
- This article assumes you installed this to C:\IoT-ADK-AddonKit
- A Board Support Package (BSP)
- Baytrail BSP for Windows 10 IoT Core is located here

Installation Steps
Once you have the prerequisites installed, you are now ready to begin the installation process. We will be building a basic image, which involves combining the Windows IoT Core packages along with a board support package for the target hardware (Baytrail device) into a flashable file (FFU file).
First off, you need to set your OEM name, which will help you distinguish your created packages from packages other manufacturers have created. Edit the setOEM.cmd file, located at C:\IoT-ADK-AddonKit and set the OEM_NAME variable accordingly. Please note you can only use alphanumeric characters.
You should now open the IoTCoreShell.cmd file, which is a specialized command-line window that you will be doing a lot of the work for building the image. This file is located in the directory where you installed the IoT Core ADK Add-Ons (C:\IoT-ADK_AddonKit). Open an administrator-elevated privilege command window and navigate to the C:\ IoT-ADK_AddonKit directory. Type in IoTCoreShell.cmd to open the IoT Core Shell. This application will prompt you to select the architecture you are working with (1 for ARM, 2 for x86, 3 for x64). We are creating an x64 image so select x64.

At this point, you need to install certificates which will be used to sign the package binaries. Since this article is focused on a test image, you can run the installoemcerts.cmd command to install test certificates in the root certificate store of the PC you are building the image on. This only needs to be done the first time you are building an image.

The next step is to extract the board support package (BSP) files for the device you are building an image for, and run the buildpkg.cmd command to build the package files used in creating the image. You can download and extract this BSP zipfile and copy to C:\IoT-ADK-AddonKit\Source-x64\BSP directory to begin using for building an image.

You can now begin to create the packages and build the FFU image for the Baytrail x64 device. Go back to the IoTCoreShell.cmd command window and enter buildpkg all which will build the .cab files for all the BSP directories the program sees under C:\IoT-ADK-AddonKit\Source-x64\BSP. Please note that if you had selected x86 when you ran the IoTCoreShell.cmd, running this command to build all the packages would look in the C:\IoT-ADK-AddonKit\Source-x86\BSP to build any BSP files located there.

Once the program finishes building all the BSP packages, you can now create a new project by entering the following, where Product_Name and BSP_Name are the name of the product you would like and the BSP name, respectively.
newproduct <Product_Name> <BSP_Name>
So, for example, entering newproduct MyBayTrailDevice BYTx64 will create a project and its files under C:\IoT-ADK-AddonKit\Build\amd64\MyBayTrailDevice for the BYTx64 board support package files.


You are now ready to build the actual FFU flashable image file. This can be done by entering buildimage <Product_Name> Test, replacing Product_Name with your product name (MyBayTrailDevice in our example). The second parameter specifies whether you are building a Test or Retail image. This process takes about 20-30 minutes to complete and once finished you will have a file named flash.ffu created under the C:\IoT-ADK-AddonKit\Build\amd64\ MyBayTrailDevice\Test subdirectory.

If you encounter any errors, the buildimage process will error out and specify a log file that has detailed information on the error.
Now that you have a flashable FFU image file, you will need to flash it onto the IoT device you are working with. For our example, this is the Baytrail device and since it has onboard storage space we need to use a bootable USB thumbdrive with the FFU file on it. In order to create this, we will use Windows PE to create a bootable disk and then copy the flash.ffu file onto it. Here are instructions to create a bootable WinPE thumbdrive:
https://docs.microsoft.com/en-us/windows-hardware/manufacture/desktop/winpe-create-usb-bootable-drive
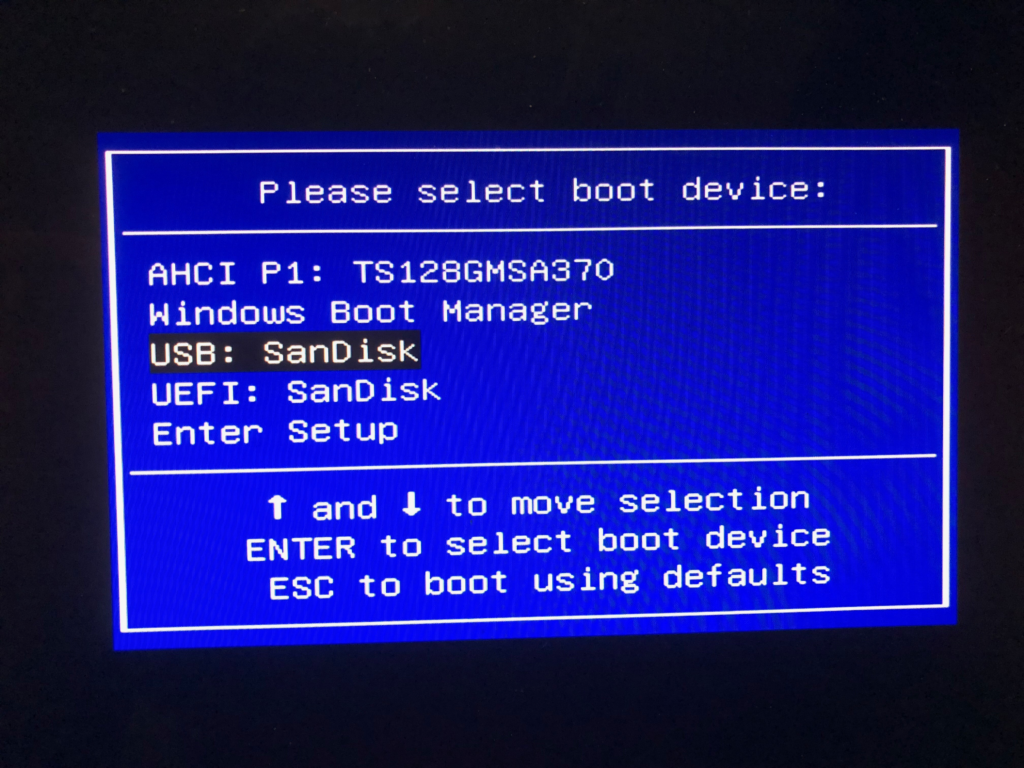
Copy the flash.ffu file to the root of this bootable drive once you’ve created it. You are now ready to insert this USB thumbdrive to the IoT device and power it up. Make sure you specify in the IoT device’s BIOS to boot first from a USB drive.

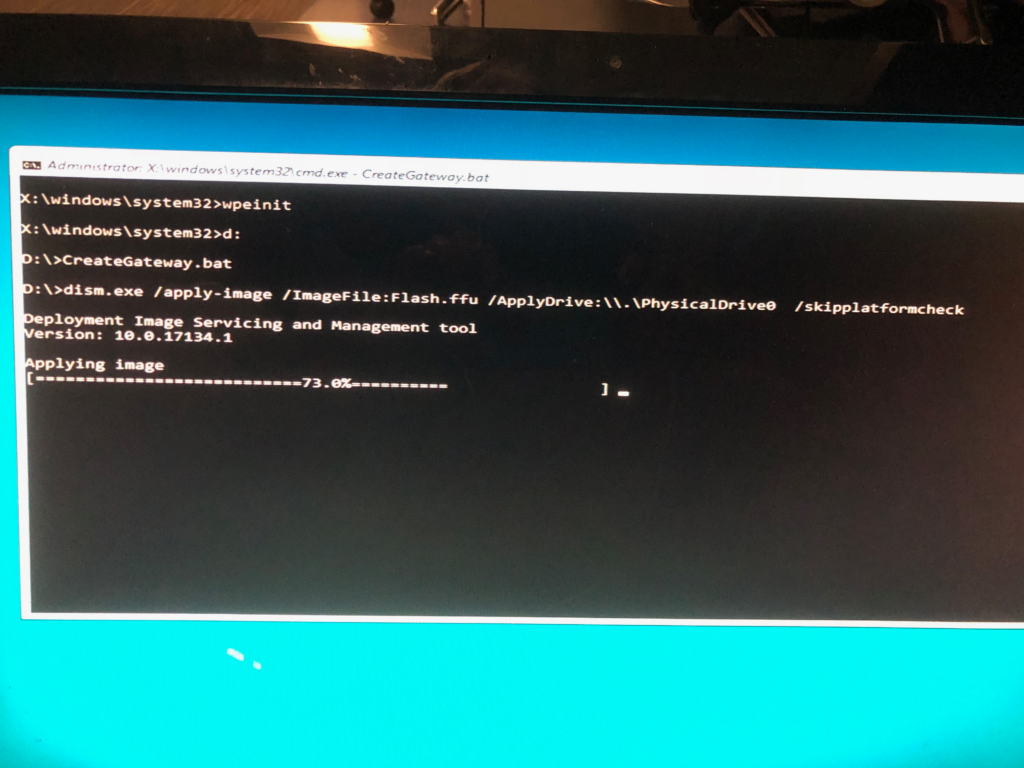
WinPE will boot up and open a command window for you at the x: drive. Change to the d: drive and enter dir to see your flash.ffu file. WinPE comes with DISM, the Deployment Image Servicing and Management tool and we will be using this to flash the FFU file onto the IoT device. Enter the following in the command line to flash the FFU file:
dism.exe /apply-image /ImageFile:Flash.ffu /ApplyDrive:\\.\PhysicalDrive0 /skipplatformcheck

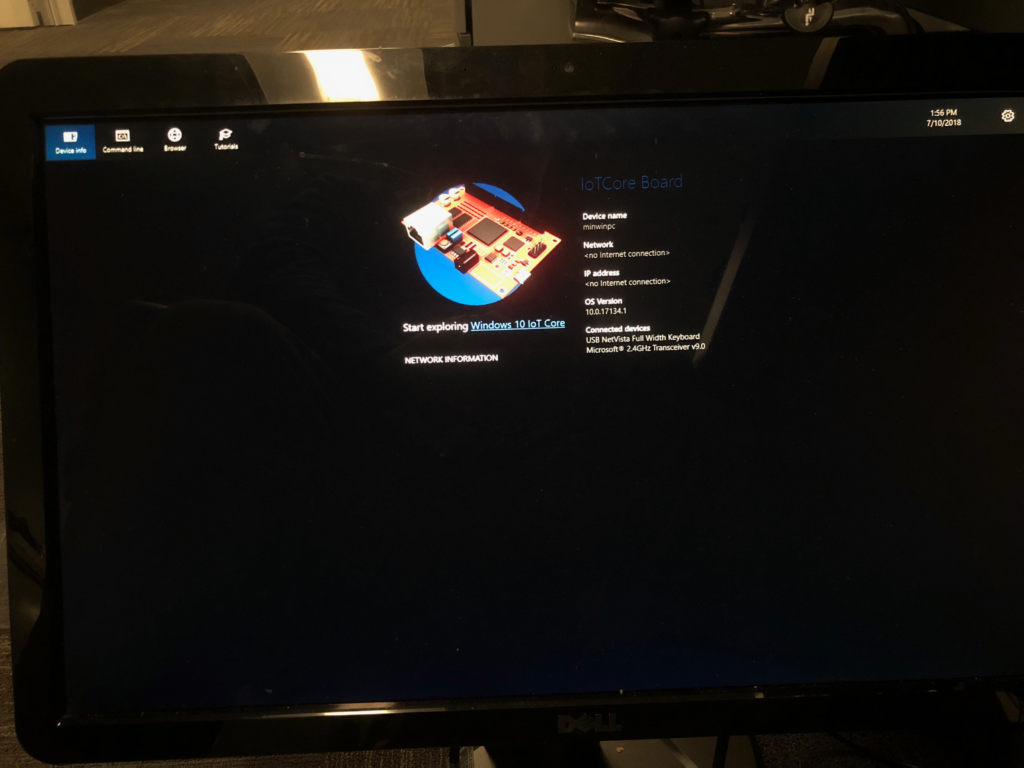
Once DISM has successfully completed the flashing process, you can power down the IoT device and remove the USB thumbdrive. Turn on the IoT device and have it boot normally off its storage. After a few minutes you should see the Windows 10 IoT Core startup screen and it should prompt you to select a language and whether you want Cortana activated. Once you make these selections the default application will appear.

Congratulations! You have successfully installed Windows 10 IoT Core on a x64 IoT device! Future steps can now be to modify the image to have it include your custom application or you can add drivers to the image if you need other functionality (such as Bluetooth or serial communications).
Enjoy!
29 июля 2015 года завершилась эпоха Windows Embedded — отдельного семейства операционных систем, используемых в программно-технических комплексах. На смену ей пришла Windows 10 IoT — встраиваемая операционная система, предназначенная для управления промышленными и домашними интеллектуальными системами, то есть всего того, что принято обозначать модной фразой «интернет вещей».
Предполагается выпустить несколько редакций этой ОС, вроде бы их должно быть семь, но пока что наиболее известными являются три — IoT Industrial, Mobile Enterprise и IoT Core.
Первая редакция, IoT Industrial, имеет много общего с Windows 10 Enterprise, отличаясь от последней оптимизацией под конкретный тип устройств и операций. Редакция Mobile Enterprise с архитектурой ARM и поддержкой универсальных приложений предназначается, как видно из названия, для мобильных устройств. Самая любопытная редакция, IoT Core, служит для управления устройствами с ограниченными ресурсами вроде Raspberry Pi 2 и Intel Minnowboard MAX. Системные требования Windows 10 IoT Core более чем скромны — для работы системе хватит всего 256 Мб ОЗУ и 2 Гб физического пространства.
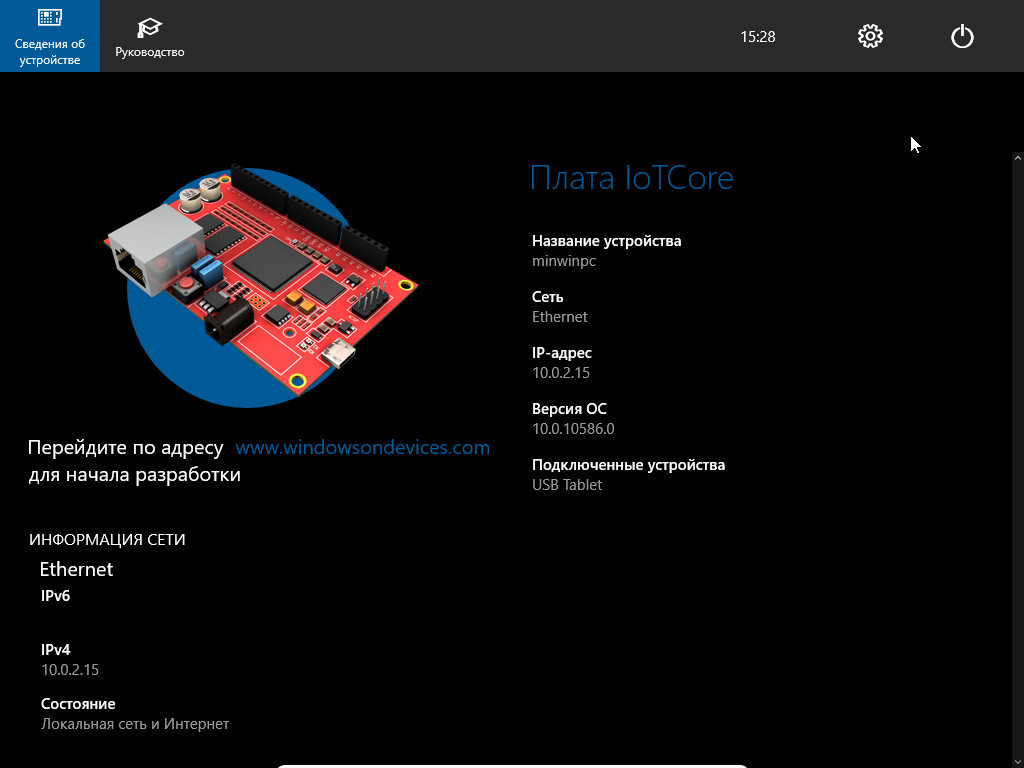
Windows 10 IoT Core поддерживает универсальные и написанные на C и C++ консольные приложения, протокол SSH, управление базовыми системными настройками, есть PowerShell Remoting, веб-сервер Node.js, но ни рабочего стола в привычном понимании, ни меню Пуск, давно ставшего визитной карточной операционных систем Windows в ней нет. Интерфейс Windows 10 IoT Core практически не имеет ничего общего с интерфейсом десктопных и серверных систем, это скорее панель управления с подключенными к ней устройствами.
Да, всё это интересно, но можно ли скачать и установить это чудо на обычный компьютер? В принципе можно, сборка для платы MinnowBoard Max поддерживает архитектуру x86, но какая от всего этого будет практическая выгода? IoT Core не предназначается для установки на десктопные ПК, если же вы просто хотите получить о ней общее представление, можно поставить ее на бесплатный гипервизор VirtualBox. Предположим, VirtualBox у вас уже есть, теперь нужно скачать образ Windows 10 IoT Core с официального сайта Microsoft или поискать его в сети.
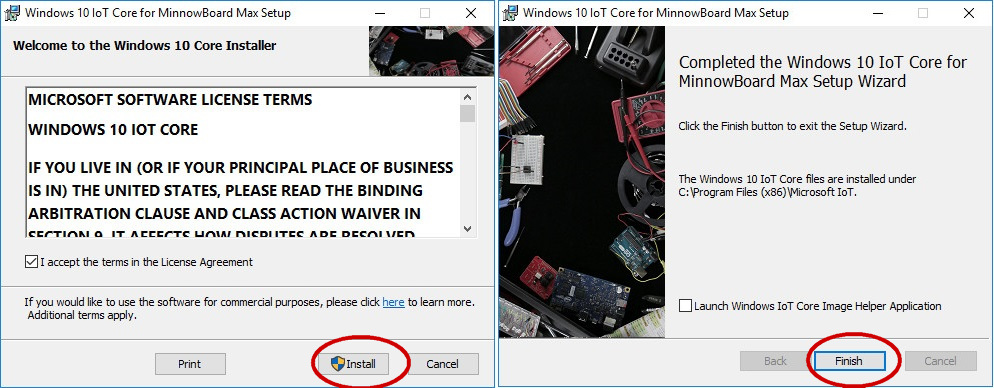
Скачанный ISO-образ не является загрузочным, на самом деле это запакованный MSI-инсталлятор. Извлеките его из образа и установите как обычную программу.
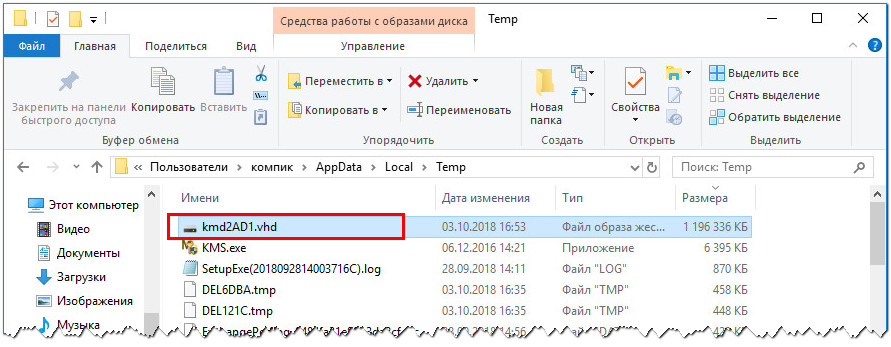
Затем проследуйте в папку C:\Program Files\Microsoft IoT\FFU\MinnowBoardMax.
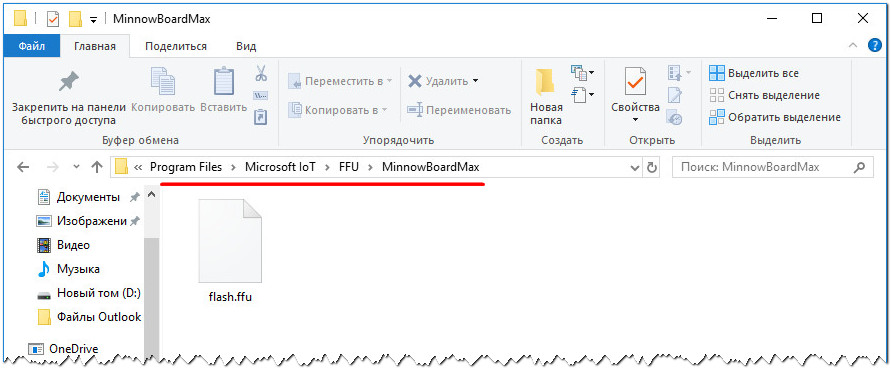
В ней вы найдите файл flash.ffu, представляющий собой образ прошивки. Теперь его нужно преобразовать в поддерживаемый VirtualBox файл виртуального диска VHD. Скачайте со странички forum.xda-developers.com/showthread.php?t=2066903 архив с утилитой ImgMount распакуйте его, запустите от имени администратора командную строку и выполните такого вида команды:
cd C:\Program Files\Microsoft IoT\FFU\MinnowBoardMax
D:\ImgMount\ImgMount.exe flash.ffu
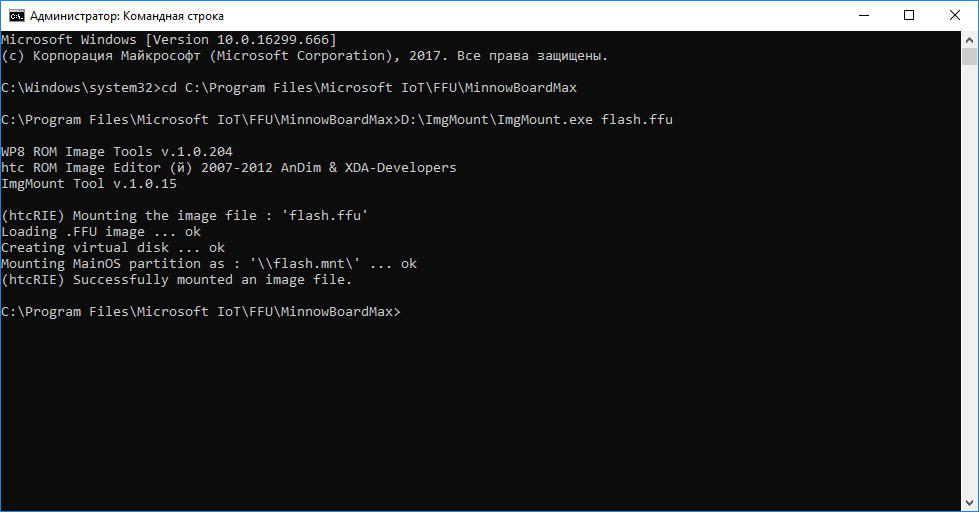
Первая команда перемещает в расположение образа flash.ffu, вторая запускает процедуру его преобразования и монтирования утилитой ImgMount.exe, которая в отличие от показанного здесь пути, может располагаться в любой папке, равно как и сам файл образа flash.ffu.
Если в процессе выполнения второй команды вы получите ошибку «Не удается продолжить выполнение кода, поскольку система не обнаружила MSVCP110.dll», скачайте с сайта Microsoft и установите пакеты Visual Studio 2012-1015.
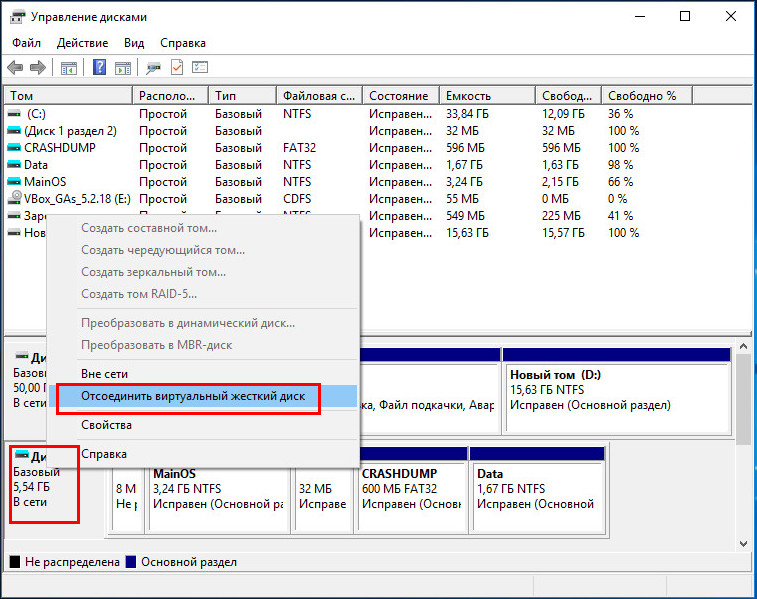
В результате на компьютере будет создан и замонтирован виртуальный диск VHD. Откройте оснастку управления дисками, кликните по диску ПКМ и выберите в меню «Отсоединить виртуальный жесткий диск».
Скопируйте в открывшемся окошке путь к VHD-контейнеру.
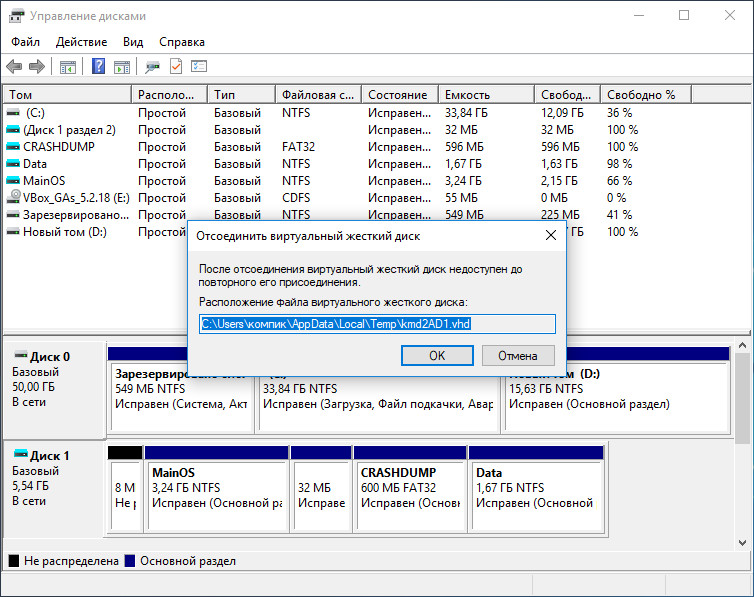
Нажмите «OK», перейдите в его расположение и переместите файл в удобную вам папку.
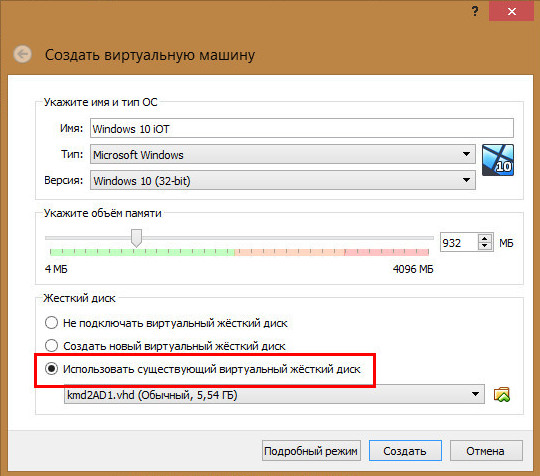
Почти всё готово, осталось только создать виртуальную машину.
Запускаем VirtualBox, даем машине имя, выделяем немного оперативки (хватит и 512 Мб), в блоке «Жесткий диск» выбираем «Использовать существующий виртуальный жесткий диск» и указываем путь к файлу VHD.
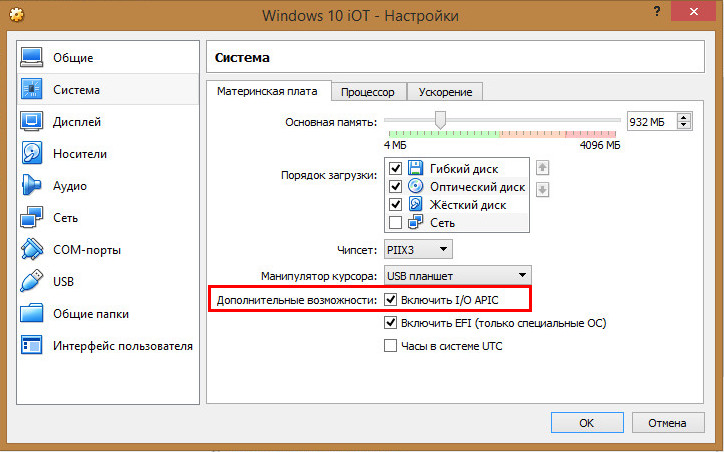
После этого заходим в настройки созданной виртуальной машины, на вкладке «Система» обязательно ставим галочку «Включить EFI (только специальные ОС)».
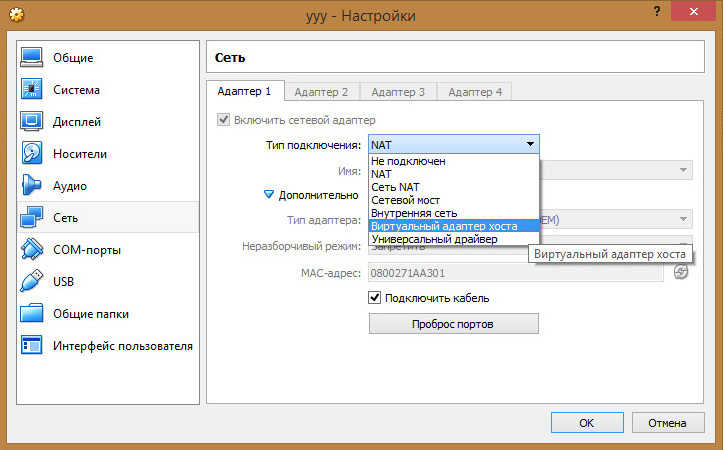
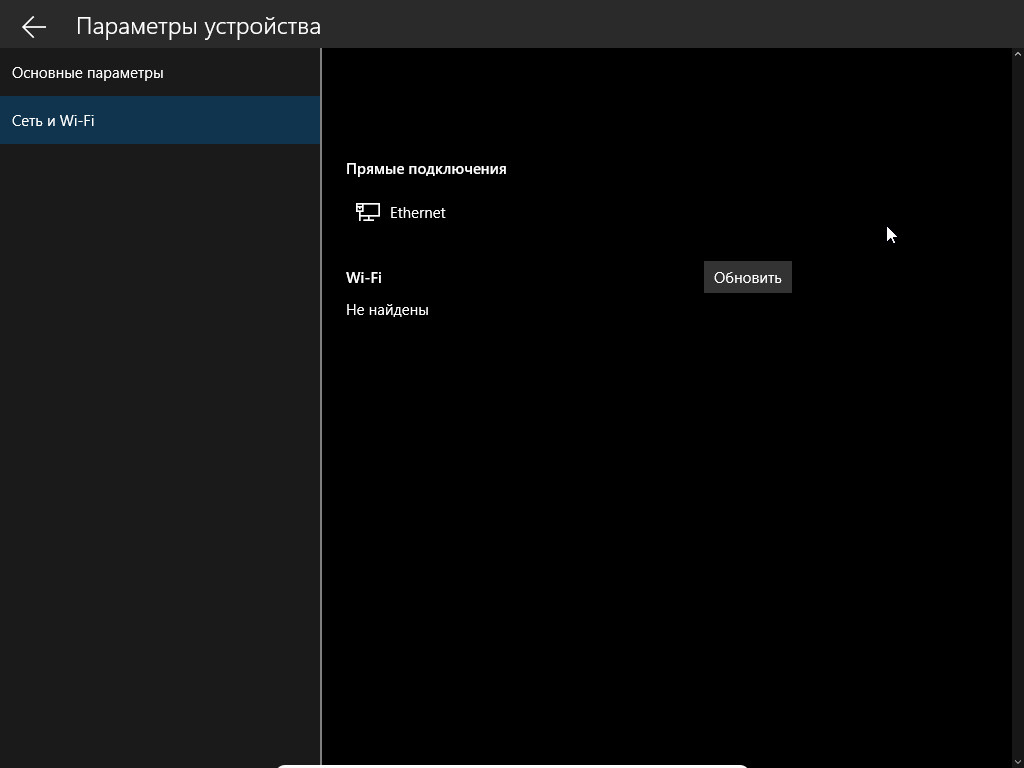
Если вы собираетесь подключить Windows 10 IoT Core к интернету, дополнительно на вкладке «Сеть» попробуйте заменить тип подключения «NAT» на «Виртуальный адаптер хоста».
Убедитесь, что используется контролер SATA.
Теперь можно запускать машину.
Если всё было сделано правильно, вскоре вы увидите приветственное окно Windows 10 IoT Core.
Что дальше?
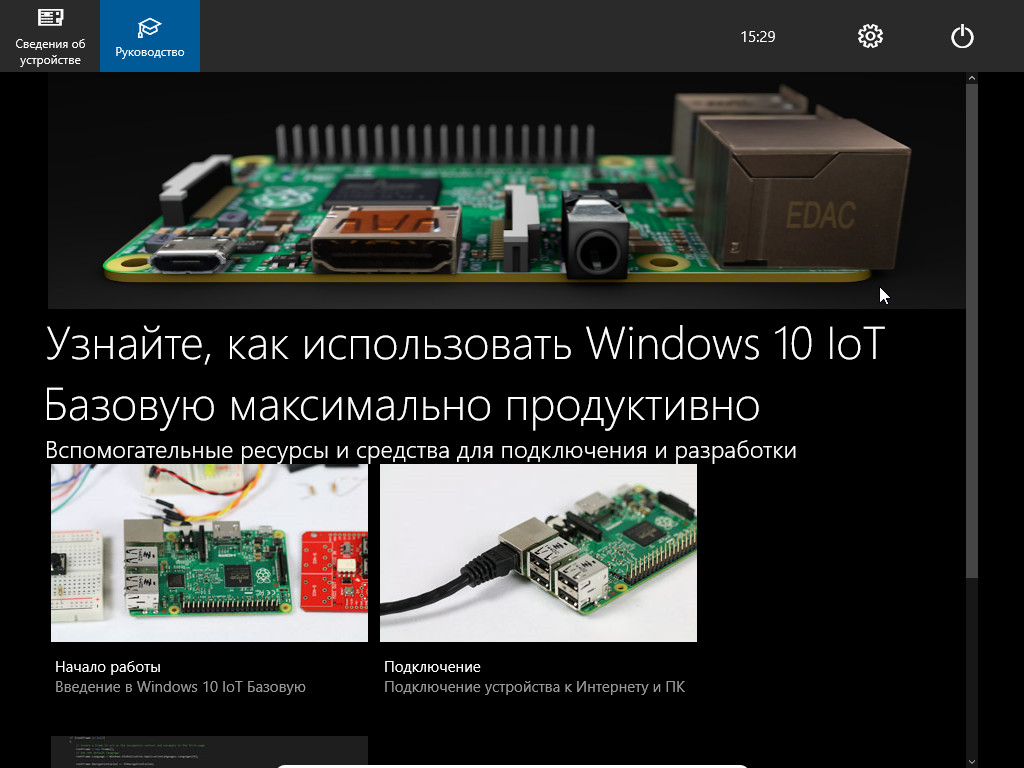
Можете ознакомиться с руководством по использованию системы на платах Raspberry Pi 2 и Intel Minnowboard MAX.
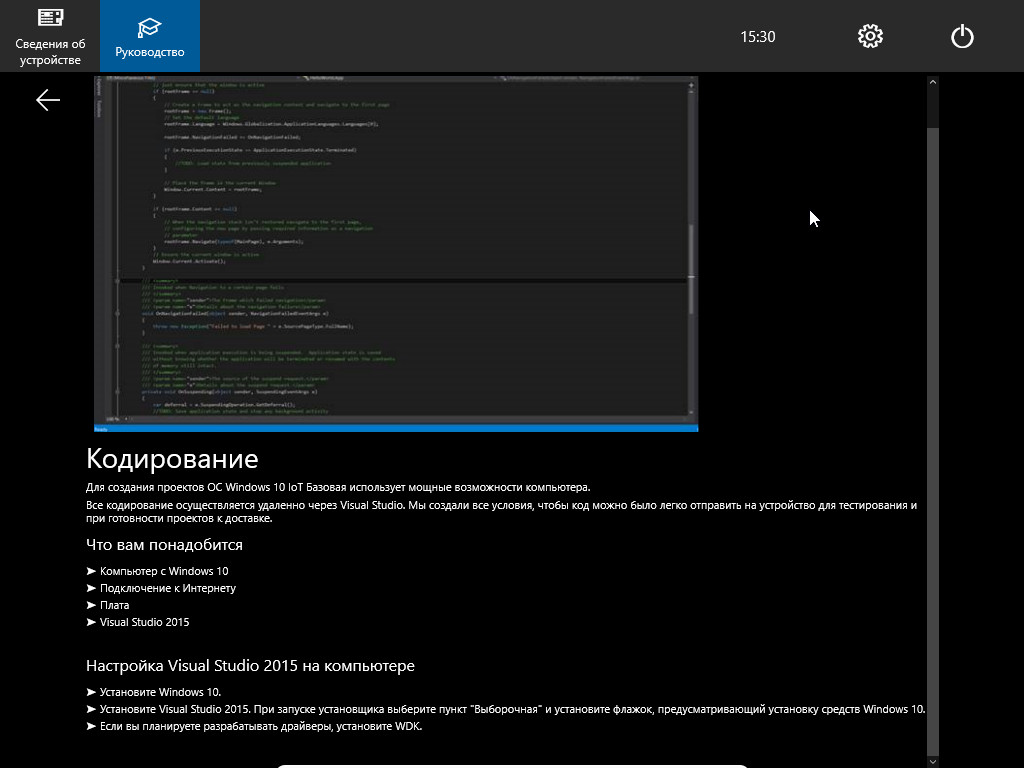
Больше, собственно, здесь делать нечего, если только вы не программист и знаете, как реализовать доступ к функциям системы, вроде бы с помощью Visual Studio в ней можно разворачивать приложения UWP.
Windows 10 IoT Core:
www.microsoft.com/en-us/download/details.aspx?id=48233&WT.mc_id=rss_alldownloads_all