
Последние версии Windows 10 Домашняя при чистой установке и при условии, что вы подключились к Интернету не предлагают возможности создать автономную учетную запись (локальный аккаунт), оставляя лишь два варианта действий: ввод существующей учетной записи Майкрософт или регистрация новой такой же учетной записи. Однако, создание автономной учетной записи всё ещё возможно.
В этой инструкции два простых способа создать автономную учетную запись при установке Windows 10 последних версий и дополнительная информация, которая может оказаться полезной для целей создания локального аккаунта пользователя или администратора.
Способы использования автономной учетной записи при установке Windows 10
Самый простой метод создания автономной учетной записи вместо использования учетной записи Майкрософт в облаке — выполнение чистой установки Windows 10 Домашняя без подключения к Интернету. Однако, если вы уже подключились к Интернету и дошли до этапа «Войдите с помощью учетной записи Майкрософт», начинать процесс установки заново — не самый удобный метод.
Вместо этого вы можете поступить следующим образом, что тоже даст возможность создания локального аккаунта:
- Если у вас уже есть учетная запись Майкрософт, введите соответствующий E-mail. Если нету, введите любой адрес электронной почты, для которого такая учетная запись существует, например, вот этот: test@outlook.com

- Введите любой пароль, кроме правильного.
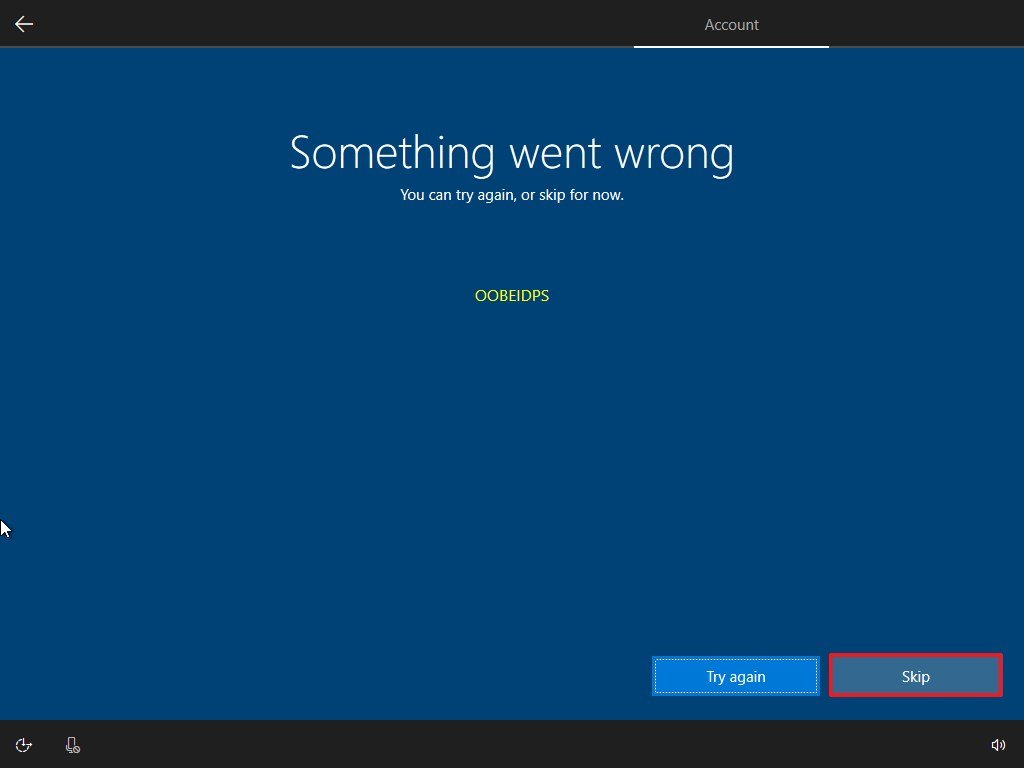
- После ввода неправильного пароля вам предложат восстановить его, но здесь же появится еще один вариант действий «Пока что пропустите этот шаг» — выберите этот вариант.
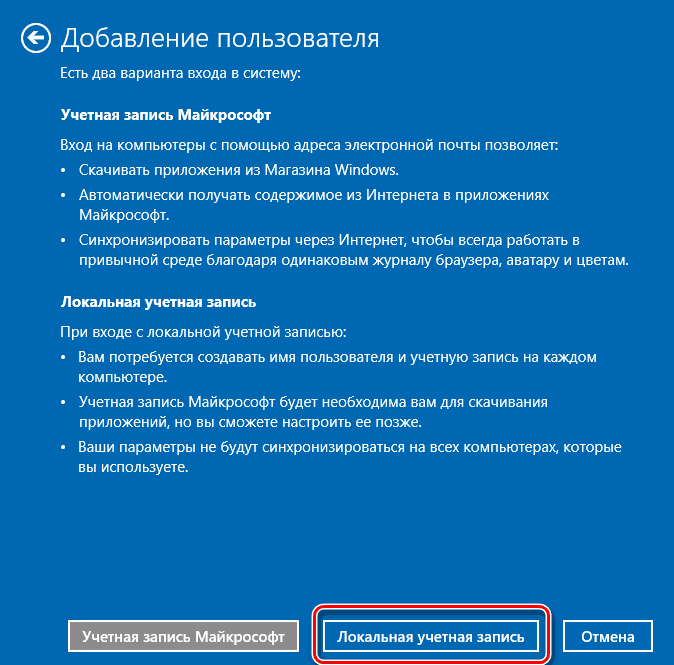
- На следующем экране выберите «Ограниченные возможности».
- Создайте локальную учетную запись для использования на компьютере (сразу после создания у этой записи будут права администратора, еще один важный пункт: не используйте имя «Администратор» для учетной записи, это имя зарезервировано за скрытым системным пользователем).


Вот в общем-то и всё — автономная учетная запись на вашем компьютере создана и её можно использовать вместо учетной записи Майкрософт.
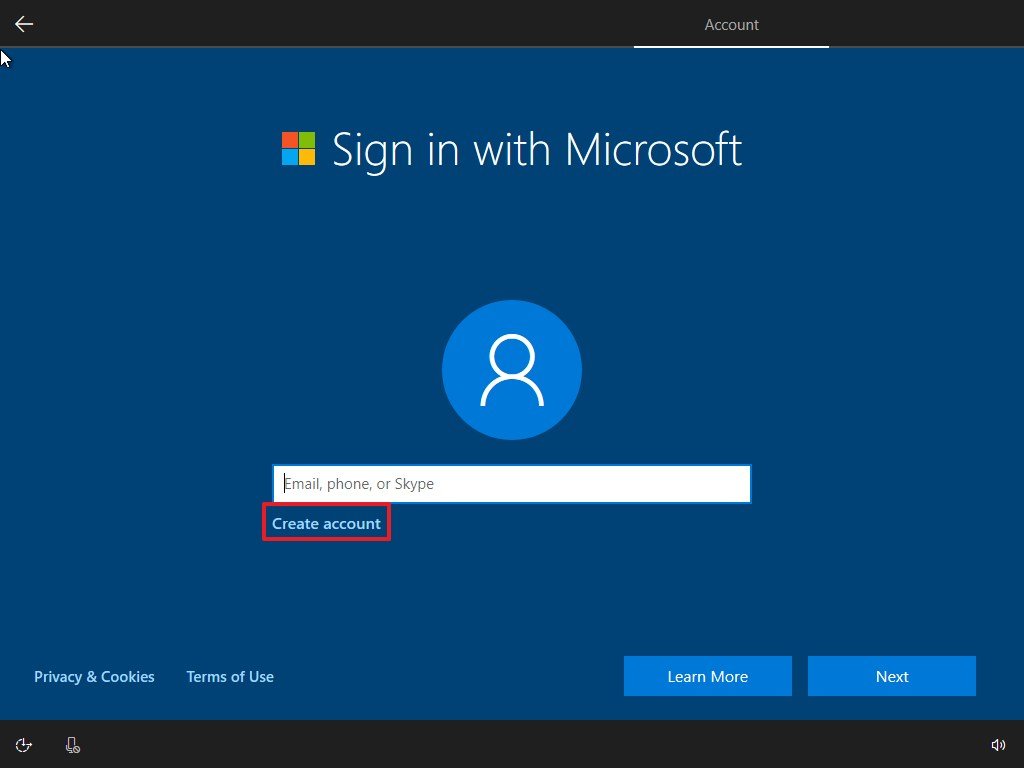
Ещё один простой метод, если вы легко можете отключить Интернет (вынуть кабель, выключить Wi-Fi роутер из розетки) — нажать «Создать учетную запись» на экране с предложением входа в учетную запись Майкрософт, подождать некоторое время и, после появления сообщения об ошибке (так как Интернет отключен), нажать кнопку «Пропустить этот шаг» — на следующем шаге откроется окно для ввода имени локального аккаунта.
Дополнительная информация
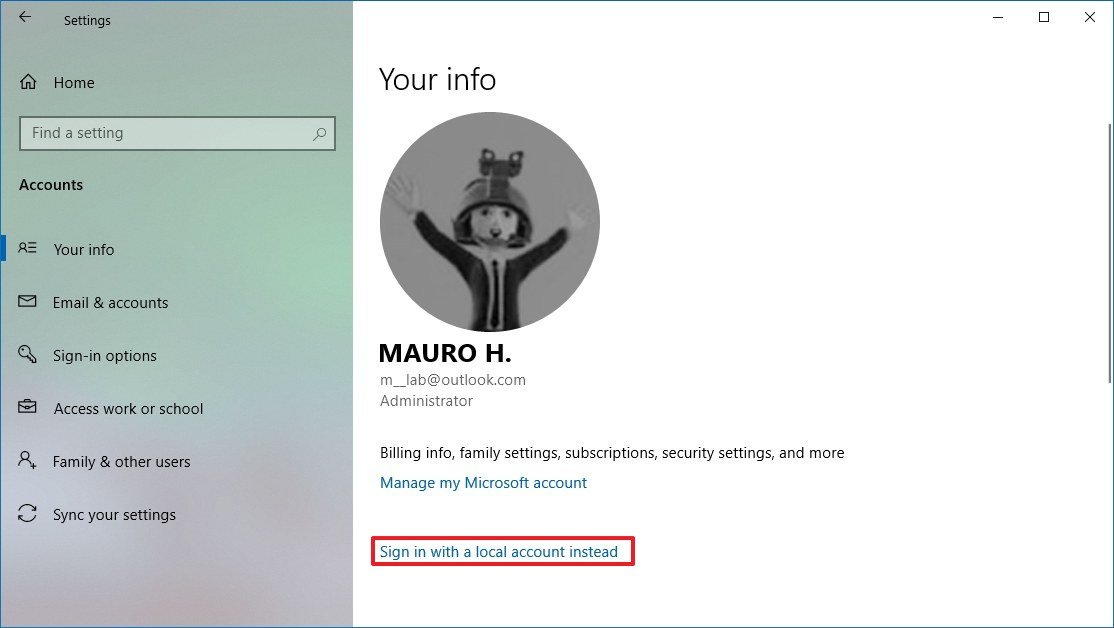
Если вы всё-таки создали учетную запись Майкрософт или вошли под ней при установке Windows 10, а теперь по какой-либо причине хотите использовать автономную учетную запись вместо неё, то можно зайти в Параметры — Учетные записи — Ваши данные и нажать по пункту «Войти вместо этого с локальной учетной записью», подробнее об этом и других методах — Как удалить учетную запись Майкрософт в Windows 10.

Еще один метод — создать локальную учетную запись пользователя и дать её права администратора, зайти под ней, а потом в разделе Параметры — Учетные записи — Семья и другие пользователи удалить имеющуюся учетную запись Майкрософт.

Windows 10 Home users no longer has the option to create a local account during the out-of-box experience (OOBE) setup, but there’s a workaround if you don’t want to use a Microsoft account. Although you have been able to choose between a Microsoft account or traditional local account during the setup process, the experience has always been intended to lure users into selecting the Microsoft account option.
The reasoning behind this approach is that Microsoft wants you to use the cloud-based account system to take advantage of additional benefits, such as access to many of the company’s online services, the ability to sync settings and files across devices, as well as manage various aspects of your devices, including updating personal information, easily reset the account password, and find your comptuer if it’s lost or stolen.
However, there are still people who prefer the security, privacy, and simplicity of a local account, which was one of the reasons the option was available during the setup process. But since version 1903 (May 2019 Update), the choice has disappeared entirely from the Windows 10 Home setup.
If you’re among those who use the Home version of Windows 10 and prefer the offline account type, the next time that you reset or set up a new device, or perform a clean installation, you will have to use a workaround if you want to create a local account.
In this Windows 10 guide, we’ll walk you through two ways in which you can create a local account now that Microsoft no longer includes the option for Home users.
- How to create local account during installation of Windows 10
- How to create local account after installation of Windows 10
How to create local account during installation of Windows 10
To create a local account within the out-of-box experience for Windows 10 Home, while in the account setup stage, use these steps:
Quick note: If you’re stuck creating a Windows 10 account, we assume you already went through the steps to perform a clean install of Windows 10, or you’re setting up a new device.
All the latest news, reviews, and guides for Windows and Xbox diehards.
- Disconnect the computer from the network.Quick tip: If you’re using an Ethernet connection, disconnect the cable from the back of your computer. If you’re using a wireless connection, turn off the adapter using the shortcut on your laptop. (In the case that there’s no way to disable the Wi-Fi adapter, then restart your computer, and skip the network connection step.)
- In the «Sign in with Microsoft» section, click the Next button without specifying an account name.
- Click the Create account option.
- Click the Skip button.
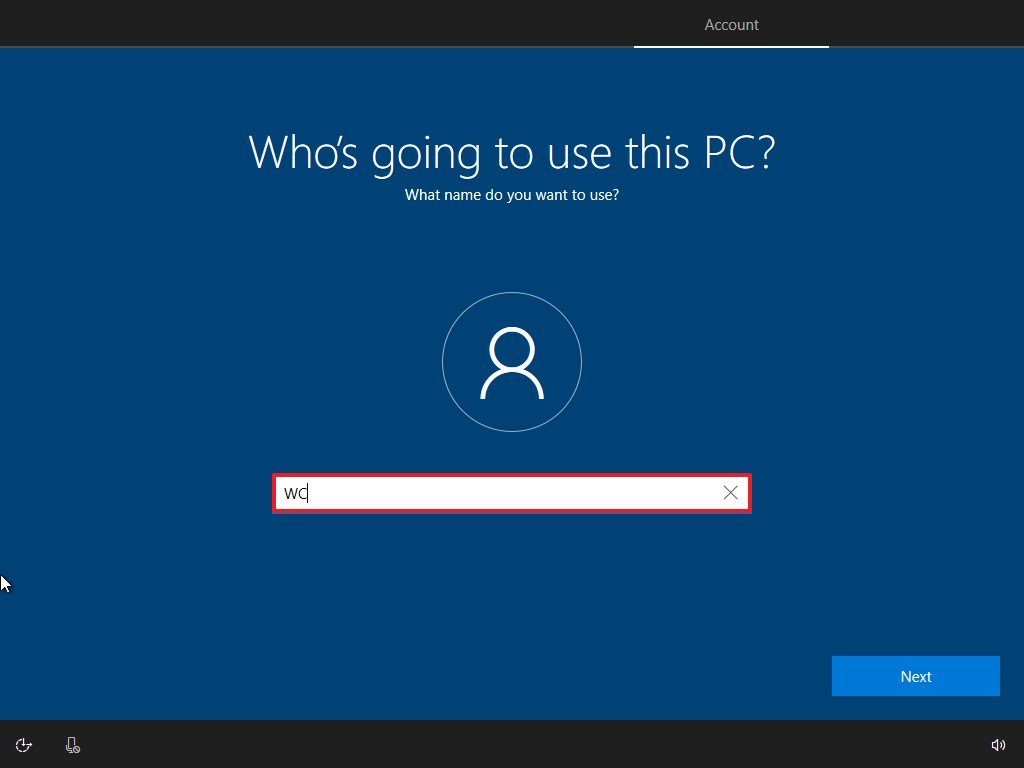
- Specify a name for your local account.
- Click the Next button.
- Create a password for the local account.
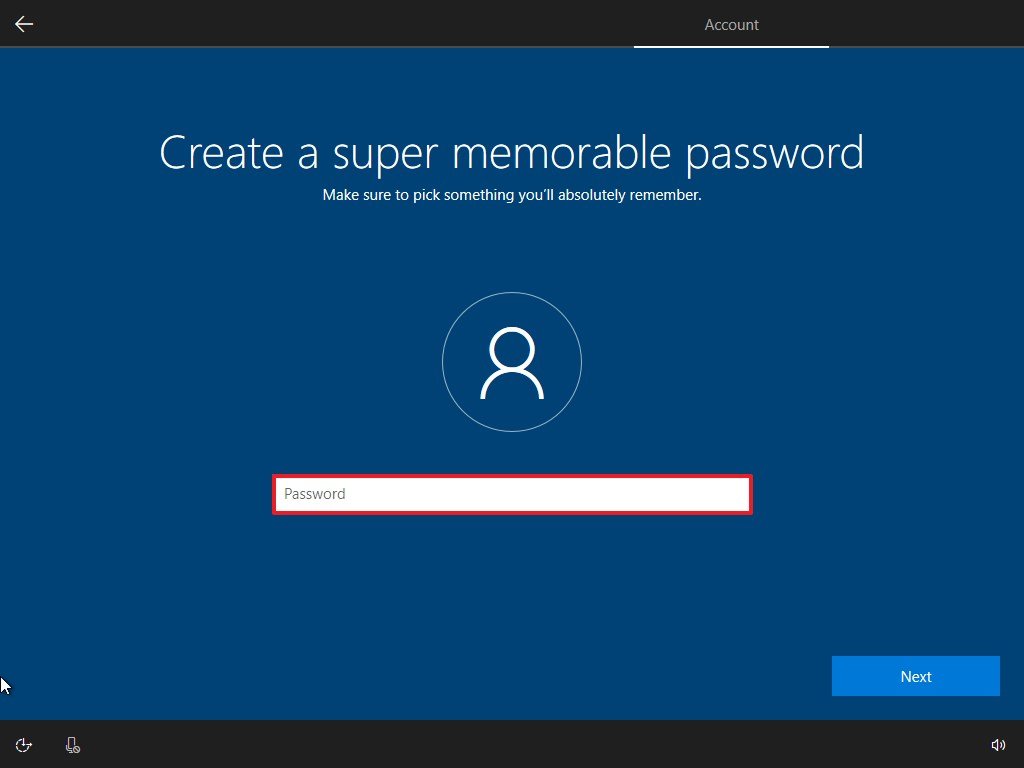
- Click the Next button.
- Confirm the password.
- Click the Next button.
- Select your first security question using the drop-down menu.
- Confirm your first answer.
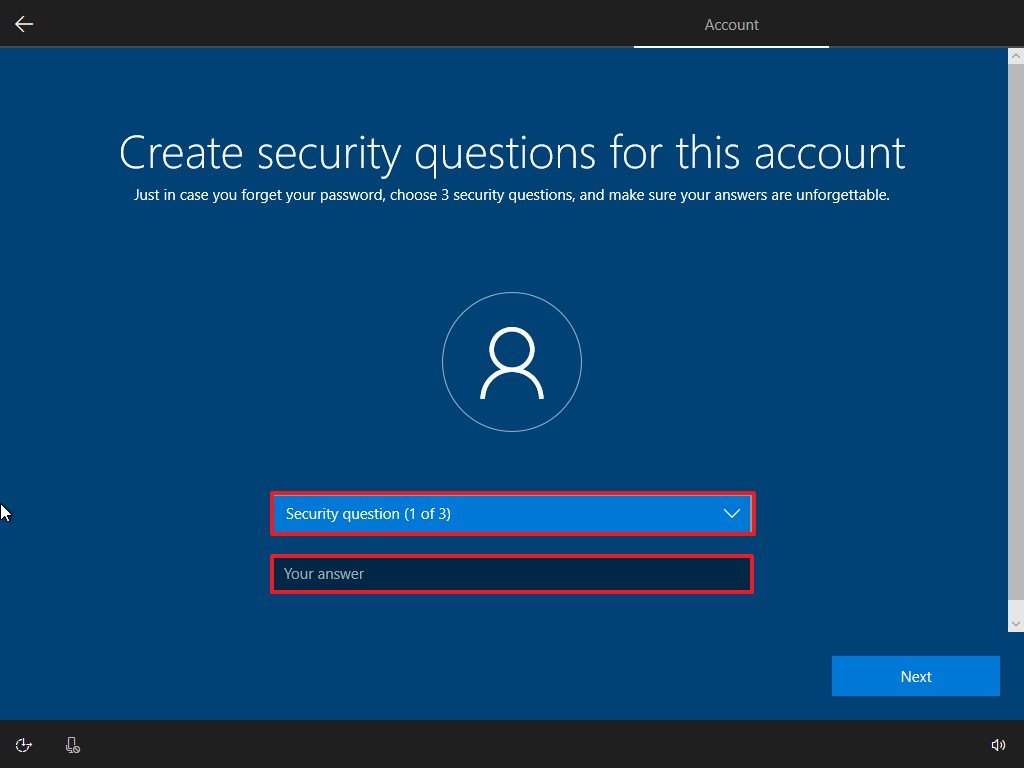
- Click the Next button.
- Repeat step No. 11, 12, and 13 two more times to complete setting up the local account security.
- Continue with the on-screen directions.
Once you complete the steps, and you’re back on the desktop, reconnect the device to the network, and continue using Windows 10 with a local account.
How to create local account after installation of Windows 10
If you completed the Windows 10 Home setup using a Microsoft account, you could still use a local account. You can do this by removing the Microsoft account link from the Windows 10 account, or you can create a local account and move your content to the new account.
To convert a Microsoft account to a local account, use these steps:
- Open Settings.
- Click on Accounts.
- Click on Your Info.
- Click the Sign in with a local account instead option.
- Click the Next button.
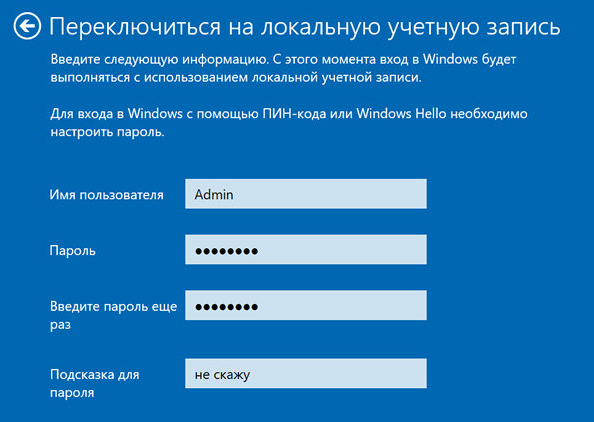
- Specify your account information, such as username, password, and password hint.
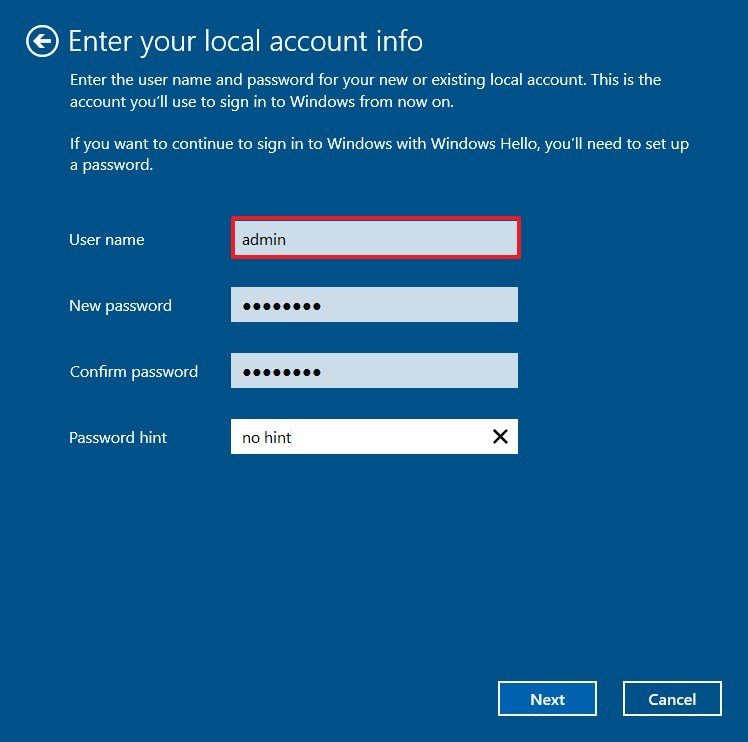
- Click the Next button.
- Click the Sign out and finish button.
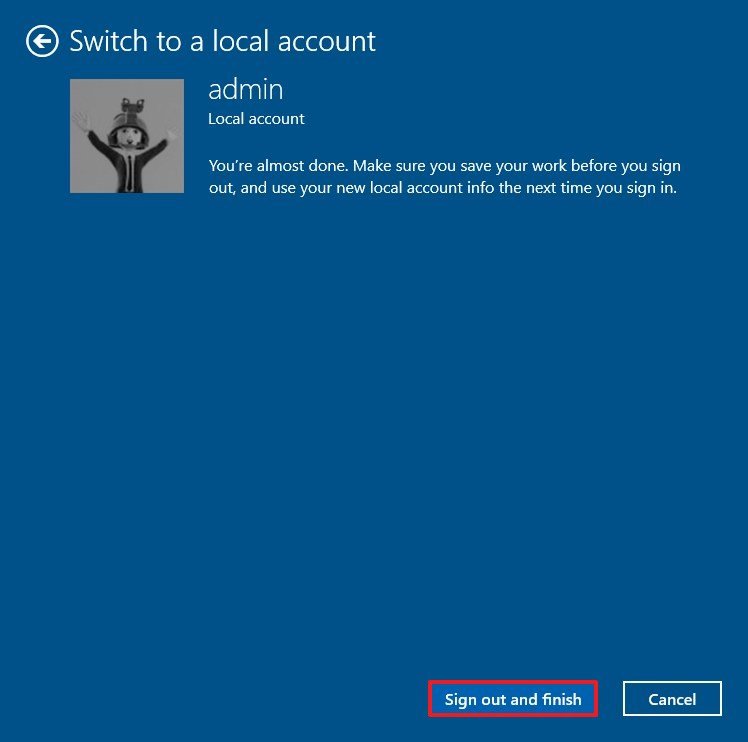
After you complete the steps, sign back into the account to continue your Windows 10 experience using local account.
Mauro Huculak has been a Windows How-To Expert contributor for WindowsCentral.com for nearly a decade and has over 15 years of experience writing comprehensive guides. He also has an IT background and has achieved different professional certifications from Microsoft, Cisco, VMware, and CompTIA. He has been recognized as a Microsoft MVP for many years.
There are times when you need to know how to add a non-Microsoft account to Windows 10. Microsoft accounts come with the advantage of syncing your settings across multiple devices. However, some users prefer giving that up, in exchange for the more secure and private experience of a local offline (non-Microsoft) account. If you don’t want to share your info with Microsoft and you ask yourself “How do I add another user to Windows 10 without a Microsoft account?”, you’ve come to the right place. This tutorial illustrates six ways to create a local or non-Microsoft user account in Windows 10:
NOTE: Some of the methods illustrated require an Administrator account. To gather more info on the subject, you can also read What is a user account or a username in Windows? and Should you use a local or a Microsoft account in Windows 10?. While we don’t recommend it, you can add local accounts that don’t require a password to login by leaving the password fields blank during the account creation process.
1. Add another user to Windows 10 without a Microsoft account from Settings
We find it easiest to create a non-Microsoft account with the Settings app. First, open Settings by pressing Win + I on your keyboard, and then click or tap on Accounts.
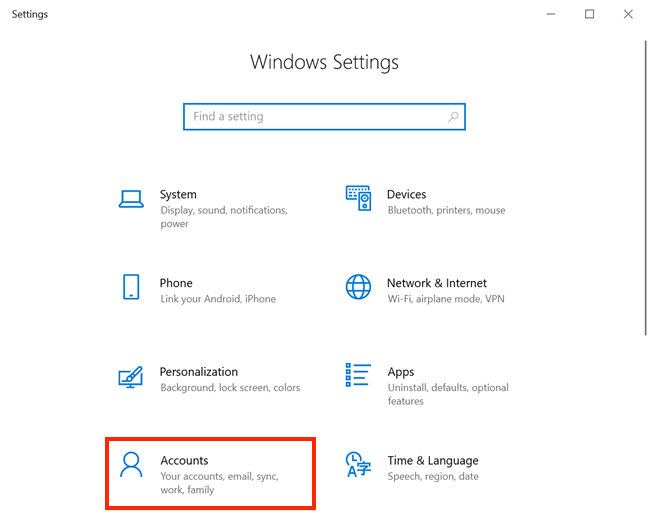
Open Accounts settings
In the column on the left, click or tap on the “Family & other users” tab. On the right-hand side, under Other users, press the + button next to the “Add someone else to this PC” option.
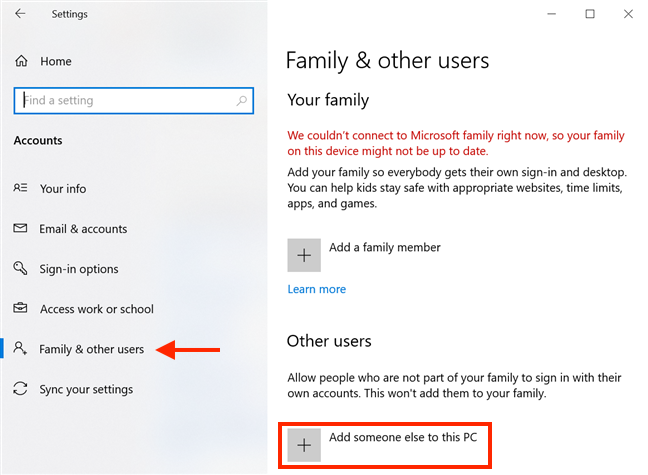
Add someone else to this PC
The Microsoft account wizard opens, asking you to enter the email or phone number of a Microsoft account. Click or tap the “I don’t have this person’s sign-in information” link underneath.
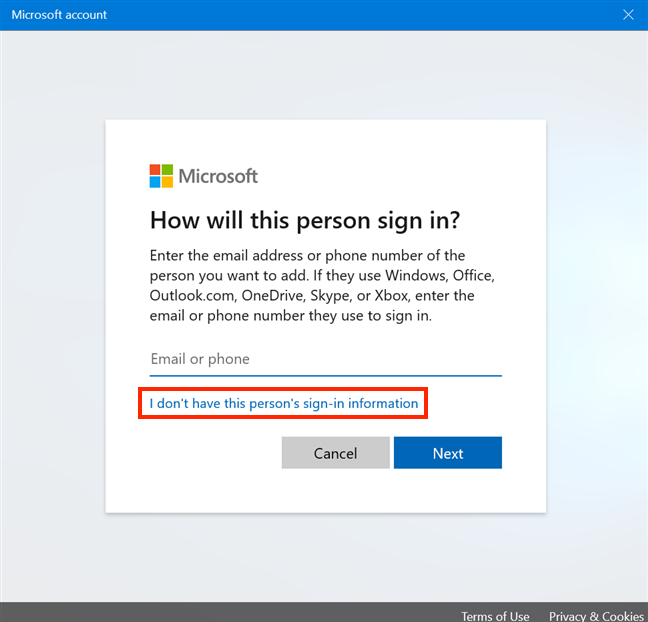
Avoid creating a Microsoft account
Microsoft then tries to get you to create an account. Stand firm and click or tap on “Add a user without a Microsoft account” link, then press Next.
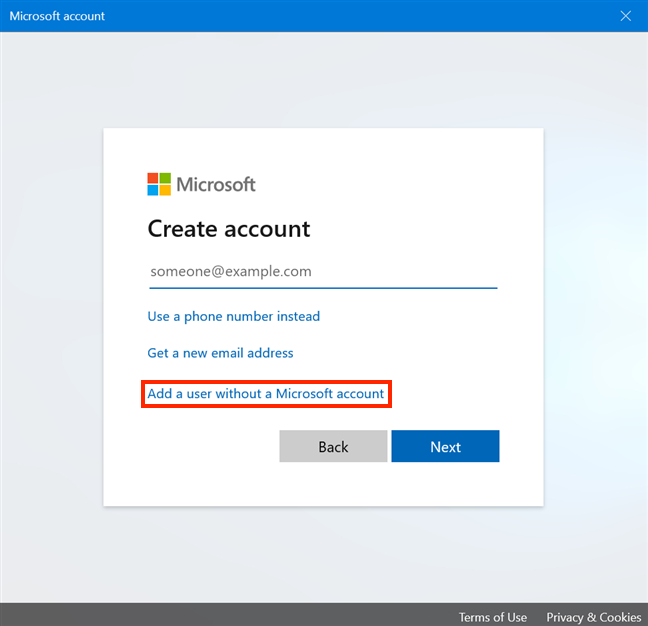
Add a user without a Microsoft account
Next, you can enter your desired User name under “Who’s going to use this PC?”. Enter a password and verify it to make your account secure.
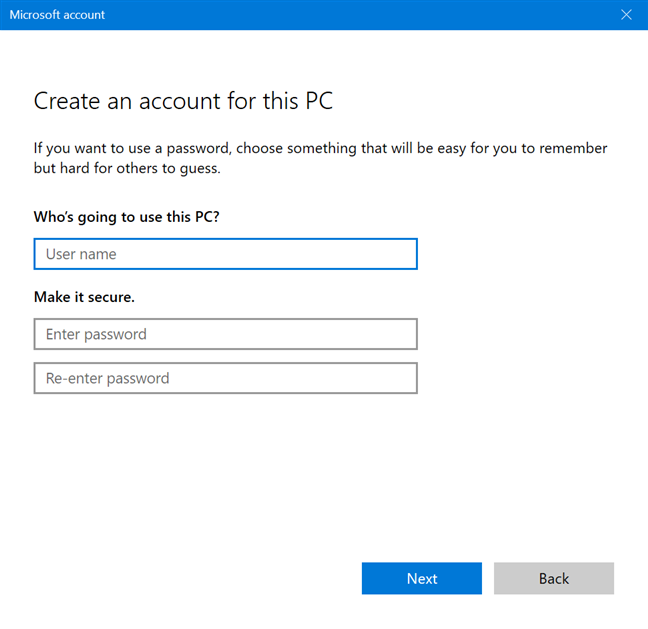
Enter a User name and password
The moment you start to insert a password, six more fields are revealed at the bottom of your screen, in the “In case you forget your password” section.
You have to choose three security questions from the list and provide an answer for each of them. Click or tap on each field to either open a dropdown menu with the available questions or to type in an answer. When you are done, press Next.

Choose three security questions and press Next
Your account is created, and you are returned to the Settings app, where you can see it displayed under Other users.

Your account is created
To easily access the new account, read 7 ways to switch the user in Windows 10.
2. Convert your Microsoft account into a local one in Windows 10
If you already created a Microsoft account, but you want to increase your privacy and stop sharing your data with the company, you can convert your Microsoft account into a local one. We created a tutorial with all the details necessary for switching to a Windows 10 local account from a Microsoft one.
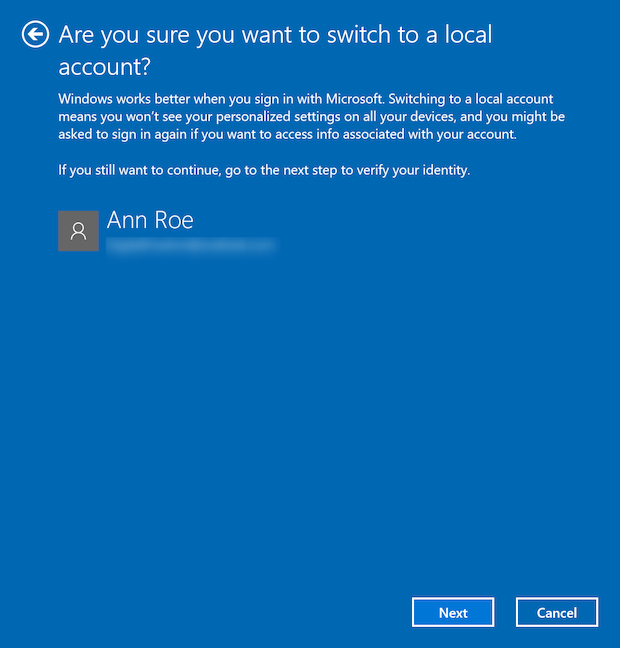
Switching to a local account in Windows 10
3. Create a non-Microsoft account in Windows 10 with netplwiz
You can also use the netplwiz app to add a local user account. To begin, open the Run window with the keyboard shortcut Win + R and insert “netplwiz”. Then, press OK or Enter on your keyboard.
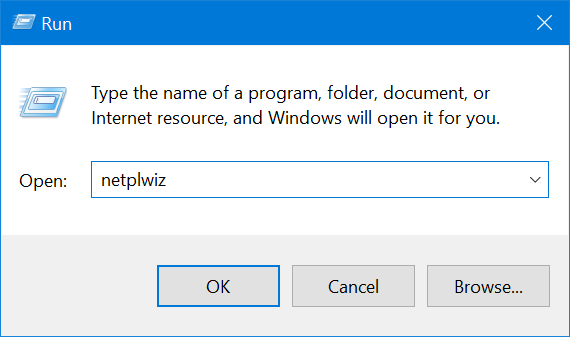
Enter netplwiz and press OK
In the Users tab of the User Accounts window, first, make sure the box next to the “Users must enter a user name and password to use this computer” option on top is checked. Then, click or tap on Add.
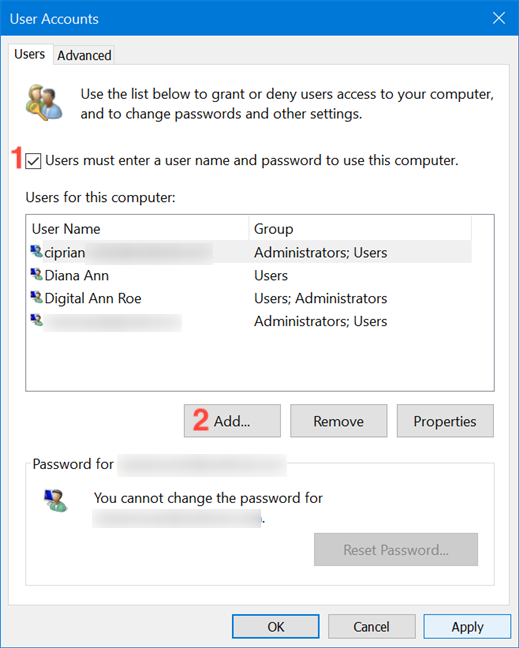
Check the box and press Add
In the next pop-up window, click or tap “Sign in without a Microsoft account (not recommended).”

Choose to add a non-Microsoft account
Next, you are presented once more with all the advantages of using a Microsoft account.
The lack of syncing across devices can be a downside, but it is the only one, even if Microsoft suggests that you need one of their accounts to download apps. While this might seem like a big incentive to get a Microsoft account, it is just a scare tactic. We have a guide showing you How to use the Microsoft Store in Windows 10 without a Microsoft account, so go ahead and press the Local account button.

Ignore Microsoft’s false info and choose Local account
Enter a new User name, choose and confirm a password, and add a Password hint. Then, click or tap on Next.
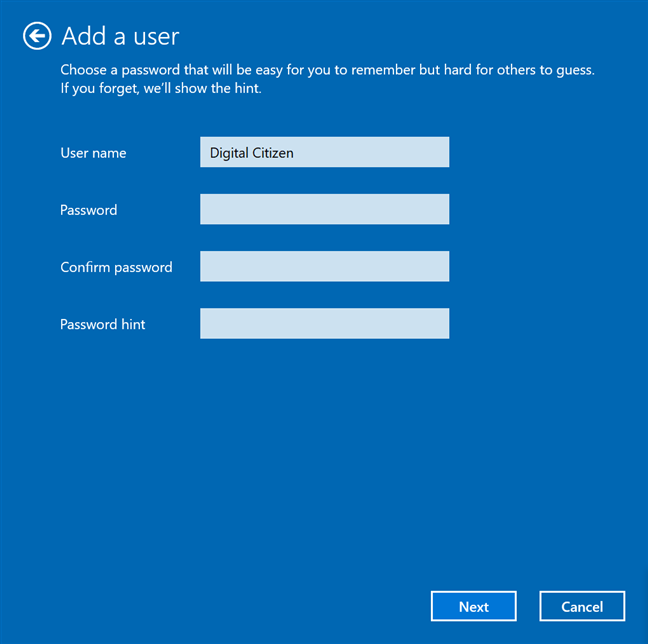
Enter the info for a new user
Press Finish to complete the process of creating a local account.
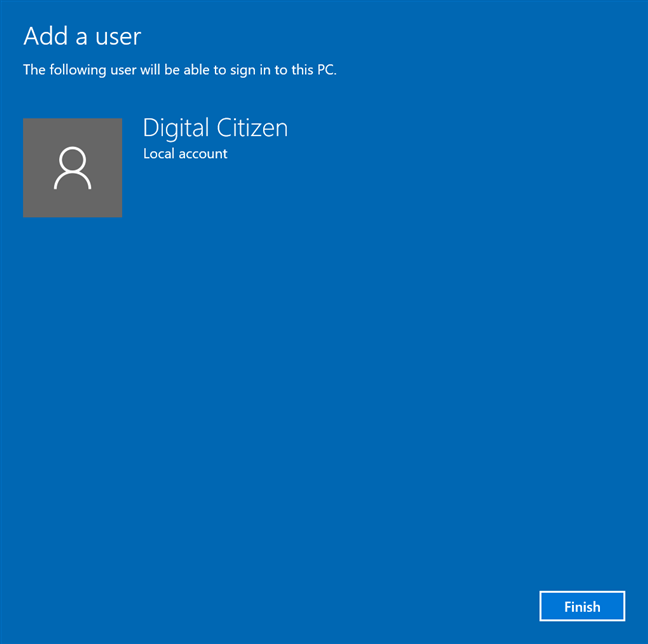
Finish the creation process
You are returned to the User Accounts window, where you can already see the new user among the “Users for this computer.”
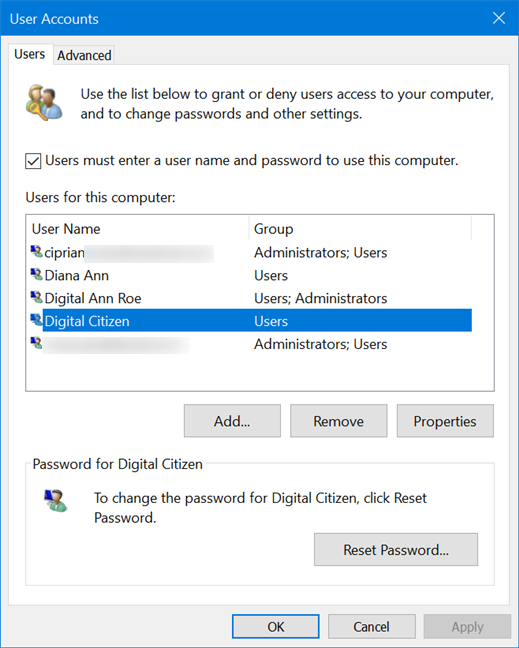
The new user is displayed in User Accounts
TIP: If you like the netplwiz app, you can also use it to automatically login into Windows without typing a password.
4. Add a local user account to Windows 10 using Computer Management
If you’re running Windows 10 Pro on your computer or device, you can also use the Computer Management tool to create a local account. Open Computer Management and click or tap on “Local Users and Groups” under System Tools.

Access Local Users and Groups
In the middle pane, right-click or press-and-hold on the Users folder, and then click or tap New User on the contextual menu.
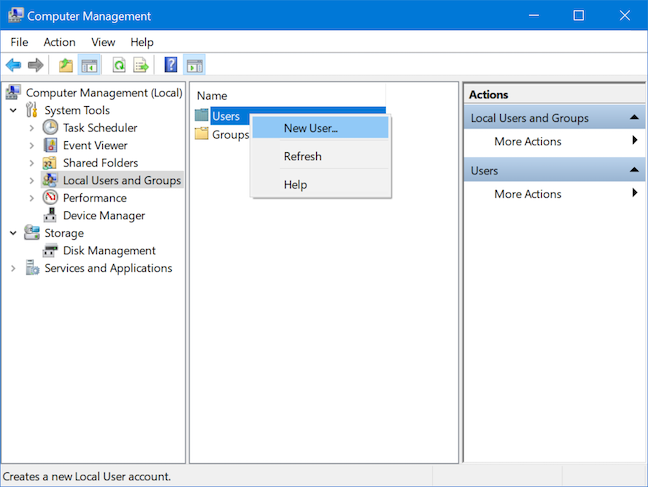
Create a New User
The New User window pops up. Choose a User name, then insert and confirm your password. You only need to fill in the User name field. The Full name uses the same info once the account is created. However, if you insert a different Full name during this step, this is the name displayed in Windows 10 for this account (including on the login screen). Check the boxes if you want to apply to the new account any of the options displayed next to them. Then, press Create and Close the New User window.
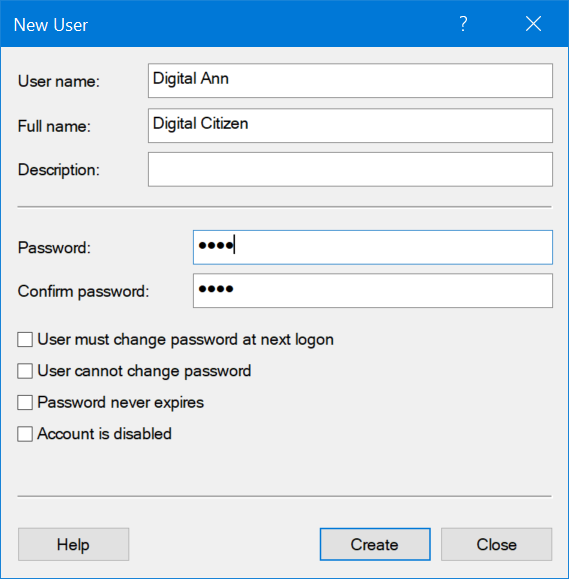
Insert the info and click or tap Create to finish adding the account
If you access the Users folder in Computer Management, you can see the new account displayed inside.
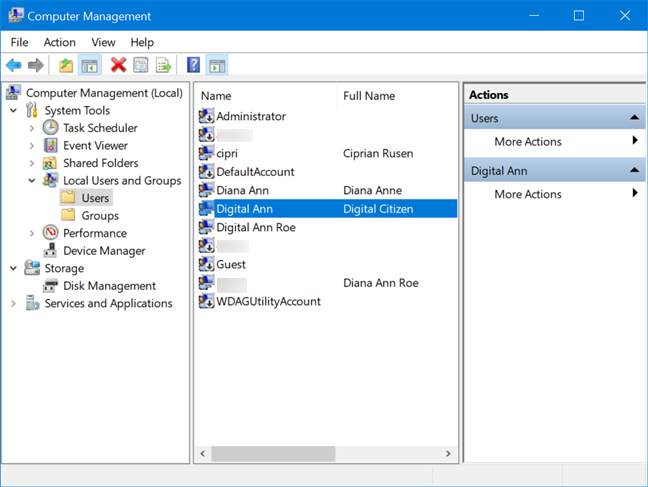
Your account is displayed in Users
TIP: The Computer Management tool and the netplwiz app, which we discussed in the previous section, are also useful if you want to rename a local account in Windows 10. Learn more about it from How to change your user account name in Windows 10.
5. Add a non-Microsoft account to Windows 10 with CMD or PowerShell
If you like using command-line interpreters, both the Command Prompt and PowerShell can be used to add a local user to Windows 10. The steps are identical for both apps, but we only go over the ones for the Command Prompt.
Start the Command Prompt as administrator by searching “cmd” in your taskbar’s search field and then clicking or tapping on the “Run as administrator” option.

Search cmd and press Run as administrator
Confirm your choice in the UAC window that pops up, and the Command Prompt is launched.
The command you need to enter is relatively simple: “net user NAME PASS /add” — replace NAME with the name of the account you are creating and PASS with the password for that account. Below, we created a user called Digital using the password 1234.
NOTE: You can completely remove the PASS value from the command, and the newly created user can login without a password.
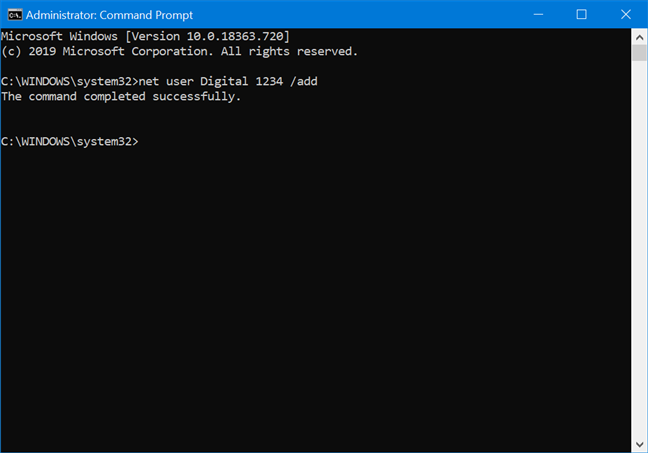
Use CMD to create a local account
If everything is fine, you get the message “The command completed successfully.”, and the new user is displayed among the other accounts that exist on your PC or device.
6. Create a local offline account while installing Windows 10
You can also create a non-Microsoft user while installing Windows 10. During the installation process, when asked about the account that you want to use, you should get the Offline account option.

Opting to use an offline account instead of a Microsoft account
We detail the process of configuring the Windows 10 setup to use a local account in the last section of our tutorial How to install Windows 10 from a DVD, ISO file or a USB drive. However, during our tests, we discovered that the Offline account option is not always available while installing Windows 10. To make sure you’re not forced to create a Microsoft account, we recommend you avoid connecting your computer to the internet before the Windows 10 installation is complete. This ensures you can finish the installation using a local account.
Which method to add a local user do you prefer?
A non-Microsoft account lets you perform any task on your Windows 10 computer or device while keeping your settings and files safe on your computer. Did you manage to add a local user account? Which method do you prefer? Let us know in the comment section.
Создание локального аккаунта в Windows 10 без профиля Microsoft
дWindows 10 всё больше изощряется, пытаясь заставить всех использовать исключительно учётные записи Microsoft. Не так давно разработчики скрыли опцию создания локального профиля. Система Windows 10 Home даже не предлагает использовать оффлайн-аккаунт, но это возможно на всех версиях ОС.
Тестирование работоспособности методов проводилось на актуальной версии 1903 Windows 10, которая также известна в качестве майского обновления 2019 года. Достичь намеченной цели можно как во время установки ОС, так и в случае получения уже готового ПК со встроенной системой.
Windows 10 Home: отключение от Интернета
В домашней версии Виндовс 10 отсутствует видимая опция регистрации системы без использования онлайн учётной записи Майкрософт. По крайней мере такая ситуация наблюдается до тех пор, пока активно подключение к интернету. Изменить положение дел с созданием локальной учётной записи призвано отключение от сети ещё до завершения работы установщика.
В случае с проводным подключением самое простое решение – отсоединить кабель Ethernet. Ситуация с Wi-Fi также не вызывает особого труда, достаточно пропустить этап подключения к сети – это один из первых шагов в мастере установки. Альтернативный вариант – нажать на кнопку «Режим полёта» на ноутбуке. Это одна из функциональных клавиш верхнего ряда, расположенная над цифровой строкой клавиатуры. Если ничего из перечисленного не помогает, всегда можно просто выключить Wi-Fi-маршрутизатор. Для этого нужно вынуть шнур питания из розетки на минуту.
Во время попытки создания учётной записи Microsoft при отключённом интернете появится сообщение об ошибке и отобразится кнопка «Пропустить». После клика экран активации профиля проходит и появляется возможность настроить локальный аккаунт.
Если используется Windows 10 Pro, можно воспользоваться инструментом – доменное соединение. Несмотря на неочевидное название, оно позволяет проигнорировать создание учётной записи Майкрософт в пользу локального профиля. Данная кнопка расположена в левом нижнем углу и доступна на стадии инсталляции системы.
Если в силу каких-либо причин нет указанной опции, всегда можно воспользоваться трюком с отключением интернета. Всё работает по аналогии с методом для Home. В модификации ОС Professional выключение доступа к сети также можно использовать для создания локального профиля Виндовс 10.
После установки переключиться на локальную учётную запись
Если в момент установки пришлось создать аккаунт с привязкой к Майкрософт, единственное что остаётся – преобразовать учётную запись в локального пользователя. Такой подход рекомендует провернуть корпорация Microsoft. После инсталляции системы профиль можно просто удалить.
Как это работает:
- Открыть раздел «Настройки».
- Выбрать «Учётные записи».
- Перейти в «Ваши данные».
- Нажать на кнопку «Войти вместо этого в локальную учётную запись».
Windows 10 подскажет необходимые шаги для переключения к оффлайн профилю. Нельзя сказать, что онлайн аккаунт Microsoft – это плохо. Он также пригоден для использования, но порой всё же лучше применять локальные учётные записи.