Звукозапись — это приложение, которое можно использовать для записи звука в течение трех часов для каждого файла записи. Его можно расположить на экране рядом с другими приложениями и использовать их одновременно, что позволяет записывать звук, не прерывая работы на компьютере.
-
Нажмите кнопку Пуск и найдите звукозапись или выберите приложение Звукозапись в списке.
-
Чтобы начать запись, коснитесь или выберите Пункт Запись.
-
Чтобы приостановить запись, нажмите кнопку Приостановить. Кнопка Пауза изменится на кнопку Записать. Чтобы возобновить приостановленную запись, коснитесь или выберите Запись еще раз.
-
Чтобы сохранить запись, нажмите кнопку Остановить. Вы увидите запись в списке записей. При следующем касании или нажатии кнопки Запись вы начнете новую запись.
-
-
Коснитесь и удерживайте или щелкните правой кнопкой мыши запись, которую нужно переименовать.
-
Нажмите кнопку Переименовать.
-
Введите для записи новое имя. Нажмите кнопку Переименовать.
Ваши записи сохраняются в приложении «Студия звукозаписи». При удалении приложения будут удалены и записи.
-
Откройте «Студию звукозаписи».
-
Коснитесь и удерживайте или щелкните правой кнопкой мыши запись, к которой вы хотите предоставить общий доступ.
-
Нажмите Поделиться.
-
Вы увидите список приложений, с помощью которых можно открыть общий доступ к вашим файлам. Чтобы отправить запись по почте, нажмите кнопку Почта и следуйте инструкциям. Чтобы предоставить общий доступ к записи приложению, щелкните приложение и следуйте инструкциям.
Кроме того, вы можете отправить запись в виде вложения при помощи приложения «Почта». При выборе файла для вложения в сообщение электронной почты коснитесь или выберите звукозаписыватель в меню.
-
Выберите запись, которую нужно удалить.
-
Коснитесь и удерживайте или щелкните правой кнопкой мыши и выберите Удалить.
Если вы впервые используете это приложение, следуйте инструкциям на экране, чтобы предоставить ему разрешение на доступ к микрофону компьютера.
Чтобы вручную предоставить звукозаписывательу разрешение на использование микрофона, выполните следующие действия:
-
Выберите Пуск > Параметры > Конфиденциальность & безопасность > Микрофон.
-
В разделе Разрешить приложениям доступ к микрофону найдите приложение «Звукозапись» и включите доступ к микрофону .
-
Выберите Пуск > Параметры > система > звук > вход >массив микрофона.
-
Рядом с массивом микрофона выберите шеврон .
-
В разделе Параметры ввода > Громкость ввода используйте ползунок, чтобы настроить громкость микрофона.
Нужна дополнительная помощь?
Нужны дополнительные параметры?
Изучите преимущества подписки, просмотрите учебные курсы, узнайте, как защитить свое устройство и т. д.
If you want to record audio on Windows 10, there’s a handy tool — Voice Recorder. It’s a pre-installed app. Read on, and this article tells you whatever you want to know about Voice Recorder.
You’ll learn
- How to set up a microphone for Voice Recorder on Windows 10?
- How to use Voice Recorder on Windows 10?
- How to fix issues with Voice Recorder on Windows 10?
How to set up a microphone for Voice Recorder on Windows 10?
- Type voice recorder in the Windows search box, and select Voice Recorder.
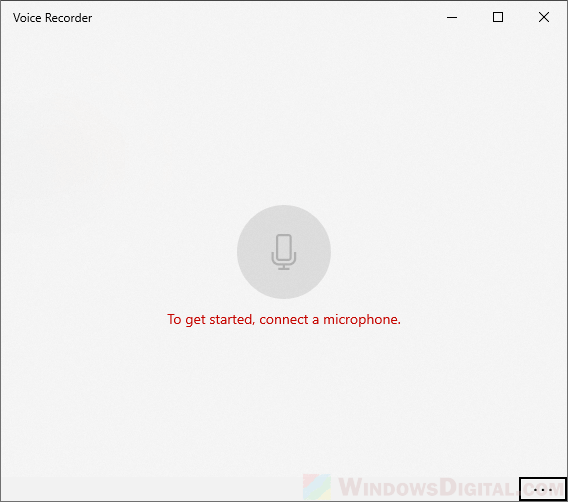
- A window will pop up and may display an error message: You need to set up a microphone in Settings — Just click the three dots in the lower left corner, and choose Microphone settings.

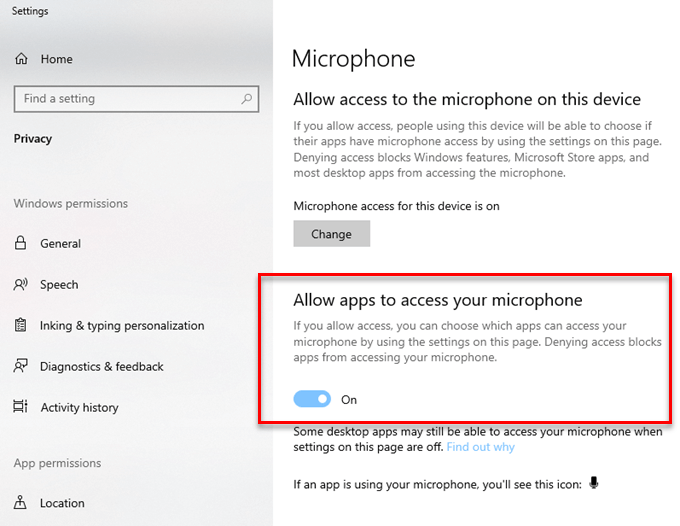
- In the Settings window, verify Allow apps to access your microphone is turned on.

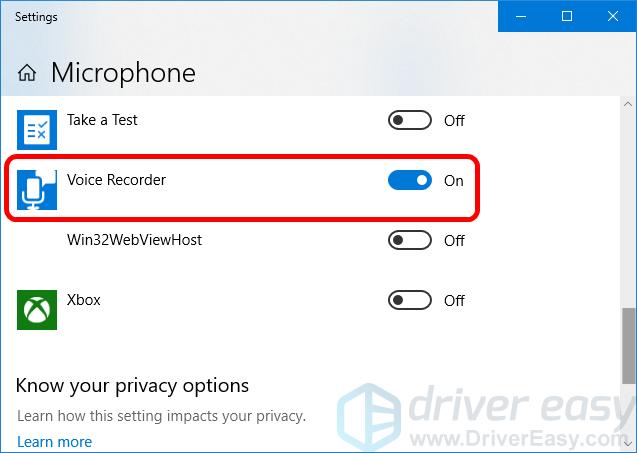
- In the Choose which apps can access your microphone section, make sure Voice Recorder is enabled.
- Close the Settings window and the Voice Recorder window.
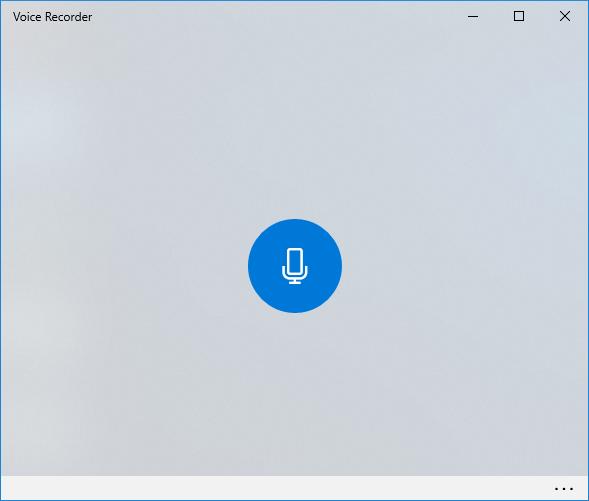
- Relaunch Voice Recorder through the search box, and you should be able to record smoothly.


How to use Voice Recorder for Windows 10?
- Launch Voice Recorder through the Windows search box.
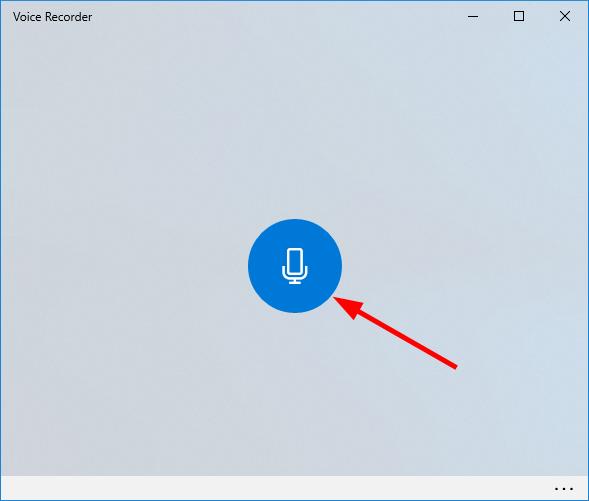
- Click the microphone icon to begin recording.
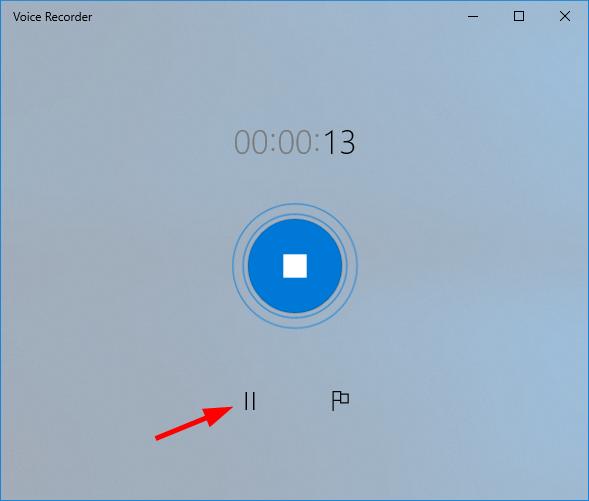
- You can pause the recording at any time — click the pause icon in the lower left.
-
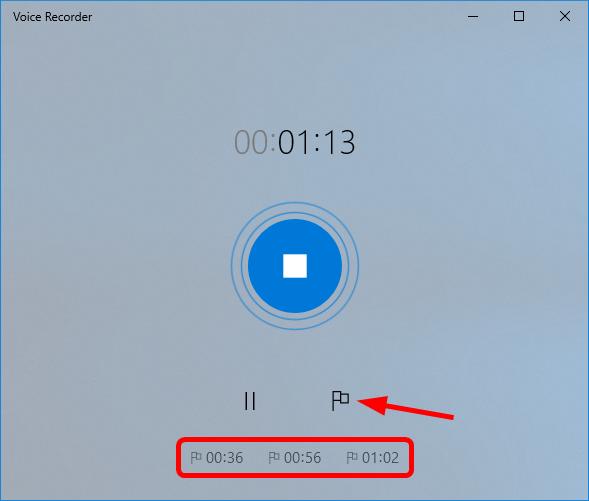
Another thing you can do is mark certain parts of your recording — click the flag icon in the lower right to add a marker in the recording. You can add as many markers as you want.
-
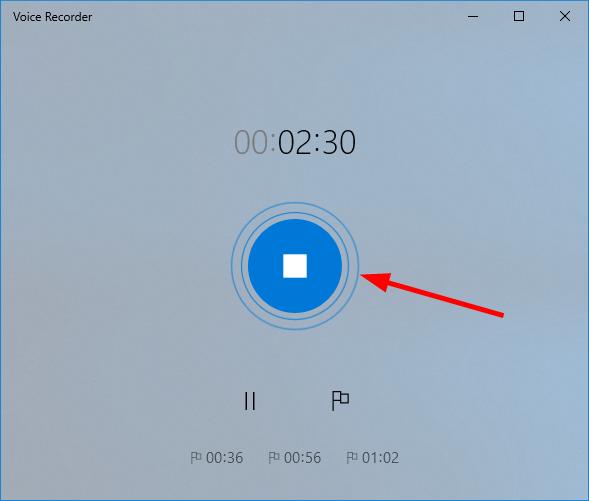
When you’re done recording, click the stop button in the middle to stop recording.
-
You can then click the recording to play it.
-
There’re a few actions you can perform on your recording: share, trim, delete and rename your recording.
Note: All the markers you added also appear on the play bar.
If you want to open the file location of the recording, just click the three dots in the lower-right corner, and select Open file location.


If you can’t record because your mic isn’t working, you may need to update your audio driver.
How to fix issues with Voice Recorder for Windows 10?
A missing or outdated audio driver may stop you from recording on Windows 10. You can try fixing the issue by updating your audio driver.
There are two ways to update your audio driver: manually and automatically.
Manual driver update — You can update your audio driver manually by going to the manufacturer’s website and searching for the most recent correct driver. Be sure to choose the driver that’s compatible with your exact audio device model and your version of Windows.
Automatic driver update — If you don’t have the time, patience or computer skills to update your audio driver manually, you can, instead, do it automatically with Driver Easy.
Driver Easy will automatically recognize your system and find the correct drivers for it. You don’t need to know exactly what system your computer is running, you don’t need to be troubled by the wrong driver you would be downloading, and you don’t need to worry about making a mistake when installing. Driver Easy handles it all.
- Download and install Driver Easy.
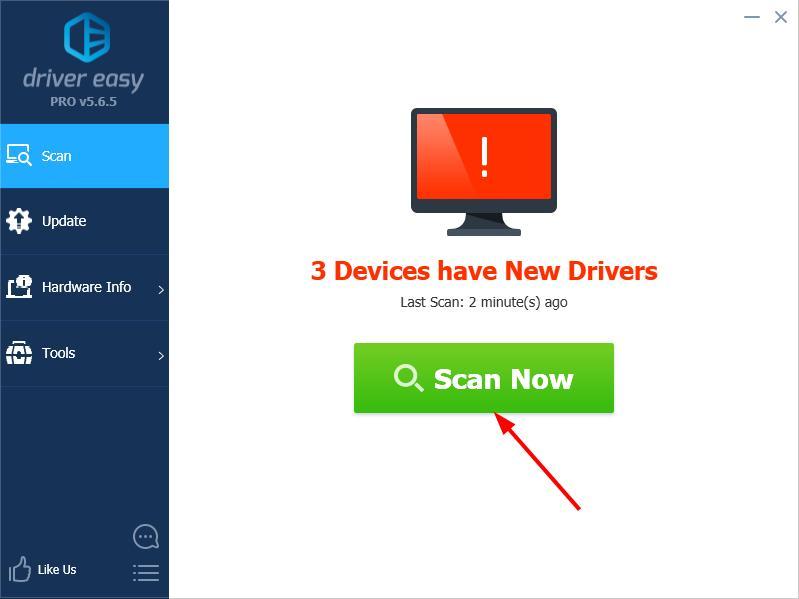
- Run Driver Easy and click Scan Now. Driver Easy will then scan your computer and detect any problem drivers.

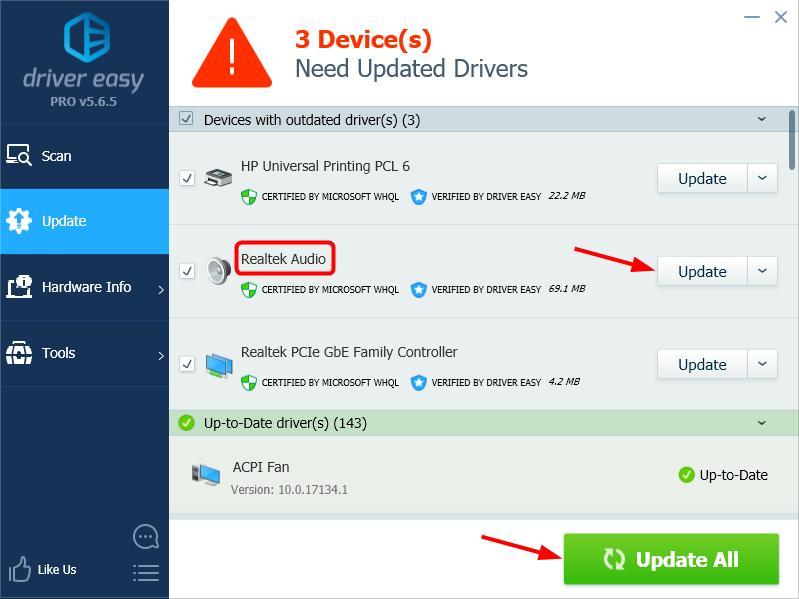
- Click the Update button next to your audio device to automatically download the correct version of its driver, then you can manually install it (you can do this with the FREE version).
Or click Update All to automatically download and install the correct version of all the drivers that are missing or out of date on your system. (This requires the Pro version which comes with full support and a 30-day money back guarantee. You’ll be prompted to upgrade when you click Update All.)
Note: If you need assistance, please contact Driver Easy’s support team at support@drivereasy.com.
Все способы:
- Способ 1: Штатные средства операционной системы
- Что делать, если приложения «Запись голоса Windows» нет в системе
- Способ 2: Стороннее программное обеспечение
- Вариант 1: Audacity
- Вариант 2: UV Sound Recorder
- Вариант 3: Free Audio Recorder
- Вопросы и ответы: 2
Обратите внимание! В этой статье будет рассказываться о том, как записать звук, воспроизводимый непосредственно самой системой, и который вы слышите из динамиков. Если вам необходимо записать звук с подключенного к компьютеру микрофона, тогда обратитесь за помощью к другой тематической статье на нашем сайте, в которой автор подробно рассказывает об этом.
Подробнее: Как записать голос с микрофона на компьютер
Способ 1: Штатные средства операционной системы
Чтобы записать звук с компьютера в Windows 10, не обязательно устанавливать специальное программное обеспечение, можно воспользоваться штатными средствами операционной системы. Правда, предварительно необходимо будет выбрать в качестве основного записывающего устройства звуковую карту ПК. Для этого выполните следующие действия:
- Откройте окно системных настроек любым доступным способом. Сделать это можно, например, через контекстное меню «Пуска». Щелкните по нему правой кнопкой мыши и выберите пункт «Параметры».
Читайте также: Как открыть «Параметры» в Windows 10
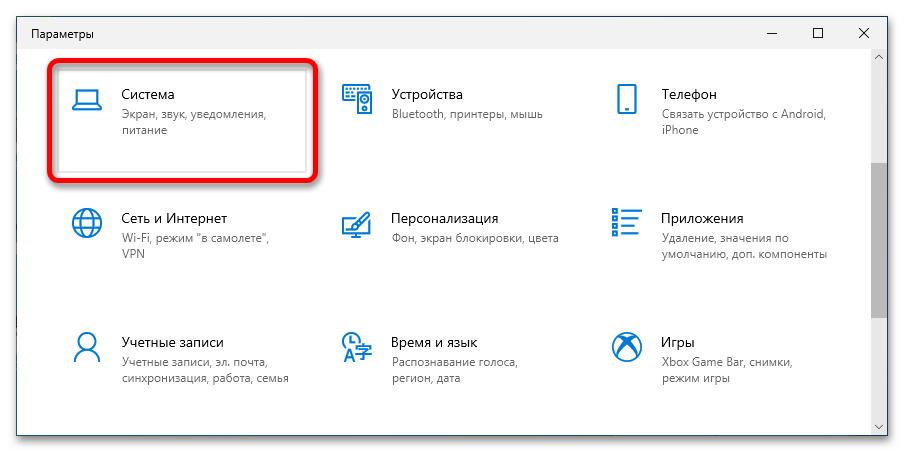
- Проследуйте в раздел «Система», для чего кликните по одноименному элементу интерфейса.
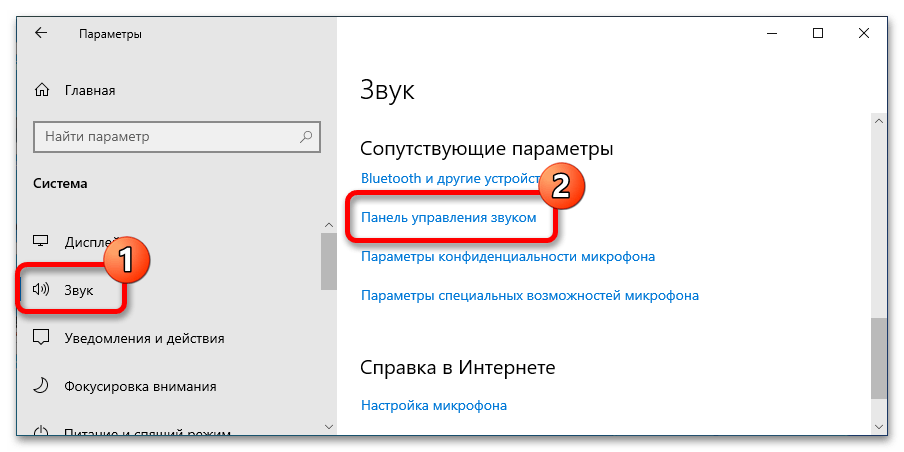
- Воспользовавшись навигационной панелью слева, перейдите на вкладку «Звук», а затем спуститесь вниз по странице и в блоке «Сопутствующие параметры» кликните по ссылке «Панель управления звуком».
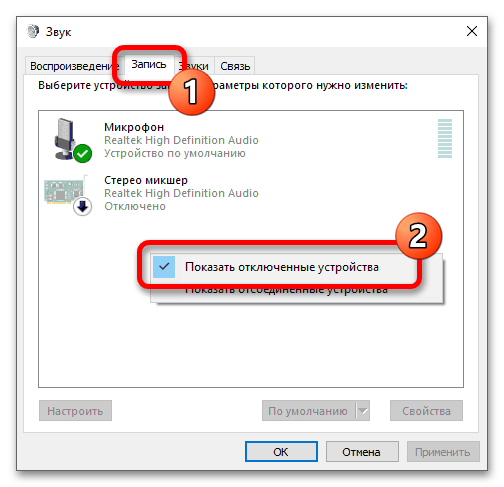
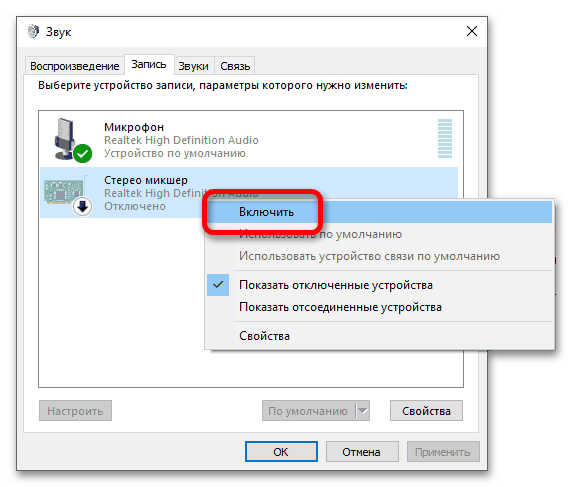
- В появившемся окне «Звук» проследуйте на вкладку «Запись», где включите отображение всех подключенных к ПК устройств. Для этого кликните правой кнопкой мыши по пустому месту и установите в открывшемся контекстном меню галочку напротив пункта «Показать отключенные устройства».
- После этого в списке появится звуковая карта компьютера. Чаще всего она будет иметь название «Стерео микшер», но оно может отличаться и зависит от устройства. Нажмите по ней правой кнопкой мыши и выберите пункт «Включить».
Теперь в качестве звукозаписывающего устройства выбран не микрофон компьютера, а его звуковая карта, через которую и воспроизводятся системный звук. Это позволит записать его с помощью стандартного диктофона, предустановленного в Windows 10:
- Откройте приложение «Запись голоса», отыскав его через поиск по системе или в «Пуске», введя запрос «Запись голоса».
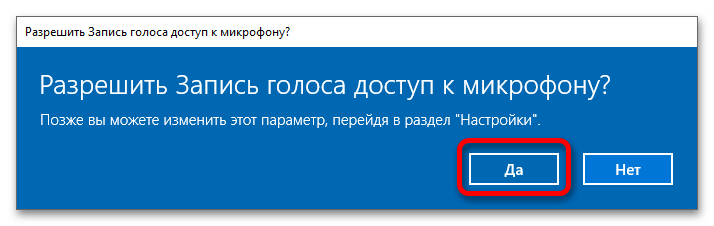
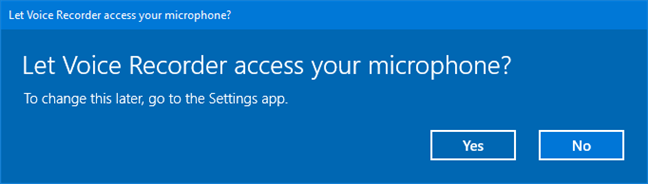
- При первом запуске на экране появится диалоговое окно с просьбой предоставить программе доступ к микрофону. Сделайте этого, кликнув по «Да».
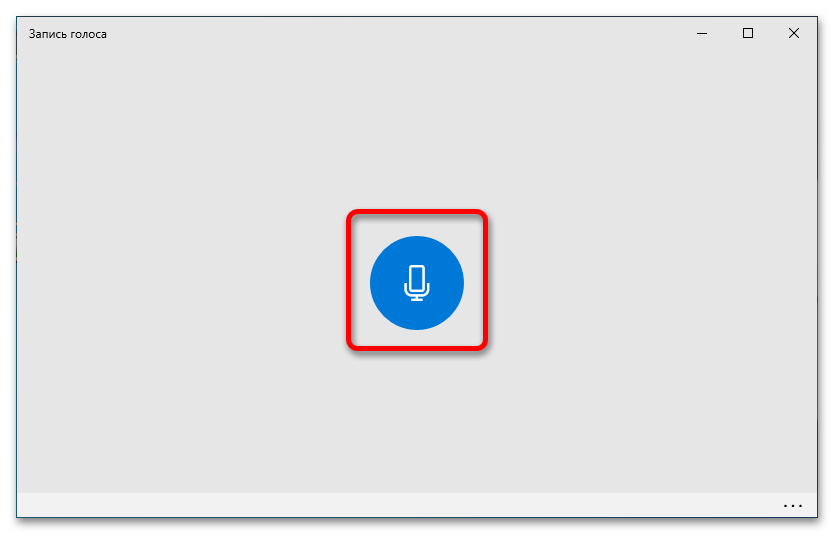
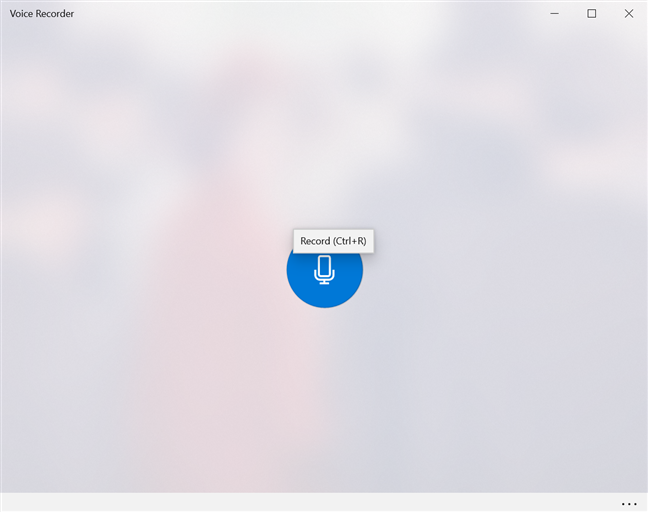
- После запуска приложения нажмите по единственной кнопке, которая имеет иконку микрофона.
- Сразу после этого начнется запись системных звуков. Как только вам потребуется остановить ее, откройте снова программу и кликните по кнопке «Стоп», имеющей иконку белого квадрата.
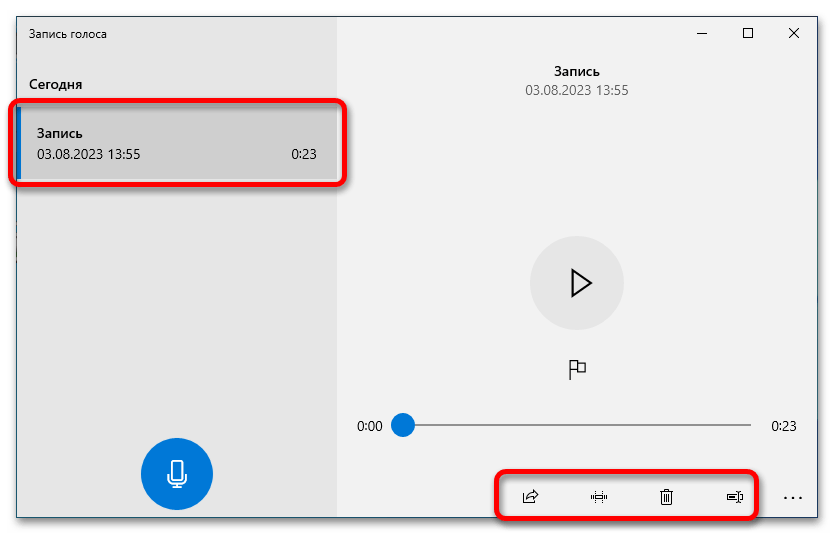
- Как только запись завершится, она будет помещена на боковую панель слева. Кликните по ней, чтобы выбрать. В основной рабочей области приложения вы можете воспроизвести ее, кликнув по кнопке с треугольником, или воспользоваться функциональными кнопками для редактирования, удаления и переименования.

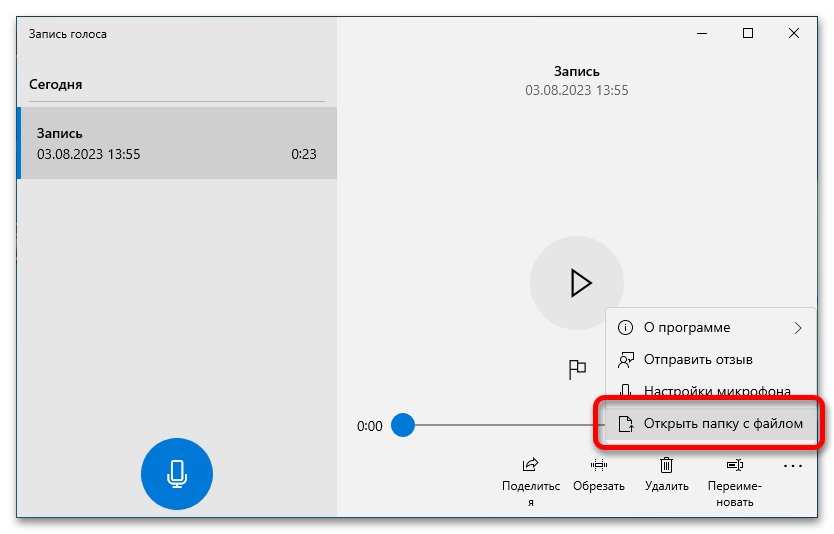
Также вы можете открыть этот файл в «Проводнике». Для этого разверните дополнительное меню, нажав по кнопке с тремя точками, и выберите пункт «Открыть папку с файлом».
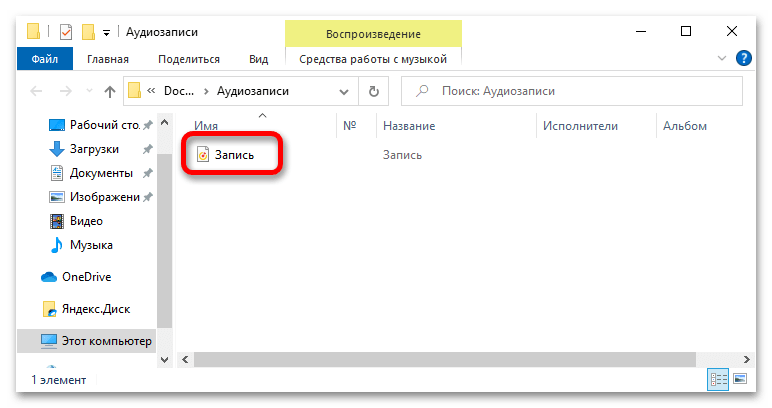
По итогу появится окно файлового менеджера, в котором будут находиться все сделанные вами аудиозаписи.

Примечание! Вы также можете поставить запись на паузу, чтобы в будущем продолжить ее. Для этого воспользуйтесь кнопкой в виде двух вертикальных полос, находящейся в нижней части интерфейса окна.
Что делать, если приложения «Запись голоса Windows» нет в системе
Если посредством поиска у вас не получилось найти приложение «Запись голоса», значит, оно отсутствует у вас на компьютере. Для его установки выполните следующие действия:
- Откройте программу «Microsoft Store», например, посредством соответствующей иконки на панели задач. Если она у вас отсутствует, тогда воспользуйтесь поиском по системе. Введите запрос в специальное поле на панели задач, а затем кликните по одноименному приложению в результатах.
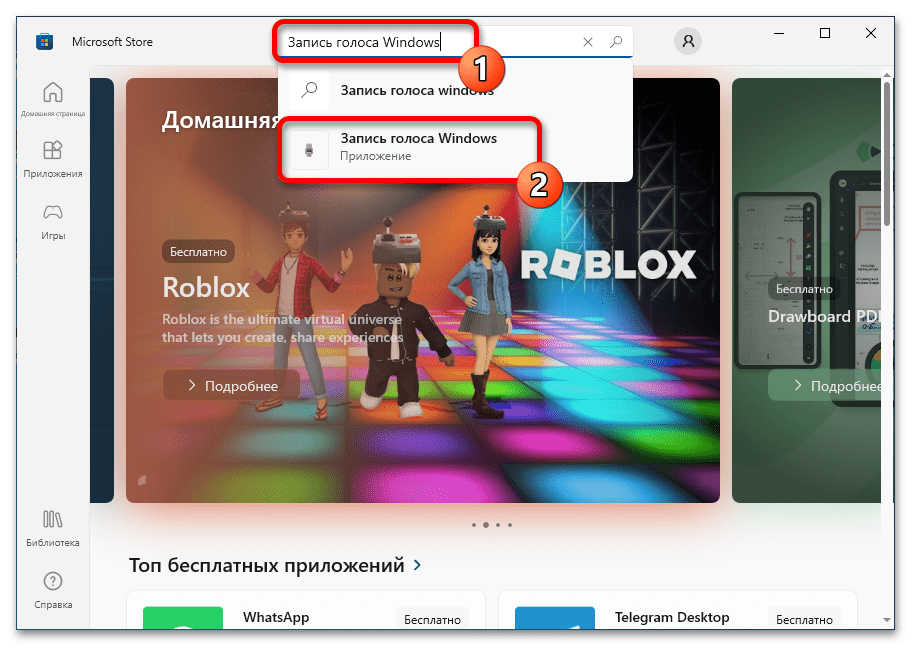
- Отыщите приложение «Запись голоса Windows», для чего воспользуйтесь поисковой строкой в верхней части окна. Как только вы введете свой запрос, появится подсказка с результатами, среди которых выберите искомую программу.
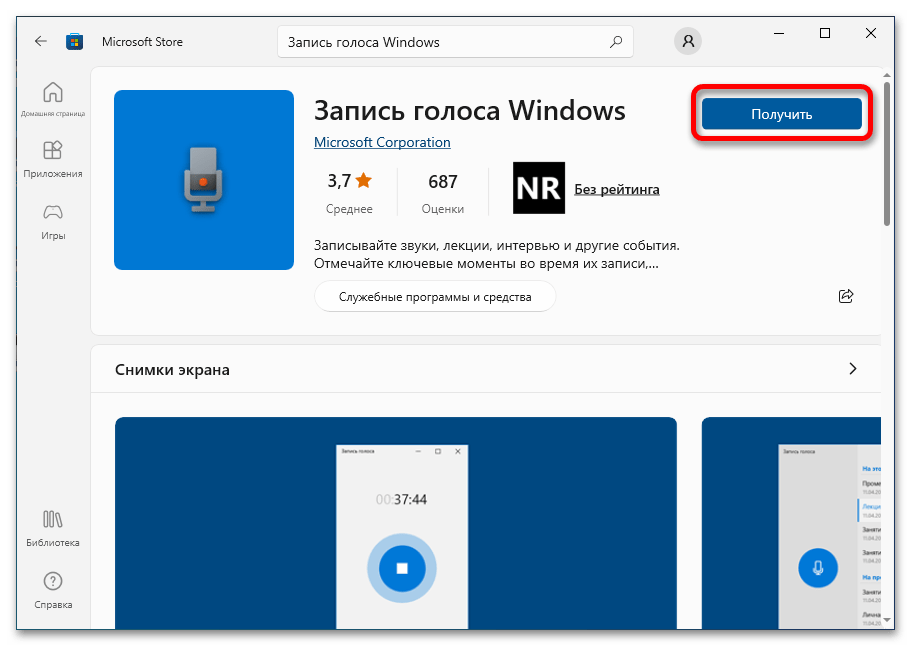
- Находясь на странице приложения, нажмите по «Получить», чтобы запустить процесс загрузки и установки «Запись голоса Windows».
- Дождавшись завершения процедуры инсталляции, откройте приложение при помощи соответствующей кнопки. После этого вы сможете записать системные звуки, воспользовавшись приведенной ранее инструкцией.

Способ 2: Стороннее программное обеспечение
Штатное средство операционной системы многим может показаться неудобным, так как оно требует ручной настройки звуковой карты перед началом записи, а подключенный в это время к компьютеру микрофон перестанет работать. Чтобы исключить эти недостатки, рекомендуется воспользоваться специальным программным обеспечением от сторонних разработчиков.
Вариант 1: Audacity
Audacity — секвенсор с открытым исходным кодом, обладающий множеством функций для редактирования аудиофайлов. С его помощью можно записать звуки из операционной системы, выполнив предварительную настройку каналов. Загрузите инсталлятор приложения с официального сайта разработчика, используя ссылку ниже.
Скачать Audacity
После того как программа будет установлена на компьютер, запустите ее и выполните следующую инструкцию:
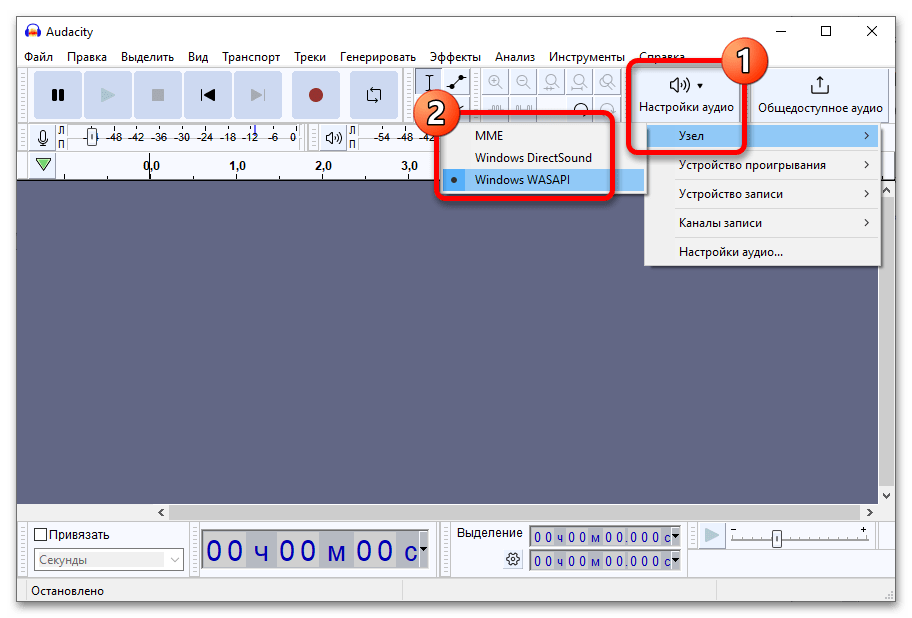
- Кликните по кнопке «Настройки аудио», расположенной на панели инструментов вверху, а затем наведите в появившемся контекстном меню на пункт «Узел». По рекомендациям разработчика через дополнительное меню сделайте основным вариант «Windows WASAPI». Если этот пункт будет отсутствовать, попробуйте другой.
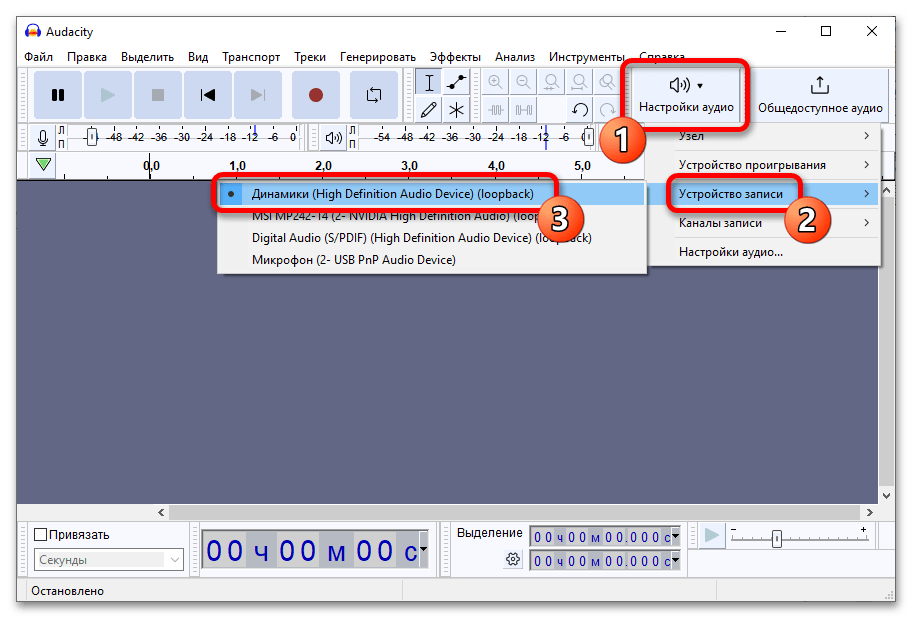
- Снова воспользуйтесь «Настройки аудио», только на этот раз наведите курсор на пункт «Устройство записи». Из появившегося дополнительного меню выберите подключенные к вашему ПК динамики или аудиокарту, которая будет называться «Системный микшер».
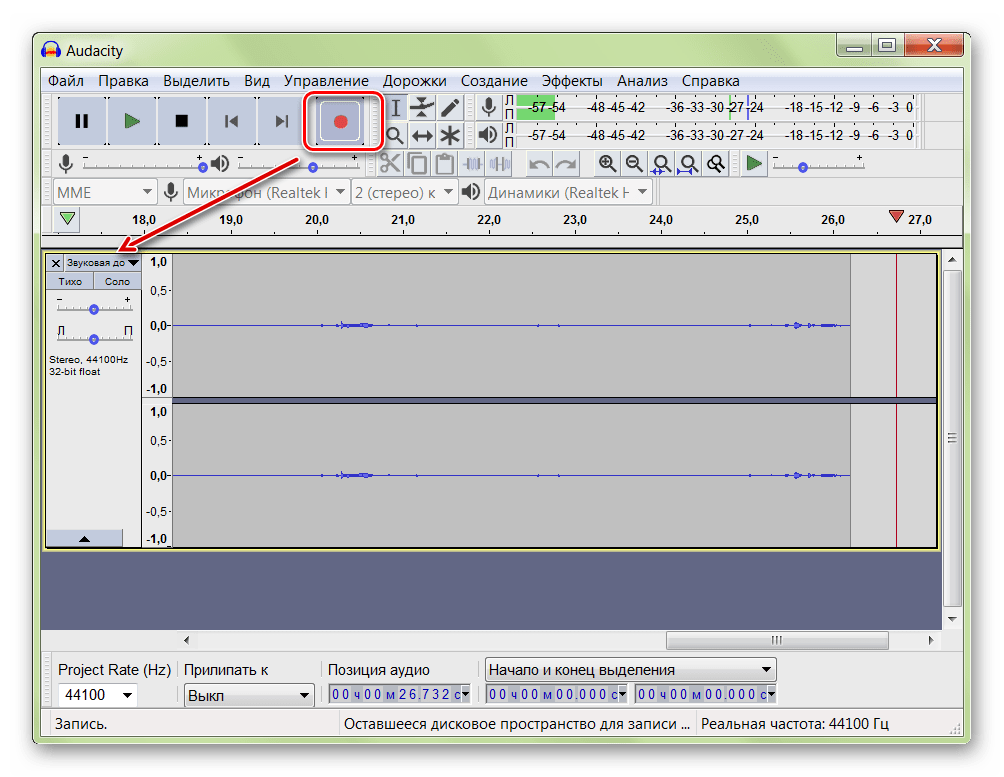
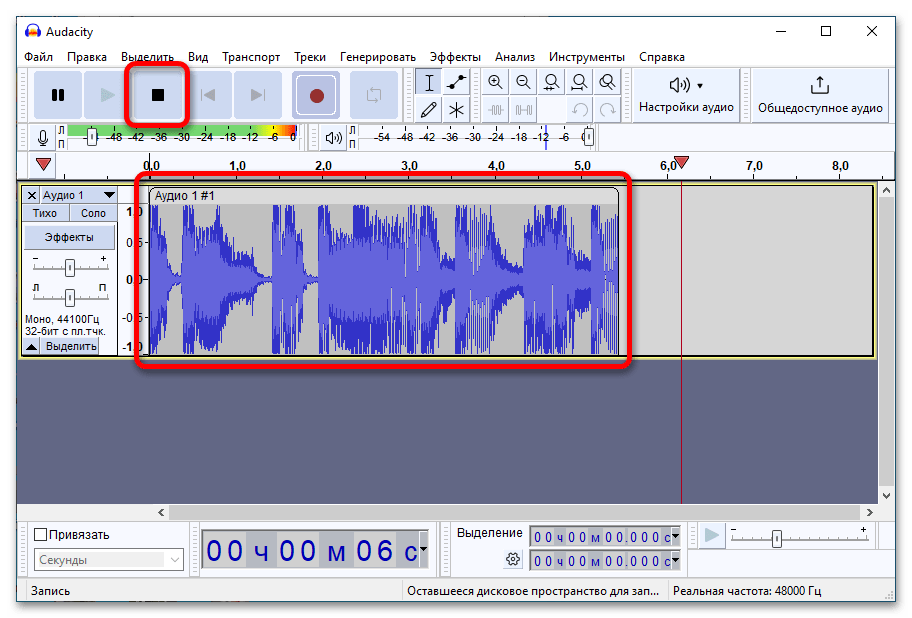
- Когда устройство будет определено, начните запись звука, щелкнув по кнопке «Recording» (красный кружок). Точное ее расположение показано на изображении ниже.
- Начнется процесс записи звука, за которым вы можете следить непосредственно в окне программы Audacity. Как только потребуется остановить запись, щелкните по «Стоп» (черный квадрат).
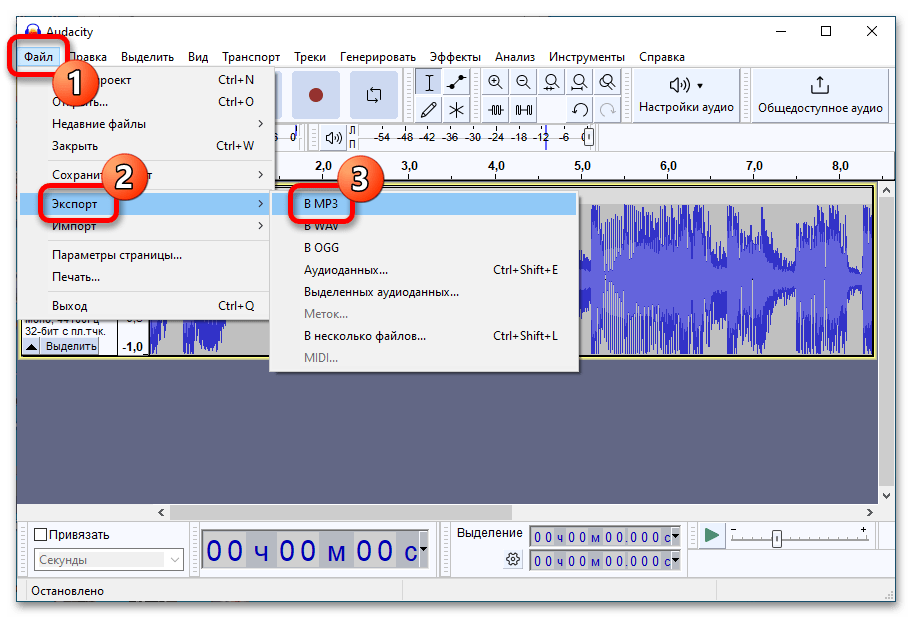
- При необходимости произведите редактирование семпла, воспользовавшись инструментами приложения. Когда все будет готово, сохраните запись на компьютер. Для этого откройте меню «Файл» в верхнем левом углу окна, наведите курсор на пункт «Экспорт», и выберите подходящий аудиоформат, в котором хотите сохранить отрывок. Наиболее распространенным считается MP3.
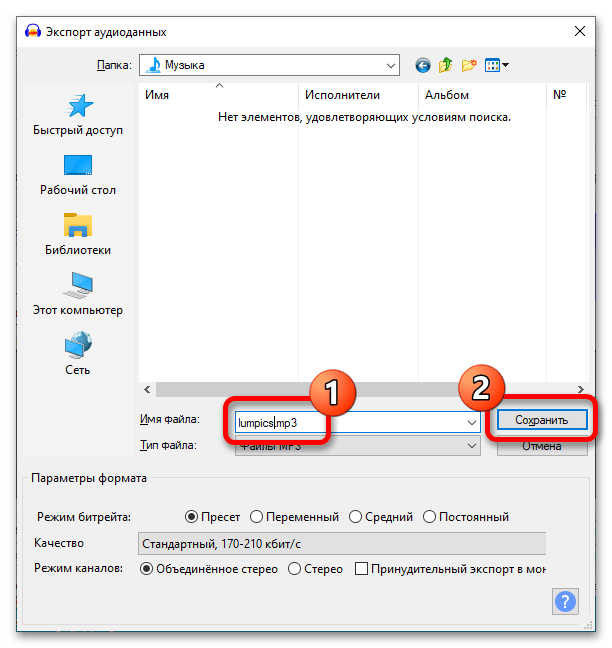
- Через файловый менеджер перейдите в ту директорию, куда хотите сохранить записанный отрывок. После этого введите имя файла в соответствующее поле и кликните по кнопке «Сохранить».
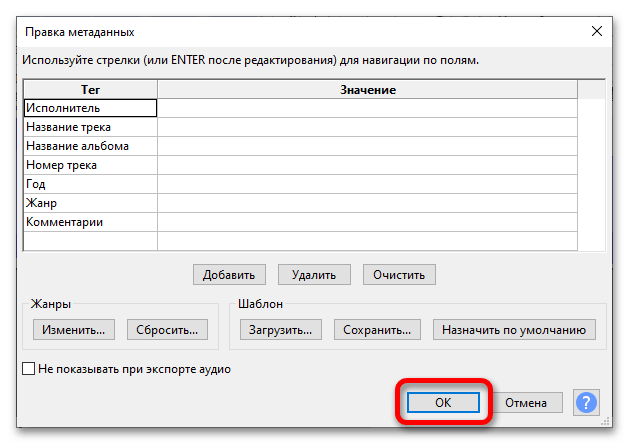
- При необходимости заполните метаданные аудиофайла (делать это не обязательно) и нажмите по кнопке «ОК».
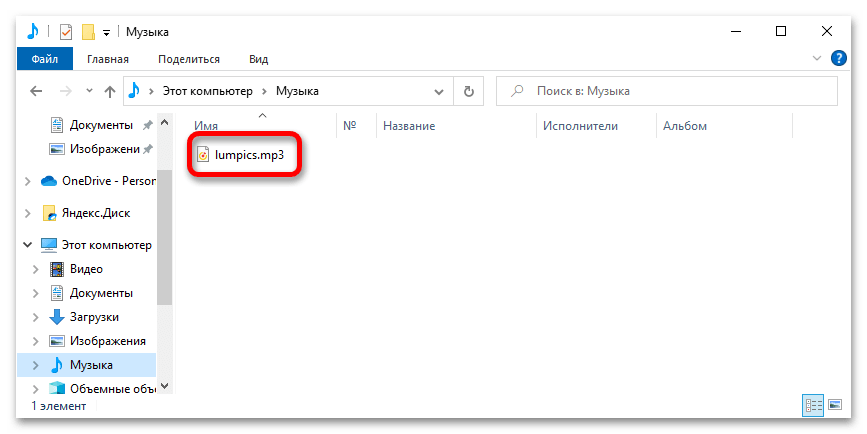
- По итогу сохраненную запись вы сможете найти на своем ПК в той папке, которую выбрали во время экспорта из Audacity.

Вариант 2: UV Sound Recorder
Помочь записать звук с компьютера также может программа UV Sound Recorder, которая разрабатывалась для выполнения именно этой задачи, хоть и имеет некоторые дополнительные функции. Как и в случае с предыдущим рассмотренным софтом, этот тоже рекомендуется загружать с официального сайта.
Скачать UV Sound Recorder
После того как файлы из архива будут извлечены, перейдите в появившуюся директорию и запустите приложение UV Sound Recorder. Далее следуйте инструкции:
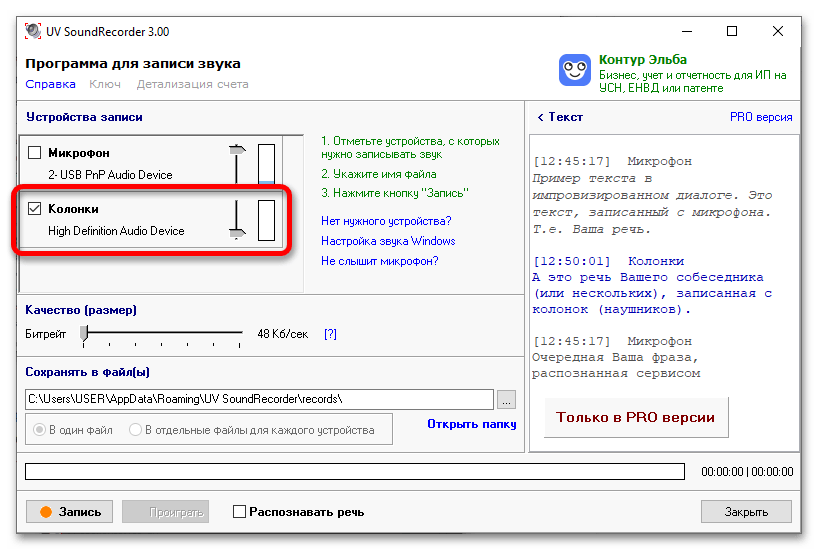
- Первостепенно в окне установите отметку напротив пункта «Колонки». Если рядом со строкой «Микрофон» стоит галочка, уберите ее. Таким образом вы выберете устройство, с которого будет вестись запись звука.
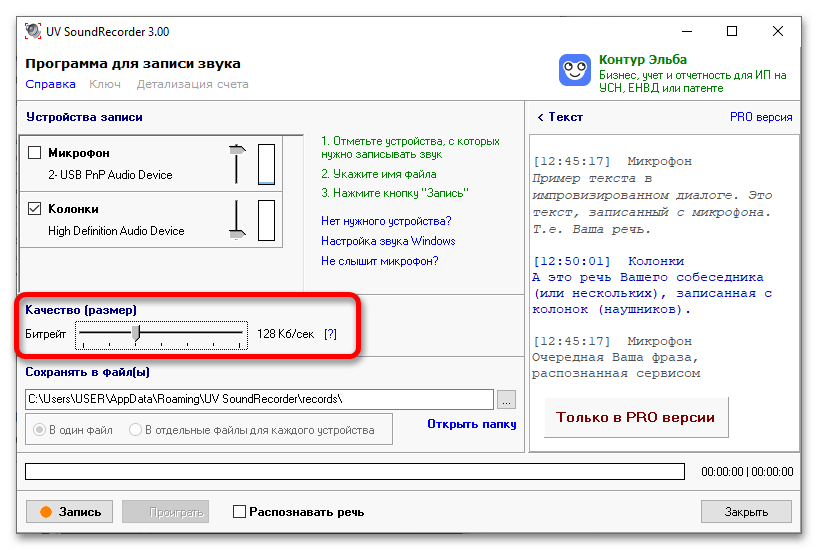
- В блоке «Качество (размер)» воспользуйтесь горизонтальным ползунком, чтобы определить битрейт будущей записи. В конечном итоге этот показатель повлияет на размер файла и качество звука. Приемлемым в большинстве случаев считается битрейт 128 Кбит/с, поэтому выбирать рекомендуется именно его.
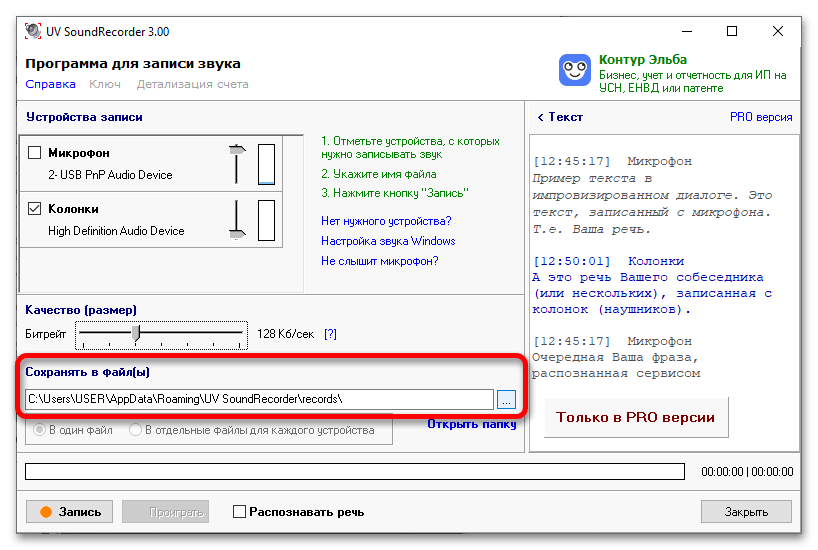
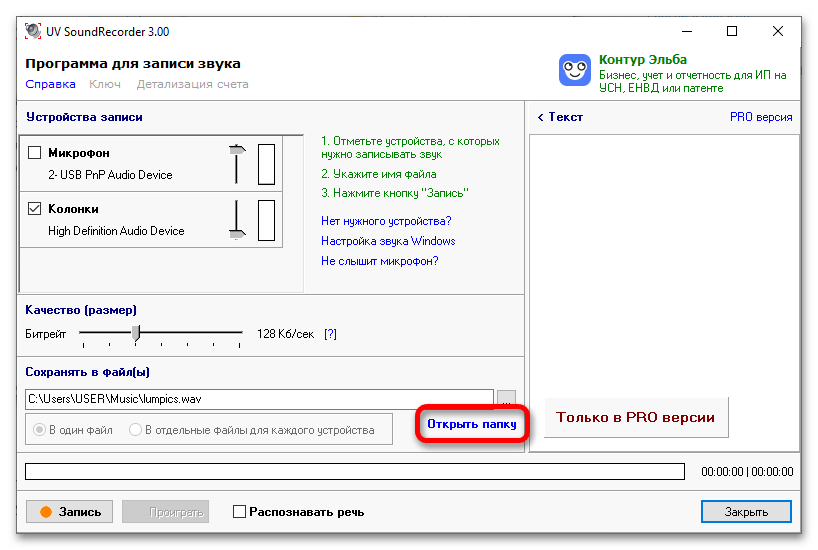
- В блоке «Сохранять в файл(ы)» укажите путь к директории, в которую после окончания записи будет помещен аудиофайл. Сделать это можно вручную, прописав адрес в текстовом поле, или с помощью диалогового окна файлового менеджера. Во втором случае для его открытия щелкните по кнопке с тремя точками.

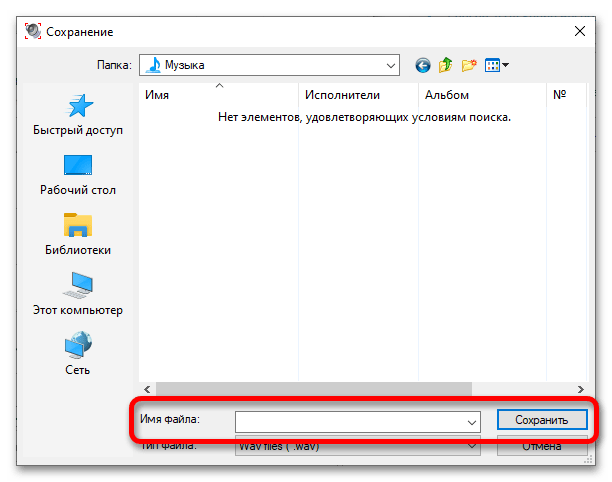
После этого проследуйте в целевую папку, введите любое значение в строку «Имя файла» и щелкните по «Сохранить».
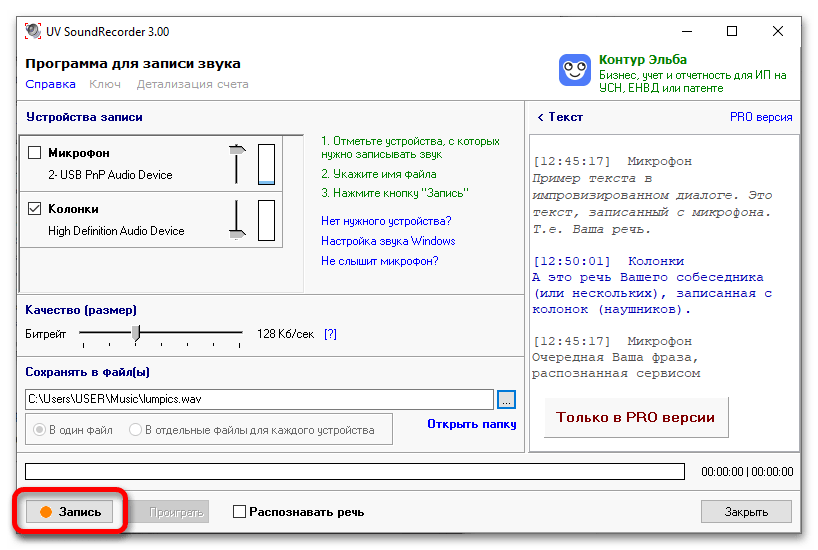
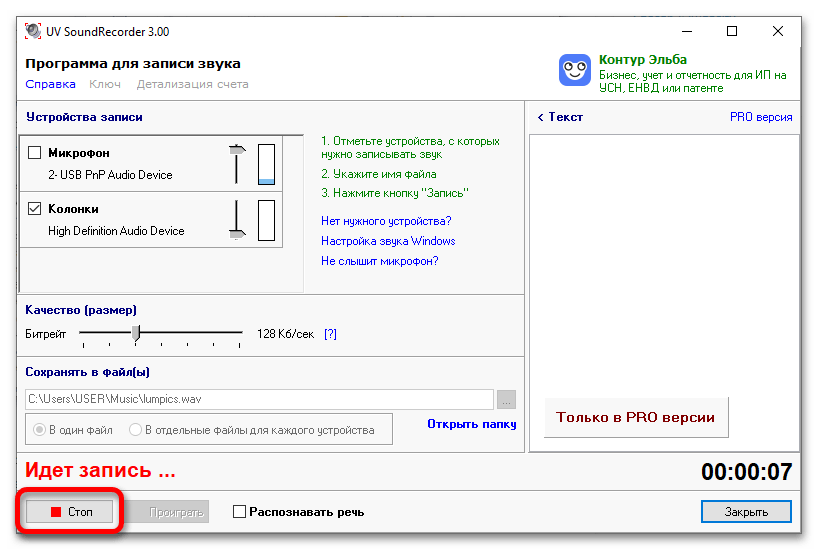
- Начните запись звука с ПК, кликнув по кнопке «Запись», расположенной в нижнем левом углу программы.
- Когда нужный фрагмент будет записан, остановите процесс, нажав по «Стоп».
- Как только это будет сделано, останется прослушать отрывок посредством проигрывателя, используемого в вашей ОС по умолчанию. Находится аудиозапись в указанной ранее директории, и чтобы ее открыть, кликните по строке «Открыть папку».
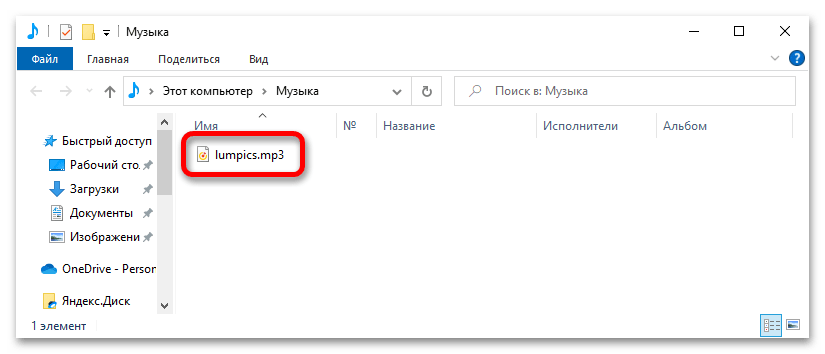
После этого откроется «Проводник», в котором вы сможете найти записанный вами отрывок.
Вариант 3: Free Audio Recorder
Free Audio Recorder — это маловесная утилита, предназначенная для записи звука как с микрофона, так и непосредственно со звуковой карты компьютера. Распространяется она в виде архива. Скачать его вы можете с официального сайта разработчика, воспользовавшись кнопкой ниже.
Скачать Free Audio Recorder
Разархивируйте программу, перейдите в папку и запустите ее исполняемый файл. Далее выполните следующие действия:
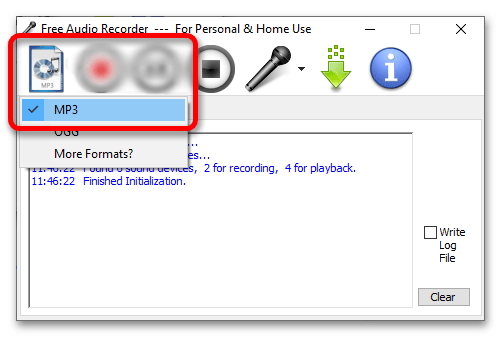
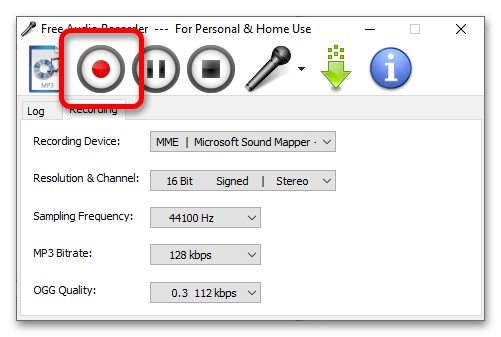
- Выберите аудиоформат, в котором будет сохранена итоговая запись звука. Для этого щелкните по первой иконке на панели инструментов и в появившемся списке нажмите по предпочитаемому варианту. Рекомендуется выбирать «MP3», так как именно он является наиболее распространенным форматом аудио.
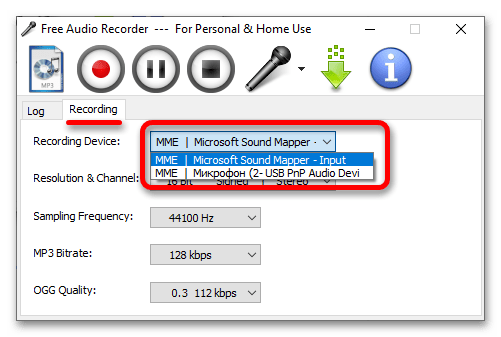
- Последуйте на вкладку «Recording» и из выпадающего списка «Recording Device» выберите название своей звуковой карты или динамиков.
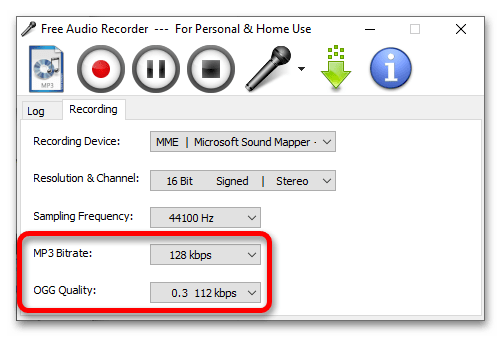
- Через выпадающий список «Sampling Frequency» задайте частоту. При необходимости этот параметр вы можете оставить по умолчанию.
- Определите битрейт ранее выбранного формата аудио. Как уже упоминалось ранее, для MP3 достаточно «128 kbps», но если размер конечного файла не имеет значения, выставляйте максимальное значение.
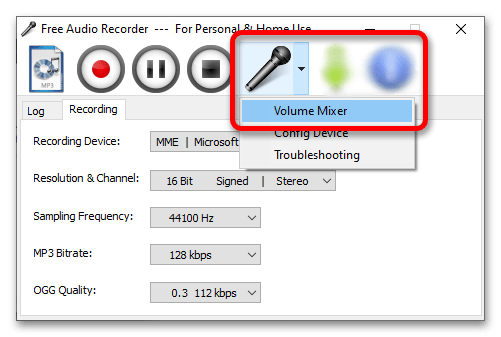
- Настройте выходной звук каждого системного приложения. Сделать это можно с помощью стандартного микшера, который открывается через контекстное меню иконки микрофона, расположенного на верхней панели инструментов. Щелкните по ней левой и выберите пункт «Volume Mixer».

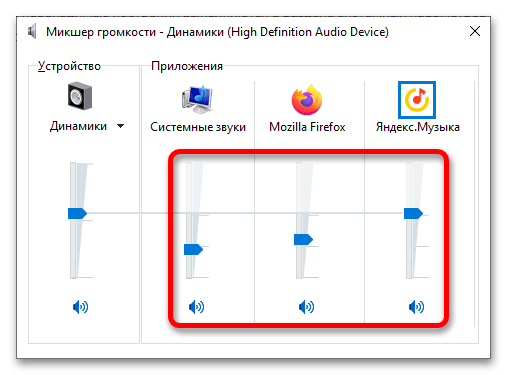
В системном микшере громкости воспользуйтесь вертикальными ползунками, чтобы понизить или повысить громкость определенного приложения. Но делать это не обязательно.
- Начните запись звука с ПК, нажав по соответствующей кнопке в верхней части окна. Ее внешний вид и расположение вы видите на скриншоте ниже.
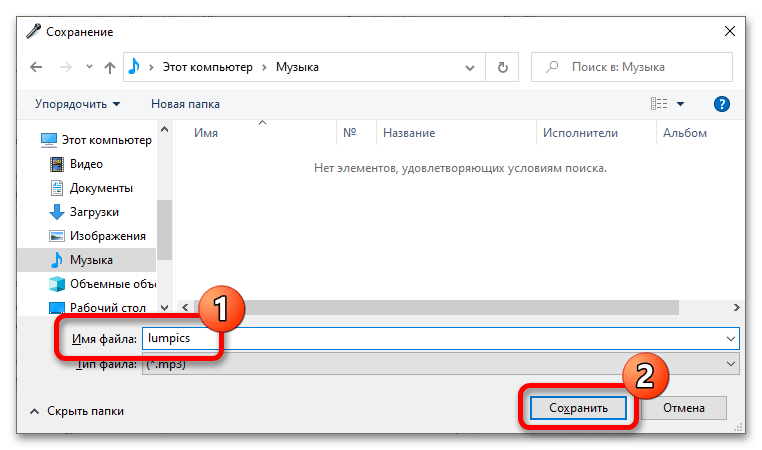
Через «Проводник» перейдите в папку, в которую хотите сохранить готовый аудиофайл. Укажите его название, введя в поле «Имя файла», после чего щелкните по «Сохранить».
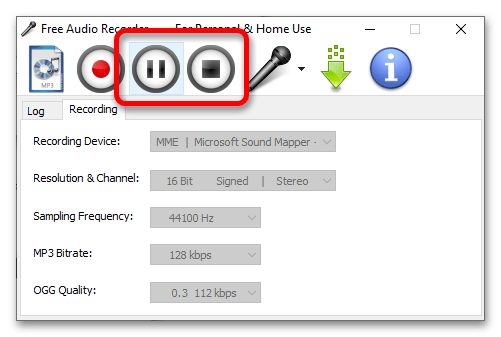
- После начала записи основные элементы интерфейса станут неактивными, о чем будет свидетельствовать их серый оттенок. При необходимости вы можете поставить запись на паузу, щелкнув по соответствующей кнопке. Для завершения процедуры воспользуйтесь кнопкой «Стоп».
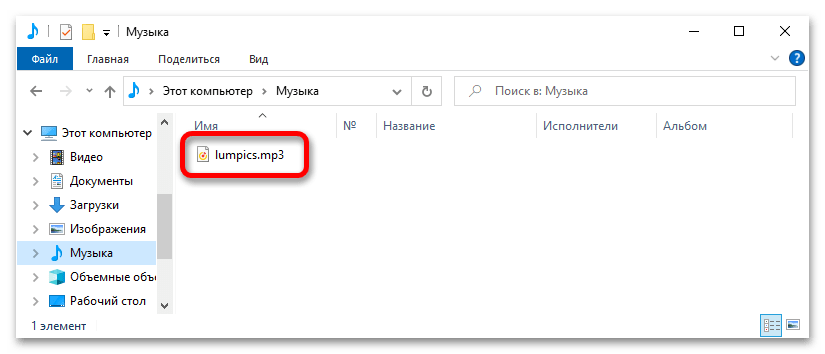
- По итогу аудиофайл с записью звуков компьютера вы сможете найти в папке, выбранной в начале этой процедуры.

Наша группа в TelegramПолезные советы и помощь
The free Voice Recorder app bundled with Windows 10 is great in its simplicity, allowing you to make quick and clear audio recordings, without the use of a professional program or recording device. Whether you need to practice the acceptance speech for winning your Hearthstone Tournament, decide to interview your favorite pet or want to figure out if you are good enough for American Idol, the Voice Recorder is your go-to app in Windows 10. Let’s see what it can do:
NOTE: The screenshots and the instructions in this guide apply to Windows 10 May 2019 update or newer. If you do not know what version of Windows 10 you have, read: How to check the Windows 10 version, OS build, edition, or type.
How to access the Voice Recorder app in Windows 10
One way to access the Voice Recorder is to start typing the app’s name in the Windows 10 search box and then click or tap the relevant result.

Another way is by finding the app in the list of apps from the Start Menu and then clicking or tapping on it.
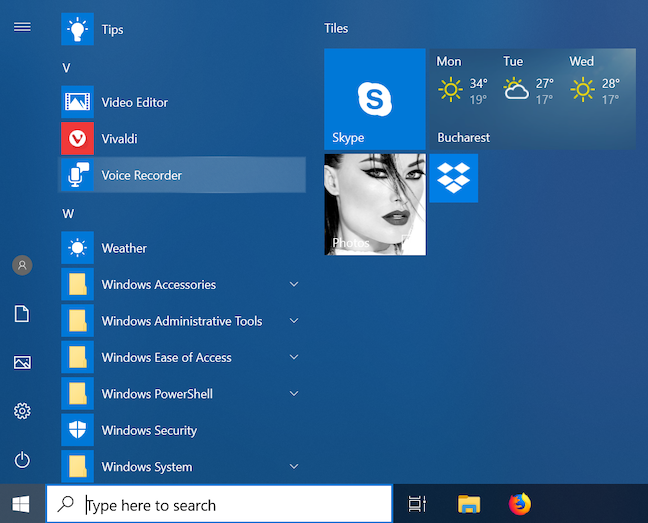
The Voice Recorder app opens, and, if this is the first time you access it and there are no previous recordings saved, it asks for permission to access your microphone. Obviously, this permission should be given, otherwise the app does not work.
How to create a recording using Voice Recorder in Windows 10
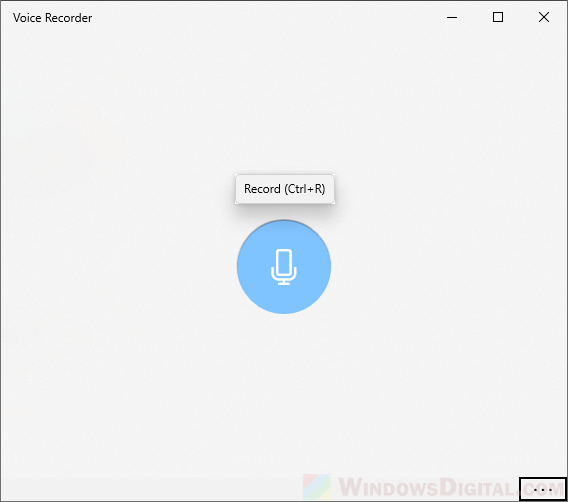
Click or tap the Record button or use the keyboard shortcut Ctrl + R to start your recording.
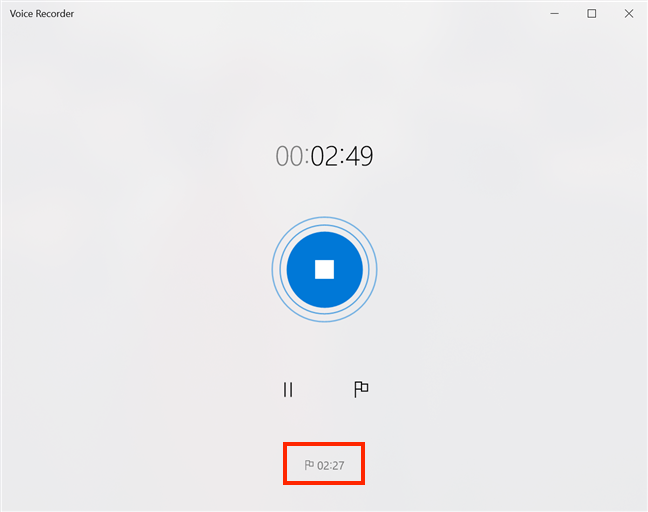
The app starts recording, displaying the time elapsed since the audio recording started.
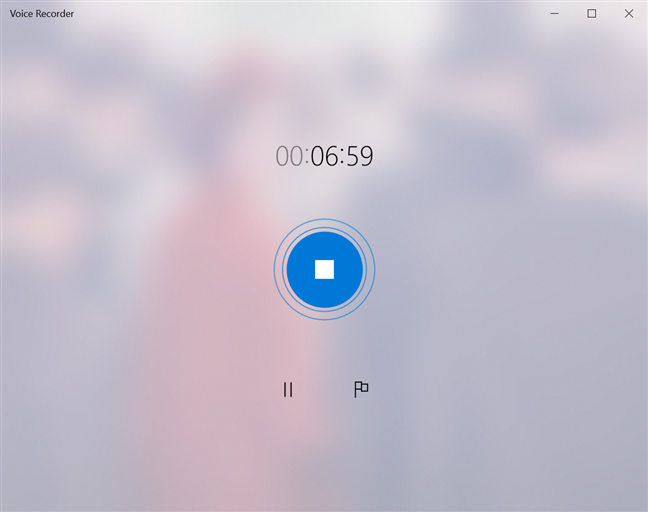
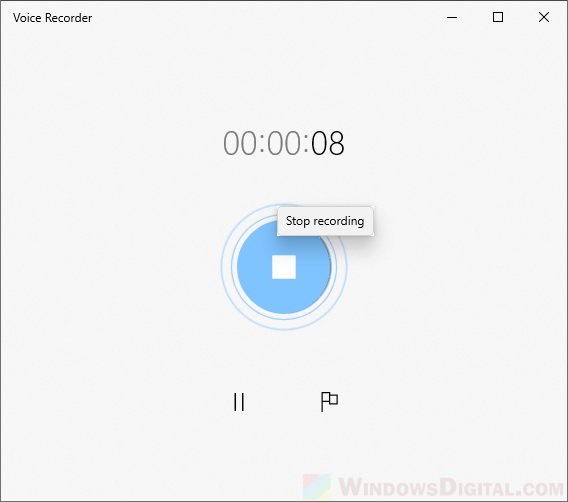
Click or tap the Pause button to pause the recording at any time, without ending the current recording session.
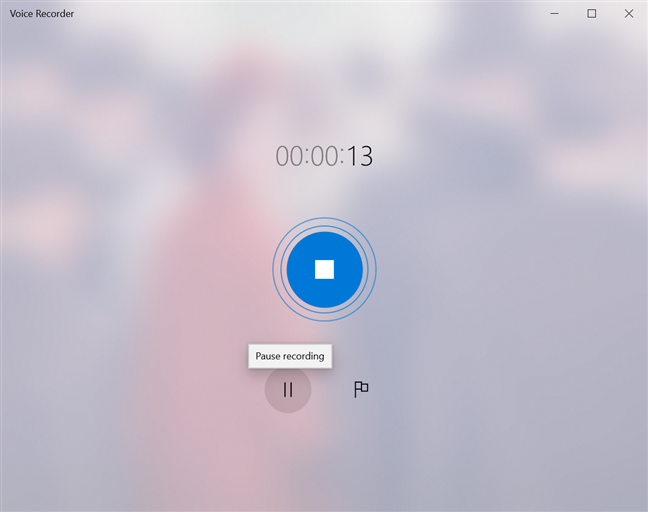
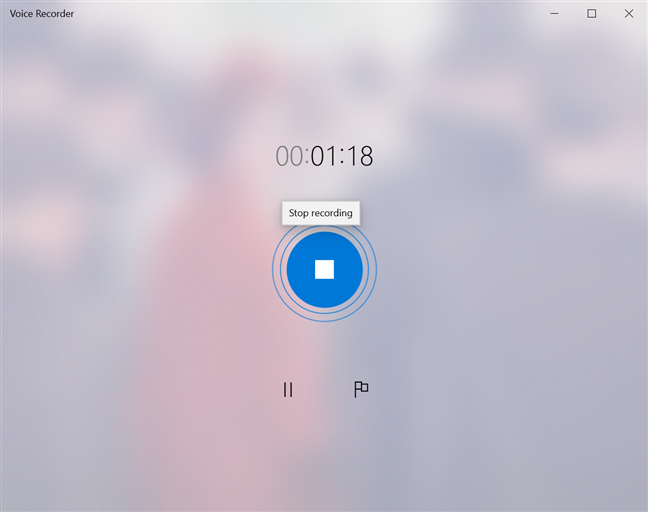
Clicking or tapping the Pause button one more time causes the app to resume the recording. When you are done recording, click or tap the Stop recording button in the center of the window, or press one of the following keys on your keyboard: Esc, Enter, Spacebar, or BackSpace.
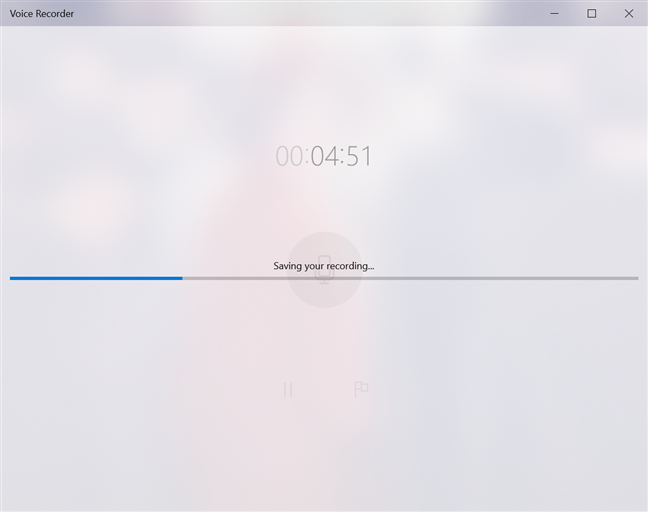
The recording session ends and, especially when it comes to long audio recordings, you are notified that it is being saved. Keep in mind that the limit for a recording is 2hours 59 minutes and 59 seconds, according to our tests.
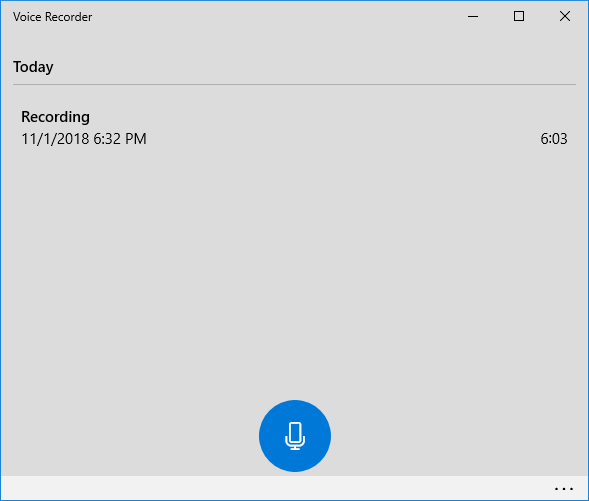
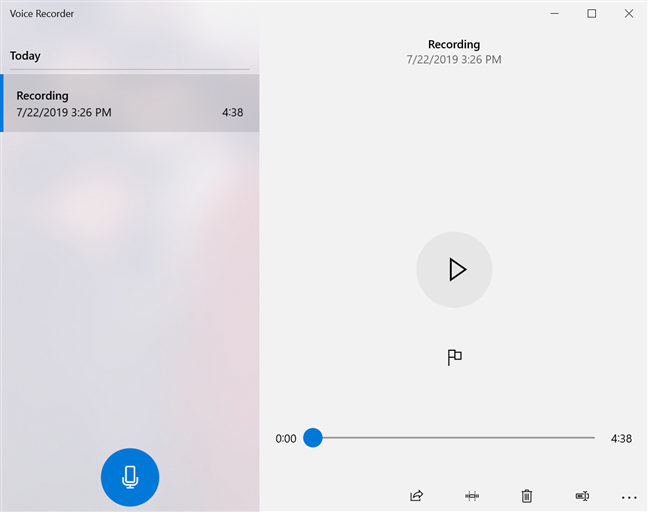
Your audio recording is saved under the default name Recording. The date and time when the recording was saved are displayed underneath, followed by the duration of the recording. Once you have at least one recording saved in Voice Recorder, the Record button is displayed in the lower-left corner of the window, and you can press it at any time to start a new recording.
If the Voice Recorder is closed before saving the recording, you get a notification, letting you know that your recording is paused.
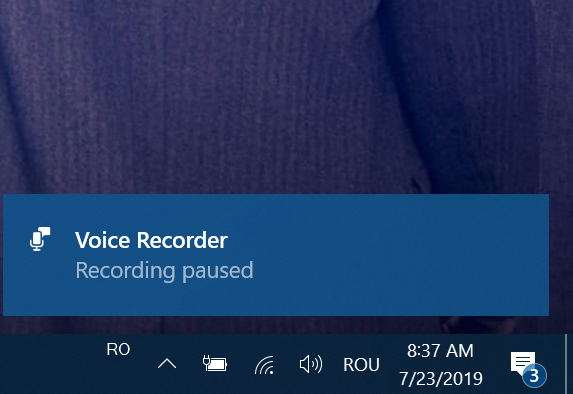
This is not entirely accurate, as your recording is actually saved under the name Recording (autosaved) and it can not be resumed.
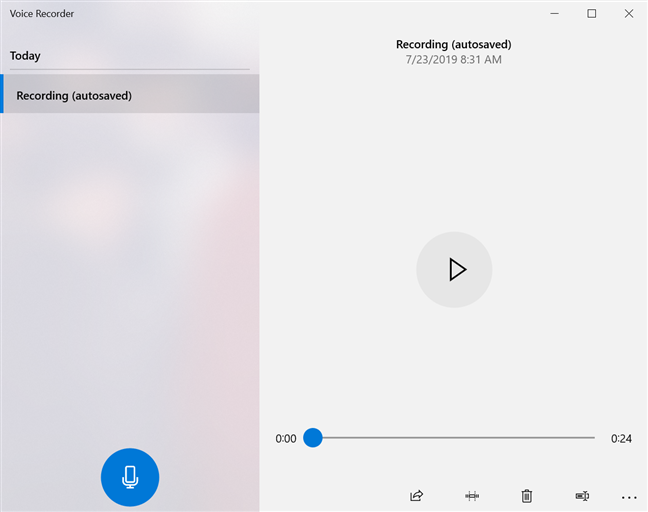
In this specific case, any markers added to the recording are gone, same as the option to add a marker.
How to find and play your audio recording in Voice Recorder
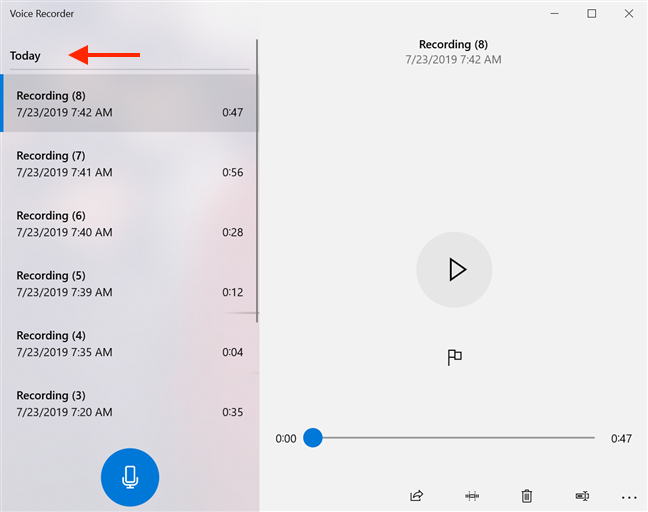
All your recording sessions are saved in a list in the Voice Recorder app under the default name Recording, the most recent being at the top. To make things less confusing for users, subsequent recordings display a number in brackets, and the list is divided by days.
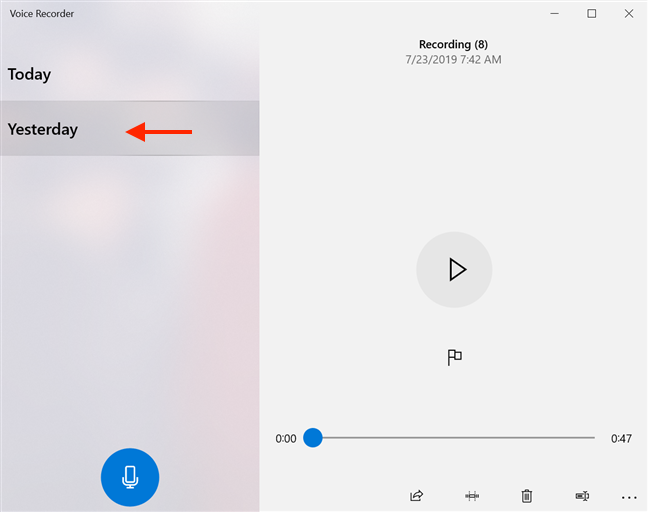
If you use the Voice Recorder a lot, scrolling through the list of recordings to find the one you want can become tiresome. Clicking or tapping the day subcategory displayed in the Voice Recorder takes you to a new window, where you can choose any of the days when recordings have been made.
Click or tap the day that interests you from the list.
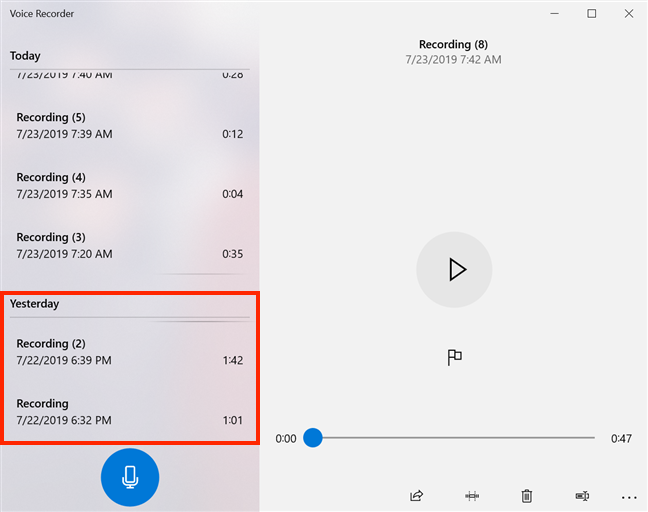
This returns you to the initial list, where the recordings from that day come into focus.
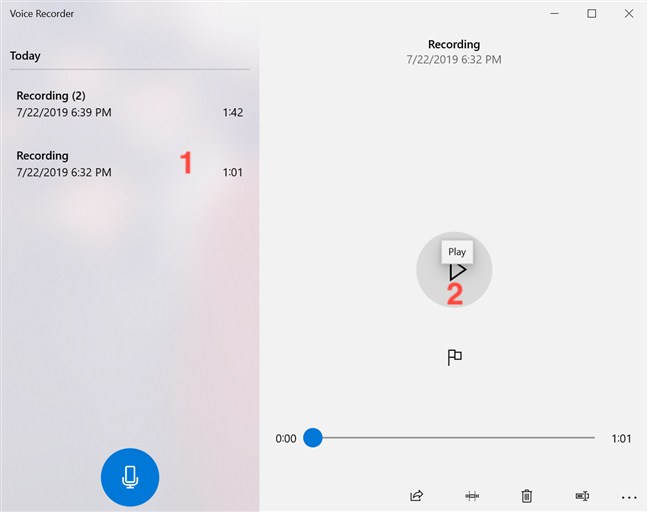
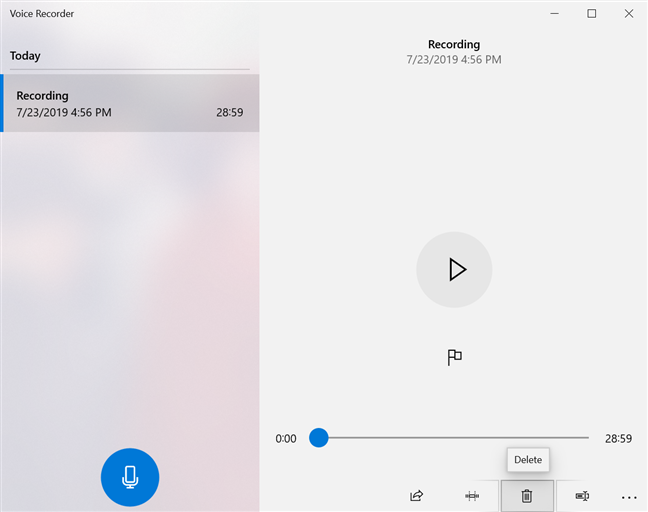
To listen to a recording, select it from the list and either click or tap on it again or press Play.
Press the Pause button to pause the recording at any time. To toggle between playing and pausing a recording, you can also click or tap on its name in the list, or use the Enter or Spacebar keys on your keyboard.
How to use markers inside a recording in Voice Recorder
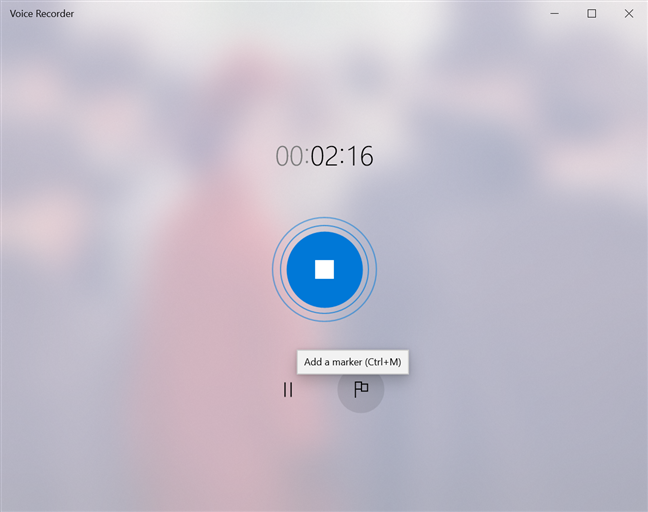
Markers let you «bookmark» important parts of a recording, making them easy to identify and access afterwards. You can use them to mark portions of a recording or to highlight key moments, and they come in handy, especially when it comes to long recording sessions. A marker does not alter or interrupt the recording in any way. While you are recording, the flag icon displayed next to the Pause button allows you to «Add a marker» inside your recording. To add a marker, click or tap the «Add a marker» button or use the keyboard shortcut Ctrl + M.
The marker is shown at the bottom of the window, next to a flag icon, and it displays the time elapsed since the recording started.
You can add as many markers as you want while recording. You can also add markers while playing a previously saved recording, by pressing the «Add a marker» button.

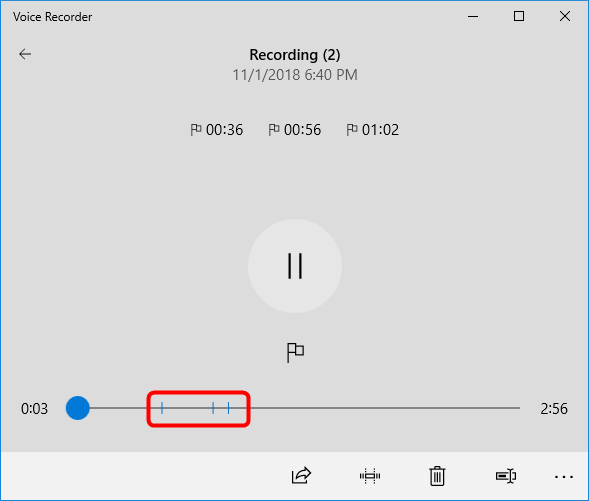
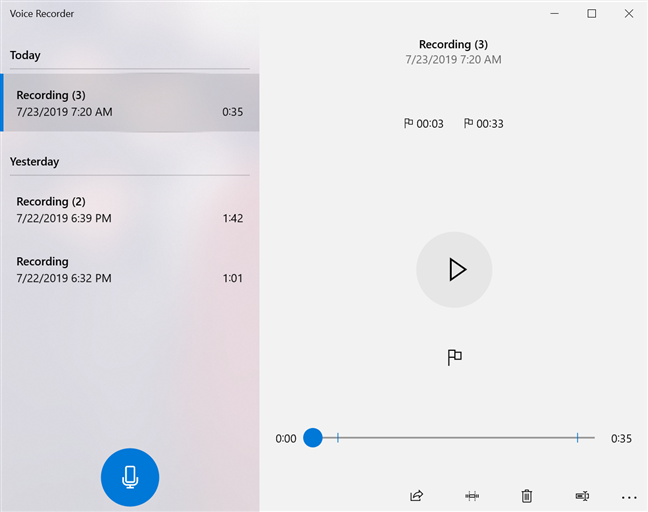
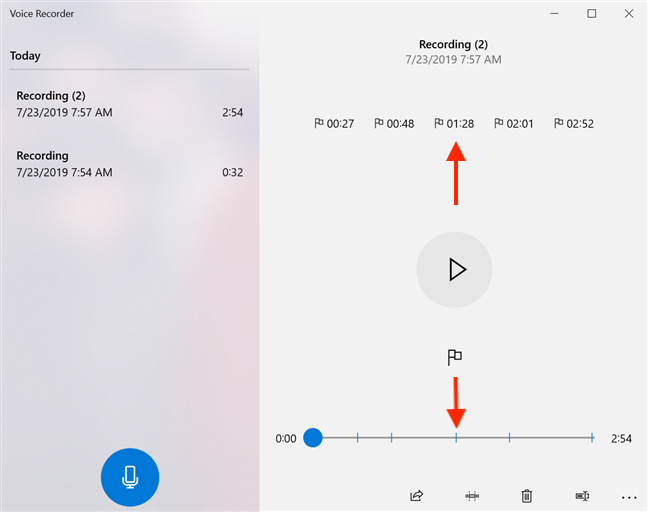
When you play a recording, all the markers for that recording (whether you added them doing the making of the recording or while listening to it) are displayed both in the upper right portion of the window, under the name and details of the recording, and in the play bar. Clicking or tapping a marker allows you to quickly jump to underlined moments.
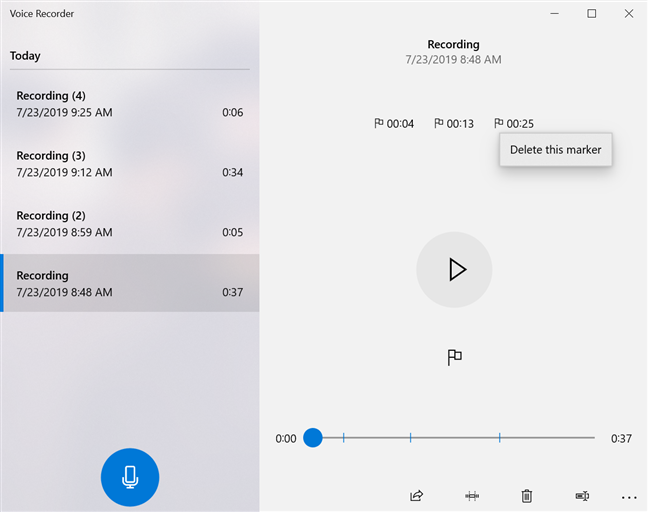
To remove a marker, right-click or press-and-hold on it, and then click or tap the only available option: «Delete this marker.«
How to trim a recording with Voice Recorder in Windows 10
The Voice Recorder allows you to trim a recording, and only keep the relevant part(s) from it.
To do that, select the Recording from the list and then click or tap the Trim button at the bottom of the window.
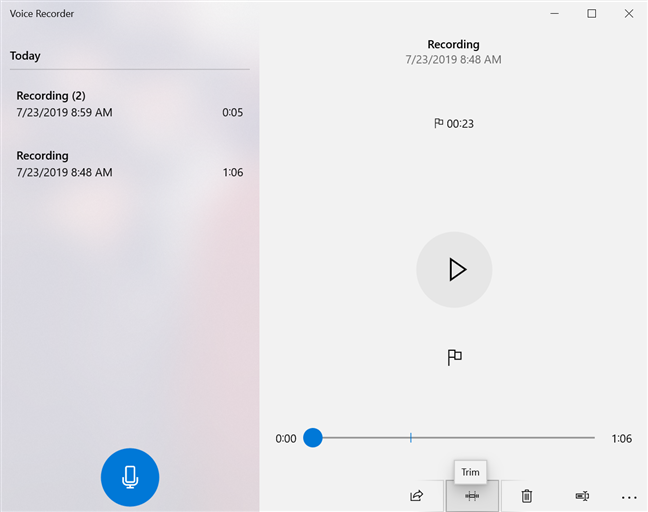
This causes two pins to appear on the play bar, named «Start of trimmed section» and «End of trimmed section.« Drag them around to select the part of your recording you want to keep.

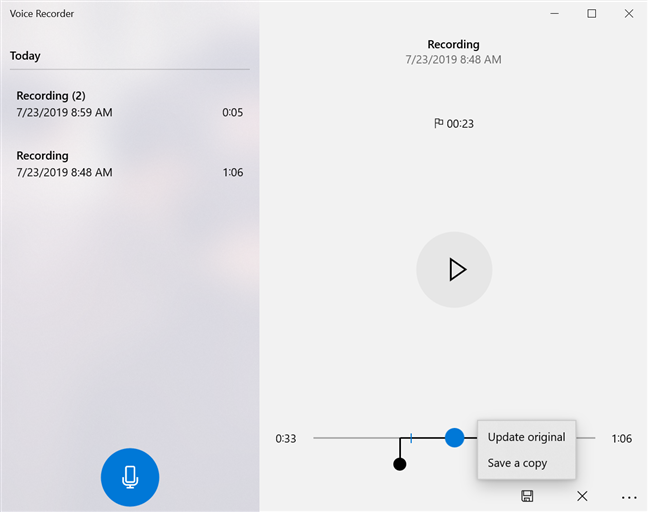
You can press the Play button at any time while trimming to make sure your selection is accurate. When you have made your decision, click or tap Save at the bottom of the window.
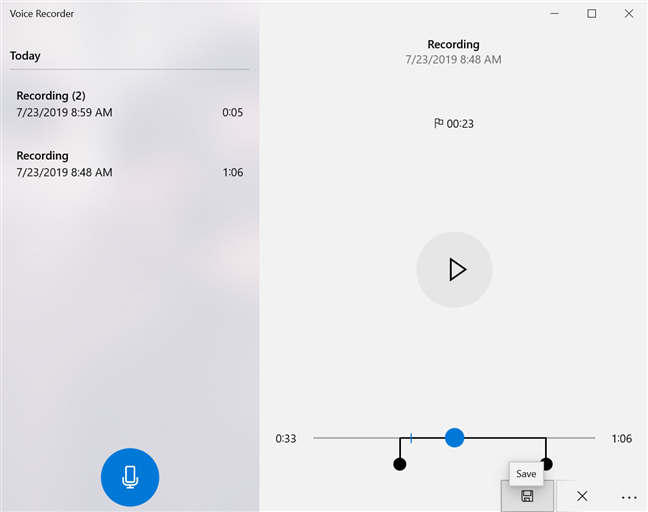
You now have two options: «Update original» or «Save a copy.« If you choose to «Update original,« the recording is replaced by the new version, while «Save a copy» creates a new recording in the list.
If you change your mind, use the Cancel button (marked with an X) at any point during the trimming process or select another recording from the list to cancel editing the recording.
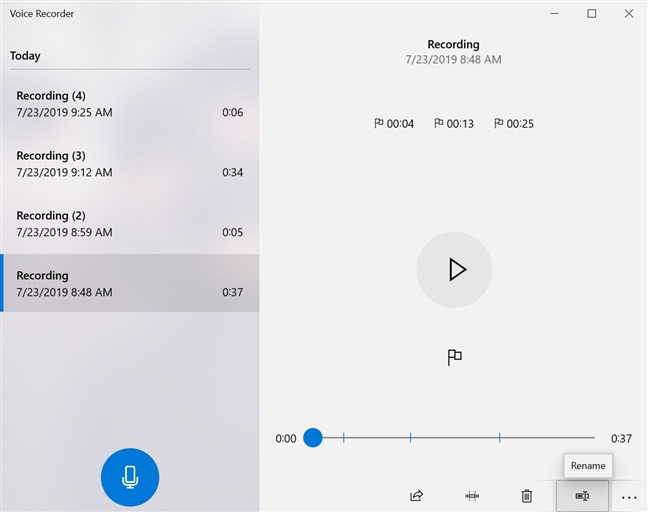
How to rename a recording in Voice Recorder
Having all the files in Voice Recorder named Recording can be inconvenient, so the option to rename them is a welcome addition. The easiest way to do this is by selecting the recording you want to rename and then clicking or tapping the Rename button at the bottom of the window.
In the pop-up window that appears, insert the desired name for your recording, and click or tap Rename.
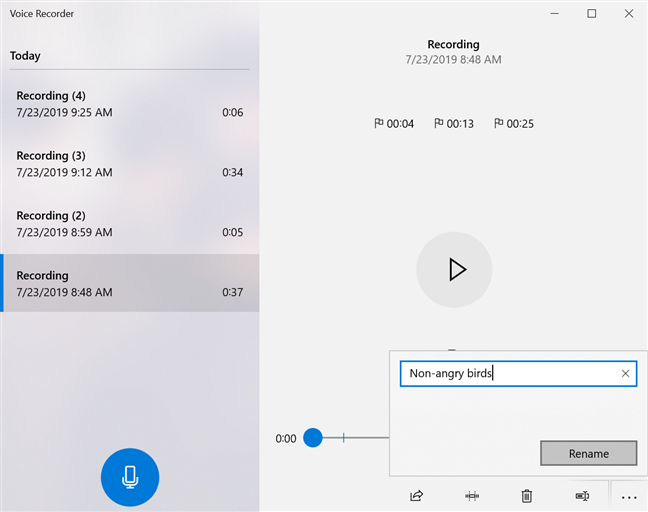
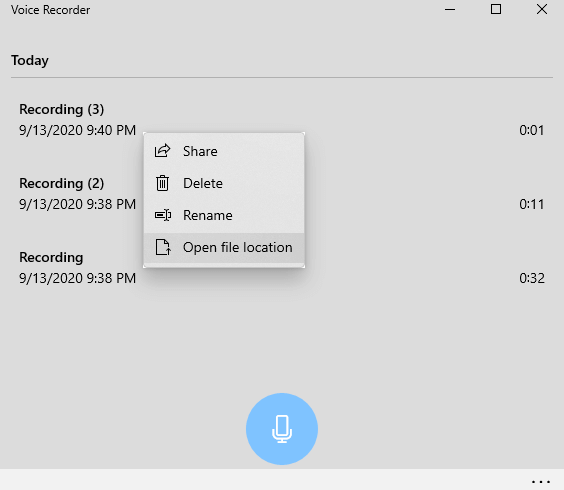
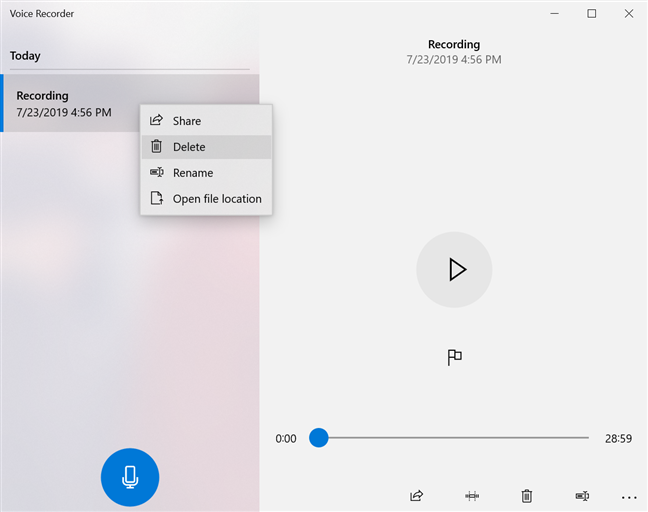
You can also rename a recording by right-clicking or pressing-and-holding it and then choosing Rename from its contextual menu.
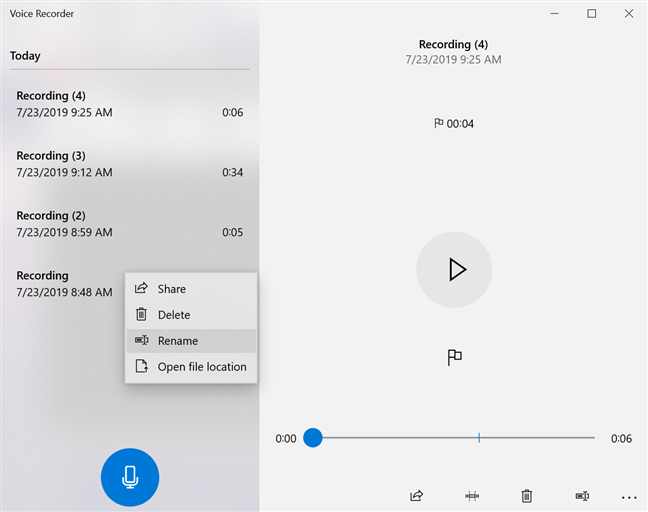
The pop-up window appears, and you can insert the name of your choice for the recording and click or tap Rename.
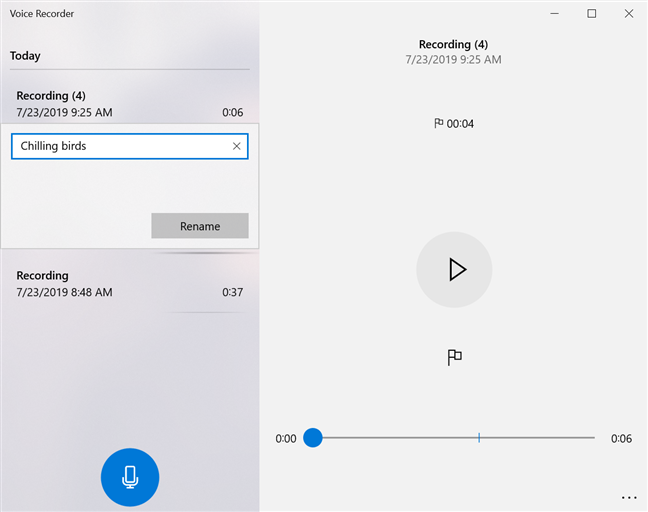
Your recording’s new name is instantly displayed.
How to share your recordings from Voice Recorder in Windows 10
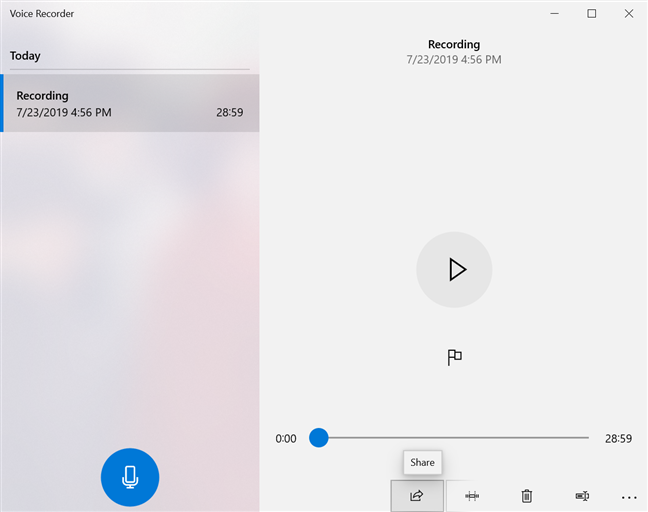
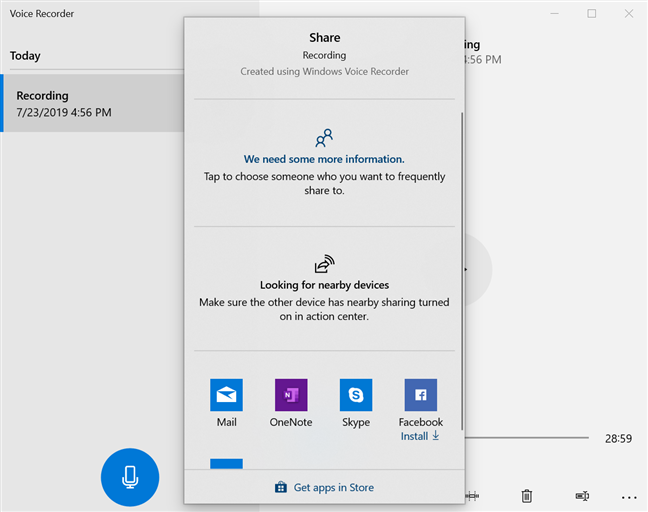
Once you are happy with your recording, the Voice Recorder gives you the option to share it with others. Select the recording you want to share and click or tap the Share button at the bottom of the window.
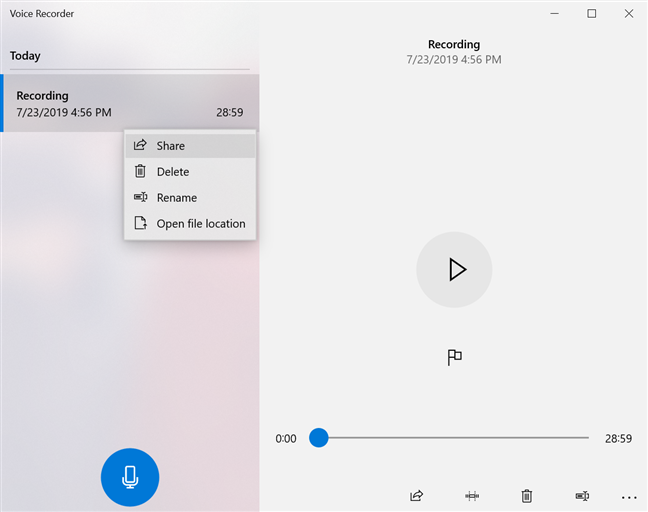
Alternatively, you can right-click or press-and-hold the recording in the list and click or tap Share from the contextual menu.
A window pops up, displaying the options available for sharing.
How to delete a recording from Voice Recorder
The obvious way to delete a recording is by selecting it and then clicking or tapping the trash-bin button at the bottom of the window, called Delete, or by pressing the Delete key on your keyboard.
You can also right-click or press-and-hold on any recording, then click or tap Delete.
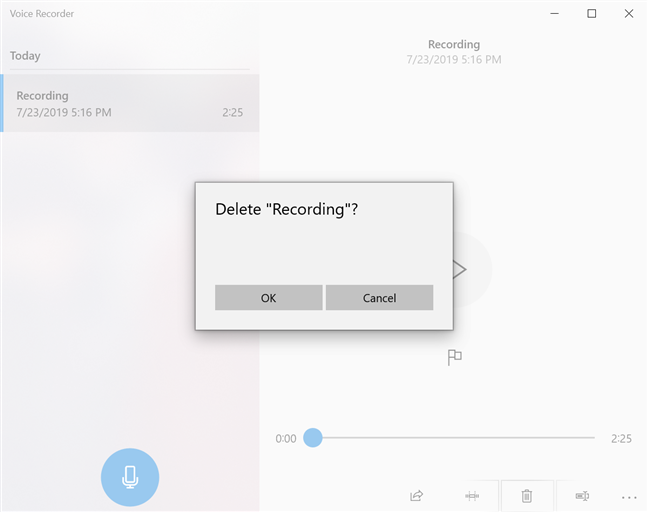
A pop-up window asks you to confirm the action.
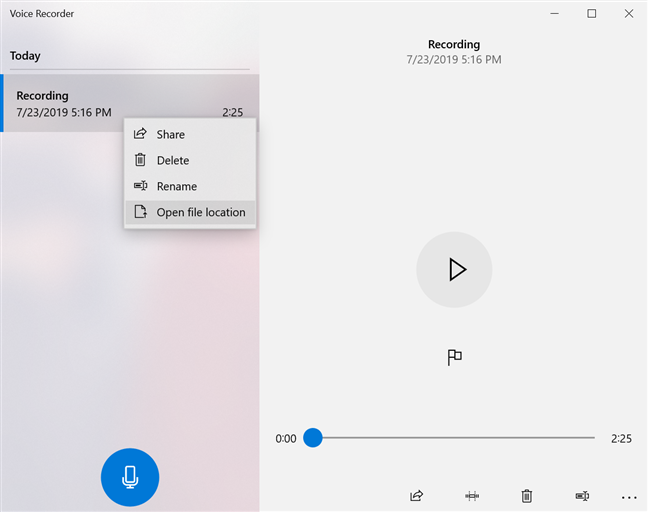
How to open recordings in File Explorer from Voice Recorder
To open a recording from Voice Recorder, right-click or press-and-hold it and then press «Open file location.«
You can also click or tap the three dots in the bottom right corner to open the See more menu.
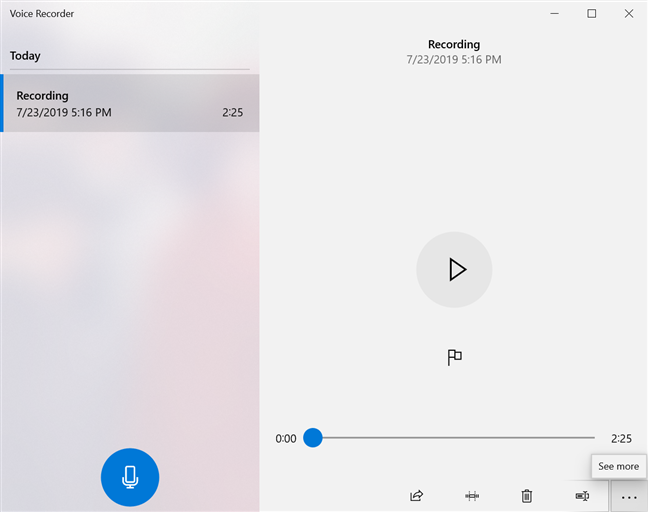
Then click or tap «Open file location» from the See more menu.
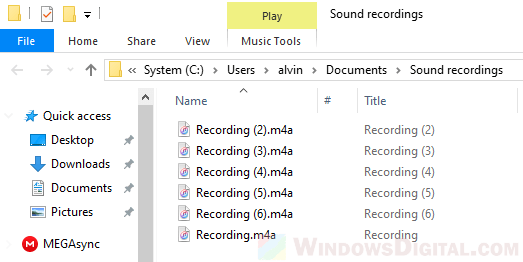
The Sound recordings folder opens in File Explorer, and your recording is highlighted within. You can find the Sound recordings folder in Documents. The default location is C:UsersusernameDocumentsSound recordingsRecording.m4a.
How to provide feedback to Microsoft about Voice Recorder
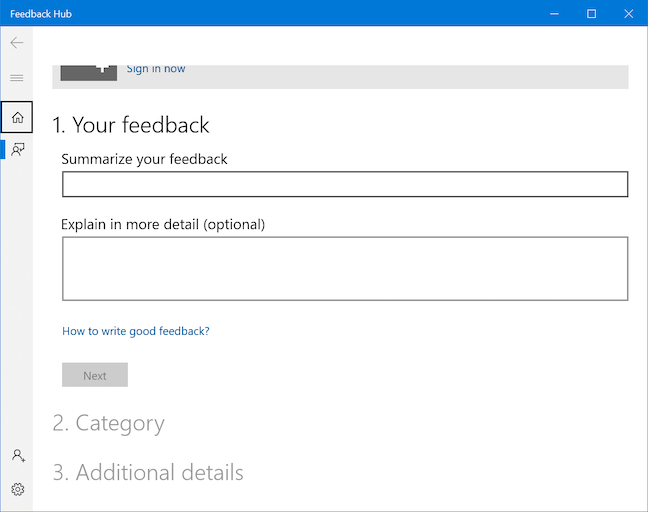
The Feedback Hub is easily accessible from the Voice Recorder app, allowing you to offer feedback to Microsoft. Click or tap the See more menu and then Send feedback.
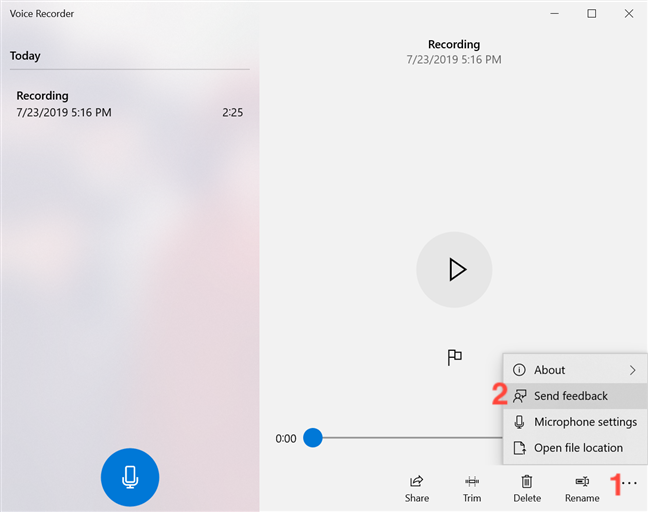
When the Feedback Hub opens, you can sign in with your Microsoft account and use it to send your opinion to Microsoft.
How to set up a microphone for the Voice Recorder app
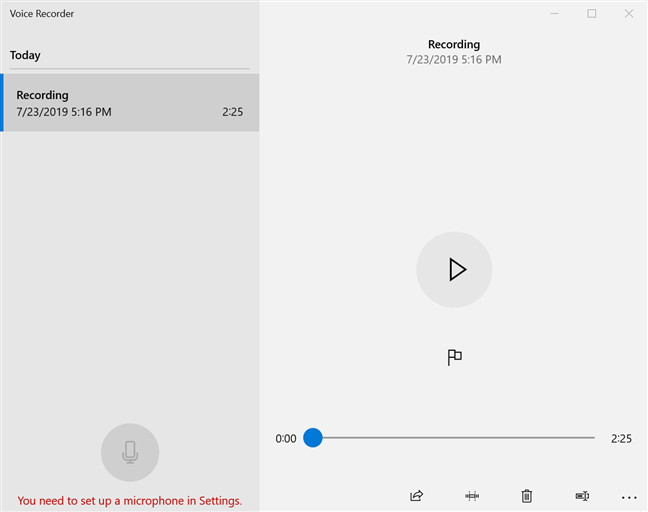
When you open the Voice Recorder app, you might find that the Record button is unavailable and the message «You need to set up a microphone in Settings» is displayed at the bottom of the window. This happens because you did not give this app access to your microphone.
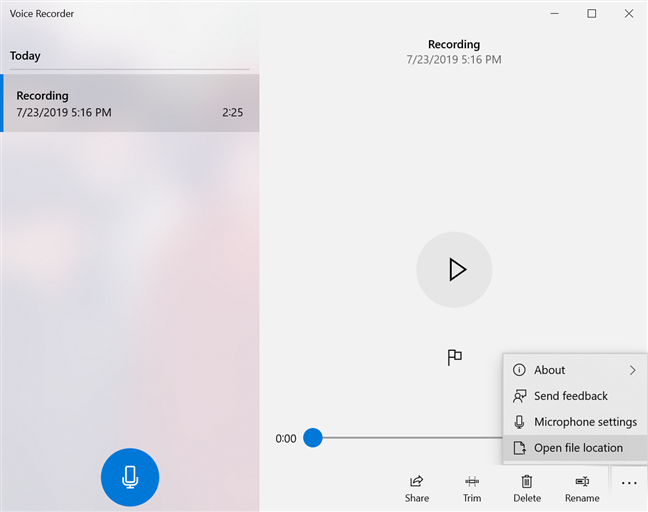
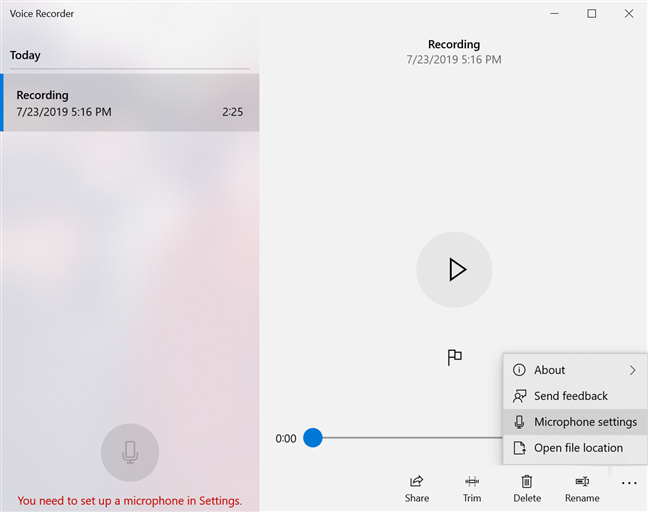
To fix this problem, click or tap the See more menu to open it, and then Microphone settings.
The Microphone window opens in the Settings app.
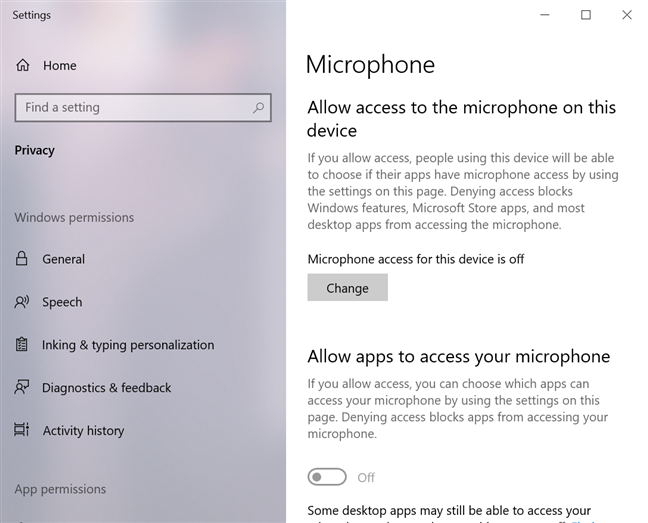
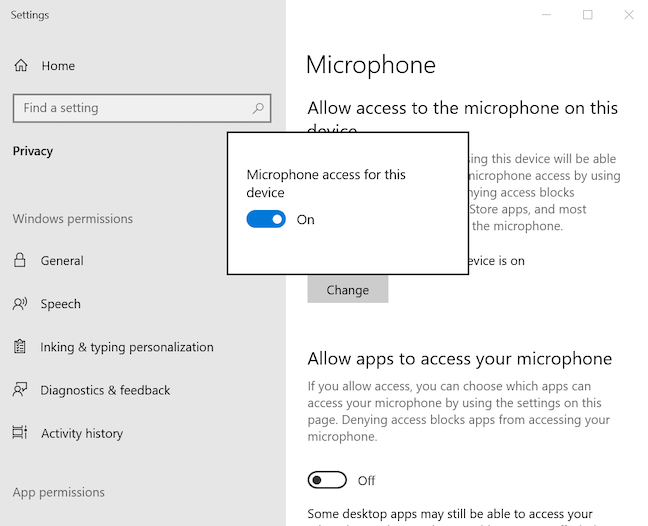
The first thing you need to enable is the «Allow access to the microphone on this device» option. Press the Change button at the bottom of this option if the status displayed is «Microphone access for this device is off,« and then turn the switch On.
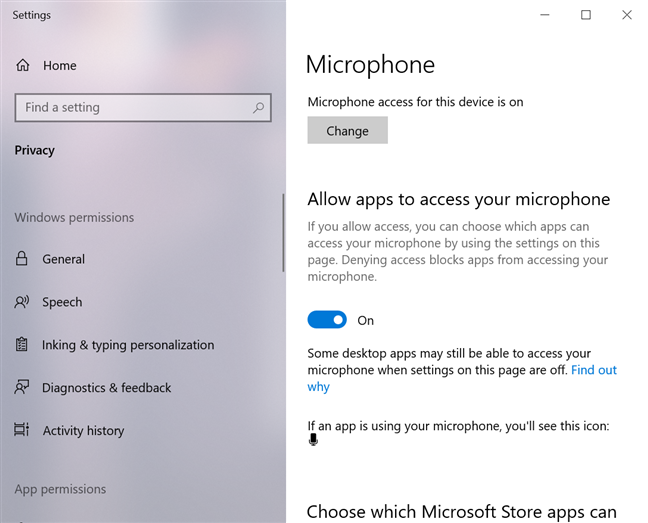
The option underneath, «Allow apps to access your microphone,« also needs to be enabled, so turn it On.
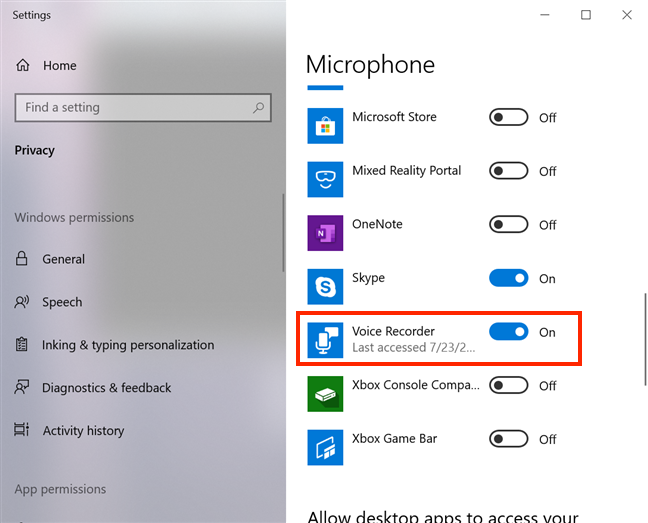
Scroll down to find a list containing apps and whether or not they are allowed to access your microphone. Find the Voice Recorder app in the list and make sure it is allowed to access the microphone, by turning the switch On.
This should resolve any issues, and the Voice Recorder app should work as intended.
What is the first recording you plan to make with the Voice Recorder?
Thank you for taking the time to read this very thorough tutorial! During its creation, our Lenovo Yoga Book kept picking up birds happily chirping outside, so we ended up creating lots of National Geographic soundtracks. Now that you know everything about the Voice Recorder app, let us know what you plan your first recording to be. Comment below and let’s discuss.