
The error of No TAP Adapter Available Error On OpenVPN or All TAP-Windows adapters on this system are currently in use usually happens when the OpenVPN TAP (Network Adapter) has been disabled by you (mistakenly) or by your system.
To resolve this, please follow the steps below, please try the workaround as per below.
All TAP-Windows Adapters On This System Are Currently In Use

First of all, click on the OK button when you see Connecting to (Your VPN) has failed error.

How Do I Enable the TAP Adapter?
At the search box at the bottom left, type in Control Panel and open it.

In the Control Panel menu, click on Network and Internet.

Now, click on Network and Sharing Center

Next, click on Change adapter settings on the left side of your screen.

Find the one that is called ‘Local Area Connection XX or Ethernet XX (XX denoting a number) and that has a description of TAP-Windows Adapter V9.
If it’s disabled, right-click on it and choose Enable and you can now use OpenVPN again.

Adding OpenVPN TAP Adapter Manually
If you don’t see the TAP-Windows Adapter V9, it could have been deleted and you will need to add it back again manually.
To do so, please follow the steps below:
Windows XP, Vista & 7: Go to Start – All Programs – Tap-Windows
Windows 8, 8.1, & 10: Windows + Q, and look for Add a New Tap
Right-click on Add a New Tap Virtual Ethernet Adapter and select Run as Administrator.
If you do not have the Run as Administrator option (Windows 8, 8.1 & 10), select Open File Location, right-click on Add a New Tap Virtual Ethernet Adapter and select Run as Administrator.
Follow through the instructions and you’ll end up with the following screen:

Now, press any key on your keyboard to continue and give the VPN another try.
Note: If you are still on an older version of the OpenVPN application, you can find the tool in the location below:
Start – All Programs – OpenVPN – Utilities
Can’t Setup A TAP Network Adapter?
If you can’t find the option to add the OpenVPN TAP adapter or the installation has failed as per the error below, Please re-install OpenVPN to the latest version.

Re-install OpenVPN
We suggest that you download a free application removal tool called Revo Uninstaller. This is a great tool to remove applications, leftover files and broken registry keys.
Once OpenVPN has been removed, please scan for leftover files and registry keys. Remove them and restart your computer.
Finally, download the latest version of OpenVPN from the official website and install it on your computer.
Best VPN Provider
If you’re looking for a secured and trusted VPN provider, we would recommend you that you try hide.me VPN
hide.me VPN client app supports OpenVPN in their app so you don’t need to configure the VPN connection manually and their app is so easy to use.
The free service provides the same level of protection as the paid service. They don’t keep logs of their user activities and there are no ADs!
Conclusion
Adding/re-enabling the OpenVPN TAP adapter should be pretty straight forward but often, VPN providers don’t update the OpenVPN client on their site which can lead to such issues.
Chris is a blogger based in Kuala Lumpur, where he dives into a broad spectrum of topics related to technology and travel. Known for his approachable style, Chris is committed to providing valuable advice and answering questions. Read more about Chris.
OpenVPN – это набор open source программ, который заслуженно является одним из самых популярных и легких решений для реализации защищенной VPN сети. OpenVPN позволяет объединить в единую сеть сервер и клиентов (даже находящиеся за NAT или файерволами), или объединить сети удаленных офисов. Серверную часть OpenVPN можно развернуть практически на всех доступных операционных системах (пример настройки OpenVPN на Linux). Вы можете установить OpenVPN сервер даже на обычный компьютер с десктопной редакцией Windows 10.
В этой статье, мы покажем, как установить OpenVPN сервер на компьютер с Windows 10, настроить OpenVPN клиент на другом Windows хосте и установить защищенное VPN подключение.
Содержание:
- Установка службы OpenVPN сервера в Windows
- Создаем ключи шифрования и сертификаты для OpenVPN
- Конфигурационный файл OpenVPN сервера в Windows
- Настройка OpenVPN клиента в Windows
Установка службы OpenVPN сервера в Windows
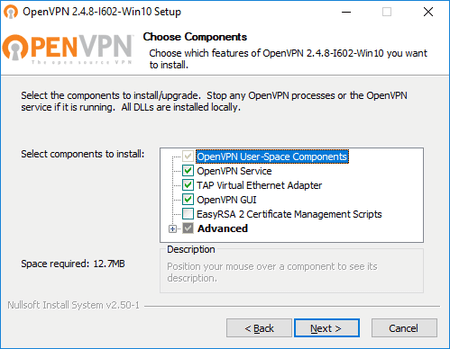
Скачайте MSI установщик OpenVPN для вашей версии Windows с официального сайта (https://openvpn.net/community-downloads/). В нашем случае это OpenVPN-2.5.5-I602-amd64.msi (https://swupdate.openvpn.org/community/releases/OpenVPN-2.5.5-I602-amd64.msi).
Запустите установку.
Если вы планируете, OpenVPN сервер работал в автоматическом режиме, можно не устанавливать OpenVPN GUI. Обязательно установите OpenVPN Services.
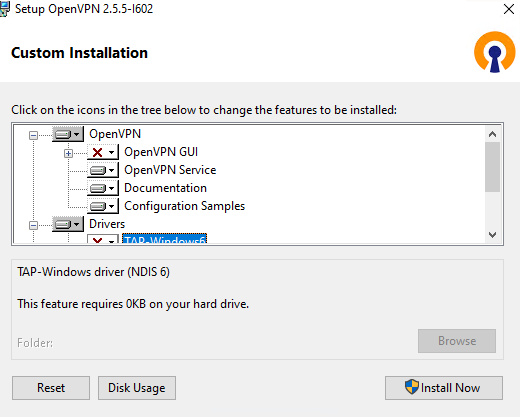
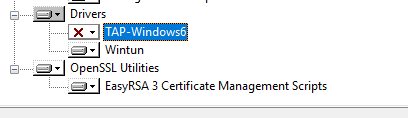
Начиная с версии OpenVPN 2.5, поддерживается драйвер WinTun от разработчиков WireGuard. Считается, что этот драйвер работает быстрее чем классический OpenVPN драйвер TAP. Установите драйвер Wintun, откажитесь от установки TAP-Windows6.
Установите OpenSSL утилиту EasyRSA Certificate Management Scripts.
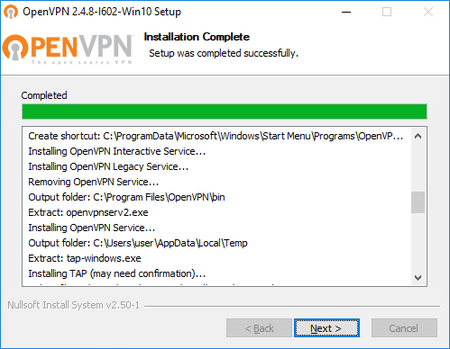
Запустите установку.
По умолчанию OpenVPN устаналивается в каталог C:\Program Files\OpenVPN.
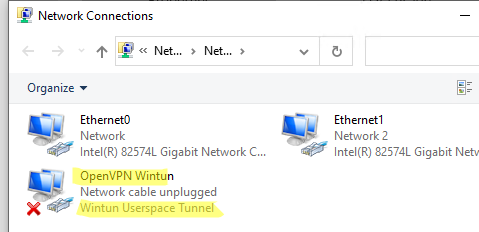
После окончания установки появится новый сетевой адаптер типа Wintun Userspace Tunnel. Этот адаптер отключен, если служба OpenVPN не запущена.
Создаем ключи шифрования и сертификаты для OpenVPN
OpenVPN основан на шифровании OpenSSL. Это означает, что для обмена трафиком между клиентом и серверов VPN нужно сгенерировать ключи и сертификаты с использованием RSA3.
Откройте командную строку и перейдите в каталог easy-rsa:
cd C:\Program Files\OpenVPN\easy-rsa
Создайте копию файла:
copy vars.example vars
Откройте файл vars с помощью любого текстового редактора. Проверьте пути к рабочим директориям.
Обязательно поправьте переменную EASYRSA_TEMP_DIR следующим образом:
set_var EASYRSA_TEMP_DIR "$EASYRSA_PKI/temp"

Можете заполнить поля для сертификатов (опционально)
set_var EASYRSA_REQ_COUNTRY "RU"
set_var EASYRSA_REQ_PROVINCE "MSK"
set_var EASYRSA_REQ_CITY "MSK"
set_var EASYRSA_REQ_ORG "IT-Company"
set_var EASYRSA_REQ_EMAIL " [email protected] "
set_var EASYRSA_REQ_OU " IT department "

Срок действия сертификатов задается с помощью:
#set_var EASYRSA_CA_EXPIRE 3650
#set_var EASYRSA_CERT_EXPIRE 825
Сохраните файл и выполните команду:
EasyRSA-Start.bat
Следующие команды выполняются в среде EasyRSA Shell:
Инициализация PKI:
./easyrsa init-pki
Должна появится надпись:
init-pki complete; you may now create a CA or requests.
Your newly created PKI dir is: C:/Program Files/OpenVPN/easy-rsa/pki
Теперь нужно сгенерировать корневой CA:
./easyrsa build-ca
Задайте дважды пароль для CA:
CA creation complete and you may now import and sign cert requests.
Данная команда сформировала:
- Корневой сертификат центра сертификации: «C:\Program Files\OpenVPN\easy-rsa\pki\ca.crt»
- Ключ центра сертификации «C:\Program Files\OpenVPN\easy-rsa\pki\private\ca.key»
Теперь нужно сгенерировать запрос сертификата и ключ для вашего сервера OpenVPN:
./easyrsa gen-req server nopass
Утилита сгенерирует два файла:
req: C:/Program Files/OpenVPN/easy-rsa/pki/reqs/server.req
key: C:/Program Files/OpenVPN/easy-rsa/pki/private/server.key
Подпишем запрос на выпуск сертификата сервера с помощью нашего CA:
./easyrsa sign-req server server
Подтвердите правильность данных, набрав yes.
Затем введите пароль CA от корневого CA.
В каталоге issued появится сертификат сервера («C:\Program Files\OpenVPN\easy-rsa\pki\issued\server.crt»)

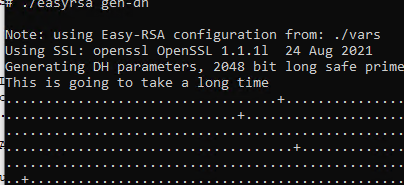
Теперь можно создать ключи Диффи-Хеллмана (займет длительное время):
./easyrsa gen-dh
Для дополнительной защиты VPN сервера желательно включить tls-auth. Данная технология позволяет использовать подписи HMAC к handshake-пакетам SSL/TLS, инициируя дополнительную проверку целостности. Пакеты без такой подписи будут отбрасываться VPN сервером. Это защитит вас от сканирования порта VPN сервера, DoS атак, переполнения буфера SSL/TLS.
Сгенерируйте ключ tls-auth:
cd C:\Program Files\OpenVPN\bin
openvpn --genkey secret ta.key
Должен появиться файл «C:\Program Files\OpenVPN\bin\ta.key». Переместите его в каталог C:\Program Files\OpenVPN\easy-rsa\pki
Теперь можно сформировать ключи для клиентов OpenVPN. Для каждого клиента, который будет подключаться к вашему серверу нужно создать собственные ключи.
Есть несколько способов генерации ключей и передачи их клиентам. В следующем примере, мы создадим на сервере ключ клиента и защитим его паролем:
./easyrsa gen-req kbuldogov
./easyrsa sign-req client kbuldogov
Данный ключ («C:\Program Files\OpenVPN\easy-rsa\pki\private\kbuldogov.key») нужно передать клиенту и сообщить пароль. Клиент может снять защиту паролем для ключа:
openssl rsa -in "C:\Program Files\OpenVPN\easy-rsa\pki\private\kbuldogov.key"-out "C:\Program Files\OpenVPN\easy-rsa\pki\private\kbuldogov_use.key"

Если вы хотите сгенерировать ключ, не защищенный паролем, нужно выполнить команду:
./easyrsa gen-req имяклиента nopass
На сервере с OpenVPN вы можете создать неограниченное количество ключей и сертификатов для пользователей. Аналогичным образом сформируйте ключи и сертфикаты для других клиентов.
Вы можете отохвать скомпрометированные сертификаты клиентов:
cd C:\Program Files\OpenVPN\easy-rsa
EasyRSA-Start.bat
./easyrsa revoke kbuldogov
Итак, мы сгенерировали набор ключей и сертификатов для OpenVPN сервера. Теперь можно настроить и запустить службу OpenVPN.
Конфигурационный файл OpenVPN сервера в Windows
Скопируйте типовой конфигурационный файл OpenVPN сервера:
copy "C:\Program Files\OpenVPN\sample-config\server.ovpn" "C:\Program Files\OpenVPN\config-auto\server.ovpn"
Откройте файл server.ovpn в любом текстовом редакторе и внесите свои настройки. Я использую следующий конфиг для OpenVPN:
# Указываем порт, протокол и устройство
port 1194
proto udp
dev tun
# Указываем пути к сертификатам сервера
ca "C:\\Program Files\\OpenVPN\\easy-rsa\\pki\\ca.crt"
cert "C:\\Program Files\\OpenVPN\\easy-rsa\\pki\\issued\\server.crt"
key "C:\\Program Files\\OpenVPN\\easy-rsa\\pki\\private\\server.key"
dh "C:\\Program Files\\OpenVPN\\easy-rsa\\pki\\dh.pem"
# Указываем настройки IP сети, адреса из которой будет будут получать VPN клиенты
server 10.24.1.0 255.255.255.0
#если нужно разрешить клиентам подключаться под одним ключом, нужвно включить опцию duplicate-cn (не рекомендуется)
#duplicate-cn
# TLS защита
tls-auth "C:\\Program Files\\OpenVPN\\easy-rsa\\pki\\ta.key" 0
cipher AES-256-GCM
# Другая параметры
keepalive 20 60
persist-key
persist-tun
status "C:\\Program Files\\OpenVPN\\log\\status.log"
log "C:\\Program Files\\OpenVPN\\log\\openvpn.log"
verb 3
mute 20
windows-driver wintun
Сохраните файл.
OpenVPN позволяет использовать как TCP, так и UDP для подключения. В этом примере я запустил OpenVPN на 1194 UDP. Рекомендуется использовать протокол UDP, это оптимально как с точки зрения производительности, так и безопасности.
Не забудьте открыть на файерволе порты для указанного вами порта OpenVPN на клиенте и на сервере. Можно открыть порты в Windows Defender с помощью PowerShell.
Правило для сервера:
New-NetFirewallRule -DisplayName "AllowOpenVPN-In" -Direction Inbound -Protocol UDP –LocalPort 1194 -Action Allow
Правило для клиента:
New-NetFirewallRule -DisplayName "AllowOpenVPN-Out" -Direction Outbound -Protocol UDP –LocalPort 1194 -Action Allow
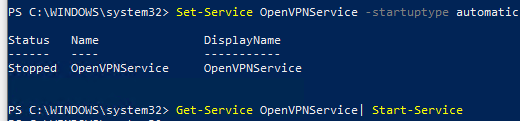
Теперь нужно запустить службу OpenVPN и изменить тип ее запуска на автоматический. Воспользуйтесь таким командами PowerShell, чтобы включить службу:
Set-Service OpenVPNService –startuptype automatic –passthru
Get-Service OpenVPNService| Start-Service
Откройте панель управления, и убедитесь, что виртуальный сетевой адаптер OpenVPN Wintun теперь активен. Если нет, смотрите лог «C:\Program Files\OpenVPN\log\server.log»
Если при запуске OpenVPN вы видите в логе ошибку:
Options error: In C:\Program Files\OpenVPN\config-auto\server.ovpn:1: Maximum option line length (256) exceeded, line starts with..
Смените в файле server.ovpn символы переноса строки на Windows CRLF (в notepad++ нужно выбрать Edit -> EOL Conversion -> Windows CR LF). Сохраните файл, перезапустите службу OpevVPNService.
Данный конфиг позволит удаленным клиентам получить доступ только к серверу, но другие компьютеры и сервисы в локальной сети сервера для них недоступны. Чтобы разрешить клиентам OpenVPN получить доступ к внутренней сети нужно:
Включить опцию IPEnableRouter в реестре (включает IP маршрутизацию в Windows, в том числе включает маршрутизацию меду сетями Hyper-V): reg add «HKLM\SYSTEM\CurrentControlSet\Services\Tcpip\Parameters» /v IPEnableRouter /t REG_DWORD /d 1 /f
Добавьте в конфгурационный файл сервера OpenVPN маршруты до внутренней IP сети:
push "route 10.24.1.0 255.255.255.0"
push "route 192.168.100.0 255.255.255.0"
Если нужно, назначьте клиенту адреса DNS серверов:
push "dhcp-option DNS 192.168.100.11"
push "dhcp-option DNS 192.168.100.12"
Если нужно завернуть все запросы клиента (в том числе Интернет трафик) на ваш OpenVPN сервер, добавьте опцию:
push "redirect-gateway def1"
Настройка OpenVPN клиента в Windows
Создайте на сервере шаблонный конфигурационный файла для клиента VPN (на базе iшаблона client.ovpn) со следующими параметрами (имя файла kbuldovov.ovpn)
client
dev tun
proto udp
remote your_vpn_server_address 1194
resolv-retry infinite
nobind
persist-key
persist-tun
ca ca.crt
cert kbuldogov.crt
key kbuldogov.key
remote-cert-tls server
tls-auth ta.key 1
cipher AES-256-GCM
connect-retry-max 25
verb 3
В директиве remote указывается публичный IP адрес или DNS имя вашего сервера OpenVPN.
Скачайте и установите клиент OpenVPN Connect для Windows (https://openvpn.net/downloads/openvpn-connect-v3-windows.msi).
Теперь на компьютер с клиентом OpenVPN нужно с сервера скопировать файлы:
- ca.crt
- kbuldogov.crt
- kbuldogov.key
- dh.pem
- ta.key
- kbuldogov.ovpn
Теперь импортируйте файл с профилем *.ovpn и попробуйте подключиться к вашему VPN серверу.
Если все настроено правильно, появится такая картинка.
Проверьте теперь лог OpenVPN на клиенте «C:\Program Files\OpenVPN Connect\agent.log»
Mon Dec 27 08:09:30 2021 proxy_auto_config_url
Mon Dec 27 08:09:31 2021 TUN SETUP
TAP ADAPTERS:
guid='{25EE4A55-BE90-45A0-88A1-8FA8FEF24C42}' index=22 name='Local Area Connection'
Open TAP device "Local Area Connection" PATH="\\.\Global\{25EE4A55-BE90-45A0-88A1-8FA8FEF24C42}.tap" SUCCEEDED
TAP-Windows Driver Version 9.24
ActionDeleteAllRoutesOnInterface iface_index=22
netsh interface ip set interface 22 metric=1
Ok.
netsh interface ip set address 22 static 10.24.1.6 255.255.255.252 gateway=10.24.1.5 store=active
IPHelper: add route 10.24.1.1/32 22 10.24.1.5 metric=-1
Клиент успешно подключится к OpenVPN серверу и получил IP адрес 10.24.1.6.
Проверьте теперь лог на сервере («C:\Program Files\OpenVPN\log\openvpn.log»). Здесь также видно, что клиент с сертификатом kbuldogov успешно подключится к вашему серверу.
2021-12-27 08:09:35 192.168.13.202:55648 [kbuldogov] Peer Connection Initiated with [AF_INET6]::ffff:192.168.13.202:55648
2021-12-27 08:09:35 kbuldogov/192.168.13.202:55648 MULTI_sva: pool returned IPv4=10.24.1.6, IPv6=(Not enabled)
2021-12-27 08:09:35 kbuldogov/192.168.13.202:55648 MULTI: Learn: 10.24.1.6 -> kbuldogov/192.168.13.202:55648
2021-12-27 08:09:35 kbuldogov/192.168.13.202:55648 MULTI: primary virtual IP for kbuldogov/192.168.13.202:55648: 10.24.1.6
«Слепая» установка до добра не доведет
Прочитали: 93202
Комментариев: 49
Рейтинг: 70
3 февраля 2020
Прошу помочь в вопросе блокировки навязчивого предложения по установке TAP Provider v9….
Нигде в интернете не смог найти решение этой противной проблемы. Сил уже нет.
Обращение в службу техподдержки «Доктор Веб»
Поиск в Интернете показал, что «достало» упомянутое ПО не только одного пользователя. В то же время информации по удалению этого приложения более чем достаточно.
Утром появилась эта табличка.
Когда я ее закрываю, она через несколько секунд открывалась снова.
Зашел в «Программы и компоненты», отсортировал по дате установки, и обнаружил, что вчера перед выключением компьютера, браузер Opera, сам переустановился/обновился.
Как только я удалил этот браузер, табличка перестала появятся.
Предполагаю, что установка этого драйвера VPN, связана с функцией Opera turbo.
Источник
Создатель проги – это компания OpenVPN Technologies. По названию не трудно понять, что этот разработчик выпускает ВПН-программы для ПК. Возможно, в связи с участившимися случаями блокировок сайтов, вы решили обойти бан и установили софт, который предлагает фирмы Open VPN?!
Хотя, немного порывшись в Сети, я обнаружил, что этот драйвер вылазит и от других издателей, например, от KMSpico.
Выходит, что установку предлагать могут разные программы, но я бы не стал им верить, особенно если вы скачали прогу не с официальных источников. Настоятельно рекомендую удалить первоисточник заразы, будь то ВПН или активатор ворованного Офиса под названием KMSpico.
Пользуйтесь легальным ПО и ваше оборудование будет жить десятилетиями!
Источник
CyberGhost 6 устанавливает подобное ПО. Программа для скрытия IP-адреса.
ВАЖНО!!!!!!!!!!!
Этот же адаптер ставится при установке сихронизации папок с гугл диском, так что не спешите сносить
Антивирус Avira ставит. Точнее идущий в комплекте VPN
У меня ничего подобного даже близко нет, однако этот TAP Provider V9 уже порядком задолбал.
Источник
В целом ситуация понятна. Устанавливая некий продукт, пользователи не обращают внимания на то, что в ходе инсталляции им предлагают поставить еще 3-5 дополнительных программ, в результате чего потом удивляются, к примеру, утечке своих персональных данных.
В случае обращения, вынесенного в эпиграф, на компьютере был обнаружен KMSAutoNet. Но так как наиболее часто пользователи упоминают OpenVPN, то скачать мы решили на удачу именно его.
Скачиваем – и сразу проверяем сканером Dr.Web:
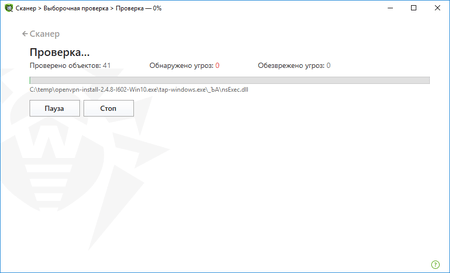
В ходе проверки замечаем ключевое слово: tap. Результат сканирования говорит о том, что явных вирусов в нем нет, можно запускать. Запускаем:
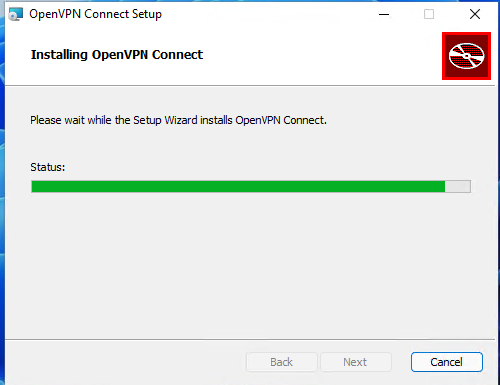
Как и предполагалось, мы намеревались установить OpenVPN, а нам предлагают еще и некий Tap Virtual Adapter в нагрузку.
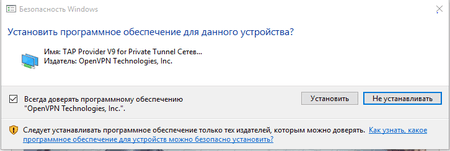
В ходе установки выясняется, что для этого адаптера требуется дополнительное подтверждение.
Предложение выскакивало в самый неподходящий момент! ( играешь в WoT, и вот оно! … проиграл, пока убирал это сообщение!
Из обращения в службу техподдержки «Доктор Веб»
Что такое TAP Provider V9 for Private Tunnel?
TAP Provider V9 for Private Tunnel – это виртуальный сетевой интерфейс, используемый KMSpico для активации офиса с использованием поддельного KMS сервера. Сервис сотрудничает со сторонними партнерами, поэтому нет ничего удивительного в том, что он продвигает их продукты и веб-сайты в рекламе, которую создает. Его цель состоит в том, чтобы максимально увеличить количество этих объявлений, поскольку чем больше рекламы создает рекламное ПО, тем больше шансов, что пользователи нажмут на них и принесут прибыль. По этой причине приложение TAP Provider V9 for Private Tunnel является очень навязчивым.

Источник
Нужен ли этот адаптер для чего-либо, кроме рекламы – для нас остается загадкой.
К сожалению, упомянутое рекламное ПО не стало показывать свое уведомление сразу после установки (традиционный прием мошенников – усыпить бдительность, чтобы пользователь успел забыть, что он когда-то что-то установил).
Нажимаем Пуск → Найти и вводим слова: «Диспетчер устройств».
В группе Сетевые адаптеры находим TAP-Windows Adapter V9, нажимаем на него правой кнопкой и выбираем Удалить устройство:
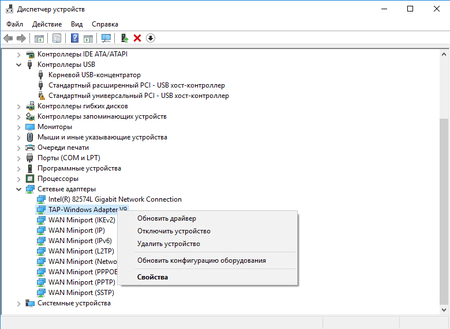
В появившемся окне подтверждаем выбор действия, установив галочку на подтверждение удаления драйверов:
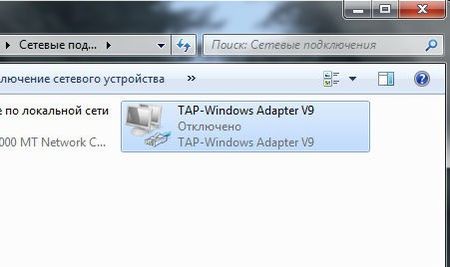
Чтобы отключить этот адаптер временно (вдруг он для чего-то нужен и после его удаления все рухнет?), можно воспользоваться папкой Сетевые подключения. В нашем случае в данной папке адаптер не проявился (возможно, по причине того, что еще не всплывал упомянутый пользователем запрос), поэтому воспользуемся советом из Сети:
Открываем папку Сетевые подключения, нажимаем правой кнопкой по этому адаптеру и выбираем Отключить:
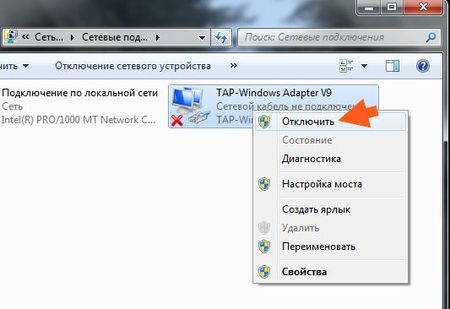
После этого он станет черно-белым:
Источник
Окончательно удалить это ПО можно штатным способом – из панели управления:
Пуск → Найти → Панель управления.
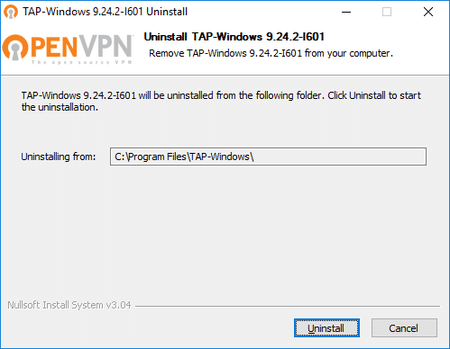
Выбираем раздел Установка или удаление программ.
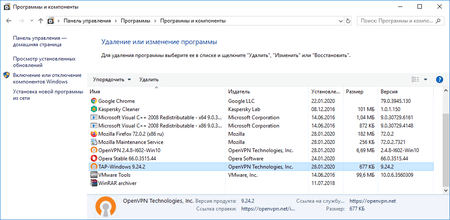
Находим в списке программу TAP-Windows и в меню сверху выбираем Удалить. В появившемся окне нажимаем Uninstall. Дальнейшая процедура удаления стандартна и не должна вызывать вопросов.
Есть информация, что TAP устанавливается и как плагин к браузерам. В нашем случае этого не произошло, поэтому на всякий случай:
Чтобы удалить TAP Provider V9 for Private Tunnel из браузеров
Chrome: Открыть Google Chrome > нажмите меню Chrome > выберите Инструменты > щелкните расширение > выберите TAP Provider V9 for Private Tunnel расширения > корзину
На Firefox: Откройте Firefox > перейти на правом углу, чтобы открыть меню браузера > выберите Дополнения > выбрать и удалить расширения TAP Provider V9 for Private Tunnel
В Internet Explorer: Откройте IE > нажмите Инструменты > нажмите на управление надстройками, инструменты и расширения > выберите расширения TAP Provider V9 for Private Tunnel и его элементы и удалите их.
Источник
#антивирусная_проверка #нелегальное_ПО #поддержка #рекламное_ПО
Антивирусная правДА! рекомендует
Почему антивирусы не блокируют это ПО? Причина проста: оно явно устанавливается легально – пользователь сам (САМ!) разрешает его установку, а очевидных деструктивных функций оно не несет. Деинсталлятор тоже показывается в списке установленного ПО. Все правила поведения легальных программ соблюдены. А той же рекламой переполнен чуть ли не любой портал.
Будьте внимательны!
И еще.
К сожалению, подобные обращения дают минимум информации для того, чтобы разобраться в проблеме. Как вариант, можно воспользоваться функцией сбора технической информации вашего компьютера или использовать специальную утилиту Dr.Web.
Для этого запустите в системе, где возникла проблема, эту программу (обязательно от имени администратора) и нажмите в ней кнопку Сформировать отчет. Получив созданный программой архив, прикрепите его к комментарию в запросе в техническую поддержку, никак не перепаковывая и не изменяя.
Отчет желательно собрать сразу же, как только возникла проблема. Иначе информация о ней может пропасть:
К сожалению, из-за высокой файловой активности часть логов успела отротироваться и информации в них оказалось очень мало. Пожалуйста, перезагрузите компьютер и не запускайте никаких приложений (ни игр, ни браузеров, ни других программ), пока не появится снова это окно. Как только это окно появится, зафиксируйте время, которое показывали системные часы компьютера в этот момент, а затем соберите архив отчёта специальной версией утилиты dwsysinfo, добавленной к этому ответу, и отправьте нам новый отчёт, сообщив в комментарии зафиксированное время повторения проблемы.
Из переписки специалиста «Доктор Веб» с пользователем
|
Оцените выпуск Чтобы проголосовать зайдите в аккаунт на сайте или создайте его, если аккаунта еще нет. |
Сделайте репост |
Необходимо войти на страницу выпуска через аккаунт на сайте «Доктор Веб» (или создать аккаунт). Аккаунт должен быть связан с вашим аккаунтом в социальной сети. Видео о связывании аккаунта.
With the dangers of surfing online, more and more people look for solutions that may guarantee their privacy.
One such solution is a VPN, which often requires the installation of files on your device.
One must choose a VPN service that not only ensures that your data is secure, but also that the service is compatible with your device.
If you are a frequent VPN user, chances are that you might’ve come across a file called TAP-Windows Adapter v9.21.2. Before going further let us understand what VPN is.
VPN, the acronym for Virtual Private Network, is a service that lets you access websites that are blocked in your country, gives you privacy from internet providers, hackers, ISP’s or sites that collect data and speed up your server connections by using private, direct routes.
Since it reduces the risk of many online and spy attacks, using a VPN is highly recommended by IT experts. VPN allows you to:
- Avoid ISP tracking
- Use public networks safely
- Downloads files anonymously from the Internet
- Stream blocked content
- Bypass traffic shaping
Now, let us understand what it is actually.
Most Windows users panic when they find an application they don’t remember which is a valid fear because many malware and spyware are capable of seemingly appearing out of nowhere as an app on your device. That being said, it is entirely harmless.
This is a network driver used by VPN services to connect to servers. Since it’s a driver, it can be found in the Device Manager. If you’re using a browser extension, you won’t come across it.
On the other hand, most full-featured VPN clients such as ExpressVPN, NordVPN, CyberGhost, etc require this driver to function properly.
In simple words, it is a Windows adapter that acts as a virtual network interface, allowing VPN clients access to create a VPN connection.
There are 2 different versions of this that you will come across depending on the version of your Windows:
- On Windows XP – NDIS 5 driver (tap windows 9.9.x)
- On windows vista / 7 / 8 / 10 – NDIS 6 driver (tap windows 9.21.x)
If you have configured your VPN client to not use it for establishing private connections, you can safely remove it. However, in this case, it may cause issues such as interfering with your internet connection, making it near impossible to go online. If you’re suffering from the same fate.
Although there are no drawbacks to keeping the adapter on your computer, there are cases in which the adapter makes it impossible to connect to the Internet.
Read more: How to Add Widgets To Windows 10 Desktop?
Uninstall your VPN client
This will become a useless driver if you have customized or uninstalled your VPN client, in which case it might start to interfere with your connection, not allowing you to get online.
The solution to this is to completely remove it from your system. The following steps will show you how to uninstall and reinstall it:
- Terminate all VPN connections and close your VPN. This is an important step that will make sure that it can be removed safely without any interruptions.
- Go to device manager and expand the Network adapters section
- Locate your file. You might see a yellow exclamation mark next to the icon of the driver. This means that a reinstall is required.
- Right-click on the driver’s option and select uninstall.
- Once it is successfully uninstalled, open your VPN client, which might prompt you to install the missing drivers, or reinstall the adapter automatically.
- If the VPN client only prompts the missing driver error but not an option to install them, reinstall the VPN client itself. This will prompt the installer to install the missing drivers as well.
- When the installation is complete, check if your connection issues are resolved.
If you want to completely remove it, you will also have to remove the VPN clients that require the adapter. If you do not remove the clients, the driver might appear the next time you boot up.
Other than that, the VPN clients will detect the missing drivers and attempt to reinstall them now and then.
Conclusion
It is a network adapter that allows your VPN client to function properly. This article talked about what a VPN is and how it helps.
Other than that it also discussed how you can uninstall and reinstall the driver to resolve connection issues.
Read more: How to Clear Printer Queue in Windows 10?
Github help: here
Every VPN user needs to know what TAP-Windows is, as the issues associated with TAP-Windows 9.21.2 Adapter can be a bit worrisome.
Many users have reported trouble connecting to the internet while the TAP-Windows Adapter was enabled.
You need not worry anymore as we will tell you how to manage the TAP-Windows Adapter in this article.
What is TAP-Windows Adapter?
If you have been using the Windows VPN to safeguard the personal data stored on the PC, you must be aware of the role of the TAP-Windows Adapter V9.
Essentially, the Adapter acts as a virtual network interface that lets the VPN clients fetch the desired VPN connection by making all the necessary functionalities available.
The TAP-Windows 9.21.2 Adapter can be found as an installed program at the location C:\Program Files\Tap-Windows.

Many VPN software runs only after installing a specific network driver, known as TAP-Windows. You can find this Adapter mainly in the Device Manager once installed by any VPN client like SoftEther, Cyberghost, Hamachi, etc.
The VPN suites mostly use it as a helping medium for establishing a private connection to any internet network nearby.
You will find two different types of driver versions of TAP-Windows that operate only on the specific Windows OS version running on the PC. The two types are:
- The Windows XP version uses the NDIS 5 driver for TAP-Windows and version 9.9.x
- The Windows 10/ 8/ 7/ Vista versions use the NDIS 6 driver for TAP-Windows and version 9.21.x

Note: An amazing VPN facilitating software for your Windows PC or laptop would be PureVPN. This software is compatible with Windows 8, 8.1, and 10. It has a very simple-to-use interface, and the streaming speed is blazing fast. PureVPN will be your best bet for making your PC a VPN hotspot with high-security features like IPv6 Leak protection and DNS.
PS: Learn more about the full TigerVPN review.
Why would you need to remove TAP-Windows?
Whether you use TAP-Windows 9.21.2 or the other version, there are chances of an error in the drivers. Suppose you use the VPN with the help of the internet frequently, and you experience connectivity problems during that process when the VPN connection is running.
In that case, there is a possibility that the driver associated with the TAP-Windows might have gone corrupted. You should better start with an investigation of the problem.
The major and best solution to help you in this scenario would be reinstalling the TAP-Windows Adapter. Another situation might be where you have been using a VPN connection for a long time but have discontinued the usage in the present for a while.
In this case, the leftover data from the TAP-Windows Adapter might be the potential culprit behind the internet connectivity issues. It may have gone corrupted in the time being and started causing trouble.

In both the cases mentioned above, removing the particular Adapter is the best fix. A thing to note here is that if you decide not to uninstall the VPN software from the PC or laptop, then there are chances that the TAP-Windows Adapter will get reinstalled automatically.
If you see the following error message – “All TAP-Windows adapters on this system are currently in use,” then it is time for you to restart the TAP-Windows fox adapter to fix such issues.
Now that the air is clear on the possible issue that might happen. Let us take you through the methods for removing, restarting, and reinstalling the TAP-Windows adapter.
Method for removing the TAP-Windows 9.21.2 Adapter V9
As we have already discussed, removing the TAP-Windows Adapter is not as easy as it may seem once you have uninstalled it from the Device Manager. You may find the Adapter reinstalled into the Device manager as per the VPN software installed on the system.
This will happen every time you boot the system. The main reason behind this is the startup service that is associated with some of the VPN programs. This service looks for the missing drivers and automatically installs the required ones.
Once you decide to remove the driver associated with the TAP-Windows Adapter V9, follow the given steps:
Open the window of Program Files.
Navigate through and find the option of TAP-Windows.
Hit double-click over the option uninstall.exe. Now keep following the instructions as they appear on the screen for finally deleting the driver from the system.
If you decide to terminate the process at this stage, remember that the next time you start the device, the driver will return once again and reinstall upon opening the VPN software.
You have to fully shut the software off the system to ensure that the driver is barred from getting reinstalled on the PC.
Follow the steps below to do so:
Press the keys Windows + R together to launch the Run window. Enter the command appwiz.cpl into the box. Hit OK now. This will open the window of Programs and Features.

Find the relevant VPN client from the given list and then uninstall it.

Note that if you have previously been a user of more than one VPN solution, ensure that you d the same removal process with every other client on the list.
Make sure that there is no such software left that can cause trouble again, and reinstall the TAP-Windows Adapter.
Method for restarting the TAP-Windows 9.21.2 Adapter V9
Suppose you don’t wish to remove the Adapter altogether and think there is a possible chance of its recovery by removing any minor issue. In that case, you may try it by just performing a restart of the Adapter.
As we know that when the error message tells you that every Adapter is currently being used, restarting the TAP-Windows is a good option to try.
We will tell you how to do so in the steps given below:
Open the Control Panel of the PC.
Click the option of Network and Internet.

At this stage, hit the tab Change Adapter options.

In the next Network Connections window, hit a right-click on the local area connection associated with your TAP-Windows Adapter V9. Then click on the tab Disable.

Wait for some time. Hit a right-click again on the same option and then click Enable.
Try running your VPN client once again and see if the error is resolved.
Method for reinstalling the TAP-Windows 9.21.2 Adapter V9
Suppose you face difficulties establishing a connection with any VPN network (it doesn’t matter which program you are using).
In that case, you may have to first start your troubleshooting operation by running a check on the TAP-Windows Adapter primarily.
If installed correctly, reinstall the adapter from scratch if you encounter any incorrect settings.
The steps given below are going to be your guide to do so:
It would be best if you first terminated your VPN connection and shut down the related program of the VPN client simultaneously.
Now press the keys Windows + R together to launch the Run window. Enter the command devmgmt.msc into the box. Hit Enter now. This will open the window of Device Manager.

In this window, navigate the options and select the Network Adapters tab. Open the menu that drops down.
Now, find the option TAP-Windows Adapter V9. Look for an exclamation mark that might appear over the icon adjacent to the option.
If the exclamation mark is there, your next move would be to reinstall the particular driver that will fix the problem. To do that, right-click over the icon and click the tab Uninstall device.
Once you successfully remove the TAP-Windows 9.21.2 Adapter V9 from the Device Manager, open the VPN client again. Now keeping in mind the VPN software you use, you may have to face two situations over here.
Either a prompt will emerge asking you to install the missing Network Driver, or the Client will automatically install the driver again without asking for permission.
Note: If you see a “missing driver error” message on the VPN software when it has not automatically reinstalled the driver, you may have to remove the VPN Client. All the installation kits associated with the VPN client come with the TAP-Windows Adapter.
If you do not wish to reinstall the VPN client, then visit the website of OpenVPN. Scroll down and stop at TAP-Windows. Now download the right installer as per the windows version of the PC.
Go back and open Device Manager. Check if the exclamation mark is gone from the icon. If it is still there, you may resort to expert support from the VPN client or go for another VPN provider.
FAQs
Q1: Can I fix TAP-Windows 9.21.2 Adapter errors without technical knowledge? Yes, the solutions provided in this article are designed to be user-friendly and can be followed by individuals with varying technical expertise.
Q2: Is it necessary to update the TAP-Windows driver? Yes, updating the driver is an important step as outdated drivers can cause compatibility issues and lead to TAP-Windows 9.21.2 Adapter errors.
Q3: Can I reinstall the TAP-Windows Adapter manually? Yes, you can manually uninstall and reinstall the TAP-Windows Adapter by following the steps provided in this article.
Q4: What should I do if none of the solutions work? If none of the solutions work, it is recommended to seek technical support from the VPN software provider or consult an IT professional for further assistance.
Q5: How can I ensure a smooth VPN connection after resolving the errors? After resolving the TAP-Windows 9.21.2 Adapter errors, it is advisable to restart your computer and test the VPN connection to ensure it is functioning properly.
Conclusion
We hope this article dealt with all your queries related to TAP-Windows and the TAP-Windows 9.21.2 Adapter.
We gave you a thorough guide to help you better manage the adapter and prevent it from hindering your internet connection.