
Меню Пуск Windows 10 с настройками по умолчанию кому-то может нравиться, кому-то — нет, но почти всегда содержит массу ненужных элементов, может иметь не оптимальный вид и, о чем некоторые начинающие пользователи порой не догадываются, имеет самые различные варианты настройки.
В этой инструкции подробно о различных методах, которые позволят настроить стандартное меню Пуск в Windows 10 так, чтобы его было удобно использовать вам, а также дополнительная полезная информация, на случай, если даже после всех настроек новое меню Пуск вас не устраивает. Внимание: даже если вы не относите себя к начинающим пользователям, с большой вероятностью среди описанных ниже возможностей вы найдете что-то новое для себя.
- Изменение цвета меню Пуск (светлый, темный, на выбор, прозрачность)
- Удаление ненужных элементов из списка приложений меню Пуск
- Настройка плиток в меню Пуск (удаление, добавление, группировка и изменение размеров, создание собственных)
- Работа с контекстным меню кнопки Пуск (открывается правым кликом по кнопке или сочетанием клавиш Win+X)
- Дополнительные возможности настройки
- Как сделать меню Пуск в Windows 10 как в Windows 7
Изменение цвета меню Пуск Windows 10
По умолчанию, если вы не применяли никаких тем оформления, меню Пуск в последних версиях Windows 10 темное и с эффектами прозрачности. Всё это можно поменять.
Доступные варианты действий, касающиеся изменения цвета меню Пуск:
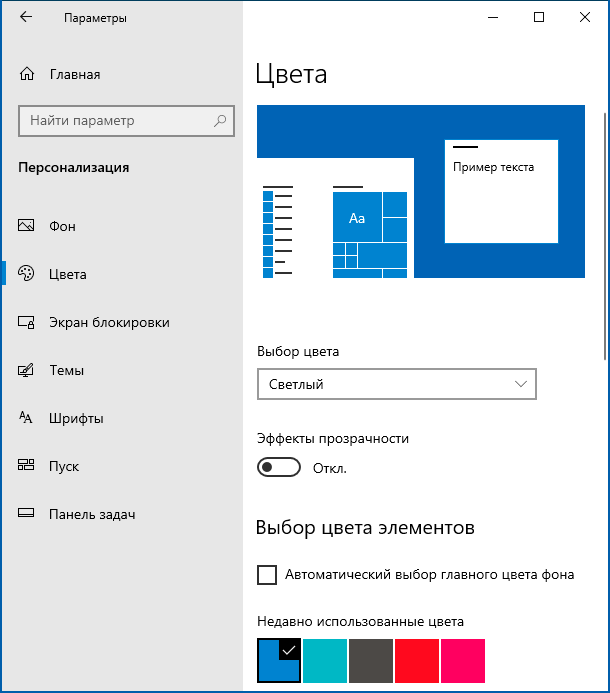
- Зайдите в Параметры — Персонализация (либо нажмите правой кнопкой мыши по рабочему столу и выберите пункт «Персонализация»). Зайдите в раздел «Цвета».

- Здесь вы можете выбрать тему оформления, которая сразу применится к меню Пуск (и не только) в разделе «Выбор цвета» — «Темный» или «Светлый». При выборе «Настраиваемый» вы можете задать темную и светлую тему отдельно для разных элементов. На изображении ниже — пример светлой темы оформления для меню Пуск.

- Чуть ниже вы можете включить или отключить эффекты прозрачности для меню Пуск и некоторых других элементов Windows 10. Некоторым без них оформление кажется лучше, попробуйте.
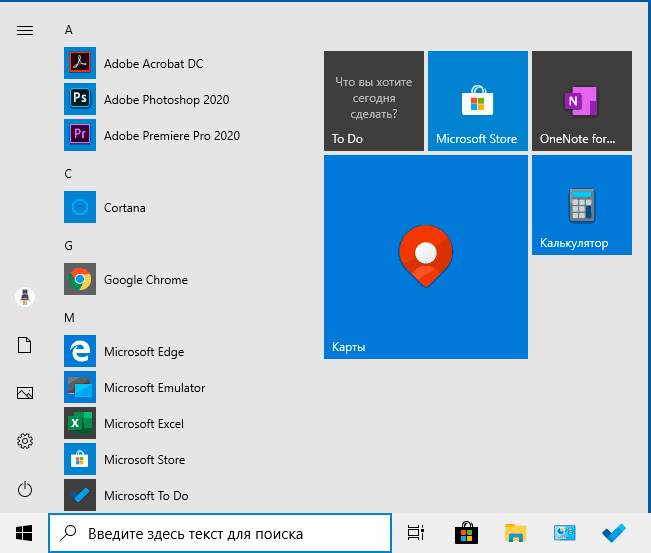
- Выбрав какой-либо цвет в разделе «Выбор цвета элементов» вы можете использовать его также для панели задач и меню Пуск, для этого ниже отметьте пункт «Отображать цвет элементов на следующих поверхностях — В меню Пуск, на панели задач и в центре уведомлений». Пример возможного результата на скриншоте. Примечание: пункт не активен, если у вас выбрана светлая тема оформления.

Удаление ненужных элементов из меню Пуск
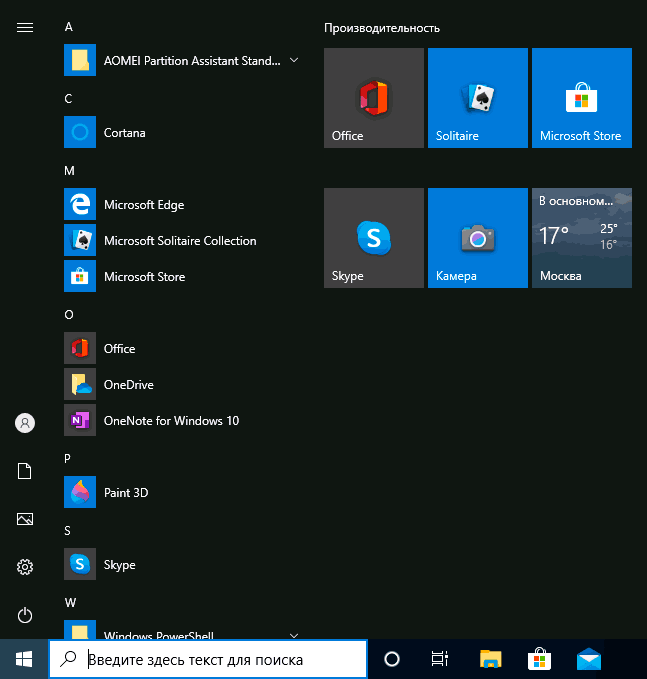
В этом разделе — про удаление ненужных программ и папок из меню Пуск в левой части, то есть из списка приложений, где часто добавляется значительное количество ярлыков, многие из которых никогда не используются.
Эти папки и ярлыки находятся в следующих папках (достаточно скопировать путь в адресную строку проводника и нажать Enter, чтобы сразу перейти в папку):
- %ProgramData%\Microsoft\Windows\Start Menu\Programs\
- %AppData%\Microsoft\Windows\Start Menu\Programs\
Ярлыки из первой папки применяются ко всем пользователям, из второй — только к текущему пользователю.
К сожалению, ярлыки некоторых приложений в этих папках вы обнаружить не сможете (они хранятся в специальной базе данных Windows 10), но, в случае если эти приложения вам не нужны, вы можете удалить их, используя стандартные средства системы или специальные программы-деинсталляторы.
Дополнительно вы можете:
- Отключить добавление вверху меню ярлыков недавно установленных программ в Параметры — Персонализация — Пуск — Показывать недавно добавленные приложения.
- Организовать ярлыки по папкам так, как удобно вам, а также, изменив их имена, изменить и их порядок в меню (в нем ярлыки расположены по алфавиту, а самыми первыми показываются те, имена которых начинаются с цифр и специальных символов).
Настройка плиток в меню Пуск
Элементы, расположенные в правой части меню Пуск Windows 10 называются Плитками. Вы можете удалять их, добавлять, изменять размеры плиток, группировать их и создавать папки.
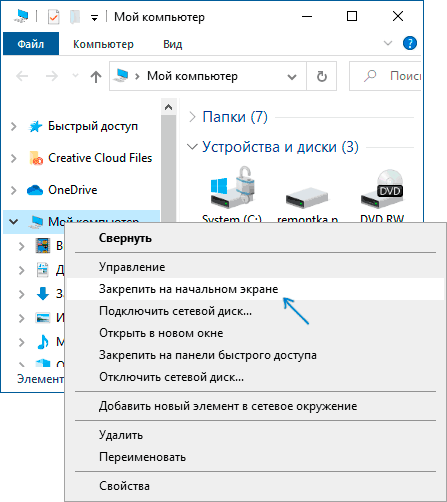
- Для добавления новой плитки вы можете нажать по программе в меню Пуск, по ярлыку или файлу .exe в любом расположении Windows 10 и выбрать пункт «Закрепить на начальном экране». Это действие доступно и для некоторых других элементов, например, для «Мой компьютер», как на изображении ниже.

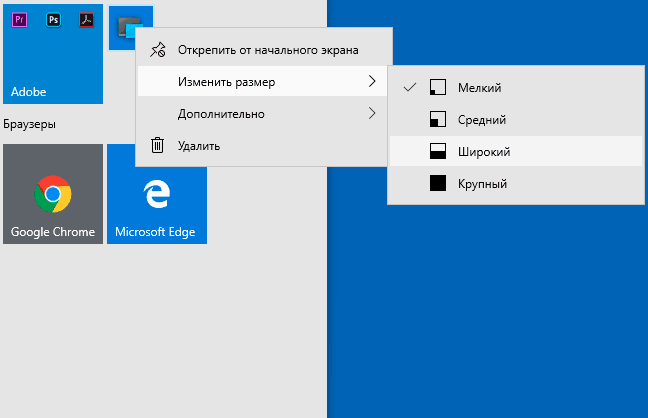
- Для того, чтобы удалить плитку с начального экрана (из правой части меню Пуск), нажмите по ней правой кнопкой мыши и выберите пункт «Открепить от начального экрана».
- Для помещения нескольких плиток в одну папку (недоступно в ранних версиях Windows 10), перетащите одну плитку на другую. Затем, при желании, добавьте больше плиток в папку и укажите имя папки.
- Для создания групп плиток перетащите одну из плиток дальше от других в свободное место вправо или вниз (зависит от ширины и высоты меню Пуск), пока не появится разделитель, отделяющий её от других плиток. Затем отпустите. Плитка окажется в отдельной группе, куда можно перетащить и другие плитки, переименовать группы, изменить их порядок (подводим указатель мыши к названию группы, тянем за две линии справа от имени).
- Некоторые плитки постоянно обновляют свое содержимое, это называется «Живые плитки». Если вы хотите отключить такое обновление, нажмите по плитке правой кнопкой мыши и в разделе «Дополнительно» отключите живые плитки.
- В контекстном меню плиток вы также можете изменить их размер и организовать их удобным для вас образом в правой части меню Пуск.

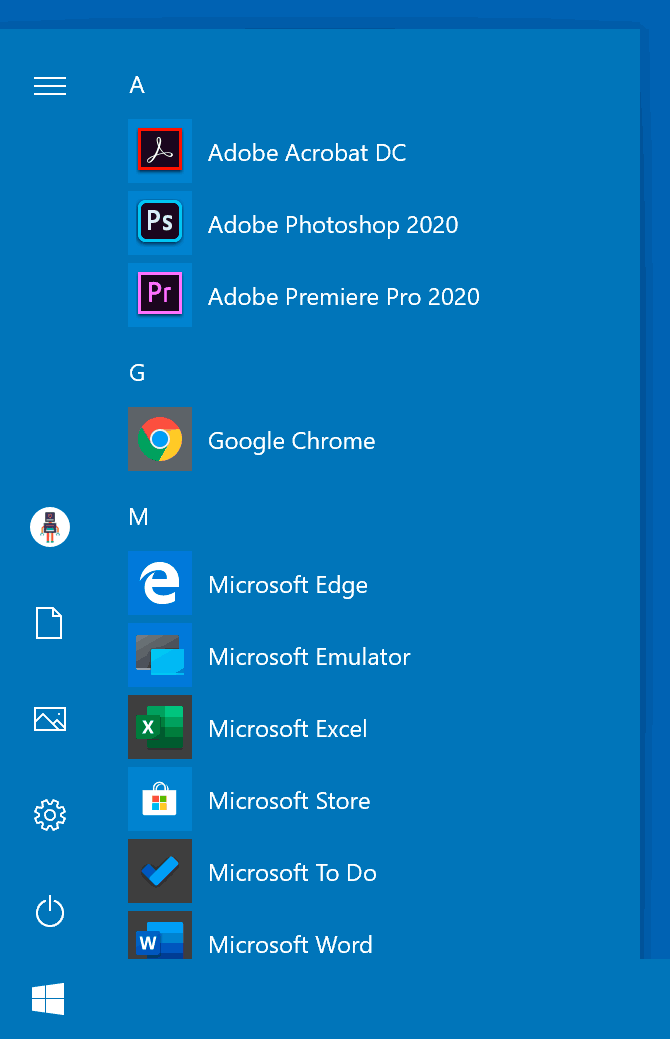
- Если вам не нужны плитки в меню Пуск, вы можете открепить их все от начального экрана, а затем изменить размер (ширину и, при желании, высоту) меню Пуск и получит результат, похожий на скриншот ниже.
Дополнительно, существуют возможности создания собственного оформления плиток в меню Пуск Windows 10 для программ, которые отображают там лишь ярлыки, подробнее об этом в инструкции Как создать свои плитки в меню Пуск Windows 10.
Работа с контекстным меню кнопки Пуск
Контекстное меню кнопки Пуск — очень полезная вещь, когда вам нужно быстро открыть какие-то часто используемые системные элементы. Открыть это меню можно, нажав правой кнопкой мыши по кнопке «Пуск» или сочетанием клавиш Win+X, где Win — клавиша с эмблемой Windows.
В самой Windows 10 есть не так много возможностей настройки этого меню: вы можете зайти в Параметры — Персонализация — Панель задач и отключить пункт «Заменить командную строку оболочкой Windows PowerShell в меню» и тогда в контекстном меню Пуск будет более часто используемая многими командная строка с возможностью запуска от имени Администратора.
Однако, при желании, вы можете настроить это меню более тщательно, об этом отдельные инструкции:
- Как редактировать контекстное меню Пуск Windows 10
- Как вернуть панель управления в контекстное меню Пуск
Дополнительные возможности настройки меню Пуск Windows 10
Среди дополнительных возможностей, позволяющих изменить вид и поведение меню Пуск в Windows 10:
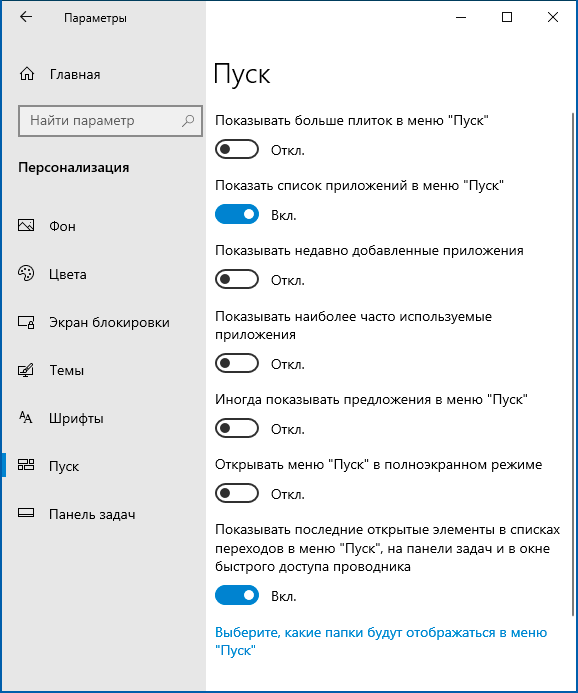
- Пункты в Параметры — Персонализация — Пуск. Большинство из них очень понятны (или можно попробовать и посмотреть на результат: например, увидеть, как именно пункт «Показать список приложений в меню Пуск» повлияет на внешний вид), но некоторым не ясен пункт «Выберите, какие папки будут отображаться в меню Пуск». Под этими папками подразумеваются папки в левом узком столбце, раскрывающиеся при наведении в последних версиях Windows 10.

- Вы можете отключить автоматическое раскрытие этого левого столбца, подробнее — Как отключить раскрывающуюся панель слева меню Пуск.
- Также могут оказаться полезными материалы: Как убрать поиск и пуск на весь экран в Windows 10, Что делать, если вместо рабочего стола плитки в Windows 10.
- Не забывайте о возможности изменения высоты и ширины меню Пуск (мышью, за край меню).
Классическое меню Пуск из Windows 7 в Windows 10
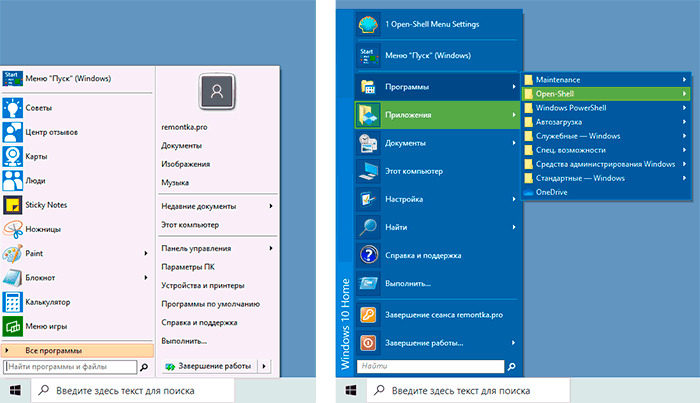
Если не под каким предлогом вы не хотите использовать новое меню Пуск в Windows 10, а хотите, чтобы оно выглядело как в Windows 7, для этого вы можете использовать сторонние программы.
- Как сделать меню Пуск из Windows 7 в Windows 10 с помощью Open Shell (отличный бесплатный вариант).
- Классическое меню Пуск для Windows 10 (обзор нескольких программ, платных и бесплатных).
Если вы можете предложить дополнительные методы изменения внешнего вида, поведения или других аспектов работы меню Пуск в Windows 10, буду рад, если вы сможете ими поделиться в комментариях к статье: не исключено, что информация пригодится другим читателям.
The Windows Start menu is a key feature of the operating system, providing quick access to your apps, settings, and files. It includes a powerful search function and allows you to pin your favorite apps, folders, and websites for easy access. Customization options let you organize your pins into groups and change the Start menu layout to fit your preferences.
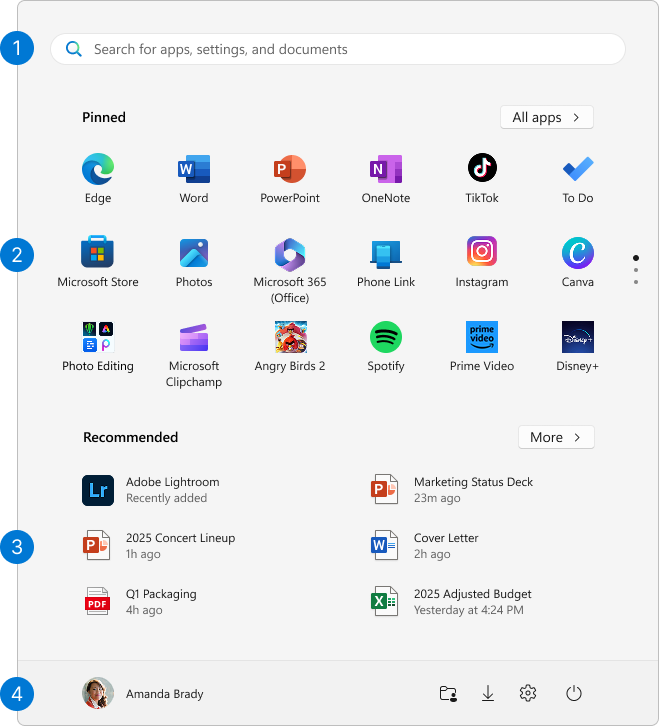
Start menu areas
The Start menu is organized into four main areas:
-
Search: Quickly find apps, files, and settings by typing keywords
-
Pins: Pinned apps, files, folders and websites in a grid format for easy access. All apps shows an alphabetical list of all installed applications
-
Recommendations: Recently added and frequently used apps, plus recently opened files
-
Account: Profile icon for account settings, switching accounts, or signing out. You can also add shortcuts for easy access to common folders. The power button lets you lock, sleep, shut down, or restart your device
Configure the Start menu
Here are common customizations for the Start menu. Expand each section to learn more.
There are different ways to pin apps or shortcuts to the Start menu. For example:
-
In the Search box on the taskbar or on the Start menu, type the name of the app you want to pin. Right-click on the app, then select Pin to Start
-
From Explorer, right-click on a folder and select Pin to Start
-
For websites, open Edge and navigate to the website you want to pin. Then select the more options menu > More tools > Pin to Start
Unpin an item from the Start menu
To remove a pinned app or shortcut from the Start menu, right-click on it and select Unpin from Start .
Whenever you want to change the order of pins on the Start menu, drag the pin from its current position to a different one.
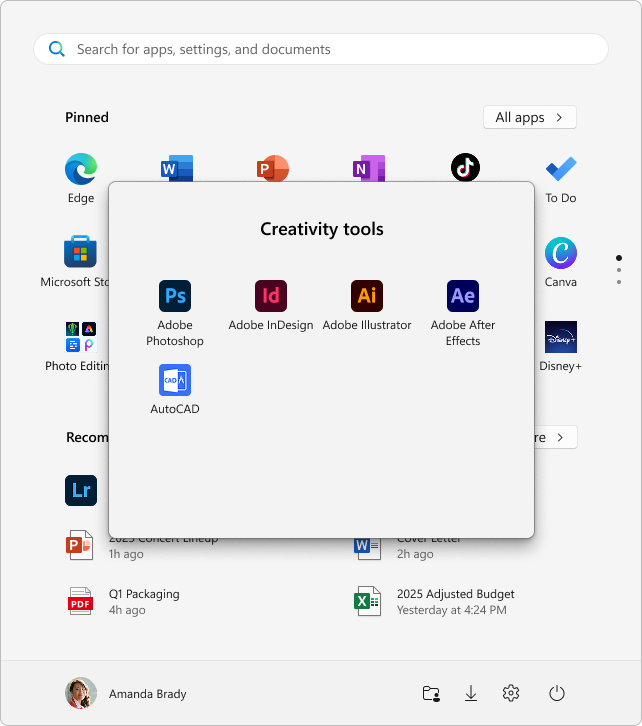
Organize your pins into folders
Grouping pins into folders in Start menu helps keep your apps organized, reduces clutter, and makes it easier to find and access related apps quickly. It also allows for better space management and personalization, giving your Start menu a cleaner and more efficient layout.
-
To create a folder, drag one pinned item over another to create a folder. The folder will automatically be created, and you can rename it
-
To add more pins to the folder, drag them into it
-
To remove a pin from a folder, open the folder and drag the pin out of it
-
Once only one pin is left, the folder is removed from the Start menu
You can customize the Start menu layout to show more pins, more recommendations, or keep the default layout.
-
Select Start , right-click on the bottom of the Start menu and select Start settings or use the following shortcut:
Start
-
Select one of the layout options:
-
More Pins: prioritizes showing more pinned apps
-
More Recommendations: This layout focuses on showing more recommended items, such as recently added apps and files
-
Default: balances between pinned apps and recommended items

-
-
Toggle on or off the other layout options, which include
-
Show recently added apps
-
Show most used apps
-
Show recommended files in Start, recent files in File Explorer, and items in Jump Lists
-
Show recommendations for tips, shortcuts, new apps, and more
-
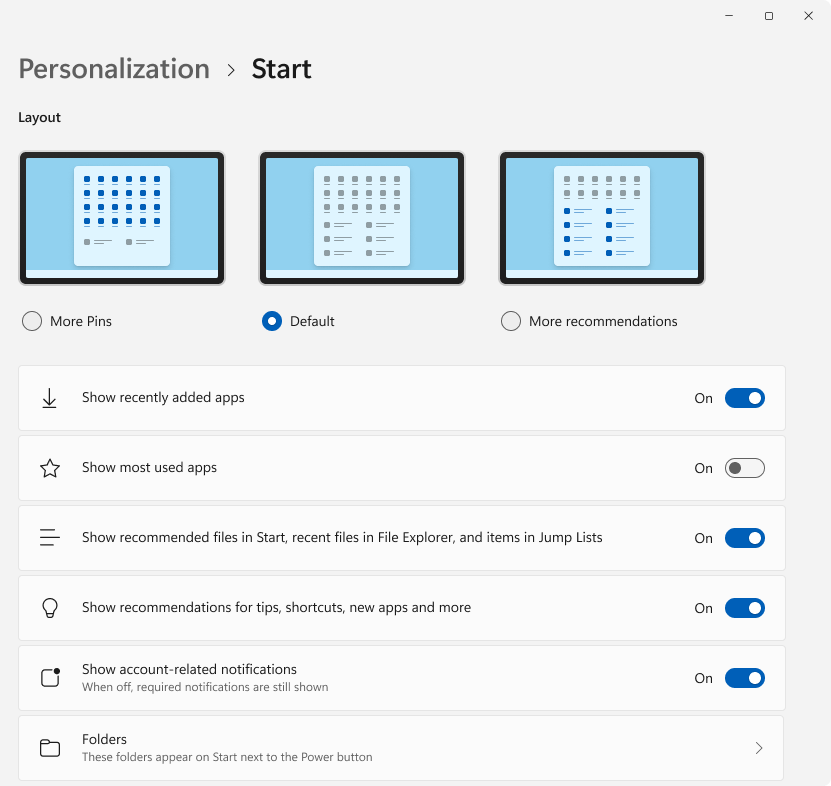
You can choose which folders appear next to the power button on the Start menu. These folders can include common locations such as Documents, Downloads, Music, Pictures, Videos, Network, and Personal folder.
Simply toggle the switches for the folders you want to add. This customization allows you to quickly access frequently used folders directly from the Start menu, enhancing your workflow and making navigation more efficient.
-
Select Start , right-click on the bottom of the Start menu and select Start settings or use the following shortcut:
Start
-
Select Folders then toggle to On all the folders that you want to appear next to the Power button
Typically, the Start menu is centered, but you can change the alignment to the side of the taskbar.
-
Right-click on the taskbar and select Taskbar settings, or use the following shortcut:
Taskbar
-
Expand Taskbar behaviors and select your desired option for Taskbar alignment
To learn more, see Customize the Taskbar in Windows.
Need more help?
Want more options?
Explore subscription benefits, browse training courses, learn how to secure your device, and more.
Editing the Start Menu on Windows 10 can give your PC a personal touch and help you find your favorite apps quicker. To tweak it, open the Start Menu, right-click on the tiles, and choose options like resize, unpin, or move. You can also add new apps or folders by dragging them into the Start Menu.
In this section, we’ll walk you through the steps to customize your Start Menu. Each step will cover a specific task you can perform, such as resizing tiles, pinning apps, or creating new folders.
Step 1: Open the Start Menu
Click on the Windows icon at the bottom-left corner of your screen.
The Start Menu is your gateway to all your PC’s features. Clicking the Windows icon will expand the menu, showing a grid of app tiles and a list of programs.
Step 2: Right-click on a Tile
Right-click on any tile to bring up a menu with customization options.
When you right-click a tile, a context menu appears showing options like «Unpin from Start,» «Resize,» and «More.» This is your control panel for tweaking each tile.
Step 3: Resize a Tile
Select «Resize» from the context menu and choose a size.
Tiles come in various sizes: small, medium, wide, and large. Select the size that best fits your needs and layout preferences.
Step 4: Unpin a Tile
Click «Unpin from Start» to remove a tile from the Start Menu.
If you find a tile you don’t use often, you can quickly declutter your Start Menu by unpinning it. Don’t worry; this won’t uninstall the app.
Step 5: Pin an App or Folder
Drag an app or folder from the list into the Start Menu.
You can personalize your Start Menu by adding apps or folders you frequently use. Simply drag them into the Start Menu to create new tiles.
Step 6: Create a Folder
Drag one tile on top of another to create a folder.
Folders help you organize similar apps together. Once you drag one tile onto another, a new folder will appear which you can name as you like.
When you finish these steps, your Start Menu will look just the way you want it. You’ll be able to find your favorite apps and folders more easily, making your daily tasks faster and more enjoyable.
Tips for Editing Start Menu Windows 10
- Rearrange your tiles by dragging them around to create a layout that makes sense to you.
- Use «Live Tiles» to get real-time updates from apps like Weather or News.
- Pin your most-used settings to the Start Menu for quick access.
- Personalize your Start Menu color scheme by going to Settings > Personalization > Colors.
- Add shortcuts to websites by dragging the URL from your browser to the Start Menu.
Frequently Asked Questions
Can I uninstall apps from the Start Menu?
Yes, right-click on the app tile and select «Uninstall» to remove the app from your PC.
How do I add a website to the Start Menu?
Drag the website’s URL from your browser into the Start Menu to create a shortcut.
Can I change the Start Menu’s background color?
Yes, go to Settings > Personalization > Colors and choose your preferred color.
How do I rename folders in the Start Menu?
Click on the folder, then click on the text box at the top to rename it.
Is it possible to turn off Live Tiles?
Yes, right-click on the Live Tile, go to «More,» and select «Turn live tile off.»
Summary
- Open the Start Menu
- Right-click on a tile
- Resize a tile
- Unpin a tile
- Pin an app or folder
- Create a folder
Conclusion
Editing the Start Menu on Windows 10 is like putting a fresh coat of paint on your house. It makes everything feel personal and more suited to your needs. By customizing the tiles, pinning your favorite apps, and even creating folders, you can make your computing experience more efficient and enjoyable. Plus, with the tips and FAQs we’ve covered, you’re now equipped to handle any customization challenge that comes your way.
Feel free to explore further and experiment with different settings until you find what works best for you. The more you play around, the more proficient you’ll become. Happy customizing!
Kermit Matthews is a freelance writer based in Philadelphia, Pennsylvania with more than a decade of experience writing technology guides. He has a Bachelor’s and Master’s degree in Computer Science and has spent much of his professional career in IT management.
He specializes in writing content about iPhones, Android devices, Microsoft Office, and many other popular applications and devices.
Read his full bio here.
Editing the Start Menu in Windows 10 can make your computer experience more personalized and efficient. By customizing the Start Menu, you can organize your favorite apps, folders, and settings for quick access. To do this, you’ll need to pin or unpin tiles, resize them, create app groups, and even tweak the list of applications that appear. With a few simple steps, you can make your Start Menu work just the way you want it, reflecting your individual style and needs.
Customizing the Start Menu in Windows 10 allows you to arrange it to your liking and improve your workflow. Follow the steps below to tailor your Start Menu experience.
Step 1: Open the Start Menu
Click the Windows icon on the bottom-left corner of your screen to open the Start Menu.
This action brings up the initial view of your Start Menu, showcasing pinned tiles and the list of installed applications. It’s your hub for customization.
Step 2: Pin or Unpin Tiles
Right-click on an app and select “Pin to Start” to add it, or “Unpin from Start” to remove it.
When you pin a tile, it gets added to the right side of your Start Menu for easy access. Unpinning removes it, helping you declutter your screen.
Step 3: Resize Tiles
Right-click a tile, hover over “Resize,” and select your desired size.
Resizing tiles allows you to emphasize important apps or save space by making them smaller, giving your Start Menu a tidy appearance.
Step 4: Create App Groups
Drag a tile to an empty space until a horizontal bar appears, then release to create a new group.
Grouping apps together based on function or frequency of use can make navigation smoother and your Start Menu more organized.
Step 5: Customize the App List
Go to Settings > Personalization > Start, then toggle “Show more tiles” or “Show app list in Start menu.”
These options let you modify how many tiles are displayed or whether the app list is visible, tailoring the Start Menu to your needs.
After completing these steps, your Start Menu will reflect your preferences, with your most-used apps and features readily available. Your computing experience will be more streamlined, saving you time and effort as you navigate through your tasks.
- Stay Organized: Regularly update your Start Menu to ensure it remains useful and clutter-free.
- Use Folders: Group similar apps into folders by dragging one tile over another to save space.
- Personalize with Colors: Change the theme color in Settings > Personalization > Colors to match your style.
- Backup Your Layout: Use third-party software to save your Start Menu layout for quick recovery.
- Explore Live Tiles: Enable live tiles for apps like Weather or News to get updates at a glance.
Frequently Asked Questions
Can I remove the entire app list from my Start Menu?
Yes, you can hide the app list by going to Settings > Personalization > Start and toggling off “Show app list in Start menu.”
How do I disable live tiles?
Right-click on a live tile and select “Turn live tile off” to stop it from displaying real-time updates.
Can I add web links to the Start Menu?
Yes, you can pin websites by opening them in Microsoft Edge, clicking the ellipsis (…), and selecting “Pin to Start.”
Is it possible to revert changes to the Start Menu?
While there’s no default button to revert, manually unpinning or resizing tiles will return your Start Menu to its original state.
Where can I find more customization options?
Explore the Settings > Personalization menu for additional customization options like themes and taskbar settings.
Summary
- Open the Start Menu.
- Pin or unpin tiles.
- Resize tiles.
- Create app groups.
- Customize the app list.
Conclusion
In wrapping up, mastering how to edit the Start Menu in Windows 10 can significantly enhance your user experience. It’s like arranging your room just the way you like it, making everything from your favorite games to essential productivity apps just a click away. With each drag and right-click, you’re not just customizing a menu; you’re tailoring a digital space that meets your personal needs.
By regularly updating your Start Menu, you ensure that your workflow remains smooth and efficient. Remember to explore features like live tiles and color themes to add flair and functionality. Don’t be afraid to experiment with different layouts and configurations—it’s all about finding what works best for you.
If you’re keen to delve deeper, there are plenty of online resources and community forums filled with tips and tricks from other Windows 10 users. Consider diving into those to further enhance your setup.
Customizing the Start Menu is a simple yet powerful way to make your Windows 10 experience uniquely yours. So go ahead, give it a try, and enjoy a more personalized and efficient computing experience.
Matt Jacobs has been working as an IT consultant for small businesses since receiving his Master’s degree in 2003. While he still does some consulting work, his primary focus now is on creating technology support content for SupportYourTech.com.
His work can be found on many websites and focuses on topics such as Microsoft Office, Apple devices, Android devices, Photoshop, and more.
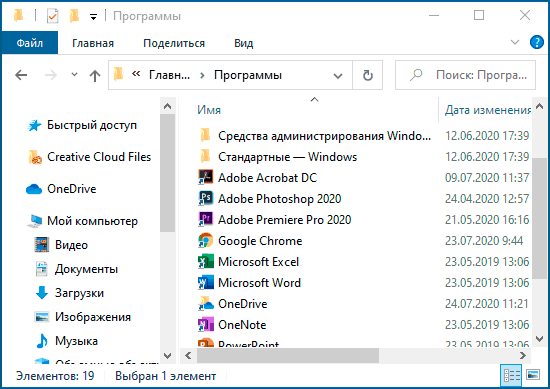
Today we are going to see how to edit the folders and applications in the Windows 10 Start menu list, so it is possible to sort it according to the user’s taste. Indeed, each newly installed program behaves differently. In fact, some create folders in the Start menu and others create shortcuts. It is therefore convenient to organize it. It is well known that Windows 10 has a Start menu customization section. However, it is not possible to edit the contents of the list. In order to organize these items, it is necessary to resort to the file explorer. Read on to find out how to do it.
How to edit the Start menu folders.
This is a simple procedure. Just open the Windows file explorer. With this in mind, you can click on the icon in the taskbar. Or press the Win+E combination.

Next, it is necessary to go to a specific address. For this you need to do two steps. First, you must click on the address bar. This action causes the full address of the location to be displayed.

Next, enter the following address in the search bar:
C:\ProgramData\Microsoft\Windows\Start Menu\Programs
Next, press Enter to go to the selected selection. You will immediately access the list of folders and shortcuts in the start menu. As you can see, the items are displayed as they are in the Start menu. In addition, the system sorts them alphabetically. However, you can edit it to create or delete folders.

Obviously, the only thing left to do is to organize it to your liking. That is to say, inside the folders there are the shortcuts. Then, it is possible to cut and paste them outside the folder. By doing so, you delete the folder and only the shortcut of the application will remain in the Start menu list. In the same way, it is possible to do the process the other way around. To organize all items in folders. Very well, in this way it is possible to edit Windows 10 Start menu folders and applications. This will give you another way to customize the system. See you later!
— Advertisement —
Everything Linux, A.I, IT News, DataOps, Open Source and more delivered right to you.
Subscribe
«The best Linux newsletter on the web»