
Whether you’re reading documents, browsing the web, or working on other text-heavy tasks, the Windows 10 feature known as ClearType can make fonts appear sharper and easier on the eyes. However, depending on your display or personal preferences, you may want to adjust, enable, or disable this feature. In this guide, we’ll show you how to turn on or off ClearType in Windows 10 and customize it to suit your needs.
What is ClearType?
ClearType is a font-smoothing technology developed by Microsoft to improve text readability, particularly on LCD and LED screens. It works by fine-tuning the way fonts are displayed, smoothing out the edges to make them appear sharper and more legible. Similar to anti-aliasing used in graphics rendering, ClearType reduces the jagged appearance of text, making it easier to read, especially on modern flat-panel monitors.
ClearType operates by manipulating the individual red, green, and blue sub-pixels within each pixel on a screen, optimizing how fonts are rendered. This method of sub-pixel rendering is comparable to anti-aliasing, a technique commonly used in computer graphics to smooth out jagged edges in images. ClearType applies this concept to text, adjusting the color and intensity of each sub-pixel to create smoother, more natural-looking font edges. This leads to text that is less pixelated and more refined on screens where each pixel is highly visible.
How does ClearType enhance text clarity?
On modern high-resolution monitors, ClearType significantly improves text clarity, especially at smaller font sizes. Without it, text can look jagged and pixelated. By applying a form of anti-aliasing to the text, ClearType ensures smooth edges and crisp letters, making extended reading or working on text-intensive tasks much more comfortable. This is particularly beneficial for reducing eye strain and fatigue, enhancing the overall user experience for those who spend long periods in front of their screens.
Why turn ClearType on or off?
While ClearType is designed to optimize text clarity on Windows 10 screens, there are scenarios where you might want to turn it on or off, depending on your display setup or personal preferences.
When to turn ClearType on
ClearType is particularly beneficial when you’re working with text-heavy applications, such as reading documents, browsing websites, or working on spreadsheets. By smoothing out the edges of fonts, ClearType makes text sharper and easier to read, reducing eye strain, especially during extended periods of screen use. This feature is most effective on modern LCD and LED monitors, where pixel clarity can greatly enhance your experience. Users who work in graphic design, editing, or other detail-oriented tasks may find that ClearType improves overall screen legibility, making work easier and more efficient.
When to turn ClearType off
There are situations where you may prefer to disable ClearType in Windows 10 settings. For example, if you’re using older CRT monitors or certain high-contrast display settings, ClearType can sometimes distort text or make it appear overly smoothed. Additionally, some users may have a personal preference for sharper, more defined text without the softening effect ClearType applies. Turning it off may also be useful if your display is calibrated in a way that makes ClearType’s adjustments unnecessary or less effective.
Step-by-step guide: how to turn on ClearType
Step 1: Accessing ClearType settings (Windows 10)
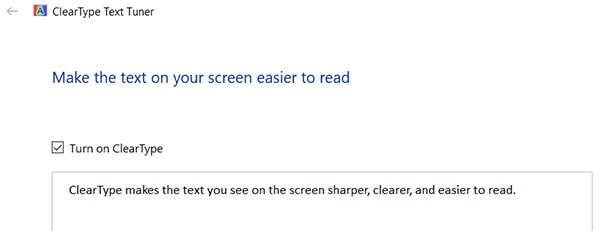
To begin, open the ClearType settings by typing “ClearType” into the Windows search bar and selecting “Adjust ClearType text” from the results. This will take you to the ClearType Text Tuner.
Step 2: Running the ClearType text tuner
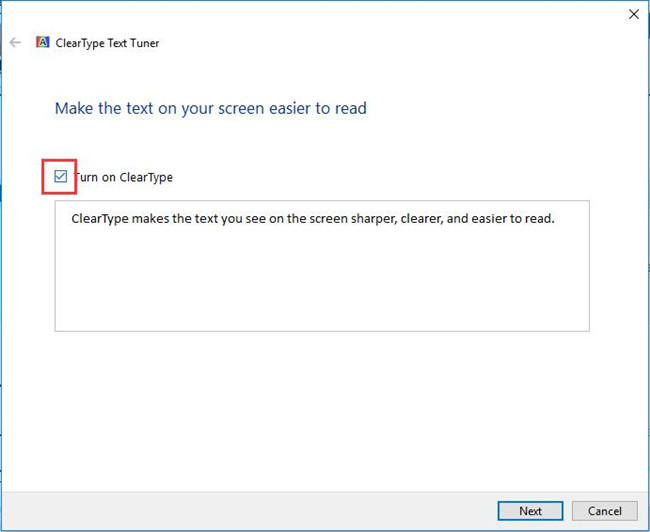
Once the ClearType Text Tuner opens, make sure the checkbox labeled “Turn on ClearType” is selected. Click Next to start the tuning process. The system will guide you through a series of screens showing text samples to help you choose the one that looks best on your display.
Step 3: Adjusting settings for optimal text clarity
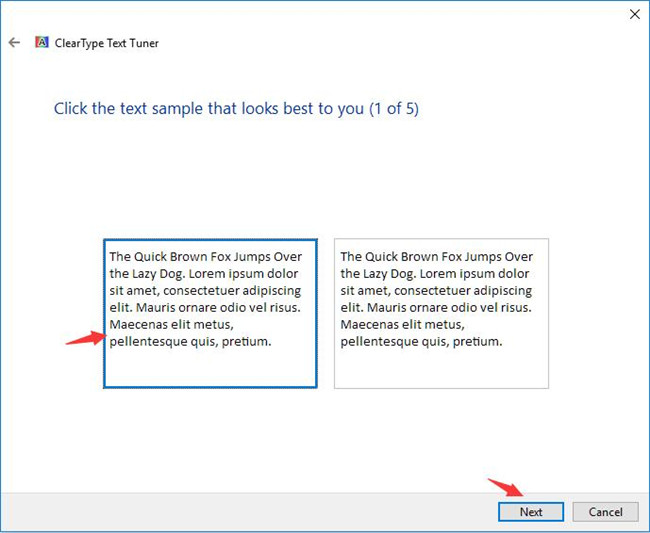
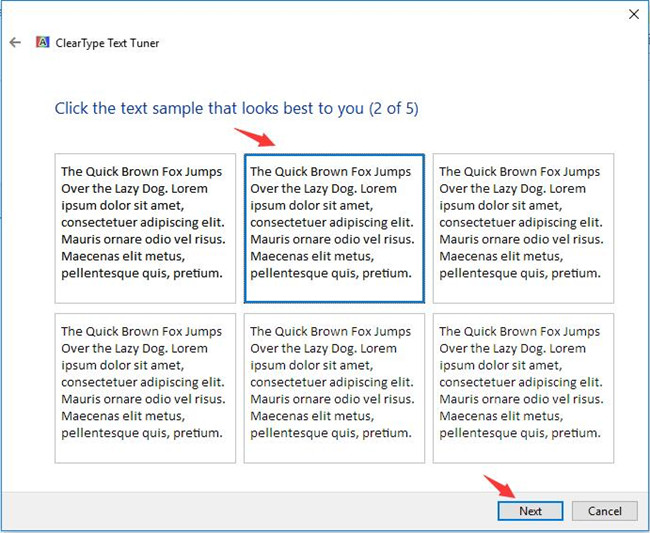
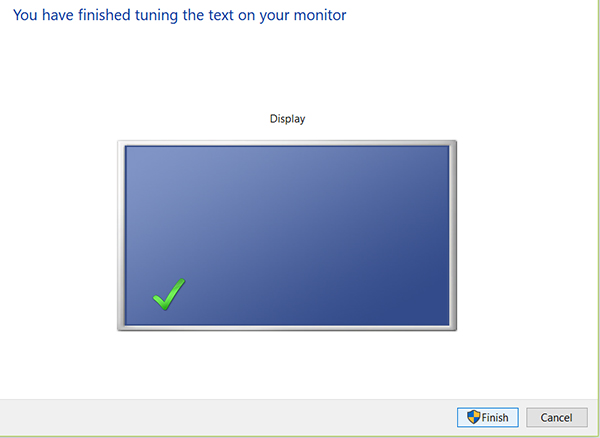
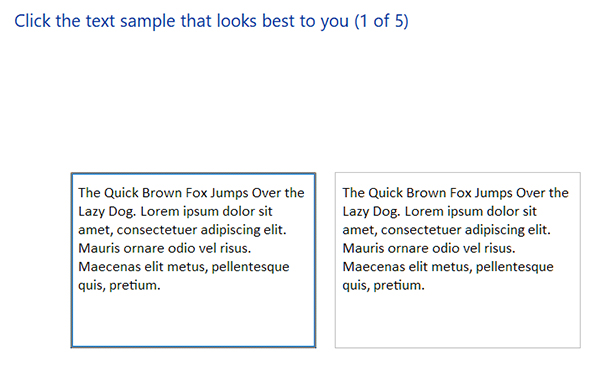
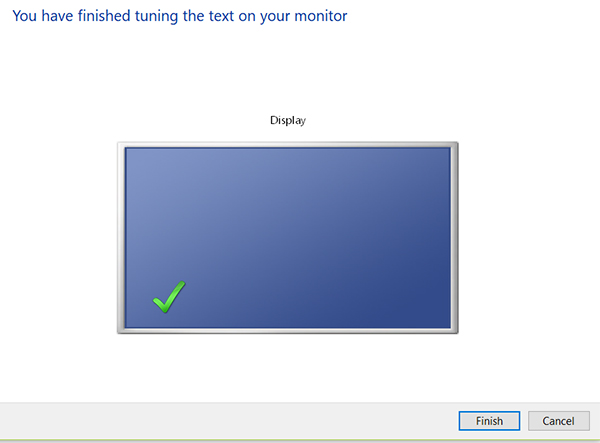
During the tuning process, select the text samples that appear clearest to you. Windows will use these preferences to optimize text rendering for your display. After going through all the tuning steps, click Finish to apply your new settings. The changes should immediately improve the clarity of text on your screen.
Step-by-step guide: how to turn off ClearType
Step 1: Accessing ClearType settings
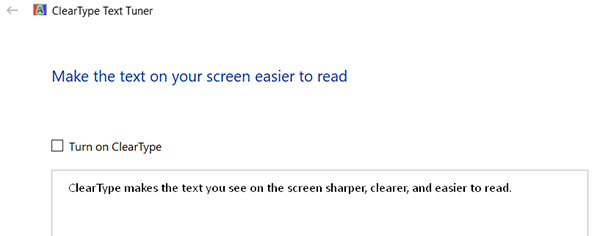
Start by typing “ClearType” into the Windows search bar and selecting “Adjust ClearType text” from the list of results. This will open the ClearType Text Tuner window.
Step 2: Running the ClearType text tuner
In the ClearType Text Tuner window, uncheck the box labeled “Turn on ClearType” to disable the feature. Once the box is unchecked, click Next to proceed.
Step 3: Finalizing the changes
You’ll be guided through a series of screens, but since ClearType is now off, simply click Finish to apply your settings. Your text will no longer be smoothed by ClearType, and the changes will take effect immediately, making the text appear sharper or more defined depending on your display configuration.
Tips for optimizing screen readability
Adjust screen resolution
Your monitor’s resolution plays a critical role in how clear and sharp text appears. Ensure your display is set to its native resolution (the highest resolution supported by your screen) for the best clarity. You can adjust this by right-clicking on the desktop, selecting Display settings, and then choosing the recommended resolution under the Resolution dropdown.
Fine-tune scaling options
Scaling settings can also impact text readability, especially on high-resolution displays where text may appear too small. In the Display settings, adjust the Scale and layout options to increase text size without distorting it. A common scaling setting is 125% or 150%, which can make text more readable on larger monitors or high-DPI screens.
Enable high contrast mode
For users with vision impairments or those who prefer a bolder text display, enabling High Contrast Mode can help improve readability. Go to Settings > Ease of Access > High contrast and toggle it on. This setting makes text stand out more by adjusting the color contrast between the background and the text.
Consider using dark mode
Dark mode can reduce eye strain, especially in low-light environments. This mode changes the color scheme to display light text on a dark background. To enable it, go to Settings > Personalization > Colors, and select Dark under the Choose your color dropdown.
Customize text size independently
If you need larger text without scaling the entire display, you can customize just the text size. In Ease of Access settings, under the Display section, use the slider labeled Make text bigger to adjust font size across all applications without affecting images or window sizes.
Use built-in magnifier
Windows includes a Magnifier tool for users who require enhanced text visibility. To turn it on, press Windows key + Plus (+). The Magnifier will zoom in on parts of your screen, making it easier to read smaller text without changing your display settings permanently.
By adjusting these settings, you can optimize your screen’s text readability for your specific needs, whether for general comfort or to accommodate visual impairments.
ClearType FAQs
What is ClearType in Windows 10, and how does it work?
ClearType is a text-smoothing feature in Windows designed to make fonts appear sharper and more legible, especially on LCD and LED screens. It uses sub-pixel rendering to improve how text edges are displayed, reducing pixelation and making letters look smoother.
How can I tell if ClearType is turned on or off?
To check the status of ClearType, type “ClearType” into the Windows search bar and select “Adjust ClearType text.” The ClearType Text Tuner will open, and you can see if the “Turn on ClearType” box is checked. If it’s checked, ClearType is enabled.
Why does text still look blurry after turning on ClearType?
Blurry text could be caused by an incorrect screen resolution or improper monitor calibration. Ensure your display is set to its native resolution, and consider adjusting the ClearType settings again to fine-tune the clarity. You can also try recalibrating your monitor’s color settings to see if that improves the appearance of text.
Can ClearType improve text readability on any screen?
ClearType is most effective on modern LCD and LED monitors. On older CRT monitors or certain high-contrast displays, ClearType may not work as well and could even make text appear less sharp. In such cases, turning ClearType off might provide better results.
How do I fix text that looks worse after enabling ClearType?
If text appears distorted or worse after enabling ClearType, revisit the ClearType Text Tuner and carefully choose the text samples that look clearest to you. Additionally, ensure your monitor is properly calibrated, and check that you’re using the recommended resolution for your display.
Is it necessary to use ClearType if I’m using a high-resolution display?
While high-resolution displays often produce sharper text naturally, enabling ClearType can still provide additional text smoothing and enhance readability, particularly for smaller fonts. However, some users may prefer the default text rendering on high-res displays and choose to turn ClearType off.
Does ClearType work with all applications?
ClearType generally works with most applications in Windows 10, but certain apps or custom fonts may not benefit from ClearType’s smoothing. If you notice that text in a specific app looks jagged, it could be an issue with the app’s compatibility with ClearType.
How can I reset ClearType settings to default?
To reset ClearType settings, open the ClearType Text Tuner by typing “ClearType” into the Windows search bar. Click Next through the tuning process, selecting the default options or the text samples that look best to you. After completing the tuning, click Finish to apply the default settings.
In summary
ClearType is a valuable tool for enhancing text readability on Windows 10, especially for those working with text-intensive tasks or spending extended time in front of their screens. Whether you choose to turn it on for sharper fonts or turn it off for a more natural display, understanding how to customize ClearType to your preferences can make a noticeable difference in screen comfort and clarity. By following these steps and tips, you can tailor your display settings to achieve the best reading experience on your device.
ClearType — это технология сглаживания шрифтов в операционных системах Windows, предназначенная для того, чтобы текст на современных жидкокристаллических мониторах (TFT, IPS, OLED и других) был более удобным для чтения. Использование этой технологии на старых мониторах CRT (с электронно-лучевой трубкой) не требовалось (однако, например, в Windows Vista была включена по умолчанию для всех типов мониторов, отчего на старых CRT экранах могла выглядеть неприглядно).
В этой инструкции подробно о настройке ClearType в Windows 10, 8 и Windows 7. А также кратко о том, как настроить ClearType в Windows XP и Vista и когда это может потребоваться. Также может оказаться полезным: Как исправить размытые шрифты в Windows 10.
Как включить или выключить и настроить ClearType в Windows 10 – 7
Для чего может потребоваться настройка ClearType? В некоторых случаях и для некоторых мониторов (а также, возможно, в зависимости от восприятия пользователя), используемые Windows по умолчанию параметры ClearType могут приводить не к удобству чтения, а к обратному эффекту — шрифт может казаться размытым или просто «необычным».
Изменить отображение шрифтов (если дело именно в ClearType, а не в неверно установленном разрешении монитора, см. Как изменить разрешение экрана монитора) вы можете с помощью соответствующих параметров.
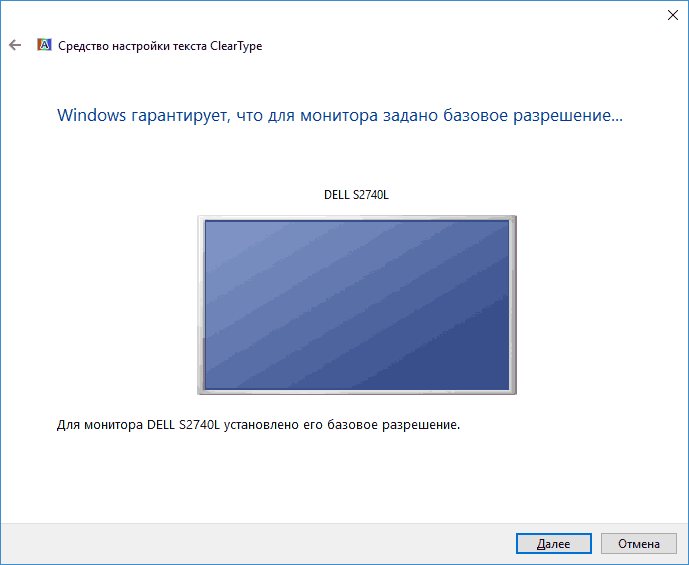
- Запустите средство настройки ClearType — сделать это проще всего, начав набирать ClearType в поиске на панели задач Windows 10 или в меню пуск Windows 7.
- В окне настройки ClearType вы можете выключить функцию (по умолчанию для ЖК мониторов она включена). Если требуется настройка, то не выключайте, а нажмите «Далее».

- Если на вашем компьютере несколько мониторов, вам будет предложено выбрать один из них или выполнить настройку двух одновременно (лучше делать это по отдельности). Если один — вы сразу перейдете к пункту 4.
- Будет выполнена проверка того, что для монитора установлено правильное (физическое разрешение).
- После чего в течение нескольких этапов вам будет предлагаться выбрать тот вариант отображения текста, который кажется вам лучше других. Нажимайте «Далее» после каждого из этих этапов.
- В завершение процесса вы увидите сообщение о том, что «Настройка отображения текста на мониторе завершена». Нажмите «Готово» (внимание: для применения настроек вам потребуются права Администратора на компьютере).


Готово, на этом настройка будет закончена. При желании, если результат не понравится, в любой момент вы сможете повторить ее или отключить ClearType.
ClearType в Windows XP и Vista
Функция сглаживания экранных шрифтов ClearType присутствует также в Windows XP и Vista — в первом случае она по умолчанию выключена, а во втором — включена. И в обоих операционных системах нет встроенных инструментов для настройки ClearType, как в предыдущем разделе — только возможность включить и выключить функцию.
Включение и выключение ClearType в этих системах находится в параметрах экрана — оформление — эффекты.
А для настройки существует онлайн средство настройки ClearType для Windows XP и отдельная программа Microsoft ClearType Tuner PowerToy for XP (которая работает и в Windows Vista). Скачать ее можно с официального сайта https://www.microsoft.com/typography/ClearTypePowerToy.mspx (примечание: странным образом, на момент написания статьи загрузка программы с официального сайта не происходит, хотя пользовался ей недавно. Возможно, дело в том, что пробую скачать ее из Windows 10).
После установки программы в панели управления появится пункт ClearType Tuning, запустив который вы сможете пройти процесс настройки ClearType почти также, как в Windows 10 и 7 (и даже с некоторыми дополнительными настройками, такими как параметры контрастности и очередности цветов на матрице экрана на вкладке «Дополнительно» в ClearType Tuner).
Обещал рассказать для чего это может понадобиться:
- Если вы работаете с виртуальной машиной Windows XP или с ней же на новом ЖК мониторе — не забудьте включить ClearType, так как по умолчанию сглаживание шрифтов отключено, а для XP сегодня оно обычно полезно и повысит удобство работы.
- Если вы запустили Windows Vista на каком-то древнем ПК с ЭЛТ монитором — рекомендую выключить ClearType, если вам предстоит работать за этим устройством.
На этом завершаю, а если что-то работает не так, как ожидается или возникли иные проблемы при установке параметров ClearType в Windows, сообщайте в комментариях — я постараюсь помочь.
Contents:
- Windows 10 Clear Type Overview
- What is ClearType?
- How to Turn On or Off ClearType in Windows 10?
- How to Make Text Sharper for ClearType Windows 10?
- How to Reset ClearType Settings to in Windows 10?
Windows 10 Clear Type Overview
Sometimes, after rebooting your computer, the screen looks fuzzy, and all the font on Windows 10 are blurry, such as the desktop icon texts, documents, programs interface, etc.
Maybe it is related to the ClearType function, which can be regarded as a tool for font smoothing. Before Windows 7, the ClearType was not enabled when installing the system, you need to set it manually. In Windows 7 and its advanced system, the ClearType was turned on by default.
But many users find the vague or uncomfortable text on Windows 10, they can’t help thinking “ Is there ClearType in Windows 10?”, of course, there is Windows 10 ClearType.
The case is your font would go blurry even with the ClearType Tuner. To some extent, the issue consists in the improper ClearType settings, for example, ClearType keeps turning off on Windows 10.
Here by showing you some common but rather useful tricks about ClearType Windows 10, this post will walk you through how to make text clear using ClearType Windows 10, from what it is to how to configure it to how to turn off or on it to fix ClearType issues.
What is ClearType?
ClearType is a subpixel rendering technology which can improve the readability of the text on the Liquid Crystal Displays such as the laptop screens, different computer monitors, Pocket PC screens, etc. With the ClearType font technology in Windows 10, the word appears sharp and clear. When you see it, it is comfortable and the same as printed on the paper.
Nevertheless, even the ClearType is built-in and enabled automatically when you install the system, you would also come across text turns grey and unreadable error due to Windows 10 ClearType missing or turning off problems.
So follow some helpful tips to turn on ClearType and then customize it to make text sharper in Windows 10.
How to Turn On or Off ClearType in Windows 10?
Turning on the ClearType and then choose the clearest text will enhance the text readability. That will also restore the disappeared ClearType back to Windows 10. Turning on or off ClearType in Windows 10 is very easy.
1. Type cleartype in the search box, and Adjust ClearType text will appear. Click it to enter ClearType Text Tuner. From the screenshot below, you can know that the ClearType is stored in Control Panel.
2. In ClearType Text Tuner, tick Turn on ClearType, and click Next.
3. Click Next. In this step, windows will detect and help you set the monitor to its native resolution.

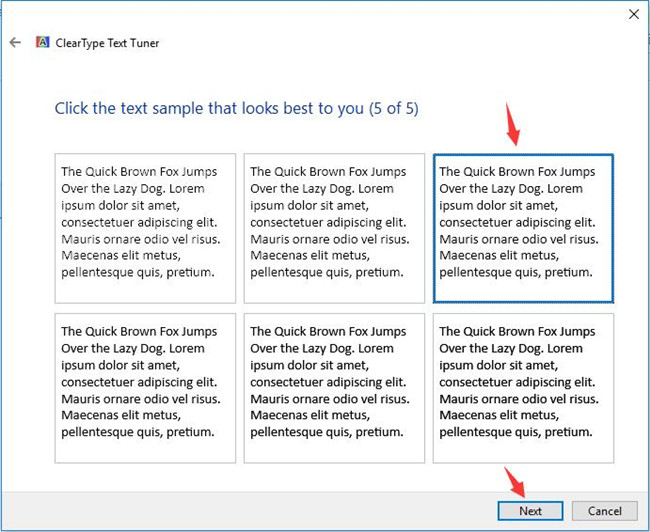
4. Choose the clear text sample and click Next. There are 5 text samples you need to choose.
5. Click Next.
6. Click Next.
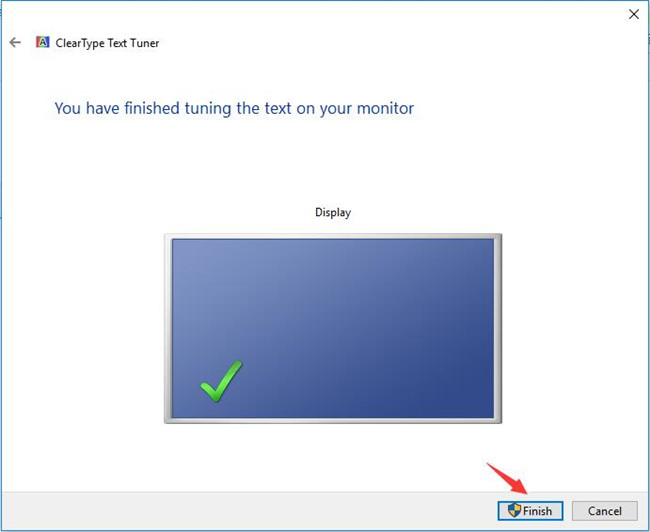
After choosing the 5 text samples, you will finish set the ClearType on your monitor.
Of course, if you want to turn off the ClearType, uncheck Turn on ClearType and reset it again.
So it is very easy to enable and disable ClearType function on Windows 10. If there are more than one monitor, you can also to set for the specific monitor or for all monitors.
Therefore, it is a necessary trick to turn on ClearType in Windows 10 to fix the blurry text.
How to Make Text Sharper for ClearType Windows 10?
Sometimes, with Windows 10 ClearType turned on, even though you have chosen five text samples, you can also make the text look better on Windows 10.
That means you can further calibrate the ClearType text to get rid of the fuzzy Windows 10 text by changing text color, text size, and resolution.
To adjust the sharpness of Windows 10 ClearType text, just change into high-resolution display settings.
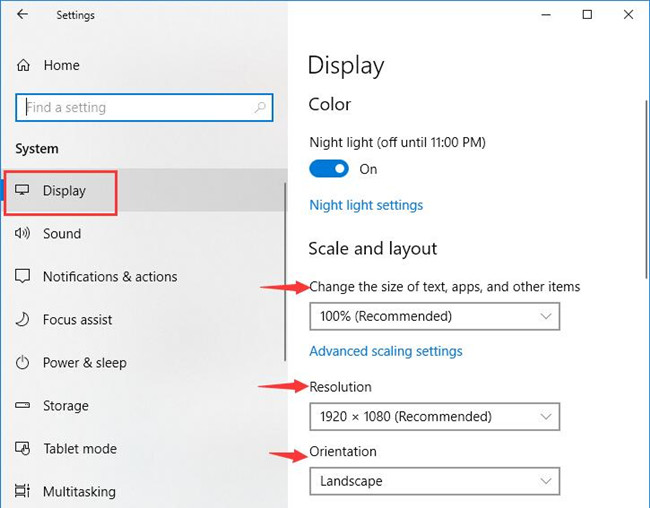
1. Go Start > Settings > System.
2. Under Display, try to Change the size of the text, apps, and other items, resolution and Landscape.
Particularly, to get the ClearType text clear on Windows 10, you should configure your PC in high resolution.
In this way, Windows 10 ClearType text samples you have selected will be more readable for you.
How to Reset ClearType Settings to in Windows 10?
If you have already turned on ClearType, but the fonts become worse or ClearType Windows 10 is not working, how can you set ClearType back to default settings?
After creating a system restore point, you can return back to the previous system version. This will get the ClearType to the default settings as well.
If you do not want to restore Windows 10, you can follow the next steps. In this case, you may as well manually adjust ClearType with Administrator’s rights.
1. Login in the computer with Administrator account.
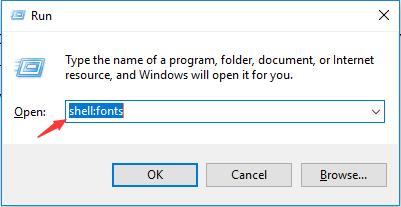
2. Click Win + R to open the Run box. And here you can see 23 important shortcuts on Windows 10.
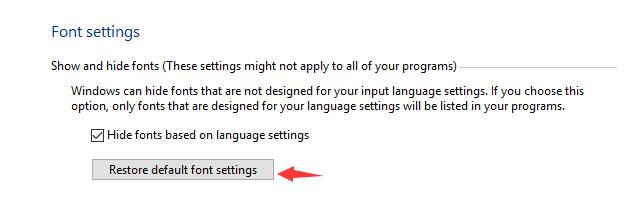
3. Type shell:fonts to open the Windows font settings.
4. Click Font Settings in the left side.
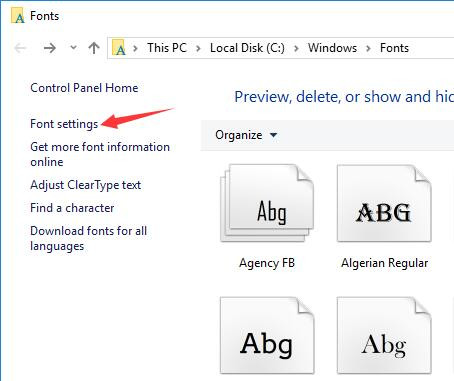
5. Click Restore default font settings. This settings will help you return the ClearType font settings to previous.
6. Set the monitor to the factory settings.
All ClearType settings will be reset for Windows 10, for the sake of clear text, there is a need to enable ClearType and set it again.
In summary, above are the tips and tricks you may need someday to customize ClearType Windows 10.
More Articles:
How to Get Help on Windows 10?
How to Download Fonts on FontSpace?
How to Turn On or Off Sticky Keys on Windows 10
Brian Peng
Brian Peng is a PC technician and network engineer with over 13 years of IT experience. He has worked in the IT industry for a long time, providing IT support and network service support for various companies. Currently, he has written over 1000 articles about computers, games, and mobile.
Enable or Disable ClearType in Windows 10: ClearType is a font smoothing technology that makes the text on your screen display sharper and clearer which enable users to read the font easily. ClearType is based on the implementation of subpixel rendering technology in rendering text in a font system. ClearType was built for LCD monitors which means if you’re still using old LCD monitor then ClearType settings can help your text look more sharper and easily readable.

Also, if your text is looking blurry then ClearType Settings can definitely help. ClearType uses multiple color shading on the text to make it look sharper and clearer. So without wasting any time let’s see How to Enable or Disable ClearType in Windows 10 with the help of the below-listed tutorial.
Make sure to create a restore point just in case something goes wrong.
1.Type cleartype in Windows Search then click on “Adjust ClearType text” from the search result.
2.If you want to enable ClearType then checkmark “Turn on ClearType” or else uncheck “Turn on ClearType” to disable ClearType and click Next.

Note: You can easily check or uncheck “Turn on ClearType” and you would see a small preview of how your text would look like with and without ClearType.

3.If you have multiple monitors attached to your system then you will be asked to select either you want to tune all monitors now or only tune your current monitor then click Next.
4.Next, if your display is not set to native screen resolution then you will be asked to either set your display to its native resolution or keep it at the current resolution then click Next.

5.Now on the ClearType Text Tuner window select the text which looks best to you and then click Next.

Note: ClearType Text Tuner will ask you to repeat the above steps with different text blocks, so make sure you follow that.

6.If you enabled the ClearType text for all the monitors attached to your system then click Next and repeat the above steps for all other displays.
7.Once done, simply click on Finish button.

8.Reboot your PC to save changes.
Recommended:
- 5 Ways to Adjust Screen Brightness in Windows 10
- Configure Windows 10 to Create Dump Files on Blue Screen of Death
- Disable Automatic Restart on System Failure in Windows 10
- How to Create a Shortcut to Clear the Clipboard in Windows 10
That’s it, you successfully learned How to Enable or Disable ClearType in Windows 10 but if you still have any questions regarding this tutorial then feel free to ask them in the comment’s section.
How to Turn on or off ClearType in Windows 10
ClearType Windows 10 is a built-in utility on your Windows 10 computer that strives to make the text on your screen crisper for you. It does that to ensure all the text on your screen is more readable and is very sharp unlike the blurry texts you sometimes see on other computers. Windows provides you the option to either keep the utility OFF or ON, in your computer.
Now that you know what is ClearType, you might want to learn how you can enable ClearType and make the text more crisper on your screen. The following guide shows how you can turn the utility on and off on your Windows 10 PC:
- Part 1. How to Turn on ClearType in Windows 10?
- Part 2. How to Turn off ClearType in Windows 10?
- Extra Tip: How to Download and Install Fonts in Windows 10?
Part 1. How to Turn on ClearType in Windows 10?
Enabling ClearType on a Windows PC is easy as you just need to enable an option in the settings panel and it will enable the utility for you. The following steps will help you out with that.
Here’s how to turn on ClearType on a Windows 10 PC:
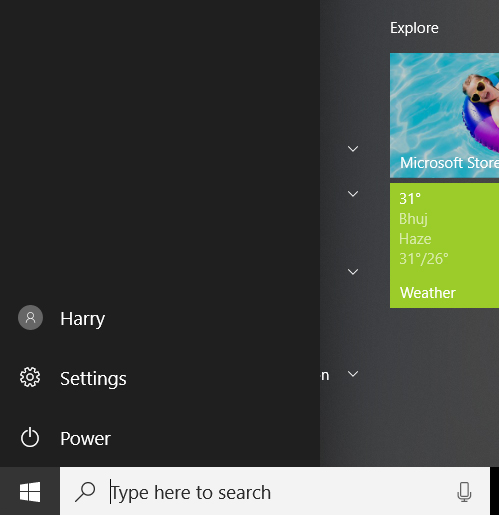
Step 1. Press the Windows key on your keyboard to open the Start Menu. When it opens, find and click on the option that says Settings to open the Windows settings panel.
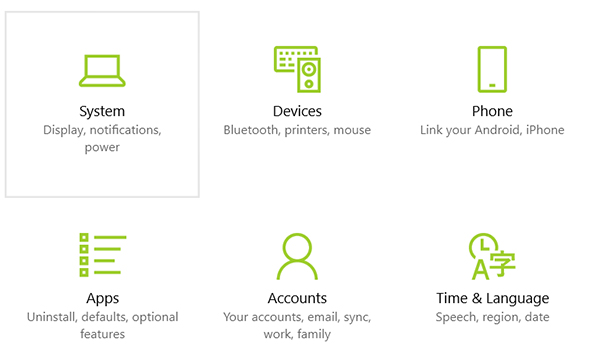
Step 2. When the settings panel launches, find the option named System and click on it to open it.
Step 3. On the system panel, you will see a number of options in the left-hand side. Choose the option that says Display and it will launch more options in the right panel. Click on Advanced display settings followed by ClearType text link at the bottom of the right panel.

Step 4. On the screen that follows is where you can enable the option. Put a tickmark in the box that says Turn on ClearType and click on the Next button.
Step 5. Keep hitting the next button until you reach the last screen. Once there, click on Finish to save the changes.
ClearType should now be enabled on your Windows 10 computer and you will see the different in the sharpness of the text on your screen for yourself. You’ll find that the text is now much easier to read and is crisper than what it was when ClearType was disabled.
Part 2. How to Turn off ClearType in Windows 10?
If you think ClearType hasn’t done an excellent job at improving the sharpness of the text on your screens and you would rather keep it disabled, you can do it in an effortless way as shown below. Disabling the option is as easy as enabling it was and here’s how to do it.
To turn off ClearType on your Windows 10 PC, follow the following steps:
Step 1. Find Settings in the Start Menu of your PC and click on it to open your PC settings. Then, head to System > Display > Advanced display settings > ClearType text and uncheck the Turn on ClearType option and hit Next.
Step 2. You will be shown a few text examples where you need to click on the one that looks best to you. Then, click on the Next button to continue.
Step 3. On the final screen, click on the button that says Finish to save the changes.
The ClearType feature is now turned off on your Windows 10 PC. If you open a screen where there’s some text, you’ll see the difference in the sharpness of the text.
Extra Tip: How to Download and Install Fonts in Windows 10?
We’ve got an extra tip for you about how you can download and install fonts on your Windows 10 computer. We know that your PC has come loaded with tons of fonts but sometimes you may want to add a font of your own or a font that doesn’t already exist on your system. It’s quite easy to do that and the following shows how:
Find a website that lets you download fonts for your PC. There are a lot of those and performing a simple Google search will get you many sites you can download fonts from. Download and save the font to your system.
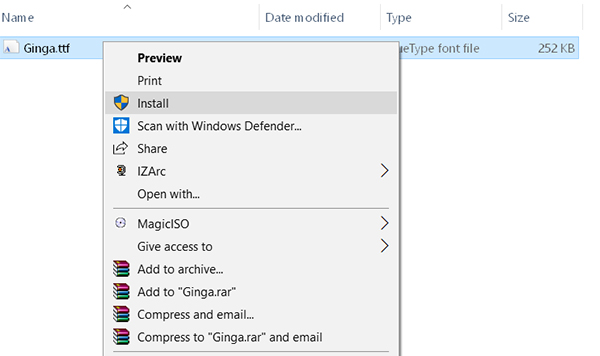
Right-click on the downloaded font file and choose Install. That’s it. The chosen font will automatically be installed on your system. You’ll then be able to use it in any of the apps on your computer.
That’s not the end of the information that we want to convey to you. One more thing we would like for you to know is that you can now recover the lost passwords for your user accounts on a Windows PC. What makes this possible is a utility called Windows Password Key that can be downloaded from its official website. Once installed, it will let you recover passwords for your user account on your PC.
ClearType is a great utility that enables more sharper text on your PC screen. The above guide shows how to enable ClearType and disable it should you wish to do that. Also, you’ve learnt about 4WinKey that enables users to recover password for your user account.
Recommended Product
- Reset/Remove Windows admin and other user password for local/domain account.
- Create a new local/domain admin account to unlock your computer.
- Change your Microsoft account password offline.
- Fully support Windows 10/8.1/8/7/Vista/XP, Windows Server 2012 (R2)/2008 (R2)/2003 (R2).
Free Download
- Related Articles
- How to Disable Windows 10 Lock Screen
- Can’t Remember Windows 10 Password
- How to Windows 10 Password
comments powered by