
When it comes to ensuring optimal performance and stability of your Windows 10 computer, CPU stress testing is an essential tool in a professional’s toolkit. This method of testing the central processing unit’s capabilities is not only crucial for system administrators and hardware enthusiasts but also for anyone who wants to push their computer to the limits and identify any potential weaknesses. With CPU stress test tools specifically designed for Windows 10, you can uncover hidden vulnerabilities, measure CPU performance under heavy workloads, and make informed decisions to optimize your system.
CPU stress testing has come a long way since its inception. In the early days, it was primarily used in the field of hardware development to validate new processors. Fast forward to today, and CPU stress tests have become an indispensable part of optimizing and fine-tuning system performance. With the ability to simulate demanding workloads and measure a CPU’s ability to handle those loads, these tests empower users to identify overheating issues, voltage problems, and instability before they become major problems. By stress testing your CPU, you can ensure that your Windows 10 system remains stable and reliable, even when subjected to intense tasks such as gaming, video editing, or complex computations.
When conducting a CPU stress test on Windows 10, it is important to ensure the stability and performance of your CPU. To do this, you can use software programs specifically designed for stress testing, such as Prime95 or AIDA64. These programs will put your CPU under heavy load, measuring its ability to handle the stress and detect any potential issues. By performing a CPU stress test, you can identify if your CPU is operating at optimal levels and make necessary adjustments to enhance its performance.

Understanding CPU Stress Tests in Windows 10
A CPU stress test is a diagnostic tool used to evaluate the stability, performance, and cooling capability of a computer’s central processing unit (CPU). By subjecting the CPU to intense workloads, stress tests can identify potential hardware issues, such as overheating, faulty cooling systems, or unstable operations. Windows 10 provides several options for conducting CPU stress tests, whether you want to assess a newly built system, diagnose performance issues, or simply push your CPU to its limits for benchmarking purposes.
Using Windows 10 Built-in Stress Testing Tools
Windows 10 offers built-in tools that allow users to stress test their CPUs without the need for third-party software. These tools are particularly useful if you want a quick and straightforward way to assess your CPU’s performance and stability. The Windows 10 built-in stress testing tools include:
- Windows Memory Diagnostic
- IntelBurn Test
- Prime95
- AMD OverDrive
The Windows Memory Diagnostic utility allows you to test your CPU’s integrated memory controller and memory modules. This tool can help identify any issues related to memory stability and potential errors that could impact system performance.
IntelBurn Test is specifically designed to stress test Intel CPUs. It puts a heavy workload on the CPU and tests its thermal design, ensuring that it can handle intense processing without overheating. IntelBurn Test is an excellent choice for users with Intel CPUs who want to gauge the cooling performance of their system.
Prime95 is a popular CPU stress testing tool that puts a high load on the CPU by performing complex calculations. It tests the CPU’s stability and can help identify potential issues related to overclocking or insufficient cooling. Prime95 is a great choice for users who want to thoroughly stress test their CPU’s performance and stability.
For AMD CPU users, AMD OverDrive offers a comprehensive set of stress testing tools. It allows users to test their CPUs using various benchmarks to assess performance, stability, and cooling efficiency. AMD OverDrive includes features such as CPU stability tests, thermal stress tests, and performance tuning for overclocking enthusiasts.
Using Windows Memory Diagnostic
The Windows Memory Diagnostic utility is a useful tool for stress testing your CPU’s memory stability. Follow these steps to use it:
- Open the Start menu and search for «Windows Memory Diagnostic.»
- Click on the Windows Memory Diagnostic app from the search results.
- Choose between restarting your computer and running the test immediately or scheduling it for the next restart.
- The test will then run, checking for any memory-related issues. It may take several minutes to complete, depending on your system’s memory size.
Once the test is complete, the Windows Memory Diagnostic utility will provide you with the results, indicating whether any memory errors were found. This information can help you diagnose potential problems related to your CPU’s memory stability.
Using IntelBurn Test
If you have an Intel CPU and want to stress test its performance and cooling capability, you can use the IntelBurn Test tool. It can be downloaded from the Intel website and follows these steps:
- Download the IntelBurn Test tool from the official Intel website.
- Extract the downloaded file and open the IntelBurn Test executable.
- Choose the stress level you want to apply to your CPU (e.g., Standard, High, or Maximum).
- Click on «Start» to begin the stress test.
The IntelBurn Test utility will then push your CPU to its limits, running multiple threads at maximum intensity. As the test progresses, monitor your CPU’s temperature using third-party software or the motherboard’s temperature sensors to ensure it does not exceed safe operating limits.
Using Prime95
If you want a thorough and intensive stress test for your CPU, Prime95 is an excellent option. Follow these steps to perform the test:
- Download Prime95 from the official website.
- Extract the downloaded file and open the Prime95 executable.
- Choose the «Just Stress Testing» option and click on «OK.»
- The stress test will start, pushing your CPU to its limits by performing complex calculations.
Prime95 allows you to monitor the CPU’s temperature and voltage during the stress test to ensure it remains within safe limits. The test can be run for an extended period to thoroughly assess long-term stability and performance.
Using AMD OverDrive
For AMD CPU users, AMD OverDrive provides a comprehensive stress testing suite. Follow these steps to utilize AMD OverDrive’s stress testing tools:
- Download and install AMD OverDrive from the official AMD website.
- Open AMD OverDrive and navigate to the «Benchmark» tab.
- Select the benchmark test you want to perform (e.g., CPU Stability Test or Thermal Stress Test).
- Configure the test settings, such as the duration and stress level.
- Click on «Start» to begin the stress test.
AMD OverDrive provides detailed information about your CPU’s temperature, clock speed, and voltage during the stress test, allowing you to monitor its performance and stability. It also offers tuning options for enthusiasts who want to push their CPUs to their maximum potential.
Third-Party CPU Stress Testing Tools for Windows 10
In addition to the built-in stress testing tools, there are several third-party options available for Windows 10 users who want more advanced features and customization options. These tools often provide additional stress tests, real-time monitoring, and extensive reporting. Some popular third-party tools for CPU stress testing in Windows 10 include:
- AIDA64
- HWiNFO
- OCCT
- Cinebench
- PassMark BurnInTest
These third-party tools offer a range of stress testing options and provide comprehensive reports on CPU performance, cooling efficiency, and stability. They often include additional benchmark tests to evaluate different aspects of CPU performance, such as single-threaded and multi-threaded workloads.
AIDA64
AIDA64 is a powerful system diagnostics and benchmarking tool that includes stress testing capabilities. It provides a wide range of stress tests for different system components, including the CPU. AIDA64 offers real-time monitoring of various system parameters and can generate detailed reports for analysis.
To utilize the CPU stress testing feature in AIDA64, follow these steps:
- Download and install AIDA64 from the official website.
- Open AIDA64 and navigate to the «System Stability» tab.
- Choose the CPU stress test option.
- Configure the test parameters, such as the stress level and duration.
- Click on «Start» to begin the stress test.
AIDA64 will subject your CPU to intense workloads, allowing you to assess its stability, performance, and cooling efficiency. The tool provides real-time monitoring graphs for CPU temperature, clock speed, and usage, giving you valuable insights into the performance of your system.
HWiNFO
HWiNFO is a comprehensive hardware monitoring tool that also offers stress testing capabilities. It provides detailed information about various system components, including the CPU, and allows users to perform stress tests to evaluate stability and cooling efficiency.
To use the CPU stress testing feature in HWiNFO, follow these steps:
- Download and install HWiNFO from the official website.
- Open HWiNFO and navigate to the «Sensors» tab.
- Expand the «CPU» section and locate the stress testing options.
- Configure the test parameters, such as the stress level and duration.
- Click on «Start» to begin the stress test.
During the stress test, HWiNFO will provide real-time monitoring of various CPU parameters, such as temperature, voltage, clock speed, and utilization. This information can help you assess your CPU’s performance under heavy workloads and evaluate cooling efficiency.
OCCT
OCCT is a popular stress testing tool used to evaluate the stability and cooling efficiency of various system components, including the CPU. It offers different stress testing options and includes real-time monitoring features for comprehensive hardware analysis.
To perform a CPU stress test using OCCT, follow these steps:
- Download and install OCCT from the official website.
- Open OCCT and navigate to the «CPU» tab.
- Configure the test parameters, such as the stress level and duration.
- Click on «Start» to begin the stress test.
During the stress test, OCCT displays real-time monitoring graphs for key CPU parameters, allowing you to track temperature, clock speed, usage, and voltage. The tool also includes error detection mechanisms to identify stability issues accurately.
Cinebench
Cinebench is a popular benchmarking tool that can also be used for basic CPU stress testing. It primarily focuses on rendering performance, making it suitable for users involved in graphics-intensive workloads such as 3D modeling and animation.
To use Cinebench for CPU stress testing, follow these steps:
- Download and install Cinebench from the official website.
- Open Cinebench and click on the «Run» button.
- Cinebench will run a rendering benchmark, putting your CPU under a sustained workload for a predefined duration.
Cinebench does not offer real-time monitoring or stress testing customization options like other tools mentioned above. However, it provides a useful indicator of your CPU’s rendering performance and can be used as a basic stress test for stability assessment.

CPU Stress Test for Windows 10
Performing a CPU stress test in Windows 10 is crucial for troubleshooting system stability issues, evaluating system performance, and testing system cooling efficiency. It helps identify any potential hardware issues, such as overheating, inadequate cooling, or faulty components. Here are two popular methods:
1. Software-Based CPU Stress Test
Using third-party software like Prime95, AIDA64, or IntelBurnTest, you can stress test your CPU by putting it under high workload conditions. These tools subject your CPU to intensive calculations, providing readings for temperature, voltage, and stability. Ensure proper cooling to prevent overheating during the test.
2. CPU Benchmarking Software
Benchmarking software such as Cinebench or Geekbench can indirectly stress test your CPU by performing various tasks and providing performance scores. These scores help gauge the CPU’s ability to handle real-world applications and multitasking scenarios.
Remember to monitor CPU temperature and system stability during stress tests. Always follow proper safety precautions and refer to the software’s documentation for detailed instructions.
CPU Stress Test Windows 10: Key Takeaways
- CPU stress testing is essential to ensure the stability and performance of your Windows 10 computer.
- A CPU stress test puts your processor under a heavy workload, simulating real-life usage scenarios.
- Effective CPU stress testing helps identify any potential issues with your computer’s cooling system.
- There are various CPU stress testing tools available for Windows 10, such as Prime95, AIDA64, and IntelBurnTest.
- When performing a CPU stress test, it’s important to monitor the temperature to prevent overheating.
Frequently Asked Questions
Here are some frequently asked questions related to CPU stress testing on Windows 10:
1. What is CPU stress testing and why is it important?
CPU stress testing is the process of putting your computer’s processor under heavy workload to evaluate its performance, stability, and cooling capabilities. It helps identify any hardware or cooling issues and ensures that your CPU can handle demanding tasks without any problems. This is especially important for gamers, content creators, and professionals who rely on high-performance computing.
2. How do I perform a CPU stress test on Windows 10?
There are several software tools available to perform CPU stress tests on Windows 10. Some popular options include Prime95, AIDA64, and IntelBurnTest. These tools simulate heavy workloads and push your CPU to its limits, allowing you to monitor its performance, temperature, and stability. You can download and install these programs from their respective websites and follow the instructions provided to run the stress tests.
3. How long should I run a CPU stress test?
The duration of a CPU stress test depends on various factors, including the specific test being performed, the cooling solution installed in your system, and the intended use of your computer. In general, it is recommended to run a stress test for at least 30 minutes to an hour to thoroughly evaluate your CPU’s performance and stability. However, for more accurate results and to ensure your CPU can handle sustained heavy workloads, it is advisable to run the stress test for several hours or even overnight.
4. What should I look for during a CPU stress test?
During a CPU stress test, there are several key factors you should monitor:
— CPU temperature: Ensure that your CPU temperature remains within safe limits. Excessive heat can cause instability or even damage your CPU.
— CPU usage: Monitor the CPU usage to see how well it handles the stress. Higher usage indicates that your CPU is working harder to complete the tasks.
— Stability: Check for any system crashes, freezes, or errors during the stress test. This helps identify if your CPU can handle demanding workloads without issues.
— Performance: Pay attention to benchmarks and performance scores generated during the stress test. Compare these scores to standard values to assess the overall performance of your CPU.
5. Are there any precautions to take before running a CPU stress test?
Before running a CPU stress test, it is important to take some precautions:
— Ensure that your computer is adequately cooled. Make sure your cooling solution, such as fans or liquid cooling, is functioning properly to prevent overheating.
— Close any unnecessary programs and background processes to maximize CPU resources for the stress test. This helps create a more accurate representation of your CPU’s performance.
— Backup any important data on your computer as a stress test can put strain on your CPU, potentially increasing the risk of system instability or crashes.
— Keep an eye on the CPU temperature throughout the stress test. If the temperature exceeds safe limits, consider stopping the test to prevent any damage to your CPU.
To summarize, CPU stress tests on Windows 10 are a valuable tool for assessing the performance and stability of your computer’s processor. These tests put your CPU under intense load to simulate heavy usage scenarios and identify any potential issues.
By conducting CPU stress tests, you can ensure that your system can handle demanding tasks such as gaming, video editing, and software development without encountering performance problems or crashes. It allows you to optimize your system by identifying the maximum temperature, speed, and stability limits of your CPU.
CPU Stress Test on Windows 10: A Comprehensive Guide
Introduction
In today’s digital age, consumers and professionals alike depend heavily on their computers for various tasks, ranging from simple web browsing to advanced gaming and professional productivity. At the heart of every computer lies the Central Processing Unit (CPU), often referred to as the brain of the computer. Ensuring that your CPU functions optimally is crucial, particularly for high-performance tasks. A CPU stress test is a method to evaluate a computer’s performance and stability under heavy load. This article will explore what CPU stress testing is, why it’s necessary, how to execute the tests on Windows 10, and the best software tools available for this purpose.
Understanding CPU Stress Testing
A CPU stress test is designed to push the processor to its limits, testing its performance and thermal efficiency under sustained high workload. This is essential for various reasons:
-
Performance Benchmarking: Stress tests can help you determine your CPU’s performance capability. This can be particularly important if you’re overclocking or assembling a new system.
-
Stability Testing: After modifications or upgrades, it’s crucial to ensure that the CPU remains stable and correctly handles the workload without crashing or exhibiting errors.
-
Thermal Management: By conducting a stress test, you can assess how effectively your cooling system works. Monitoring temperature during a stress test can reveal if your system’s cooling can keep the CPU within safe operating limits.
-
Component Health Check: Regular stress testing can help identify potential hardware issues before they lead to serious problems. It is also beneficial for maintaining old systems and verifying that they are still performing at acceptable levels.
-
Prevention of Throttling: Modern CPUs are designed to throttle their performance when they overheat. Stress testing will help determine if your CPU can maintain its performance without hitting those thermal limits.
Preparing for a CPU Stress Test
Before you start stress testing your CPU, it’s crucial to prepare your system adequately to ensure accurate results and minimize potential risks. Here’s what you should do:
-
Back Up Critical Data: While stress tests are generally safe, unexpected failures can occur. Always have a backup of your important files before proceeding with any intensive benchmarks.
-
Ensure Proper Cooling: Make sure your CPU cooler is correctly installed and functioning. If you have an after-market cooler, confirm that it’s seated correctly, and the thermal paste is adequately applied.
-
Check System Health: Use monitoring software to record temperatures, voltages, and fan speeds. Look for any potential signs of instability before applying extreme stress to your CPU.
-
Close Unused Applications: To ensure the stress test focuses solely on CPU performance without interference from other running applications, close all non-essential programs.
-
Configure Power Settings: Set your Windows 10 power plan to ‘High Performance.’ This setting prevents the CPU from downclocking during the stress test.
Choosing the Right CPU Stress Testing Software
There are various software options available for conducting CPU stress tests on Windows 10. Each has its own features, benefits, and target audience. Here’s a look at some of the most popular stress testing tools:
-
Prime95: One of the most widely used applications for CPU stress testing. It conducts mathematical calculations to push the CPU to its limits. It’s been historically used by enthusiasts for its reliability and effectiveness.
-
AIDA64: A comprehensive system diagnostics tool that includes a CPU stress testing feature. AIDA64 is not free but offers a trial period for users to evaluate its capabilities.
-
IntelBurnTest: Designed to push Intel CPUs to their limits, IntelBurnTest uses the same algorithm as Prime95 but is generally easier to use.
-
OCCT: This program provides an all-in-one solution for monitoring and stress testing. OCCT includes various tests not only for the CPU but also for other components like RAM and GPU.
-
Cinebench: While Cinebench is primarily a benchmarking tool for evaluating CPU performance, it can also serve as a rudimentary stress test by pushing your CPU to its operational limits.
-
LinX: Another utility based on the Linpack benchmark that allows for quick stress tests of both Intel and AMD CPUs while providing useful data on thermal performance and rendering power.
How to Perform a CPU Stress Test on Windows 10
Step 1: Download and Install the Software
Choose your preferred CPU stress testing software and download it from a reputable source. Ensure it’s compatible with Windows 10. Install the application following the necessary prompts.
Step 2: Configure the Testing Parameters
Once installed, open the software and navigate to its settings. You can usually adjust parameters such as the number of threads (typically, set this to the number of cores your CPU has) and the duration of the test (a minimum of 30 minutes to several hours is recommended for a thorough assessment).
Step 3: Begin the Test
Once configured, start the stress test. The software will begin to push your CPU to its limits. Monitor the CPU usage via the software interface and keep an eye on system temperatures.
Step 4: Monitor the Performance
During the test, you should monitor several key metrics:
-
CPU Temperature: Use software like HWMonitor or Core Temp to check CPU temperatures. Most CPUs operate at safe temperatures below 85°C, and it’s crucial to keep them within that range.
-
CPU Usage: Ensure that CPU usage reaches close to 100%. Occasionally, check how well it distributes the load across all cores.
-
Stability: Look for any errors or instability messages. If something goes wrong, such as system crashes or blue screens, it’s best to terminate the test immediately.
Step 5: Terminate the Test and Review Results
Once you’ve completed the stress test (or had to cut it short due to high temperatures), stop the test and examine any error messages or logs that the software generates. These can give you valuable insight into your CPU’s stability and health.
Step 6: Take Cooling Measures if Necessary
If you find that your CPU temperature reached unacceptable levels, consider improving your cooling system. Check for dust build-up in cooling fans and heat sinks, consider more efficient thermal paste, or invest in high-quality aftermarket cooling solutions.
Analyzing Results
After completing the CPU stress test, here’s how to interpret your findings:
-
Temperature Readings: If your CPU temperature remained below 80°C, your cooling solutions are likely functioning well. Consistently reaching or exceeding 90°C is a red flag, indicating a potential thermal issue.
-
Performance Stability: If your CPU ran stable throughout the stress test with no errors or crashes, it indicates that the CPU and associated components are likely healthy.
-
Frequency Consistency: Ensure that the CPU maintained its expected clock speeds throughout the test. Any significant drops may indicate that the CPU is throttling due to heat or insufficient power supply.
-
Error Logs: Many testing applications will generate a report containing error logs. Look for any failed calculations or errors indicating potential issues with the CPU or system configuration.
Safety Considerations
While stress testing is a valuable procedure, it carries some risks if not performed correctly:
-
Overheating: Pushing a CPU to its limits can lead to overheating. This is why monitoring temperatures is vital during any stress tests.
-
Hardware Damage: Prolonged exposure to high temperatures can lead to permanent damage. Be cautious of the duration of the test and adjust according to the temperature readings.
-
Power Supply: Ensure your power supply unit (PSU) can handle the system’s demands under stress. Insufficient power can lead to instability and sudden shutdowns.
-
Thermal Paste: Good thermal management starts with proper thermal paste application. If recently installed, ensure that it’s the right type and applied in the correct amount.
-
Cooling Solutions: Upgrading your cooling solution can go a long way. Consider liquid cooling options for high-performance CPUs if air cooling proves inadequate.
Common Issues Encountered During Stress Testing
Even with careful preparation, issues can arise during a stress test:
-
System Crashes: If the system crashes, it may indicate that the CPU is unstable at its current clock speed or voltage.
-
High Temperatures: As mentioned earlier, exceeding safe temperatures is a concern. Address cooling before attempting future tests.
-
Throttling: If you notice that the CPU clock speeds drop significantly during the test, it may indicate thermal throttling.
-
Blue Screen of Death (BSOD): Frequent BSODs during a stress test could indicate hardware compatibility issues or faulty components.
Post-Test Recommendations
After conducting a stress test and analyzing the results, consider the following recommendations:
-
System Cleanup: If the stress test revealed high temperatures, proceed with a thorough cleaning of the internal components to clear any dust or obstructions in the airflow.
-
Cooling Solutions: If temperatures were high, consider investing in additional case fans or upgraded CPU coolers.
-
Check for Overclocking Stability: If you’ve overclocked your CPU, verify the settings. Reduce the overclock if instability is observed during the stress test.
-
Monitoring Software: Install software that monitors temperature and performance in real time, providing continual feedback on your system’s health.
-
Reassess Power Supply: Ensure your PSU is rated to handle your system’s demands, especially when under stress.
Conclusion
Performing a CPU stress test on Windows 10 is an essential task for anyone looking to evaluate their system’s performance, stability, and longevity. By understanding the importance of stress testing, knowing how to choose the right software, and recognizing the steps for conducting these tests safely, you empower yourself to maintain optimal performance from your CPU and, by extension, your computer’s overall health. Regular stress testing, particularly after system upgrades, can save you from potential failures in the future and ensure that your computer remains a reliable tool for work or play. Make it a part of your routine maintenance and enjoy the peace of mind that comes with knowing your CPU is performing at its best.
In the realm of computer performance and stability assessment, one of the key processes that enthusiasts, gamers, and IT professionals often engage in is a CPU stress test. This methodology ensures that the processor operates under maximum load, helping to evaluate its efficiency, stability under duress, and thermal performance. This article provides an in-depth exploration of CPU stress testing in Windows 10, walking through the why, how, and what to expect from stress testing your CPU.
Understanding CPU Stress Testing
Before delving into the specifics of stress testing, it’s crucial to understand what a CPU stress test is and its importance. A CPU stress test involves running your processor at full capacity for a defined period, pushing it to its limits to ascertain its performance and reliability.
Why Stress Test Your CPU?
-
Performance Benchmarking: Stress testing allows you to gauge the overall performance of your CPU. By measuring speed, efficiency, and temperature under load, you can understand how well it operates compared to its specifications and other processors.
-
Stability Testing: When overclocking or tweaking your CPU for enhanced performance, stress testing is vital to ensure stability under load. It helps reassure users that their systems won’t crash during demanding tasks.
-
Thermal Management: Understanding how your CPU manages heat is critical, especially in high-performance applications like gaming, video editing, or running servers. Stress testing shows how well your cooling solutions maintain temperature levels under pressure.
-
Identifying Potential Issues: If there are underlying issues with your CPU or other components, stress testing can reveal them early on. This preventive measure can help avoid system failures and data loss.
Preparing for a CPU Stress Test
Before you conduct a CPU stress test on Windows 10, thorough preparation is essential. You need to ensure that your environment is conducive to both the test and monitoring the results effectively.
System Requirements
-
Cooling Solutions: Make sure your cooling system is adequate. High temperatures during stress tests can lead to thermal throttling or even permanent damage to your CPU. Consider a decent CPU cooler or good airflow if you’re using a stock solution.
-
Power Supply: A reliable power supply is crucial, particularly if your CPU is overclocked. Ensure your PSU can deliver the required power consistently.
-
Monitoring Software: Download software that monitors CPU temperatures, usage percentages, voltages, and clock speeds. Tools like HWMonitor, Core Temp, or MSI Afterburner can provide real-time data during the stress test.
-
Updates: Make sure that your Windows 10 OS, drivers, and BIOS are up-to-date. This can prevent issues related to compatibility or performance during the test.
-
Backup your Data: Always backup important documents and files before running stress tests, especially if your system is unstable or overclocked.
Tools for CPU Stress Testing on Windows 10
Several applications can put your CPU through a rigorous stress test. Each has unique features that cater to different testing needs.
1. Prime95
Prime95 is one of the most popular tools used for stress testing CPUs. Originally designed for distributed computing, it includes a ‘Torture Test’ feature particularly suited for stability testing.
How to Use Prime95:
- Download and install Prime95 from the official website.
- Choose the «Just Stress Testing» option upon launching.
- Select the tests you want to run (the «Blend» test is generally recommended for overall CPU stress).
- Monitor performance using additional monitoring software to keep track of temperatures and usage.
2. AIDA64
AIDA64 is more than just a stress test application; it’s a comprehensive system diagnostics tool. It offers detailed hardware and software information, making it perfect for in-depth investigations.
How to Use AIDA64:
- Download and launch AIDA64.
- Navigate to the ‘Tools’ menu and select ‘System Stability Test’.
- Configure the stress test options, including the CPU, cache, and other components.
- Start the stress test and monitor critical data in real-time.
3. IntelBurnTest (IBT)
IntelBurnTest is noted for its high CPU stress load, utilizing Intel’s Linpack technology. It’s especially preferred by those aiming for maximum stress testing.
How to Use IntelBurnTest:
- Download IntelBurnTest from a trusted source.
- Choose the stress testing level (higher numbers mean more stress).
- Initiate the test and monitor CPU temperatures, ensuring they do not exceed safe limits.
4. CPU-Z
While CPU-Z is primarily a diagnostic tool, it can also be useful when combined with other stress testing tools. It provides essential information about your CPU and allows for real-time monitoring of performance.
How to Use CPU-Z:
- Download CPU-Z and open it to monitor CPU metrics like clock speeds and temperatures.
- Use another stress testing tool in conjunction with it for comprehensive monitoring.
5. OCCT
OCCT (OverClock Checking Tool) is an excellent tool for CPU stress testing. It’s user-friendly and provides helpful diagnostic information.
How to Use OCCT:
- Download and launch OCCT.
- Select the CPU test and configure your settings.
- Start the test and view the detailed results, including core temperatures.
Conducting the Stress Test
Once you have everything set up and ready, it’s time to conduct the stress test. Follow these steps to ensure a successful testing process.
-
Close Unnecessary Applications: Free up as much system resources as possible by closing applications that are not needed.
-
Launch the Chosen Stress Testing Tool: Open your selected tool and configure the stress testing parameters as discussed.
-
Begin the Stress Test: Start the stress test. Depending on the tool, this may involve clicking a button or choosing a menu option.
-
Monitor the Performance: Keep an eye on CPU temperatures, utilization percentages, and any potential warnings. Most monitoring software will provide alerts if things exceed safe limits.
-
Evaluate Results: After the stress test concludes, analyze the data. Note any warnings or signs of instability. Look for inconsistencies in CPU speed, temperatures, or voltage.
Duration of the Test
The length of the stress test can vary based on your objectives. A minimum of 30 minutes is often recommended, but more extended tests (up to several hours) are commonly used for comprehensive stability assessments, particularly after overclocking.
Signs of Issues During Stress Test
During a stress test, there are several indicators of potential problems. Recognizing these can help you take immediate action:
-
High Temperatures: If CPU temperatures exceed the manufacturer’s specified limits (typically over 85-90°C), this indicates a cooling issue.
-
System Crashes: Unexpected crashes indicate instability, which may point to hardware issues or inadequate power supply.
-
Throttling: Noticeable reductions in CPU clock speeds during the test suggest thermal throttling, which is a protective measure that reduces performance to cool the CPU.
-
Erratic Behavior: Errors or instability in the stress testing program itself can indicate underlying issues.
What to Do After the Test
Following the stress test, it’s essential to take several steps based on your observations.
-
Review the Logs: Most tools generate logs after testing, reviewing these can provide insight into how well your CPU performed.
-
Cooling Solutions Adjustment: If temperatures were excessively high, consider upgrading your cooling solution or ensuring that your case has adequate airflow.
-
Adjust Overclocks: If you tested an overclocked CPU, you might need to dial it back for stability or adjust voltage levels for improved performance.
-
Consult Forums and Communities: Many online communities, such as Reddit’s r/overclocking or various tech forums, offer insights and shared experiences to help troubleshoot any issues you might encounter.
-
Ongoing Monitoring: After making adjustments or confirming stability, continue to monitor performance during typical use scenarios, as stress tests may sometimes not represent real-world usage.
Conclusion: The Importance of CPU Stress Testing
Stress testing your CPU on Windows 10 is a vital process for assessing performance, stability, and thermal management. Whether you’re a casual user, a gamer, or an overclocking enthusiast, understanding how to effectively carry out stress tests can lead to a more stable and reliable computing experience.
By using the right tools, preparing adequately, and observing the results responsibly, you can gain valuable insights into your CPU’s capabilities and limitations, ensuring your system performs at its best, even under the most demanding conditions.
So you just spent days researching, purchasing, CPU stress test, and/or building the perfect new gaming or workstation PC. You’ve gone the whole nine yards, making sure the entire system is cable managed to a tee, your bright RGB LEDs are installed in just the right spots, and there’s plenty of airflow flowing through the entire system.
You power on your new PC and it seems to be working fine, but you want to make sure it’ll also be perfectly fine when the system has Battlefield loaded at the highest settings while streaming to Twitch for hours on end. Have a problem with an old computer aging system or overclocking any of the components when building the new computer? Here we suggest some software for RAM, a free CPU stress test, and a GPU stress test to install on your computer and check its stability. This is very important to ensure that your computer will work well, either in starting up or running programs.
This article is aimed at helping you overcome the problems with your CPU and GPU and ensuring that your computer’s programs will run well along with their stability. Thus, you need software dealing with the way you do that. In this guide, we are going to share the software you can use to overcome the problem, particularly in testing the system’s components. For instance, we are going to share the best CPU stress tester, the best RAM stress test, and the best GPU stress test.
Check them all out below along with the additional information you may need. You may take note of some important information that may have many advantages.
1. Prime95
Looking for the best free cpu stress test? GIMPA developed Prime95 as a computing project to find new Mersenne prime numbers. It includes the torture test in the program to ensure accurate operation in the way of searching the numbers. Many hardware enthusiasts adopt the “torture test” to assist them in stressing their computer processors, particularly after they overclock the CPU and memory.
2. Aida64
What is the best overclocking software? Aida64 is one of the best software for CPU and GPU stress testing. Aida64 is a free CPU stress test that is widely used. Compared to the torture test offered by prime95 to push the operation in an unrealistic way, Aida64 comes more practically through its mimicking of real-world processes and is able to load up to 100% on the test.
The only downside of Aida 64 is the charge. Yeah, it is not free. Aida64 requires you to pay $34.99 for a handful of stress tests. This is not very expensive, but it is considered not ideal to take as an option among the users. Aida64 offers a 30-day trial which is available for free. You can actually optimize this feature to try the software when you really need to use it. When you are finished, you don’t have to pay for the software installation.
3. IntelBurn test
The next stress test for free GPU stress test you can try is the IntelBurn test. This is an ideal stress test tool you can use maximally to determine stability. Like Prime95, the IntelBurn test works further than necessary in pushing the processor. It can even more unnecessary stress on your computer’s processor than Prime95 does. More typically, the free GPU stress test is performed to check the CPU’s performance after running the full speed which is completely up to the maximum temperature. When you perform the CPU stress test, the cores inside the multi-core system will start to be used. later, the CPU will be tested with a justified and compatible workload. The second thing to know after the CPU stress test is the best free cpu stress test. There are always a variety of options dealing with GPU stress tests. Now you can try to push your GPU maximally by one of the following benchmarks.
4. Heaven and Valley Benchmarks
For your best free CPU stress test, heaven and valley benchmarks can be the first option on the list. It is formerly known as Unigine, too. This software is just one of the popular software to stress test your graphic card not only for stability but also after overclocking. It can also play a role as a synthetic benchmark to check how well your graphic card performs. Heaven and Valley benchmark is considered worth a GPU benchmark that offers VR features inside.
5. 3DMark
The second GPU stress test you can try is 3DMark. It is a widely used best free CPU stress test that comes along with many kinds of devices such as PCs, Laptops, tablets, phones, and many others. It also has a function to monitor the clock speed, load, framerate, and temperatures when each benchmark performs. You can get the basic edition of 3DMark for free. However, if you want the full version, you must pay ̴$30 on Steam.
6. FurMark
FurMark is another GPU best free CPU stress test option you can try. Many enthusiasts do not prefer using this stress test due to the unrealistic amount of stress on the graphic card. FurMark can only be used for a short time. Many users say it is not the best option for your graphic card stress test. In shorts, a GPU stress test is performed to check its limits through the optimization of its full processing power utility.
Now it’s time for you to check out the best RAM stress test, too. In relation to the software for CPU, GPU stress test, this software works out your system’s memory not only to detect any issues that may occur in your RAM but also to check the computer’s stability after overclocking. Thus, its function is the same as CPU and GPU stress tests. There are two software or tools offered to stress test your RAM we are going to present in the following.
7. Memtest86
Memtest86 is the first RAM stress test you can try to test your system’s memory and solve any issues. There is also the Memtest86+ version. It was an offshoot of MemTets86 but it has not been updated since 2003, thus, it is no longer used now. If you want to stress-test your RAM, you can install and use this tool which is always updated.
8. Prime95 Blend Test
The second software you can choose to help you overcome issues on RAM is the Prime95 Blend test. It is a popular CPU stress test tool, however, the “blend” mode torture test serves the incredible RAM stress test. This tool is considered best for your RAM stability. Meanwhile, if you want to check the memory stability, Memtest86 is a better option. If you own an Intel CPU-based system, one of the best CPU stress testing tools actually comes directly from the company that manufactured your processor. Intel’s Processor Diagnostic Tool will verify the processor, its operating frequency, test all of its onboard functionality, then proceed to stress testing it in one of the most intense ways possible. This test can be set to run on a loop and the test can even be set to automatically shut itself down if the CPU overheats.
9. CPU-Z (Free)
CPU-Z is a great lightweight tool for checking the specifications of your CPU, memory, motherboard, and RAM and it’s almost always one of the first tools I install in any system I set up. Since it’ll most likely already be installed, I always also do a quick run of CPU-Z’s CPU stress test, which isn’t as intense as Prime95, but it does stress the CPU out enough that if you’re right on the edge in terms of stability, you’ll still have a chance to turn it down a notch.
10. Cinebench R20 (Free)
Cinebench has been one of our favorite free benchmarking tools for years and with the long-overdue Cinebench R20 version, the test is now even more challenging thanks to a significantly more complex scene that must now be rendered.
Along with the increase in difficulty, Cinebench R20 now also features the capability to set a minimum time for the benchmark to run, which turns the benchmarking tool into an incredibly tough CPU stress test that simulates 3D video rendering loads. If you plan on using your PC for rendering video, 3D modeling, or photo editing, this test is definitely for you.
11. AIDA64 (Paid)
AIDA64 is a very comprehensive full system diagnostic utility typically aimed at engineers, IT professionals, and systems enthusiasts. Among other tools, one of the best tools AIDA64 offers is the System Stability Test which has the ability to stress everything from the CPU to RAM to the GPU.
What’s great about AIDA64 however, is that it will tell you if the CPU begins throttling, or slowing itself down when the temperatures are too high. If the CPU throttles, then it’s a good idea to check that the CPU cooler is properly installed, purchase a new cooler, or if you’ve been overclocking, it may be time to reduce the overclock.
Conclusion
Having read the review about software for CPU, GPU, RAM stress tests, you must find a conclusion that all the software is much recommended to use. They are all good along with their own features and ability to help you find a solution over the CPU and GPU stability.
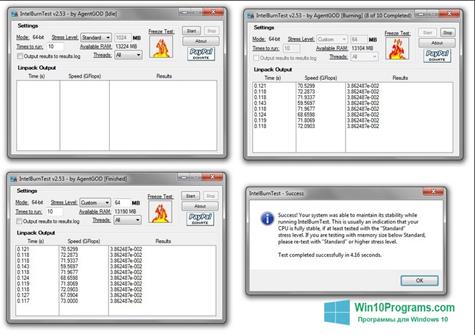
CPU Stress Test для Windows 10 — приложение для анализа работоспособности процессоров. Утилита нагружает устройство SSE командами, что позволяет выяснить стабильность ЦП, наличие и характер неполадок в канале между ним и памятью, определить эффективность охлаждающей системы и максимальный порог разгона. Файлы с отчетами сохраняются в каталог с дистрибутивом программы. После первого запуска там же появится файл конфигурации, через который можно настраивать отдельные параметры данного ПО.
Использование подобного софта позволяет опытным путем установить максимальный объем информации, который может обрабатываться ЦП. Рекомендуем скачать CPU Stress Test для Windows 10 на русском языке без регистрации и смс с официального сайта.
Информация о программеСКАЧАТЬ БЕСПЛАТНО
- Лицензия: Бесплатная
- Разработчик: TestMem
- Языки: русский, украинский, английский
- Устройства: пк, нетбук, ноутбук (Acer, ASUS, DELL, Lenovo, Samsung, Toshiba, HP, MSI)
- ОС: Windows 10 Домашняя, Профессиональная, Корпоративная, PRO, Enterprise, Education, Home Edition (обновления 1507, 1511, 1607, 1703, 1709, 1803, 1809)
- Разрядность: 32 bit, 64 bit, x86
- Версия: последняя 2025, без вирусов
Аналоги CPU Stress Test
- Adobe Illustrator CC
- SolveigMM Video Splitter
- Process Killer
- Opera
- Балаболка
- MAGIX Movie Edit Pro
Отзывы пользователей
Категории программ
- Программы для Windows 10
- Создание слайд шоу
- Скриншоты экрана
- Создание музыки
- Разгон видеокарты
- Видеоредакторы
- Запись видео с веб-камеры
- Видео конвертеры
- Архиваторы
- Торрент клиенты
- Чтение FB2