
Are you also facing the issue where AMD drivers don’t install? Well, you might not be the only one facing such an issue. As AMD is one of the most commonly used chipsets in today’s generation computers and even creates its drivers which are ultimately the pivotal component of your system known to enhance its performance and operations.
To maximize the performance of AMD hardware, you must install and routinely update of these drivers. Typically, Windows are known to take care of such updates through its automatic feature however, inability to perform it can often lead to AMD drivers not installing error which can be frustrating so the objective of this article will be to look for ways to resolve this error in Windows 11 or 10. See – Fix AMD fTPM Stutter and Audio Problem.
AMD Drivers won’t install in Windows 10 and 11
Here is how to fix AMD Drivers won’t install in Windows 11 or 10 –
Way-1: Remove all AMD Drivers
If you are having trouble and encountering the AMD drivers not installing error it means that it’s time to remove all the current AMD drivers. To perform this function check out the ways mentioned below:
- Press Windows key, type control, and then select Control Panel.
- Click on Programs and Features.
- Select – AMD Catalyst Install Manager.
- Click on Change.
- An AMD Catalyst Install Manager InstallShield window will appear; click Next.
- Click Next.
- Now, select Express Uninstall ALL AMD Software when asked.
- On User account control prompt select Yes.
- Click on All versions.
- After the process started, select Remove.
- Click on – Finish.
- When prompted, select Yes to restart the system and finish the uninstallation.
Once the application has finished removing all AMD drivers, the display should seem as if a regular VGA driver had been installed. Afterward, you would be able to install your AMD Catalyst drivers properly after restarting their setup once again.
In case of residual data backup, we recommend utilizing a reliable driver uninstaller. A professional tool can rapidly scan your system for all installed drivers and allow you to pick one or more for simultaneous removal.
Way-2: Run System File Checker (SFC) and DISM
When Windows won’t let you install AMD drivers, System File Checker (SFC) is a program included with all current versions known to repair corrupt system files. Whereas, Deployment Image Servicing and Management program aka DISM is used to service Windows images and resolve errors like AMD Drivers won’t install. These are the steps check them out here:
SFC
- Click Start and then type CMD.
- Select Run as Administrator after right-clicking on Command Prompt.
- Enter
sfc /scannowinto the command prompt window.
- Windows will begin searching all system files to restore them and complete the task in a few minutes.
DISM
- After that enter the following command, as shown below
Dism /Online /Cleanup-Image /RestoreHealth
- The scan will take some time, and any problems found will be restored via the command prompt.
If the error still exists with AMD chipset drivers not installing then move on to the next way.
Way-3: Turn off Windows Defender Firewall
Windows defender firewall with its vigilant programming and traits looks for malware and suspicious behavior as it tries to protect Windows 11 or 10. However, doing the same has a bad impact on other driver performances like the one mentioned above leading to showing AMD Drivers won’t install error.
- Press Windows + S.
- Type – Windows Defender Firewall and click on the same from result.
- Click “Turn Windows Defender Firewall on or off” from the existing window.
- Go to Private network settings.
- Check – Disable Windows Defender Firewall (Not recommended).
- Now go to Public network settings.
- Select – “Disable Windows Defender Firewall (Not recommended)”.
- Click OK to save changes.
If you are unable to install or update your drivers using any of the above methods and installed a third party antivirus suite then consider temporarily disabling the “anti-virus” and Firewall.
Antivirus applications are notoriously incompatible with Windows upgrades. And driver upgrades might not perform any better. To turn off, right-click on the icons in the System tray on Taskbar and select Disable for 10 minutes.
Alternatively, you may remove it and replace the same with a superior pro version of the program that does not interfere with essential tasks.
Way-4: Use Compatibility Mode to Install AMD Drivers
As the name suggests compatibility mode provides the perfect settings and platform which gels with the drivers and system and prevents frequent errors that portray messages like AMD drivers not installing. Check out the steps to initiate this mode:
- Right-click on AMD Drivers and select – Show more options.
- Select – Troubleshoot compatibility.
- On the Program compatibility troubleshooter, click on Try recommended settings.
- Choose Test the program.
- Follow guidelines shown on the installation wizard to complete the process.
If compatibility mode is unable to provide you relief from this can’t install AMD graphics driver Windows 10 or 11 error then move on to the next fix without any delay.
Way-5: Look Out for Visual C++ File Status
Installing and running AMD drivers on Windows has a prerequisite of Microsoft Visual C++ Redistributable package. Ensure that this package is not broken as it could be the lead reason for showing you the error, AMD Drivers won’t install. So follow these steps to resolve it:
- Press Winkey + I.
- Select Apps.
- Click on Instaled apps.
- You will see a list of programs installed on your computer. Microsoft Visual C++ Redistributable packages app should be also available.
- Note the versions of all the packages and go to Microsoft’s download page for the packages. Make sure that the latest version is installed.
- If the edition is old then click on the 3 dots menu and select Uninstall.
- Confirm the prompt and remove the package.
- Download the latest Microsoft Visual C++ Redistributable packages on your PC.
- Then, install the downloaded packages once again.
Way-6: Determine if recently installed software is not creating a problem
Determine whether a recent software installation is not faulty for AMD Drivers won’t install error. If found then try removing it and restarting the computer.
The applications we install can cause problems when they are incompatible with other software or when they interfere with drivers or processes. If such an issue arises, uninstalling the most recent program is the best course of action.
Way-7: Keep Third-Party Antivirus Program updated
You need to ensure that the antivirus software installed on your computer is up-to-date and does not obstruct the installation of AMD drivers by hindering it in any sort.
Thus, you could either look for antivirus software updates or disable it till you install the AMD drivers and then re-install it.
Way-8: Use Device Manager to update or reinstall AMD Driver
AMD driver install crash Windows 10/11 error can be solved conventionally, just by installing a new AMD driver by following the steps mentioned below:
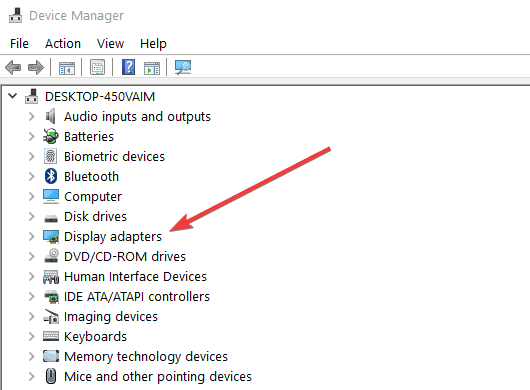
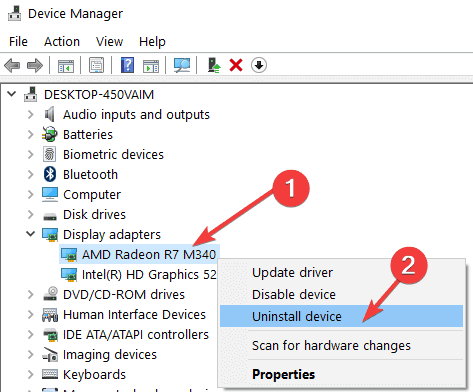
- Right-click the Start button and select Device Manager.
- To update the driver for your AMD graphics card, expand the Display adapters folder, then right-click the device.
- Select – Update driver.
- Choose – Search automatically for best driver.
- Restart the computer and check if the error still persists.
- In case the issue continues again launch the Device Manager.
- Right-click on the graphics card (AMD) under Display adapters.
- Select Uninstall and confirm the popup.
- Reboot the system.
- If this process fails to repair the problem install the latest version of driver from AMD official website.
Go for solutions to – Fix AuthenticAMD.sys BSOD Blue Screen Error in Windows 10 or 11.
Way-9: Roll back the driver to the previous version
Installing or upgrading to a new version of Windows may update some of erroneous drivers automatically causing this problem. Some users over various community panels have claimed that they were able to solve the issue of AMD Chipset drivers not installing by reverting to an older version of the display card driver.
As a result, rather than upgrading the graphics card driver, you can resolve the issue by downgrading it. Here are the actions you may take to do this:
- Right-click the Start button and then pick Device Manager from the context menu.
- In the Device Manager window, expand the Display adapters by double clicking on it.
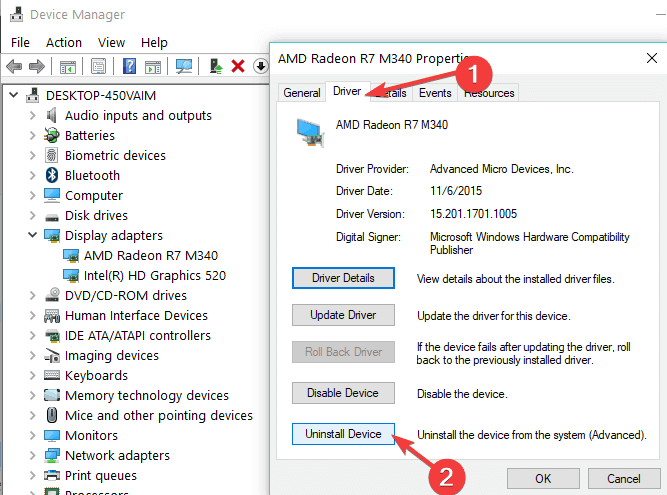
- Then, right-click on the problematic adapter (AMD) and choose Properties.
- Verify that the Roll Back Driver option is active on the Driver tab.
- If it does, clicking on it may lead you to the correct version.
We believe these 9 ways should be enough to fix AMD drivers won’t install errors in your Windows 11 or 10.
Methods:
Way-1: Remove all AMD Drivers
Way-2: Try Running SFC and DISM
Way-3: Turn off Windows Defender Firewall
Way-4: Use Compatibility Mode to Install AMD Drivers
Way-5: Look Out for Visual C++ File Status
Way-6: Determine if recently installed software is not creating a problem
Way-7: Keep Third-Party Antivirus Program updated
Way-8: Use Device Manager to update or reinstall AMD Driver
Way-9: Roll back the driver to the previous version
That’s all!!
Readers help support Windows Report. We may get a commission if you buy through our links.
Read our disclosure page to find out how can you help Windows Report sustain the editorial team. Read more
My PC disabled AMD drivers, how do I fix it?
- Uninstall AMD driver
- Run AMD driver in compatibility mode
- Change Boot options
- Delete AMD driver and AMD Catalyst from Control Panel
- Roll back to a previous OS version
- Additional solutions
If you are one of the users who upgraded their operating system to a newer Windows 10 version, you might have experienced some issues regarding the graphics driver. You can fix AMD driver issues after installing the latest Windows 10 updates by following the steps listed below in the order they are described. This will take you no more than ten minutes of your time.
So even though you have the latest AMD graphics drivers installed, usually after a reboot, the Windows 10 operating system will either tell you that the drivers are not compatible with the OS or they cannot be installed properly. You will also be surprised to hear that for the previous Windows 10 version, these drivers work quite well.
How to fix AMD drivers in Windows 10
1. Uninstall AMD driver
- Press and hold the buttons “Windows” and the “R” button.
- You now have the Run window in front of you.
- Write in the run dialog box the following : “devmgmt.msc” without the quotes.
- Press the Enter button on the keyboard.
- Now the Device Manager Windows is in front of you.
- On the left side, you will have to search for the Display adapter driver.

- After you found the driver, right click or hold tap on it.
- From the menu that pops up, left click or tap on the “Properties” feature.

- In the Properties window, left click or tap on the “General” tab.
- Check in the General tab dialog box for any errors you may get on this driver, they should be pretty straight forward and tell you exactly what is the cause of the driver failure.
Note: Even if you get error messages or you do not, proceed with the steps below. - Left click or tap on the “Driver” tab situated in the upper side of the Properties window.
- Left click or tap on the “Uninstall” button situated in the Drivers tab.

- Now close the Device manager window after the uninstall process has finished.
- Reboot your Windows 10 Technical Preview system.
- After the device starts check to see if your display is working as intended with the build-in model for the display adapter.

A faster solution would be to use an automatic uninstaller, that deletes any trace of unwanted programs. We recommend this type of program because it has built-in tools that remove all the junk files left behind in your system. It can perform an in-depth clean-up and keep your OS in optimal condition.
2. Run AMD driver in compatibility mode
- Go to the directory where you have the setup file of the latest AMD driver.

- Right click on the setup installation file of the AMD driver.
- Left click or tap on the Properties feature from that menu.
- Left click or tap on the “Compatibility” tab situated in the upper side of the “Properties” window.
- Left click or tap on the “Run this program in compatibility mode for:” feature.
- From the drop down menu choose the operating system where you know this driver worked without issues.
- Left click or tap on the “Apply” button.
- Left click or tap on the “OK” button.
- Follow the instructions on the screen to finish the driver installation process.
- Reboot the Windows 10 Technical Preview system after the installations has finished.
- When the device starts check to see if your AMD driver works without issues in your Windows 10 operating system.
3. Change Boot options
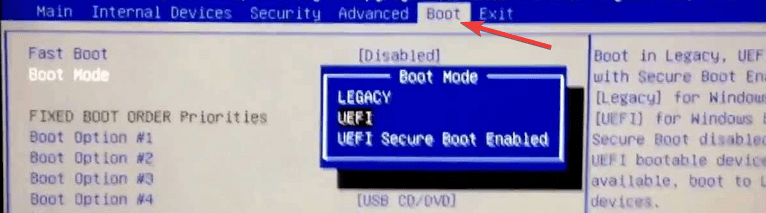
- Reboot the Windows 10 system.
- When the operating system starts keep the “Esc” button or the button that you use to enter the BOOT options in Windows 10.
- Change the Boot options to EFI + legacy feature.

- Start the operating system.
- Install the AMD display drivers by right clicking on the Setup file.
- Left click or tap on the “Run as Administrator” feature.
- Follow the instructions on the screen to finish the installation of the driver.
- Reboot the Windows 10 Technical Preview again and be sure to have the EFI-Legacy feature activated.
- Check again for the driver issue and see if it reacts the same.
4. Delete AMD driver and AMD Catalyst from Control Panel
- Press and hold the “Windows” button and the “R” button.
- In the run dialog box write the following: “devmgmt.msc” without the quotes.
- Press the Enter button on the keyboard.
- Now from the Device Manager, locate the display driver you have installed.
- Check the box next to “Delete the driver software for this device”.
- Right click on the driver and left click or tap on the “Uninstall” button.

- Follow the instructions on the screen to finish the uninstall process.
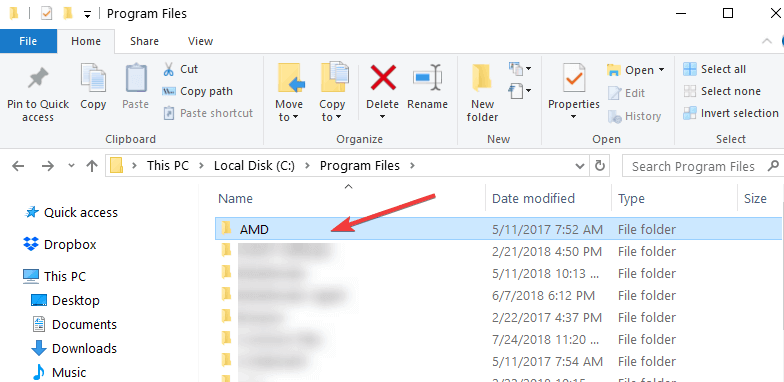
- Open the Control Panel window.
- Left click or tap on the “Programs and Feature” option.

- Uninstall from there the AMD driver and AMD Catalyst Control Center.
- Left click or tap on the “View Installed Updates” feature.
- Uninstall the “KB3036140” update from Microsoft.
- Reboot the Windows 10.
- When the device starts open the Settings feature in your Windows 10.
- Left click or tap on the “Check for Updates” feature in the Settings window.
- Install all the updates available there.
- Reboot the Windows 10 computer again and see if everything works now.

5. Roll back to a previous OS version
Seeing that most of the users affected by this issue are Insiders running new Windows 10 Technical Preview builds, we suggest you roll back to a previous build in order to solve your issue if the steps above did not work. The same is valid for non-Insiders. You can use System Restore in order to roll back to a previously working version of Windows 10.
Another solution to this issue is to upgrade your Windows 10 Technical Preview build to the latest version – if you haven’t already. The latest Insider builds usually bring fixes for all the major issues affecting previous releases, so maybe this quick workaround will help you fix your AMD driver issue.
6. Additional solutions
If the issue persists, here is some additional workaround that you can apply:
- Disable/ Uninstall overclocking software — If you use specific tools to increase your CPU/GPU performance, temporarily disable them and check if this solved the problem.
- Temporarily disable antivirus software — In rare cases, your antivirus software may trigger various app and software issues, including AMD driver problems. Make sure that your antivirus solution is not the culprit. Temporarily disable it, reboot your computer and check if the AMD driver is available on the list.
- Roll back your driver — Some users confirmed that rolling back their AMD drivers fixed this problem.
That’s it, folks, these are a few methods that will get your AMD drivers up and running on your Windows 10 operating system. Also if you have other questions related to this article, please let us know by posting a comment below.
Ivan Jenic
Windows Hardware Expert
Passionate about all elements related to Windows and combined with his innate curiosity, Ivan has delved deep into understanding this operating system, with a specialization in drivers and driver troubleshooting.
When he’s not tackling diverse driver-related problems, Ivan enjoys watching good movies and spending time hiking with his family and friends.
If you are one of AMD graphics card users with Windows 10 operating system, which are many, you might face this situation: when you try to install your AMD drivers, you get the notification like the following screenshot saying that there is an error involving the detection driver:
Actually, this is not a difficult question to solve. Basically, if you want to install AMD Catalyst drivers, you need to uninstall the drivers installed by Microsoft first which was installed when you set up your system. Please follow the instructions below to get the problem fixed in no time.
1) First, download AMD Catalyst Install Manager from the official website of AMD if you have not done it yet.
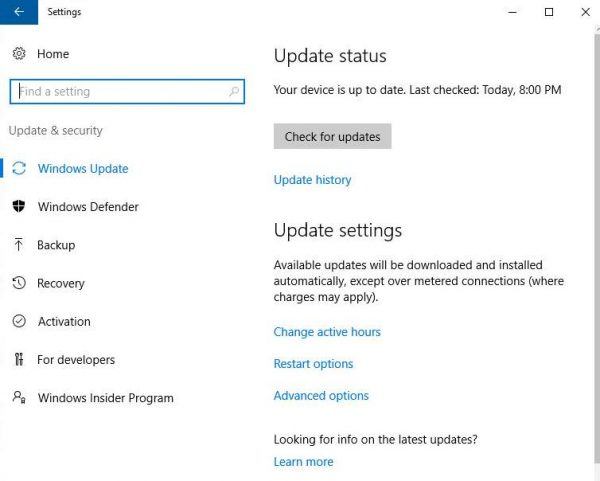
2) Make sure that your computer is fully updated from Windows Update (in Start button > Settings > Update & Security). Please pay extra attention to the C++ and .NetFrameworks upgrades.
3) Now go to Programs and Features window (Start button > Control Panel > Programs > Programs and Features) and right click your AMD driver and choose Change.
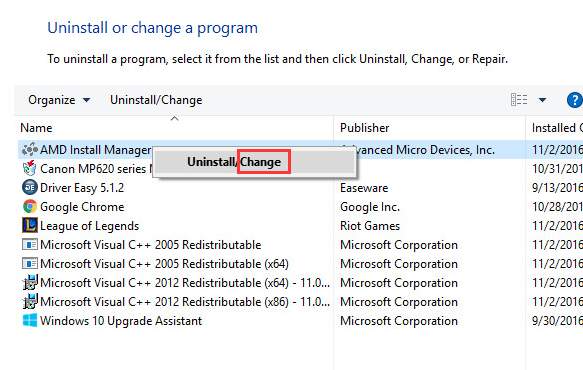
4) Choose Uninstall so AMD Catalyst Install Manager will help you remove all AMD driver and application components.
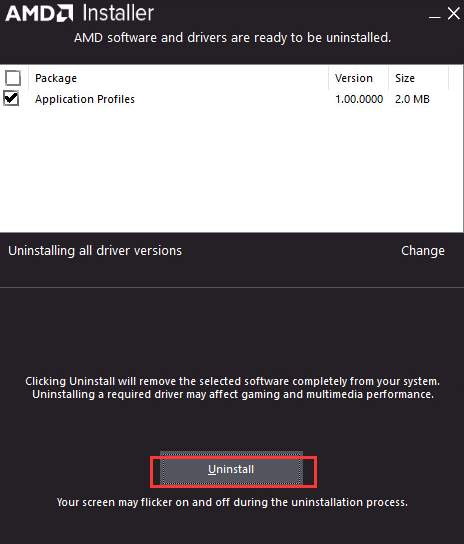
You may want to restart your computer when the uninstall finishes.
5) Now we are moving on to update your drivers manually. Go to support website of AMD and search for the correct graphics driver for your system. If you are not sure what driver you need, you can choose the option on the left so the automatic detect will help you locate the exact driver. If you know well what driver you are looking for, use the right pane to get the right one for your operating system.
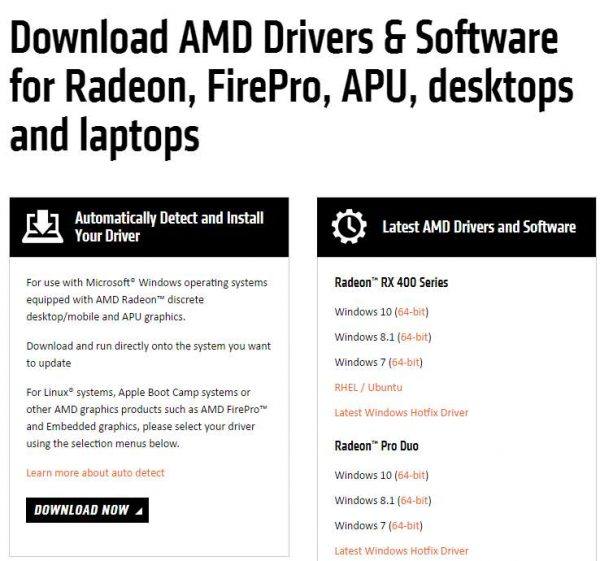
Please make sure that you have downloaded the correct driver on your computer. Then move on.
6) Double click the setup file of the downloaded file and run the installation as instructed.
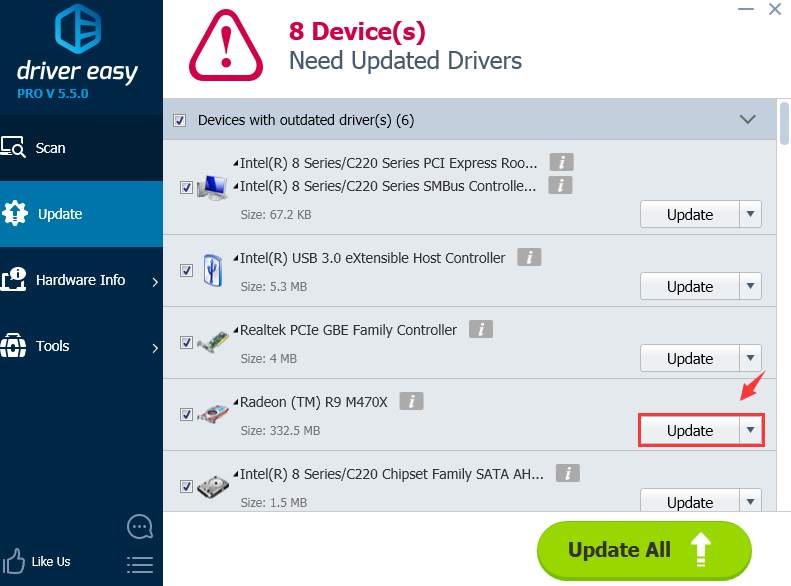
As you may see, the whole process could be head-scratching. If you have not so much time searching and downloading and reinstalling the AMD drivers, it is suggested that you give Driver Easy a try. Driver Easy is a powerful program that helps you detect, download and install all the drivers needed and update outdated drivers on your computer. There are only two steps involved:
1) Press the Scan Now button.

2) Press the Update button next to the driver you need to update and let Driver Easy take care of the rest of the procedure.
Not only so, if you are looking for more features such as driver back up and driver restore as well as a team of professional technicians assisting you whenever you run into driver problems, you can always choose to use the professional version of Driver Easy. If you are not satisfied with the product, you can always ask for a refund 30 days within the purchase.
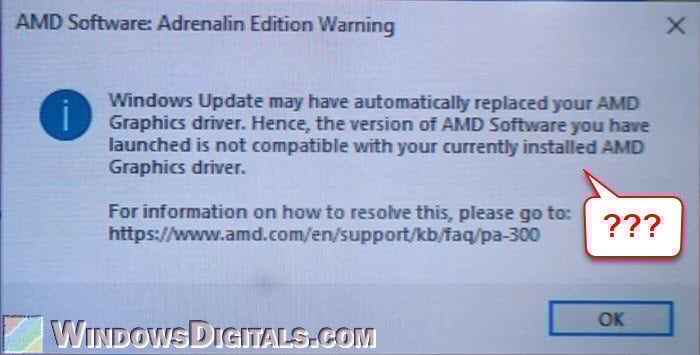
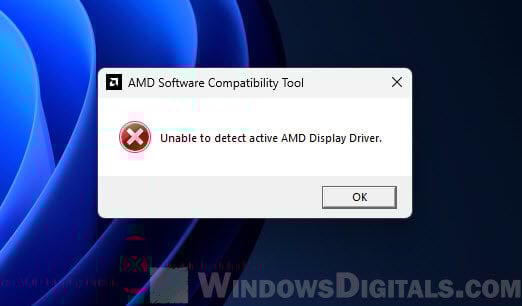
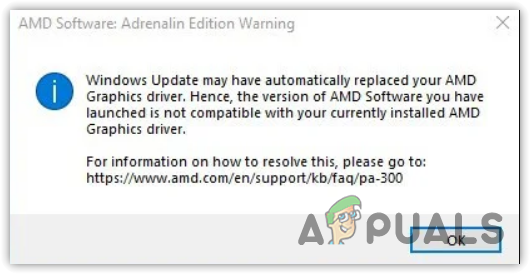
If you use an AMD graphics card with Windows 11 or 10, you might see a warning message from AMD Software: Adrenalin Edition. This message says that Windows Update has changed your AMD Graphics driver, so the AMD Software you have doesn’t work with the new driver. You’ll usually see this warning when your computer starts or when you try to open AMD Software. It says:
AMD Software: Adrenalin Edition Warning
Windows Update may have automatically replaced your AMD Graphics driver. Hence, the version of AMD Software you have launched is not compatible with your currently installed AMD Graphics driver.
For information on how to resolve this, please go to:
https://www.amd.com/en/support/kb/faq/pa-300
After you close this message, AMD Software won’t open, which can be a problem if you need it for setting up your graphics. This guide will show you how to fix this step by step.
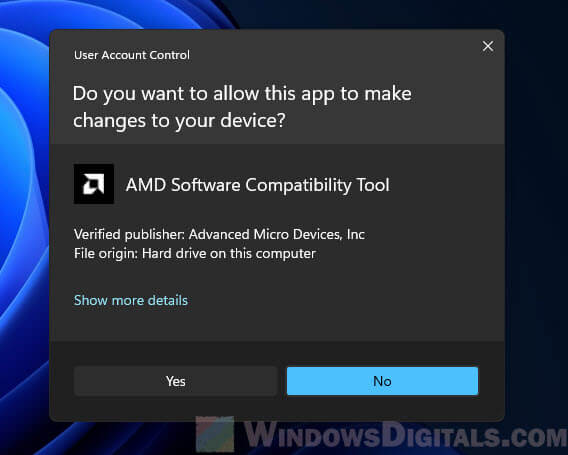
How about using the AMD Software Compatibility Tool?
When you see the compatibility warning, AMD suggests visiting their support page and using the AMD Software Compatibility Tool. This tool automatically finds and installs a compatible version of AMD Software for your graphics driver. This can quickly solve your problem and get your AMD Software working again.
However, this fix might only work until the next Windows Update. Windows Update tends to change your AMD graphics driver, which might bring back the same compatibility issue. If you are part of the Windows Insider Program, the complexity increases as the AMD graphics drivers for insiders might not have an immediately compatible AMD Software version. Sometimes, you might also see the message “Unable to detect active AMD Display Driver” when using the AMD Software Compatibility Tool. If this happens, you should look at the permanent solution we’ll discuss next.
Next, we’ll talk about more permanent ways to stop this issue by turning off automatic driver updates through Windows Update.
Related resource: Check Graphics Card on Windows 11/10 (NVIDIA, AMD or Intel)
Fix AMD graphics driver incompatibility issue caused by Windows Update
To stop Windows Update from changing your AMD Graphics driver, you can turn off automatic driver updates. This helps you keep your current drivers and stops Windows Update from causing compatibility problems with AMD Software.
Step 1 – Disable automatic driver updates
Using Advanced System Settings
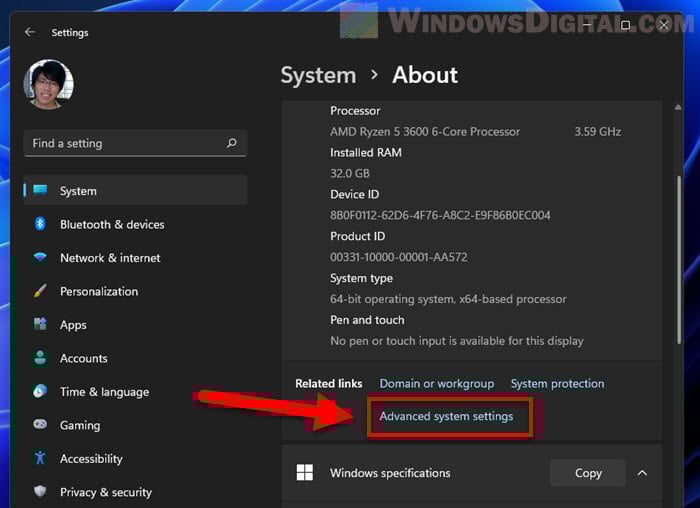
- Right-click on the Start menu and select “System.” In the related settings section, click on “Advanced system settings.”

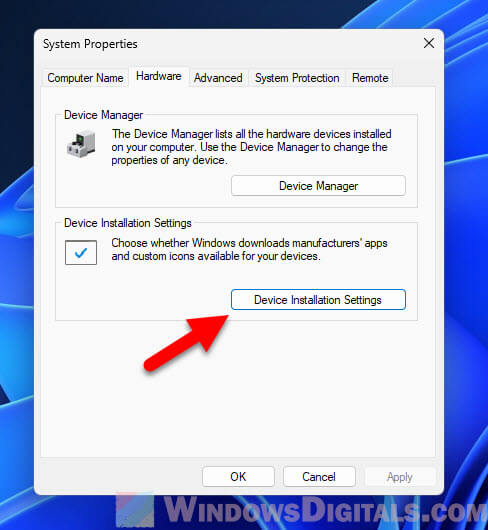
- In the System Properties window, go to the “Hardware” tab and click on “Device Installation Settings.”

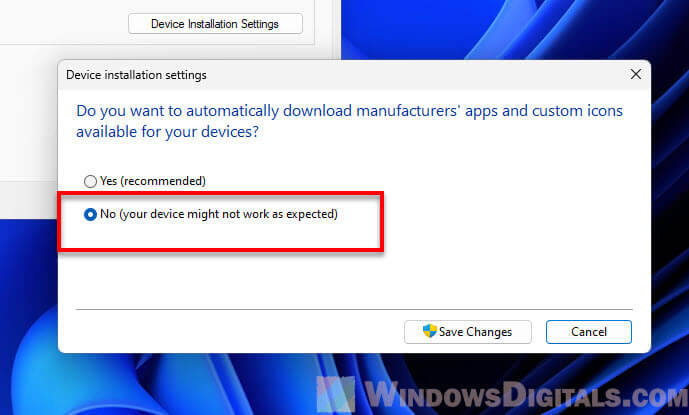
- In the Device Installation Settings window, choose “No (your device might not work as expected)” and click “Save Changes.”

If this method doesn’t stop Windows Update from changing your AMD graphics driver, please try the WuMgr method described below.
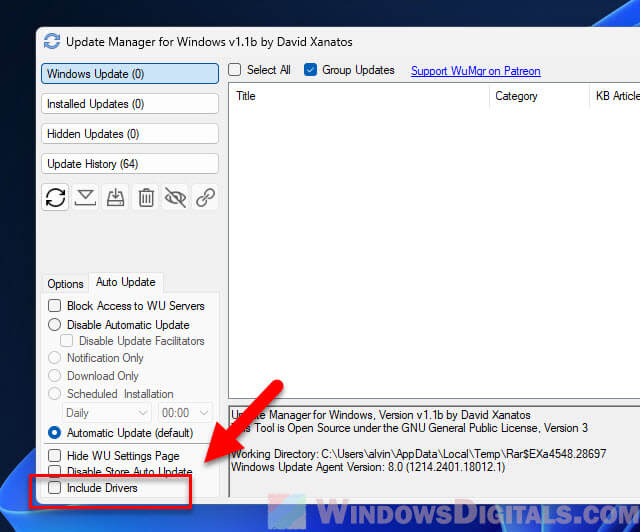
Using Windows Update Manager (WuMgr)
WuMgr is a tool that gives you more control over Windows Update, including the option to stop automatic driver updates.
- You can download WuMgr from its GitHub page. After downloading, extract the files and run the WuMgr application.
- In the WuMgr interface, go to the “Auto Update” tab. Under the “Automatic Update” section, uncheck “Include Drivers”

Either of these methods can stop Windows Update from changing your AMD Graphics driver, which avoids compatibility problems with AMD Software.
Next, we’ll show you how to uninstall your current driver using Display Driver Uninstaller (DDU) and manually install the latest driver from the AMD website.
Pro tip: Using Onboard Graphics And Graphics Card Simultaneously
Step 2 – Do a clean uninstall of current problematic graphics drivers
- DDU is a tool that completely removes graphics drivers from your system. Download DDU from its official website and extract the files to a folder on your computer.
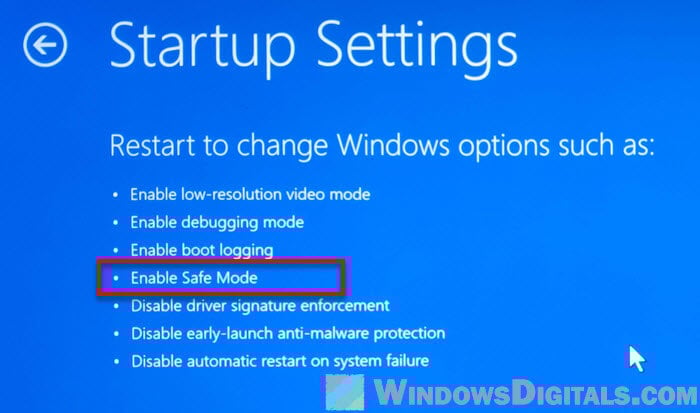
- For the best results and to make sure Windows doesn’t interfere with the uninstallation, it’s best to run DDU in Safe Mode. Boot your PC into Safe mode.

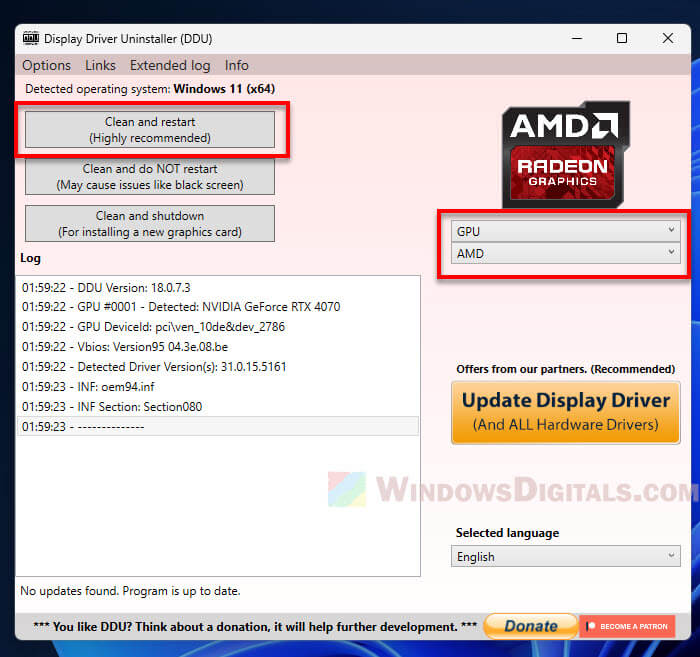
- Open the folder where you extracted DDU and run the Display Driver Uninstaller.exe file.
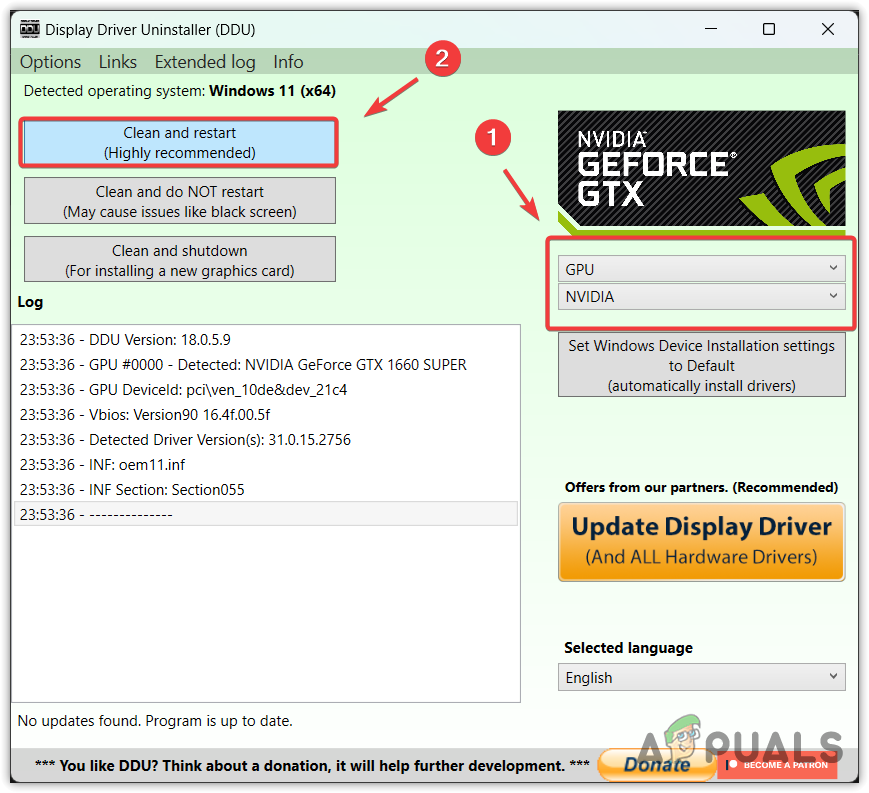
- In DDU, choose your device type as “GPU” and your device as “AMD.”
- Click the “Clean and restart” button. DDU will remove the AMD driver and restart your computer.

Step 3 – Download and install the latest AMD driver
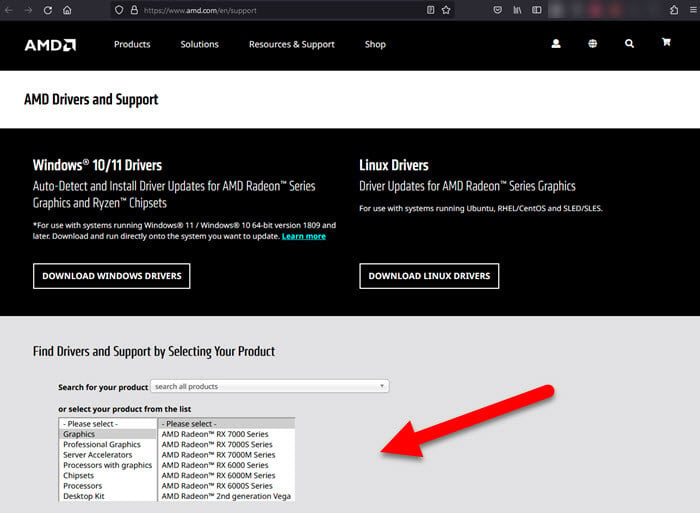
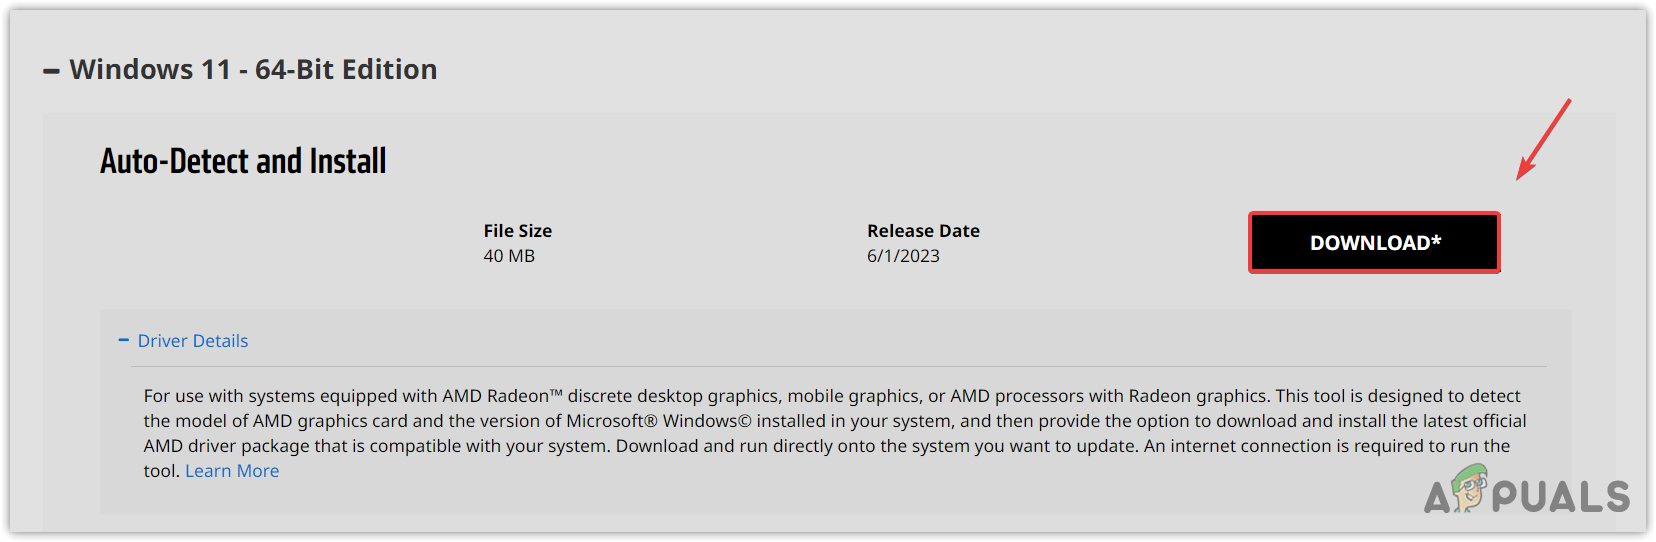
- After your computer restarts, go to the AMD Drivers and Support page.
- Select your product or use the auto-detect tool to find the right driver for your AMD Graphics card.

- Download and install the latest driver by following the instructions on the screen.
If you’ve followed all the steps as described, you’ll have a clean installation of the latest AMD Graphics driver directly from AMD, and you will have stopped the automatic driver updates from Windows Update that can cause compatibility issues with AMD Software Adrenalin Edition.
Useful guide: Force App or Game to Use Nvidia/AMD GPU or Integrated Graphics
Why drivers from Windows Update might not work well
Windows Update tries to keep your system updated by installing the latest drivers and security patches. But sometimes, these drivers aren’t fully compatible with AMD Software for a few reasons.
- Windows Update often gives you generic drivers that might not have all the special features or tweaks that are specific to your AMD Graphics card.
- AMD might release new drivers to fix problems or add features, but it can take a while for these updates to show up in Windows Update.
- The driver version from Windows Update might not match what AMD Software needs, which can often cause compatibility problems.
- AMD tests their drivers thoroughly with AMD Software. Drivers from Windows Update might not be tested as much, which can lead to stability or compatibility issues.
How to keep driver compatibility problems away
To reduce the chance of running into problems between AMD Software and your graphics driver, do the following.
- As we mentioned earlier, turning off automatic driver updates from Windows Update lets you pick which driver versions you install.
- Regularly check for driver updates on the AMD website or through AMD Software to make sure you have the newest and most compatible versions.
- Using AMD’s auto-detect tool can help you find the best driver for your system, lowering the risk of compatibility issues.
The error “Windows Update May Have Automatically Replaced Your AMD Graphics Driver ” means that AMD Radeon software cannot communicate with the installed graphics driver as it is not compatible because it has been replaced by Windows update.
This simply means that the Windows update utility has detected an update for your graphics driver from its server, which ended up replacing the compatible AMD graphics driver.
AMD Radeon Software needs to communicate with the compatible driver to do various tasks, such as providing access to the latest features, performance reports, driver updates, and more.
According to the reports, the screen automatically goes black and starts flickering when users encounter this error message. Thus, it is essential to fix this problem as it is related to the graphics driver.
1. Roll back the graphics driver
The simple and basic solution to this issue is to roll back the AMD graphics driver. It is recommended to start troubleshooting by rolling back the graphics driver. When you update the driver, Windows automatically backs up the old driver, which can be installed later if the user experiences issues with the latest driver.
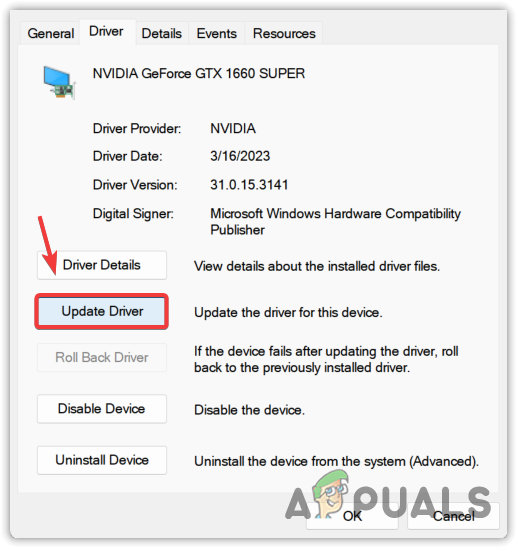
Since Windows has automatically updated the graphics driver, the Roll Back Driver option will be available. To roll back the AMD graphics driver, follow the steps:
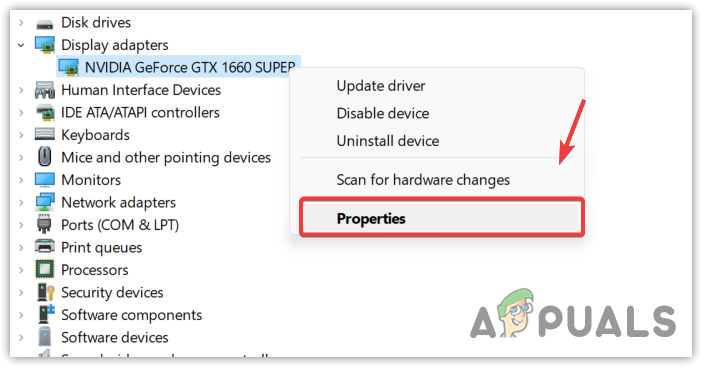
- Right-click the Start Menu button and select Device Manager to open it.
- Now expand the Display adapters and right-click the graphics driver.
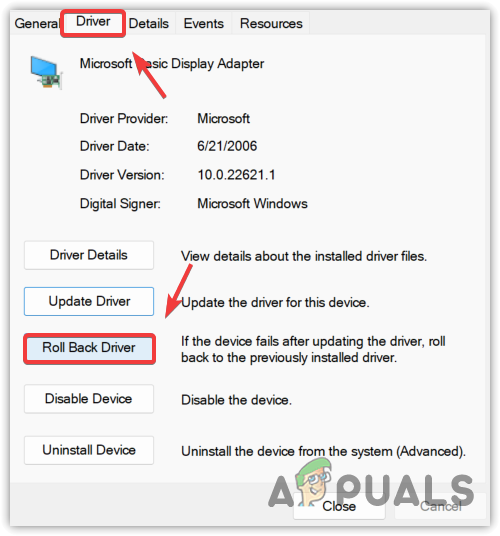
- Select Properties and go to Driver.

- Here click Roll Back Driver.

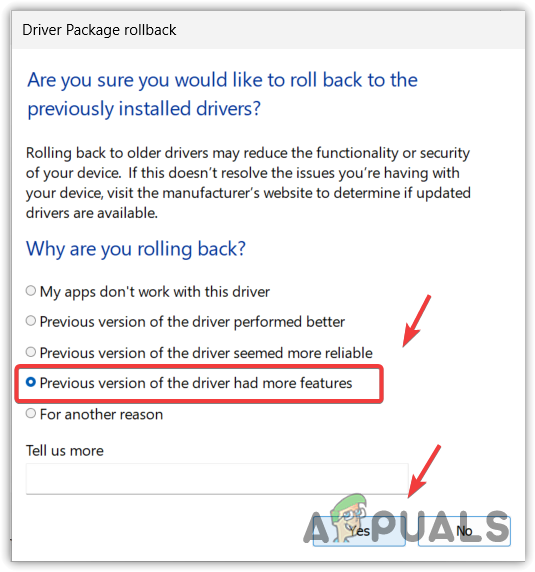
- Select any reason why you are rolling back. Then, click Yes to install the previous driver.

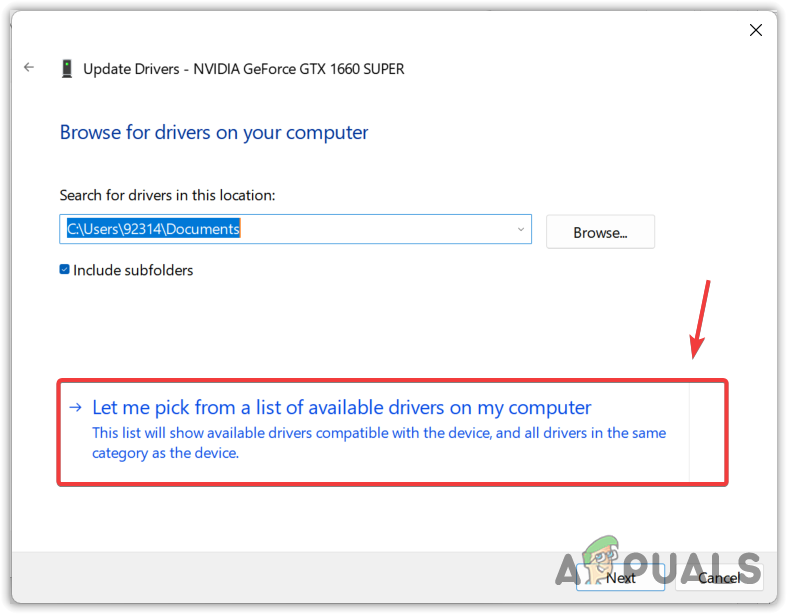
- If the Roll Back Driver option is disabled, then click Update driver.

- Select Browse my computer for drivers and select Let me pick from a list of available drivers on my computer.

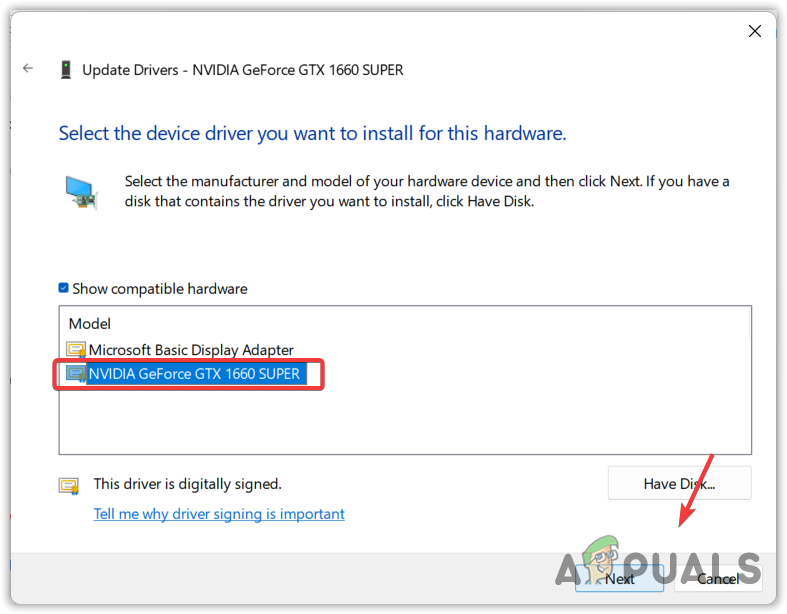
- Tick Show compatible hardware and select the old driver.
- Then, click Next to install the driver. If that does not work for you, move on to the following methods.
2. Download the AMD graphics driver
Since the Windows update has replaced the AMD graphics driver with the incompatible one, you can try downloading the compatible AMD driver from the official site, which could fix this error. To do so, follow the steps:
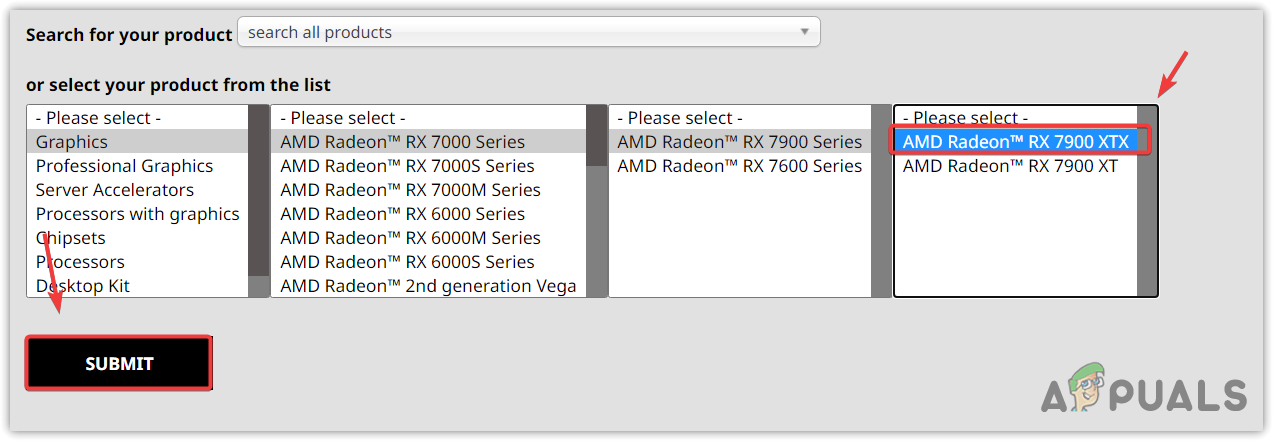
- Head to the official AMD site.
- Select the graphic card and click Submit.

- Then, select the Operating System and click Download.

- Once the installer is downloaded, simply run it to install the graphics driver.
- Once done, restart your computer and try launching AMD Radeon Software.
3. Use DDU to reinstall the graphics driver
If the error still persists, then you need to reinstall the graphics driver completely from the system. This can be achieved by using the Display Driver Uninstaller (DDU) application. DDU allows users to remove the drivers with their associated registry files, which ensures a clean uninstallation without any file leftover behind. To use the DDU to reinstall the drivers, follow the steps:
- Download Display Driver Uninstaller by navigating the website through the link.
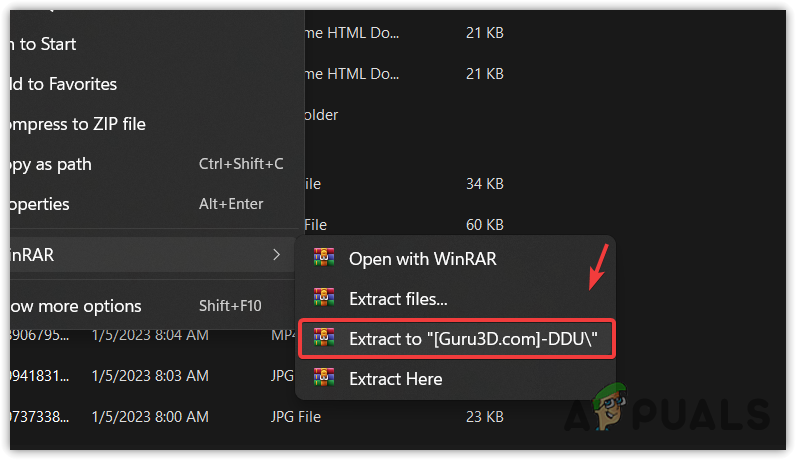
- Once you downloaded it, you will have to extract the folder. For that, you can use WinRar or 7Zip to extract the folder.

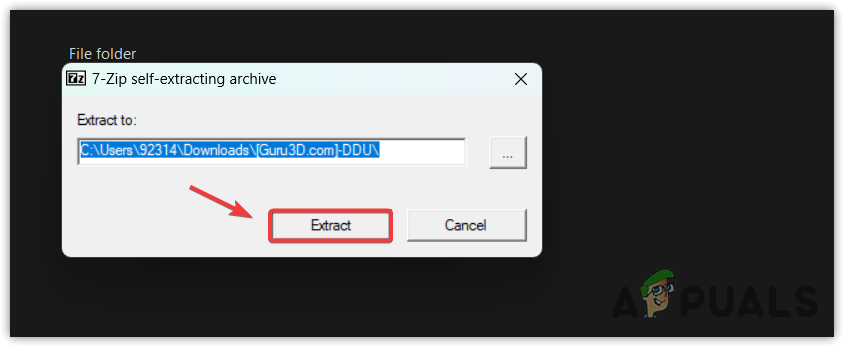
- Open the extracted folder, and run the DDU 7Zip file to extract the DDU folder.

- Now navigate to the extracted folder and run the DDU application.
- Select the Device and the Device type.
- Then, click Clean and restart.

- Once done, follow the 2nd method to download the latest driver from the official manufacturer’s suite.
4. Disable Windows MPO
Windows Multiplane Overlay is a part of the display driver, and it is designed to reduce the CPU and GPU load. When this feature was introduced to Radeon Setup Tool, it started causing this error along with several problems, such as flicker or stutter. Therefore, try disabling the MPO feature by following the instructions.
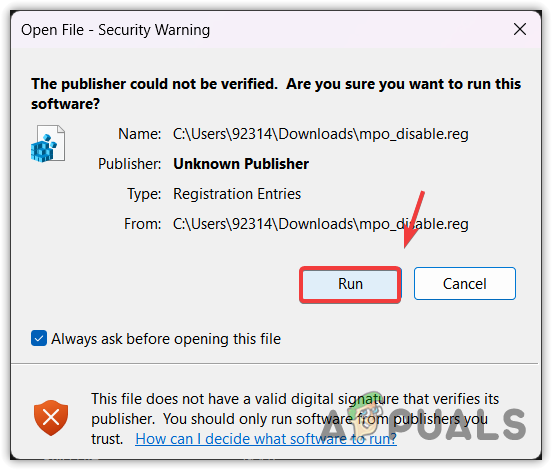
- Download the Disable MPO registry file through the link.
- Once it is downloaded, open the registry entry file.
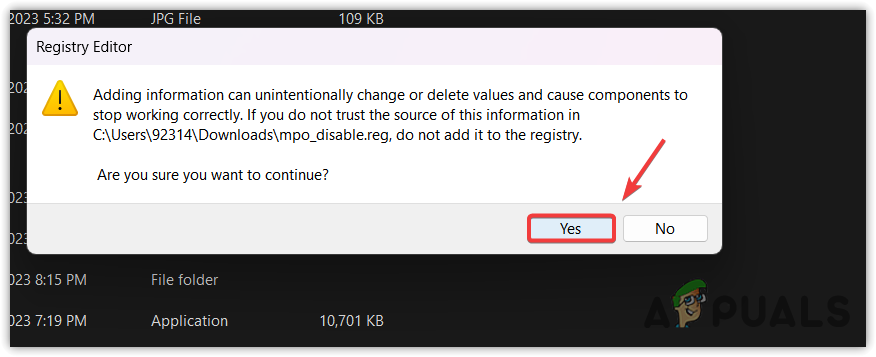
- Click Run, and click Yes when UAC prompts.

- Click Yes when it says Are you sure you want to continue?

- Once done, restart your computer for the registry changes to take effect.
5. Perform a System Restore
If you are familiar with the System Restore utility, you may have created a restore point that can be used to revert to the previous version of Windows that did not have this issue. System Restore is a utility that saves the system files, drivers, and registry files into a restore point so if anything unusual happens, the user can use the System Restore utility to fix the issues.
To perform a system restore point, follow the steps:
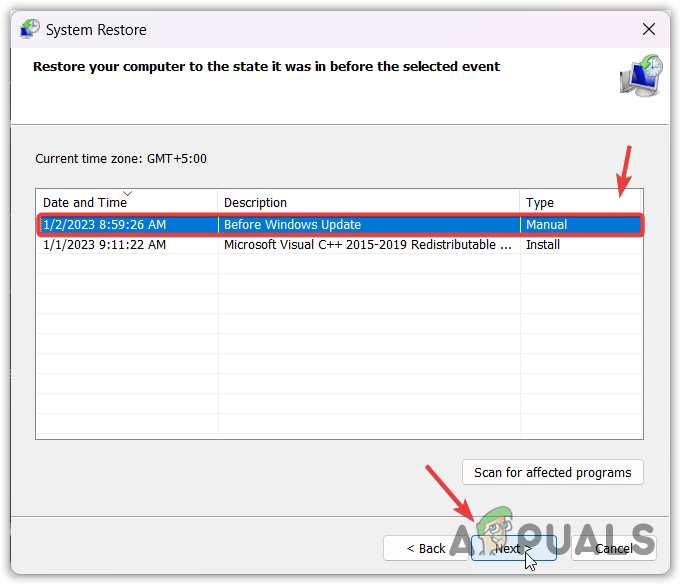
- Click the Start Menu and type the system restore command rstrui.

- Hit Enter to run the system restore utility.
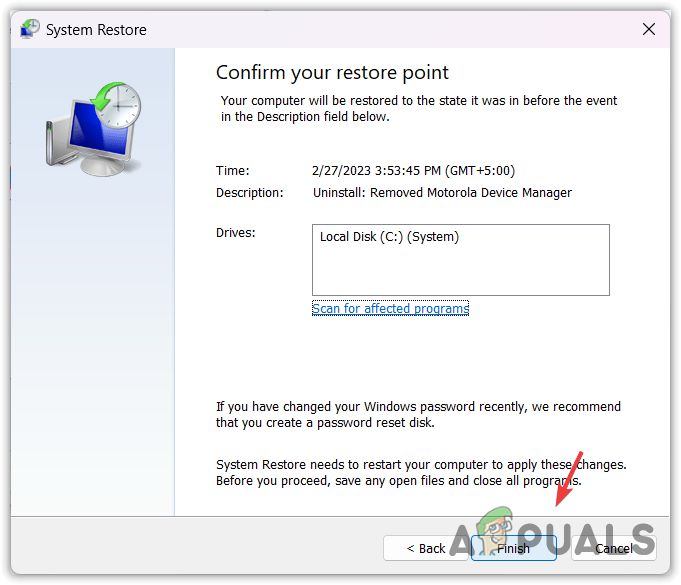
- Click Next and select a restore point.

- Again, click Next and click Finish to restore the Windows to a previous state.

That’s it! this will fix your issue. However, if certain settings are not configured correctly you can face this issue again if Windows update replaces the driver. To prevent it from happening again, you have to follow the following method:
Prevent Windows Update from automatically installing the drivers
In this method, we will tell Windows not to update the drivers from it’s database. Follow the steps:
6.1 Disable driver updates through Group Policy Editor
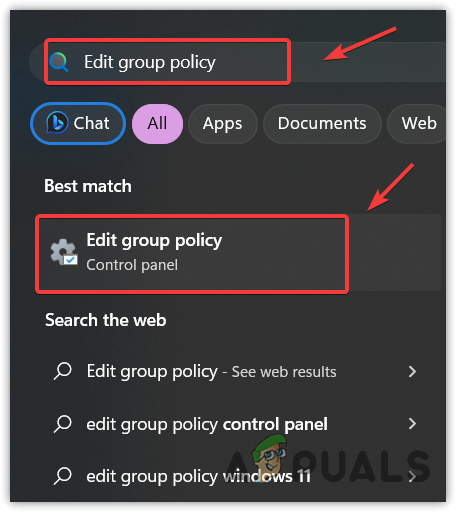
- Click the Start Menu and type Edit group policy.

- Hit Enter to open the group policy editor.
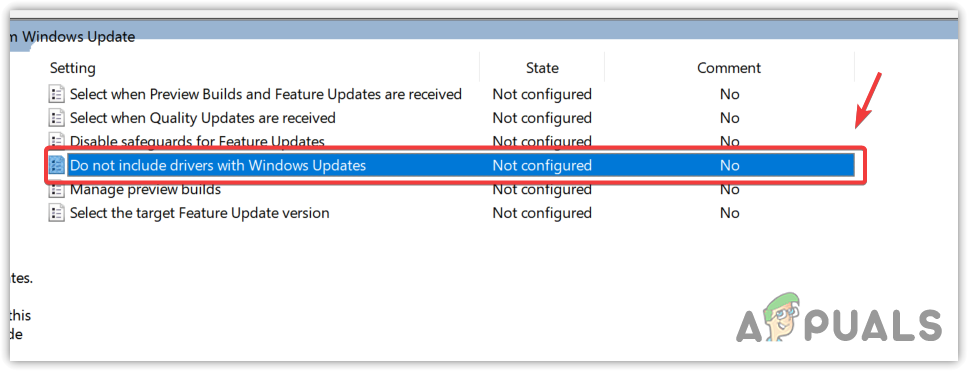
- Navigate to the following destination using the left pane.
Computer Configuration > Administrative Templates > Windows Components > Windows Update > Manage updates offered from Windows Update. - In the right pane, double-click the Do not include drivers with Windows update.

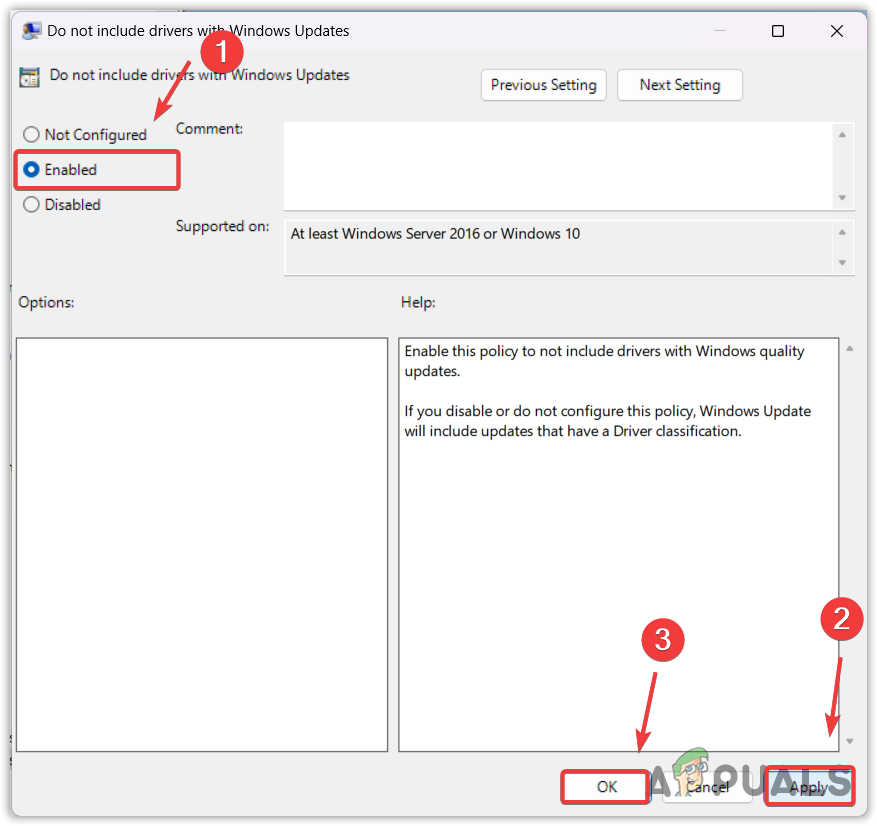
- Select Enabled, click Apply and click OK.

- Now your Windows will no longer include drivers in Windows updates. You can now install the latest AMD graphics driver to replace the driver downloaded via the Windows update utility to fix this error.
- In case the error persists, try disabling driver updates using the registry editor.
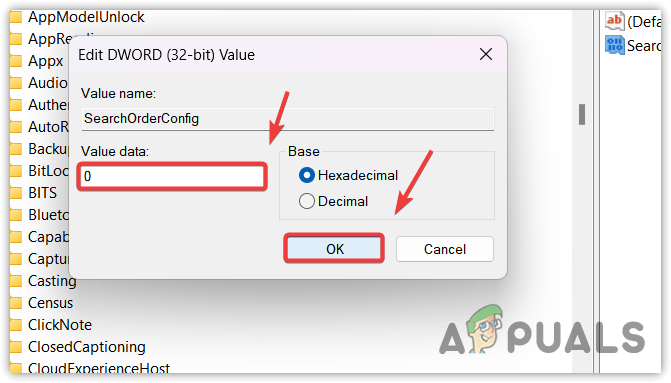
6.2 Disable driver updates through Registry Editor
- Open the Start Menu and type regedit.
- Press Enter and click Yes when UAC prompts appear to open the registry editor.

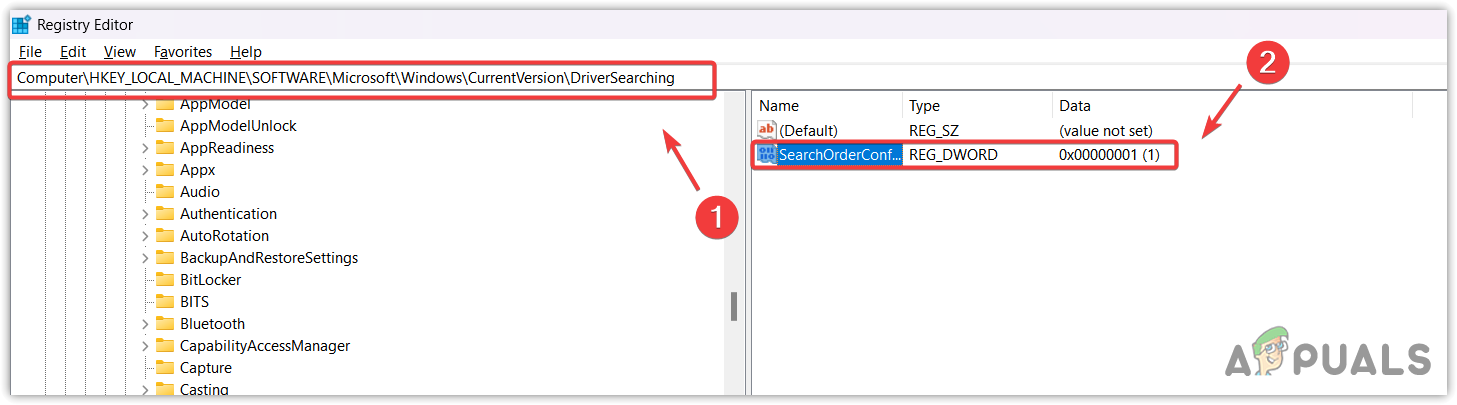
- Use the left sidebar to navigate to the following destination.
HKEY_LOCAL_MACHINE\SOFTWARE\Microsoft\Windows\CurrentVersion\DriverSearching

- Double-click the SearchOrderConfig and change its value data to 0 to dsiable the driver updates.
- Once done, click OK, close the registry editor, and restart your computer.

- Then, try installing the AMD graphics driver and see if the error is resolved.

In case you want to enable the Windows to update drivers from it’s database again, simply follow the steps mentioned above but this time put Value data to ‘1’ instead of ‘0’.
Windows Update May Have Automatically Replaced Your AMD Graphics Driver- FAQs
How to fix Windows Update replaced your AMD graphics driver?
Open Device Manager, right-click the graphics driver, and select Properties. Then, go to Driver from the top and click Roll Back Driver. Then, select any reason and click Next to roll back the graphics driver.
What causes Windows Update replaced your AMD graphics driver error message?
This error occurs when the AMD graphics driver is incompatible with the AMD Radeon Software. This often happens when the Windows update installs the graphics driver from the server. To fix this error, you need to install the compatible AMD graphics driver and also configure Windows not to include drivers in Windows updates.
Hamza Mohammad Anwar
Hamza Mohammad Anwar is an intermediate JavaScript web developer with a focus on developing high-performance applications using MERN technologies. His skill set includes expertise in ReactJS, MongoDB, Express NodeJS, and other related technologies. Hamza is also a Google IT Certified professional, which highlights his competence in IT support. As an avid problem-solver, he recreates errors on his computer to troubleshoot and find solutions to various technical issues.