
Среди частых вопросов пользователей последних версий Windows — загрузка и установка приложения Realtek Audio Console (или Realtek Audio Control), а также решение проблем с его работой, если оно было установлено.
В этой инструкции подробно о способах скачать и установить Realtek Audio Console, а также о причинах, по которым при установке приложения могут возникнуть проблемы.
Информация про Realtek Audio Console и необходимые условия для работы приложения
Прежде чем устанавливать Realtek Audio Console необходимо учесть важный нюанс: это приложение предназначено для звуковых карт Realtek, работающих с новыми драйверами DCH или UAD (Universal Audio Driver). Определить версию текущего драйвера в Windows 11 и Windows 10 легко:
- Нажмите правой кнопкой мыши по кнопке пуск и выберите пункт «Диспетчер устройств» в контекстном меню.
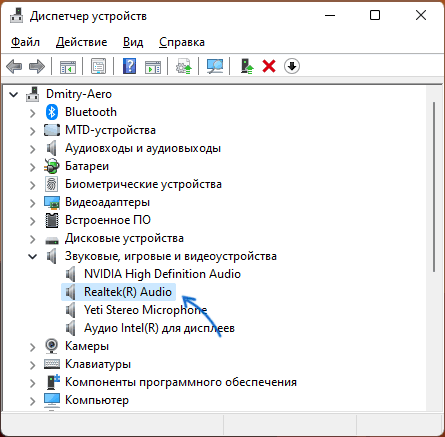
- Посмотрите название вашей звуковой карты в разделе «Звуковые, игровые и видеоустройства».
- Если вы видите Realtek(R) Audio — это говорит о том, что у вас установлен драйвер DCH/UAD и Realtek Audio Console может использоваться.

- Если указано: Realtek High Definition Audio — это говорит о том, что установлен старый драйвер и для управления должно использоваться приложение Realtek HD Audio Manager.
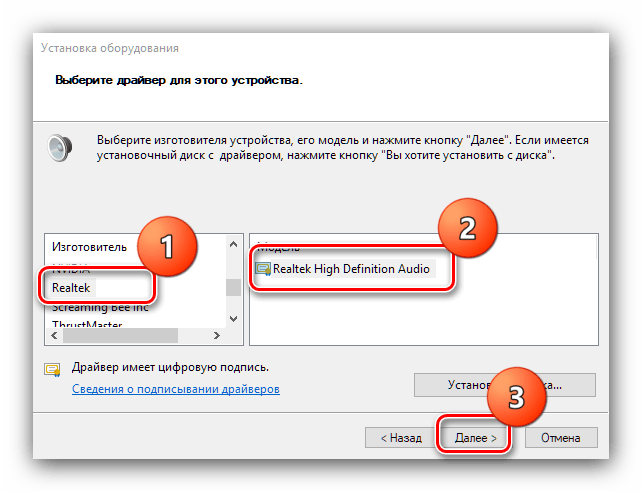
В случае, если у вас используется традиционный (старый) вариант драйвера, вы можете попробовать обновить драйвер прямо в диспетчере устройств: нажмите правой кнопкой мыши по Realtek High Definition Audio, выберите пункт «Обновить драйвер», затем — «Найти драйверы на этом компьютере» — «Выбрать драйвер из списка доступных драйверов на компьютере» и посмотрите, есть ли в списке совместимых устройств Realtek(R) Audio. При наличии — выберите и установите его.
И дополнительный нюанс: в случае если на компьютере установлен новый драйвер Realtek, как правило, установка Realtek Audio Console выполняется автоматически, и вы увидите его в списке установленных приложений. Если же этого не произошло, есть следующие варианты скачать и установить приложение.
Как скачать Realtek Audio Console из магазина Microsoft Store
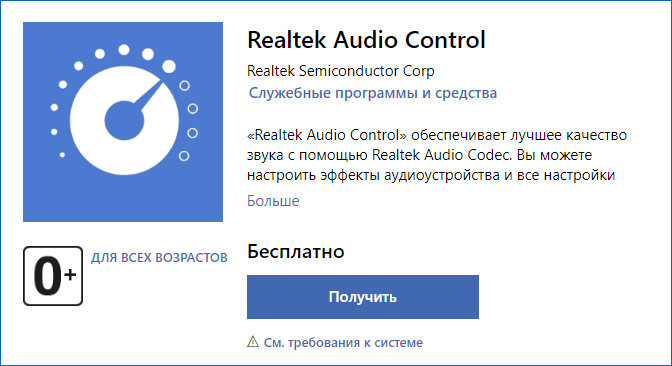
Если выполнять поиск по приложениям в Microsoft Store, приложение, которое в магазине имеет название Realtek Audio Control, вы не найдёте. Однако можно воспользоваться прямой ссылкой:
- Перейдите по ссылке на приложение Realtek Audio Control в Microsoft Store
- Нажмите кнопку «Получить» (если будет предложено открыть в приложении магазина, согласитесь) и установите приложение.

- После установки оно появится в списке приложений под именем Realtek Audio Console.
Напомню, что приложение будет работать лишь при наличии соответствующих драйверов Realtek. В некоторых случаях вы можете получить сообщение об ошибке при подключении к службе RPC, решение описано в инструкции Невозможно подключиться к службе RPC при запуске Realtek Audio Console — как исправить?
Установка Realtek Audio Console вместе с драйверами звуковой карты
Если после установки или переустановки Windows 11 или Windows 10 вы не устанавливали драйверы вручную, при этом имеете не самый старый компьютер или ноутбук, загрузка и установка драйвера звука с официального сайта производителя может решить проблему:
- Найдите официальную страницу поддержки вашей материнской платы (если это ПК) или ноутбука.
- В разделе загрузок найдите драйвер Audio и скачайте его.

- После установки проверьте, появилось ли приложение Realtek Audio Console.
- В некоторых случаях оно появляется не сразу, а загружается из Интернета.
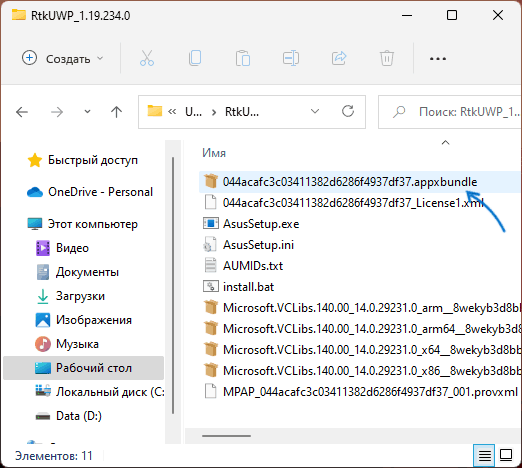
- В некоторых драйверах файлы приложения можно найти внутри архива. К примеру, если открыть архив с драйверами Audio некоторых материнских плат Asus (на примере — B560M), то в нём можно найти папку UWP, распаковать её и запустить файл appxbundle оттуда для установки Realtek Audio Console.


Неофициальный источник Realtek Audio Console и драйверов UAD (DCH)
На GitHub доступен проект, где выкладываются неофициальные сборки драйверов Realtek Universal Audio Driver и приложения Realtek Audio Console. Если другие методы установки для вас не работают, можно попробовать этот вариант:
- Зайдите на страницу https://github.com/pal1000/Realtek-UAD-generic/releases
- Ссылка на установщик Realtek Audio Console находится в разделе Realtek Audio Control app, после распаковки потребуется запустить файл setup.cmd из папки с распакованным архивом.

- Ниже, в разделе Assets вы найдете архив с последней сборкой драйвера Realtek, необходимого для работы приложения. Учитывайте, что он может не работать для достаточно старых звуковых карт Realtek.

В случае, если Realtek Audio Console не запускается, хотя все условия для его работы выполняются, причинами могут быть:
- Отключенные элементы Realtek в автозагрузке.
- Отключенные службы Realtek в списке служб.
- Наличие и работа дополнительных приложений и служб улучшения звука от производителя.
Надеюсь, инструкция поможет или решить проблему и установить Realtek Audio Console или разобраться, почему это не удавалось сделать.
Realtek HD Audio Codec Driver — официальная версия драйверов для всех HD Audio кодеков от компании Realtek для корректного воспроизведения аудиофайлов на стационарном компьютере, ноутбуке и других устройствах.
Набор поддерживает большое количество звуковых устройств и материнских плат. Поддерживаются чипы ALC880, ALC882, ALC883, ALC885, ALC888, ALC861, ALC861VD, ALC660, ALC260, ALC262, ALC268, используемые в последних материнских платах. Содержит встроенные утилиты для настройки выходных звуковых сигналов.
Полноценная поддержка новых форматов звука, высокая частота пропускания, поддержка подключения аудио-устройств по технологии Plug and Play, точное распознавание речи и ее ввод.
Возможности:
- Управление уровнем громкости динамиков. Поддержка звуковых устройств.
- Совместим со следующими моделями звуковых карт: ALC883, ALC882, ALC880, ALC861VD, ALC660, ALC260 и другие.
- Поддержка материнских плат Intel® D2500CC — Intel ® 2700DC, Intel® DB65AL, Intel® DH61KVCH, Intel® DH77DF, Intel® DH77KC и многих других.
- Запись звука с любых аудиоустройств, подключенных по технологии Plag And Play.
- Совместимость с Direct Sound 3D для работы со звуками.
- Регулировка громкости звука.
- Изменение конфигурации динамиков.
- Поддержка звуковых эффектов.
- Поддержка 12-полосного эквалайзера. Можно регулировать высоту звука.
- Высокая частота пропускания.
- Установка частоты дискретизации.
- Поддержка функций по распознаванию речи.
- Поддержка WDM-драйвера, утилиты Realtek Soundman и Realtek Sound Effect Manager.
ТОП-сегодня раздела «Программы для драйверов»
Отзывы о программе Realtek HD Audio Codec Driver
ответьте про Realtek HD Audio Codec Driver R2.83 [28-12-2024]
во время установки драйвера выскакивает ошибка с кодом -0001 помогите
43 | 122 | Ответить
Олег про Realtek HD Audio Codec Driver R2.83 [10-06-2024]
Нормальные дрова это 281, потом админы увлеклись кокаином или ещё чем(предположение)
8 | 12 | Ответить
Кирилл про Realtek HD Audio Codec Driver R2.82 [15-05-2023]
Прога работает, но эквалайзер отсутствует
40 | 37 | Ответить
Сергей про Realtek HD Audio Codec Driver R2.82 [19-02-2022]
Реалтек дерьмо, надеюсь разрабы этих драйверов сдохнут в мучениях. Невозможно откатить, удалить, даже после полного удаления отовсюду, этот сраный драйвер после перезагрузки восстанавливается. Не могу подключить теперь блютуз наушники. Пара минут и комп уходит в принудительную перезагрузку, переустановить никак не получается. Выход, только сносить винду. Компания уëбищная максимально, извиняюсь конечно за маты, но по другому никак не отозваться, худшие драйвера из всех.
80 | 112 | Ответить
* в ответ Сергей про Realtek HD Audio Codec Driver R2.82 [06-11-2022]
И что ты предлагаешь делать? На линукс переходить и обоссаный пульсаудио использовать?
30 | 45 | Ответить
Ебобий в ответ Сергей про Realtek HD Audio Codec Driver R2.82 [21-11-2022]
Ты видимо просто долбоеящер) таких земля не долго носит
45 | 35 | Ответить
Raven Ravenovich в ответ Сергей про Realtek HD Audio Codec Driver R2.82 [12-12-2022]
Проблема не в драйверах, а в тебе мужик
37 | 49 | Ответить
вася про Realtek HD Audio Codec Driver 2.82 (Vista/Windows 7, 8, 8.1, 10) [16-01-2022]
… и второе,если вы так сильно беспокоитесь о своей репутации, почему вы не даете информацию о плохом качестве ваших драйверов?
25 | 34 | Ответить
Do you have a problem with your Realtek HD Audio Manager on your Windows 10 computer? Let us assist you by providing some information on how to download, install or reinstall your audio manager.
Realtek HD Audio is an audio driver for system sound that supports DTS, Dolby, and Surround Sound. It is not mandatory to install Realtek HD Audio, but it is very helpful.
The application used for managing audio settings on the PC is called RealTek HD Audio Manager. This application allows you to configure your microphone/speaker settings and try out different sound effects as well.

In this article we have compiled several methods that will serve as a complete guide to download, install or reinstall Realtek HD Audio Manager on your computer.
Table of Contents
Reinstall Realtek HD Audio using the Device Manager
- Open the Device Manager. You can do this by simply pressing the Windows key + X + M.
- Here you will see a list of several categories. The one that you need to explore at the moment is the Sound, video, and game controllers category. Once you expand this category, you will find the Realtek HD Audio Definition option.
- Right-click on Realtek HD Audio Definition and click the uninstall button.

- Once the application is successfully uninstalled, you need to click on the Action tab in the toolbar of the Device Manager window.
- In the action tab, select the Scan for Hardware Changes option and wait for Windows to complete the scan.

- Once you press this option, Windows will search for Realtek HD Audio Driver automatically. The Realtek HD Audio Manager will be installed along with it as well.


Download the Realtek HD Audio Manager and driver
If the above method does not work for you, you have nothing to worry about. Hopefully you will be able to manually download and install the application on your computer. Let’s look at how you can download and install this audio manager manually.
- Visit Realtek’s official download page and download the software version that is suitable for your operating system and processor type. If you have a 32-bit or 64-bit processor running on either Windows 10, 8, or 7, you can download this version.
- Once you download the correct version, the next step is to run the executable file on your system.

- Now follow the instructions in the application installation dialogue box to install it on your computer.

This will install RealTek Audio Driver 2.82 on your system. It will install the driver as well as RealTek Audio Manager. If you are running Windows 10, you should get an updated Realtek audio driver from Windows Update. Otherwise, you can download the latest update patch from Microsoft from the following link:
Download RealTek Audio Driver update Version 6.0.9098.1 (For Windows 10 Version 1903 or later)
Download RealTek Audio Driver update Version 6.0.9098.1 (For Windows 10 Version 1809 or later)
Download RealTek Audio Driver update Version 6.0.9098.1 (For Windows 10 Version 1803 or later)
The installation of this update will update the driver to the latest version (up to January 2021).

Troubleshooting Realtek HD Audio Manager
There are times when simply installing or reinstalling the audio driver will not work. Generally, we can troubleshoot the problem of the driver not getting installed correctly in a few common situations.
Let’s discuss the fixes here.
Fixing driver conflicts
Realtek audio drivers can conflict with existing audio drivers (even if they are from Microsoft). For generic sound, Microsoft installs UAA Bus Driver for High Definition Audio. It should be disabled or removed before we can install Realtek audio drivers.
- Open up the Device Manager and double-click on System devices.
- Look for Microsoft UAA Bus Driver for High Definition Audio option
- Right-click on this option and select “Disable” from the menu that appears
- Now, open up “Settings” by typing it in the search bar of your taskbar.
- Once the Settings window opens, click on Apps & Features
- Now, select the “Realtek High Definition Audio Driver” and choose the Uninstall option to completely remove the driver from your system before trying to reinstall it.
- Once you uninstall the driver, consider reinstalling it and check whether it’s working or not.
Enable RealTek Audio on system startup
- Open up the Task Manager by right-clicking on your taskbar and selecting “Task Manager” from the list of options that appear
- Click on “Startup” from the list of tabs in the Task Manager
- Now, consider searching for the Realtek HD Audio Manager
- Once you locate the Realtek HD Audio Manager, check the Status tab in front of it.
- If the status is Disabled, you will have to enable it. You can do that by right-clicking on the Realtek HD Audio Manager in the list and selecting the Enable option from the list of options that appear.
- Once you have enabled it, consider restarting your system for the Realtek HD Audio Manager to be completely enabled, up, and working.
Error: Install Realtek HD Audio Driver Failure [Error OxC0000374]
Some users have reported that they are facing the error code OxC0000374 while trying to install the Realtek HD Audio Driver. However, you should know that the error code can be different for different users and cases.
This problem can happen due to different reasons. Different causes can create an error like this. However, sometimes, these issues appear when you have a dead sound card. Keep in mind that you will not be able to apply a software fix to clear this issue if you are having problems with your physical sound card. The only solution to a dead sound card is replacing it with a brand new one.
In case of a dead sound card, Windows will show you a yellow exclamation mark with an “Unknown device” label. You won’t be able to install the drivers for your sound card because the hardware is not responding to the system. Hence, none of the solutions that we have mentioned here will work for you if your sound card needs to be replaced.
Find malfunctioning sound drivers and update them
If you are unable to install the sound card drivers, consider updating them directly through the Device Manager through the following procedure:
- Search for Device Manager in the Windows Search option next to the Start icon in the Taskbar
- Once the Device Manager opens up, start looking for the Sound driver option
- After finding the Sound options, consider inspecting them for a bit and see whether any of them have a question mark or an exclamation mark in front of them
- If any of the drivers on that list have an exclamation or a question mark, right-click on that driver.
- By right-clicking on the driver, a list of options will appear. Select the Update Driver option from this list
- Once you select this option, you may have to provide a confirmation.
Once the driver is updated, consider restarting your system to see if the problem has been resolved. If the error is not resolved, consider continuing with this second method.
Adding legacy hardware through Device Manager
Another method that is applicable to tackle this situation is adding legacy hardware. However, this method is only considered when you are trying to fix the missing Sound, video, and game controllers from the Device Manager.
- Open up the device manager by pressing Windows Key + X and then pressing the M key from the keyboard when the list of options appears on the lower-left corner of your pc screen.
- Once the Device Manager opens up, click on select the Action tab from the toolbar and choose the Add legacy hardware option from the drop-down menu.
- A window will appear. Click Next and choose the option you want to go with from the menu that appears in the Add Hardware window.
- Once the list of hardware is displayed, select the driver you want to install and proceed.
Once the driver is installed, reboot your system and test it to confirm whether it works or not. If it does not, you can consider disabling the UAA Bus Driver and reinstalling the Realtek HD Audio Driver. These drivers usually conflict with each other and once the UAA driver is removed, Realtek HD Audio Driver works normally.
The Last Resort
If none of the above solutions work for you, you can consider rolling back to a previous system restore point where the Realtek HD Audio Manager and its driver were working properly on your computer system.
If there is no system restore point on your computer, your System Restore utility will not be able to do anything to resolve the issues you are facing with either your Realtek HD Audio Manager or your Realtek HD Audio Driver. However, if you use this option with a previously saved point, your data won’t be affected.
Understand that this solution is the last option and do it only if none of the methods that we mentioned in this article are working for you.
- To restore your system to a previous state, start by pressing opening up the Run utility with Windows Key + X and then R later on when the menu appears.
- Now, type “rstrui” in the run “Open” box and hit the Enter key.
- Once the System Restore Window appears in front of you, click the “Next” button.
- If you have created any System Restore points in the past, you will be able to see them in the list that appears in the System Restore utility window.
- Check the “Show more restore points” option to display all of the system restore points that you have created.
- Now, select the restore point that is most suitable for you depending upon the time when it was created and click on the Next button option.
- However, make sure not to select a restore point where the audio drivers were not working correctly or were missing from the system. There’s no use reverting to this kind of state.
- Once you have confirmed your restore point, click the Next button.
- Once you click the Next button, Windows will start to restore your system to a point that is discussed in the “Description” field. Click the “finish” button and wait for the process to complete.
The above were some methods that you can implement if you are unable to find the Realtek HD Audio Manager on your PC or if it is not working correctly. If any of the above procedures are not working for you, maybe it’s time to replace your sound card to continue experiencing sounds from your computer system. Remember, applying software fixes to a hardware problem is never going to work and is a waste of time as well. Hence, make sure that you have confirmed that the sound card is working perfectly fine before applying the above methods.
Conclusion
Realtek HD Audio Manager is an important utility and often comes pre-installed in the latest version of Windows like Windows 10 and and most probably Windows 11. However, there might be some problems that are forcing the audio manager to not function properly on your system. In such situations, you need to follow the simple step-by-step guide mentioned in the article.
Just implement any of the above strategies, and hopefully, your Realtek HD Audio Driver will come to life again by integrating with the Realtek HD Audio Manager. If it does not, maybe replacing the whole sound card might be a better option that could save you a lot of time. Anyone can follow the above steps to install the Realtek HD Audio Manager and fix these minor issues themselves.
Все способы:
- Шаг 1: Удаление старого драйвера
- Шаг 2: Установка
- Возможные проблемы
- Вопросы и ответы: 0
Шаг 1: Удаление старого драйвера
Если программное обеспечение уже использовалось в операционной системе, то рекомендуется сначала удалить старый драйвер, чтобы избежать конфликта между версиями ПО Realtek HD. Если ОС «чистая» и звуковой драйвер еще не устанавливался, то можно пропустить этот шаг и сразу переходить к следующему.
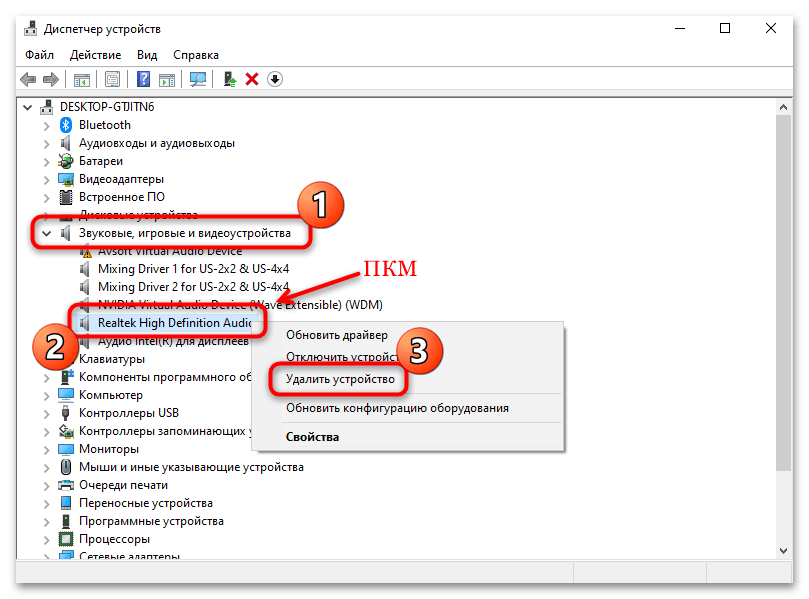
- Откройте встроенное средство «Диспетчер устройств». Для этого можно использовать сочетание клавиш «Win + X», после чего выбрать соответствующий пункт.
- Разверните меню «Звуковые, игровые и видеоустройства» и найдите драйвера для Realtek High Definition Audio. Щелкните по названию правой кнопкой мыши и из контекстного меню выберите функцию удаления устройства.
- В новом окне подтвердите действие.
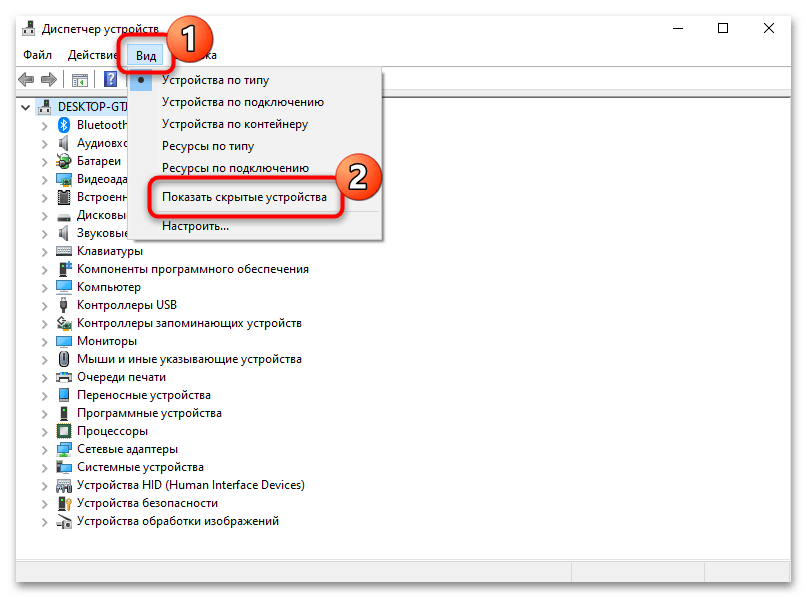
Также рекомендуется поискать дубликаты этого устройства. Для этого на вкладке «Вид» вверху интерфейса «Диспетчера устройств» отметьте опцию «Показать скрытые устройства». Удаляйте ПО аналогичным способом.
После удаления программного обеспечения необходимо перезагрузить операционную систему, чтобы изменения вступили в силу.
Скорее всего, после этого звук пропадет, но после установки Realtek HD все компоненты автоматически возобновят свою работу.
Шаг 2: Установка
Для начала потребуется скачать утилиту Realtek HD, причем нужно определить разрядность и версию операционной системы при загрузке. Процедура инсталляции несложная, поскольку предустановлен пошаговый мастер. Достаточно следовать алгоритму в соответствии с инструкциями.
Скачать Realtek HD
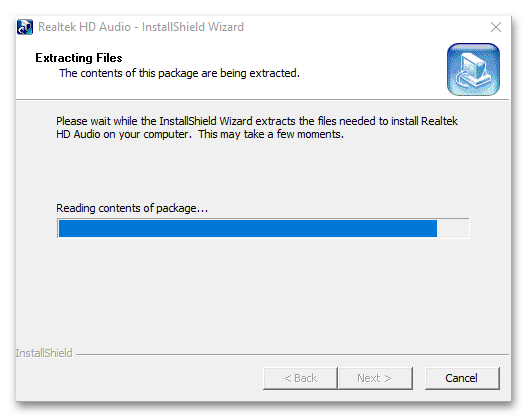
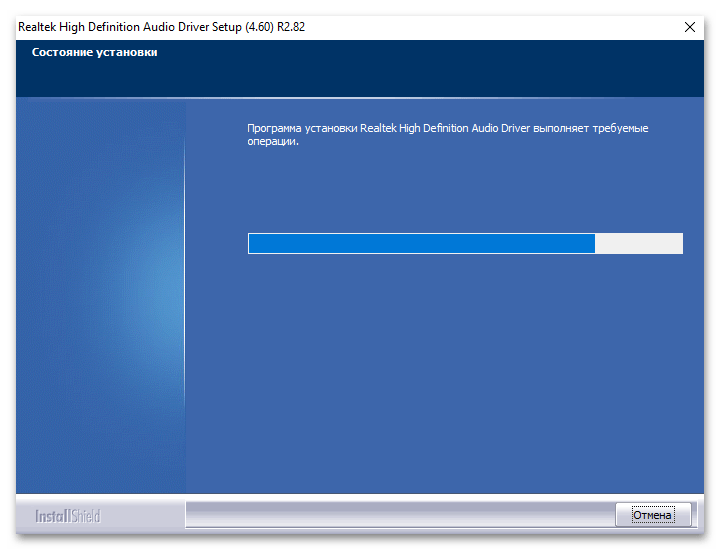
- Скачайте и запустите установочный файл. Автоматически начнется извлечение компонентов, которые необходимы для установки.
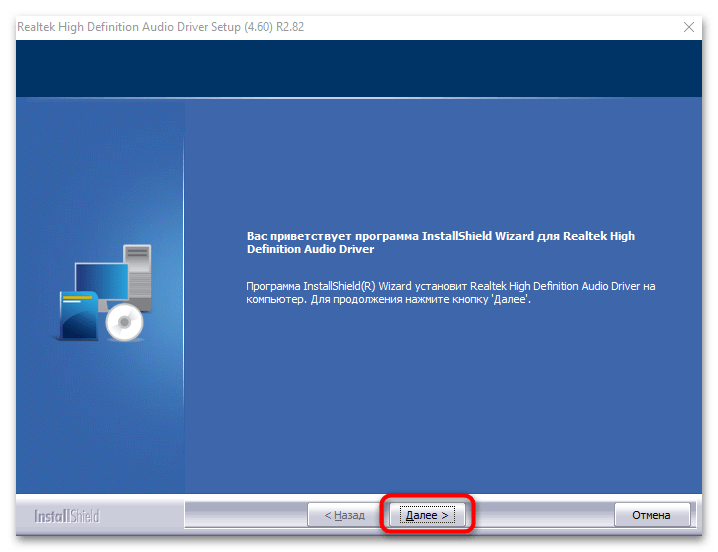
- Запустится пошаговый мастер. Нажмите на кнопку «Далее», чтобы продолжить установку.
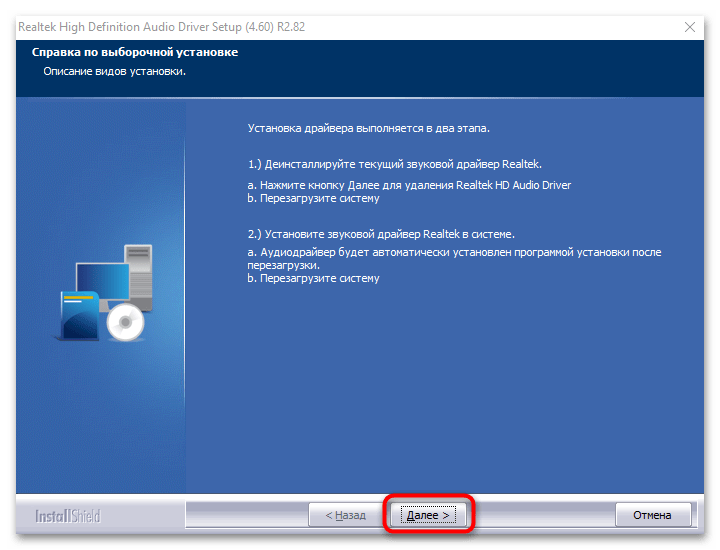
- В следующем окне появится небольшая инструкция. Ознакомьтесь с ней и продолжите инсталляцию.
- Если вы пропустили первый шаг с ручным удалением, мастер установки автоматически удалит обнаруженное старое программное обеспечение. Затем начнется установка нужных компонентов. Это может занять некоторое время.
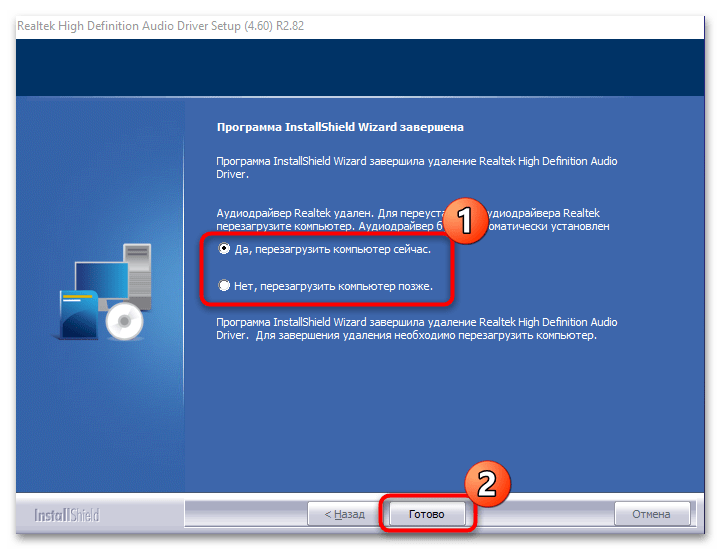
- Когда все будет установлено, программа предложит перезагрузить устройство. Чтобы звук снова появился, рекомендуется сделать это. Но также можно отложить перезапуск на более удобное время. Нажмите кнопку «Готово».
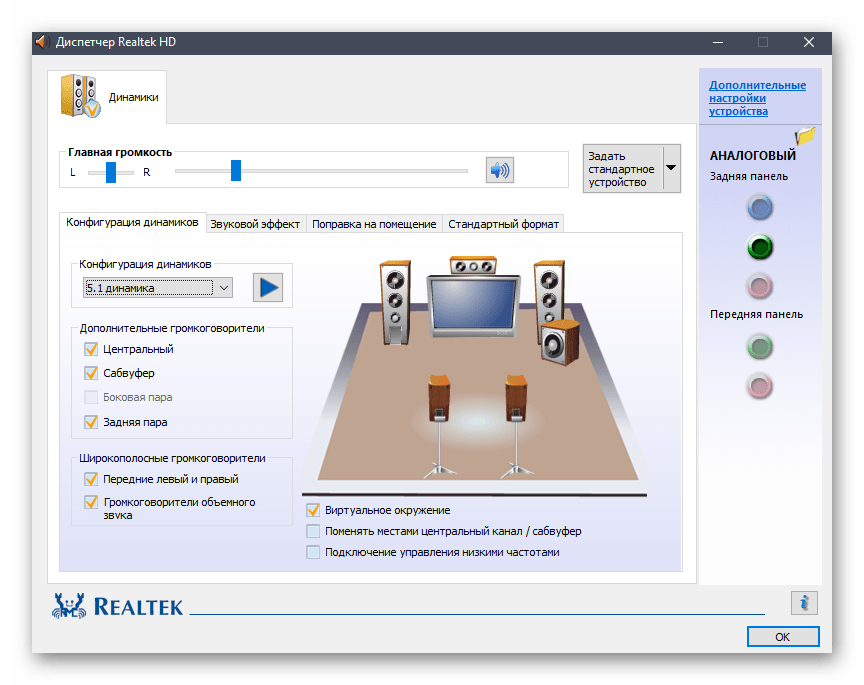
На этом установка Realtek HD завершена. Приложение для дополнительной настройки звука (оно называется Диспетчер Realtek HD) можно найти среди установленного софта, например через поиск в «Пуске» по запросу «realtek». Если не удается найти данную программу, читайте статью дальше.
Кстати, вы также можете устанавливать любые драйверы при помощи специальных помощников.
Подробнее:
Программы для установки драйверов
Как обновить драйверы на компьютере
Возможные проблемы
Если во время установки возникли какие-либо проблемы, то решить большинство из них можно самостоятельно.
Realtek HD не устанавливается
Нередко причиной становится конфликт программного обеспечения или несовместимая с операционной системой версия драйвера. Бывает, что установка Realtek HD не удается из-за неполадок со звуковым оборудованием или чипом на материнской плате; неполадки в Windows также могут стать причиной неудачной инсталляции. Большинство проблем и путей их решения разобрано в нашем отдельном материале.
Подробнее: Не устанавливается Realtek HD в Windows 10
Отсутствует ярлык для запуска / Не стартует вместе с Windows / Автоматически закрывается
Самая распространенная проблема с уже установленным Realtek HD – это отсутствие иконки Диспетчера в трее или значка на рабочем столе. Кроме того, из-за разных сбоев этот Диспетчер может автоматически закрываться или даже не запускаться вместе с операционной системой. Как исправить открытие данного приложения, можете узнать из следующего материала.
Подробнее: Как открыть Диспетчер Realtek HD в Windows 10
Диспетчер Realtek HD не запускается
Если установленный Диспетчер Realtek HD не запускается, источник проблемы следует искать в операционной системе. Наш автор в отдельной инструкции объяснял, что делать в этой ситуации, даже если звуковое оборудование не отображается в «Диспетчере устройств».
Подробнее: Не открывается Realtek HD в Windows 10
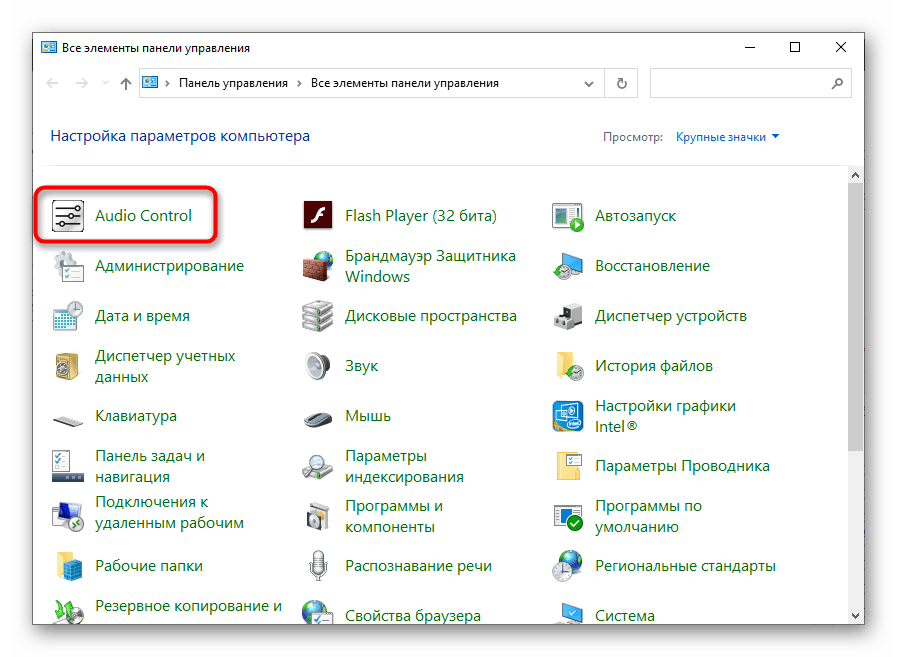
Диспетчер пропал из «Панели управления»
Если вы привыкли запускать Диспетчер Realtek HD через «Панель управления» Windows, но теперь его значка там нет, вывести его можно через «Параметры» Windows 10. Существуют альтернативные методы запуска, о которых можно узнать из отдельного руководства на нашем сайте.
Подробнее: Нет значка диспетчера Realtek HD в «Панели управления»
Наша группа в TelegramПолезные советы и помощь
Want to learn how to download and update the Realtek Audio Console on Windows computers? We outline straightforward methods to accomplish this task efficiently.
The Realtek Audio Console is an upgraded version of the Realtek HD Audio Manager, offering advanced functionalities. This tool can configure speakers, headsets, microphones, headphones, and others.
Sometimes referred to as the Realtek Audio Control, this tool provides an intuitive interface for adjusting settings and applying audio effects. Thus, users can customize sound configurations and adjust volume levels for individual speakers. In essence, it’s an enhanced iteration of the Realtek HD Audio Manager. Let’s delve into more details below.
What Issues May the Out-of-Date Driver Cause?
As a common audio driver for Windows, Realtek HD Audio facilitates the management of DTS, surround, and Dolby sound. Given its pivotal role in ensuring accurate functionality of audio devices, maintaining the console for Windows 11 through regular updates is essential. Failure to do so may result in various issues. If the console fails to open or becomes outdated, difficulties arise while listening to music, or having sound while playing games.
But, downloading or updating the outdated audio driver solves the issues. This guide provides comprehensive insights into downloading the Realtek Audio Console for Windows 11, 10, or older.
How to Open the Realtek Audio Console
If you’re unable to locate or open the Realtek Audio Console in the System Tray, follow the here is what you need to do:
- Press the Windows + E keys simultaneously to open File Explorer.
- In its address bar, paste the following path and press Enter: C:\Program Files\Realtek\Audio\HDA\
- This will navigate you to the target directory. Look for and double-click on the relevant file. This will open the Realtek HD Audio Manager.
Also Read: How to Fix Realtek Audio Not Working in Windows 10,11
Some Common Realtek Audio Problems on Windows PCs
Before jumping to the various methods to download the console on Windows 11/10/8/7, it’s crucial to comprehend the issues that may arise:
- Conflicts with existing device drivers.
- Absence of the Realtek HD Audio Manager icon.
How to Download & Update the Realtek Audio Console on Windows 11, 10, 8, 7
Typically, the console is pre-installed on Windows computers. But, there are instances where it might suddenly disappear or inadvertently get uninstalled. Regardless of the scenario, the following methods will assist you in downloading it on Windows 11, 10, 8, and 7. Let’s see them!
1. Download Realtek Audio Console via Microsoft Store
Below, we outlined the path to download the Realtek Audio Console from the Microsoft Store. While this method requires manual intervention, it is a very safe one. To locate this update, you have to use the following steps:
1. Navigate to the Realtek Audio Console download page.
2. Click on the Get in Store app, to initiate the download.
3. Click on Download.
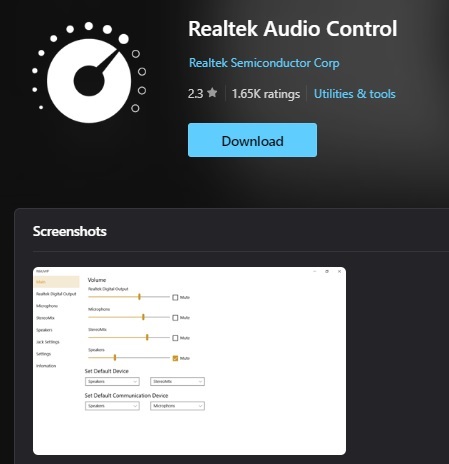
4. Once the file is on your system, double-click on it. This will install the Realtek Audio Console driver.
Also Read: Insignia Bluetooth Adapter Driver Download For Windows 10, 11
2. Use Win Riser to Automatically Update the Realtek Audio Console for Windows 10, 11
We recommend using the best driver updater software for Windows 10, 11 PC like Win Riser to download and install the driver, as other methods require both technical knowledge and time.
Win Riser can update all of your PC drivers, including Realtek Audio Console for Windows, effortlessly. The software is available in both free and paid versions. The premium one also offers additional features and advanced functionality, including 24/7 technical support and a 60-day money-back guarantee. Additionally, it includes an automatic backup and a restore wizard. Thus, before the updates, the older drivers will be backed up.
This is the way to get and install Win Riser updater, so you can then download the Realtek Audio Console for Windows 11, 10, 8.1, 8 & 7:
- Get the Win Riser installer by clicking the link below.
- Install and launch the tool on your Windows operating system.
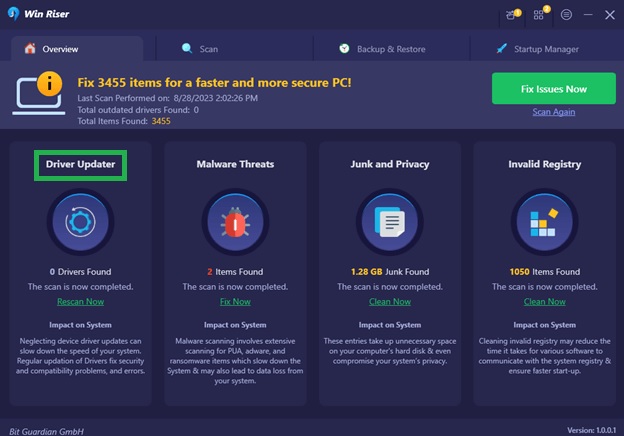
- Click the Scan button to initiate a comprehensive scan for malware, outdated drivers, unwanted software, and more.
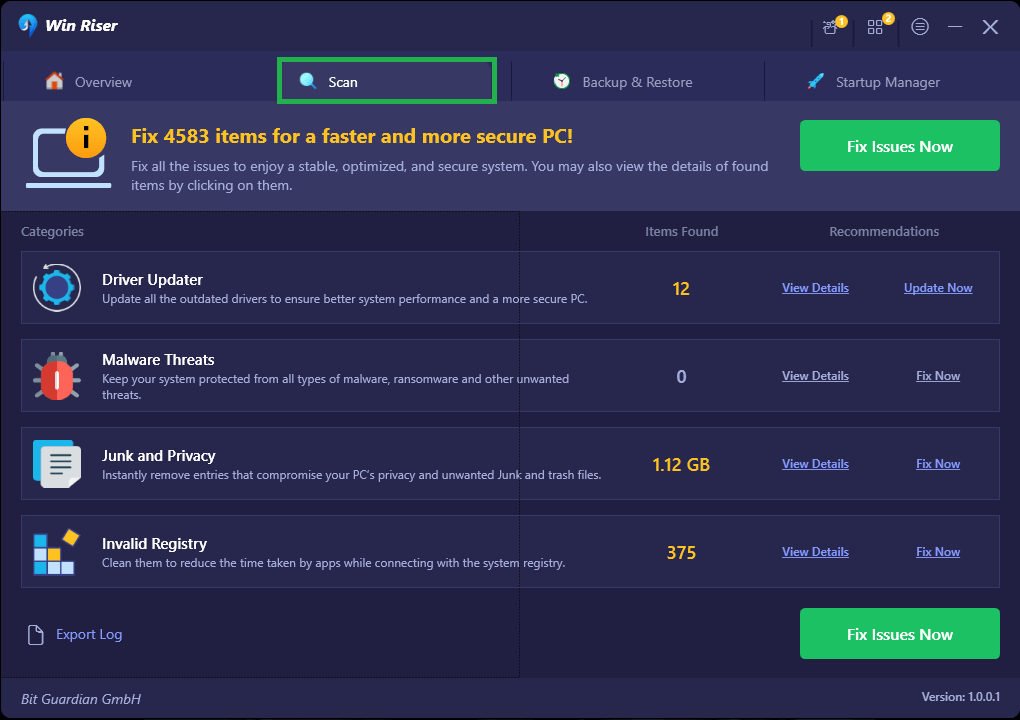
- Review the scan results and utilize the Fix Issues Now button to resolve the identified issues.
After following these steps, reboot the system, so the new driver becomes active
3. Update Realtek Audio Console Using Device Manager
Device Manager is a default utility program in Windows that facilitates downloading the driver for Windows 11/10/8/7. Follow the steps below:
- Use the Windows + X key combination. Thus, you can open the Device Manager.
- Double-click the Sound, video, and game controllers section.
- Use the context menu on the Realtek HD audio driver.
- Click the first option – Update Driver.
- Select Search Automatically for Updated Driver Software.
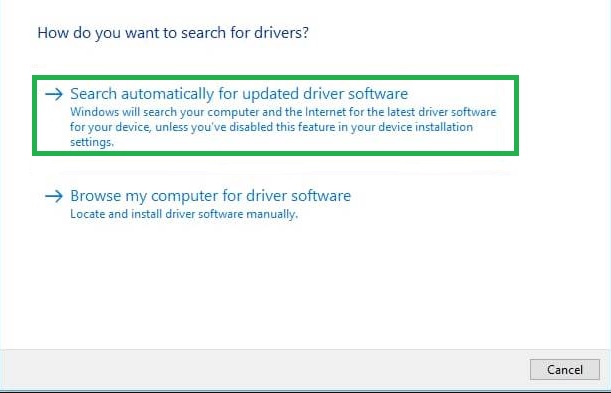
Follow the prompts to install the Realtek audio driver on Windows 10, 11, and older versions. Then, reboot your computer.
Also Read: Nvidia High-Definition Audio Driver Download for Windows 11, 10
4. Utilize Windows Update
Besides delivering new features, improved functionalities, fixes for bugs, and better functionality, Windows Update also takes care of the updates your system needs. Thus, you can download the driver for Windows 11 Windows. Here are the steps:
- Use the Windows + I key combination. As a result, Windows Settings will open.
- Choose Update & Security.
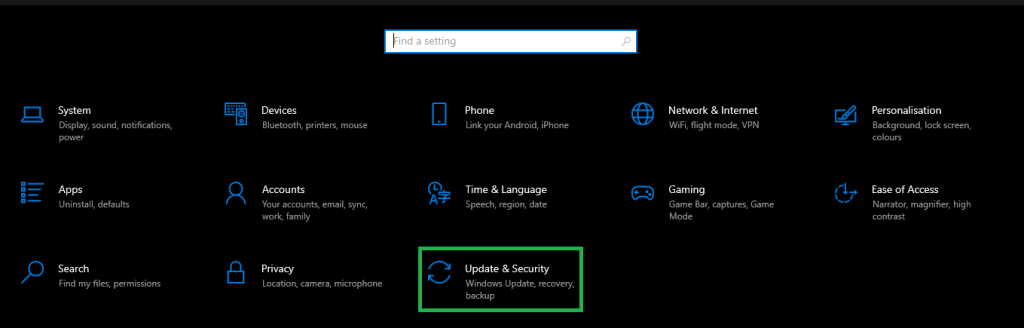
- Navigate and click the Windows Update option.
- Then, use the only available button – Check for Updates.

- Allow Windows to identify the updates. This will also include the Realtek Audio driver. When the process ends, restart your computer. This will allow the updates to apply.
5. Use the Official Website to Get the Most Recent Realtek Driver Update
The producer consistently releases updates for their drivers. So, if you feel like you possess enough technical expertise and time allows, proceed to the manual installation of the drivers from the manufacturer’s official website. Just take these steps to download Realtek Audio Console for Windows 10 smoothly:
- Visit the Realtek page and access the Download section from the left menu.
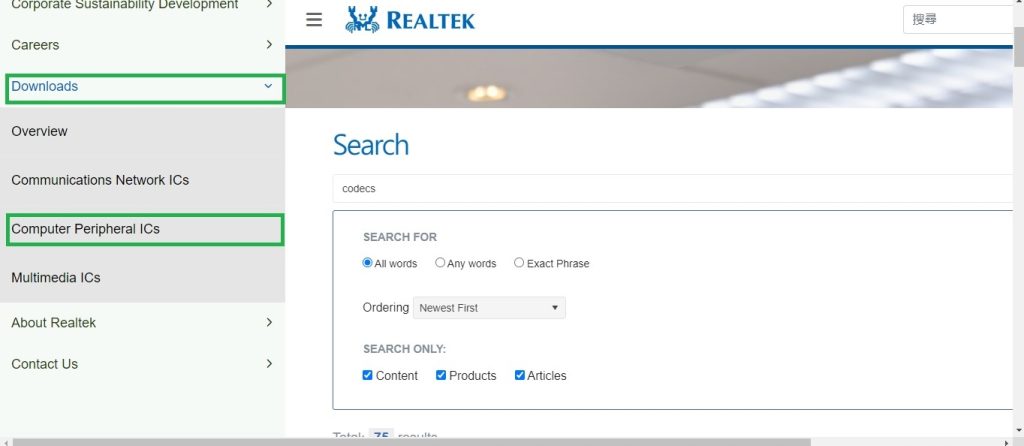
- Choose the Audio Codecs, from the drop-down menu.
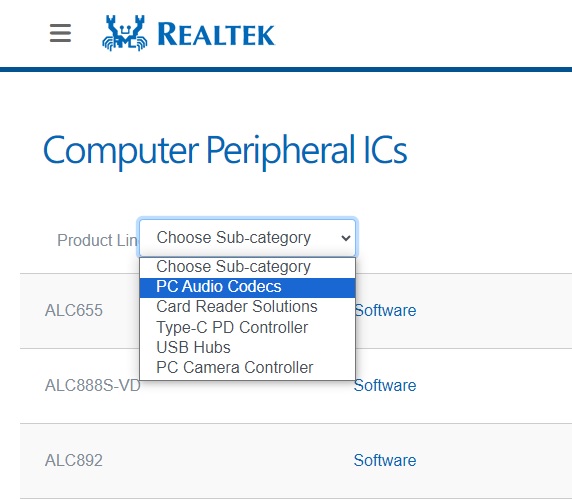
- Download the compatible driver.
- Open Device Manager on your computer, and open the Sound, video, and game controllers option.
- Use the context menu on the Realtek audio console. Then, select Update Driver Software in the context menu.
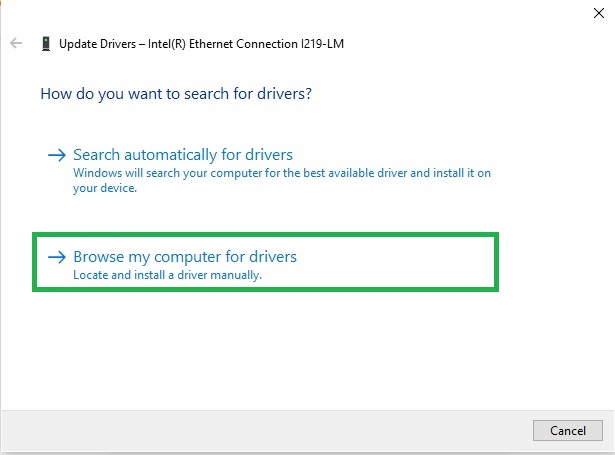
- Click on Browse my computer for driver software.
- Indicate where the downloaded driver file is.
- Follow the prompts to install the file successfully.
After the installation, restart your computer, so that the newly installed drivers to your Windows PC apply.
Common Questions Regarding Realtek Audio Console Download
Explore the frequently asked questions below. After that, the answers can assist you in finding what you want to know, effortlessly.
1. Is the console Necessary?
The Realtek Audio Console enables users to adjust the effects of the audio device and also manage various settings related to audio devices. It plays a pivotal role in handling DTS sound, Dolby, and surround sound systems, making it essential for ensuring the proper functionality of audio/sound devices.
2. What Sets the Console Apart from the Realtek HD Audio Manager?
The driver facilitates high-definition audio playback, whereas the Realtek HD Audio Manager is a comprehensive software specifically designed for Windows PCs. It manages both the audio recording and the playback functions efficiently.
3. How Can I Restore it?
To retrieve your Realtek Console, start by visiting the official Realtek website. Then, select the High-Definition Audio Codecs (Software) to initiate the download. Follow the prompts to complete the installation process. After that, restart the PC to implement the changes.
4. Should I Uninstall the Realtek Audio Console?
The Realtek Audio Console serves as a driver for the audio/sound devices linked to your computer. While it’s possible to uninstall it and allow Windows to assume complete control, doing so may result in the loss of any unique features and functionalities it provides. Therefore, it’s advisable to retain the installed driver.
5. What are the Ways to Resolve the Issue of Realtek Audio Console Not Connecting to RPC Service?
Outdated drivers represent the primary cause of major Realtek Audio Console connection problems. Thus, the initial step in addressing the Realtek Audio console that cannot connect to the RPC service issue is to update the relevant drivers. To automatically download these updates and other system enhancements, and ensure flowless connections, consider utilizing Bit Driver Updater.
6. Ways to Solve the Issue of Realtek Audio Console Not Opening?
If you’re encountering the problem of the Realtek Audio Console failing to open, even though you updated its driver, the solution lies in reinstalling the Realtek audio console for Windows 11. This approach will restart the console, ensuring optimal functionality.
Also Read: Realtek Wifi Driver (Wireless LAN) Download for Windows 10, 11 PC
Concluding the Realtek Audio Console Not Working in Windows 10, 11
Any of the methods outlined above will help you download, install, or update the Realtek Audio Console on Windows 11, 10, 8.1, 8, or 7.
Thus, you will enjoy a quality experience with your sound system sound.