
Update: It is also solve the problem on Windows 11.
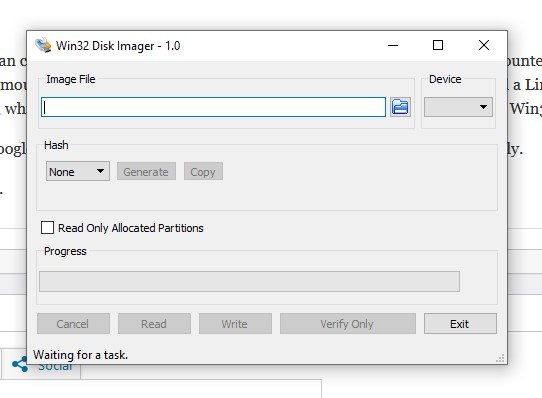
I am trying to burn an ISO file into a USB disk for installation. Most of the time, I am using Win32DiskImager to do the job.
But today, I can not start the Win32diskimager program. I uninstalled it and downloaded a fresh copy from Sourceforge and installed it. Still not working.
I have used it before and it is OK to launch.
So, I did research and found someone who has the same problem as me.
I downloaded Win32DiskImager from SourceForge, as was recommended in some Linux installation instruction (coming from Windows). The installer runs successfully and the program is installed into C:\Program Files (x86) as expected. When launching the program Windows prompts me to accept that this program can make changes, I accept and nothing happens. No service or process launches in Task Manger.
vi kltft
The answer is quite simple.
It turns out that mounted drives can cause issues with Win32DiskImager. In my case Google Drive had mounted itself on the file system. Quitting Google Drive unmounted the drive it had mounted and then Win32DiskImager launched without issue! I also had a Linux ISO mounted (I believe Windows did this automatically after download, which seems odd) and had unmounted that as well before re-launching Win32DiskImager.
So I did the same way, right-click the Google Drive icon at the taskbar, and click quit to stop Google Drive temporarily.
Then, I run Win32DiskImager, it works.
What is Win32 Disk Imager? What to do if this program fails to launch on your computer? If you are struggling with Win32 Disk Imager not opening at the moment, then this guide from MiniTool Solution is perfect for you. Without further ado, let’s jump into it!
What Is Win32 Disk Imager?
Win32 Disk Imager is an open-source and free utility that can write your ISO files into CDs, DVDs, and SD/CF cards. Meanwhile, it also allows you to create backups images of your data and bootable USB flash drive. Once your computer fails to boot due to unknown reasons, you can utilize this bootable drive to rescue your device.
At times, some of you might be bothered by Win32 Disk Imager not opening on Windows 10/11. How to solve this annoying issue? In the following content, we will explore some solutions for you.
How to Fix Win32 Disk Imager Not Opening on Windows 10/11?
Suggestion: Create Bootable Media with MiniTool ShadowMaker
When Win32 Disk Imager is not opening, you can try its alternative – MiniTool ShadowMaker. Like Win32 Disk Imager, it also supports creating a bootable medium for your Windows machine. Moreover, this PC backup software can also create a backup of files, folders, systems, partitions, and disks.
Now, let’s see how to create bootable media with it:
Step 1. Download, install, and launch MiniTool ShadowMaker.
MiniTool ShadowMaker TrialClick to Download100%Clean & Safe
Step 2. In the Tools page, click on Media Builder.
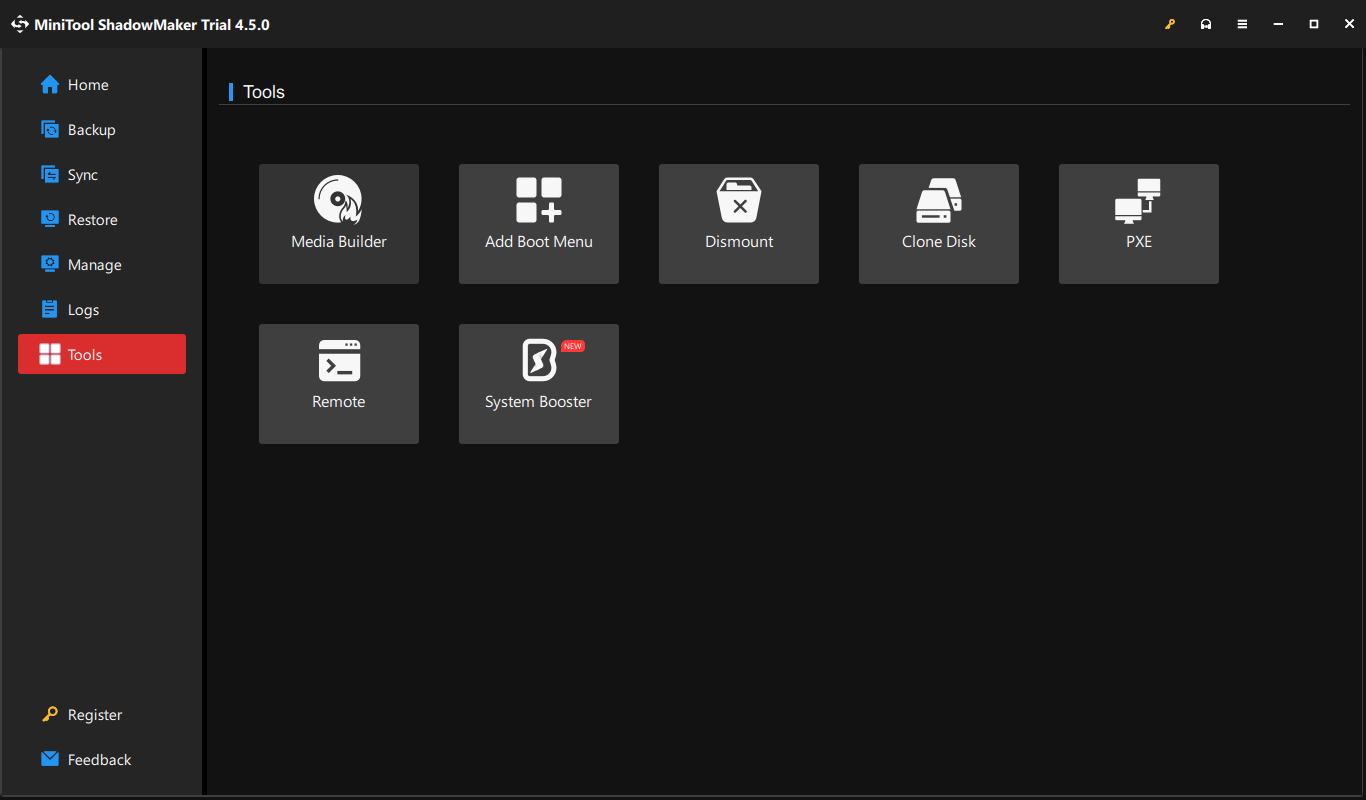
Step 3. Click on WinPE-based media with MiniTool plug-in.
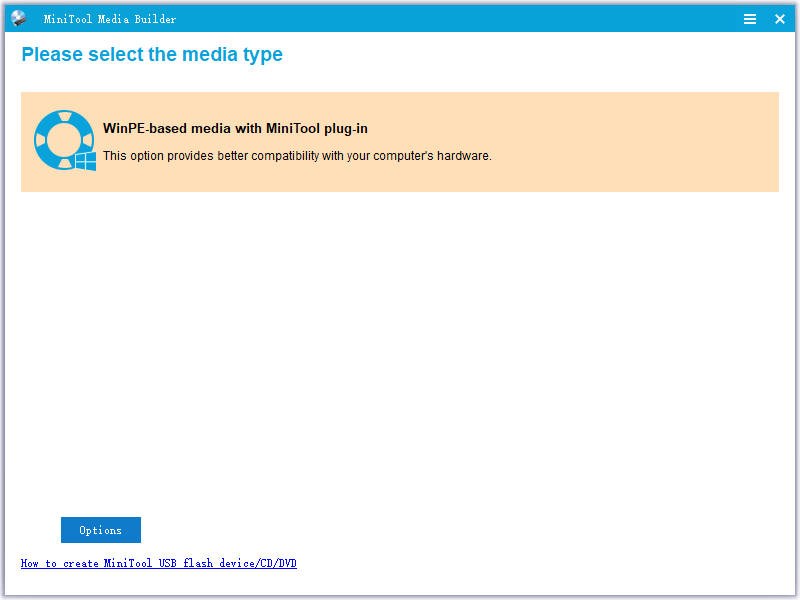
Step 4. MiniTool ShadowMaker supports the 4 types of media destinations below and you can select one option according to your needs.
- ISO File
- USB Flash Disk
- USB Hard Disk
- CD/DVD Writer
Fix 1: Quit Google Drive and Other Conflicted Programs
Some programs or services like Google Drive, pCloud Drive, VeraCrypt, and more might be conflicted with Win32 Disk Imager, so this program might fail to launch. Therefore, disabling these conflicted programs might help to solve Win32 Disk Imager not opening. Here’s how to quit Google Drive:
Step 1. Click on the Google Drive icon from the system tray.
Step 2. Press the gear icon and select Quit from the context menu.
Or, you can go to Task Manager to terminate other conflicted applications:
Step 1. Right-click on taskbar and select Task Manager.
Step 2. In the Processes tab, find other programs like pCloud Drive and more and right-click on them one after another to select End task.
Fix 2: Run Win32 Disk Imager as an Administrator
To run Win32 Disk Imager properly, make sure to grant it with sufficient administrative rights. Here’s how to do it:
Step 1. Locate the executable file of Win32 Disk Imager and right-click on it to choose Properties.
Step 2. In the Compatibility tab, tick Run this program as an administrator.
Step 3. Click on Apply & OK to make the change effective.
Fix 3: Unmount Other Virtual Drives
To ensure there are no conflicts preventing Win32 Disk Imager from starting, it’s a good idea to unmount other unwanted virtual drives. To do so:
Step 1. Press Win + E to open File Explorer.
Step 2. Go to This PC to view all mounted drives.
Step 3. Right-click on any unwanted virtual drive and select Eject.
Step 4. Relaunch Win32 Disk Imager.
Fix 4: Disable Windows Defender Firewall or Antivirus Programs Automatically
Sometimes, Windows Security or Windows Defender Firewall might block some safe programs from launching. To avoid that, you need to disable them temporarily to see if it works. To do so:
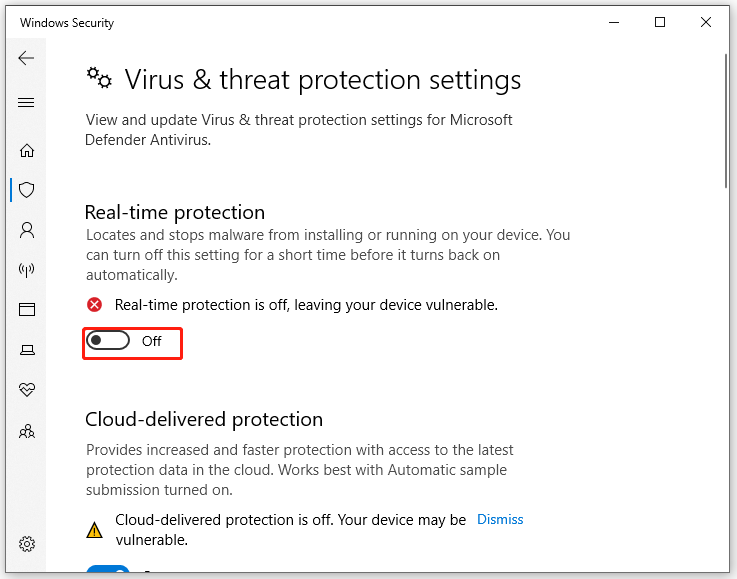
Turn off Windows Defender Real-time Protection
Step 1. Press Win + I to open Windows Settings and go to Update & Security.
Step 2. In the Windows Security tab, click on Virus & threat protections > Manage settings.
Step 3. Toggle off Real-time protection and hit Yes to confirm this action.
Turn off Windows Defender Firewall
Step 1. Open Control Panel.
Step 2. Tap on System and Security > Windows Defender Firewall > Turn Windows Defender Firewall on or off.
Step 3. Tick Turn off Windows Defender Firewall (not recommended) under both Private network settings and Public network settings.
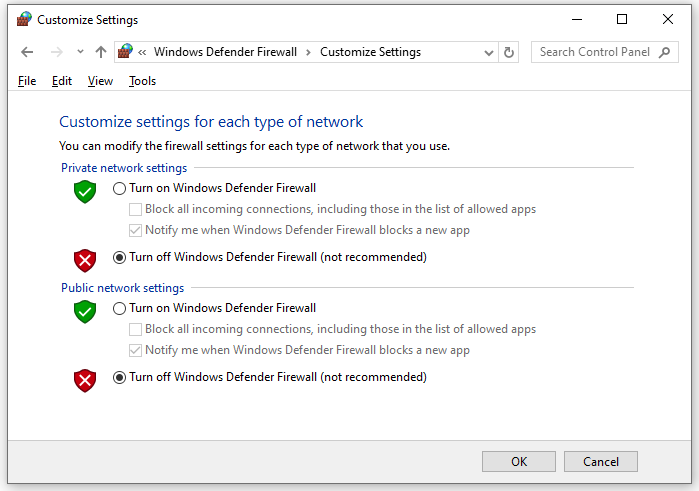
Step 4. Save all the changes you’ve made.
Fix 5: Reinstall Win32 Disk Imager
Some corrupted files might be responsible for Win32 Disk Imager not working. If this is the case, you can consider uninstalling and then reinstalling the program. To do so:
Step 1. Press Win + R to open the Run box.
Step 2. Type appwiz.cpl and hit Enter to launch Programs and Features.
Step 3. Now, you can see a list of programs installed on your computer. Right-click on Win32 Disk Imager and select Uninstall.
Step 4. After uninstallation, go to Win32 Disk Imager’s official website to download and install this program.
Final Words
That’s all for Win32 Disk Imager not opening on Windows PC. More importantly, it’s strongly recommended to try Win32 Disk Imager alternative – MiniTool ShadowMaker to create bootable media rather than spend quite a long time finding out the root cause. We sincerely hope that you can benefit from the paragraphs above!
Readers help support Windows Report. We may get a commission if you buy through our links.
Read our disclosure page to find out how can you help Windows Report sustain the editorial team. Read more
If you’re struggling with Win32 Disk Imager not opening on your Windows system, you’re not alone. This issue is usually due to drives mounting to the system, and especially Google Drive. Don’t worry because we tested the solutions below and they are working.
What do I do if Win32 Disk Imager is not opening?
1. Quit or unmount Google Drive
- Locate the Google Drive icon in the taskbar (usually at the bottom-right corner of the screen).
- Right-click on the Google Drive icon and select Quit from the context menu.
- Try to launch Win32 Disk Imager again.
Unmounting or quitting Google Drive stops it from mounting a virtual drive that interferes with Win32 Disk Imager, allowing the application to launch without issues.
2. Unmount other virtual drives
- Click on the File Explorer icon on the taskbar or press Windows + E to open the app.
- Navigate to This PC to see all mounted drives.
- Identify any virtual drives you don’t need (e.g., ISO files).
- Right-click on each virtual drive and select Eject.
- Try launching Win32 Disk Imager again.
Unmounting these drives ensures that no conflicts prevent Win32 Disk Imager from starting, which can be a common issue especially with ISO files.
3. Use an older version of Win32 Disk Imager
- Go to the Win32 Disk Imager SourceForge page.
- Navigate to the files section and look for an older version, such as v0.9.5.
- Download and install the older version.
- Try launching the application again.
Using an older version can bypass some bugs present in the latest release that might be causing the application to fail to open. If you have an older version than v1.0.0, go straight to the official download page and get the latest one.
4. Check for conflicting applications
- Press Ctrl + Shift + Esc to open Task Manager.
- Go to the Processes tab.
- Look for any applications or services that could be conflicting (e.g., VeraCrypt, pCloud Drive).
- Select the conflicting application and click End Task.
- Try launching Win32 Disk Imager again.
Ending conflicting tasks can help to ensure that no other application is causing the issue, allowing Win32 Disk Imager to open successfully.
5. Run Win32 Disk Imager with administrative privileges
- Right-click on the Win32 Disk Imager shortcut or executable file.
- Select Run as administrator from the context menu.
- Confirm any UAC prompts that appear.
Running the application with administrative privileges can sometimes resolve issues related to permissions and allow the application to open correctly.
6. Reinstall Win32 Disk Imager
- Press Windows + R to open the Run dialog.
- Type appwiz.cpl and press Enter to open the Programs and Features window.
- Locate Win32 Disk Imager in the list of installed programs.
- Right-click on it and select Uninstall.
- Download the latest version from the official page.
- Install the application again.
- Try launching Win32 Disk Imager.
Reinstalling the application ensures that you have a fresh installation free from corrupt files, which can resolve the issue of the application not opening.
7. Disable antivirus or firewall temporarily
- Right-click on the antivirus icon in the taskbar.
- Select Disable or Pause protection (this varies depending on the antivirus software).
- Try launching Win32 Disk Imager again.
Disabling the antivirus or firewall temporarily can help determine if they are blocking the application from launching. Always remember to re-enable protection afterwards.
Following these steps should help you resolve the issue of Win32 Disk Imager not opening. Each solution addresses a different potential cause, ensuring that you can troubleshoot effectively and get the application running.
You may also refer to our guide on what to do when Windows 11 apps are not opening for more solutions and information. If you get the This app can’t run on your PC error, the highlighted guide will provide the needed fixes. If all else fails, it might be time to look into a Win32 Disk Imager alternative.
For any other suggestions or questions, hit the comments section below and let us know.
Claudiu Andone
Windows Toubleshooting Expert
Oldtimer in the tech and science press, Claudiu is focused on whatever comes new from Microsoft.
His abrupt interest in computers started when he saw the first Home Computer as a kid. However, his passion for Windows and everything related became obvious when he became a sys admin in a computer science high school.
With 14 years of experience in writing about everything there is to know about science and technology, Claudiu also likes rock music, chilling in the garden, and Star Wars. May the force be with you, always!
Win32diskimager latest version 1.0 downloaded and installs just fine. However when launching the executable it never comes up. No splash screen no nothing. Not sure where to look for it. I have several USB and SD cards plugged in. I can write a file just fine using the etcher program so I know my PC can see and write the retropi images just fine with that but love all the features of this program.
brand of micro sd card — SanDisk Ultra 32GB HC 1
image trying to write is a raspberry pi of course i never get that far.
I did find this in the event log
Log Name: Application
Source: Application Error
Date: 4/20/2017 11:04:18 PM
Event ID: 1000
Task Category: (100)
Level: Error
Keywords: Classic
User: N/A
Computer: Bell-Media
Description:
Faulting application name: Win32DiskImager
Faulting module name: AcLayers.DLL, version: 10.0.14393.953, time stamp: 0x58ba5d8a
Exception code: 0xc00000fd
Fault offset: 0x0001923e
Faulting process id: 0x2374
Faulting application start time: 0x01d2ba65189cdfa6
Faulting application path: C:\Program Files (x86)\ImageWrit
Faulting module path: C:\WINDOWS\
Report Id: 8d04eea5-
Faulting package full name:
Faulting package-relative application ID:
Event Xml:
<Event xmlns=»http://
<System>
<Provider Name=»Application Error» />
<EventID Qualifiers=
<Level>
<Task>
<Keywords>
<TimeCreated SystemTime=
<EventRecor
<Channel>
<Computer>
<Security />
</System>
<EventData>
<Data>
<Data>
<Data>
<Data>
<Data>
<Data>
<Data>
<Data>
<Data>
<Data>
<Data>
<Data>
<Data>
<Data>
</Data>
<Data>
</Data>
</EventData>
</Event>
as well as this entry
Log Name: Application
Source: Windows Error Reporting
Date: 4/20/2017 11:04:19 PM
Event ID: 1001
Task Category: None
Level: Information
Keywords: Classic
User: N/A
Computer: Bell-Media
Description:
Fault bucket 108794295219, type 1
Event Name: APPCRASH
Response: Not available
Cab Id: 0
Problem signature:
P1: Win32DiskImager.exe
P2: 1.0.0.0
P3: 58bdb94c
P4: AcLayers.DLL
P5: 10.0.14393.953
P6: 58ba5d8a
P7: c00000fd
P8: 0001923e
P9:
P10:
Attached files:
\\?\C:\
These files may be available here:
C:\ProgramData\
Analysis symbol:
Rechecking for solution: 0
Report Id: 8d04eea5-
Report Status: 0
Hashed bucket: 4fd3c18dcac4d41
Event Xml:
<Event xmlns=»http://
<System>
<Provider Name=»Windows Error Reporting» />
<EventID Qualifiers=
<Level>
<Task>0</Task>
<Keywords>
<TimeCreated SystemTime=
<EventRecor
<Channel>
<Computer>
<Security />
</System>
<EventData>
<Data>
<Data>1</Data>
<Data>
<Data>Not available</Data>
<Data>0</Data>
<Data>
<Data>
<Data>
<Data>
<Data>
<Data>
<Data>
<Data>
<Data>
</Data>
<Data>
</Data>
<Data>
\\?\C:\
<Data>
<Data>
</Data>
<Data>0</Data>
<Data>
<Data>0</Data>
<Data>
</EventData>
</Event>
Problem
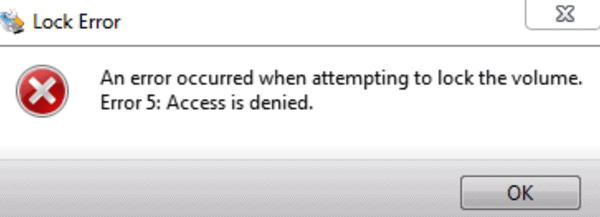
I was building a new Retropie image for my RaspberryPi this week when I hit a hurdle. I attempted to write the RetroPie image (.img) onto the SD Card via Win32 Disk Imager using Microsoft Windows 10 when the following error occurred:
An error occurred when attempting to lock the volume. Error 5: Access is denied.
The SD card looked fine in Windows, I could see it and write to it from within Windows file explorer. I also tried the following which did not work:
- Formatting the SD Card as NTFS
- Formatting the SD card as FAT32
- Using an alternate SD card reader
I come across a couple of solutions and outlined them below, solution number 2 worked for me.
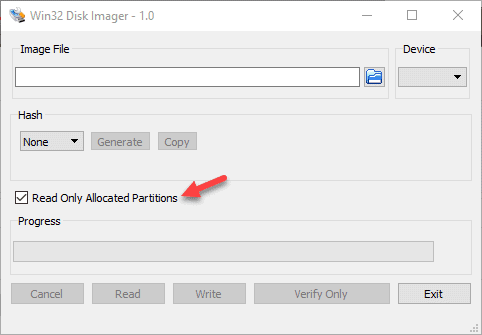
Solution 1
The first solution is a simple one and some people have reported that the problem was fixed for them by selecting the “Read only allocated partitions” checkbox within Win32 Disk Imager:
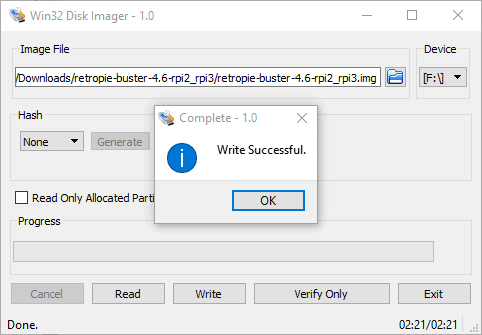
Solution 2
The solution that worked for me was to use a program called SD Memory Card Formatter. Once I formatted the card using this tool, Win32 Disk Imager worked fine and committed the Retropie image to the SD card.
I’ve outlined the steps below:
- Download SD Memory Card Formatter from here.
- Find and Open SD Memory Card Formatter
- It should default to your SD Card – confirm that it’s the correct card if you have multiple readers connected to your machine.
- Update the formatting options to “Overwrite format“
- Set the Volume label to any name you like
- Click Format
Depending on the size of your SD Card this process may take a while. I had a Class 10 32Gb card and it took just on 15 minutes to complete.
Once the format is complete, re-open Win32 Disk Imager and try copy the image again – it should work this time!
Feel free to post a comment below if you have any issues – Good Luck.
Recent Posts