
In our increasingly connected world, a stable and fast WiFi connection is essential for both work and leisure. However, many users are unaware that they can optimize their WiFi experience by altering the WiFi channel their router operates on. In this comprehensive guide, we will walk you through the process of changing the WiFi channel on Windows 10, covering everything from understanding WiFi channels to step-by-step instructions and troubleshooting tips.
Understanding WiFi Channels
WiFi channels are essentially different frequencies that your router uses to communicate with your devices. Depending on the type of WiFi network you are using—namely, 2.4 GHz or 5 GHz—there are specific channels available.
2.4 GHz Channels
The 2.4 GHz band is known for its wider coverage but typically experiences more interference. It consists of 14 channels in total, but only three (1, 6, and 11) are non-overlapping in the United States. This means that if your neighbors are using a WiFi channel that is overlapping with yours, your connection may slow down significantly.
5 GHz Channels
On the other hand, the 5 GHz band offers faster speeds and less interference but a shorter range. There are more non-overlapping channels available in this band, providing better options for users looking to optimize their networks.
Why Change Your WiFi Channel?
Changing your WiFi channel can help improve your internet connection significantly. Here are some reasons you might consider doing this:
- Reduce Interference: If multiple routers are operating on the same channel, interference can occur, leading to a slow and unreliable connection.
- Enhance Speed: A less congested channel can lead to better speeds, especially in densely populated areas.
How to Identify Your Current WiFi Channel
Before we dive into changing your WiFi channel, it’s essential to know which channel your current network is using. Windows 10 provides a straightforward way of determining your current channel.
Using Windows Command Prompt
- Press the Windows + R keys to open the Run dialog.
- Type cmd and hit Enter.
- In the Command Prompt window, type the following command and press Enter:
netsh wlan show interfaces
- Look for your WiFi network’s name (SSID). Under it, you will find details about the network, including the currently active channel.
Steps to Change Your WiFi Channel on Windows 10
Changing your WiFi channel is primarily done through your router’s settings rather than directly through your Windows 10 system. Here’s a detailed guide on how to do that:
Step 1: Accessing Your Router
To begin, you’ll need to access your router’s web interface.
- Open a web browser on your Windows 10 device.
- In the address bar, type your router’s IP address (this is commonly 192.168.1.1 or 192.168.0.1, but you can check your router for specifics).
- Press Enter.
Step 2: Logging In
You will be prompted to enter a username and password. If you haven’t changed these from their defaults, they are usually printed on a sticker on your router or mentioned in its manual. Common combinations include:
- Username: **admin** / Password: **admin**
- Username: **admin** / Password: **password**
Always remember to change these login details once you have access to enhance security.
Step 3: Locating the Wireless Settings
Once you’re logged in, navigate to the Wireless Settings or WiFi Settings section of your router’s interface. This can vary depending on the router brand and model.
Step 4: Changing the WiFi Channel
- Look for the option labeled Channel.
- You may see a dropdown menu that lets you select from the available channels. If you’re on a 2.4 GHz network, it’s often advisable to select one of the non-overlapping channels (1, 6, or 11).
- For 5 GHz networks, feel free to choose any available channel as long as it’s less congested.
Step 5: Saving Changes
After you’ve selected your desired channel, make sure to save or apply the changes before exiting the router’s interface. Your router may reboot, which can take a couple of minutes.
Checking Your WiFi Connection
Once you’ve changed the WiFi channel, it’s important to check whether your changes have positively impacted your connection.
Using Windows Network Settings
To check your connection:
- Click on the Start Menu.
- Go to Settings > Network & Internet > Status.
- Click on Network and Sharing Center.
- Under your network connection, click on your WiFi network name.
- In the WiFi Status window, click Wireless Properties.
- Go to the Security tab where you can check the status of your connection.
Troubleshooting Common Issues
While changing WiFi channels usually leads to improved performance, you may encounter some issues. Below are some common problems and their solutions.
1. Connection Drops
If you find that your connection drops frequently after changing channels, revert to the previous channel or try a different one.
2. Slow Speeds
If your speeds aren’t consistently better, it may be a sign that you should experiment with other channels. Use apps designed to analyze channel congestion in your area, such as NetSpot or inSSIDer.
Final Thoughts
Changing your WiFi channel on Windows 10 is a simple yet effective way to enhance your internet speed and stability. By understanding how channels work, identifying your current channel, and following the steps to change it, you’re taking significant steps toward a better online experience.
Whether you’re streaming, gaming, or video conferencing, a little change can go a long way. Don’t hesitate to revisit your settings periodically, especially if you notice a dip in performance, as WiFi environments can change over time.
By investing a few minutes to find and set the optimal channel, you can drastically improve the quality of your WiFi connection. Enjoy the seamless and speedy internet that comes with a well-optimized network!
What is a WiFi channel and why is it important?
A WiFi channel is a specific frequency band within the wireless spectrum that devices use to communicate. In the 2.4 GHz band, there are 11 to 14 channels available, depending on the country, while the 5 GHz band has more channels. Choosing the right channel is crucial because it can reduce interference from other devices and improve overall network performance.
When too many devices are operating on the same channel, it can lead to congestion, resulting in slower speeds and dropped connections. By selecting a less crowded channel based on your environment, you can enhance your internet experience, making it faster and more reliable for streaming, gaming, and browsing activities.
How do I find out which WiFi channel my network is using?
To find out which WiFi channel your network is using, you can access your router’s settings. Open a web browser and enter the router’s IP address to access the administration panel. Typically, the IP address can be 192.168.1.1 or 192.168.0.1. Once logged in, look for the wireless settings section, where you will find your current channel listed.
Alternatively, you can use network analysis tools. Software such as inSSIDer or WiFi Analyzer offers detailed information about all nearby networks, including their channels. This helps you identify both your channel and the channels used by nearby networks, allowing you to choose a less congested option easily.
How can I change the WiFi channel on Windows 10?
Changing the WiFi channel is primarily done through your router settings rather than directly in Windows 10. Start by accessing your router’s configuration page as mentioned earlier. Navigate to the wireless settings section, look for the option that displays the current channel, and select a different channel from the dropdown menu.
After you choose a new channel, save the settings and restart your router to apply the changes. Once the router boots back up, connect your Windows 10 device to the network, and you should notice improved performance if the new channel reduces interference.
What are the best channels to use for 2.4 GHz and 5 GHz bands?
For the 2.4 GHz band, the best channels to use are 1, 6, and 11. These channels are spaced out enough to minimize interference with each other. By choosing one of these channels, you’re more likely to experience a stable connection and faster speeds, especially in densely populated areas where many networks overlap.
For the 5 GHz band, you have more options as there are more channels available. Channels like 36, 40, 44, and 48 are commonly recommended. It’s essential to experiment with various channels, as the best one can depend on nearby networks and other electronic devices that might contribute to interference.
Does changing the WiFi channel improve my internet speed?
Changing the WiFi channel can significantly improve your internet speed, especially if you are experiencing slow connections due to channel interference. If multiple nearby networks operate on the same channel, it can create congestion, thereby reducing the available bandwidth for each network. Switching to an alternate, less crowded channel can help free up bandwidth and enhance your overall speed and connection stability.
However, it’s essential to remember that changing the WiFi channel is just one factor that affects internet speed. Devices’ range, the router’s capabilities, and the internet service plan also play crucial roles. Thus, while changing the channel can yield improvements, it’s not a guaranteed solution if other underlying issues exist.
Can I manually set a WiFi channel on my router?
Yes, you can manually set the WiFi channel on your router. This adjustment is typically found in the wireless settings section of your router’s configuration page. Once you access this section, you can select the desired channel from a dropdown menu, allowing you total control over your network’s performance.
It’s a good practice to periodically check your channel settings, especially in areas where your WiFi might overlap with a large number of other networks. Regular adjustments based on real-time assessment with tools can help ensure you maintain optimal performance as surrounding network environments change.
What tools can help me find the best WiFi channel?
Several tools can help identify the best WiFi channel for your network by analyzing nearby wireless networks. Applications like WiFi Analyzer for Android or inSSIDer for Windows provide real-time information on the channels being used by other routers, signal strengths, and network configurations. These tools can help you visualize channel congestion and select a less crowded channel.
Additionally, your router’s built-in features may include a channel scan option, automatically recommending the best channel based on the current network conditions. Utilizing a combination of these tools can guide you in making informed decisions to optimize your WiFi channel settings and enhance your internet experience.
What if I still experience slow speeds after changing my WiFi channel?
If you continue to face slow speeds even after changing your WiFi channel, it may indicate that other factors are at play. Consider checking your internet service plan to ensure you are receiving the speeds you are paying for. Additionally, review the placement of your router; ideally, it should be positioned centrally in your home and away from physical obstructions or electronic devices that may cause interference.
Another possibility to explore is the number of connected devices on your network. Too many devices using bandwidth simultaneously can slow down your connection. Identifying and disconnecting any unnecessary devices or upgrading your router to a newer model equipped with advanced technology (like WiFi 6) may also help alleviate speed issues.
In order to change the WiFi channel on Windows 10, you will need to follow these steps:
1. Go to the Start menu and search for “Network and Sharing Center”. Click on it to open the window.
2. Select “Change adapter settings” from the left side of your screen.
3. Right-click on your WiFi connection and select “Properties” from the dropdown list.
4. Select “Configure” from the bottom of the window that opens up, then click on the Advanced tab at the top of this new window that appears.
5. Look for a setting named ‘Preferred Channel Width’ or something similar; this is where you can change your WiFi channel width (20MHz, 40MHz). Make sure it is set to 20MHz if you want better performance or reliability in congested areas with many networks running in parallel — otherwise leave it as it is if you want maximum speed but may experience interference from other networks nearby due to overlapping channels .
6. Next, look for a setting called Country Code or Region Code (depending on your network card) and make sure this is set correctly according to your geographic location; failing to do so may cause interference problems with some routers in certain countries/regions due to different regulatory requirements for wireless transmissions across regions/countries in various territories around the world .
7 Click OK twice and restart your computer for changes take effect properly — after restarting, check if everything works as expected by connecting back again using WiFi 8 If not satisfied with current settings then try switching between different channels available within range; this can be done by repeating step 5 above while making sure preferred channel width remains unchanged at all times . Additionally, always make sure that any other devices connected via wireless are also configured correctly according their own manuals before attempting any changes with main router configuration – sometimes outdated firmware versions or incorrect driver installation may cause unexpected compatibility issues even though basic settings seem correct at first glance .
How do I change my Wi-Fi channel on Windows 10?
How do I change my Wi-Fi channel?
Changing your Wi-Fi channel is a great way to improve the speed and performance of your network. Here are the steps you need to take:
1. Access your router’s settings page. You can do this by entering the IP address of the router into your web browser’s address bar. The IP address will be listed in the documentation that came with your router, or you can search online for it using the make and model number of your router.
2. Once on the settings page, navigate to where you can adjust the Wi-Fi channel settings (this may be under “Wireless” or “Wi-Fi”).
3. Choose a different channel than what is currently selected (ideally one that is not used by other nearby networks). Be sure to save any changes before exiting out of this page.
4. Test out how well your connection works on this new channel and repeat these steps if necessary until you find an optimal setting.
I hope this advice helps!
How do I see Wi-Fi channels on Windows 10?
To see Wi-Fi channels on Windows 10, you can use the Network Status window. Here are the steps:
1. Open Settings (Windows key + I)
2. Click on Network & Internet
3. Select Wi-Fi from the left pane
4. In the right pane, scroll down to Related Settings and click on Change Adapter Options
5. Right-click your active network adapter and select Status from the menu
6. In the Network Status window, select Wireless Properties
7. Go to the Advanced tab and select your preferred channel from the list under Preferred Networks
8. Click OK and then Apply
9. Restart your computer for changes to take effect
10. To verify that you are connected to a specific channel, open Command Prompt (Windows key+X) and type “netsh wlan show networks mode=bssid” and press enter
It is recommended to set your wireless connection’s channel manually in order to get better performance out of it as well as avoid possible interference with other nearby devices using conflicting channels or signals in a crowded area/network environment like an office or apartment complex with lots of people using their own routers or access points at once etc..
How do I change my Windows 10 from 2.4 GHz to 5GHz?
To change your Windows 10 device from 2.4 GHz to 5GHz, you will first need to make sure that your hardware supports 5GHz Wi-Fi. You can check this in your device’s manual or by looking up the specifications online.
Once you have verified that your hardware is compatible, follow these steps:
1. Open the Start Menu and type «Network & Internet Settings» into the search bar and select it from the list of results.
2. Select Wi-Fi from the left side menu, then click on Advanced Options at the bottom of the window.
3. Under “Wireless Mode”, select “5 GHz” and save your settings by clicking OK at the bottom of the window.
You should now be connected to a 5GHz network! If you are still having trouble connecting, contact a technical support representative for further assistance.
How do I connect to 2.4 GHz instead of 5GHz?
If you need to connect to a 2.4 GHz network instead of a 5GHz network, the first step is to verify that the device you are trying to connect with supports 2.4GHz connections. If it does, then you will need to access your wireless router’s settings page and look for an option that allows you to switch between 2.4GHz and 5Ghz networks. Once you have switched the setting, save your changes and attempt to reconnect your device with the new network connection settings. If the issue persists after making this change, please contact your Internet Service Provider for additional assistance in troubleshooting your connection issue.
What channel is best for 2.4 GHz WiFi?
The best channel for 2.4GHz WiFi is typically Channel 1, 6, or 11. To determine the best channel for your network, you can use a WiFi analyzer app to scan the area and see what channels are being used by nearby networks and which ones have the least interference. Additionally, you should also refer to your router’s documentation or manufacturer website for specific setup instructions and recommendations on the best channel for your particular router model.
Is 2.4 GHz better than 5GHz?
It depends on the situation. 2.4GHz is a longer range frequency than 5GHz, meaning it can travel farther distances with fewer obstructions in the way. However, 5GHz has much faster speeds and less interference from other wireless networks and devices. It is best to consider your needs and environment before making a decision about which frequency to use for your network connection. For instance, if you need fast speeds and do not have many obstacles in the way, then 5GHz may be better for you. On the other hand, if you have a lot of interference or need to cover large distances with few obstacles, then 2.4GHz may be more appropriate for your situation.
Why can’t I change my WiFi channel?
It is possible that you may not be able to change your WiFi channel if the router settings are locked or if the router does not allow for manual configuration. To determine whether you can change your WiFi channel, please try the following steps:
1. Log into your router settings by typing your IP address into a browser window.
2. Find the Wireless section of the menu and look for a setting for selecting a channel or frequency band.
3. If there is an option to select a different WiFi channel, make sure to save any changes before exiting out of the menu.
4. If there is no option to select a different WiFi channel, then it may not be possible to change it without upgrading or replacing your current router with one that allows manual configuration options.
Changing the Wi-Fi channel on Windows 10 can help improve your internet connection, especially if you’re experiencing lag or interference from other devices. You can do this by accessing your router’s settings through a web browser and adjusting the channel settings. The process is straightforward and can be completed in just a few minutes.
Changing the Wi-Fi channel on Windows 10 involves accessing your router’s web interface. This guide will take you through each step of the process, ensuring you know exactly what to do.
Step 1: Open a Web Browser
Navigate to your favorite web browser and open it.
Your router’s settings can only be accessed through a web browser, so this is the first step. Whether you use Chrome, Firefox, Edge, or another browser, it doesn’t matter.
Step 2: Enter Router IP Address
Type your router’s IP address into the address bar and press Enter.
Router IP addresses are usually something like 192.168.1.1 or 192.168.0.1. You can find this information in your router’s manual or on a label on the router itself.
Step 3: Log In to Router Settings
Enter your router’s username and password.
If you haven’t changed the default login details, they should be in the manual or on the router. If you have changed them and can’t remember, you might need to reset the router.
Step 4: Find Wireless Settings
Navigate to the wireless settings section.
This section is often labeled as «Wireless» or «Wi-Fi Settings.» Here, you can adjust various settings related to your Wi-Fi network.
Step 5: Change the Wi-Fi Channel
Select a new Wi-Fi channel from the list of available channels.
Most routers will have an option to change the channel. Pick a channel that is less crowded. Channels 1, 6, and 11 are usually good choices because they don’t overlap with each other.
Step 6: Save Your Settings
Click «Save» or «Apply» to save the new settings.
After you make your changes, make sure to save them. The router might restart, so you may lose internet connection briefly.
Once you’ve completed these steps, your router will switch to the new Wi-Fi channel. This can help improve your Wi-Fi performance, reducing lag and interference.
Tips for Changing Wi-Fi Channel on Windows 10
- Use a Wi-Fi analyzer tool to see which channels are the least crowded.
- Make sure to choose a non-overlapping channel, such as 1, 6, or 11.
- If your router supports it, consider switching to the 5GHz band for less interference.
- Regularly check your Wi-Fi performance to see if changing the channel has made a difference.
- If you’re still having issues, consider upgrading your router or contacting your ISP.
Frequently Asked Questions
How do I find my router’s IP address?
You can find your router’s IP address by opening Command Prompt and typing «ipconfig.» Look for the «Default Gateway» under your network connection details.
What if I forget my router’s login information?
If you’ve forgotten your router’s login information, you might need to reset the router to its factory settings. This will reset the username and password to default.
Why should I change my Wi-Fi channel?
Changing your Wi-Fi channel can reduce interference from other nearby networks and devices, leading to better performance and fewer connection issues.
Can I change the Wi-Fi channel on my router using my phone?
Yes, you can access your router’s settings through a web browser on your phone. The steps are the same as on a computer.
What are the best Wi-Fi channels to use?
Channels 1, 6, and 11 are generally the best options because they don’t overlap with each other.
Summary
- Open a web browser
- Enter router IP address
- Log in to router settings
- Find wireless settings
- Change the Wi-Fi channel
- Save your settings
Conclusion
Changing the Wi-Fi channel on your Windows 10 device can greatly enhance your internet experience. By following these steps, you can reduce interference and improve overall performance. If you’re still experiencing issues, consider using additional tools like Wi-Fi analyzers or upgrading your hardware. Keeping your network settings optimized is key to a smooth, fast, and reliable Wi-Fi connection. Try out these steps today and see the difference it makes in your Wi-Fi performance!
Matt Jacobs has been working as an IT consultant for small businesses since receiving his Master’s degree in 2003. While he still does some consulting work, his primary focus now is on creating technology support content for SupportYourTech.com.
His work can be found on many websites and focuses on topics such as Microsoft Office, Apple devices, Android devices, Photoshop, and more.
Changing the Wi-Fi channel in Windows 10 can help improve your internet speed and reduce interference from other networks. Here’s how to do it: First, access your router’s settings through a web browser and log in. Next, navigate to the wireless settings section, locate the channel settings, and select a new channel. Save your changes and restart your router. You’ve successfully changed your Wi-Fi channel!
Changing the Wi-Fi channel can help reduce interference and improve connection speed. Follow these simple steps to change your Wi-Fi channel through your router’s settings.
Step 1: Open Your Web Browser
First, open your web browser. This can be any browser you prefer, such as Chrome, Firefox, or Edge.
Step 2: Enter Router’s IP Address
Type your router’s IP address into the browser’s address bar and press Enter. Common IP addresses include 192.168.0.1 or 192.168.1.1. If you’re unsure, check the router’s manual or the label on the router itself.
Step 3: Log In to Your Router
Enter your username and password to log in. Default credentials are often «admin» for both fields, but if you’ve changed them, use your custom credentials.
Step 4: Navigate to Wireless Settings
Once logged in, find the wireless settings section. This is often labeled as «Wireless,» «Wi-Fi Settings,» or something similar.
Step 5: Select a New Channel
In the wireless settings, look for the channel settings. It might be set to «Auto» by default. Select a new channel from the available list, preferably one that is less congested.
Step 6: Save Changes and Restart
Save your changes and restart your router. This will apply the new channel settings.
After completing these steps, your router will operate on the new Wi-Fi channel, potentially improving your internet speed and reducing interference from other networks.
Tips for Changing Wi-Fi Channel in Windows 10
- Use a Wi-Fi Analyzer Tool: Before changing the channel, use a Wi-Fi analyzer tool to identify the least congested channel.
- Choose Channels 1, 6, or 11: On the 2.4 GHz band, channels 1, 6, and 11 are typically the best choices as they don’t overlap with other channels.
- Check for Interference: Other devices like microwaves and cordless phones can cause interference. Keep your router away from these devices.
- Update Router Firmware: Ensure your router firmware is up to date to take advantage of the latest performance improvements and security features.
- Restart Regularly: Restart your router periodically to maintain optimal performance.
Frequently Asked Questions
Why should I change my Wi-Fi channel?
Changing your Wi-Fi channel can reduce interference from other networks and improve your internet speed.
What is the best Wi-Fi channel to use?
For the 2.4 GHz band, channels 1, 6, and 11 are generally the best because they don’t overlap with each other.
How do I find my router’s IP address?
You can find your router’s IP address by checking the label on the router or looking it up in your network settings.
What if I can’t log in to my router?
If you can’t log in, you might need to reset your router to factory settings, but this will erase custom settings.
Do I need to change the channel on both 2.4 GHz and 5 GHz bands?
Yes, if your router supports dual-band, you should consider adjusting channels on both bands for optimal performance.
Summary
- Open your web browser.
- Enter router’s IP address.
- Log in to your router.
- Navigate to wireless settings.
- Select a new channel.
- Save changes and restart.
Conclusion
Changing your Wi-Fi channel in Windows 10 can be a game-changer when it comes to improving your internet connection. By following the simple steps outlined above, you can reduce interference and enjoy faster speeds. Don’t forget to use a Wi-Fi analyzer tool to choose the best channel and keep your router away from interference-causing devices. Regularly updating your router’s firmware and restarting it can also help maintain peak performance. If you run into any issues, consult your router’s manual or manufacturer for additional support. Happy surfing!
Kermit Matthews is a freelance writer based in Philadelphia, Pennsylvania with more than a decade of experience writing technology guides. He has a Bachelor’s and Master’s degree in Computer Science and has spent much of his professional career in IT management.
He specializes in writing content about iPhones, Android devices, Microsoft Office, and many other popular applications and devices.
Read his full bio here.
Are you having trouble with the internet speed as your Wi-Fi has slowed down considerably in recent times? Well, it can be for many reasons, and the selection of the wrong Wi-Fi channel is one of them. I know most probably you did not select any channels ever but your router does it automatically by default. Changing the Wi-Fi channel may improve internet speed to a great extent and you should give it a shot. How to do it? Follow this post and you will learn how you can easily change your Wi-Fi channel in Windows 10.

You may have a question – how a wrong Wi-Fi channel can have a bad impact on producing slow internet speed. If the same Wi-Fi channel is used by a couple of neighbors of yours, then data flow can be interfered with and overlapped with each other resulting in slower internet speed on both your and your neighbors’ routers. Thus, you would want to change the current Wi-Fi channel. The following screenshots are provided here for Windows 10 although users of the other versions of Windows can follow the process with a bit of tweaking.
Step 1: Right-click on the Windows icon and select the ‘Command Prompt’ tool. If you do not find it here, search for it on the Windows search bar and tap on it.

Step 2: On the command prompt box, type in ‘ipconfig’ and hit the enter button.
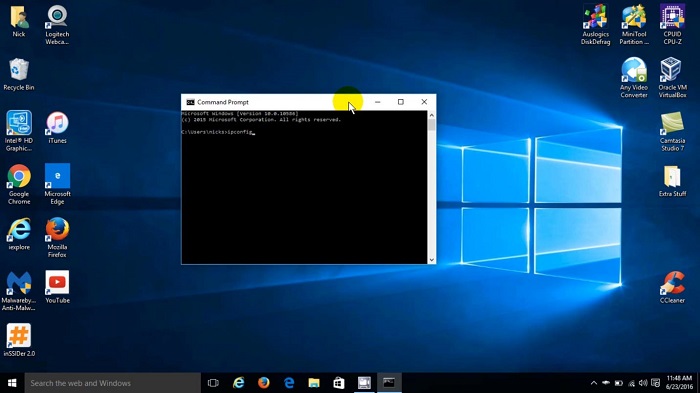
Step 3: You will see the default gateway of your router. It differs from router to router. Here the address is 192.168.1.1; copy it for later use.

Step 4: Open any browser and paste the gateway address on the browser’s top bar and hit the enter key. We want to get into the router’s website to change the Wi-Fi channel.

Step 5: Provide the network credentials. The username and password will vary from router to router. Search on Google to know your router’s credentials.

Step 6: Select the ‘Wireless’ option from your router’s website under which you will see 2..4 GHz Wireless Network. We want to change its channel.

Step 7: From the channel’s drag-down menu, choose the appropriate number which was previously set as ‘Auto’. How to know which Wi-Fi channel would be best for you? Some software can be found in the web world which can assist you in this regard. Select the channel that is not used by any surrounding neighbor.

Step 8: Now, click on the ‘Apply’ option to save the change you had made. Close the gateway website and that’s it. If the selected channel does not speed up your internet, then try again selecting another by following the same process. Basically, it is a try-and-error method.

Conclusion
As a Windows 10 user, you have learned how to change your Wi-Fi channel. One caution here, changing the channel might not solve the problem because the problem might have been somewhere else. But, trying this method helps many users in gaining faster Wi-Fi speed.