
What does WGET Do?
Once installed, the WGET command allows you to download files over the TCP/IP protocols: FTP, HTTP and HTTPS.
If you’re a Linux or Mac user, WGET is either already included in the package you’re running or it’s a trivial case of installing from whatever repository you prefer with a single command.
Unfortunately, it’s not quite that simple in Windows (although it’s still very easy!).
To run WGET you need to download, unzip and install manually.
Install WGET in Windows 10
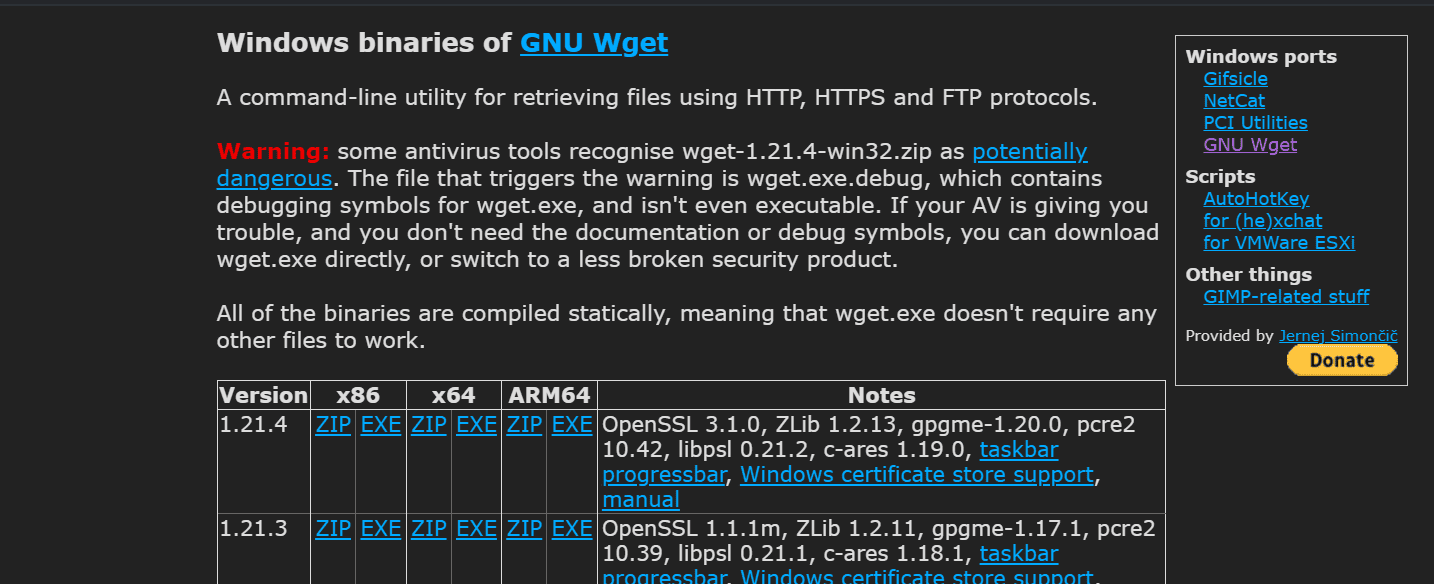
Download the classic 32 bit version 1.14 here or, go to this Windows binaries collection at Eternally Bored here for the later versions and the faster 64 bit builds.
Here is the downloadable zip file for version 1.2 64 bit.
If you want to be able to run WGET from any directory inside the command terminal, you’ll need to learn about path variables in Windows to work out where to copy your new executable. If you follow these steps, you’ll be able to make WGET a command you can run from any directory in Command Prompt.
Run WGET from anywhere
Firstly, we need to determine where to copy WGET.exe.
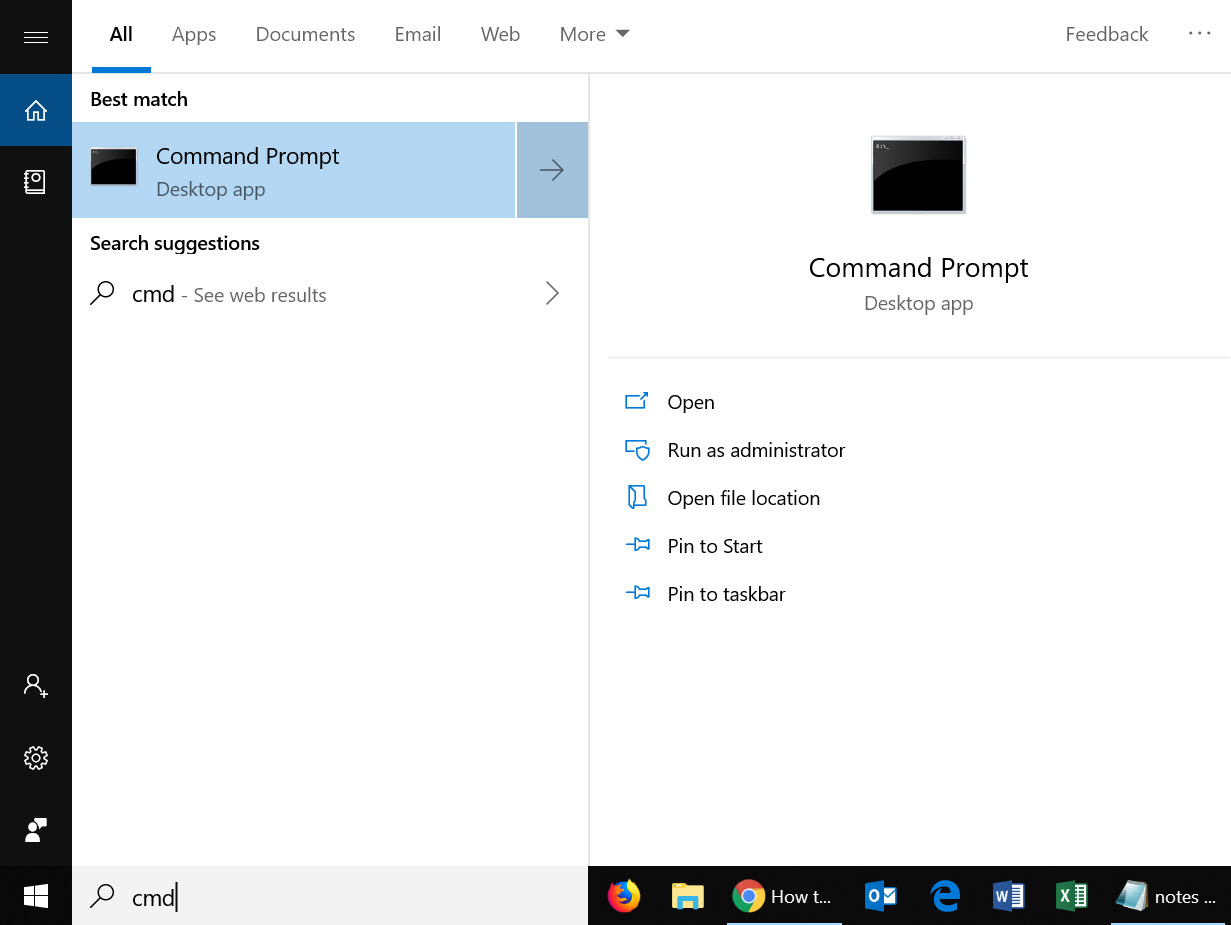
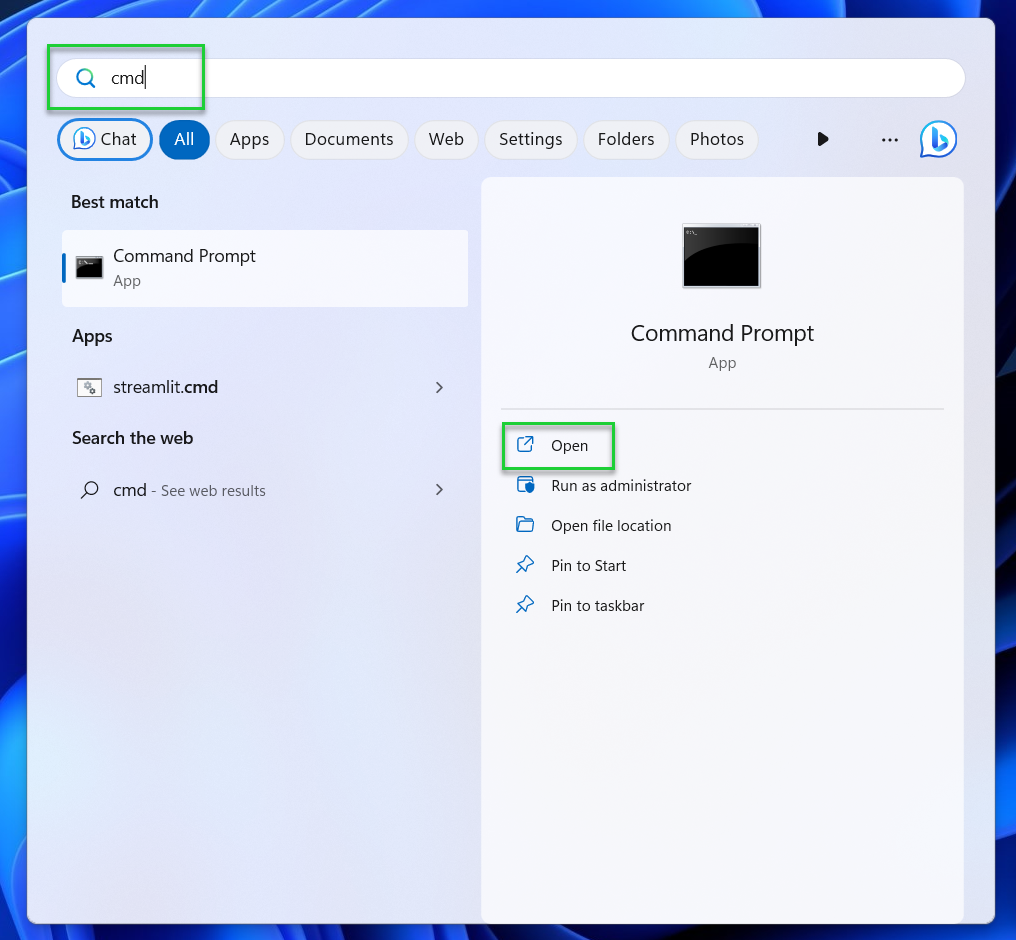
After you’d downloaded wget.exe (or unpacked the associated distribution zip files) open a command terminal by typing “cmd” in the search menu:
We’re going to move wget.exe into a Windows directory that will allow WGET to be run from anywhere.
First, we need to find out which directory that should be. Type:
path
You should see something like this:
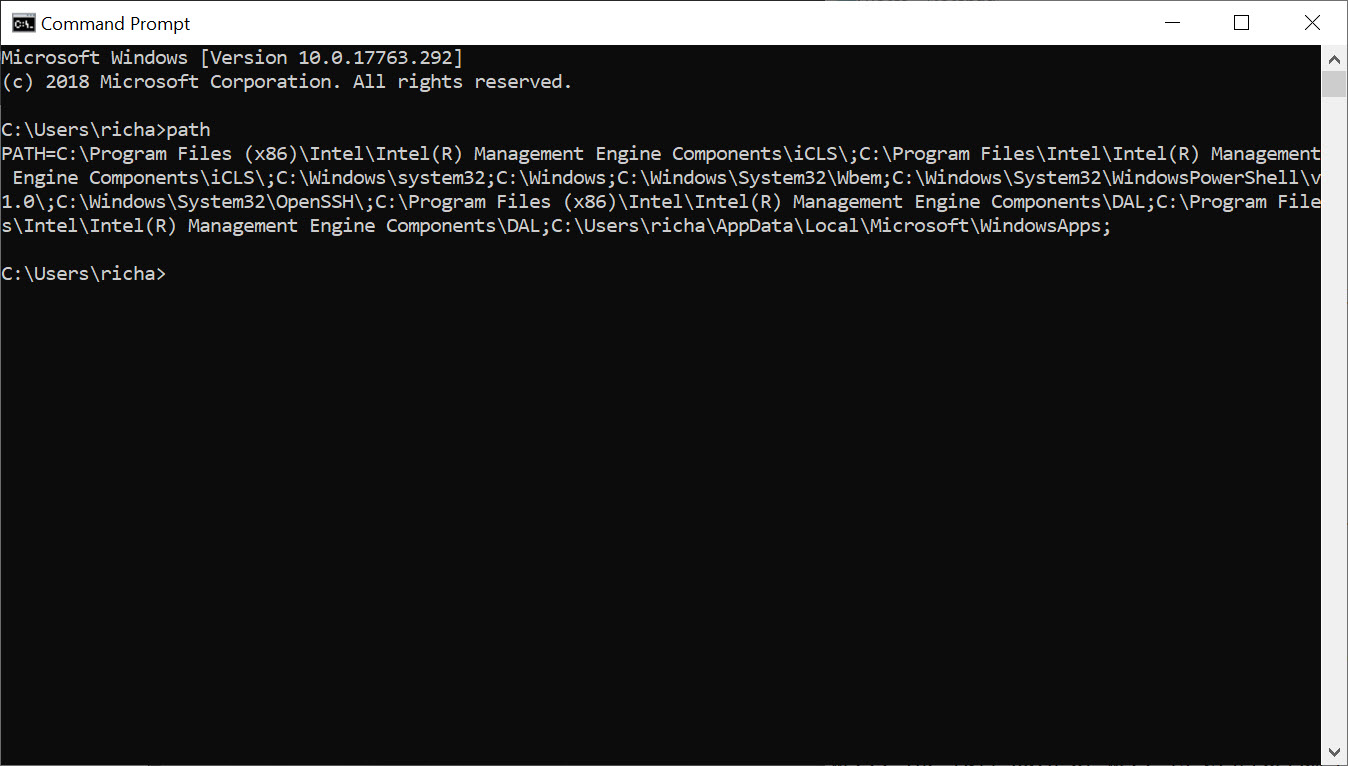
Thanks to the “Path” environment variable, we know that we need to copy wget.exe to the c:\Windows\System32 folder location.
Go ahead and copy WGET.exe to the System32 directory and restart your Command Prompt.
Restart command terminal and test WGET
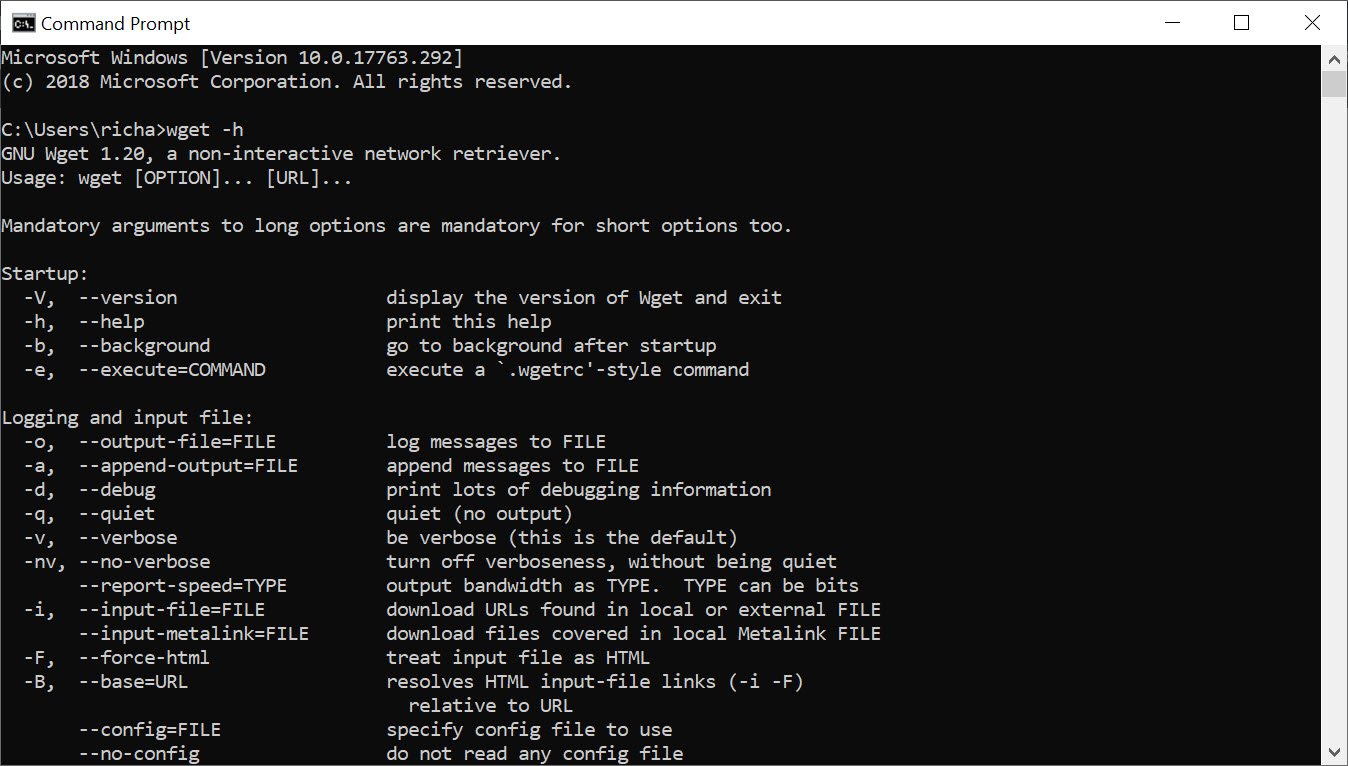
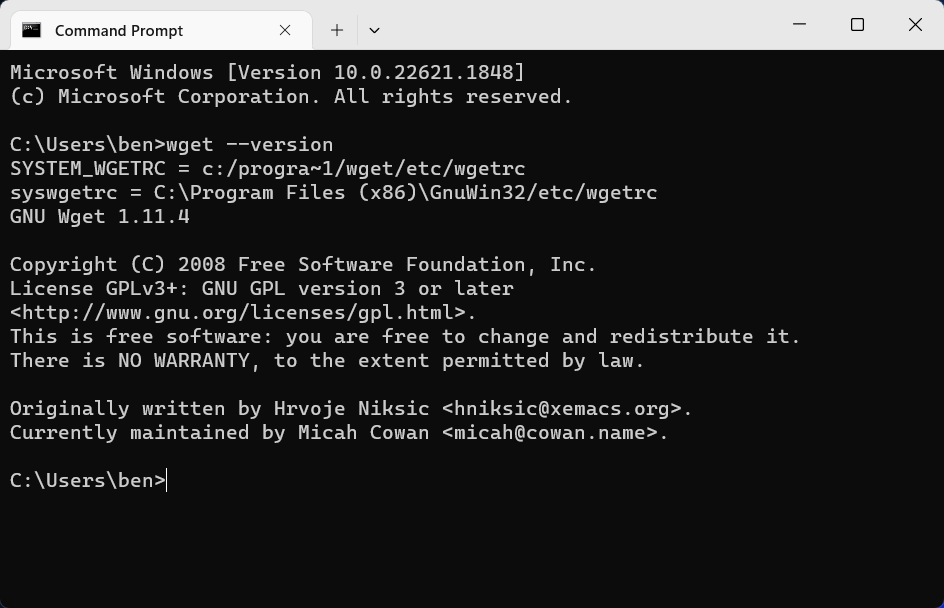
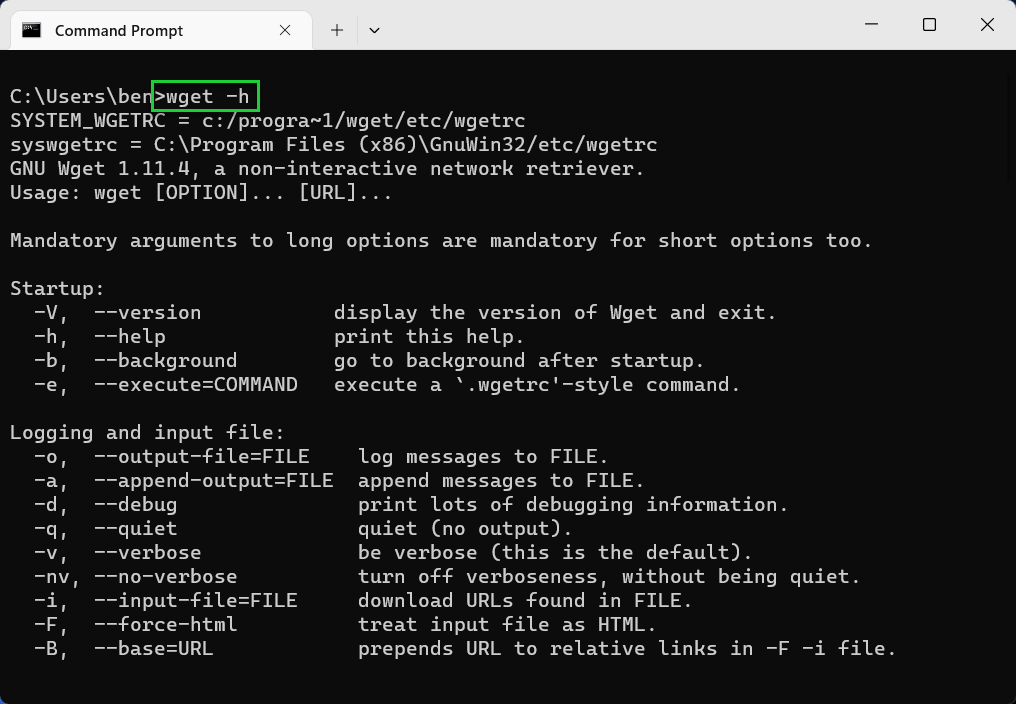
If you want to test WGET is working properly, restart your terminal and type:
wget -h
If you’ve copied the file to the right place, you’ll see a help file appear with all of the available commands.
So, you should see something like this:
Now it’s time to get started.
Get started with WGET
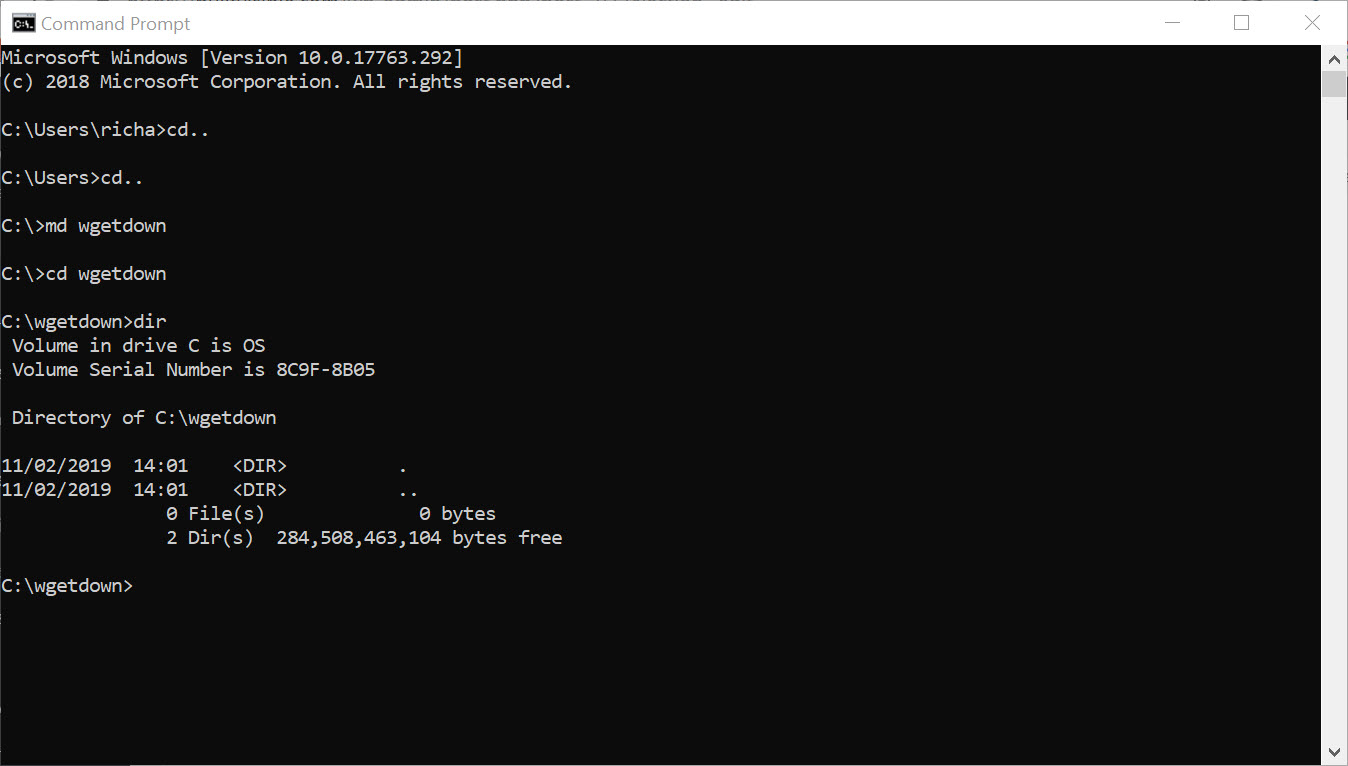
Seeing that we’ll be working in Command Prompt, let’s create a download directory just for WGET downloads.
To create a directory, we’ll use the command md (“make directory”).
Change to the c:/ prompt and type:
md wgetdown
Then, change to your new directory and type “dir” to see the (blank) contents.
Now, you’re ready to do some downloading.
Example commands
Once you’ve got WGET installed and you’ve created a new directory, all you have to do is learn some of the finer points of WGET arguments to make sure you get what you need.
The Gnu.org WGET manual is a particularly useful resource for those inclined to really learn the details.
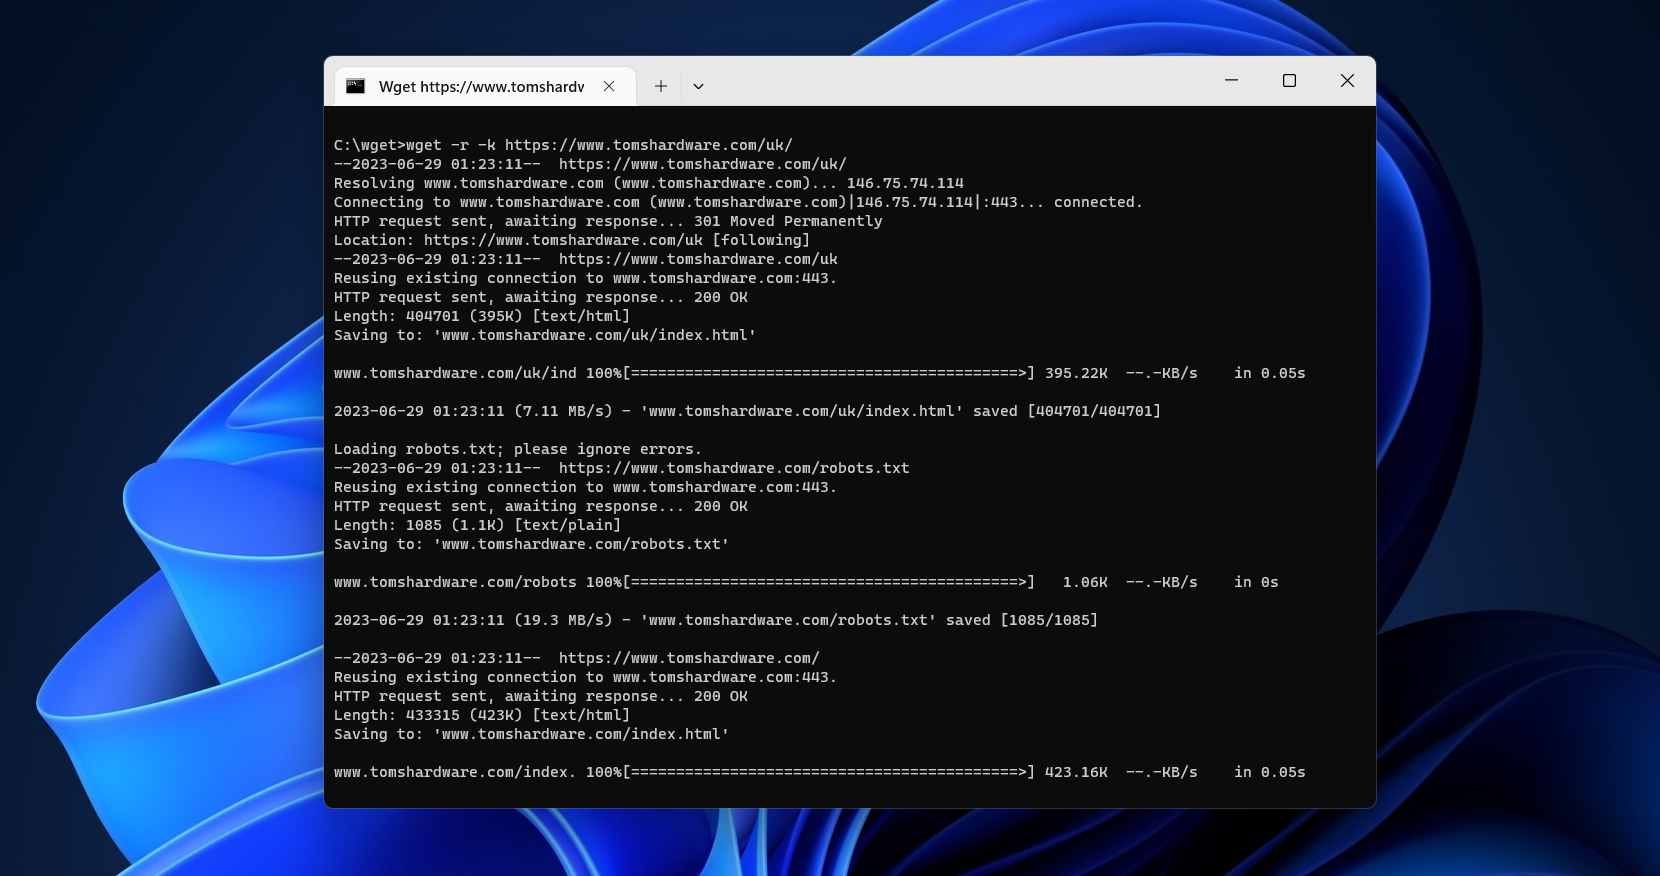
If you want some quick commands though, read on. I’ve listed a set of instructions to WGET to recursively mirror your site, download all the images, CSS and JavaScript, localise all of the URLs (so the site works on your local machine), and save all the pages as a .html file.
To mirror your site execute this command:
wget -r https://www.yoursite.com
To mirror the site and localise all of the urls:
wget --convert-links -r https://www.yoursite.com
To make a full offline mirror of a site:
wget --mirror --convert-links --adjust-extension --page-requisites --no-parent https://www.yoursite.com
To mirror the site and save the files as .html:
wget --html-extension -r https://www.yoursite.com
To download all jpg images from a site:
wget -A "*.jpg" -r https://www.yoursite.com
For more filetype-specific operations, check out this useful thread on Stack.
Set a different user agent:
Some web servers are set up to deny WGET’s default user agent – for obvious, bandwidth saving reasons. You could try changing your user agent to get round this. For example, by pretending to be Googlebot:
wget --user-agent="Googlebot/2.1 (+https://www.googlebot.com/bot.html)" -r https://www.yoursite.com
Wget “spider” mode:
Wget can fetch pages without saving them which can be a useful feature in case you’re looking for broken links on a website. Remember to enable recursive mode, which allows wget to scan through the document and look for links to traverse.
wget --spider -r https://www.yoursite.com
You can also save this to a log file by adding this option:
wget --spider -r https://www.yoursite.com -o wget.log
Enjoy using this powerful tool, and I hope you’ve enjoyed my tutorial. Comments welcome!
Linux wget: ваш загрузчик командной строки
Wget — это открыто распостраняемая утилита для загрузки файлов из интернет.
Он поддерживает HTTP, FTP, HTTPS и другие протоколы, а также средство аутентификации и множество других опций.
Если вы пользователь Linux или Mac, WGET либо уже включен в пакет, который вы используете, либо это простой случай установки из любого репозитория, который вы предпочитаете, с помощью одной команды.
Как установить команду wget в Linux
Используйте команду apt / apt-get, если вы работаете в Ubuntu / Debian / Mint Linux:
$ sudo apt install wget
Пользователь Fedora Linux должен ввести команду dnf
$ sudo dnf install wget
Пользователь RHEL / CentOS / Oracle Linux должен ввести команду yum :
$ sudo yum install wget
Пользователь SUSE / OpenSUSE Linux должен ввести команду zypper:
$ zypper install wget
Пользователь Arch Linux должен ввести команду pacman:
$ sudo pacman -S wget
К сожалению, в Windows все не так просто (хотя не так сложно!).
Для запуска WGET вам необходимо скачать, распаковать и установить утилиту вручную.
Установите WGET в Windows 10
Загрузите классическую 32-разрядную версию 1.14 здесь или перейдите в эту коллекцию двоичных файлов Windows на сайте Eternal Bored здесь, чтобы получить более поздние версии и более быстрые 64-разрядные сборки.
Вот загружаемый zip-файл для 64-разрядной версии 1.2.
Если вы хотите иметь возможность запускать WGET из любого каталога в терминале, вам нужно будет узнать о переменных пути в Windows, чтобы решить, куда копировать новый исполняемый файл. Если вы это сделаете, то сможете сделать WGET командой, которую можно запускать из любого каталога в командной строке, это отдельная тема по настройке Windows.
Запуск WGET из любого места
Во-первых, нам нужно определить, куда копировать WGET.exe.
Мы собираемся переместить wget.exe в каталог Windows, который позволит запускать WGET из любого места.
После того, как вы загрузили wget.exe (или распаковали связанные с ним zip-файлы дистрибутива), откройте командный терминал, набрав «cmd» в меню поиска и запустите командную строку.
Во-первых, нам нужно выяснить, в каком каталоге это должно быть. В командную строку введите:
path
Вы должны увидеть что-то вроде этого:

Благодаря переменной окружения “Path” мы знаем, что нам нужно скопировать wget.exe в папку c:\Windows\System32.
Скопируйте WGET.exe в каталог System32 и перезапустите командную строку.
Если вы хотите проверить правильность работы WGET, перезапустите терминал и введите:
wget -h
Если вы скопировали файл в нужное место, вы увидите файл справки со всеми доступными командами.
Итак, вы должны увидеть что-то вроде этого:

Начнем работать с WGET
Мы будем работать в командной строке, поэтому давайте создадим каталог загрузок только для загрузок WGET.
Чтобы создать каталог, воспользуемся командой md («создать каталог»).
Перейдите в корневой каталог c: / и введите команду:
md wgetdown
Затем перейдите в новый каталог и введите «dir», и вы увидите (пустое) содержимое.

После того, как вы установили WGET и создали новый каталог, все, что вам нужно сделать, это изучить некоторые тонкости аргументов WGET, чтобы убедиться, что вы получаете то, что вам нужно.
Руководство Gnu.org WGET — особенно полезный ресурс для тех, кто действительно хочет узнать подробности.
Вот несколько советов, как извлечь из этого максимум пользы:
Linux wget примеры команд
Синтаксис:
wget url
wget [options] url
Давайте посмотрим на некоторые распространенные примеры команд Linux wget, синтаксис и использование.
WGET можно использовать для:
Скачать один файл с помощью wget
$ wget https://cyberciti.biz/here/lsst.tar.gz
Загрузить несколько файлов с помощью wget
$ wget https://cyberciti.biz/download/lsst.tar.gz ftp://ftp.freebsd.org/pub/sys.tar.gz ftp://ftp.redhat.com/pub/xyz-1rc-i386.rpm
Можно прочитать URL из файла
Вы можете поместить все URL в текстовый файл и использовать опцию -i, чтобы wget загрузил все файлы. Сначала создайте текстовый файл:
$ xed /temp/download.txt
Добавить список URL:
https://cyberciti.biz/download/lsst.tar.gz
ftp://ftp.freebsd.org/pub/sys.tar.gz
ftp://ftp.redhat.com/pub/xyz-1rc-i386.rpm
Введите команду wget следующим образом:
$ wget -i /temp/download.txt
Можно ограничить скорость загрузки
$ wget -c -o /temp/susedvd.log —limit-rate=50k ftp://ftp.novell.com/pub/suse/dvd1.iso
Используйте wget с сайтами, защищенными паролем
Вы можете указать http имя пользователя / пароль на сервере следующим образом:
$ wget —http-user=vivek —http-password=Secrete http://cyberciti.biz/vivek/csits.tar.gz
Другой способ указать имя пользователя и пароль — в самом URL.
$ wget ‘http://username:password@cyberciti.biz/file.tar.gz
Скачать все mp3 или pdf файлы с удаленного FTP сервера
$ wget ftp://somedom-url/pub/downloads/*.mp3
$ wget ftp://somedom-url/pub/downloads/*.pdf
Скачать сайт целиком
$ wget -r -k -l 7 -p -E -nc https://site.com/
Рассмотрим используемые параметры:
-r — указывает на то, что нужно рекурсивно переходить по ссылкам на сайте, чтобы скачивать страницы.
-k — используется для того, чтобы wget преобразовал все ссылки в скаченных файлах таким образом, чтобы по ним можно было переходить на локальном компьютере (в автономном режиме).
-p — указывает на то, что нужно загрузить все файлы, которые требуются для отображения страниц (изображения, css и т.д.).
-l — определяет максимальную глубину вложенности страниц, которые wget должен скачать (по умолчанию значение равно 5, в примере мы установили 7). В большинстве случаев сайты имеют страницы с большой степенью вложенности и wget может просто «закопаться», скачивая новые страницы. Чтобы этого не произошло можно использовать параметр -l.
-E — добавлять к загруженным файлам расширение .html.
-nc — при использовании данного параметра существующие файлы не будут перезаписаны. Это удобно, когда нужно продолжить загрузку сайта, прерванную в предыдущий раз.
По умолчанию wget загружает файл и сохраняет его с оригинальным именем в URL — в текущем каталоге.
Здесь я перечислил набор инструкций для WGET для рекурсивного зеркалирования вашего сайта, загрузки всех изображений, CSS и JavaScript, локализации всех URL-адресов (чтобы сайт работал на вашем локальном компьютере) и сохранения всех страниц как .html файл.
Чтобы скачать ваш сайт, выполните эту команду:
wget -r https://www.yoursite.com
Чтобы скачать сайт и локализовать все URL:
wget —convert-links -r https://www.yoursite.com
Чтобы создать полноценное оффлайн зеркало сайта:
wget —mirror —convert-links —adjust-extension —page-requisites —no-parent https://www.yoursite.com
Чтобы скачать сайт и сохранить файлы как .html:
wget —html-extension -r https://www.yoursite.com
Чтобы скачать все изображения в формате jpg с сайта:
wget -A «*.jpg» -r https://www.yoursite.com
Дополнительные сведения об операциях, связанных с конкретным типом файлов, можно найти в этой полезной ветке на Stack .
Установите другой пользовательский агент:
Некоторые веб-серверы настроены так, чтобы запрещать пользовательский агент WGET по умолчанию — по очевидным причинам экономии полосы пропускания. Вы можете попробовать изменить свой пользовательский агент, чтобы обойти это. Например, притворившись роботом Google:
wget —user-agent=»Googlebot/2.1 (+https://www.googlebot.com/bot.html)» -r https://www.yoursite.com
Wget режим «паук»:
Wget может получать страницы без их сохранения, что может быть полезной функцией, если вы ищете неработающие ссылки на веб-сайте. Не забудьте включить рекурсивный режим, который позволяет wget сканировать документ и искать ссылки для перехода.
wget —spider -r https://www.yoursite.com
Вы также можете сохранить это в файл журнала, добавив эту опцию:
wget —spider -r https://www.yoursite.com -o wget.log
wget -m -l 10 -e robots=off -p -k -E —reject-regex «wp» —no-check-certificate -U=«Mozilla/5.0 (Windows NT 10.0; Win64; x64) AppleWebKit/537.36 (KHTML, like Gecko) Chrome/68.0.3440.106 Safari/537.36» site-addr.com
Как найти неработающие ссылки на вашем сайте
wget —spider -r -nd -nv -H -l 2 -w 2 -o run1.log https://site.by
Наслаждайтесь использованием этого мощного инструмента, и я надеюсь, что вам понравился мой урок.
Most users will download files onto their PC using their web browser. There’s a problem with this method, however—it’s not particularly efficient. If you need to pause your download, or if you’ve lost your connection, you’ll probably need to start your download again from scratch. You may also be working with Python or other code at the command line and want to download directly from the command prompt.
That’s where tools like Wget come in. This command line tool has a number of useful features, with support for recursive downloads and download resumption that allows you to download single files (or entire websites) in one go.
Wget is popular on Linux and other Unix-based operating systems, but it’s also available for Windows users. Below, we’ll explain how to install and use Wget to download any content you want online from your Windows command line.
Installing GNU Wget on Windows
Wget (in name, at least) is available on Windows 10 and 11 via the PowerShell terminal. However, this version of Wget isn’t the same as the GNU Wget tool that you’d use on a Linux PC. Instead, this version is simply an alias for a PowerShell command called Invoke-WebRequest.
Invoke-WebRequest is Wget-like in what it does, but it’s a completely different tool that’s much more difficult to use and understand. Instead, you’ll be better served by installing Wget for Windows, a compiled version of the same tool available for Linux users, using the steps below.
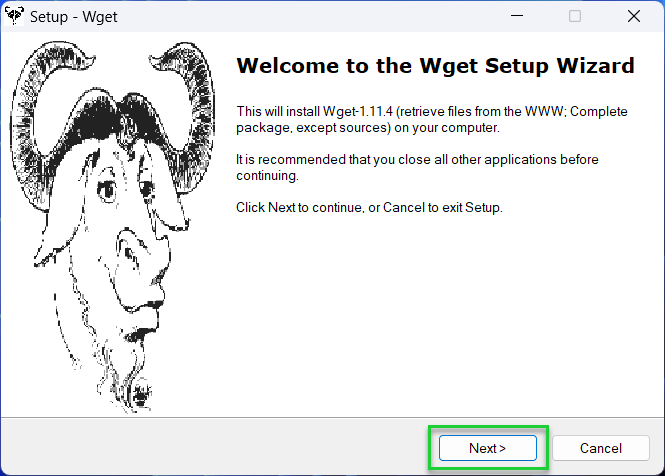
1. Download the Wget for Windows setup file from the Wget website. You’ll need to do this using your web browser.
Get Tom’s Hardware’s best news and in-depth reviews, straight to your inbox.
2. Run the Wget for Windows installer file. Once the Wget setup file has finished downloading, run the setup file and follow the on-screen instructions to complete the installation.
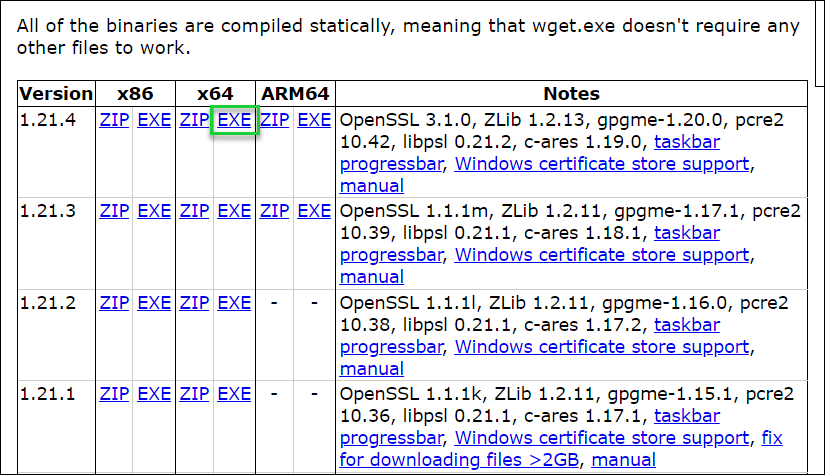
3. Update the Wget.exe file (optional). The Wget installer is packaged with a fairly old version of the Wget binary. If you run into difficulties downloading files because of SSL certificate errors, you should download the latest wget.exe for your architecture from this website and save it to your Wget installation directory (typically C:\Program Files (x86)\GnuWin32\bin). This step is optional, but highly recommended.
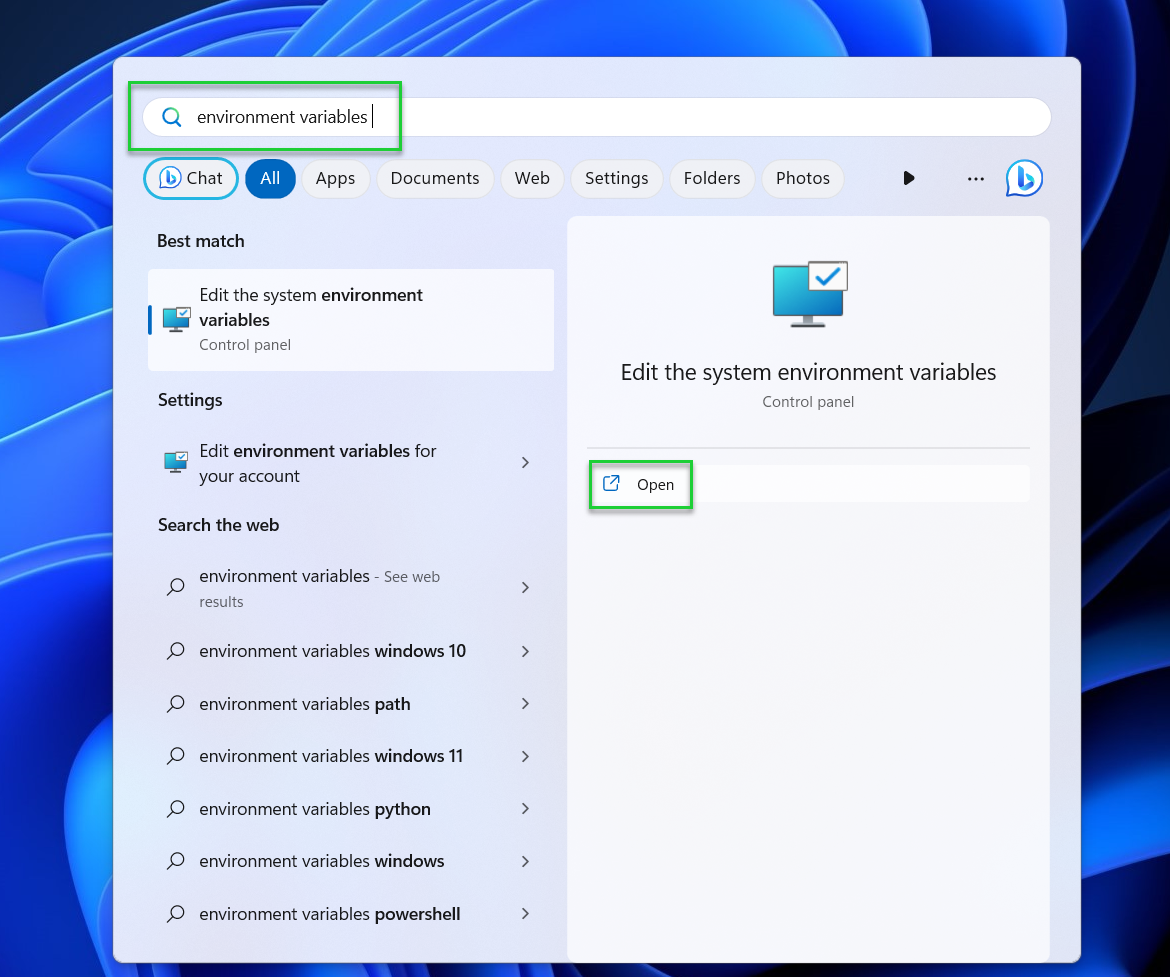
4. Open the Start menu, search for environment variables, and click Open. Once the installation is finished, use the search tool in the Start menu to search for environment variables, then click Open. You’ll need to do this to allow you to use the ‘wget’ command from the command line without referencing its location every time you wish to run it.
5. Click Environment Variables in the System Properties window.
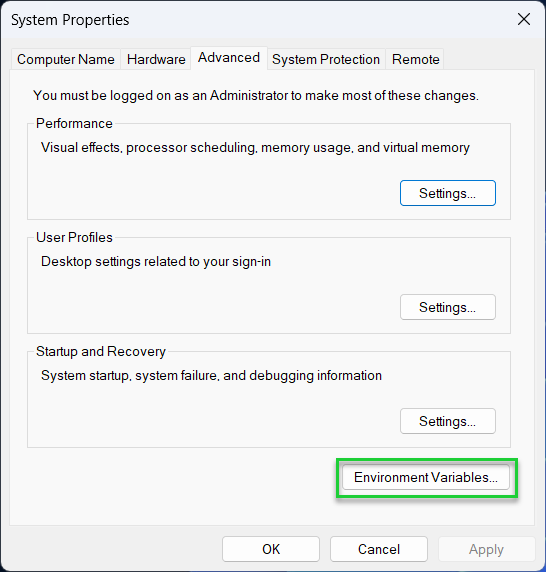
6. Select Path and click Edit under System or User variables.
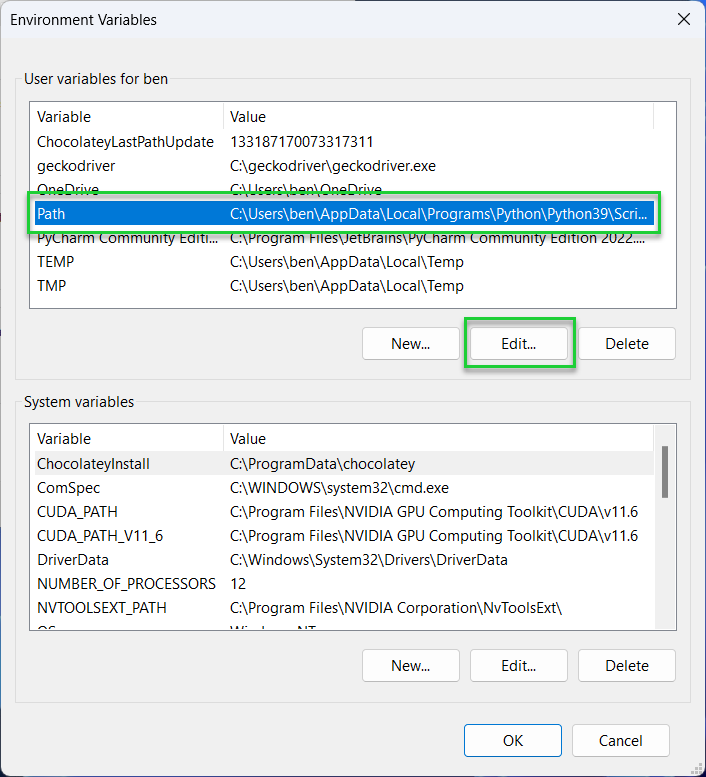
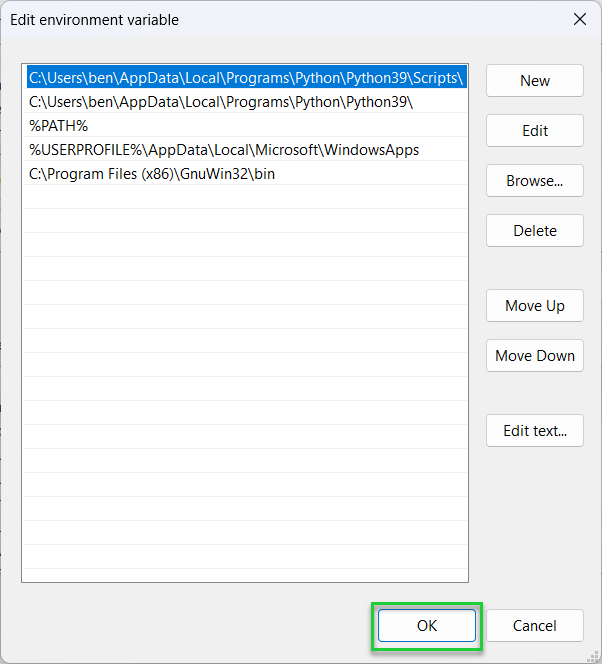
7. Click the New button and type in the directory for the Wget for Windows binary (.exe) file. By default, this should be C:\Program Files (x86)\GnuWin32\bin.
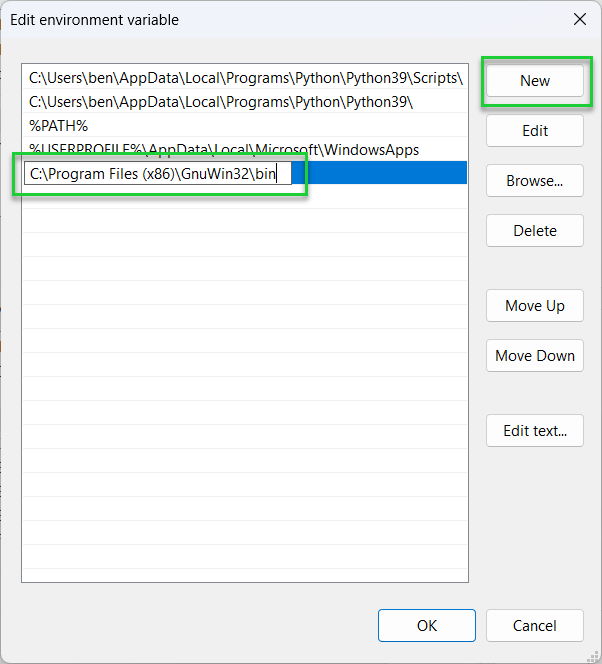
8. Save your changes. When you’re finished, click OK in each menu and exit System Properties.
9. Open the Start menu, type cmd, and press Open. This will launch a new command prompt window. You can also use the newer Terminal app, as long as you switch to using a command prompt shell.
10. Type wget —version and press Enter. If Wget was installed correctly, you should see the GNU Wget version returned in the command prompt window.
If you want to run Wget from a PowerShell terminal instead, you’ll need to run the file from its installation directory directly (eg. C:\Program Files (x86)\GnuWin32\bin\wget.exe).
Downloading Files with Wget
Once you’ve installed GNU Wget and you’ve configured the environment variables to be able to launch it correctly, you’ll be able to use it to start downloading files and webpages.
We’ve used an example domain and file path in our examples below. You’ll need to replace this with the correct path to the file (or files) that you want to download.
- Type wget -h to see a full list of commands. This will give you the full list of options that you can use with Wget.
wget -h
- Download a single file using wget <url>. Replace <url> with the path to a file on an HTTP, HTTPS, or FTP server. You can also refer to a website domain name or web page directly to download that specific page (without any of its other content).
wget example.com

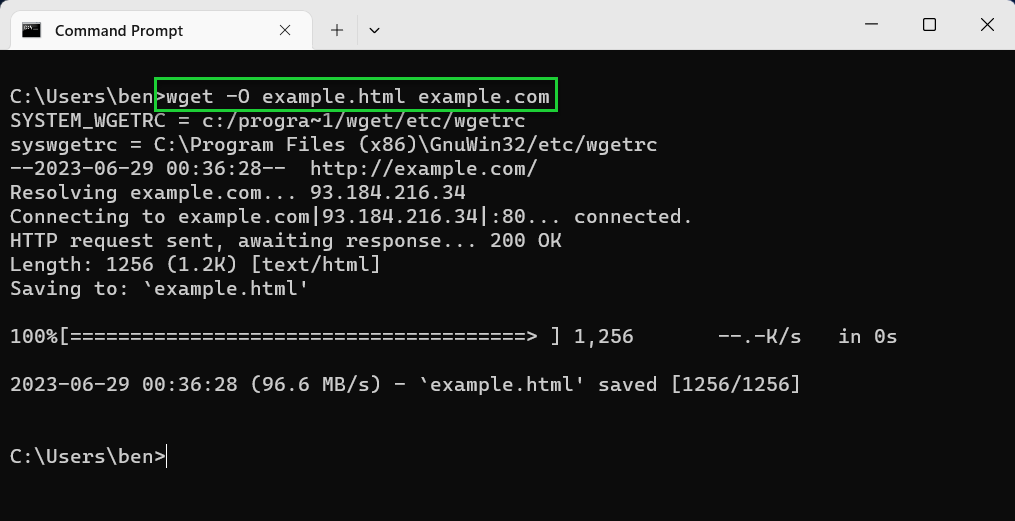
- Save with a different filename using -O. Using the -O option, you’ll be able to save the file with a different filename. For example, wget -O <filename> <url>, where <filename> is the filename you’ve chosen.
wget -O example.html example.com
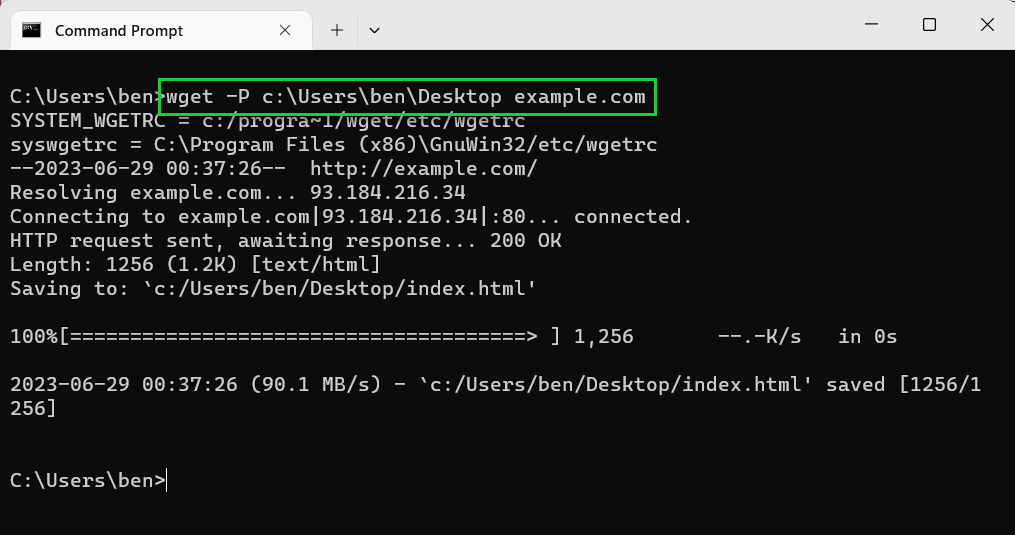
- Save to a different directory using -P. If you want to save to another directory than the one you’re currently in, use the -P option. For example, wget -P <path> <url>.
wget -P C:\folder example.com
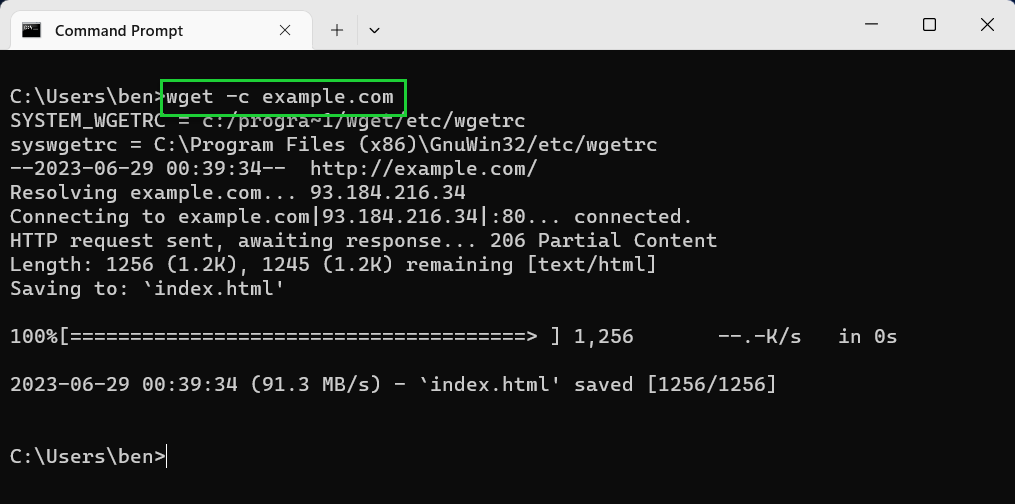
- Use —continue or -c to resume files. If you want to resume a partial download, use the -c option to resume it, as long as you’re in the same directory. For example, wget -c <url>.
wget -c example.com
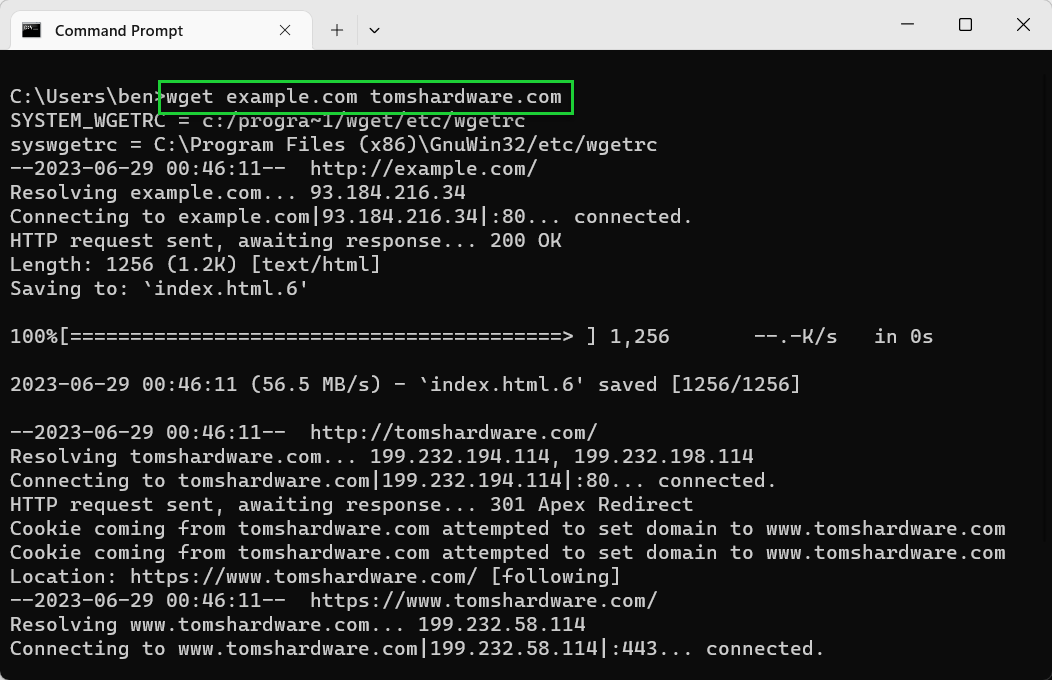
- Download multiple files in sequence. If you want to download several files, add each URL to your Wget command. For example, wget <url1> <url2> etc.
wget example.com tomshardware.com
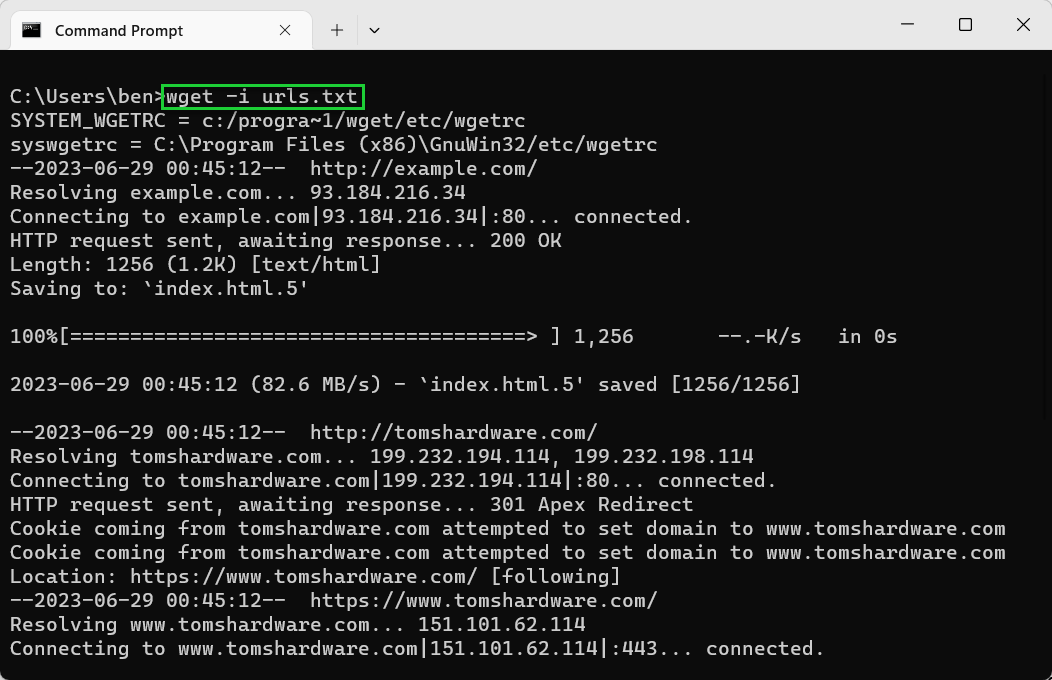
- Download multiple files using a text file with -i. Using the -i option, you can refer to a text file that contains a list of URLs to download a large number of files. Assuming that each URL is on a new line, Wget will download the content from each URL in sequence. For example, wget -i <file.txt> <url>.
wget -i urls.txt
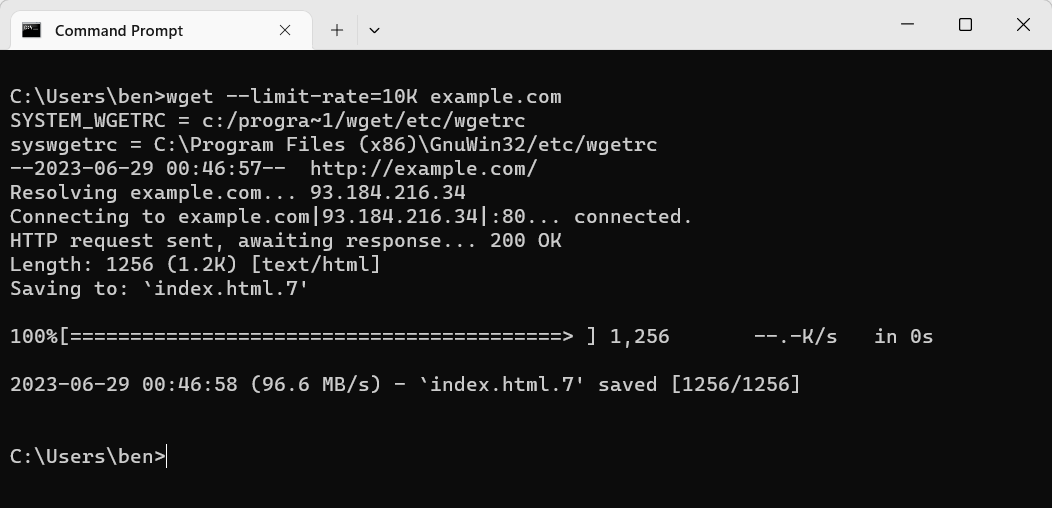
- Limit download speeds using —limit-rate. If you want to limit your bandwidth usage, you can cap the download speeds using the —limit-rate option. For example, wget —limit-rate=1M <url> would limit it to 1 megabyte per second download speeds, while wget —limit-rate=10K <url> would limit it to 10 kilobytes per second.
wget —limit-rate=10K example.com
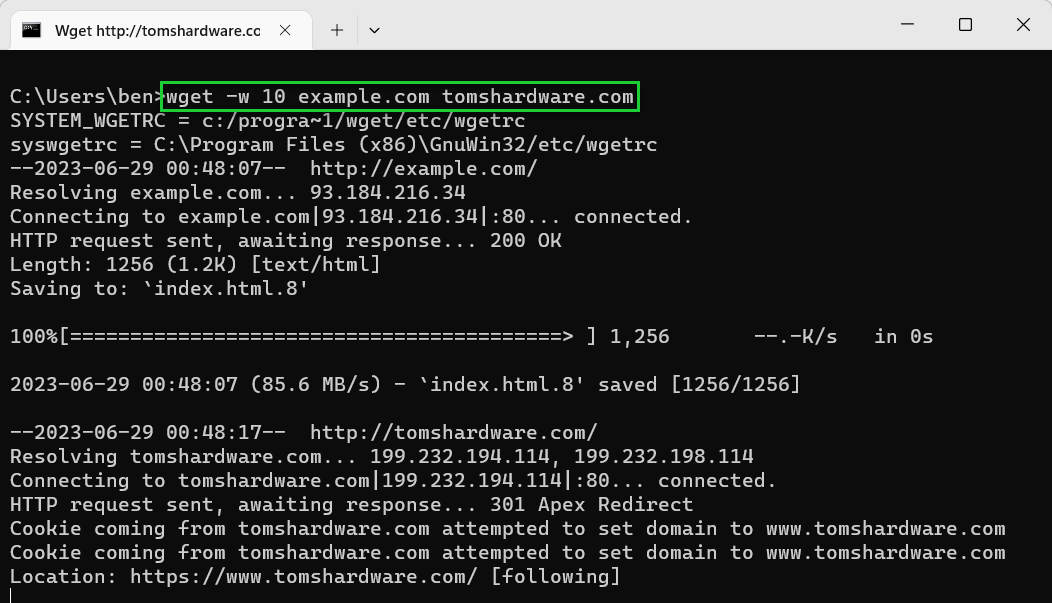
- Use -w or –wait to set a pause period after each download. If you’re downloading multiple files, using -w can help to spread the requests you make and help to limit any chance that your downloads are blocked. For example, wget -w 10 <url1> <url2> for a 10 second wait.
wget -w 10 example.com tomshardware.com
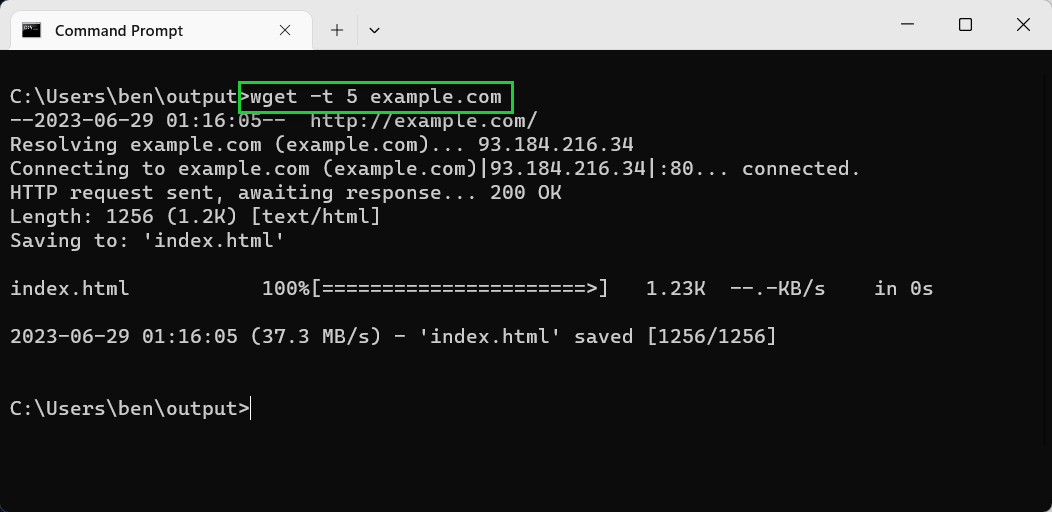
- Set a retry limit using -t or —tries. If a download fails, wget will use the -t value to determine how many times it’ll attempt it again before it stops. The default value is 20 retries. If the file is missing, or if the connection is refused, then this value is ignored and Wget will terminate immediately.
wget -t 5 example.com
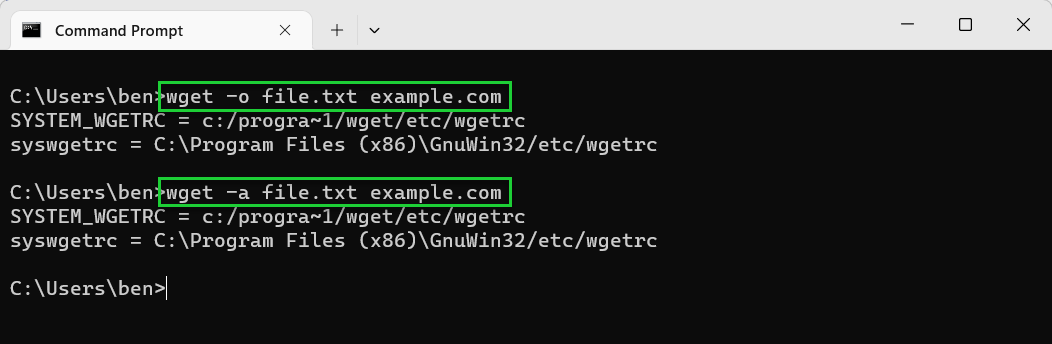
- Save a log using -o or -a. You can save your log data to a text file using -o (to always create a new log file) or -a (to append to an existing file). For example, wget -o <file.txt> <url>.
- Bypass SSL errors using —no-check-certificate. If you’re having trouble downloading from a web server with an SSL certificate and you’ve already updated your Wget installation, bypass the SSL certificate check completely using —no-check-certificate to allow the download (in most cases). You should only do this for downloads from locations that you completely trust. For example, wget —no-check-certificate example.com.
wget —no-check-certificate https://example.com
Make sure to use the wget -h or wget —help command to view the full list of options that are available to you. If you run into trouble with Wget, make sure to limit the number of retries you make and set a wait limit for each download you attempt.
Using Wget for Recursive Downloads
One of Wget’s most useful features is the ability to download recursively. Instead of only downloading a single file, it’ll instead try to download an entire directory of related files.
For instance, if you specify a web page, it’ll download the content attached to that page (such as images). Depending on the recursive depth you choose, it can also download any pages that are linked to it, as well as the content on those pages, any pages that are linked on those pages, and so on.
Theoretically, Wget can run with an infinite depth level, meaning it’ll never stop trying to go further and deeper with the content it downloads. However, from a practical point of view, you may find that most web servers will block this level of scraping, so you’ll need to tread carefully.
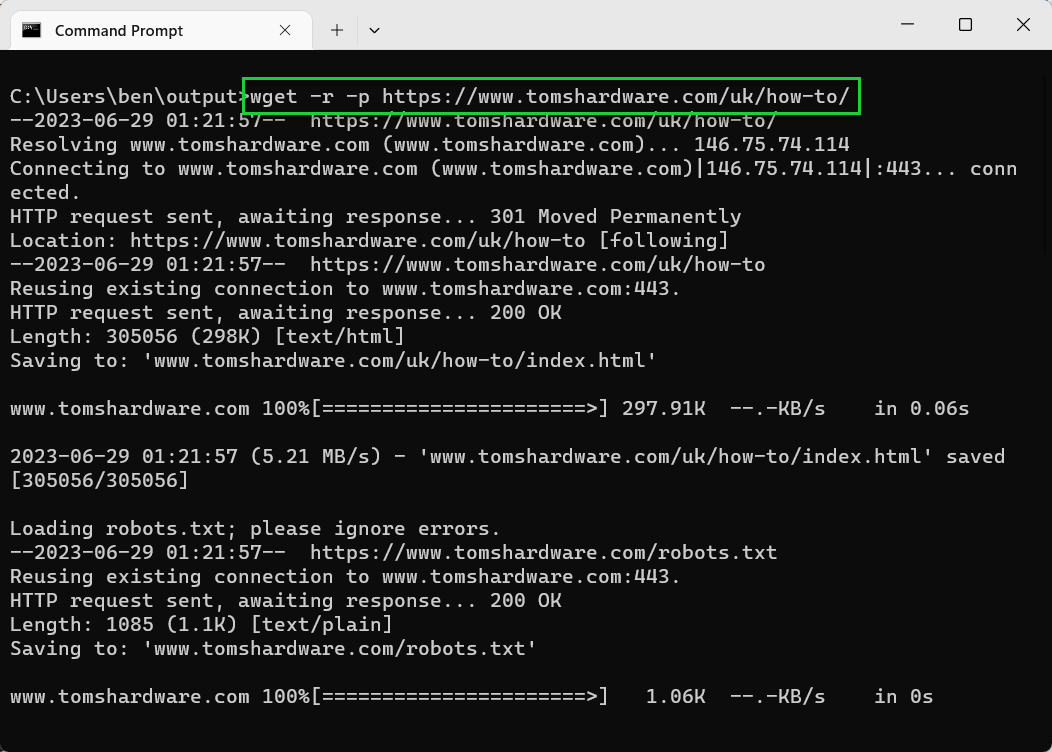
- Type wget -r or wget —recursive to download recursively. By default, the depth level is five. For example, wget -r <url>.
wget -r tomshardware.com
- Use -l or –level to set a custom depth level. For example, wget -r -l 10 <url>. Use wget -r -l inf <url> for an infinite depth level.
wget -r -l 10 tomshardware.com
- Use -k to convert links to local file URLs. If you’re scraping a website, Wget will automatically convert any links in HTML to point instead to the offline copy that you’ve downloaded. For example, wget -r -k <url>.
wget -r -k tomshardware.com
- Use -p or —page-requisites to download all page content. If you want a website to fully download so that all of the images, CSS, and other page content is available offline, use the -p or —page-requisites options. For example, wget -r -p <url>.
wget -r -p tomshardware.com
For a full list of options, make sure to use the wget —h command. You should also take care to respect any website that you’re actively downloading from and do your best to limit server loads using wait, retry, and depth limits.
If you run into difficulties with downloads because of SSL certificate errors, don’t forget to update your Wget binary file (wget.exe) with the latest version.

Sometimes, you need to download a file directly from the Command Prompt (CMD). It’s simple, quick, and doesn’t require opening a browser. Here’s how to do it step-by-step. 😉
CURL Command on CMD
For Windows 10 and later, there is a built-in tool called Curl that can be used to download files using the command line. It’s pretty simple: open your command prompt by pressing the Win + R key on your keyboard, typing cmd on the search bar that appeared, and then hitting the Enter key.
Then type the below command, replacing the download URL of your file:
curl -O https://example.com/file.zipThis will download the file and save it with the same name as on the website.

Want to rename the file as you download it? Use this:
curl -o MyFile.zip https://example.com/file.zip
Invoke-WebRequest Command on PowerShell
Invoke-WebRequest functions similarly to the curl command, but in PowerShell. To download a file using this command, replace the URL with your file’s URL as shown in the command below:
Invoke-WebRequest https://example.com/file.zip -OutFile file.zipThis will save the file as file.zip in your current directory.

BITSADMIN Command for Older Versions of Windows
Windows XP, Vista, Windows 7, 8/8.1, and Windows 10 don’t support the curl and Invoke-WebRequest commands. In this case, you can use bitsadmin. To use it, open CMD and type the below command, replacing the download URL of your file:
bitsadmin /transfer myDownloadJob /download /priority normal https://example.com/file.zip C:\Users\yourusername\Downloads\file.zipThe file will be saved to the location C:\Downloads.

WGET Command for Linux Lovers on Windows
The WGET command is available on Windows but requires manual installation. It is a built-in utility in Linux, making it easier for Linux users to use the same command on Windows OS as well.
To use WGET, download wget from the internet (Google “wget for Windows”). And then add to the system path. To do this, follow the steps:
- Open your browser and search for “wget for Windows.”
- Go to a trusted source like Eternallybored.org or another reliable website.
- Download the
wget.exefile. Choose the version that matches your system (32-bit or 64-bit). - Once downloaded, locate the
wget.exefile (usually in yourDownloadsfolder). - Move it to the location:
C:\Windows\System32\

Now you’re all set to use wget on your Windows system for downloading files. You can now open CMD and type after replacing the file URL in the below sample command:
wget https://example.com/file.zip
With this guide, you’ve covered all the methods to download a file from the CMD (command line) like a pro! 😃👏
Powerful VPS Hosting, Without the Premium Price
Get the performance you need at a price you’ll love. Explore our affordable VPS plans.
See Pricing
WGET is a free tool to crawl websites and download files via the command line.
In this wget tutorial, we will learn how to install and how to use wget commands with examples.
What is Wget?
Wget is free command-line tool created by the GNU Project that is used todownload files from the internet.
- It lets you download files from the internet via FTP, HTTP or HTTPS (web pages, pdf, xml sitemaps, etc.).
- It provides recursive downloads, which means that Wget downloads the requested document, then the documents linked from that document, and then the next, etc.
- It follows the links and directory structure.
- It lets you overwrite the links with the correct domain, helping you create mirrors of websites.
What Is the Wget Command?
The wget command is a tool developed by the GNU Project to download files from the web. Wget allows you to retrieve content and files from web servers using a command-line interface. The name “wget” comes from “World Wide Web” and “get”. Wget supports downloads via FTP, SFTP, HTTP, and HTTPS protocols.
Wget is used by developers to automate file downloads.
Install Wget
To install wget on Windows, install the executable file from eternallybored.org. To install wget on Mac, use the brew install wget command on Mac. Make sure that it is not already installed first by running the wget -V command in the command line interface. For more details on how to install Wget, read one of the following tutorials.
- Install Wget on Mac
- Install Wget on Windows
- Install Wget on Linux
Downloading Files From the Command Line (Wget Basics)
Let’s look at the wget syntax, view the basic commands structure and understand the most important options.
Wget Syntax
Wget has two arguments: [OPTION] and [URL] .
wget [OPTION]... [URL]...
- [OPTION] tells what to do with the [URL] argument provided after. It has a short and a long-form (ex:
-Vand--versionare doing the same thing). - [URL] is the file or the directory you wish to download.
- You can call many OPTIONS or URLs at once.
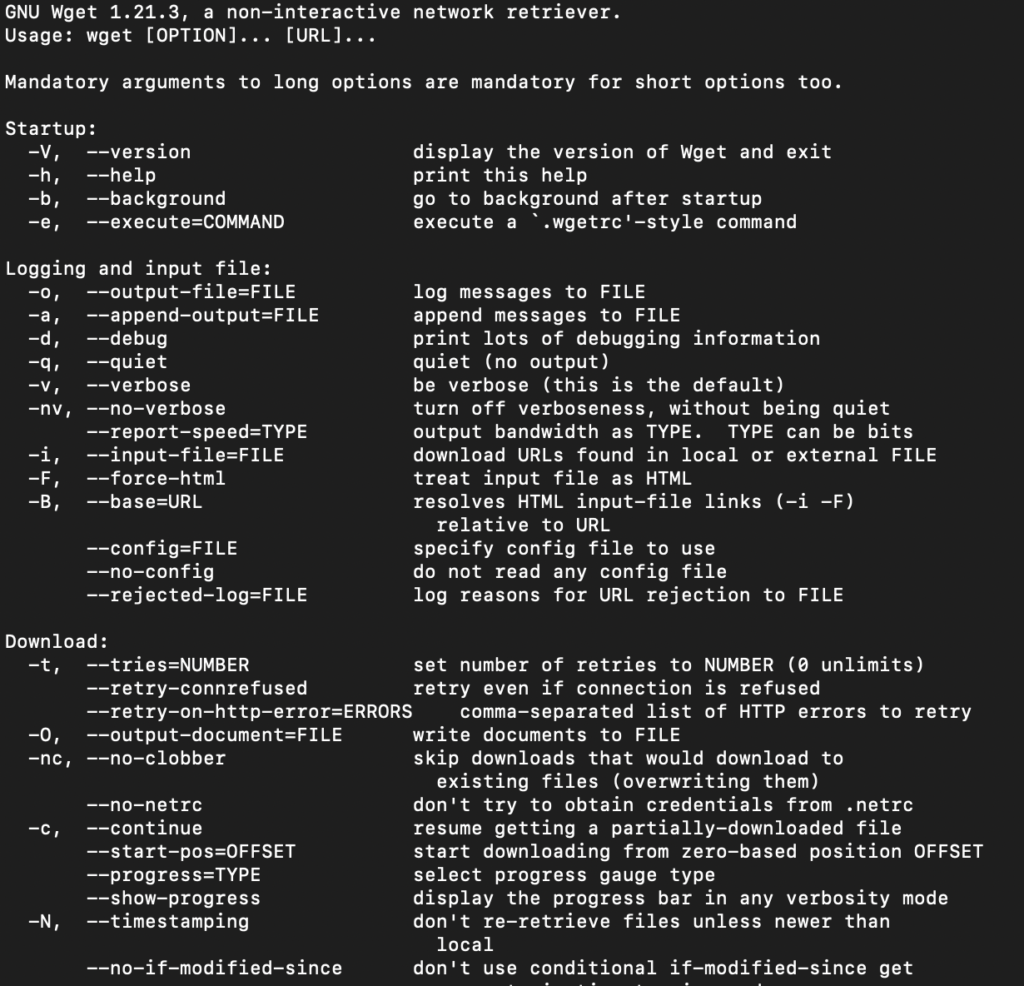
View WGET Arguments
To view available wget Arguments, use the wget help command:
The output will show you an exhaustive list of all the wget command parameters.
Here are the 11 best things that you can do with Wget:
- Download a single file
- Download a files to a specific directory
- Rename a downloaded files
- Define User Agent
- Extract as Googlebot
- Extract Robots.txt when it changes
- Convert links on a page
- Mirror a single page
- Extract Multiple URLs from a list
- Limit Speed
- Number of attempts
- Use Proxies
- Continue Interrupted Downloads
- Extract Entire Website
Download a single file with Wget
$ wget https://example.com/robots.txt
Download a File to a Specific Output Directory
Here replace <YOUR-PATH> by the output directory location where you want to save the file.
$ wget ‐P <YOUR-PATH> https://example.com/sitemap.xml
Rename Downloaded File when Retrieving with Wget
To output the file with a different name:
$ wget -O <YOUR-FILENAME.html> https://example.com/file.html
Define User Agent in WGET
Identify yourself. Define your user-agent.
$ wget --user-agent=Chrome https://example.com/file.html
Extract as Googlebot with Wget Command
$ wget --user-agent="Mozilla/5.0 (Linux; Android 6.0.1; Nexus 5X Build/MMB29P) AppleWebKit/537.36 (KHTML, like Gecko) Chrome/86.0.4240.198 Mobile Safari/537.36 (compatible; Googlebot/2.1; +http://www.google.com/bot.html)" https://example.com/path
Let’s extract robots.txt only if the latest version in the server is more recent than the local copy.
First time that you extract use -S to keep a timestamps of the file.
$ wget -S https://example.com/robots.txt
Later, to check if the robots.txt file has changed, and download it if it has.
$ wget -N https://example.com/robots.txt
Wget command to Convert Links on a Page
Convert the links in the HTML so they still work in your local version. (ex: example.com/path to localhost:8000/path)
$ wget --convert-links https://example.com/path
Mirror a Single Webpage in Wget
To mirror a single web page so that it can work on your local.
$ wget -E -H -k -K -p --convert-links https://example.com/path
Add all urls in a urls.txt file.
https://example.com/1
https://example.com/2
https://example.com/3
To be a good citizen of the web, it is important not to crawl too fast by using --wait and --limit-rate.
--wait=1: Wait 1 second between extractions.--limit-rate=10K: Limit the download speed (bytes per second)
Define Number of Retry Attempts in Wget
Sometimes the internet connection fails, sometimes the attempts it blocked, sometimes the server does not respond. Define a number of attempts with the -tries function.
$ wget -tries=10 https://example.com
How to Use Proxies With Wget?
To set a proxy with Wget, we need to update the ~/.wgetrc file located at /etc/wgetrc.
You can modify the ~/.wgetrc in your favourite text editor.
$ vi ~/.wgetrc # VI
$ code ~/.wgetrc # VSCode
And add these lines to the wget parameters:
use_proxy = on
http_proxy =  http://username:password@proxy.server.address:port/
https_proxy =  http://username:password@proxy.server.address:port/
Then, by running any wget command, you’ll be using proxies.
Alternatively, you can use the -e command to run wget with proxies without changing the environment variables.
wget -e use_proxy=yes -e http_proxy=http://proxy.server.address:port/ https://example.com
How to remove the Wget proxies?
When you don’t want to use the proxies anymore, update the ~/.wgetrc to remove the lines that you added or simply use the command below to override them:
Continue Interrupted Downloads with Wget
When your retrieval process is interrupted, continue the download with restarting the whole extraction using the -c command.
$ wget -c https://example.com
Recursive mode extract a page, and follows the links on the pages to extract them as well.
This is extracting your entire site and can put extra load on your server. Be sure that you know what you do or that you involve the devs.
$ wget --recursive --page-requisites --adjust-extension --span-hosts --wait=1 --limit-rate=10K --convert-links --restrict-file-names=windows --no-clobber --domains example.com --no-parent example.com
| Command | What it does |
|---|---|
| –recursive | Follow links in the document. The maximum depth is 5. |
| –page-requisites | Get all assets (CSS/JS/images) |
| –adjust-extension | Save files with .html at the end. |
| –span-hosts | Include necessary assets from offsite as well. |
| –wait=1 | Wait 1 second between extractions. |
| –limit-rate=10K | Limit the download speed (bytes per second) |
| –convert-links | Convert the links in the HTML so they still work in your local version. |
| –restrict-file-names=windows | Modify filenames to work in Windows. |
| –no-clobber | Overwrite existing files. |
| –domains example.com | Do not follow links outside this domain. |
| –no-parent | Do not ever ascend to the parent directory when retrieving recursively |
| –level | Specify the depth of crawling. |
$ wget --spider -r https://example.com -o wget.log
Wget VS Curl
Wget’s strength compared to curl is its ability to download recursively. This means that it will download a document, then follow the links and then download those documents as well.
Use Wget With Python
Wget is strictly command line, but there is a package that you can import the wget package that mimics wget.
import wget
url = 'http://www.jcchouinard.com/robots.txt'
filename = wget.download(url)
filename
Debugging: What to Do When Wget is Not Working
Wget Command Not Found
If you get the -bash: wget: command not found error on Mac, Linux or Windows, it means that the wget GNU is either not installed or does not work properly.
Go back and make sure that you installed wget properly.
Wget is not recognized as an internal or external command
If you get the following error
'wget' is not recognized as an internal or external command, operable program or batch file
It is more than likely that the wget package was not installed on Windows. Fix the error by installing wget first and then start over using the command.
Otherwise, it may also mean that the wget command is not not found in your system’s PATH.
Adding Wget to the System’s Path (Windows)
Adding the wget command to the system’s path will allow you to run wget from anywhere.
To add wget to the Windows System ‘s Path you need to copy the wget.exe file to the right directory.
- Download the wget file for Windows
- Press
Windows + Eto open File Explorer. - Find where you downloaded
wget.exe(e.g. Downloads folder) - Copy the
wget.exefile - Paste into the System Directory (System32 is already in your system’s path)
- Go to
C:\Windows\System32. - Paste your
wget.exefile into your System32 folder
- Go to
wget: missing URL
The “wget: missing URL” error message occurs when you run the wget command without providing a URL to download.
One of the use cases that I have seen this is when users used flags without the proper casing.
$ wget -v
# wget: missing URL
Above the casing of the v flag should not be lowercase, but uppercase.
Or use the verbose way of calling it with the double-dash and full name.
$ wget --version
# No error
Alternatives to Wget on Mac and Windows
You can use cURL as an alternative of Wget command line tool. It also has to be installed on Mac, Linux and Windows.
Wget for Web Scraping
By allowing you to download files from the Internet, the wget command-line tool is incredibly useful in web scraping. It has a set of useful features that make web scraping easy:
- Batch Downloading:
wgetallows you to download multiple files or web pages in a single command. - Recursive Downloading: the
--recursiveflag inwgetallows you to follow links and download an entire website - Retries:
wgetis designed to handle unstable network connections and interruptions and retry failed extractions - Command-line options: Options are available to improve scraping capabilities (download speed, User-Agent headers, cookies for authentication, etc.).
- Header and User-Agent Spoofing: To avoid being blocked by websites when web scraping,
wgetallows you to change the User-Agent header to make your requests appear more regular users. - Limiting Server Load: By using the
--waitand--limit-rateoptions, you can control the speed at whichwgetfetches data.
About Wget
| Wget was developed by | Hrvoje Nikšić |
| Wget is Maintained by | Tim Rühsen and al. |
| Wget Supported Protocols | HTTP(S), FTP(S) |
| Wget was Created In | January 1996 |
| Installing Wget | brew install wget |
| Wget Command | wget [option]…[URL]… |
Wget FAQs
What is Wget Used For?
Wget is used to download files from the Internet without the use of a browser. It supports HTTP, HTTPS, and FTP protocols, as well as retrieval through HTTP proxies.
How Does Wget Work?
Wget is non-interactive and allows to download files from the internet in the background without the need of a browser or user interface. It works by following links to create local versions of remote web sites, while respecting robots.txt.
What is the Difference Between Wget and cURL?
Both Wget and cURL are command-line utilities that allow file transfer from the internet. Although, Curl generally offers more features than Wget, wget provide features such as recursive downloads.
Can you Use Wget With Python?
Yes, you can run wget get in Python by installing the wget library with $pip install wget
Does Wget Respect Robots.txt?
Yes, Wget respects the Robot Exclusion Standard (/robots.txt)
Is Wget Free?
Yes, GNU Wget is free software that everyone can use, redistribute and/or modify under the terms of the GNU General Public License
What is recursive download?
Recursive download, or recursive retrieval, is the capacity of downloading documents, follow the links within them and finally downloading those documents until all linked documents are downloaded, or the maximum depth specified is reached.
How to specify download location in Wget?
Use the -P or –directory-prefix=PREFIX. Example: $ wget -P /path <url>
Conclusion
This is it.
You now know how to install and use Wget in your command-line.
SEO Strategist at Tripadvisor, ex- Seek (Melbourne, Australia). Specialized in technical SEO. Writer in Python, Information Retrieval, SEO and machine learning. Guest author at SearchEngineJournal, SearchEngineLand and OnCrawl.