
A PowerShell window that often pops up randomly can be quite irritating. But then it’s even more frustrating when you don’t know what’s causing this issue.
In this article, we’ll take a look at this strange PowerShell issue in detail, what causes the problem, and all the possible solutions you can implement to fix it.
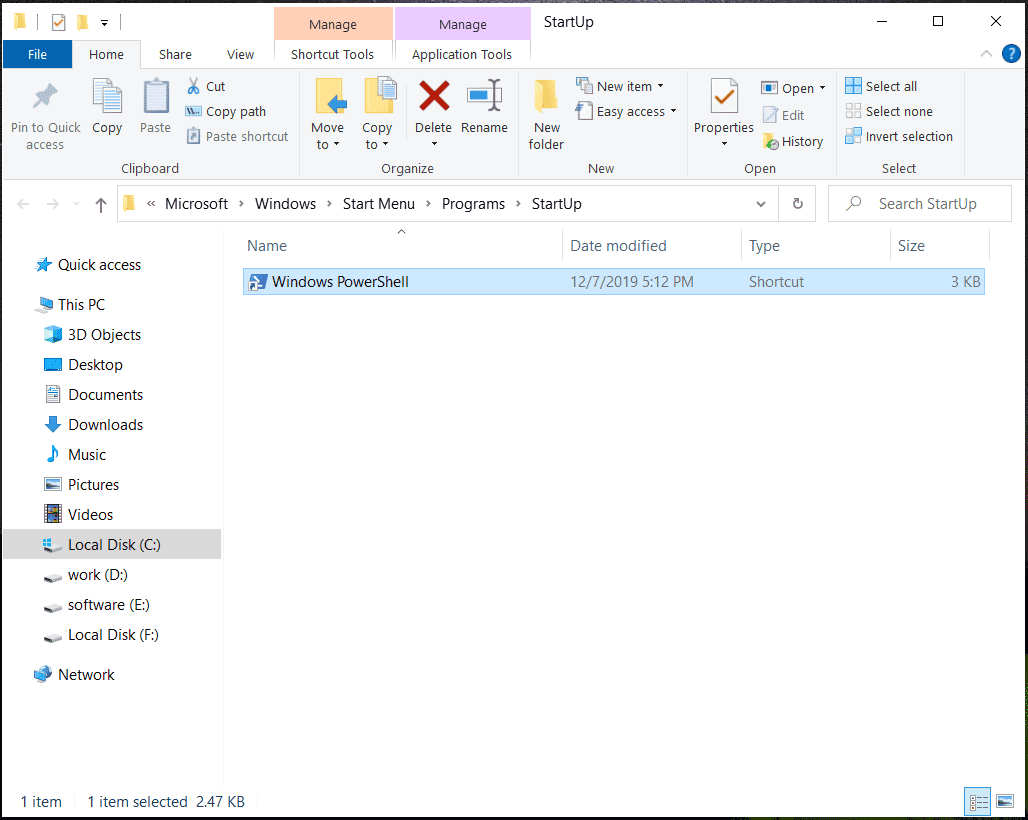
1. Remove the PowerShell Shortcut From the Startup Folder
Your Windows device has a folder named “Startup folder.” All the shortcuts or apps within this folder will run as soon as you boot up your device.
Now, PowerShell will also run on startup if its shortcut is inside this folder. To tackle this issue, remove the PowerShell shortcut from this folder as follows:
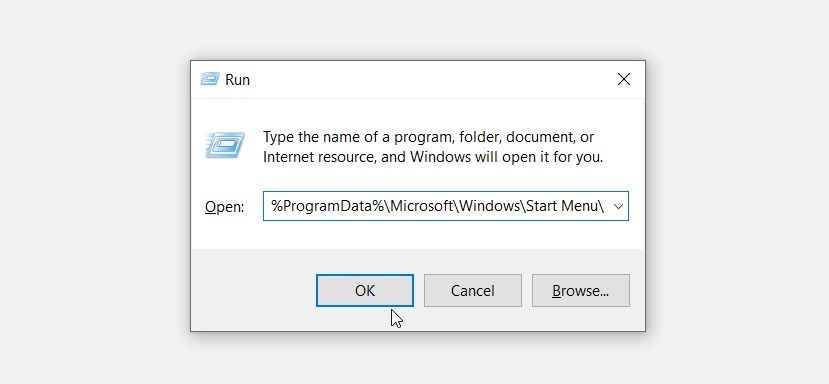
- Press Win + R to open the Run command dialog box.
- Type %ProgramData%\Microsoft\Windows\Start Menu\Programs\StartUp and press Enter.
Locate and delete the PowerShell shortcut from the Startup folder.
2. Disable the PowerShell Startup Status on the Task Manager
This issue might also be caused by the way you’ve configured a few settings. For example, the PowerShell Startup status might be enabled in the Task Manager.
So, let’s check out how you can disable the PowerShell Startup status on the Task Manager:
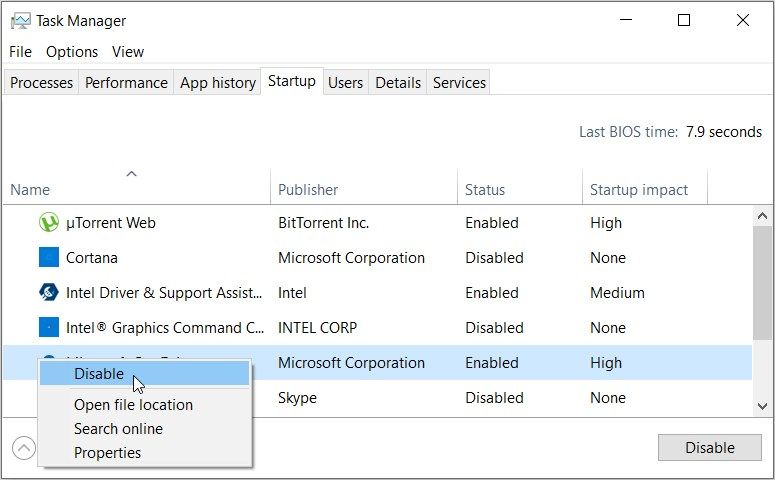
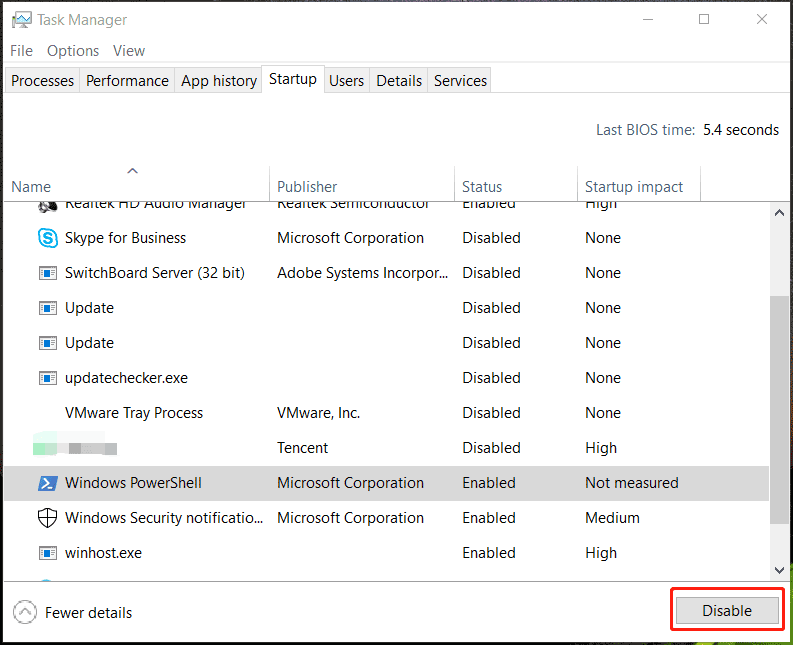
- Press Ctrl + Shift + Esc to open the Task Manager.
- Navigate to the Startup tab.
- Right-click on the Windows PowerShell option and select Disable. Finally, close the Task Manager and restart your device.
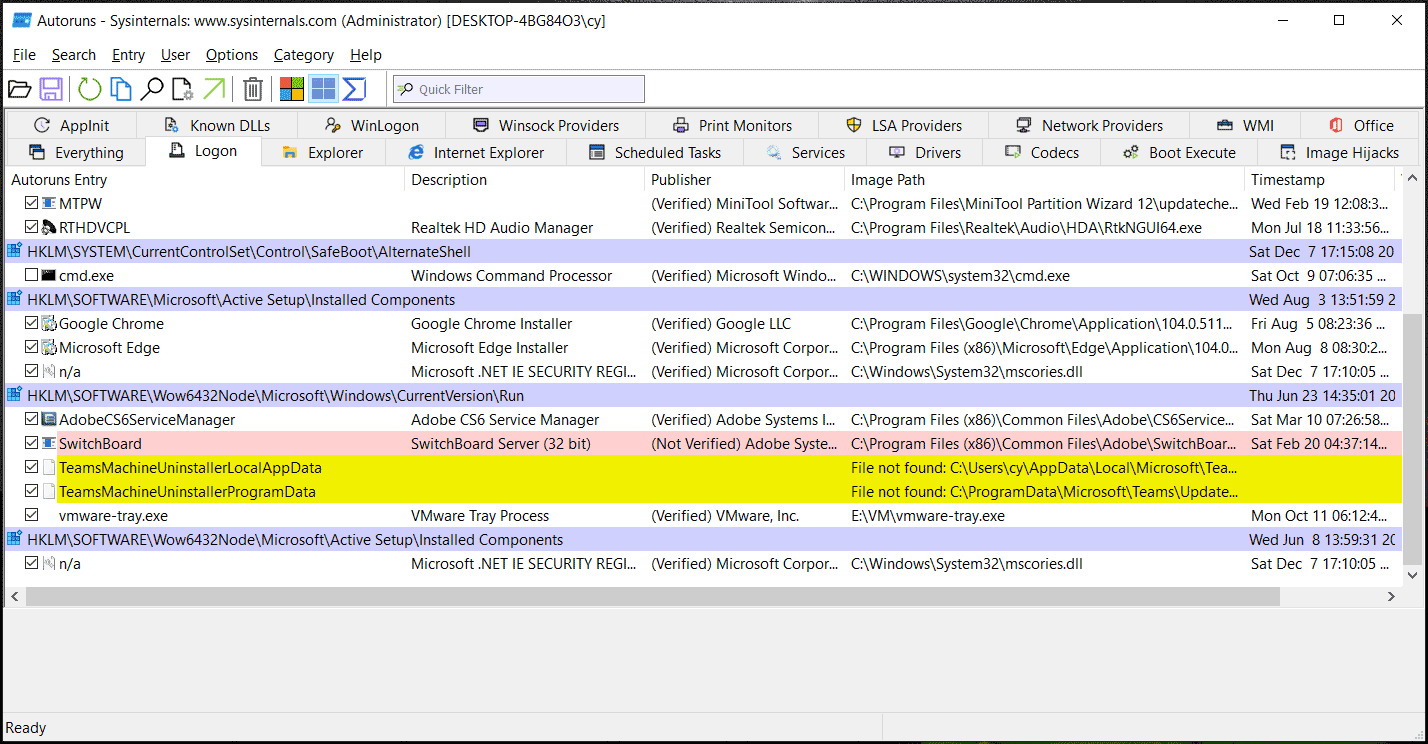
3. Disable the PowerShell Startup Status Using the Autoruns Program
At times, it’s hard to tell whether PowerShell is configured to run on startup or not.
In this instance, you can use an incredible tool called Autoruns. This feature helps you identify the apps that run immediately when you switch on your device.
Now, here’s how you can use the Autoruns program to tackle this issue:
- Download Autoruns from the Microsoft website.
- Run the program and navigate to the Logon tab.
- Locate PowerShell from the options and then uncheck its box. As an example, the image below shows how you’d do this for the OneDrive app.
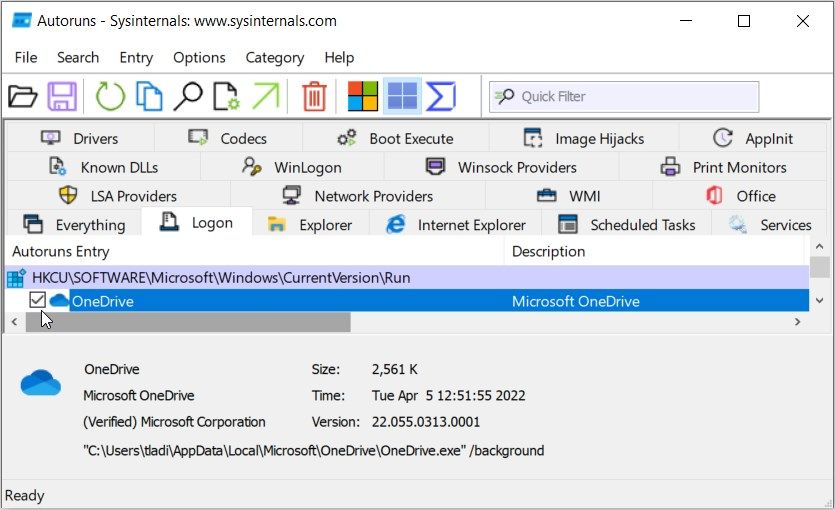
Finally, close the Autoruns program and restart your device to save these changes.
4. Restart Your Device in Clean Boot Mode
This PowerShell error might be caused by some corrupted third-party apps on your device. Now, the best solution here is to perform a clean boot. From there, you can remove any suspicious app.
And once you’ve gotten rid of the problematic app, try downloading it again—but use a safe website this time. However, if you don’t want to delete the faulty app, try updating it and see if that helps.
5. Perform a Basic Scan on Your Device
In some cases, this error might be caused by some corrupted system files. To resolve the problem, you can perform a simple scan using the Check Disk (CHKDSK) tool.
So, here’s how you can run this scan:
- Press Win + R to open the Run command dialog box.
- Type CMD and press Ctrl + Shift + Enter to open an elevated Command prompt.
- Type the following command and press Enter:
chkdsk C: /f
The C: command represents the letter of your PC’s hard drive. So, make sure that this command matches the letter displayed next to your hard drive.
Run the scan and then restart your device to save these changes.
6. Run an Advanced Scan on Your Device
If the Check Disk scan didn’t help, then you need to take a different approach. For example, you could now run an advanced scan using the DISM and SFC tools. These two features are helpful when it comes to fixing or replacing faulty system files.
To get started, you’d need to run the DISM tool through these steps:
- Type Task Manager in the Start Menu search bar and select the Best match.
- Click the File tab and select Run new task.
- Type CMD and then check the Create this task with administrative privileges box.
- Press OK to run an elevated Command Prompt.
- Next, type the following command and press Enter to run the DISM scan:
DISM /Online /Cleanup-Image /ScanHealth
When you’re done running this command, type the following command and press Enter:
DISM /Online /Cleanup-Image /RestoreHealth
From there, restart your device to save the changes. Next, run an SFC scan through these two steps:
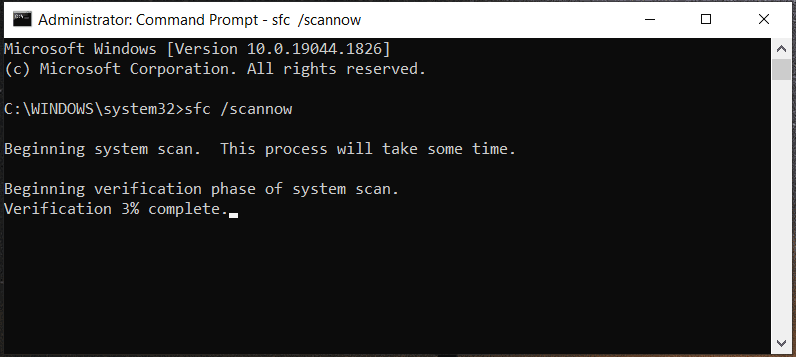
- Open an elevated Command Prompt by following the previous steps.
- Type the following command and press Enter to run an SFC scan:
sfc /scannow
Once the scan is complete, close the Command Prompt window and then restart your device.
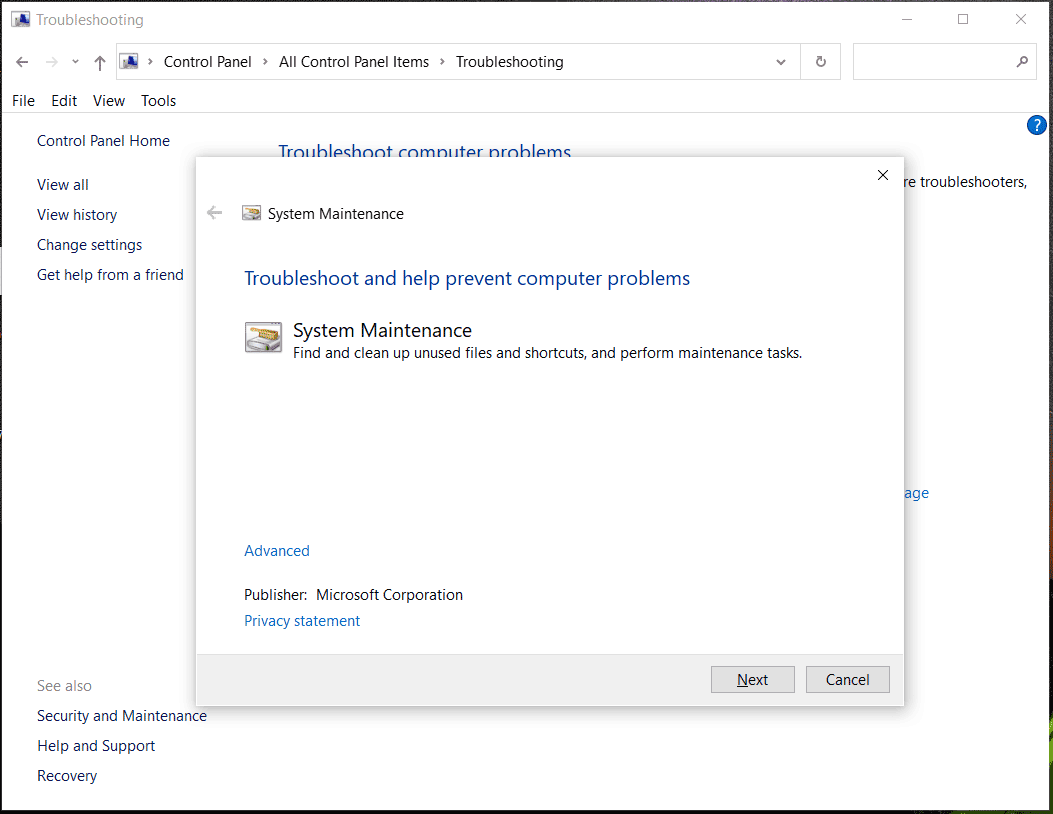
7. Run the System Maintenance Troubleshooter
Perhaps this is an issue you can resolve with one of the built-in troubleshooters. In this case, we’ll assume that this error is caused by system maintenance problems. So, an easy way out is to use the System Maintenance troubleshooter.
Now, here’s how you can run this troubleshooter to resolve the issue:
- Press Win + R to open the Run command dialog box.
- Type msdt.exe -id MaintenanceDiagnostic and press Enter.
- Next click the Advanced option in the System Maintenance troubleshooter window. From there, check the Apply repairs automatically box and click Next.
- Follow the on-screen steps and restart your device when you finish.

8. Update Windows
A simple Windows update might be one of the best solutions to this problem. That’s because the latest features could get rid of the system bugs that cause this error. Now, the best part is that this will also take care of other system problems.
So, here’s how you can update your device:
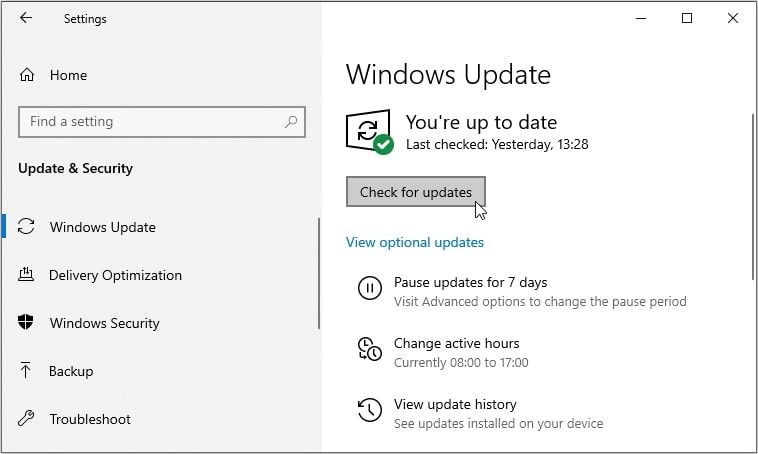
- Press Win + I to open the System Settings.
- Click Update & Security and select the Windows Update option.
- Finally, press the Check for updates button on the right and follow the on-screen instructions.
9. Disable the Windows PowerShell Temporarily
If you still can’t resolve this problem, then you could consider disabling the Windows PowerShell temporarily. Besides, you can always run your commands using the Command Prompt. And even if the Command Prompt fails, there are lots of other Command Prompt alternatives to try.
Now, here’s how you can temporarily disable PowerShell:
- Open the Start Menu search bar and type CMD.
- Right-click on the Command Prompt and select Run as administrator.
- Type the following command and press Enter:
Dism /online /Disable-Feature /FeatureName:"MicrosoftWindowsPowerShellV2Root"
Wait for the process to complete and then restart your device.
In case you want to re-enable PowerShell, here’s what you can do:
- Open the Command Prompt as per the previous steps.
- Run the following command and press Enter:
Dism /online /Enable-Feature /FeatureName:"MicrosoftWindowsPowerShellV2Root"
Get Rid of Random PowerShell Pop-Up Messages Easily
PowerShell is a handy tool that you can use for various purposes like automating PC tasks. However, it’s unpleasant when a PowerShell window keeps popping up randomly.
So, if PowerShell keeps showing up on your screen randomly, try any of the tips covered.
If Microsoft Windows PowerShell keeps popping up for no apparent reason, it can make your computer hard to use and make you worry that something’s amiss.
There are various reasons PowerShell opens all the time. Some are benign, while others are more serious. Follow these troubleshooting steps and we’ll suss out which it is in your case.

1. Run an Antivirus or Malware Scan
A malicious program or script could be causing PowerShell to run automatically. This can be a virus, malware, or another type of security threat using PowerShell to perform malicious actions on your computer.
If a malicious program or script is causing PowerShell to run automatically, you should take the following steps to address the problem:

- Disconnect your computer from the internet to prevent the malicious program or script from communicating with its server or downloading additional malware.
- Use your security software to scan your computer for malware and remove any threats that are detected. This may involve running a full system scan with your antivirus software, or using a dedicated malware removal tool.
- After removing the malicious program or script, you should restart your computer and run another scan to make sure that the threat has been completely removed.
Once your computer is clean and free of malware, you should change any passwords or security credentials that may have been compromised, and update your security software to the latest version.
2. Check if PowerShell Is Set to Autorun at Startup
PowerShell might be doing nothing in particular, but simply set to run at startup. To check if PowerShell is set to run at startup on your computer, you can follow these steps:
- Open Task Manager on your computer by pressing the Ctrl + Shift + Esc keys on your keyboard.
- In the Task Manager window, click on the Startup tab.

- In the Startup tab, look for an entry for “Windows PowerShell” in the list of startup items.

If you see an entry for Windows PowerShell in the startup list, this means that PowerShell is set to run automatically when you start your computer. The status column for the Windows PowerShell entry will indicate whether the program is enabled or disabled to run at startup.
If you don’t see an entry for Windows PowerShell in the startup list, this means that PowerShell is not currently set to run at startup. However, this does not necessarily mean that PowerShell is not running automatically – it could be running as a result of another program, script, or setting on your computer.
To further investigate and troubleshoot the problem, you may need to check other settings and configurations on your computer, such as scheduled tasks, startup scripts, and system services. You may also want to check the startup folder in Windows 10 or Windows 11 and learn how to disable startup programs.
3. A Task or Script Is Running in the Background
To check if a task or script running in the background is causing PowerShell to pop up on your computer, you can follow these steps:
- Open the Task Scheduler by clicking on the Start button on the taskbar and searching for “Task Scheduler.” Alternatively, type taskschd.msc in the Run dialog (Windows key + R) and press Enter.

- In the Task Scheduler window under Task Scheduler Library, look for any tasks or scripts that are scheduled to run at regular intervals or at startup. This will be indicated in the Triggers column. If you find any tasks or scripts that you suspect could be causing the problem, you can right-click on the task or script and select Disable from the menu.

4. A PowerShell Shortcut or Hotkey Is Opening PowerShell
PowerShell might be popping up because it’s linked to a hotkey or shortcut that you’re inadvertently triggering. If you have a program such as WinHotKey installed, it may have such a key combo configured.

You can also right-click on any shortcut, and then check its properties to see if it mentions PowerShell as part of its startup parameters. This is a sign that the shortcut may open PowerShell, perhaps to launch a script, and then just doesn’t close it again.
5. One of Your Apps Is Using PowerShell
A third-party app may use PowerShell for some of its functions. Here are some specific steps you can follow to check whether this is the case:
- Check the app’s documentation: Many apps include documentation or help files that describe the app’s features and capabilities, check to see if it mentions PowerShell.
- Look for references to PowerShell in the app’s settings or configuration options: Many apps include options that allow you to customize the app’s behavior. You can check these settings to see if they include any references to PowerShell.
- Use the app and look for PowerShell commands being executed: If you’re not able to find any references to PowerShell in the app’s documentation or settings, try running the app and using it to perform the tasks that you are interested in. Pay attention to any messages or prompts that appear on the screen, to see if they reference PowerShell.
Not all apps that use PowerShell will make this fact obvious. Some apps may use PowerShell internally without exposing it to the user. In these cases, you may not be able to determine whether the app uses PowerShell without more detailed information or by using more advanced tools and techniques. If you have the time, you can try to uninstall and then reinstall apps to track down which one might be responsible.
In some cases, you can see what’s being run in PowerShell when it pops up, and the details of that output can also be a clue to which application is associated with the problem.
6. Hardware and Software Conflicts

Hardware and software conflicts can cause PowerShell to pop up in a variety of ways. Some possible solutions for resolving these conflicts include:
- Update your drivers: Outdated or incorrect drivers can cause conflicts with PowerShell and other software. You can try updating your drivers to the latest version to see if this resolves the issue.
- Check for software or Windows updates: Software updates can often resolve conflicts by fixing bugs or compatibility issues. You can check for updates for your operating system and any other software that you are using to see if there are any available updates that may help resolve the issue.
- Restart your computer: Sometimes, restarting your computer can help resolve conflicts by resetting your system and clearing any temporary files or data that may be causing problems.
- Use the System File Checker tool: The System File Checker (SFC) tool is a built-in utility that can scan your system for corrupted or missing files and repair them. You can use the sfc /scannow command in Command Prompt (CMD) to try and fix any problems that may be causing conflicts with PowerShell. You’ll need to run it as system administrator.
- Use the DISM tool: The Deployment Image Servicing and Management (DISM) tool is another built-in utility that can help fix problems with your system. You can use the DISM tool to scan your system for issues and try to repair them.
7. You Have a Loop in Your PowerShell Script!

If you have a loop in your PowerShell script that is causing PowerShell to pop up constantly, you can try the following steps to fix the problem:
- Open the script in a text editor: The first step is to open the script in a text editor so that you can see the code and make changes to it. You can use any text editor that you are comfortable with, such as Notepad, TextEdit, or a more advanced editor like Notepad++.
- Locate the loop in the script: Once you have opened the script in a text editor, you need to locate the loop that is causing the problem. A loop is a block of code that is executed repeatedly until a certain condition is met. In your script, the loop may be marked with keywords like “for”, “while”, or “do”.
- Modify the loop to fix the problem: Once you have located the loop in the script, you need to modify it to fix the problem. This may involve changing the condition that determines when the loop should stop executing, or adding additional code to break out of the loop under certain conditions.
- Save the script and test it: After you have made the necessary changes to the script, save the file and run the script again to see if the problem has been resolved. If the problem persists, you may need to continue modifying the loop until it works as intended.
If you’re not the author of the script and don’t know anything about PowerShell scripting, it’s best to look for a specific fix for that particular script, or contact the author of the script.
8. Disable Windows PowerShell
If all else fails, why not just disable PowerShell.exe? Here’s how:
- Open the Start menu and type Windows Features into the search box.
- Select Turn Windows features on or off .

- In the Windows Features window, scroll down to the Windows PowerShell section.

- Uncheck the box next to Windows PowerShell to disable it.

- Select OK.
- Restart your computer.
Disabling PowerShell may prevent certain apps or features from working properly. You should only disable PowerShell if you are sure that you don’t need it. However, this is most likely to prevent the PowerShell popup issue permanently.
Related Posts
- The 19 Best Windows Powershell Keyboard Shortcuts
- Using PowerShell for Home Users – A Beginner’s Guide
- How to Fix a “This file does not have an app associated with it” Error on Windows
- How to Fix an Update Error 0x800705b4 on Windows
- How to Resolve “A JavaScript error occured in the main process” Error on Windows
What to do if Windows PowerShell keeps popping up on startup in Windows 11/10? This is a common issue on your PC. Take it easy! Go to read this post and you know how to stop Windows PowerShell from popping up. Try some methods gathered by MiniTool to easily get rid of this situation.
Like Command Prompt, Windows PowerShell is a command-line tool that can be used to run basic administrative tasks like installing, configuring, and uninstalling software, performing some troubleshooting tasks using scripts, etc.
Tips:
If you are interested in the difference between Command Prompt and PowerShell, see this article — PowerShell vs CMD: What Are They? What Are Their Differences.
Sometimes Windows PowerShell keeps popping up and closing, especially when booting up the operating system each time on your Windows 10/11 PC. That is, this tool opens by itself on startup and then automatically closes. This is frustrating when you run into this common issue.
The possible reasons for this situation may be various, for example, enabled PowerShell in Startup of Task Manager, virus and malware infection, corrupt registry entries, and more. No matter which triggers the random Windows PowerShell popup, you can try to troubleshoot it, and here multiple methods will be introduced.
Fixes for Windows PowerShell Keeps Popping up on Startup
Disable Windows PowerShell in Task Manager
It is likely that Windows PowerShell is configured to run in the Startup tab in Task Manager. So, to stop Windows PowerShell from popping up on startup in Windows 11/10, you can disable this process in these steps:
Step 1: Simultaneously press the shortcut – Ctrl + Shift + Esc on the keyboard to open Task Manager.
Step 2: Click More details > Startup.
Step 3: In the tab, choose Windows PowerShell and click Disable. Or, right-click on PowerShell and select Disable.
Step 4: Close Task Manager and restart the PC to see if Windows PowerShell keeps popping up and closing.
Delete Windows PowerShell Shortcut from the Startup Folder
On your PC, there is a folder called Startup. In this folder, some apps and shortcuts are saved. Once you start up your computer, the apps and shortcuts can run. That is, if you copied the shortcut of Windows PowerShell mistakenly to the Startup folder, it can run on startup. As a result, Windows PowerShell keeps popping up on startup.
To deal with this issue, remove the shortcut from that folder:
Step 1: Press Win + R to open the Run dialog. (Related post: How to Open Run Command in Windows 11 (5 Ways) & Unix OSes?)
Step 2: Type %ProgramData%\Microsoft\Windows\Start Menu\Programs\StartUp to the text box and click OK to open the Startup folder.
Step 3: Right-click on the shortcut and choose Delete. Or choose this shortcut and press the Delete key on your keyboard.
Run Autoruns to Disable Windows PowerShell Popup on Startup
If Windows PowerShell keeps popping up randomly in Windows 11/10, another solution which you can try is to use the Autoruns program that is from Microsoft.
Sometimes you cannot easily tell whether PowerShell is configured to launch on startup or not. In this case, Autoruns can help a lot since it lists all the apps that are programmed to run during the system startup. Although Windows PowerShell is configured to open at startup elsewhere, this free program can detect it.
Step 1: Go to the official website of Microsoft and click the corresponding link to download Autoruns.
Step 2: After getting the Autoruns.zip file and unzip it.
Tips:
To unzip a file, you can use a professional file archiver, and here we recommend using 7-Zip. To get it, follow this post — 7-Zip Download for Windows 10/11/Mac to Zip/Unzip Files.
Step 3: Double-click the Autoruns.exe file to run this program.
Step 4: Input PowerShell to the search box. If Windows PowerShell is configured to open at startup, it will be listed and you need to uncheck the box next to the entry to disable it, then reboot the PC. If you cannot find it, it means PowerShell is not set to automatically start anywhere in the registry.
Run SFC and DISM
According to users, running SFC and DISM scans is worth trying if Windows PowerShell keeps popping up since this issue sometimes is caused by faulty system files. SFC (System File Checker) can be used to check the system for damaged system files and repair corruption; and DISM helps to deal with faulty Windows images and download actual replacement files from Windows’ online servers to repair them.
See how to run scans:
Step 1: In Windows 11/10, run Command Prompt with admin permissions.
Step 2: Type sfc /scannow and press Enter. Then, this tool starts the verification process which may take some time.
Tips:
SFC scan stuck is a common issue. If you run into this trouble, go to find solutions from our previous post — Windows 10 SFC /Scannow Stuck at 4/5/30/40/73, etc.? Try 7 Ways.
Step 3: Execute these commands one by one:
DISM /Online /Cleanup-Image /CheckHealth
DISM /Online /Cleanup-Image /ScanHealth
DISM /Online /Cleanup-Image /RestoreHealth
Tips:
Some users recommend running another command tool – CHKDSK. And you can also execute the command — chkdsk /f /r in the CMD window.
After finishing all the scans, restart your device and see if Windows PowerShell keeps popping up randomly.
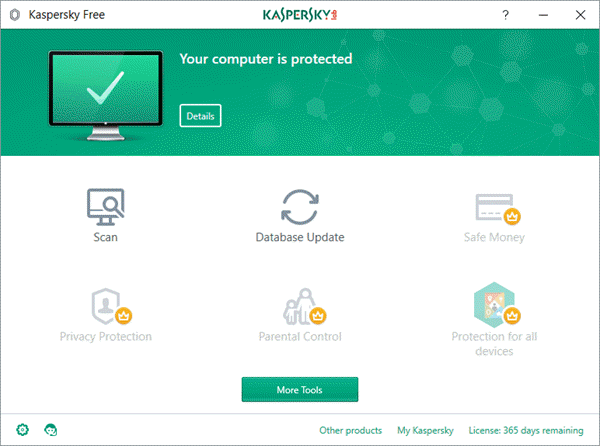
Scan Your PC with Malware Removal Tool
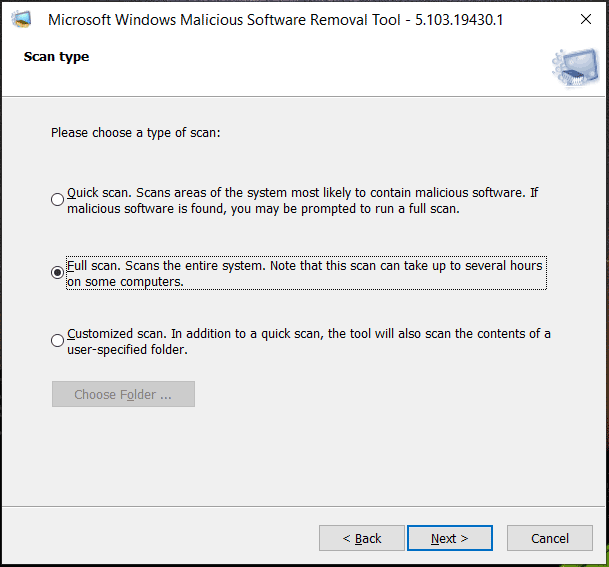
If your computer is infected with viruses or malware, the Windows PowerShell popup may keep appearing when a malicious script is running. So, you can run Microsoft Windows Malicious Software Removal Tool (MSRT) to remove malware from your PC.
This tool is available in Windows 10/11 and you can directly access it in the operating system. Besides, Microsoft offers a link to download and install its desktop app. To know details, refer to this post – Download/Run/Update/Del Windows Malicious Software Removal Tool.
Step 1: Open the Run window by pressing Win + R.
Step 2: Input mrt to the text box and click OK.
Step 3: In the following interface, choose Full scan to scan the entire system to keep your computer free from prevalent malware.
In addition, you can run other antivirus programs like Windows Defender, Malwarebytes, Avast, etc. to scan your entire system and remove viruses and malware.
Use System Maintenance Troubleshooter
At times, running the system maintenance troubleshooter in Windows 10/11 is a workaround to help you stop Windows PowerShell from popping up on startup. Have a try as follows:
Step 1: Launch Control Panel and view all the items by Large icons.
Step 2: Click Troubleshooting and choose Run maintenance tasks under System and Security.
Step 3: Click Next and this troubleshooter starts detecting the issues. Then, follow the instructions on the screen to finish the troubleshooting.
Restart Your PC in Clean Boot Mode
The random PowerShell popup could be triggered by the third-party apps and you can boot the PC in Clean Boot Mode to find the suspicious app and remove it.
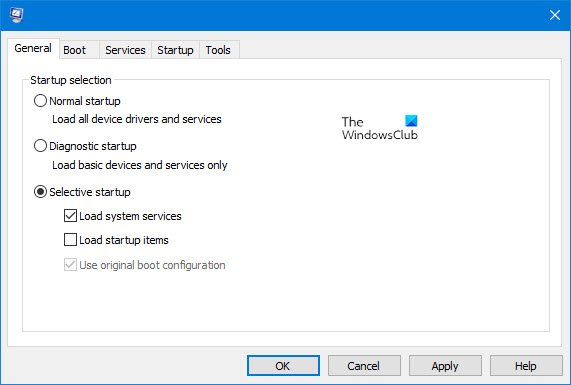
Step 1: Input msconfig to the Run window (press Win + R to get it) and click OK.
Step 2: In the System Configuration tab, click Services, check the box of Hide all Microsoft services, and click Disable all.
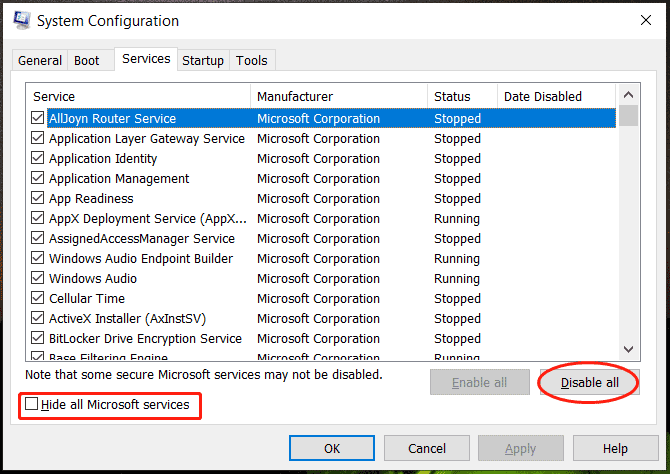
Step 3: In the Startup tab, launch Task Manager and disable all the third-party startup apps.
Step 4: Reboot Windows 11/10. If Windows PowerShell won’t pop up in this mode, a certain third-party program is a culprit. Just enable those apps one by one to have a check.
Disable Windows PowerShell Temporarily
If Windows PowerShell keeps popping up after trying these methods above, you can consider disabling it via these steps.
Step 1: In Windows 11/10, launch Command Prompt as an administrator.
Step 2: In the CMD window, type in the command – Dism /online /Disable-Feature /FeatureName:”MicrosoftWindowsPowerShellV2Root” and press Enter.
Step 3: Wait for the process to complete and then restart your computer.
Tips:
If you need to re-enable PowerShell, execute this command in the CMD window — Dism /online /Enable-Feature /FeatureName:»MicrosoftWindowsPowerShellV2Root».
In addition to these ways to stop Windows PowerShell from popping up and closing, there are some workarounds you can try, for example, create a new local administrator account (related article: How to Create Administrator Account in Windows 10), scan your computer with CCleaner, check active tasks in the Task Scheduler to see if any scripts may repeatedly launch PowerShell, and update Windows.
Common Issues about Windows PowerShell Keeps Popping up on Startup
Here, you can find some answers to frequently asked questions about PowerShell opening at startup.
FAQ 1: Is Windows PowerShell Virus
PowerShell is not a virus and it is a legitimate Windows utility like Command Prompt. But if a virus or malware attacks your computer, your PowerShell may act in an unexpected way – the tool keeps opening on startup in Windows 10/11. Thus, you can run a malware removal tool to scan your computer and remove the threat.
FAQ 2: Is It Safe to Disable Windows PowerShell?
Of course, this behavior is safe for your computer. If you need, follow the last method mentioned above to disable it.
FAQ 3: Why Does PowerShell Keep Randomly Popping up?
The reasons for this issue are various and we have mentioned them above. Usually, malware infection, scheduled tasks that use Powershell, Windows PowerShell shortcut added to the Startup folder, etc.
Suggestion – Back up Windows 11/10
Windows PowerShell popping up on startup/randomly is an annoying common issue. If you don’t want to spend much time looking for solutions when it happens, you should form a habit of backing up your PC when it is in a normal state.
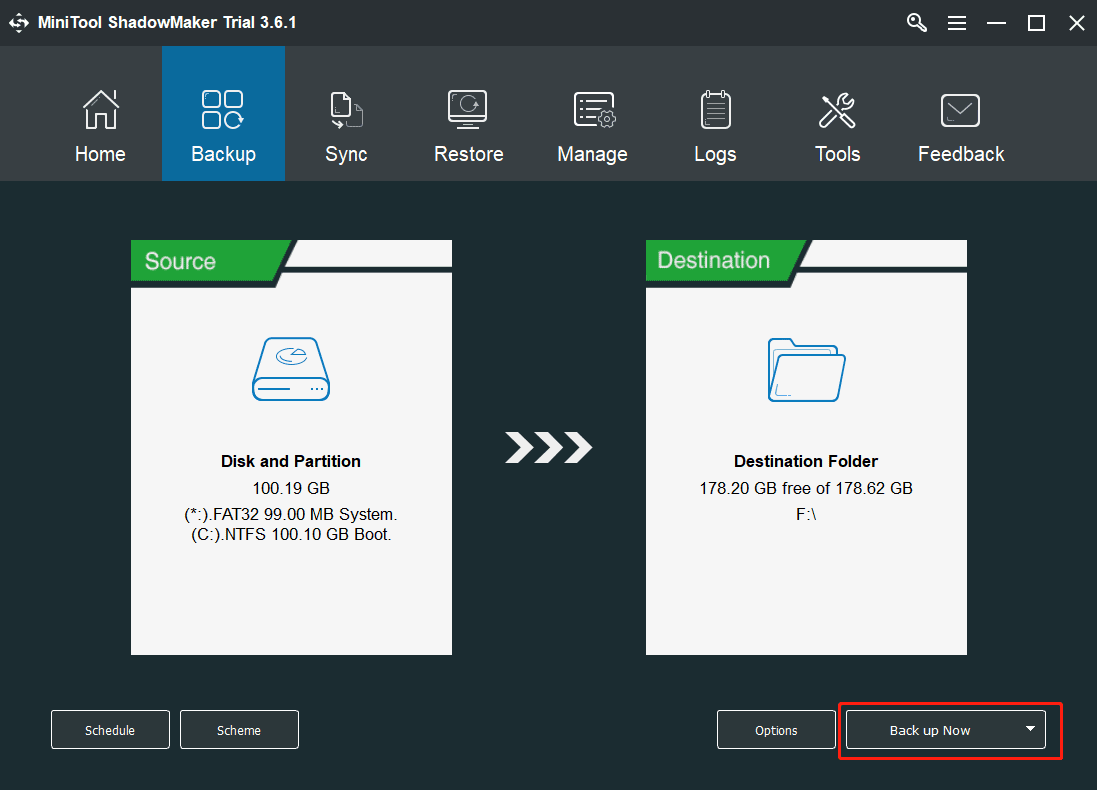
Here, we recommend creating a system image with the professional free backup software – MiniTool ShadowMaker. Once the system issues appear like the random open PowerShell popup, a system image recovery can be done to restore the PC to its previous state.
MiniTool ShadowMaker can help a lot when it comes to system image backup. During the backup process, the backup source is compressed – by default, the mode is medium. Importantly, you can use this software to create a bootable USB flash drive/external hard drive or CD/DVD. Although the system fails to run, you can boot the PC from the drive or disc and use MiniTool ShadowMaker for system recovery.
Besides, this software can help you to back up files, folders, disks, and partitions, sync data, and clone a hard drive to another. Now, don’t hesitate to download MiniTool ShadowMaker and install it on your Windows 11/10/8/7 PC.
MiniTool ShadowMaker TrialClick to Download100%Clean & Safe
Step 1: Launch MiniTool ShadowMaker Trial Edition (free use all the features in 30 days) and click Keep Trial to go on.
Step 2: By default, system-related partitions have been chosen as the backup source. Also, you can find the destination folder is selected. If you don’t want to back up your PC to that path, re-select it by clicking Destination.
Step 3: Click Back up Now to execute the system image now. After finishing the system backup, go to Tools > Media Builder to get a bootable drive or disc.
The End
How to stop Windows PowerShell from popping up on startup in Windows 11/10? After reading this post, you know much information. Just try these methods to easily get rid of the trouble if you are hit by it right now. Hope they are helpful to you. If you find some other useful solutions, you can leave a comment below. Thanks very much.
Download Windows Speedup Tool to fix errors and make PC run faster
PowerShell is not an application that we wish to open automatically at Startup. There are instances that users report that Powershell is opening at startup on Windows 11/10. In this guide, we have solutions to fix that issue.

Generally, we use Windows PowerShell to configure, manage, and administer our PC or a network. For a normal user, Powershell has no uses except for rare circumstances like running SFC or DISM scans or troubleshooting.
The issue of PowerShell opening at startup can be fixed with any of the following methods.
- Disable Opening PowerShell at Startup in Task Manager
- Delete PowerShell shortcut from Startup folder
- Run anti-malware software
- Troubleshoot in Clean Boot State.
Let’s see each method in detail.
1] Disable Opening PowerShell at Startup in Task Manager
PowerShell might have been added to Startup programs accidentally. Disabling it from the Startup in Task Manager will stop it from opening at startup. To do so, right-click on the Taskbar and select Task Manager. In the Task Manager window, click on the Start-up tab.
Right-click on Windows PowerShell from the list of programs in the Start-up tab and select Disable.
It will stop Windows PowerShell from opening at startup. If not, try the following method.
This post offers more ways in which you can disable startup programs.
2] Delete PowerShell shortcut from Startup folder
Another method to stop PowerShell from opening at startup is removing its shortcut from the Startup folder. To do so, press Win+R on your keyboard and type the following text, and press Enter:
shell:startup
Find the PowerShell shortcut in the folder and delete it. This should stop PowerShell from opening at startup.
3] Run an anti-malware tool
In most cases, the above two methods should fix the issue. If not, it could be malware. To confirm if it is not caused by a virus or malware, run your antivirus or software on your PC.
If it finds any such issue, the application will take care of it, and PowerShell should stop opening at startup.
4] Troubleshoot in Clean Boot State
If the issue is still not fixed, it is recommended to perform Clean Boot where only the necessary apps and drivers run.
If PowerShell doesn’t open at startup, it must have been caused by a third-party application you have installed.
Clean-boot troubleshooting is designed to isolate a performance problem. To perform clean-boot troubleshooting, you must take several actions and then restart the computer after each action. You may need to manually disable one item after another to try to pinpoint the one causing the problem. Once you have identified the offender, you can consider removing or disabling it.
TIP: If you don’t use it, you can uninstall PowerShell.
I hope this guide helped you fix your issues with the PowerShell opening at startup.
Related: Command Prompt cmd.exe keeps popping up on Startup.
Guru is a Communications graduate with hands-on experience with computers, cameras, and editing tools. A tech enthusiast and a movie buff who loves writing about computers, he dreams of living a life devoid of all tech and modern-day advancements in a forest.
Reader Interactions
Readers help support Windows Report. We may get a commission if you buy through our links.
Read our disclosure page to find out how can you help Windows Report sustain the editorial team. Read more
PowerShell is a powerful tool in Windows PC that helps run commands and carry out tasks in an automated manner. It is usually available only when invoked by running a command or launching the program.
However, users complain that Windows PowerShell keeps popping up when not invoked, and it interrupts the user’s activities. Even more, you can read through our guide on What PowerShell is and how to use it on Windows PC.
Why does PowerShell keep popping up?
The Windows PowerShell popping up repeatedly on your PC makes it hard to use or work on. The issue can occur for some notable reasons. Some are:
- Issues with the Startup configuration – You can run into PowerShell repeatedly appearing on your computer if it is set as a startup program. It allows it to launch immediately when the system is booted and runs as an essential component. So, it can cause it to keep appearing even when not prompted.
- Corrupt system files – The computer can malfunction when you have corrupt system files interfering with the activities of its programs. They can infect the needed components for running PowerShell, causing it to malfunction and appear at will on the computer.
- Outdated Windows OS – Running an outdated Windows operating system can affect performance. It indicates the system can’t access the needed patches and updates to fix bugs and improve its functionality. So, these bugs can impede the ability of PowerShell.
- Interference from other programs – Windows PowerShell can malfunction and keep popping up if another program is using its services. It can override the operating behavior of the tool, resulting in PowerShell constantly appearing without being invited.
Fortunately, we have some basic steps prepared to help you fix the issue and get your system running correctly.
What can I do if Windows PowerShell keeps popping up?
Before attempting any advanced troubleshooting steps, we recommend you go through the following:
- Turn off background apps running on your PC.
- Temporarily disable antivirus software on your computer.
- Restart your PC and check if the issue persists.
If you can’t fix the issue, proceed with the troubleshooting steps below:
1. Run the SFC and DISM to repair damaged system files
- Left-click the Start button, type Command Prompt, and click the Run as administrator option.
- Click Yes on the User Account Control (UAC) prompt.
- Type the following and press Enter:
sfc /scannow
- Type the following commands and press Enter after each:
DISM /Online /Cleanup-Image /RestoreHealth
- Restart your PC and check if PowerShell continues to appear repeatedly.


Running an SFC scan will detect and repair corrupt system files causing PowerShell to keep popping up. Check how to fix the run as administrator option if it’s not working on your PC.
2. Restart Windows in Safe Mode
- Press Windows + I key to open the Settings app.
- Click on System and click Recovery.

- Go to Advanced Startup, then click Restart now.
- Windows will automatically restart into the Choose an option window, then click on Troubleshoot.

- Click Advanced Options and click on the Startup Settings option.

- Press the F4 key to Enable Safe Mode.


Restart windows in Safe Mode will resolve startup issues liable to cause the issues with how Windows PowerShell works and appears.
Read our guide on how to fix the Safe Mode not working on Windows 11.
3. Update Windows OS
- Press the Windows + I to open the Windows Settings.
- Select the Windows Update and click on Check for Updates. Wait for the Windows update result and click on Install Update if a Windows update is available.


Updating the Windows OS will install patches for fixing bugs affecting your computer. Read about fixing Windows not connecting to update service if the error occurs on your PC.
- D3dx11_42.dll Not Found: How to Fix it
- Windows 11 Shutdown After Inactivity: 4 Ways to Stop it
- Windows Shuts Down Instead of Restarting: 4 Ways to Fix it
4. Disable the PowerShell Startup Status on the Task Manager
- Press Ctrl + Shift + Esc keys simultaneously to open the Task Manager.
- Go to the Startup tab.
- Right-click on the Windows PowerShell option and select Disable from the drop-down.

- Close the Task Manager and restart your PC to check if PowerShell continues to appear repeatedly.

The above steps will disable PowerShell from the startup menu and prevent it from running when the computer boots.
5. Perform a clean boot
- Press Windows + R key to open the Run dialog box, type msconfig, and click OK.
- Select the Services tab and check the box for the Hide all Microsoft services option, then click the Disable all button.

- Click the Startup tab and open Task Manager.
- Click the startup programs, then the Disable button.
- Restart your PC and check if the issue persists.


Performing a clean boot can fix background apps actions causing issues with how PowerShell works on your PC.
6. End tasks for background apps via Settings
- Press the Windows + I key to open the Settings app.
- Select Apps from the left pane and click on Installed apps.

- Choose the apps to end the task, then click on the three dots and select Advanced options.

- Go to Background app permissions, click the drop-down button, then select Never.

- Repeat the steps for all apps you want to restrict background permissions.


Ending tasks for background apps will fix the activities of programs that may prompt PowerShell to appear repeatedly on your computer.
Check ways to turn off background apps in Windows 11 if you have issues using the steps above.
7. Temporarily disable Windows PowerShell
- Left-click the Start button, type Command Prompt, and click the Run as administrator option.
- Click Yes on the User Account Control (UAC) prompt.
- Type the following commands and press Enter:
Dism /online /Disable-Feature /FeatureName:"MicrosoftWindowsPowerShellV2Root"
- Wait for the process to complete, and then restart your PC.
- Repeat steps 1 & 2, then run the following commands to enable PowerShell:
Dism /online /Enable-Feature /FeatureName:"MicrosoftWindowsPowerShellV2Root"


Disabling and reenabling Windows PowerShell helps refresh its process. Check our guide on what to do if Command Prompt keeps crashing on your PC.
Conclusively, our readers may be interested in how to use PowerShell ErrorAction on Windows PC. Also, you can check our guide on how to print Environment Variables in PowerShell.
For further questions or suggestions, use the comments section below.
Henderson Jayden Harper
Windows Software Expert
Passionate about technology, Crypto, software, Windows, and everything computer-related, he spends most of his time developing new skills and learning more about the tech world.
He also enjoys gaming, writing, walking his dog, and reading and learning about new cultures. He also enjoys spending private time connecting with nature.