
Many users often encounter errors while operating the Windows Media Center. These errors could be related to the Media Center not opening, crashing, or Media Center decoder errors. Fortunately, there are multiple ways using which you can fix most of these errors.
1. Clean Boot the Computer
An effective way to diagnose Media Center errors is to Clean Boot your PC. This will effectively ensure that the error in question is not being caused by third-party software.
Clean Boot essentially boots your computer with all third-party software and services disabled. Unlike booting into Safe Mode, Windows doesn’t have an automatic feature that will restart your computer into Clean Boot mode.
You can do this manually by following these steps:
- Press Win + R to open the Run dialog box.
- Type in msconfig and press Enter.
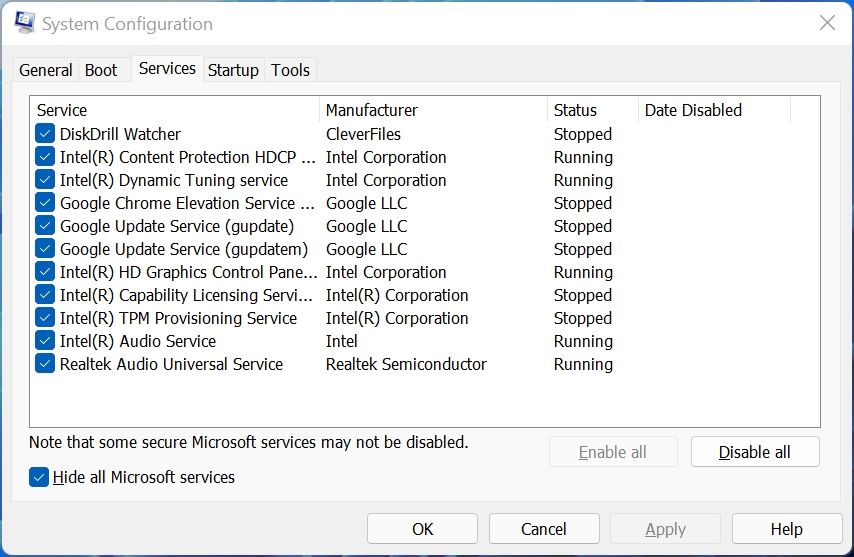
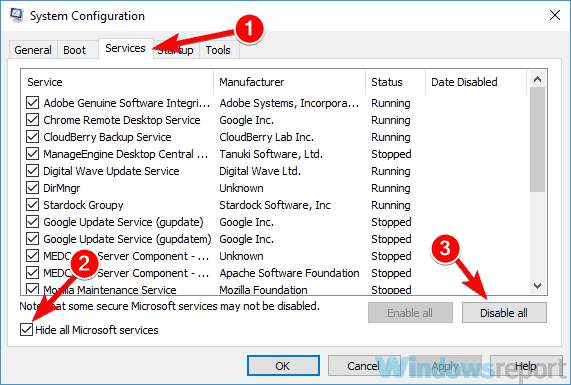
- In the System Configuration window, navigate to the Services tab.
- Check the Hide all Microsoft services checkbox.
-
Now, click on Disable all and then click on Apply.

- Close the window.
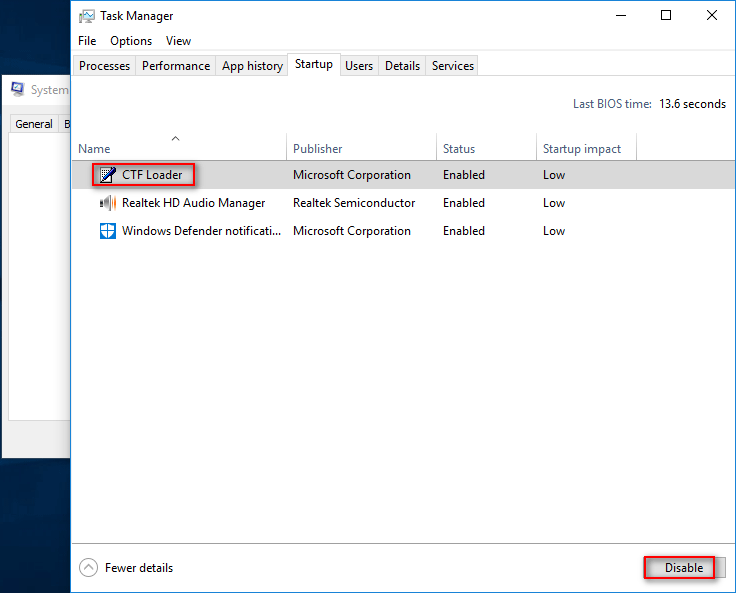
- Open Task Manager using the CTRL + Shift + ESC shortcut.
- Go to the Startup tab and select each program from the list, then click on Disable. You’ll have to do this one by one.
- Click on Apply and close the Task Manager.
- Restart your computer.
Upon rebooting your computer, check to see if the Media Center error still persists. If it is resolved, then it is most likely being caused due to interference from a third-party program. In this case, you will have to enable each program one by one to find out the culprit.
2. Update Your Drivers
Outdated or malfunctioning drivers often result in Windows errors, including Media Center errors. Thus, it’s always best to ensure that you have the latest drivers on your system.
In the case of a Windows Media Center error, it may be worth updating the display driver to the latest version. Y
ou can do this using the Device Manager:
- Right-click on the Start button and click on Device Manager. Alternatively, you can simply search for the device manager using the Start menu search bar.
- Scroll down and expand the Display section.
-
Right-click on the display driver and choose Update driver.

- Now, click on the Search automatically for drivers option.
- Wait for Windows to download and install the latest drivers, then reboot your computer.

Ideally, you should update all major drivers using the Device Manager when you encounter Windows Media Center errors. A lot of these major driver updates are automatically downloaded by Windows Update. If you don’t prefer using the Device Manager, you can also make use of these free driver updaters that will make your job much easier.
3. Ensure That Windows Is Updated
It’s always a good practice to keep your Windows OS up to date. Microsoft pushes out updates quite regularly, and it’s easy to get a backlog of updates, especially if you use a metered connection. However, you can manually check for updates and Windows will automatically download as well as install them.
Here is how you can check for Windows updates on your computer:
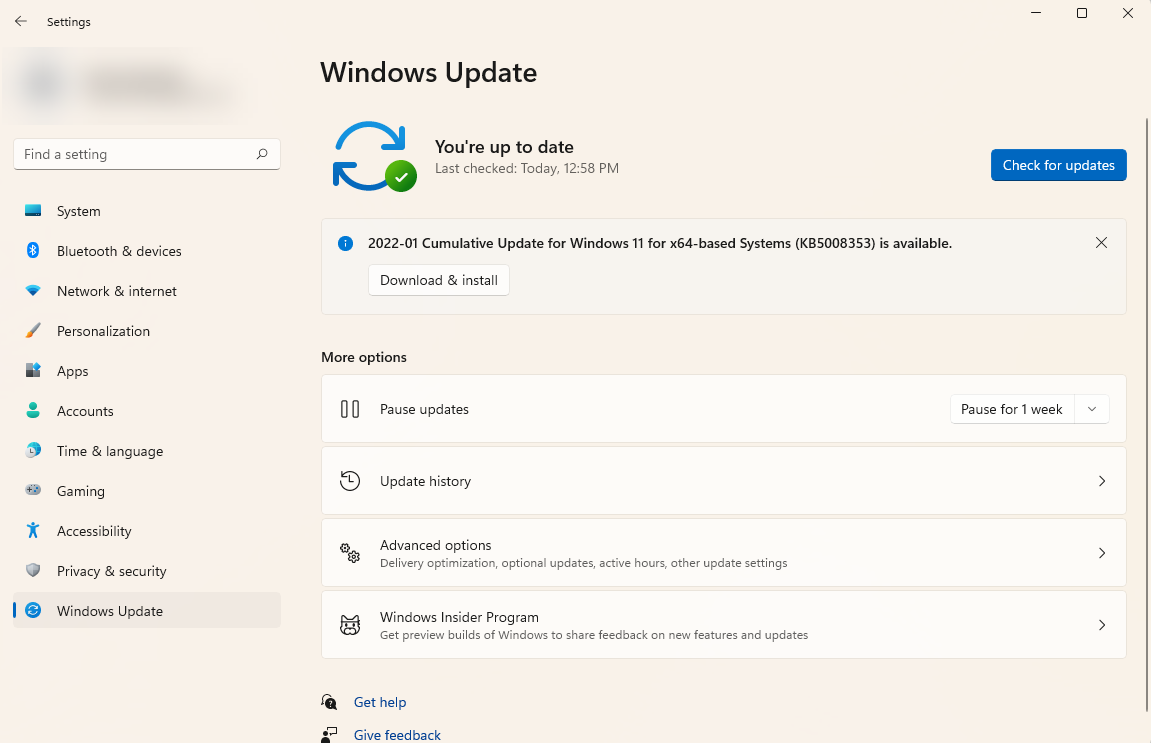
- In the Start menu search bar, type Windows Update and click on Windows Update Settings.
-
Now, click on the Check for updates button.

- If there are any updates, schedule a time for Windows to restart and install them.
After updating Windows, check whether the Windows Media Center error is still there. Most likely, it will be resolved.
4. Run CHKDSK on Your Computer
The CHKDSK utility helps you find and fix hard drive-related problems on your computer. A malfunctioning hard disk drive (HDD) can also result in Windows Media Center errors. You can CHKDSK using the Command Prompt (CMD):
- Type cmd in the Windows Start menu search bar.
- Right-click on Command Prompt > Run as administrator.
-
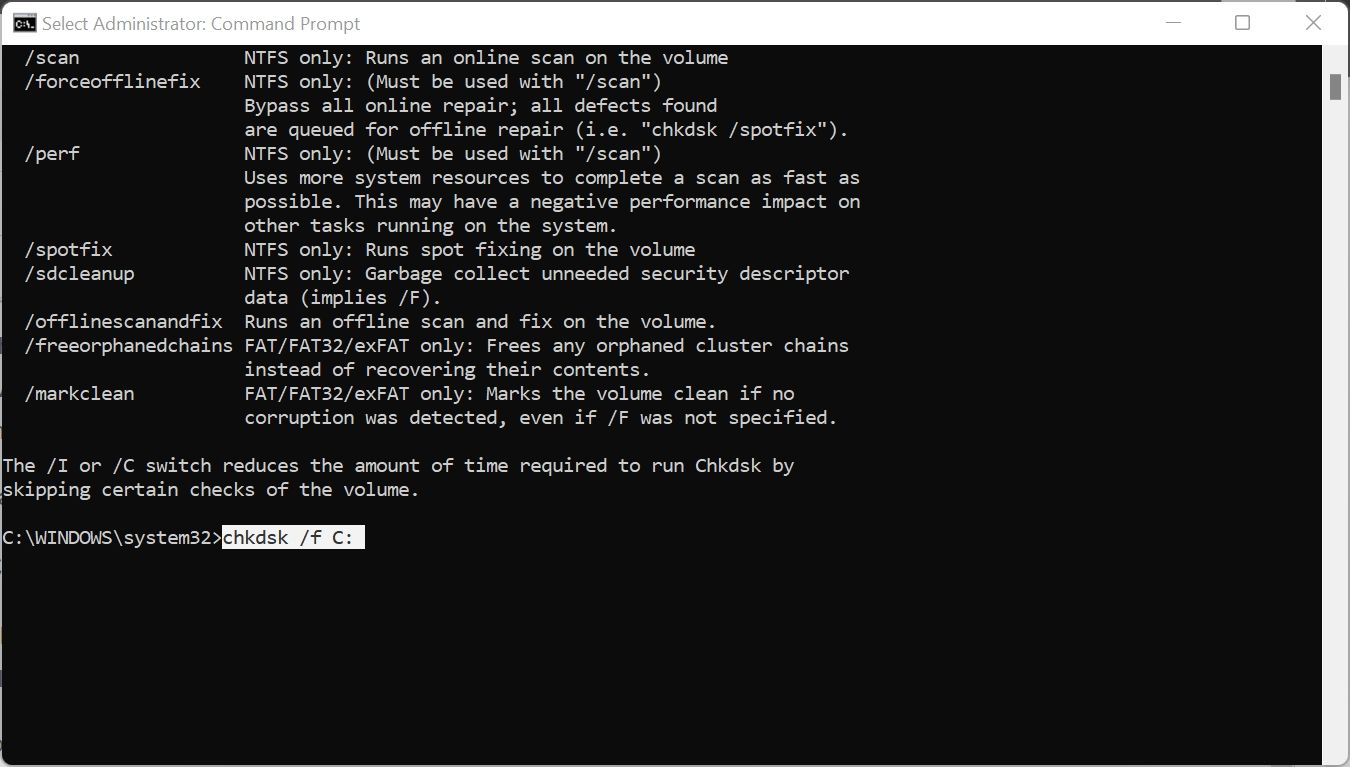
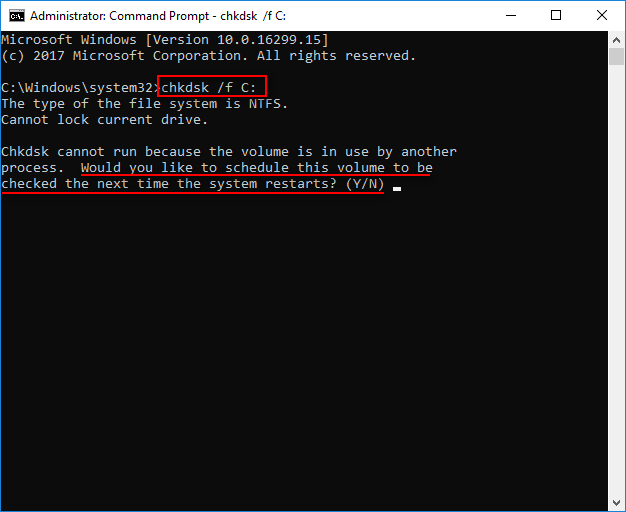
In the cmd console, type chkdsk /f X:, replacing X with the partition you want to scan. For example, if you want to scan the C: drive, you will type chkdsk /f C:.

- Wait for the scan to complete, then restart your computer.
The CHKDSK scan will automatically fix any error that it may find. It should fix the Windows Media Center error if it was due to an issue in the hard drive. If the error pops up again, move on to the next solutions listed below.
5. Rename the EpgListings Directory
Many users have fixed the Media Center error by renaming the EpgListings directory. To do this, simply use the steps listed below:
- Open Windows Explorer using Win + E.
- Navigate to C:\ProgramData\Microsoft\eHome\Packages. You can simply copy the directory path and paste in the address bar of Windows Explorer.
- Now look for EpgListings and rename it.
- Open Windows Media Center to see if you still get the error.
6. Use System Restore
As a last resort, you can use System Restore to restore your computer to an earlier state. This will wipe out any data and applications that were added after the Restore Point was created. Therefore, back up all your important data before proceeding further.
Here is how you can use System Restore:
- In the Start menu search bar, type system restore.
- Select the Create a restore point option from the search results.
- Now, click on System Restore.
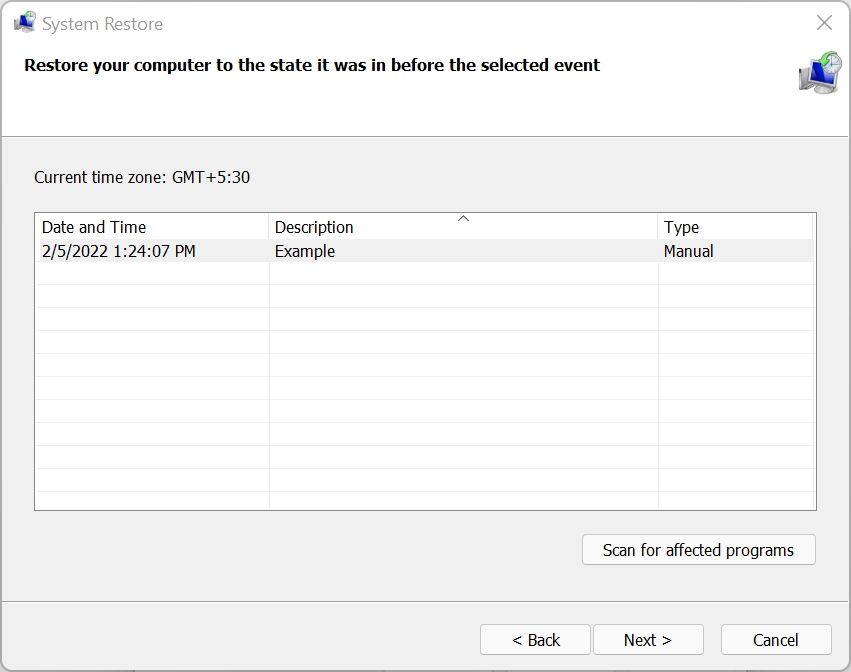
- In the System Restore wizard, click Next.
-
Select a restore point from the list and click on Next.

- Double-check everything and click on Finish.
It may take a while for your computer to reboot and be restored to an earlier state. This should fix the error, provided you chose a restore point that was at a time before the Media Center error popped up. Although it is unlikely that you’ll run into a problem when using System Restore, here are a few tips and fixes in case System Restore doesn’t work.
As is evident, there are many fixes for the Windows Media Center error. While most of the fixes are simple enough to follow along for the average user, always read the steps carefully before executing them. Additionally, it’s important to be aware of some tips that will help you resolve this, and other common Windows errors in the future.
While you’re enjoying the new features after upgrading your system to Windows 10, some people are bemoaning the malfunction of some features. For instance, the Windows Media Center error gets the attention of the public. Here, I’ll show you some useful ways to fix it.
Microsoft removes Windows Media Center from its latest Windows 10 updates; it has left a lot of Windows users angry and disappointed. Because of this, people choose to install a custom version of Windows Media Center and it can be compatible with the new Windows 10.
Whether you should upgrade to Win10?
Yet, Media Center error appears now and then, bothering the users a lot. As far as I know, there are mainly three types of Media Center errors; they are respectively:
- Windows Media Center decoder error: the video decoder is not working, is not installed, or is not supported. Try installing the codec or restating your computer. Besides, you may try to update the drivers to fix the problem.
- Windows Media Center won’t open error: when you click on it, the system prompts that this program cannot open and says it is searching for solutions. Since the system gives no suggestion on how to fix this, you may try the solutions below.
- Windows Media Center not working (stopped working) error: a problem caused the program to stop working correctly. Windows will close the program and notify you if a solution is available. This happens mainly due to third-party applications interfering with Media Center. To remove the problematic applications after a clean boot may fix the problem.
The Best Windows Media Center On Windows 10 – Check It Out.
In this part, I’ll introduce mainly 3 solutions to help you solve the Media Center problems mentioned above.
Solution 1: Perform a Clean Boot
Clean boot means the minimal set of drivers and startup programs. If you start your computer in a clean boot, you are able to find out if there is a background program interfering with your program/game.
How to perform a clean boot in Windows 10:
- Click on the search box located in the taskbar.
- Type msconfig into the textbox.
- Right click on System Configuration (Desktop app).
- Choose Run as administrator from the menu.
- Select the Services
- Check the Hide all Microsoft services option at bottom left.
- Click on the Disable all
- Shift to the Startup
- Click on the Open Task Manager
- Select the first item in Startup tab and click on the Disable
- Repeat step 10 to disable all the items listed.
- Close Task Manager.
- Go back to the Startup tab of the System Configuration dialog box. Now, click on the OK button to confirm changes.
- Restart your computer.
Note: what if the Windows 10 taskbar is not working?
Solution 2: Run CHKDSK Scan
This is able to fix the Media Center error caused by a damaged hard drive.
- Click on the search box located in the taskbar.
- Type command prompt.
- Right click on Command Prompt (Desktop app).
- Choose Run as administrator from the menu.
- Type chkdsk /f *: (* stands for the system drive letter) and press Enter.
- Press Y to schedule a restart at next reboot.
- Restart your computer.
Note: how to recover data after CHKDSK?
Solution 3: Rename the EpgListings directory
Here are the steps to rename the EpgListings directory:
- Open File Explorer.
- Navigate to C:\ProgramData\Microsoft\eHome\Packages one by one.
- Locate EpgListings
- Click to rename it.
In addition to those solutions, you could also try updating your drivers to the latest version and removing the problematic applications as I have mentioned in the beginning.
If all those methods failed, please don’t worry, you still have a trump card – upgrading your system to the latest version.
Readers help support Windows Report. We may get a commission if you buy through our links.
Read our disclosure page to find out how can you help Windows Report sustain the editorial team. Read more
Some users prefer using Media Center for their multimedia needs, but sometimes issues with this application can appear. Speaking of issues, today we’re going to show you how to fix the most common Media Center errors.
There are many issues that can occur with Media Center, and as for issues, here are some common problems that users reported:
- Windows 10 Media Center not working, stopped working – This problem can occur due to third-party applications. To fix the issue, it’s advised to perform a Clean boot and remove the problematic applications that are interfering with Media Center.
- Windows 10 Media Center decoder error – Sometimes your drivers can be the problem, so if you’re having issues with Media Center, perhaps updating your drivers will fix the problem.
- Windows Media Center Windows 10 won’t start – This is one of the problems that can occur with Media Center, but you should be able to fix it with one of our solutions.
- Perform a Clean boot
- Perform a chkdsk scan
- Make sure that your drivers are up to date
- Rename the EpgListings directory
- Download the latest updates
- Remove the problematic applications
- Perform a System Restore
Solution 1 – Perform a Clean boot
If you’re having issues with Media Center on your PC, perhaps you might be able to solve the problem simply by performing a Clean boot. In case you don’t know, by performing a Clean boot you’ll completely disable all startup applications and services.
This is quite simple to do, and you can do it by following these steps:
- Press Windows Key + R to open the Run dialog. Now enter msconfig in the input field and click OK or press Enter.
- The System Configuration window will appear. Navigate to the Services tab and check Hide all Microsoft services. Now you need to disable all non-Microsoft services. To do that, just click the Disable all
- After you disable all startup services, you need to do the same for applications. Head over to the Startup tab and click Open Task Manager.

- List of startup applications will now appear. Right-click the first entry on the list and choose Disable from the menu. Repeat this process for all startup applications on the list.

- After you disable all startup applications, close Task Manager and go back to the System Configuration Click Apply and OK to save changes and restart your PC.

Once your PC restarts, check if the problem with Media Center is still there. If not, it’s almost certain that one of the disabled applications or services was causing the issue. To pinpoint the cause, it’s advised to enable applications and services one by one until you manage to pinpoint the cause of the problem.
Bear in mind that you’ll have to restart or at least log out after enabling a set of services or applications in order to apply the changes. Once you find the problematic application or service, you can uninstall it or keep it disabled.
Solution 2 – Perform a chkdsk scan
In some cases, problems with Media Center can occur because the files on your hard drive are damaged. To fix this, it’s advised to perform a chkdsk scan and repair the files. This is actually quite simple to do, and you can do it by following these steps:
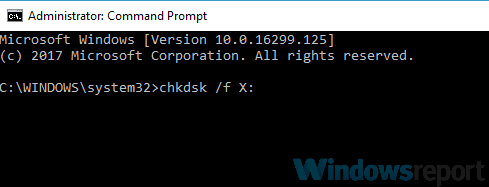
- Open Command Prompt as administrator. To do that, press Windows Key + X or right-click the Start button. Now choose Command Prompt (Admin) or PowerShell (Admin) from the menu.
- Command Prompt should now start. Type chkdsk /f :X and press Enter. Bear in mind that you need to scan your system drive, so replace :X with your system drive letter. In most cases, that would be C.

- You’ll be asked to schedule a restart at next reboot. Press Y to confirm.
Now restart your PC. Once the PC boots, the chkdsk scan should start automatically. Bear in mind that this scan can take about 10-20 minutes, depending on the size of your system drive.
Once the scan is finished, check if the problem is still there. If certain files are damaged, the scan can take an hour or more, so keep that in mind.
Solution 3 – Make sure that your drivers are up to date
- Right click on Windows Start button and select Device Manager

- Right click on the Display adapters and select Update driver option
- Select Search automatically for drivers option to install best available drivers
- See if the best drivers for your PC are already installed


Sometimes problems with Media Center can be caused by your drivers. In order for your hardware to work properly with Media Center, your drivers need to be up to date. To fix this problem, you’ll need to ensure that all-important drivers are up to date.
To update your drivers, you’ll need to visit your hardware manufacturer’s website and download the appropriate drivers for your hardware. This can be a bit tedious, especially if you need to update multiple drivers.
However, you can speed this process simply by using third-party software that can download the latest drivers automatically with just a couple of clicks.
⇒ Get Outbyte Driver Updater
Solution 4 – Rename the EpgListings directory
If you’re having problems with Media Center, the issue can be caused by EpgListings directory. To fix the problem, some users are recommending renaming or removing this folder. This is quite simple to do, and you can do it by following these steps:
- Navigate to the C:ProgramDataMicrosofteHomePackages
- Locate EpgListings directory and rename it.
After doing that, the problem should be completely resolved.
Solution 5 – Download the latest updates
If you’re having problems with Media Center on your PC, it’s possible that the issue is caused by certain glitches on your system.
Glitches can sometimes appear if your system isn’t up to date, so to prevent this problem from appearing, it’s important that you keep your system up to date.
Windows 10 usually installs the missing updates automatically, but sometimes issues with Windows updates can occur and you can miss certain updates. Of course, you can always check for updates manually by doing the following:
- Open the Settings app. You can do that quickly by using the Windows Key + I shortcut. Once the Settings app opens, navigate to the Update & Security section.
- Click the Check for updates button in the right pane.
- Windows will now check for available updates. If updates are available, Windows 10 will download and install them automatically.
Once your system is up to date, check if the problem is still there.
Solution 6 – Remove the problematic applications
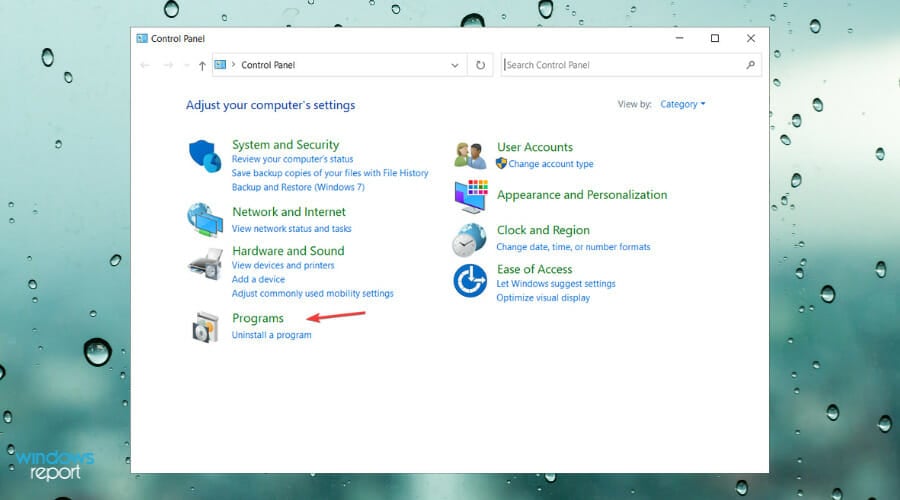
- Type Control Panel in the Search bar
- Find Programs and click on Uninstall a program
- Check the list to uninstall the problematic programs


If you’re having problems with Media Center on your PC, the issue might sometimes be other applications. Third-party applications can interfere with Media Center and they can lead to various issues.
Speaking of problematic applications, many users reported that LogMeIn software and TeamViewer caused these issues to appear. To fix the problem, it’s advised to find and remove these applications from your PC.
There are several ways to do that, but the most effective one is to use uninstaller software.
Uninstaller software is a special application that can remove the selected application from your PC completely. To do that, uninstaller software removes all files and registry entries associated with the application you want to remove.
Once you remove the problematic applications using this software, check if the problem is still there.
Solution 7 – Perform a System Restore
If the problem with Media Center is still there, you might have to perform a System Restore in order to fix the problem. If you’re not familiar, System Restore is a useful feature that allows you to restore your system to and fix various problems.
This feature is incredibly simple to use, and you can restore your system by doing the following:
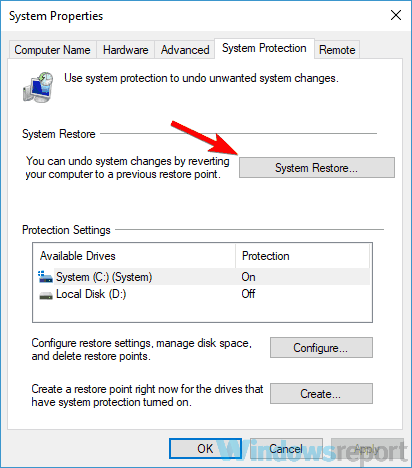
- Press Windows Key + S and enter system restore. Choose Create a restore point from the list.
- The System Properties window should now appear. Click the System Restore button.

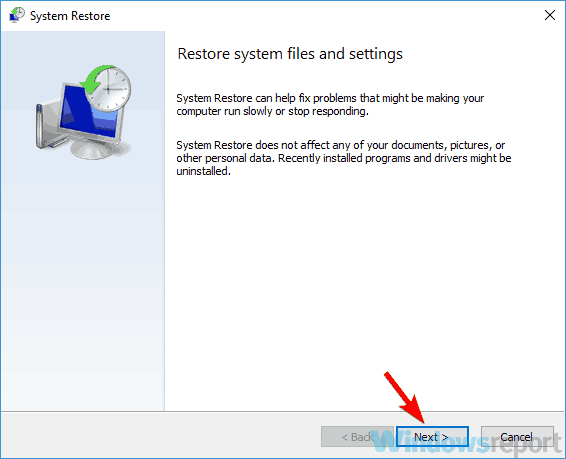
- System Restore window will appear. Click Next to proceed.

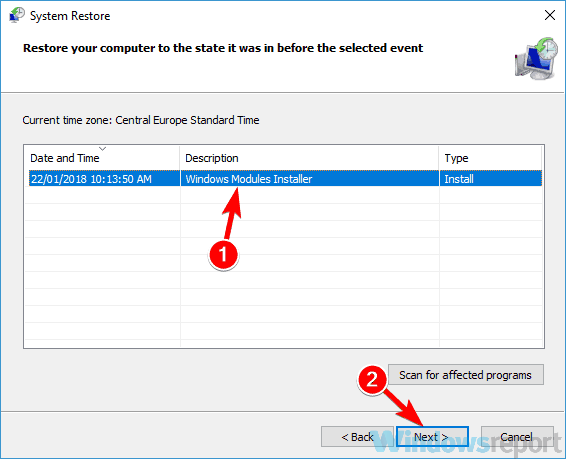
- Check Show more restore points option, if it’s available. Now select the desired restore point and click the Next button.
- Follow the instructions on the screen to complete the process.
Once your system is restored, check if the problem is still there.
Media Center is a useful tool, but sometimes problems with it can occur. However, we hope that you managed to solve your problem after reading this article.
Milan Stanojevic
Windows Toubleshooting Expert
Milan has been enthusiastic about technology ever since his childhood days, and this led him to take interest in all PC-related technologies. He’s a PC enthusiast and he spends most of his time learning about computers and technology.
Before joining WindowsReport, he worked as a front-end web developer. Now, he’s one of the Troubleshooting experts in our worldwide team, specializing in Windows errors & software issues.
Здравствуйте. В компонентах Windows снимаете галочку с Media Center и он все равно «вылезает»?
Попробуйте так:
1. Запускаем редактор реестра (Win + R > regedit > OK);
2. Находим в реестре раздел
HKEY_CURRENT_USER\Software\Microsoft\Windows\CurrentVersion\Explorer\FileExts\.lnk;
3. Удаляем подраздел UserChoice;
4. Перезагружаем компьютер.
На вирусы проверяли?
Еще, подробные инструкции по его отключению есть здесь:
www.drcomp.su/windows_7/udalenie_komponenta_windows_media_center_ili_otklyuchenie_ego_avtozapuska.html
Если не войти в редактор реестра и ничего не сделать, значит либо вирус какой-то запортил настройки, либо еще что-то в системе неисправно. Попробуйте восстановление системы на более раннюю точку (когда все работало). Еще, в принципе, можно снять жесткий диск, подключить к другому компьютеру, импортировать Ваш реестр и исправить там. Но если Вы не специалист, Вам это будет сделать проблематично.
В этом случае, либо показывать компьютер специалисту, либо пепеустанавливать windows.
-
#2
Okay first of all did you try a system restore? Could you list the specs for your computer? Did your computer come with Windows 7 preinstalled ( and for that matter, you don’t even mention your OS although I assume its 7 ) or did you perform a clean install or an upgrade? You should also perform a scan with Malwarebytes http://www.malwarebytes.org/mbam.php
As a last resort you may try to back up all your important data and restore you computer to its factory settings ( do you have installation or recovery CD’s? ). I cant help you more intill you tell us more about your computer.
in your reply include:
1) specs such as Model, Company,the OS, amount of RAM, and CPU power ( the more you list the better). To make life easyier goto click on the start button
and in the search look up system information click on system summery >> click edit select all >> then edit copy >> paste results in your next post.
2)log created after running a full system scan of malwarebytes
3) A complete list of your security software such as anti-viruses
4) check your system notifications ( that white flag close to the far right of the taskbar, it may have a red circle with a white x in the middle ) tell us what the alerts are if you have any.
5) im sure im missing some things, but the main point is give more information so I, or anyone else for that matter can help you diagnose your problem.
Windows is difficult to maintain, did your computer run really good at one time? If so you might need to do some cleaning up.
1. create a system restore
2. run ccleaner ( www.ccleaner.com ) after you install and open the program click run cleaner after that click the button that says registry >> then
click scan for issues >> then click fix selected issues.
3. run malwarebytes if you have not already, be sure to do a full scan.
4. defragment your hard drive
5. clear unneeded start up programs. ( goto search type «msconfig» without quotations then press enter >> click on the start up tab then read carefully for programs that may not be need to launch on startup.
Above all keep in mind that sometimes its not the Operating System, sometimes its the hardware. So follow my steps to give us further insight into your issue.
Last edited: