
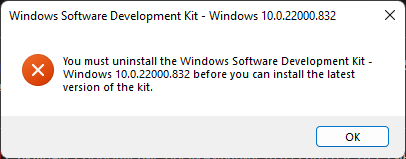
Решил я опробовать себя в плюсах, добавил к VS подержку плюсов для десктопа и начал получать ошибку с ненайденной Windows SDK version 10.0.22000.0. Недолго думая залез в интернет и нашёл то что не хватает студии, скачал, ставлю, а оно ругается, что уже установлено. Решил провернуть билд через иную версию — так оно так же ругается, что не находит, хотя вот только что я вручную устанавливал.
Перезагрузка пк ни к чему не приводила. Переустановка студии тоже.
Установлена win 11, Visual Studio Community 2022
Build Output:(Пробовал с другой доступной версией)
Build started...
1>------ Build started: Project: ConsoleApplication1, Configuration: Debug x64 ------
1>C:\Program Files\Microsoft Visual Studio\2022\Community\MSBuild\Microsoft\VC\v170\Microsoft.Cpp.WindowsSDK.targets(46,5): error MSB8036: The Windows SDK version 10.0.22000.0 was not found. Install the required version of Windows SDK or change the SDK version in the project property pages or by right-clicking the solution and selecting "Retarget solution".
1>Done building project "ConsoleApplication1.vcxproj" -- FAILED.
========== Build: 0 succeeded, 1 failed, 0 up-to-date, 0 skipped ==========
========== Build started at 10:33 PM and took 03.635 seconds ==========
Ошибка установщика:
UPD:
После нескольких десятков переустановок — откопал SDK:

Но версию 0.0.22000.0 я не могу найти в интернете как бы не искал
.NET MAUI (Multi-platform App UI) is a powerful cross-platform framework by Microsoft, often used with full-featured IDEs. However, you can now build and debug .NET MAUI apps using VS Code alone! This guide provides a step-by-step approach to setting up your environment and developing .NET MAUI apps without relying on traditional IDEs.
Step 1: Install Required Tools
-
Download and Install .NET SDK
Get the latest .NET SDK (version 8 or 9rc) from the .NET website. -
Install Visual Studio Code
Download and install VS Code from here. -
Install the .NET MAUI Extension for VS Code
Install the .NET MAUI extension from the VS Code marketplace. This extension also installs the C# Dev Kit and C# extensions for debugging and building .NET projects.
Step 2: Install .NET MAUI Templates and Workloads
- Open a new terminal and write these to install Microsoft’s .NET MAUI project templates
dotnet new install Microsoft.Maui.Templates
Enter fullscreen mode
Exit fullscreen mode
- Write the following command to create a new .NET MAUI project:
dotnet new maui -n MyMauiApp
Enter fullscreen mode
Exit fullscreen mode
- Run the following command to install the required workloads:
dotnet workload install maui
Enter fullscreen mode
Exit fullscreen mode
This ensures that your system is ready to build and run MAUI projects.
Step 3: Setup Android Development
Setting up Android development without full-featured IDEs can be tricky. Below are the steps to configure Android tools manually.
-
Install Microsoft OpenJDK 17
Download the latest version of Microsoft OpenJDK 17 here. -
Install Android Dependencies
Use the following command to install the Android SDK and related dependencies:
dotnet build -t:InstallAndroidDependencies -f:net8.0-android -p:AndroidSdkDirectory="C:\Program Files (x86)\Android\android-sdk" -p:JavaSdkDirectory="C:\Program Files\Microsoft\jdk-17.0.13.11-hotspot\bin" -p:AcceptAndroidSDKLicenses=True
Enter fullscreen mode
Exit fullscreen mode
- Configure the required environment variables:
setx ANDROID_HOME "C:\Program Files (x86)\Android\android-sdk"
setx JAVA_HOME "C:\Program Files\Microsoft\jdk-17.0.13.11-hotspot\bin"
setx PATH "%PATH%;%ANDROID_HOME%\tools;%ANDROID_HOME%\platform-tools;%JAVA_HOME%\bin"
setx PATH "%PATH%;C:\Program Files (x86)\Android\android-sdk\cmdline-tools\11.0\bin"
setx PATH "%PATH%;C:\Program Files (x86)\Android\android-sdk\platform-tools"
Enter fullscreen mode
Exit fullscreen mode
Step 4: Install and Configure the Android Emulator
- Check which system images are available:
sdkmanager --list | findstr /i system-images
Enter fullscreen mode
Exit fullscreen mode
- Install a System Image
For example install the Google Play system image for Android API 34:
sdkmanager "system-images;android-34;google_apis_playstore;x86_64"
Enter fullscreen mode
Exit fullscreen mode
- Install the Android Emulator:
sdkmanager --install "emulator"
Enter fullscreen mode
Exit fullscreen mode
- Add the emulator to your system PATH:
setx PATH "%PATH%;C:\Program Files (x86)\Android\android-sdk\emulator"
Enter fullscreen mode
Exit fullscreen mode
- Create an Android virtual device, for example Pixel 6 Pro:
avdmanager create avd -n Pixel_6_Pro_API_34_Play -k "system-images;android-34;google_apis_playstore;x86_64" --device "pixel_6_pro"
Enter fullscreen mode
Exit fullscreen mode
- Launch the Emulator:
emulator -avd Pixel_6_Pro_API_34_Play
Enter fullscreen mode
Exit fullscreen mode
Step 5: Delete an Emulator (Optional)
If you no longer need a virtual device, delete it with:
avdmanager delete avd -n Pixel_6_Pro_API_34_Play
Enter fullscreen mode
Exit fullscreen mode
A Note on iOS/macOS and Windows Development
-
iOS/macOS:
Developing for iOS/macOS requires macOS, as Apple’s tooling, such as Xcode and simulators, is only available on macOS. Once configured, you can deploy and debug your MAUI app to iOS devices or simulators directly from VS Code by setting up remote build hosts. -
Windows (WinUI):
For Windows apps, ensure that you have the required Windows SDKs installed. Building and running MAUI apps on Windows is straightforward since the necessary tools are included with the .NET SDK.
For insuring about WindowsAppSDK install you can run this command:
dotnet add package Microsoft.WindowsAppSDK --version 1.5.2
Enter fullscreen mode
Exit fullscreen mode
Conclusion
Using VS Code to develop .NET MAUI apps offers a lightweight alternative to traditional IDEs. While configuring Android development can be tricky, following the steps outlined in this guide will set you up for success.
With your environment properly configured, you can build cross-platform apps targeting Android, iOS/macOS, and Windows all from the comfort of VS Code!
Happy coding! 🚀
Как подключить SDK к Visual Studio Code. Путешествие в мир разработки: подключение SDK и не только в Visual Studio Code
✋🏻Далее👊Visual Studio Code (VS Code) — это мощная и гибкая среда разработки, которая завоевала сердца миллионов программистов по всему миру 🌎. Она позволяет работать с различными языками программирования, расширять функциональность с помощью SDK и плагинов, а также легко интегрироваться с другими инструментами. В этой статье мы рассмотрим, как подключить различные SDK, запустить код, настроить среду и многое другое.
Откройте желаемый раздел, нажав на соответствующую ссылку:
👉🏼 Подключение SDK в Visual Studio
👉🏼 Как подключить VSSDK?
👉🏼 Запуск Source SDK в Steam
👉🏼 Подключение Java к VS Code
👉🏼 Подключение других программ к Visual Studio
👉🏼 Изменение версии SDK в Visual Studio
👉🏼 Запуск кода в терминале VS Code
👉🏼 Подключение Node.js к VS Code
👉🏼 Что такое SDK
👉🏼 Запуск кода в Visual Studio Code
👉🏼 Подключение Unity к Visual Studio Code
👉🏼 Выводы
👉🏼 Заключение
👉🏼 FAQ
👉🏼 Q: Можно ли использовать несколько SDK одновременно?
👉🏼 Q: Как обновить SDK?
👉🏼 Q: Что делать, если SDK не работает?
👉🏼 Q: Где найти документацию по SDK?
👉🏼 Q: Можно ли использовать SDK бесплатно?
🤤 Читать дальше
Подключение SDK в Visual Studio
Visual Studio, как мощная платформа разработки, предоставляет возможность использования разнообразных SDK (Software Development Kit — набор инструментов для разработки программного обеспечения). SDK — это своего рода «строительные блоки», которые содержат библиотеки кода, инструменты, документацию и примеры, необходимые для создания программного обеспечения под определенную платформу или для работы с определенными технологиями.
Как подключить VSSDK?
- При установке Visual Studio вы можете включить VSSDK, выбрав рабочую нагрузку «Разработка расширений Visual Studio» в разделе «Другие наборы инструментов». 🛠️
- Эта рабочая нагрузка не только установит сам VSSDK, но и все необходимые компоненты для его работы.
- VSSDK — это набор инструментов, который позволяет создавать собственные расширения для Visual Studio.
- С помощью VSSDK вы можете расширить функциональность Visual Studio, добавив новые функции, инструменты или интеграции с другими сервисами.
Запуск Source SDK в Steam
Source SDK — это набор инструментов, который позволяет создавать модификации и карты для игр, разработанных на движке Source (например, Half-Life 2, Counter-Strike: Source).
Пошаговая инструкция запуска Source SDK:
- Откройте Steam. 🚂
- Перейдите во вкладку «Инструменты». 🧰
- Найдите Source SDK в списке (он будет в категории «Не установлено»).
- Дважды щелкните на Source SDK, чтобы начать установку.
- Прочтите информацию в диалоговом окне и нажмите «Загрузить и установить» / «Далее».
- Steam начнет загрузку Source SDK на ваш компьютер.
- После завершения установки вы сможете запускать Source SDK и начинать создавать свои модификации.
Подключение Java к VS Code
Java — это один из самых популярных языков программирования, который используется для создания различных приложений, от мобильных до серверных. VS Code предоставляет отличную поддержку Java через расширения.
Как подключить Java к VS Code:
- Откройте VS Code и перейдите в раздел «Расширения».
- Вы можете открыть раздел «Расширения» через боковую панель или с помощью сочетания клавиш Ctrl+Shift+X.
- В строке поиска введите «Java Extension Pack».
- Нажмите «Установить».
- Этот пакет включает в себя несколько полезных расширений, таких как Language Support for Java™ by Red Hat.
- После установки вы сможете писать, запускать и отлаживать Java-код прямо в VS Code.
Подключение других программ к Visual Studio
Visual Studio предоставляет возможность подключить и использовать различные программы и инструменты в процессе разработки.
Как подключить программу к Visual Studio:
- Перейдите в раздел «Сервис > Получить инструменты и компоненты».
- Это откроет установщик Visual Studio.
- Вы также можете запустить установщик из меню «Пуск».
- В установщике выберите необходимые рабочие нагрузки или компоненты.
- Установщик скачает и установит выбранные компоненты.
- После установки вы сможете использовать выбранные программы и инструменты в Visual Studio.
Изменение версии SDK в Visual Studio
В процессе разработки может возникнуть необходимость использования определенной версии SDK. Visual Studio предоставляет гибкие возможности для управления версиями SDK.
Как изменить версию SDK:
- Запустите Visual Studio Installer.
- Выберите нужную версию Visual Studio и нажмите «Изменить».
- Перейдите во вкладку «Отдельные компоненты».
- Найдите нужные SDK и отметьте их.
- Установите нужные версии SDK.
- После завершения установки выбранные версии SDK будут доступны в Visual Studio.
Запуск кода в терминале VS Code
VS Code имеет встроенный терминал, который позволяет запускать код и выполнять различные команды.
Как запустить код в терминале VS Code:
- В строке поиска расширений введите `@ext:formulahendry.code-runner terminal`
- Установите флажок «Code-runner: Run In Terminal». ✅
- Теперь при запуске кода он будет выполняться во встроенном терминале.
- Вы сможете вводить данные с клавиатуры.
Подключение Node.js к VS Code
Node.js — это среда выполнения JavaScript, которая позволяет запускать JavaScript-код на сервере. VS Code отлично интегрируется с Node.js.
Как подключить Node.js к VS Code:
- Скачайте Node.js с официального сайта.
- Установите Node.js на ваш компьютер.
- Откройте VS Code и нажмите Ctrl + ~ (где буква ё).
- В терминале введите команду `node -v` и нажмите Enter.
- Вы увидите версию установленного Node.js.
- Теперь вы можете запускать Node.js-код в VS Code.
Что такое SDK
SDK — это набор инструментов, библиотек, документации и примеров, которые помогают разработчикам создавать приложения для определенной платформы или технологии.
Пример:
- SDK для Android позволяет создавать приложения для мобильных устройств на базе Android.
- SDK для Windows позволяет создавать приложения для операционной системы Windows.
Запуск кода в Visual Studio Code
VS Code предоставляет удобные способы открытия и запуска кода.
Как открыть код в Visual Studio Code:
- В меню «Файл» выберите «Открыть» > «Папка».
- Перейдите в папку, где находится ваш код.
- Вы также можете открыть папку с кодом через контекстное меню.
- Выберите «Открыть в Visual Studio Code».
Подключение Unity к Visual Studio Code
Unity — популярный игровой движок, который позволяет создавать 2D и 3D игры. VS Code может быть использован для разработки скриптов для Unity.
Как подключить Unity к Visual Studio Code:
- В Visual Studio перейдите в «Отладка» > «Присоединить отладчик Unity».
- Или нажмите кнопку «Присоединить к Unity» на панели инструментов.
- Откроется окно с доступными экземплярами Unity.
- Выберите экземпляр Unity, в котором запущен ваш проект.
- Нажмите «Присоединить».
Выводы
Visual Studio Code — это универсальная среда разработки, которая позволяет работать с различными SDK и языками программирования. Она предоставляет богатый набор инструментов для разработки, отладки и тестирования кода. Благодаря гибкой системе расширений, VS Code можно настроить под любые нужды.
Заключение
Изучение и освоение Visual Studio Code — это инвестиция в ваше будущее как разработчика. Постоянно совершенствуйте свои навыки, изучайте новые технологии и инструменты. Не бойтесь экспериментировать и пробовать новые подходы. Успехов в вашем творческом пути!
FAQ
Q: Можно ли использовать несколько SDK одновременно?
A: Да, в большинстве случаев можно использовать несколько SDK одновременно.
Q: Как обновить SDK?
A: Обновление SDK зависит от конкретного SDK. Обычно это делается через установщик Visual Studio или менеджер пакетов.
Q: Что делать, если SDK не работает?
A: Проверьте, правильно ли установлен SDK, а также совместимость с вашей версией Visual Studio.
Q: Где найти документацию по SDK?
A: Документация обычно находится на сайте разработчика SDK.
Q: Можно ли использовать SDK бесплатно?
A: Некоторые SDK бесплатны, а другие требуют лицензии.
Надеюсь, эта статья была вам полезна!
Вопросы и ответы
👉 Как подключить SDK к Visual Studio Code 👈
Установка пакета SDK для Visual Studio при установке Visual Studio. Чтобы включить VSSDK в установку Visual Studio, установите рабочую нагрузку разработки расширений Visual Studio в разделе «Другие наборы инструментов». Эта рабочая нагрузка установит пакет SDK для Visual Studio и необходимые компоненты.
👉 Как открыть проект с GitHub в Visual Studio Code 👈
Инструменты Visual Studio Code для работы с Git и GitHub:
Вы можете быстро и без труда открыть репозиторий GitHub. Для этого можно выполнить поиск репозиториев GitHub и выбрать команду «Открыть репозиторий» в палитре команд, нажать клавишу F1 или выбрать команду Open GitHub Repository…
👉 Как включить подсказки в VS Code 👈
Для этого перейдите в Code > Параметры > Сочетание клавиш (мак). Там вы найдете все возможные операции и сможете настроить удобное сочетание клавиш.
👉 Как подключить Java к Visual Studio Code 👈
Откройте VS Code и перейдите в раздел Extensions (расширения) с помощью иконки на боковой панели или сочетания клавиш Ctrl+Shift+X . Введите в поиске «Java Extension Pack» и установите его. Этот пакет включает в себя несколько полезных расширений, таких как: Language Support for Java™ by Red Hat.
👉 Как запустить Source SDK 👈
Установка и запуск:
1. Откройте Steam.
2. Откройте вкладку Tools.
3. Сделайте двойной клик на Source SDK, который находится в категории «Not Installed».
4. Прочитайте диалоговое окно и нажмите Download and Install / Next для продолжения.
5. Source SDK будет загружаться на ваш компьютер через Steam.
♦️ Как установить расширение в Visual Studio Code
♦️ Как установить расширение для Python
♦️ Как скачать плагин в VS Code
♦️ Как установить расширение Python в Visual Studio Code
Don’t let AI Agents fail in production
Restack backend framework provides long-running workflows and infrastructure for reliable & accurate AI agents.
Get started with example agents
Research Paper
Agent accuracy benchmark
Many enterprises are exploring AI agents, but one issue blocks their adoption: keeping them accurate and on brand. General-purpose LLMs hit only 51% accuracy, while fine-tuned small agents reach 99.7%.

The trust in AI is eroding due to unreliable, poorly designed agents. For AI to reach its full potential, we need better ones. Restack helps you build agents that are reliable, scalable, and ready for real-world use.
Features
The Restack framework
Build reliable and accurate AI agents with Restack.

Developer UI
Simulate, time travel and replay AI agents
The Restack developer toolkit provides a UI to visualize and replay workflows or individual steps. Open a favourite IDE like VS Code or Cursor on one side and view workflows on the other to improve debugging and local development.
Get started in seconds
Start building with Restack AI framework and deploy with Restack Cloud.
Visual Studio has long been a popular IDE for developing .NET applications if you are on Windows.
macOS does have it’s own version of Visual Studio, but development for this was stopped in August 2023 and retired 12 months later.
That means for .NET 8 and beyond, Visual Studio is not an option for macOS users and has never been an option for Linux users.
So what’s the alternative?
Introducing Visual Studio Code
Visual Studio Code is available on Windows, macOS and Linux operating systems such as Ubuntu and Red Hat.
And with .NET being available on these operating systems since the introduction of .NET Core, it seems like a good IDE to produce .NET applications.
The first step will be to install Visual Studio Code onto your machine.
Installing the .NET SDK
When installing VS Code, it will not download and install the .NET SDK. As a result, you’ll need to make sure that you download the .NET SDK version you wish to use and install it.
Installing C# in Visual Studio Code
Once you have VS Code and the .NET SDK on your machine, you can open it up and install the C# Dev Kit extension from the Microsoft Marketplace.
This will also install the C# extension and the .NET install tool.
The C# Dev Kit brings you intellisense, debugging and being able to manage unit tests.
Create an ASP.NET Core Web API
In Visual Studio Code, we can use the VS Code terminal to run .NET command lines. This can be added by going to View and Terminal from the top menu.
To create an ASP.NET Core Web API, we need to change directory in the terminal to the folder where we want to create the application. Then we run:
dotnet new webapi -n RoundTheCode.VsCode.WebApi -controllersThis will create a new Web API project called RoundTheCode.VsCode.WebApi.
By default, it will set it up to use Minimal APIs. However, by adding the -controllers option, it will add controllers to the project.
Create a service
We want to set up a HTTP service. This will create a method that will call to a third-party API and return the response as a string.
First of all, we’ll want to make a new directory called Services, so we create that in the terminal and then change directory to it.
mkdir Services
cd Services
Next, we want to set up an interface and a class for our HTTP service. Once again, this can be done using the terminal by running the following commands:
dotnet new interface -n IHttpService
dotnet new class -n HttpService
The command will create a new interface called IHttpService, and a new class called HttpService.
Developing the interface
We’ll start off with developing the IHttpService interface and we are going to add a ReadAsync method which will return a type of Task<string>.
// IHttpService.cs
namespace RoundTheCode.VsCode.WebApi.Services;

public interface IHttpService
{
	Task<string> ReadAsync();
}
Developing the class
Afterwards, we’ll develop the HttpService class which will implement the IHttpService interface.
We’ll pass in an instance of IHttpClientFactory and use that to create a new HttpClient. This will make an API call and either return the response if it’s successful, or an empty string if it’s not.
// HttpService.cs
namespace RoundTheCode.VsCode.WebApi.Services;

public class HttpService : IHttpService
{
	private readonly IHttpClientFactory _httpClientFactory;

	public HttpService(IHttpClientFactory httpClientFactory)
	{
		_httpClientFactory = httpClientFactory;
	}

	public async Task<string> ReadAsync()
	{
		using var httpClient = _httpClientFactory.CreateClient("DummyJSON");

		var response = await httpClient.GetAsync($"/products/1");

		if (!(response?.IsSuccessStatusCode ?? false))
		{
			return string.Empty;
		}

		return await response.Content.ReadAsStringAsync();
	}
}
Add service and HttpClient to dependency injection
Finally, we want to add the HttpService and the HttpClient to dependency injection.
We’ll set the HttpService instance with a scoped lifetime and add the HttpClient by setting the BaseAddress for it.
// Program.cs
using RoundTheCode.VsCode.WebApi;

...

builder.Services.AddScoped<IHttpService, HttpService>();

builder.Services.AddHttpClient("DummyJSON", (httpClient) => {
    httpClient.BaseAddress = new Uri("https://dummyjson.com");
});

var app = builder.Build();

...

app.Run();
Create a Web API controller
It’s time to create a Web API controller. In the VS Code terminal, we want to change directory to the Controllers folder and create a new API controller called HttpController.
We do that by running these commands:
cd Controllers
dotnet new apicontroller -n HttpController
Then it’s a case of injecting the IHttpService interface and setting up an endpoint that will call the ReadAsync method and return it as part of the response.
// HttpController.cs
using Microsoft.AspNetCore.Mvc;
using RoundTheCode.VsCode.WebApi.Services;

namespace RoundTheCode.VsCode.WebApi.Controllers;

[Route("api/[controller]")]
[ApiController]
public class HttpController : ControllerBase
{
    private readonly IHttpService _httpService;

    public HttpController(IHttpService httpService) {
        _httpService = httpService;
    }

    [HttpGet]
    public async Task<IActionResult> GetProductAsync() {
        return Ok(await _httpService.ReadAsync());
    }
}
Build the application
To ensure that the application can compile, we can run this command line in the terminal:
dotnet buildAssuming there are no errors, we can run the application and test out the endpoint.
If you open up launchSettings.json in the Properties folder of your Web API project, you’ll likely to have a number of launch profiles set up.
{
  "$schema": "http://json.schemastore.org/launchsettings.json",
  "iisSettings": {
    "windowsAuthentication": false,
    "anonymousAuthentication": true,
    "iisExpress": {
      "applicationUrl": "http://localhost:39180",
      "sslPort": 44352
    }
  },
  "profiles": {
    "http": {
      "commandName": "Project",
      "dotnetRunMessages": true,
      "launchBrowser": true,
      "launchUrl": "swagger",
      "applicationUrl": "http://localhost:5097",
      "environmentVariables": {
        "ASPNETCORE_ENVIRONMENT": "Development"
      }
    },
    "https": {
      "commandName": "Project",
      "dotnetRunMessages": true,
      "launchBrowser": true,
      "launchUrl": "swagger",
      "applicationUrl": "https://localhost:7003;http://localhost:5005",
      "environmentVariables": {
        "ASPNETCORE_ENVIRONMENT": "Development"
      }
    },
    "IIS Express": {
      "commandName": "IISExpress",
      "launchBrowser": true,
      "launchUrl": "swagger",
      "environmentVariables": {
        "ASPNETCORE_ENVIRONMENT": "Development"
      }
    }
  }
}
You’ll probably want to run the project with the https launch profile. To do that you can run this command in the terminal:
dotnet run --launch-profile httpsHowever, if you don’t want to specify the launch profile everytime you run the project, you can remove the launch profiles that you are not using. Here, we have just left the https launch profile.
{
  "$schema": "http://json.schemastore.org/launchsettings.json",
  "profiles": {
    "https": {
      "commandName": "Project",
      "dotnetRunMessages": true,
      "launchBrowser": true,
      "launchUrl": "swagger",
      "applicationUrl": "https://localhost:7003;http://localhost:5005",
      "environmentVariables": {
        "ASPNETCORE_ENVIRONMENT": "Development"
      }
    }
  }
}
Then you can run the same command line without the launch profile, and it will launch it with the sole profile.
dotnet runDebug an application
It’s also possible to debug an application in Visual Studio Code.
Watch this video where we’ll show you how to set it up and use it by adding a breakpoint. The video will also show you how we created an ASP.NET Core Web API and added the relevant services and controllers described in this tutorial.
A good alternative to Visual Studio
Visual Studio Code is certainly a good alternative to Visual Studio. With the correct extensions, you can enable intellisense and debug an application.
And with VS Code also available on Linux and MacOS, it’s a great IDE for developing on these operating systems.
Just remember those .NET command lines!