
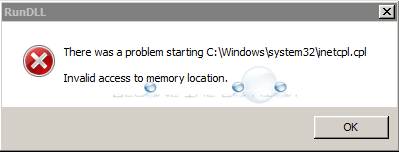
While browsing the Internet using Internet Explorer, you may experience an error message continually popping up.
There was a problem starting C:\Windows\system32\inetcpl.cpl
Invalid access to memory location.
The INETCPL.CPL file is part of the Internet Explorer control panel which is access from Tools -> Internet Options. The error is related to an update applied to Internet Explorer.
- Check for recently installed updates to Internet Explorer. Go to Control Panel -> Programs and Features and choose view installed updates on the left side. Search for updates for Internet Explorer (you can sort by date installed on).
- If you are using Internet Explorer 9, update KB2964358 will be causing this error. You can remove this update the same way as outlined in step 1.
* Please use the comment form below. Comments are moderated.*
Файл inetcpl.cpl считается разновидностью DLL-файла. DLL-файлы, такие как inetcpl.cpl, по сути являются справочником, хранящим информацию и инструкции для исполняемых файлов (EXE-файлов), например appidpolicyconverter.exe. Данные файлы были созданы для того, чтобы различные программы (например, Microsoft Office Access 2010) имели общий доступ к файлу inetcpl.cpl для более эффективного распределения памяти, что в свою очередь способствует повышению быстродействия компьютера.
К сожалению, то, что делает файлы DLL настолько удобными и эффективными, также делает их крайне уязвимыми к различного рода проблемам. Если что-то происходит с общим файлом CPL, то он либо пропадает, либо каким-то образом повреждается, вследствие чего может возникать сообщение об ошибке выполнения. Термин «выполнение» говорит сам за себя; имеется в виду, что данные ошибки возникают в момент, когда происходит попытка загрузки файла inetcpl.cpl — либо при запуске приложения Microsoft Office Access 2010, либо, в некоторых случаях, во время его работы. К числу наиболее распространенных ошибок inetcpl.cpl относятся:
- Нарушение прав доступа по адресу — inetcpl.cpl.
- Не удается найти inetcpl.cpl.
- Не удается найти C:\Windows\SysWOW64\inetcpl.cpl.
- Не удается зарегистрировать inetcpl.cpl.
- Не удается запустить Microsoft Office Access 2010. Отсутствует требуемый компонент: inetcpl.cpl. Повторите установку Microsoft Office Access 2010.
- Не удалось загрузить inetcpl.cpl.
- Не удалось запустить приложение, потому что не найден inetcpl.cpl.
- Файл inetcpl.cpl отсутствует или поврежден.
- Не удалось запустить это приложение, потому что не найден inetcpl.cpl. Попробуйте переустановить программу, чтобы устранить эту проблему.
Файл inetcpl.cpl может отсутствовать из-за случайного удаления, быть удаленным другой программой как общий файл (общий с Microsoft Office Access 2010) или быть удаленным в результате заражения вредоносным программным обеспечением. Кроме того, повреждение файла inetcpl.cpl может быть вызвано отключением питания при загрузке Microsoft Office Access 2010, сбоем системы при загрузке inetcpl.cpl, наличием плохих секторов на запоминающем устройстве (обычно это основной жесткий диск) или, как нередко бывает, заражением вредоносным программным обеспечением. Таким образом, крайне важно, чтобы антивирус постоянно поддерживался в актуальном состоянии и регулярно проводил сканирование системы.
Readers help support Windows Report. We may get a commission if you buy through our links.
Read our disclosure page to find out how can you help Windows Report sustain the editorial team. Read more
The inetcpl.cpl or Internet Properties is a built-in utility that allows users to configure Internet-related settings, including security, privacy, certificates, VPN, and add-ons. It’s stored in the following location: C:\Windows\System32
But users sometimes face trouble opening Internet Properties, and the error message reads, RunDLL The specified module could not be found or The operating system cannot run %1. In both these cases, the path to the file is listed. So, let’s find out what to do when inetcpl.cpl is not opening!
How do I fix inetcpl.cpl errors?
Before we start with the slightly complex solutions, try these quick ones:
- Check for any pending Windows updates and install them.
- If you are facing an inetcpl.cpl issue with Internet Explorer, we recommend switching to another effective web browser since the former was discontinued on June 15, 2022.
- Uninstall apps that were downloaded recently on the PC.
1. Download the missing DLLs
The inetcpl.cpl utility requires the following DLLs on the PC to run effectively:
- msvcrt.dll
kernel32.dll
ole32.dll
iertutil.dll
urlmon.dll
So, you can either replace the missing one with a copy from another PC or get the best DLL repair tool.
2. Run the DISM and SFC scans
- Press Windows + S to open Search, type Command Prompt in the text field, and click on Run as administrator.

- Click Yes in the UAC prompt.
- Paste the following DISM commands individually and hit Enter after each:
DISM /Online /Cleanup-Image /CheckHealthDISM /Online /Cleanup-Image /ScanHealthDISM /Online /Cleanup-Image /RestoreHealth - Once done, run the following command for the SFC scan:
sfc /scannow
- Finally, restart the PC for the changes to apply and check for improvements.


The DISM tool and SFC scan help find corrupt system files and then replace them with their cached copy stored on the PC.
3. Delete the NoBrowserOptions DWORD in Registry
- Press Windows + R to open Run, type regedit in the text field, and hit Enter.

- Click Yes in the UAC prompt that appears.
- Navigate the following path or paste it into the address bar and hit Enter:
HKEY_LOCAL_MACHINE\SOFTWARE\Wow6432Node\Policies\Microsoft\Internet Explorer\Restrictions
- Locate the NoBrowserOptions DWORD, right-click on it, and select Delete from the context menu.

- Click Yes in the confirmation prompt.
- If the DWORD is not found, check the following two paths (keys) as well:
HKEY_LOCAL_MACHINE\SOFTWARE\Policies\Microsoft\Internet Explorer\RestrictionsHKEY_CURRENT_USER\SOFTWARE\Policies\Microsoft\Internet Explorer\Restrictions - Restart the computer and verify whether inetcpl.cpl is now working.


4. Perform a clean boot
- Press Windows + R to open Run, type msconfig in the text field, and click OK.
- Go to the Services tab, tick the checkbox for Hide all Microsoft services, and click on Disable all.

- Head to the Startup tab, and click on Open Task Manager.
- Select any program(s) that reads Enabled under the Status column and click on Disable.

- Go back to System Configuration, and click on Apply and OK.
- Click Restart in the confirmation prompt.


If inetcpl.cpl starts working in the clean boot mode, simply re-enable the services and startup programs one at a time and wait for the problem to reappear. As soon as it does, the one enabled last is the underlying cause.
If it’s a program, uninstall it, and for a service, use the services.msc console to disable it.
5. Uninstall recent Windows updates
- Press Windows + I to open Settings, go to Windows Update from the navigation pane, and click on Update history.

- Scroll down to the bottom and click on Uninstall updates.
- Click the Uninstall option next to recently installed update.
- Again, click Uninstall in the confirmation prompt.
- Reboot the PC and check for improvements.
- If the problem persists, uninstall a few more recent updates.


Two updates, KB2820197 and KB2847204, were found to trigger inetcpl.cpl loading errors. So, uninstall the updates along with any others that might cause problems later on.
- D3dx11_42.dll Not Found: How to Fix it
- Windows 11 Shutdown After Inactivity: 4 Ways to Stop it
6. Create a new user profile
- Press Windows + R to open Run, type netplwiz in the text field, and hit Enter.
- Click the Add button.

- Click on Sign in without a Microsoft account.
- Now, choose the Local account option.

- Enter the username and, if required, a password, then click on Next to create a new user profile.
- Select the account from the list and click on the Properties button.
- Go to the Group Membership tab, select Administrator, and click on OK to save the changes.

- Finally, sign in with the new local account and check whether you can open inetcpl.cpl.


When creating a new local account, it’s imperative to grant it administrative privileges to not run into permission issues. Once done, copy the critical files from the old user account to an external drive and then move it to the new one. And you can always share programs between user profiles.
7. Perform an in-place upgrade
NOTE
The steps listed here are for Windows 11. If you are running the previous iteration, learn how to perform an in-place upgrade on Windows 10.
- Go to Microsoft’s official website, select the OS version and product language, and then download the Windows 11 ISO.

- Double-click the ISO file and click Open in the confirmation prompt.
- Run the setup.exe file.

- Click Yes in the UAC prompt.
- Click Next to proceed in the Windows 11 Setup.

- Read Microsoft’s license terms and click on Accept to continue.
- Finally, verify the setup reads, Keep personal files and apps, and then click on Install.
- Wait 1-2 hours for the process to complete. Make sure the PC is plugged into charging.


Since inetcpl.cpl is a built-in Windows component, an in-place upgrade will fix any file corruption or association and get things running!
Remember, inetcpl.cpl is useful in a lot of cases, especially if you receive a Windows proxy error or see a Microsoft Edge white/blank/grey screen, besides allowing you to reconfigure the critical settings.
For any queries or to share which fix worked for you, drop a comment below.
Kazim Ali Alvi
Windows Hardware Expert
Kazim has always been fond of technology, be it scrolling through the settings on his iPhone, Android device, or Windows PC. He’s specialized in hardware devices, always ready to remove a screw or two to find out the real cause of a problem.
Long-time Windows user, Kazim is ready to provide a solution for your every software & hardware error on Windows 11, Windows 10 and any previous iteration. He’s also one of our experts in Networking & Security.
|
Jail77 |
|
|
Статус: Новичок Группы: Участники
|
После установки КриптоПро 3.6 для x64 на ОС Windows 8 (не 8.1), после закрытия Internet Explorer 10 возникает окно «RunDLL» с описанием ошибки: «Возникла ошибка при запуске C:\windows\system32\inetcpl.cpl Удаляю КриптоПро ошибка исчезает. Отредактировано пользователем 2 июля 2014 г. 12:25:57(UTC) |
|
|
|
|
Максим Коллегин |
|
|
Статус: Сотрудник Группы: Администраторы Откуда: КРИПТО-ПРО Сказал «Спасибо»: 37 раз |
какая версия csp? |
|
Знания в базе знаний, поддержка в техподдержке |
|
|
|
WWW |
|
Jail77 |
|
|
Статус: Новичок Группы: Участники
|
Установил версию R4 7777, ошибка пропала |
|
|
|
| Пользователи, просматривающие эту тему |
|
Guest |
Быстрый переход
Вы не можете создавать новые темы в этом форуме.
Вы не можете отвечать в этом форуме.
Вы не можете удалять Ваши сообщения в этом форуме.
Вы не можете редактировать Ваши сообщения в этом форуме.
Вы не можете создавать опросы в этом форуме.
Вы не можете голосовать в этом форуме.
What should I do if the Win7 taskbar does not display the icon? How to solve the problem of the computer taskbar icon disappearing
Jun 09, 2024 pm 01:49 PM
Recently, many users using Win7 system have found that the icons in the taskbar suddenly disappeared, which makes the operation very inconvenient and they do not know how to solve the problem. This article will introduce to you how to solve the problem of disappearing taskbar icons in Win7 system. Bar! Cause Analysis When encountering such a situation, there are generally two situations: one is that the taskbar on the computer does not really disappear, but is just hidden, and the other is that the taskbar does disappear. Method 1: 1. There is a situation that you need to confirm first, that is, when the mouse is placed at the bottom of the screen, the taskbar will be displayed. You can directly click the mouse on the taskbar and select «Properties». 2. In the dialog box that opens, click & on the «Hide taskbar» option.
How to clear all desktop background images in Win7? Tips for deleting personalized background images in Win7
Jun 02, 2024 am 09:01 AM
In Win7 system, many users want to delete personalized desktop background images, but do not know how to delete them. This article will show you how to delete personalized background images in Win7 system. 1. First, open the control panel interface of the Win7 system and click to enter the «Appearance and Personalization» settings; 2. Then, in the opened interface, click the «Change Desktop Background» setting; 3. Then, click below «Desktop background» option; 4. Then, select Select all, and then click Clear all. Of course, you can also use it under «Customize», right-click the theme you want to delete, and then click &q on the shortcut menu
Where is the network discovery in Win7? Tips for enabling the network discovery function in Win7
Jun 04, 2024 am 09:02 AM
Many computer users know that network discovery is a network setting. This setting will affect whether the computer can find other computers and devices on the network and whether it can find the computer when other computers on the network are found. So how to enable network discovery in win7? The following computer System Home U Disk Installation will introduce you to the tutorial on how to enable network discovery in win7 system. 1. First, click the «Start Menu» icon on the desktop taskbar and choose to open the «Control Panel» interface. 2. Then, in the interface that opens, set «View by» to «Category», and then choose to enter «Network and Internet»
How to add Windows credentials in Win7
Mar 26, 2024 pm 07:46 PM
1. First, select the Control Panel option in the Start button of the Win7 system. 2. Then in the control panel that pops up, click the [User Accounts and Family Safety] item. 3. Then click [Credential Manager] in the pop-up interface. 4. Finally, click [Add Windows Credentials] to create your credentials. The operation method of adding and managing windows credentials in win7 is shared here in detail with friends. More exciting tutorials are available on the PHP Chinese website!
Introduction to how to change the startup sound of Windows 7 computer
Mar 26, 2024 pm 09:30 PM
1. First copy the file you want to use as boot music to the corresponding directory of C: WindowsMedia. As shown in the figure: 2. Right-click the desktop on a single machine and select Personalize menu; as shown in the figure: 3. Select the sound option; as shown in the figure: 4. In the [Program Events] box in the [Sound] tab of the sound interface Select [Windows Login], then click [Browse]; as shown in the figure: 5. Select the music file that needs to be replaced, click Open, then click Apply and confirm to save the settings. as the picture shows:
How to modify boot animation in Windows 7
Mar 26, 2024 pm 08:51 PM
1. Press and hold the [Win+R] keys to open the run dialog box, enter [regedit] in the search box, and then confirm; as shown in the figure: 2. Open HKEY_LOCAL_MACHINESoftwareMicrosoftWindowsCurrentVersionAuthenticationLogonUIBackgroud in the opened registry editor; as shown in the figure Display: 3. Double-click [OEMBackground] and open it, change the default value [0] to [1], and then confirm to exit; as shown in the figure: 4. Rename the image backgroundDefault.jpg, (the image size cannot exceed 256k
How to delete vbs virus in win7
Mar 26, 2024 pm 09:21 PM
1. Click [Start → Run] and enter gpedit.msc. On the left side of the [Group Policy] window, click the [Computer Configuration → Windows Settings → Security Settings → Software Restriction Policy] item, and then click the [Action → Create New Policy] menu item. As shown in the picture: 2. Select [Other Rules] from the left. Right-click the blank space in the right pane and select the [New Path Rule] item in the menu. In the pop-up window, click the [Browse] button after [Path], select the wscript.exe file in the C: WindowsSystem32 folder, and set the [Security Level] to [Not Allowed]. Change C: System32, Dllcache and I386 under Windows
How to quickly cancel the power-on password of WIN7
Mar 26, 2024 pm 06:56 PM
1. Press win+r to enter the run window, enter [controluserpasswords2] and press Enter. 2. In the user account window, uncheck [To use this machine, the user must enter a username and password (E)], and then click [Apply → OK].