
Все способы:
- Способ 1: Настройка BIOS
- Активация TPM-модуля
- Активация «Secure Boot»
- Способ 2: Запуск службы
- Способ 3: Ремонт игровых файлов
- Вариант 1: Riot Client
- Вариант 2: Epic Games Launcher
- Способ 4: Удаление логов игры
- Способ 5: Обновление ОС
- Способ 6: Дополнительные рекомендации
- Вопросы и ответы: 0
Способ 1: Настройка BIOS
Указанная в названии ошибка возникает при запуске или во время игры в Valorant и обычно свидетельствует о сбое подключения к серверу, поэтому в первую очередь убеждаемся, что у нас работает интернет, а затем перезапускаем клиент. Тем же пользователям, у которых неполадки продолжаются, должно помочь включение TPM-модуля и «Secure Boot».
Активация TPM-модуля
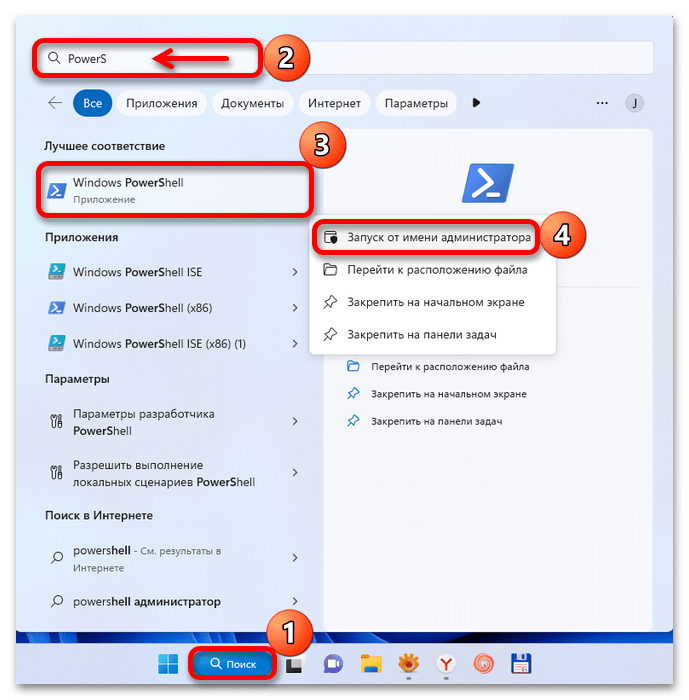
- Чтобы не совершать лишних действий, следует сначала проверить, включен модуль или нет. Для этого ищем в поиске «PowerShell» и запускаем консоль с повышенными правами.

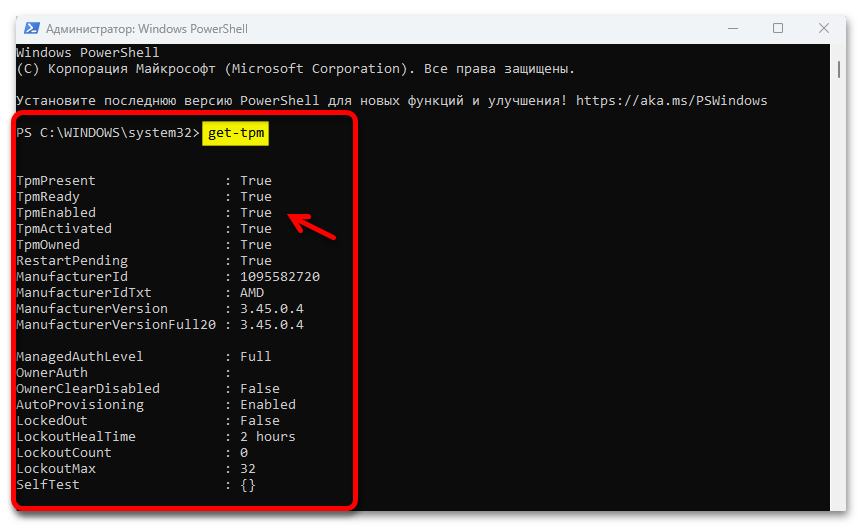
В поле вводим команду
get-tpmи нажимаем «OK». Значение «True» означает, что модуль активен, а «False» – выключен.
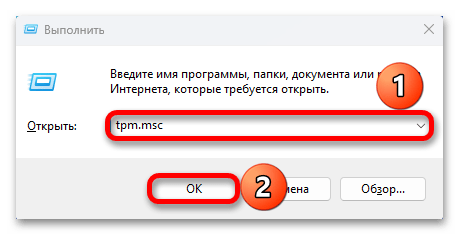
Альтернативный вариант – сочетанием клавиш «Windows+R» вызываем окно «Выполнить», вводим
tpm.mscи жмем «OK».
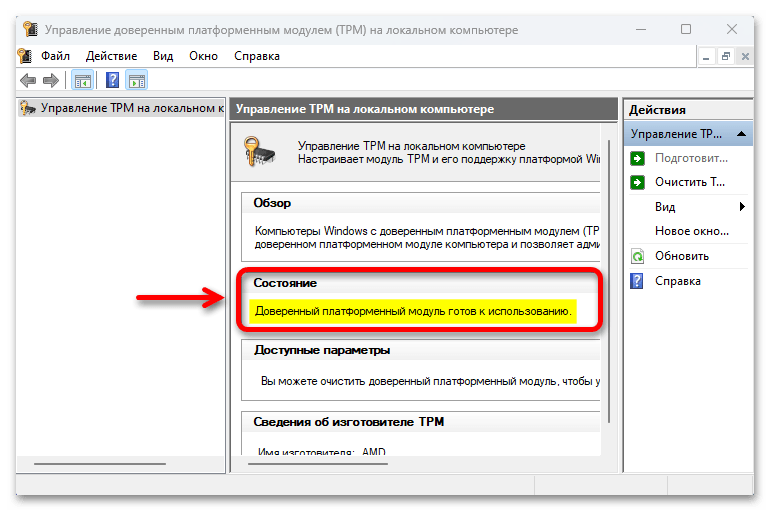
Откроется консоль управления TPM-модулем, где можно увидеть его состояние.
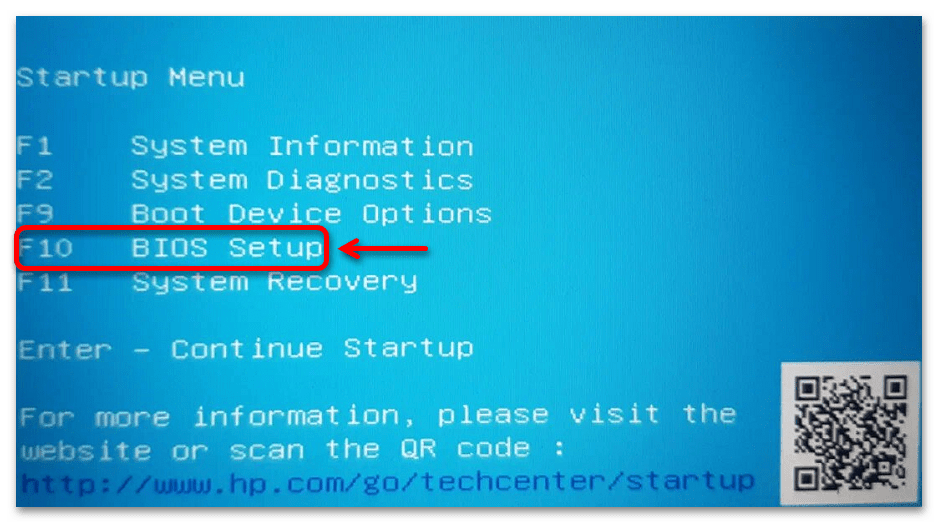
- Если модуль выключен, но вы уверены, что компьютер его поддерживает, необходимо загрузиться в BIOS/UEFI и активировать опцию. Например, на ноутбуке HP, который используется в нашем примере, это делается через специальное загрузочное меню. Перезагружаем Виндовс 11 и сразу делаем несколько нажатий клавиши «Esc», а когда откроется меню, жмем «F10».

В других случаях это могут быть клавиши «Delete», «F1», «F2», «F10» и т.д. Подробнее о том, как войти в БИОС на стационарных компьютерах и ноутбуках, читайте в отдельных статьях на нашем сайте.
Подробнее:
Как попасть в BIOS на компьютере
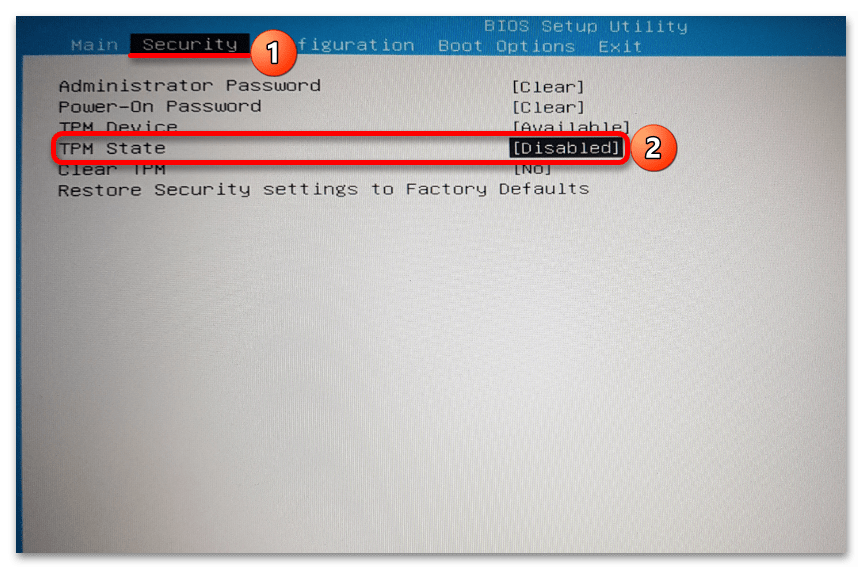
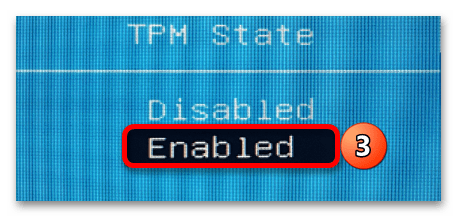
Как попасть в BIOS на ноутбуке - Задача – в разных разделах прошивки («Security», «Advanced», «Trusted Computing» и т.д.) поискать пункты, в названии которых есть слово «TPM», а также «fTPM» и «PTT», если технология реализована на платформах AMD и Intel соответственно. Кроме того, название функции может быть прописано полностью — «Trusted Platform Module», а может вообще не иметь связанных ключевых слов, например «Security Chip». У нас функция называется «TPM State», а значение «Disabled» свидетельствует о том, что она отключена. Поэтому с помощью стрелочек вверх-вниз выбираем ее, нажимаем «Enter»,

меняем значение на «Enabled» и подтверждаем его.

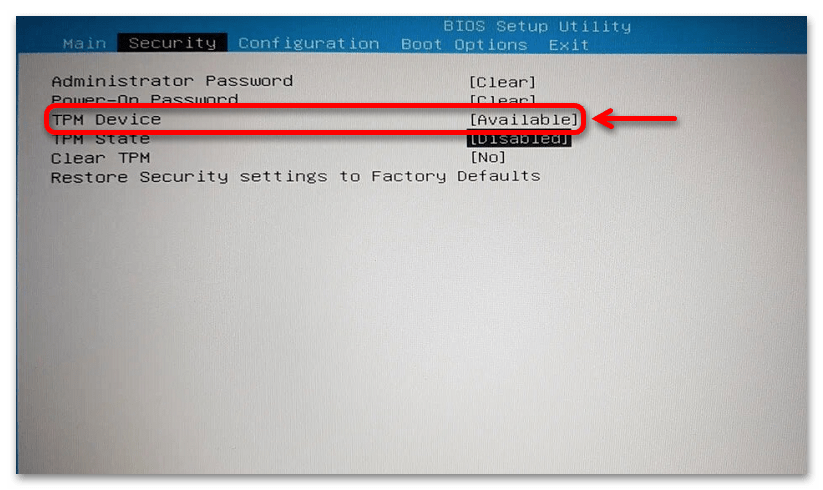
При наличии дополнительных опций их тоже включаем. Например, у нас есть «TMP Device», для которой мы установим значение «Available».
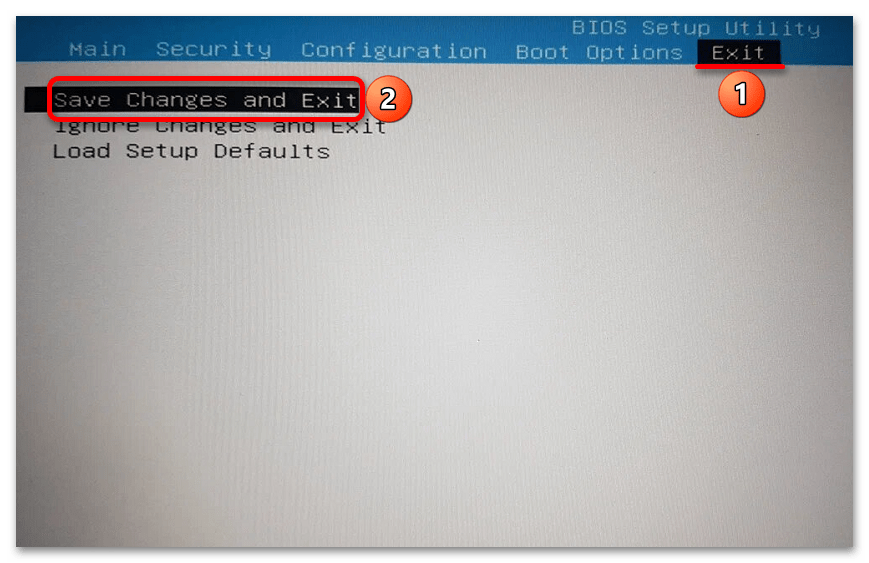
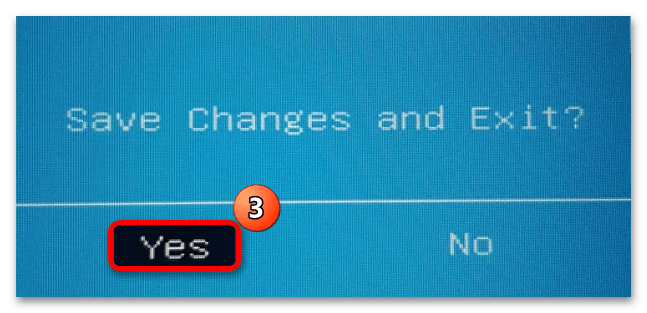
- Как только все будет настроено, переходим во вкладку «Exit», выбираем «Save Changes and Exit»

и подтверждаем операцию.
Активация «Secure Boot»
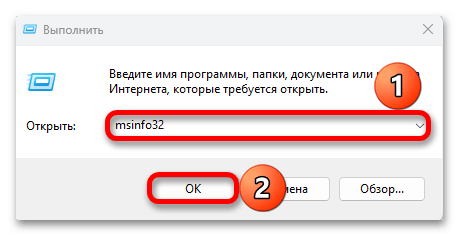
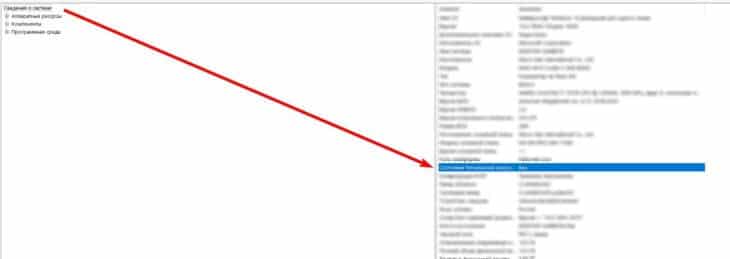
- Функция безопасной загрузки обычно включена по умолчанию. Чтобы проверить ее статус, в окне «Выполнить» вводим команду
msinfo32и подтверждаем ее.
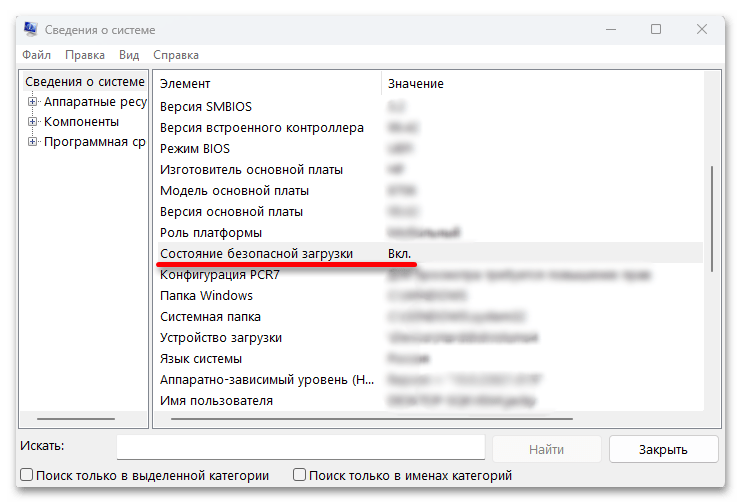
Ищем строку «Состояние безопасной загрузки» и проверяем значение. В данном случае опция активирована, но если у вас она отключена, двигаемся дальше.
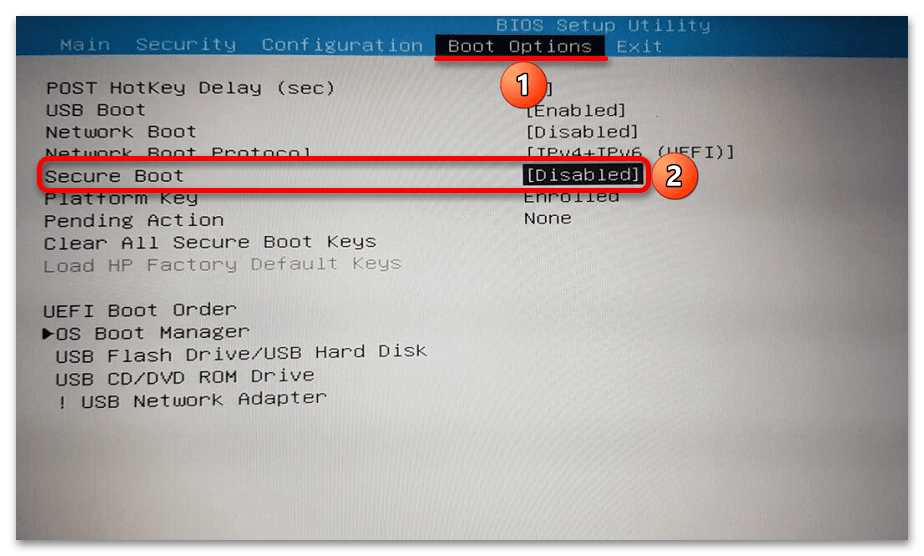
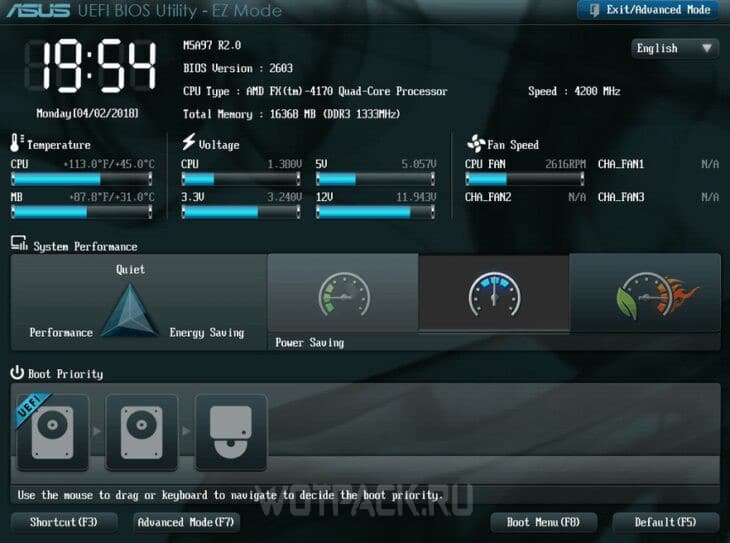
- Загружаемся в BIOS/UEFI, используя действия и рекомендации из предыдущей инструкции. Учитывая, что функция запрещает запуск компьютера с загрузочного USB-накопителя, в первую очередь ее нужно искать в разделе «Boot», «Boot Option» и т.д. Выделяем опцию, нажимаем «Enter»

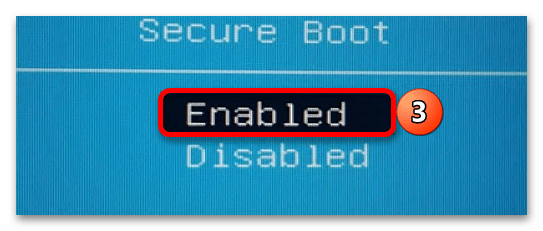
и выбираем значение «Enabled».

Теперь сохраняем изменения, дожидаемся перезагрузки системы и проверяем результат.

На нашем сайте есть подробная статья о том, как отключить функцию «Secure Boot» на ноутбуках разных брендов и материнской плате Gigabyte, но несложно использовать эти инструкции и для включения безопасной загрузки.
Подробнее: Отключаем UEFI Secure Boot в BIOS
Способ 2: Запуск службы
Riot Games используют систему защиты — «Vanguard», чтобы следить за соблюдением правил в их играх. Она включает в себя клиент и драйвер, которые вместе обеспечивают безопасность не только игроков, но и их компьютеров. Так что после установки Valorant Windows 11 получает новую службу — «Vanguard Anti-Cheat», и она обязательно должна работать, иначе не будет работать и сама игра.
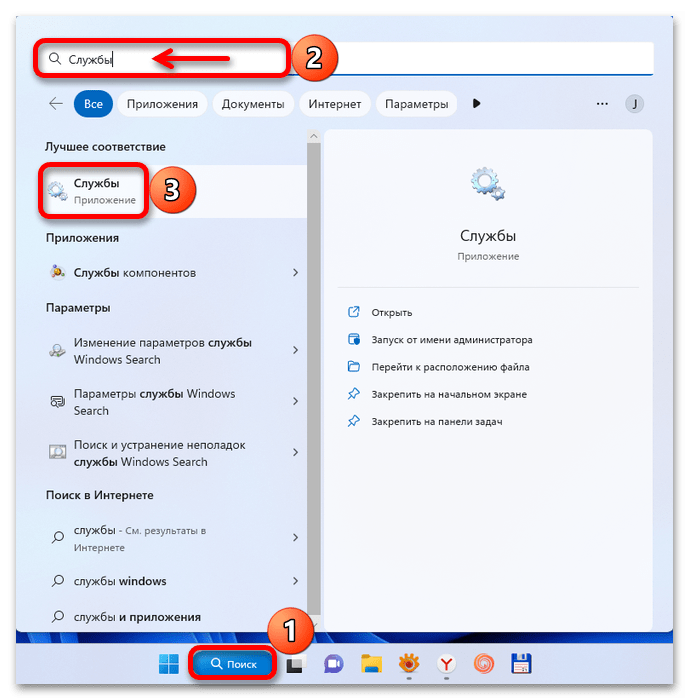
- В поиске набираем «Службы» и запускаем приложение.
Читайте также: Как открыть «Службы» в Windows 11
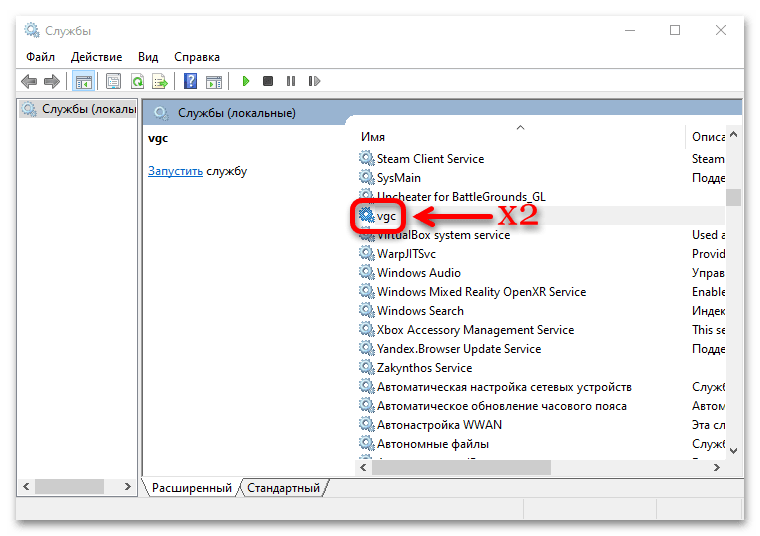
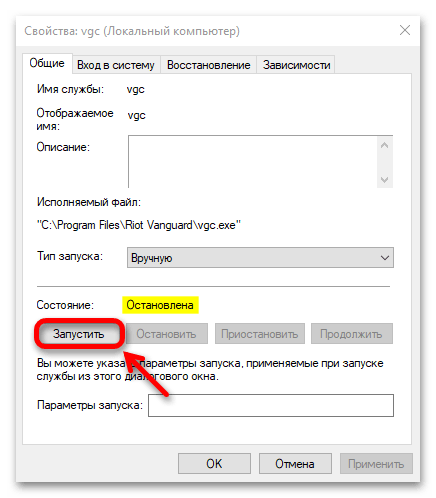
- Находим компонент «VGC» и кликаем по нему дважды.
- Сейчас служба остановлена и у нее ручной запуск, а значит, она должна запускаться вместе с игрой, но, возможно, это не происходит. Поэтому запускаем ее сами и пробуем загрузить Valorant.
- Если это поможет, но в следующий раз ошибка повторится, выбираем автоматический тип запуска и применяем изменения.

Способ 3: Ремонт игровых файлов
Valorant устанавливается через Riot Client (с официального сайта Riot Games) или Epic Games Launcher. В обеих платформах предусмотрена функция исправления игровых файлов, поэтому логично бы было запустить ее, тем более, что есть пользователи, которым это помогло устранить ошибку.
Вариант 1: Riot Client
Скачать Riot Client с официального сайта
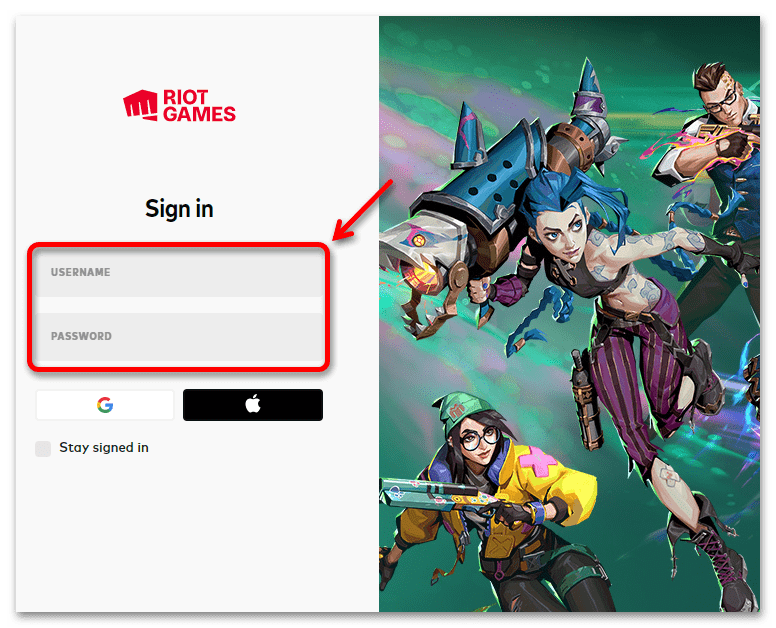
- Запускаем его и авторизуемся, используя свою учетную запись.
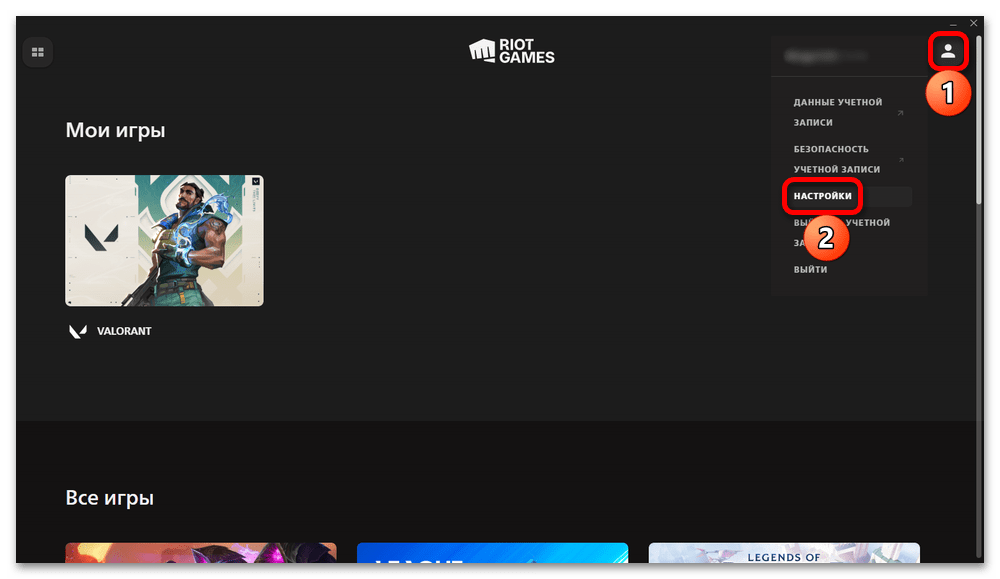
- Кликаем по иконке своего профиля и открываем настройки.
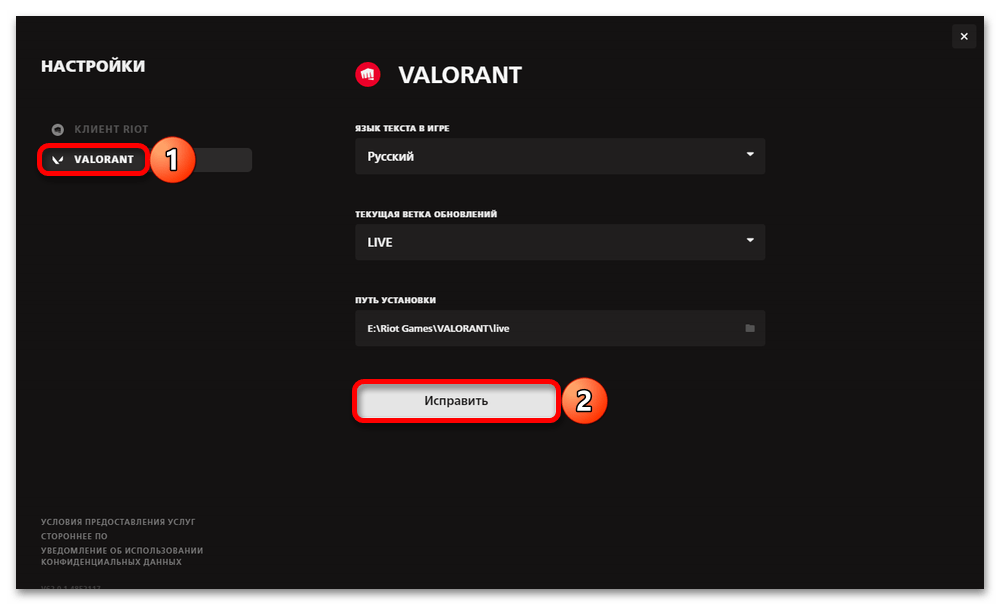
- Выбираем нужную игру, нажимаем «Исправить»

и дожидаемся завершения операции.
Вариант 2: Epic Games Launcher
Скачать Epic Games Launcher с официального сайта
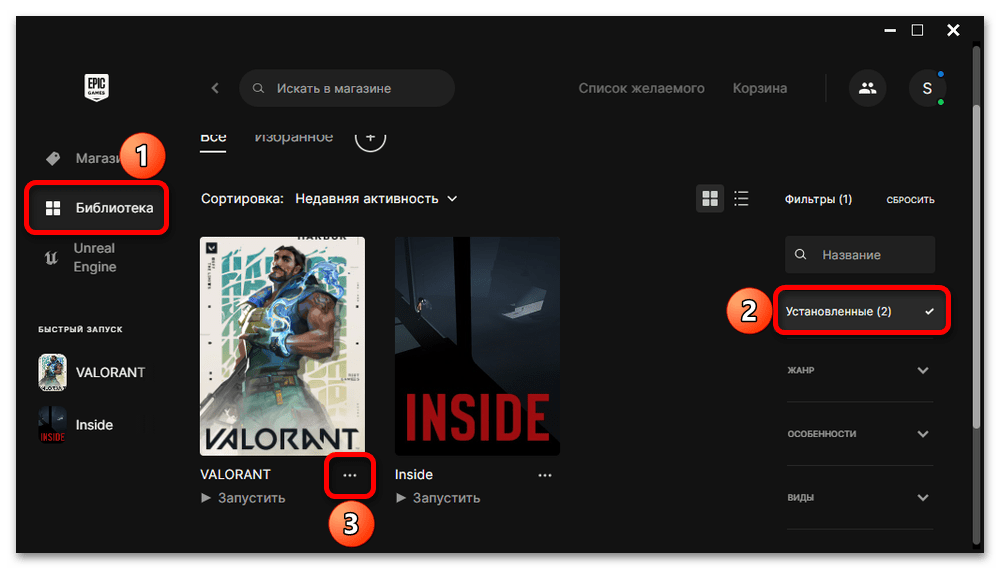
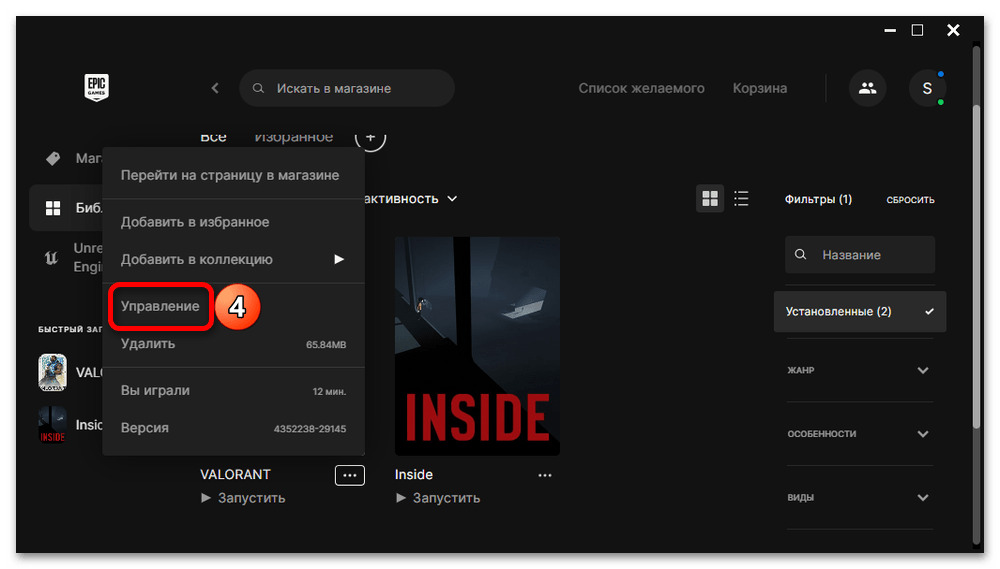
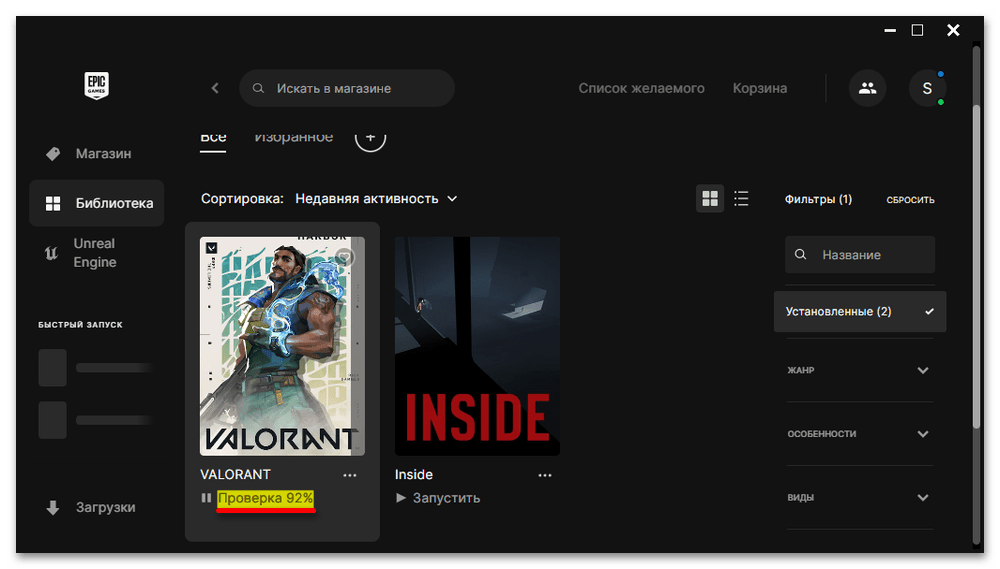
- Открываем приложение, переходим в библиотеку, в блоке фильтров кликаем «Установленные» или просто находим игру в общем списке, вызываем ее меню

и выбираем пункт «Управление».
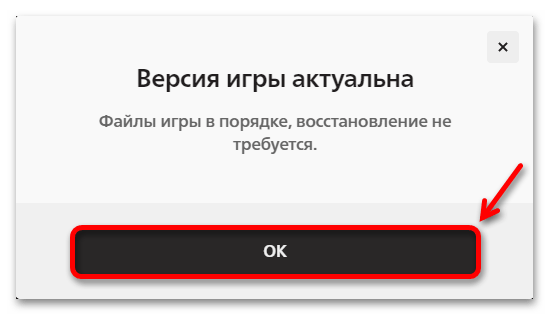
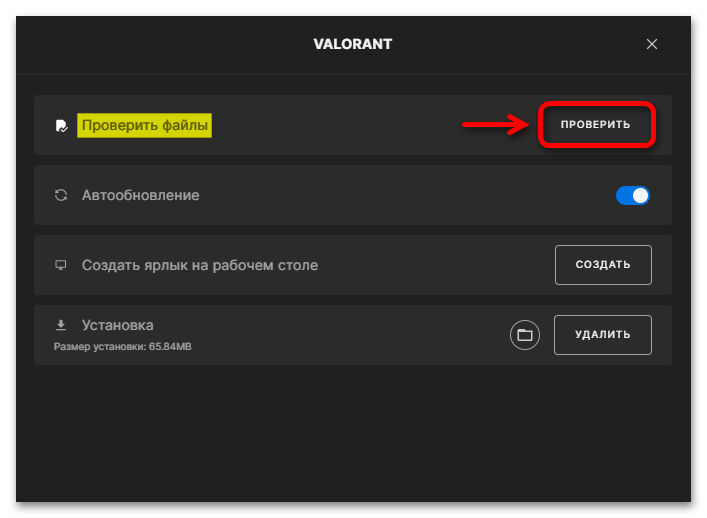
- Запускаем проверку игровых файлов,

дожидаемся, когда она завершится, и пробуем играть.
Способ 4: Удаление логов игры
Папка с временными файлами и локальными данными игры, которая обычно располагается на системном диске, может содержать конфликтные объекты. К счастью, речь идет о пользовательских логах, поэтому их удаление пройдет без последствий, по крайней мере, для игрового прогресса и настроек.
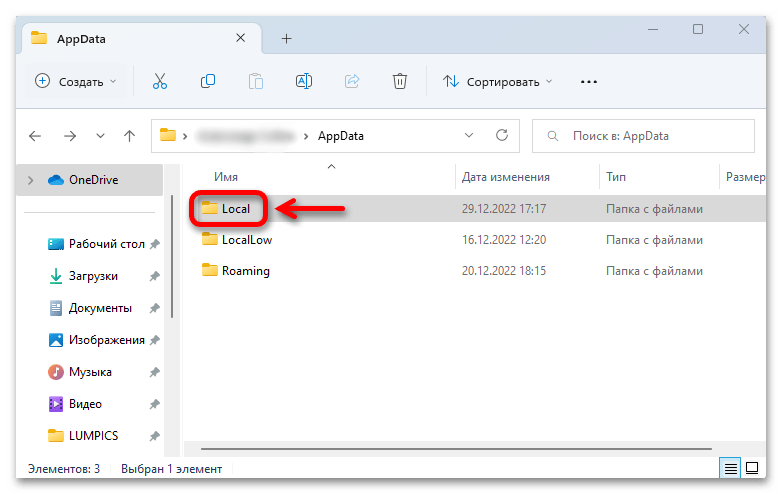
- В окне «Выполнить» вводим
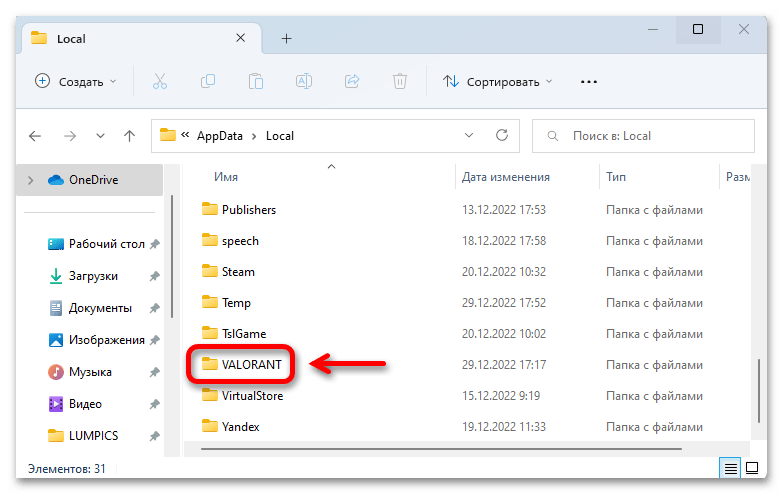
Appdataи нажимаем «OK». - Переходим в каталог «Local»

и в нем находим папку «Valorant».
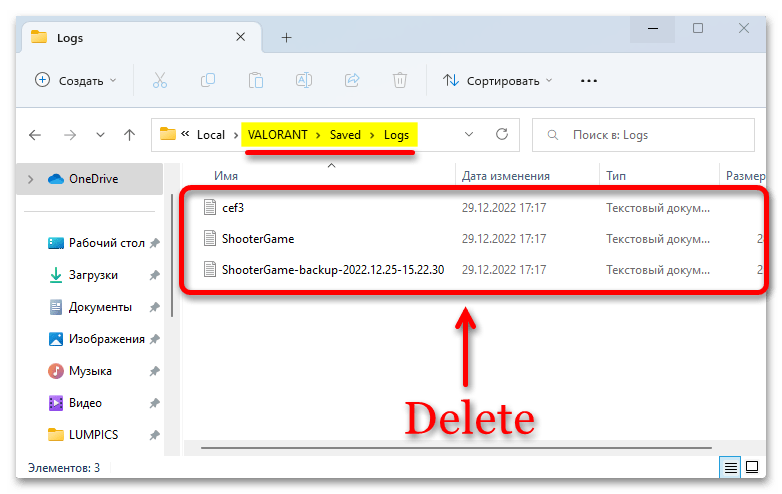
- Далее переходим в директорию:
VALORANT\Saved\Logs,удаляем все файлы, которые в ней есть, и пробуем запустить игру.

Способ 5: Обновление ОС
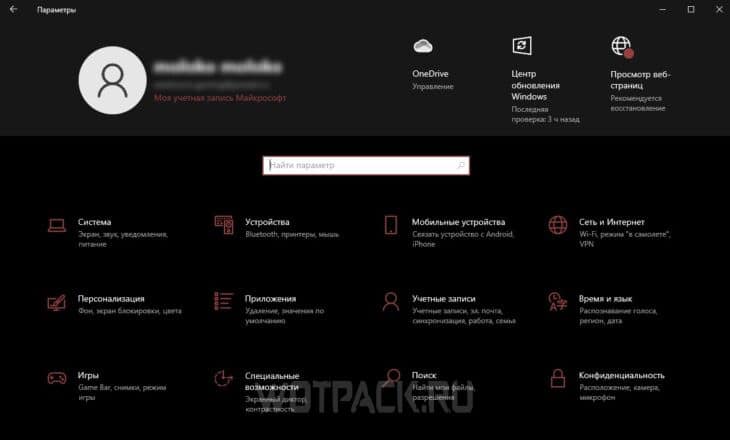
Своевременное обновление Windows 11 не является прямым «лекарством» от ошибки «VAN 1067», но это позволяет в целом избежать разного рода неполадок, особенно если они касаются самой системы. Открываем меню «Пуск», вызываем системные параметры,
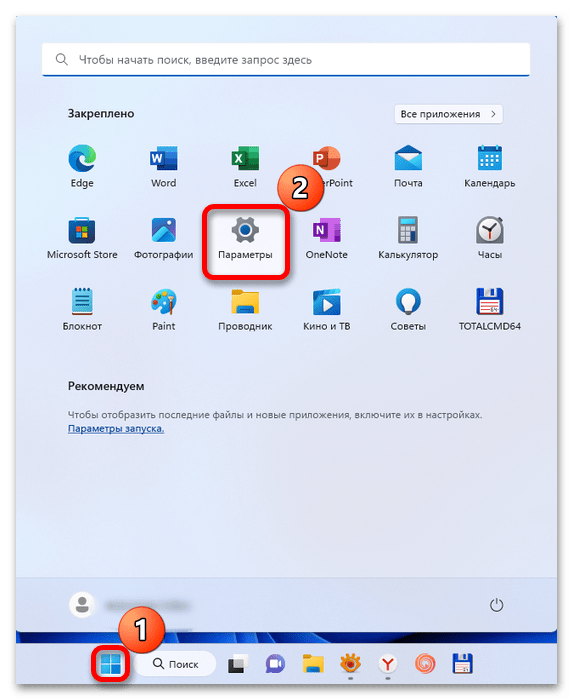
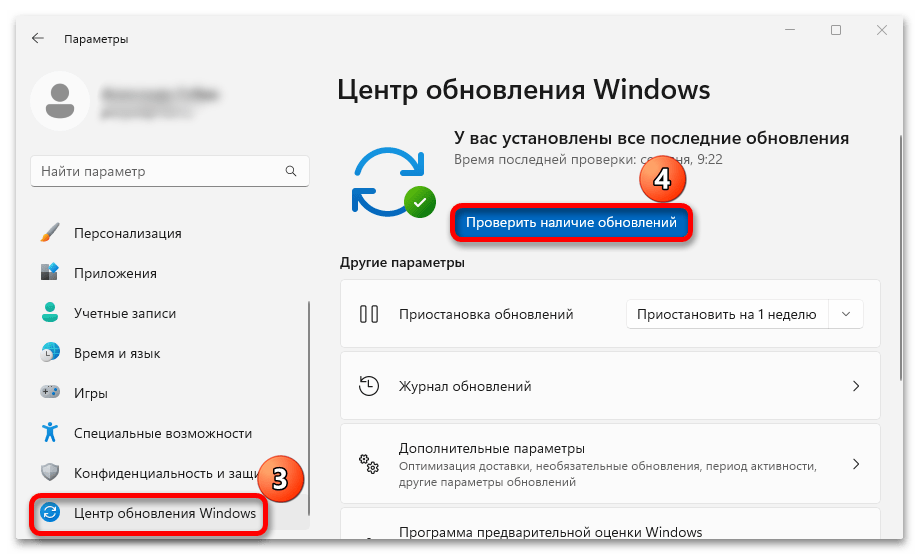
переходим в «Центр обновления Windows», запускаем поиск апдейтов, а затем устанавливаем все, что будет найдено.
Способ 6: Дополнительные рекомендации
Повторная установка – процесс долгий, но в данном случае он имеет двойной смысл. Во-первых, это позволит обновить файлы, которые, возможно, были повреждены. Во-вторых, у некоторых пользователей после включения доверенного модуля и «Secure Boot» (способ №1) ничего не исправилось, но после переустановки игры она начинала работать.
Кстати, на странице технической поддержки Valorant есть огромная таблица с ошибками и исправлениями для них, но в ней почему-то нет ничего про «VAN 1067», хотя она довольно популярна. Это не значит, что Riot Games не знает решения, просто, возможно, те юзеры, которым помогли, не стали делиться с другими. Поэтому стоит отправить разработчикам индивидуальный запрос с описанием проблемы и посмотреть, что они предложат.
Наша группа в TelegramПолезные советы и помощь
Предоставляем решение основных ошибок в Valorant, возникающих из-за проблем в системе, работы анти-чита или других причин.
Ошибки в Valorant зачастую не просто мешают играть, а даже не позволяют запустить игру. Большая часть проблем вызвана некорректной работой собственного античита Riot Games — Vanguard, который работает с системой напрямую и очень чувствителен к любому софту. Чтобы разобраться со сложностями, стоит знать коды ошибок.
В руководстве предоставим решение ошибок в Valorant с объяснением причин их возникновения.
Решение всех ошибок в Валорант
Далее предоставим подробное решение ошибок в Валорант, которые чаще всего встречаются, а также объяснение каждого из наиболее популярных кодов.
Ошибка VAN

Ошибка VAN в Valorant — конкретный тип набора ошибок, которые могут возникать в игре по разным причинам: ошибки клиента или соединения, но зачастую связаны с античитом Vanguard. Чтобы решить ошибку, важно смотреть инструкцию для конкретного номера после кода «VAN», далее разберем наиболее популярные из них.
Ошибка VAN9003
Ошибка VAN9003 в Valorant зачастую появляется на ноутбуках с ОС Windows 11 и вызвана отключенной безопасной загрузкой. Сперва стоит проверить, действительно ли она выключена:
- Зажмите сочетание клавиш «Win+R». В открывшемся окне впишите «msinfo32» и нажмите «Enter».

- Кликните на «Сведения о системе», затем в правой части окна, примерно в середине», отыщите пункт «Состояние безопасной загрузки».
Если рядом написано «Выкл», следуйте инструкции:
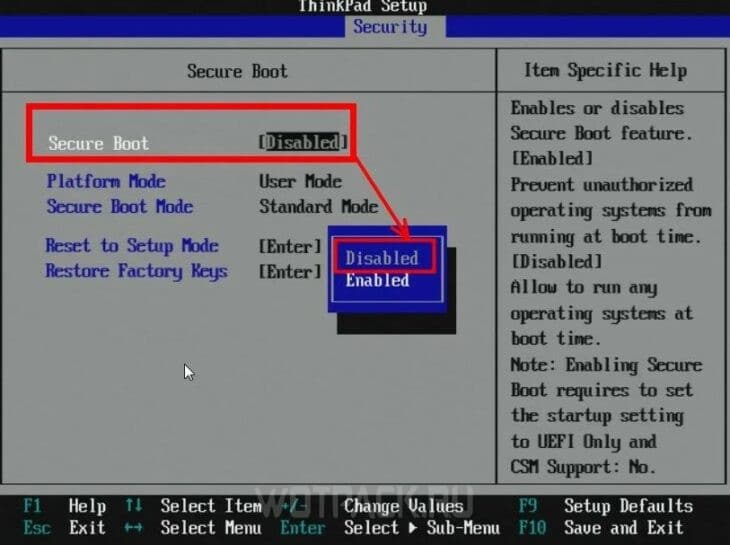
- Включая компьютер, войдите в BIOS или UEFI. Комбинация и порядок действий для открытия биоса отличается от производителя к производителю.

- Перейдите в раздел «Security», после чего найдите пункт «Secure Boot», затем установите значение «Enable», либо же «Available».

- Нажмите клавишу рядом с «Save and Exit». Настройки сохранятся, после чего произойдет перезапуск системы. Проблема должна быть решена.
Ошибка при запуске
Ошибок при запуске Valorant может быть множество. Большинство из них чинится простым перезапуском клиента и всех процессов Riot. Если же это не помогло, стоит попробовать следующее:
- Запустите процесс от имени администратора.
- Проверьте целостность игровых файлов: перейдите в «Библиотеку», выберите Валорант, а затем кликните на три точки рядом с логотипом. Затем открывайте «Управление» и «Проверить файлы».
- Очистите логи игры: для этого перейдите в расположение запускаемого файла и удалите временные файлы.
- Убедитесь, что Vanguard не блокируется другими программами.
Ошибка Windows 11
На Windows 11 чаще всего возникает две ошибки: VAN 9001 и VAN 9003. Вторая была разобрана в пункте выше. Ошибка VAN9001 в Valorant возникает как из-за выключенной функции безопасной загрузки, так и из-за выключенного TPM 2.0. Для решения проблемы требуется:
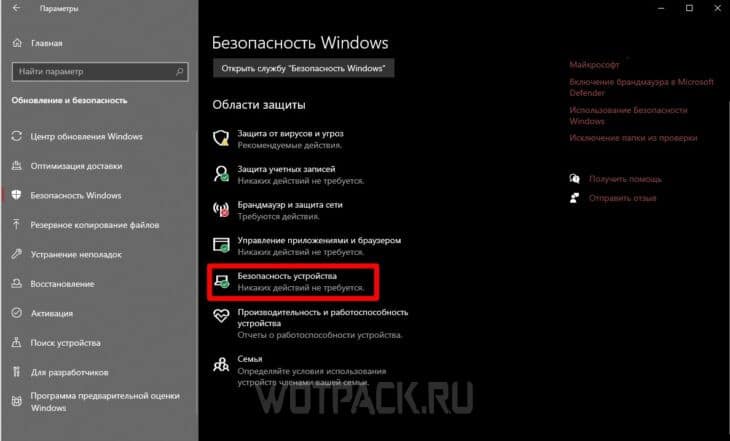
- Откройте параметры Windows.

- Перейдите в раздел «Безопасность Windows». Там необходимо найти раздел «Безопасность устройства».

- Если в этом пункте отсутствует раздел «Обработчик безопасности», значит, TPM недоступен. Если он есть, перейдите туда и убедитесь, что версия спецификации — 2.0. В противном случае устройство не соответствует требованиям Windows 11.
Чтобы включить TPM, необходимо зайти в BIOS/UEFI, делается это различными способами, в зависимости от производителя:
- Перейдите в «Настройки», затем «Обновление и безопасность», кликайте «Восстановление», после чего «Перезапустить сейчас».
- На следующем этапе выбирайте «Устранение неполадок», после этого выбирайте «Дополнительные параметры» и «Настройки прошивки UEFI». Перезапускайте устройство.
- Настройки могут содержаться в разделах «Расширенные», «Безопасность» или «Доверенные вычисления». Сама опция TPM может называться «Устройство безопасности», «Поддержка устройств безопасности» или в виде длинного текста с припиской «TPM» или «PTT» в конце.
Ошибка 128
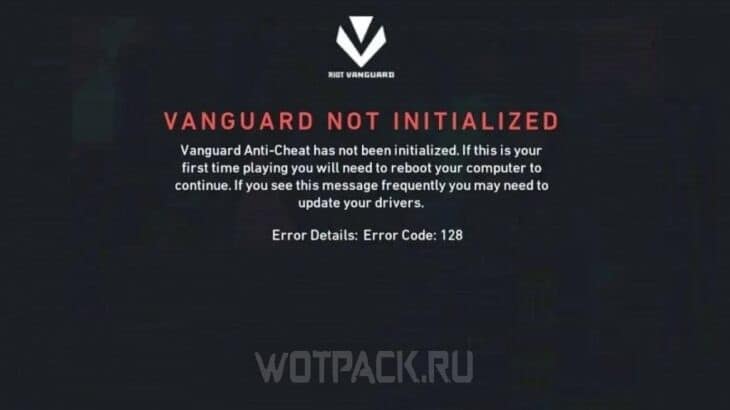
Ошибка VAN128 в Valorant напрямую связана с античитом Vanguard. Он работает с ядром, из-за чего ряд программ может вмешиваться в работу защитного ПО Riot. Сперва проверьте и обновите драйвера и перезагрузите античит, клиент и, если не помогло, компьютер. Альтернативное решение проблемы осуществляется следующим способом:
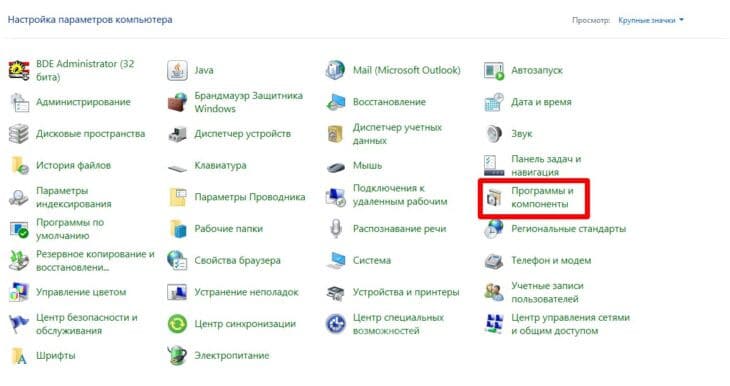
- Откройте панель управления. Затем перейдите в «Программы и компоненты».

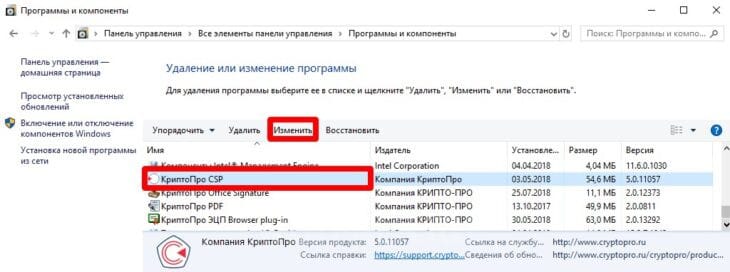
- Найдите приложение «КриптоПро CSP», затем кликните на «Изменить» сверху.

- В мастере установок жмите «Далее», после чего выбирайте «Изменить». В пункте «Совместимость с продуктами Microsoft» установите параметр «Данный компонент будет недоступен».
Теперь остается перезагрузить ПК, если проблема сохранится, необходимо будет удалить ПО. Существуют и альтернативные способы решения ошибки:
- Откройте командную строку «Win+R».
- Введите два набора команд: «bcdedit -set TESTSIGNING OFF» и «bcdedit -set NOINTEGRITYCHECKS OFF».
- Откройте Valorant и перезапустите компьютер.
Кроме того, стоит проверить и восстановить файлы Valorant.
Ошибка Vanguard

Ошибка Vanguard в Valorant вызвана проблемами в работе античита. Исправить их можно рядом способов:
- Отключить антивирусы, а также добавить игру в исключения включенных антивирусов и брандмауэра.
- Установить последние обновления Windows. Если сидите на 7-й версии, обратите внимание на обновления KB4474419 и KB4490628. В случае сохранения ошибки установите пакет Visual C++.
- Переустановить Vanguard и проверьте его на наличие обновлений.
Ошибка VAN79


Ошибка 79 в Valorant зачастую связана с ошибкой в соединении. Исправить ее можно следующими действиями:
- Обновить Windows.
- Перезапустить клиент Riot и сам Valorant.
- Перезапустить Vanguard. Для этого нажмите «Win+R» и введите «services.msc». Найдите службу «vgc» и нажмите по ней правой кнопкой мыши. В пункте «Тип запуска» поставьте «Автоматический».
Ошибка 57
Ошибка 57 в Valorant также связана с проблемами в работе античита Vanguard. Легче всего исправить ее банальным удалением:
- Откройте диспетчер задач, зажав «Ctrl + Shift + Esc». Найдите Vanguard и завершите процесс, а также все связанные с ним.
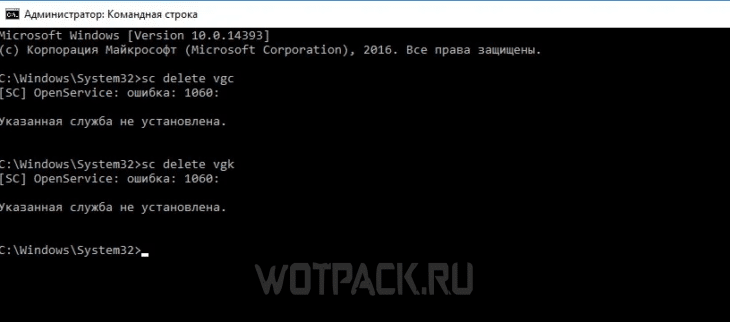
- Запустите командную строку, нажав «Win+R» и вписав «cmd». Далее введите две команды: «sc delete vgc» и «sc delete vgk».

- Закройте консоль и через проводник найдите папку «Riot Vanguard» в «Program Files». Удаляйте каталог и перезагрузите устройство.
- Запустите установщик Валоранта от имени администратора. Согласитесь загрузить новую версию античита и вновь перезагрузите устройство.
Ошибка 43

Ошибка 43 в Valorant связана с истечением времени ожидания. Проблема может быть как на стороне Riot, так и на стороне пользователя. В первом случае нужно просто ждать, во втором можно попробовать несколько решений:
- Перезагрузить игру и компьютер.
- Проверить целостность файлов, а также открыть клиент и установить обновление.
- Удалить клиентские файлы игры. Для этого зажмите «Win+R» и введите «%AppData%». Вернитесь в папку «AppData», затем в «Local». Найдите «Riot Games», в этом каталоге перейдите в «Riot Client» и «Data». Там удалите файл «RiotGamesPrivateSettings».
Ошибка 185
Ошибка VAN185 в Valorant также связана с работой античита. Починить ее можно стандартными способами:
- Перезагрузить клиент и Vanguard.
- Обновить драйвера видеокарты.
- Проверить стороннее обеспечение и отключить оверлеи, антивирусы и оптимизаторы системы.
- Переустановить Riot Vanguard и саму игру.
- Отключить IPv6 и перезагрузить службу vgc в списке служб Windows.
Коды ошибок в Valorant
Если не смогли найти свою ошибку в пунктах выше, стоит посмотреть на официальном сайте поддержки Riot. Там разобраны почти все коды ошибок в Valorant с советами по решению.
Надеемся, что наша статья помогла разобраться с тем, как исправить ошибки в Валорант. Если остались какие-либо вопросы — задавайте их в комментариях, мы обязательно ответим.
VAN 1067 Valorant Error Code: How to Fix it on Windows 11
Valorant, developed by Riot Games, has rapidly become one of the most popular tactical shooters since its release in 2020. Its competitive gameplay, unique agents, and strategic depth have captured the hearts of many gamers worldwide. However, like any online game, players occasionally run into technical issues. One such issue is the VAN 1067 error code, which can be frustrating, especially when you’re eager to get back into the game. This article will explore what the VAN 1067 error is, what causes it, and step-by-step solutions to resolve it on Windows 11.
Understanding VAN 1067 Error Code
The VAN 1067 error code usually appears when there are issues with Riot’s anti-cheat system, Vanguard. This system is designed to prevent cheating and maintain a fair gaming environment. When Vanguard detects specific issues, it can prevent players from launching or playing the game, generating error codes such as VAN 1067.
Common Causes of the VAN 1067 Error Code
-
Corrupted Vanguard Installation: Sometimes, the Vanguard anti-cheat service can be corrupted during installation or updates, causing issues when trying to launch Valorant.
-
Conflicting Software: Certain software, especially those that modify or interact with game files (like overlays, cheats, or system modification tools), can conflict with Vanguard, leading to this error.
-
Network Connectivity Issues: In some cases, network problems can interfere with Vanguard’s ability to validate your game files and account information, triggering the error.
-
Windows Updates: Occasionally, recent Windows updates can introduce changes or bugs that affect how Vanguard operates, leading to the error.
-
Permissions Issues: If Vanguard doesn’t have the necessary permissions to operate, it can result in various error codes.
Step-by-Step Solutions to Fix VAN 1067 Error Code on Windows 11
Here are detailed steps to troubleshoot and resolve VAN 1067 on your Windows 11 system:
Step 1: Restart Your Computer
The first and simplest solution is to restart your computer. This can refresh all system processes and resolve temporary conflicts or glitches with the Vanguard service.
Step 2: Repair Vanguard Installation
-
Access Control Panel:
- Open the Windows Start menu and type «Control Panel».
- Click on the Control Panel app to open it.
-
Navigate to Programs and Features:
- Click on «Programs» and then select «Programs and Features».
-
Locate Riot Vanguard:
- Scroll through the list of installed programs until you find «Riot Vanguard».
-
Repair the Installation:
- Right-click on «Riot Vanguard» and select «Uninstall».
- Confirm the uninstallation. Once it’s completed, launch Valorant again. This should prompt Vanguard to reinstall automatically.
Step 3: Check for Conflicting Software
-
Uninstall Third-Party Applications:
- Open Control Panel, navigate to «Programs and Features».
- Identify and uninstall applications that may conflict with Vanguard, such as:
- MSI Afterburner
- Discord overlay features
- Any memory-editing programs
-
Disable Background Applications:
- Press
Ctrl + Shift + Escto access the Task Manager. - Review the Processes tab and close applications that may interfere with the game.
- Press
Step 4: Update Windows 11
Keeping your operating system updated ensures that you have the latest security patches, system optimizations, and compatibility fixes.
-
Open Windows Settings:
- Click on the Start menu and select «Settings» (gear icon).
-
Go to Update & Security:
- Click on «Windows Update».
-
Check for Updates:
- Click the «Check for updates» button and install any available updates.
- Restart your computer if updates are installed.
Step 5: Adjust Vanguard Permissions
-
Locate Vanguard’s Installation Folder:
- Typically found in
C:Program FilesRiot Vanguard.
- Typically found in
-
Change Compatibility Settings:
- Right-click on
VGC.exe, select «Properties», then go to the «Compatibility» tab. - Check «Run this program as an administrator» and click OK.
- Right-click on
-
Repeat for Additional Executables:
- Make sure to also do this for any other Riot applications necessary for launching Valorant.
Step 6: Reinstall Valorant
If none of the above solutions work, a fresh install of Valorant may be necessary.
-
Uninstall Valorant:
- Go to Control Panel > Programs > Programs and Features.
- Uninstall Valorant completely.
-
Delete Remaining Files:
- Navigate to the installation directory (usually in
C:Riot GamesValorant) and ensure no files or folders remain.
- Navigate to the installation directory (usually in
-
Download and Install Valorant Again:
- Visit the official Valorant website and download the latest client.
- Install the game and allow Vanguard to install anew.
Step 7: Check Firewall and Antivirus Settings
Sometimes, firewalls or antivirus software can accidentally block Vanguard’s access.
-
Open Windows Security:
- Go to Settings > Privacy & Security > Windows Security.
-
Check Firewall Settings:
- Click on “Firewall & network protection”.
- Make sure that Valorant and Vanguard are allowed through the firewall.
-
Whitelist Vanguard/Valorant in your antivirus application to ensure they aren’t being blocked.
Step 8: Check Network Settings
Network connectivity issues can sometimes lead to the VAN 1067 error.
-
Use Windows Network Troubleshooter:
- Go to Settings > Network & Internet > Status.
- Click on “Network troubleshooter” and follow the prompts.
-
Reset Network Settings:
- In the Network & Internet settings, scroll down to the advanced network settings and click on “Network reset”.
- This will remove and reinstall all network adapters and set other networking components back to their original settings.
Step 9: Contact Riot Support
If the error persists after trying all these methods, reaching out to Riot Games support may be your best option.
-
Visit Riot Support Page:
- Go to the official Riot support page for Valorant.
-
Submit a support request:
- Provide details of the error code along with any troubleshooting steps you have already taken.
Conclusion
The VAN 1067 error in Valorant can be a significant obstacle in your gaming experience, especially if you encounter it frequently. Understanding its causes and the methods outlined in this guide can help you troubleshoot and resolve the issue efficiently. Remember, effective maintenance of software and staying updated are critical in the ever-evolving landscape of online gaming. With patience and careful application of the solutions provided, you should be able to return to the thrilling world of Valorant without further interruptions. Happy gaming!
With the introduction of Windows 11, Microsoft introduced a slew of new features made especially for the gamers like Auto HDR, support for DirectStorage and more. However, its bugs are something that are affecting everyone including Valorant players, who have encountered one typical error code – the VAN 1067 error.
Valorant is a 5v5 PvP online shooter game developed by Riot Games that is played by millions of users everyday around the globe. The Valorant VAN 1067 error is a code that has recently stumped a good chunk of the player base who are trying to run this game on their Windows 11 PCs. This error message pops up when a user tries to launch the game.
Let’s dive further and learn what this error code is, causes behind it and methods to fix it.
What is the Valorant VAN 1067 Error Message?
Valorant players facing the VAN 1067 error code while launching the game on their Windows 11 PCs are flooding various online forums for a possible fix. This error has made launching the game impossible for the users.
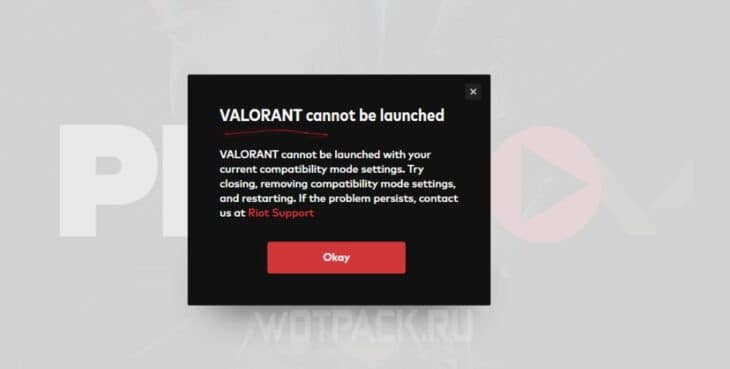
A soon as the game is launched, the following message is displayed on the screen –

CONNECTION ERROR
VALORANT has encountered a connection error. Please relaunch the client to reconnect.
Error Code: VAN 1067
While it may seem as if this error is due to server issue but in reality, it is a problem related to TPM 2.0 and the Secure Boot being disabled on the computer itself.
Both TPM 2.0 and Secure Boot are essential components that enhance computer’s security and for protect users against various security threats. They are essential components required for the smooth functioning of Windows 11 and some applications like Valorant.
If you have encountered the VAN 1067 error code while trying to launch Valorant on your Windows 11 PC, there are high chances that TPM 2.0 and Secure Boot are disabled. It can also happen due to other reasons like outdated graphics driver, VGC service stopped, etc.
Reasons Behind the VAN 1067 Error
As mentioned earlier, Valorant VAN 1067 seems like a server issue but is in fact due to an issue in the users’ computer. Here are the possible reasons that could cause you to encounter the Valorant VAN 1067 error message –
- Disabled TPM & Secured Boot
- Disabled VGC service
- Outdated component drivers
- Outdated Windows OS
Methods to Fix the VAN 1067 Error
Now that we have understood what VAN 1067 error code is and the reasons that cause it to pop up, let’s look at some methods that you can employ to fix this issue. Users on various online forums have discussed these methods. However, as they are not official fixes, they might or might not work on some systems.
Note – Before proceeding with the methods, make sure that your computer is running on the latest Windows OS. Also, make sure that all the device drivers, including the GPU driver are up to date. Outdated Windows OS and device drivers can also cause your Windows 11 computer to show the VAN 1067 error message while launching Valorant.
Method 1: Reinstall Riot Vanguard
This is the simplest way to get rid of the Valorant VAN 1067 error message on your Windows 11 PC. A problem with Riot Vanguard (Valorant client) can cause you to encounter the VAN 1067 error code. Simply uninstall Riot Vanguard from your PC and reinstall it after downloading it again from its official website.
Method 2: Relaunch Valorant
A handful of users reported that they were able to get rid of the VAN 1067 error code by relaunching Valorant. You can also try relaunching the game again. This should fix the issue.
Method 3: Enable TPM and Secure Boot
TPM 2.0 and Secure Boot are two crucial system components required by Windows 11 and some other applications. These components are included in Windows 11 to increase the security of the system and safeguard the user from any cyber attacks.
If Valorant is displaying the VAN 1067 error on launch, it could be due to these two components being disabled. You can get rid of this error code by enabling these two crucial components. Follow the steps below to do this –
- Press WIN + I and open Settings.
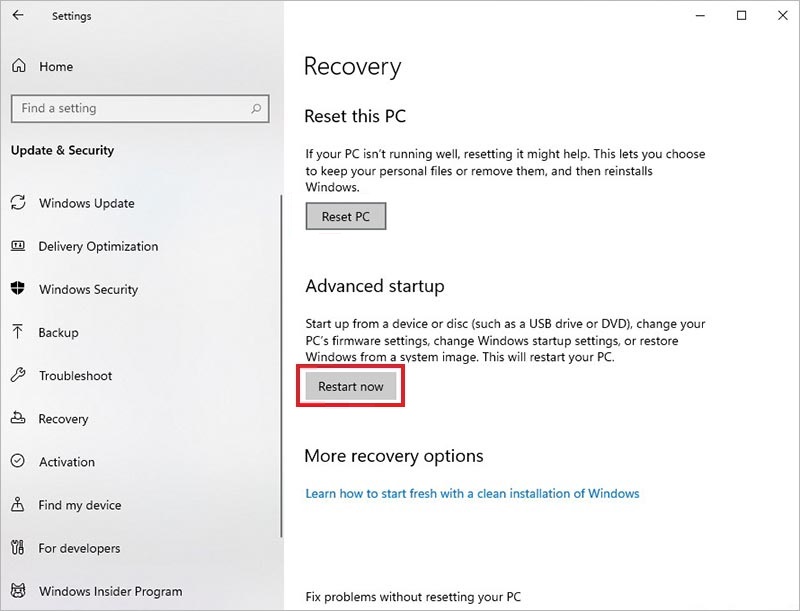
- Click on Update & Security and then Recovery in the left pane.
- Click on the Restart now button under the Advanced startup option.
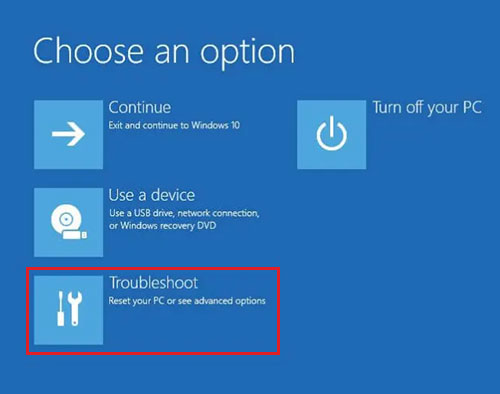
- In the Windows Recovery Environment (WinRE), click on Troubleshoot and then Advanced options.
- Click on UEFI Firmware Settings option.
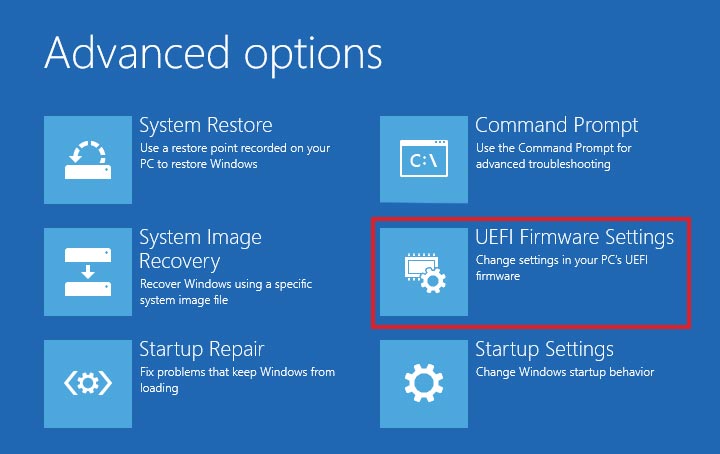
- On the next screen, click on Restart. It will restart the computer and take you to the UEFI settings screen. Depending upon your motherboard manufacturer, this screen will be different.
- Navigate to Secure Boot and Trusted Platform Module and Enable them.
- Exit BIOS and Restart the computer.
Enabling these two components should fix the VAN 1067 error on your Windows 11 computer.
Method 4: Restart VGC Service
VGC service is Riot’s anti cheat system that runs simultaneously with various games developed by Riot. If this service is disabled or isn’t functioning properly, it could cause the game to not launch and rather show the Valorant VAN 1067 error code. Follow the steps below to restart the service and get rid of the issue –
- Press WIN + R and type services.msc. Hit Enter.
- Search for the VGC service.
- Right-click on it and select Restart.
Method 5: Resetting Windows 11 without Losing Your Data
The above methods should work and help you get rid of the VAN 1067 error message. However, if they don’t provide any results, you can reset Windows 11 PC without losing your data. Doing so will reset your Windows 11 PC to its factory state and preserve all your data and files present on your computer. Follow the steps mentioned below carefully to do this –
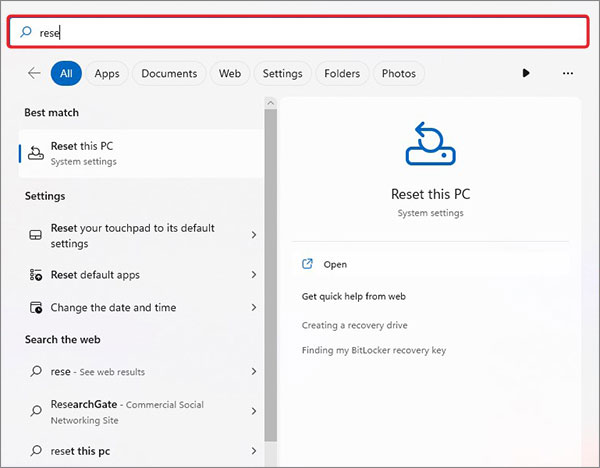
- Press WIN + Q or WIN + S and type Reset this PC.
- Click on the result.
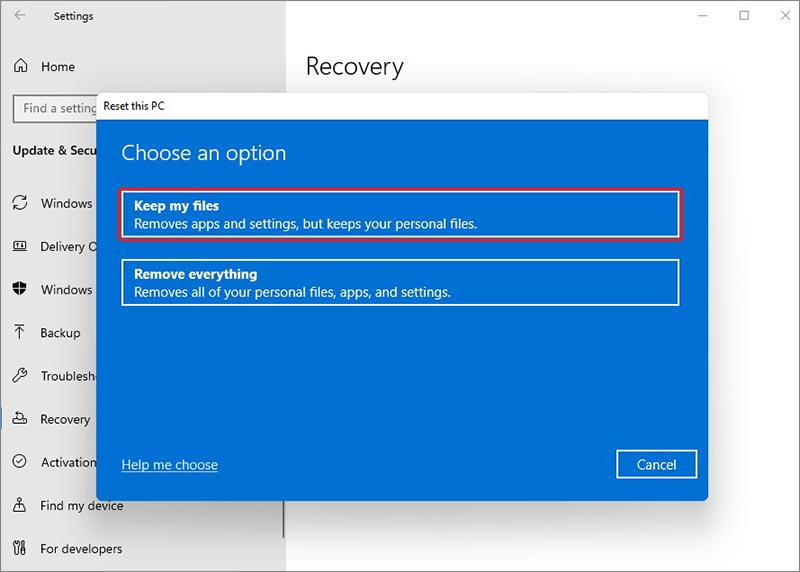
- In the Recovery window, navigate to Reset this PC option and click on Reset PC.

- In the following dialog box, click on Keep my files option.
- In the next dialog box, make your selection between either Cloud download or Local reinstall to reinstall Windows 11.

- Next, in the Additional settings dialog box, click on Next.
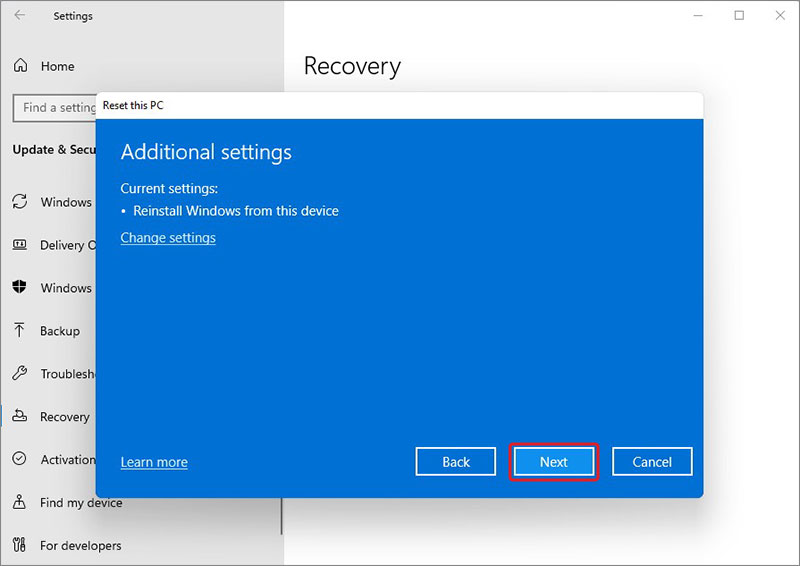
- In the last dialog box, click on Reset. This will begin resetting your PC.

What if My PC Keeps on Crashing Due to Valorant VAN 1067 Error?
While this may sound strange, but in rare cases, error messages could cause your computer to crash and get stuck in a boot loop. You may feel as if you have lost all your data but you should not worry about your data as it can still be recovered.
In such a scenario, you can take help of a professional data recovery tool like Stellar Data Recovery Professional and retrieve your lost data easily in no time. You can use this software to easily recover any type of files from almost every storage device like HDD, SSD, SD card and more. This software is capable of recovering data from damaged, encrypted or corrupted drives. Finally, it also allows users to create a bootable media for performing data recovery on crashed or unbootable computers.
Match Starts In…
The Valorant VAN 1067 error code is an annoying issue that has affected many Valorant players around the globe. Due to unavailability of any official fix for it yet, it might seem unfixable but using the right methods as mentioned in this post, you can get rid of this error in no time.
In this post, we learned about the VAN 1067 error that is affecting Valorant players on Windows 11 computers along with the reasons causing it to occur. We also discussed some methods that you can employ to get rid of this error message. Finally, we highlighted how you can use a professional data recovery software and retrieve your lost data from crashed or corrupted computer or storage drives.
FAQs
Is it necessary to have TPM 2.0 and Secured Boot enabled for playing Valorant on Windows 11?
TPM 2.0 & Secured Boot are essential services of Windows 11 and are required for running apps like Valorant. Otherwise, they will show error messages like the VAN 1067 code.
Why am I facing VAN 1067 error while launching Valorant on my PC?
VAN 1067 error occurs due to multiple reasons. However, the primary cause is the disabled Secured Boot or TPM 2.0 or both. You can enable them in the BIOS to get rid of this error code.
How do I check if TPM 2.0 is enabled or not?
Press WIN + R to open RUN and type tpm.msc and press Enter. If you see a message saying, “Compatible TPM cannot be found”, then it is disabled.
Was this article helpful?
YES0
NO
Readers help support Windows Report. We may get a commission if you buy through our links.
Read our disclosure page to find out how can you help Windows Report sustain the editorial team. Read more
Many gamers reported Van 1067 error in Windows 10, and this error can prevent them from playing the game, however, there are a few solutions that can fix this.
Your security software can sometimes cause this issue as well as pending Windows updates. Problems with network connection are also a common culprit.
What can I do to fix Van 1067 in Windows 10?
Start by ensuring that your PC meets the minimum requirements and has enough storage space. Also, make sure the internet connection is stable and install the required DirectX and Visual C++ Redistributable. You can also temporarily disable your antivirus.
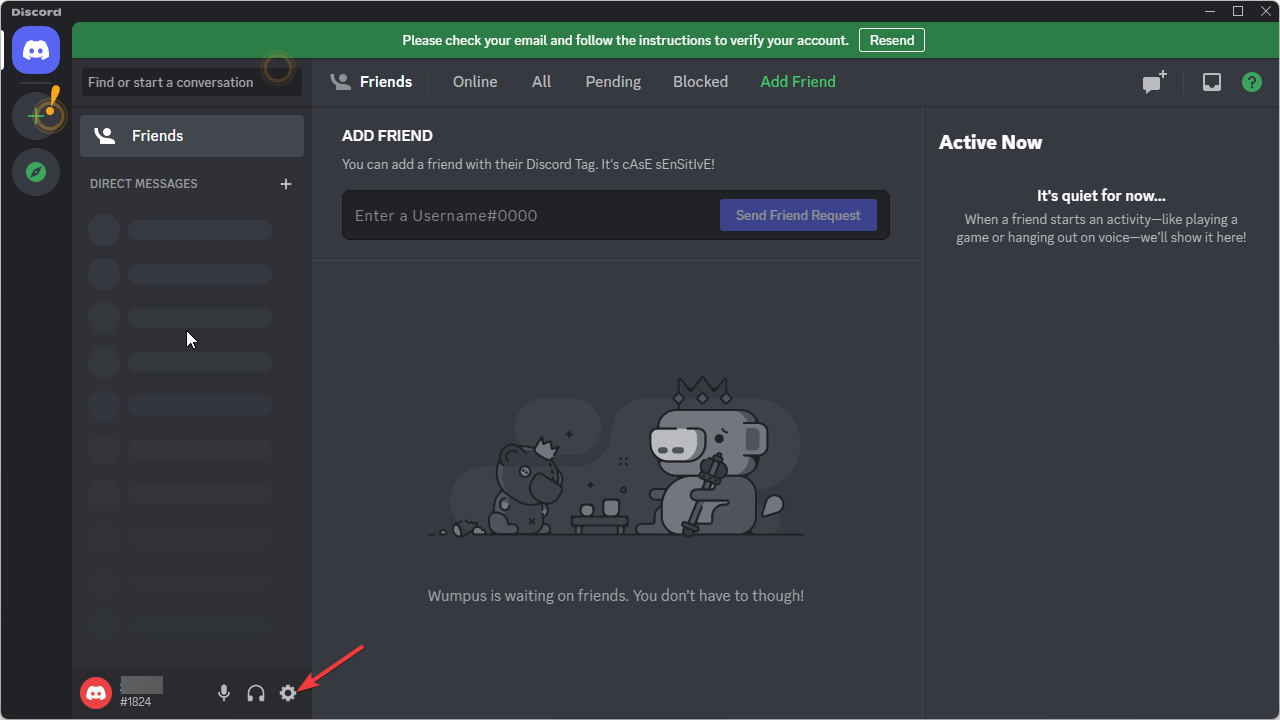
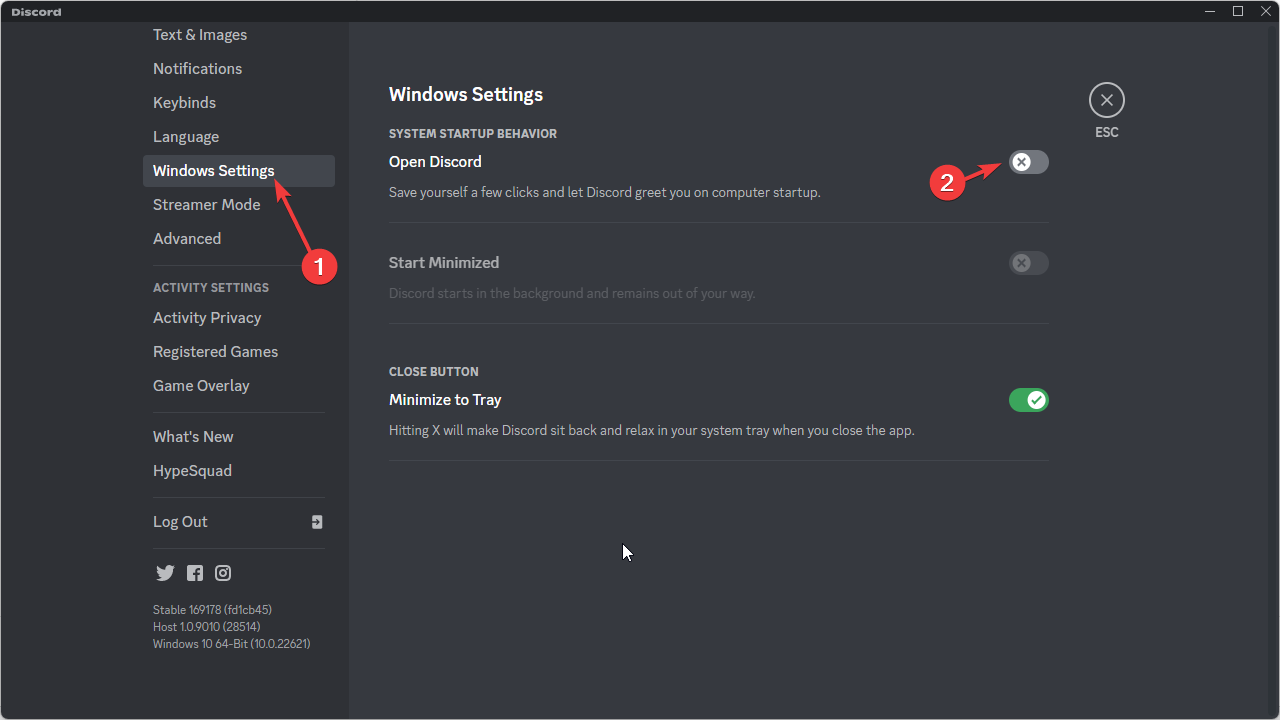
1. Disable Discord’s Automatic boot
- Launch the Discord app and go to User Settings.

- From the left pane, click Windows Settings.
- Disable Open Discord by clicking the toggle button.
2. Change compatibility settings
- Go to the Valorant app, right-click it and select Properties.
- Switch to the Compatibility tab.
- Place a checkmark next to Run the program in compatibility mode for and from the drop-down, and select Windows 8.
- Click Apply and OK.
- Microsoft wants Windows 10 users to upgrade to Windows 11 or Copilot + PCs
- Deleting ‘inetpub’ folder lets hackers permanently stop Windows updates, Microsoft warns
- The latest KB5055612 for Windows 10 22H2 brings huge stability to the OS
- Microsoft April 2025 Patch Tuesday: Fixes for 134 security vulnerabilities, one exploited Zero-Day
3. Update Windows
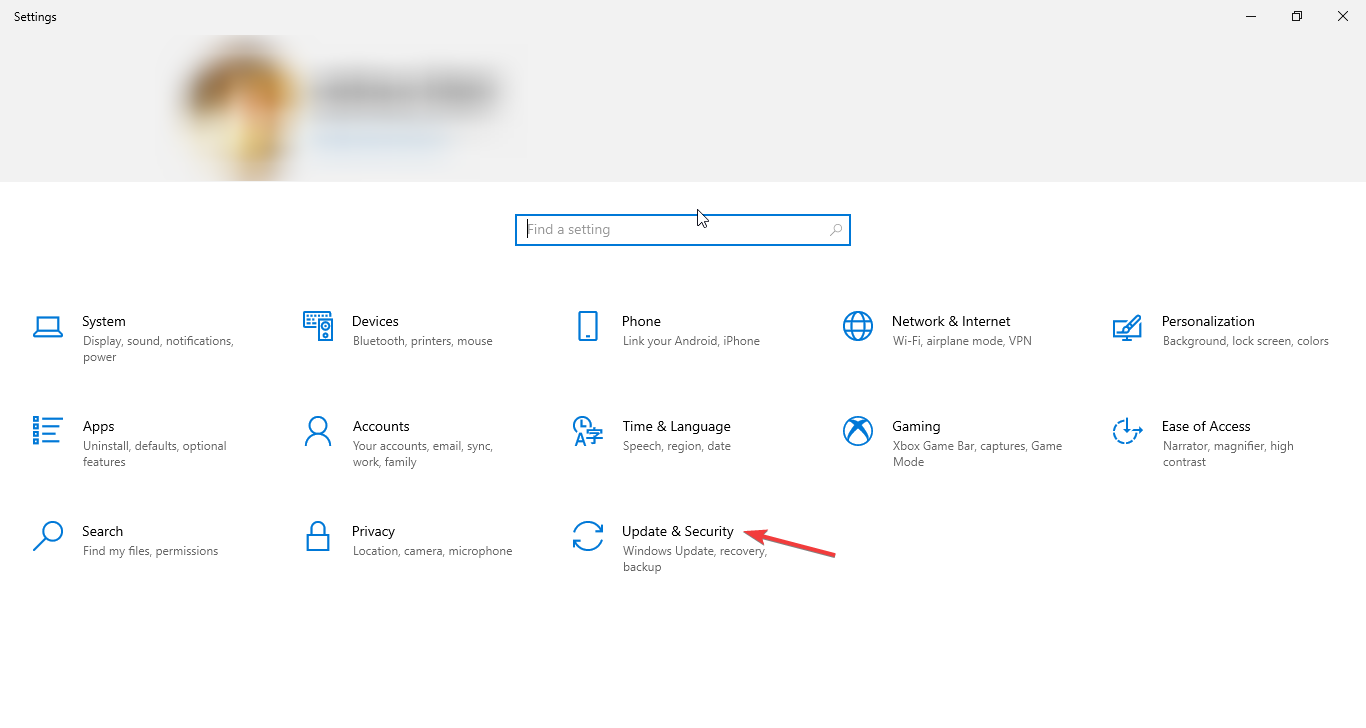
- Press Windows + I to open Settings.
- Click Update & Security from the left pane and click on Windows Update.

- Click Check for Updates if available, and Download & Install the update.
- Restart your PC.
4. Use the Services app
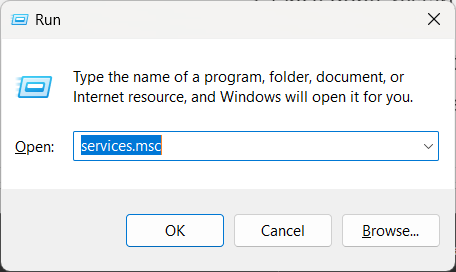
- Press Windows + R to open the Run window

- Type services.msc and press Enter to open Services.
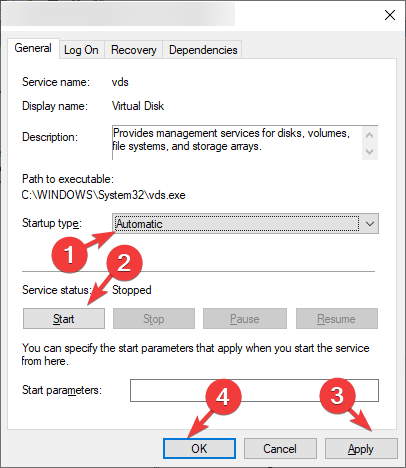
- Locate the VGC service, and check if it is running. Double-click on it to open Properties.
- Choose Startup type as Automatic and click Start under Services status.

- Click Apply and then OK.
5. Reset the network connection
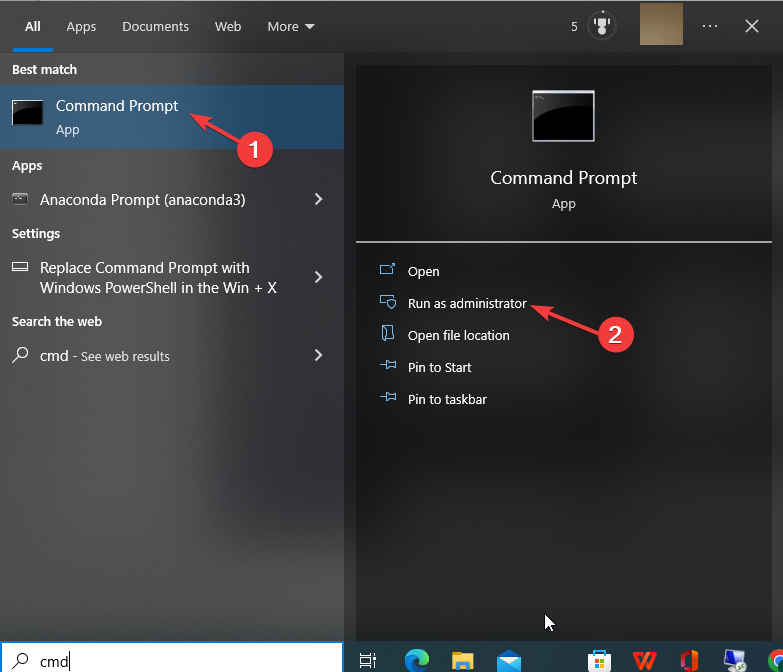
- Press the Windows key, type CMD and click Run as administrator.

- Copy and paste the following command one by one and press Enter after every command:
ipconfig/flushdnsnetsh winsock reset - Once done, restart your computer.
So, these are the steps to fix van 1067 in Windows 10 error. In case you have further problems, we have another guide that can help you resolve Valorant error VAN9003 effectively.
We also have a guide on VAN 1067 Valorant error code on Windows 11 as well as a guide on Valorant Error Code 0.
Before you go, you might want to check our guide on error VAN 152 on Valorant for more solutions.
Try them and let us know which worked for you in the comments below.
Loredana Harsana
Windows Software Expert
Loredana is a passionate writer with a keen interest in PC software and technology. She started off writing about mobile phones back when Samsung Galaxy S II was on top of the world and she fell in love with tech of all sorts.
Whenever she’s not at her work desk, you’ll find her enjoying refreshing tea flavors, spilling stories on paper, and listening to the radio.