
Содержание
- 1 Массивы под Windows
- 2 Причины потери данных RAID
- 3 Как восстановить RAID 1 Windows 10
- 3.1 Другие варианты
Любой массив, даже отличающийся высокой отказоустойчивостью, может выйти их строя. Знание причин, повлекших неисправность, а также способы восстановления данных с RAID массива Windows помогают спасти информацию и быстро исправить ситуацию.
Специалисты ГК «Интегрус», обладающие большим опытом восстановления данных с RAID, работают с любым оборудованием и типами массивов. После полной диагностики пользователь получает подробный отчет о неисправностях и вариантах восстановления данных, в том числе конфиденциального характера.
Ускорить работу компьютера можно, используя материнскую плату в качестве основы для создания RAID массива. Это экономит средства, повышает безопасность информации. Такой вариант сборки часто используется для домашнего использования или в небольших офисах.
В ОС Windows предусмотрена технология объединения двух или более дисков в единый пул хранения. В полученном пользовательском (несистемном разделе) допустимо хранить информацию как не слишком важную (для конфигурации низкой отказоустойчивости) или же критически важную, обеспечивая отказоустойчивость за счет зеркал.
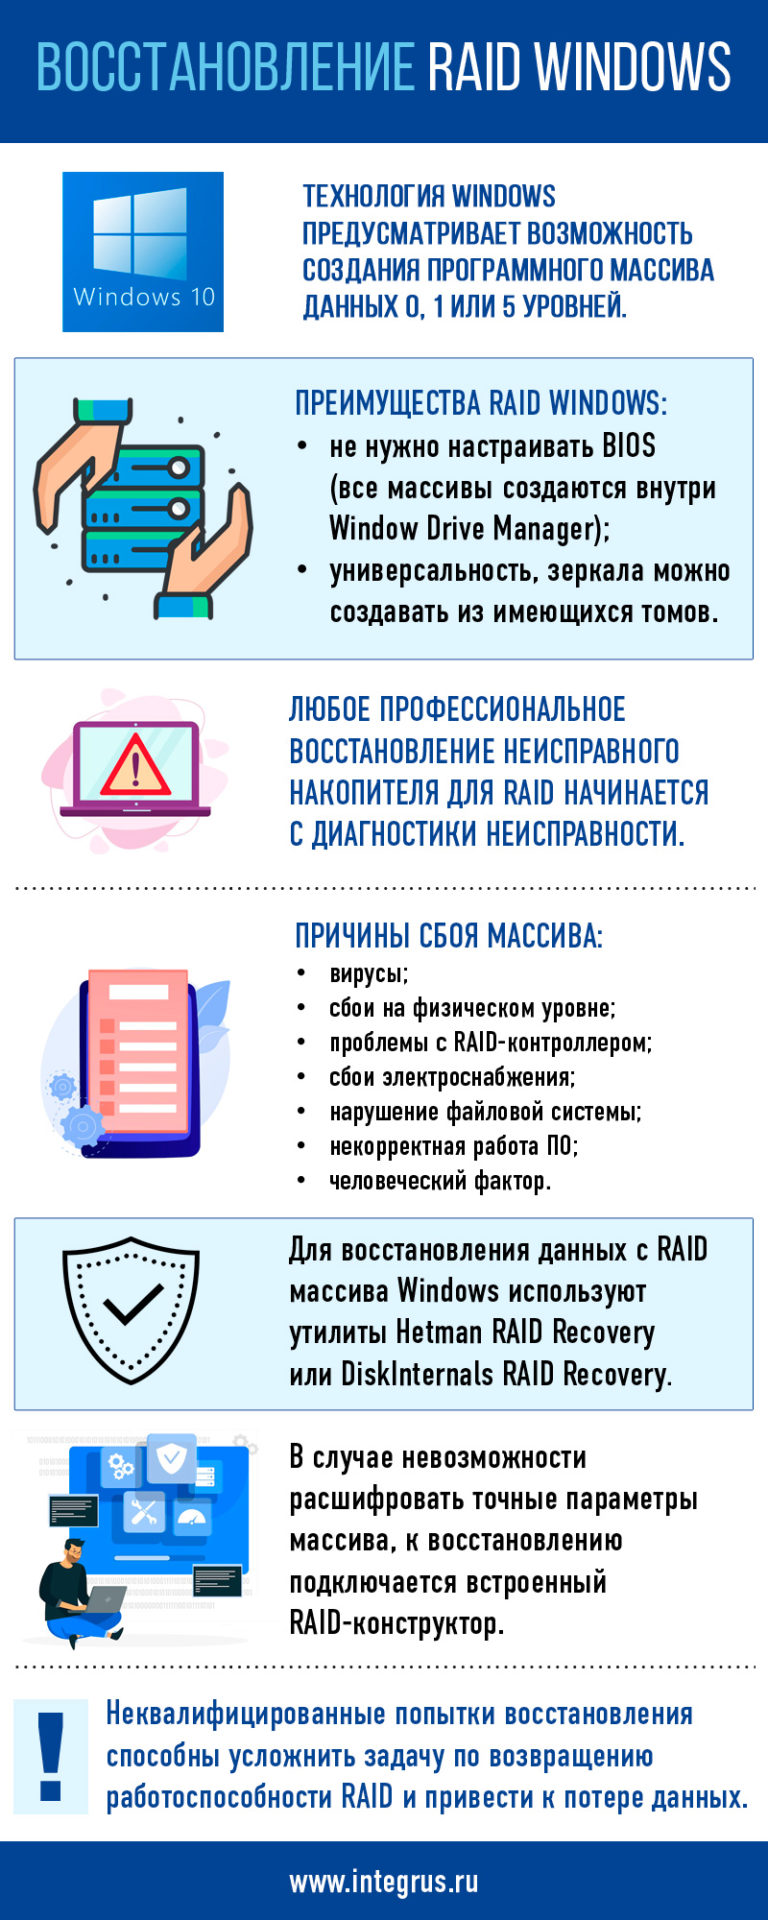
Массивы под Windows
Технология Windows предусматривает возможность создания программного массива данных 0, 1 или 5 уровней.
RAID 0 – из двух дисков создается один большой том, который равен сумме объемов обоих дисков. Смежные данные распределяются методом чередования по разным дискам, что увеличивает их емкость и повышает производительность.
При поломке любого носителя массив разваливается, данные теряются. Отказоустойчивость минимальная.
RAID 1 – избыточный массив, где информация с каждого диска полностью зеркалируется на резервном носителе, что существенно повышает отказоустойчивость. Способ дорогой, но надежный, поэтому его часто применяют на серверах.
Полезный объем составляет лишь 50 дискового пространства. Производительность при чтении высокая, при записи – стандартная.
RAID 10 – массив, комбинирующий первый и нулевой уровни для обеспечения избыточности и повышения производительности. Умеет записывать и считывать данные на различных носителях, повышая скорость доступа. Массив требует наличия минимум четырех носителей.
RAID 5 – отказоустойчивый массив, состоящий из независимых накопителей с отдельным хранилищем контрольных сумм. Требуется минимум три винчестера, а в режиме записи скорость ниже, чем при работе с одним диском.
Выход любого диска из строя переводит RAID в аварийный режим со снижением производительности. Предназначен для работы в стрессовых условиях (например, в многопользовательских системах).
Тип программного RAID зависит от версии Windows:
- Windows XP использует составные тома, размещая том на двух или более дисках (JBOD);
- Windows Vista чередует JBOD и RAID 1;
- Windows 7 версии Home использует JBOD и RAID 1, Professional / Ultimate – добавляют RAID 0;
- Windows 2000 Professional поддерживает JBOD, RAID 0, 1;
- версии ОС Windows Server с 2000 года используют JBOD, RAID 0, 1 и поддерживают RAID 5 с распределенной четностью.
Версии, поддерживающие RAID технологию Windows, при переустановке или переподключении к другому ПК будут обнаруживать массив автоматически. ОС Linux не умеет распознавать разделы RAID, созданные на основе технологии Microsoft.
Преимуществами RAID Windows являются:
- отсутствие необходимости настраивать BIOS (все массивы создаются внутри Window Drive Manager);
- универсальность, зеркала можно создавать из имеющихся томов, стирая одну половину и сохраняя другую без изменений.
Для создания аппаратного массива под Windows потребуется RAID контроллер (как правило, все новые чипсеты материнок имеют уже встроенный контроллер) или карта адаптера.
Операционная система совместима с программными и аппаратными RAID. Дисковое пространство формируется из устройств разных объемов и типов – SAS, SATA, внешних USB-HDD. Желательно в массиве использовать идентичные жесткие диски, хотя существуют контроллеры, позволяющие смешивать и сопоставлять различные емкости.
Пространство существует вне среды Windows, т.к. данные о конфигурации хранятся на носителях. Технология программного рейда позволяет присоединять излишки пространства к другим разделам или же создавать отдельные разделы.
Емкость пула позволяет создавать виртуальные диски и назначать имена дискового пространства. Такой метод защищает данные от сбоев за счет зеркалирования и увеличивает объем памяти при добавлении драйверов.
Причины потери данных RAID
Массивы выходят из строя нечасто. Если следить за оборудованием и не заниматься самодеятельностью при поломке, восстановление удаленных данных с RAID массива Windows не представляет сложности для специалиста.
Основные причины потери данных:
- вирусы;
- сбои на физическом уровне (механика, электроника, внешние воздействия);
- проблемы с RAID-контроллером;
- сбои электроснабжения;
- нарушение целостности файловой системы;
- некорректная работа ПО;
- человеческий фактор.
Программные и логические нарушения вызывают наиболее серьезные последствия.
Как восстановить RAID 1 Windows 10
Вне зависимости от степени отказоустойчивости, никто не гарантирует, что ценная информация не будет потеряна. Такое происходит из-за вмешательства пользователя в файловую систему, случайного форматирования, скачков напряжения, физических внешних воздействий.
Что делать, если массив не запустился? Необходимо сначала извлечь информацию из него, и только после этого предпринимать попытки восстановления RAID в Windows. Помните, что неквалифицированное и хаотичное вмешательство способно усложнить задачу по возвращению работоспособности рейду и привести к полной потере данных.
Способ 1. При неисправности одного носителя из RAID 1 массива «Диспетчер дисков» в ОС Windows изменит его статус на «Отказавшая избыточность».
Для замены диска потребуется:
- сделать резервную копию критически важной информации;
- отключить питание, заменить дефектный накопитель;
- включить питание, зайти в «Управление дисками»;
- подтвердить, что новый найденный диск необходимо «Преобразовать в динамический диск»;
- выбрать «Удалить зеркало» и изъять из массива отсутствующий носитель;
- выбрать «Добавить зеркало» / «Добавить зеркальный том», указав новый носитель.
Исправный новый диск будет подхвачен массивом и конвертирован в динамический.
Способ 2. Если требуется восстановление удаленных данных с RAID массива Windows, можно воспользоваться утилитой Hetman RAID Recovery. Программа поддерживает все форматы массивов любого уровня, автоматически исправляя ошибки логической структуры. В случае невозможности расшифровать точные параметры массива, к восстановлению подключается встроенный RAID-конструктор.
Чтобы восстановить RAID 1 массив Windows 10 следует:
- скачать и установить ПО RS RAID Retrive, запустив рейд-конструктор;
- выбрать режим создания массива;
- выбрать носители, входившие ранее в массив, для обнаружения конфигурации RAID;
- после сборки массива он отобразиться как обычный диск;
- по двойному щелчку отобразиться панель «Мастер восстановления файлов»;
- запустить сканирование массива – быстрое или полное (если тип файловой системы не известен, можно поставить галочки напротив всех доступных вариантов);
- по окончании сканирования будет видна прежняя структура папок и файлов;
- указать место записи восстановленных файлов;
- после успешного восстановления массив потребуется создать заново.
Способ 3. Потерянные файлы из массива под Windows 10 могут быть восстановлены утилитой DiskInternals RAID Recovery, позволяющей запускать ручное или автоматическое восстановление, создавать образы дисков, восстанавливать сильно поврежденные пулы, которые не монтируются, проверять контрольные суммы.
Потребуется:
- выбрать целевой массив;
- выбрать режим восстановления;
- проверить автоматически состояние массива, контроллера, файловой системы с восстановлением максимального объема файлов;
- в режиме чтения проверить полноту восстановления данных;
- экспортировать файлы на любой иной носитель.
Другие варианты
Любое профессиональное восстановление неисправного накопителя для RAID программы Windows начинается с диагностики. Например, посыпался рейд, собранный на материнке Intel RST. Чтобы понять проблему, можно воспользоваться любым, подходящим для этой задачи, софтом.
Часто функция управления рейдом на материнской плате выполняется через BIOS, в том числе при необходимости разбора массива. Затем режим работы накопителя переключается из положения RAID в AHCI или SATA. Если рейд развалился из-за проблем с материнкой, потребуется подключить винчестеры к другому ПК.
Переподключение для RAID, собранного на материнской плате, не требуется. Для операционной системы они будут недоступны, пока составляют единое дисковое пространство. Для того чтобы разобрать массив, необходимо воспользоваться утилитой управления RAID.
Заменив дефектный диск, нужно выполнить следующие операции:
- зайти в BIOS, в настройках Advance Mode найти вкладку Advance / Intel Rapid Storage Technology;
- запустить восстановление неработоспособного RAID;
- добавить в массив новый накопитель;
- после входа в ОС будет произведено автоматическое восстановление;
- сохранить настройки в BIOS, перезагрузиться.
Иногда возникает вопрос, как восстановить RAID 1, если не работает один диск Windows. Какой еще вариант ребилда подойдет?
Восстановить массив RAID 1 можно и через программу Intel Optan Memory and Storage Management. Этот вариант подойдет, если неисправен один накопитель, а Windows 10 загружается с исправного диска.
Существует достаточно много инструментов для восстановления информации при любом сценарии разрушения массива. Выбрать оптимальный вариант можно только после диагностики в специализированной лаборатории. Сложные случаи требуют индивидуального подхода и серьезных знаний в области железа и программного обеспечения.
Время на прочтение4 мин
Количество просмотров8.1K
Отказал аппаратный RAID5, собранный под Windows Storage Spaces, на ОС Windows Server 2019? Вы переустановили ОС, один или несколько дисков не работают, весь массив стал недоступен? В обзоре мы расскажем, как заставить его работать и восстановить данные.

Встроенная в Windows Server технология для создания аппаратного RAID позволяет защитить ваши файлы от случайной утери. Данная функция используется, чтобы уберечь информацию в случае сбоя одного или нескольких дисков, в зависимости от конфигурации массива. Но все же, к сожалению, проблемы потери данных, с которыми сталкиваются пользователи этих систем далеко не всегда связаны с неисправностью дисков: сбои в программном обеспечении, некорректная настройка конфигурации пула, повреждение метаданных, случайное форматирование, удаления и т. д. Все это приводит к потере важной информации, после чего у пользователей возникает вопрос как достать или восстановить файлы с такого массива.

Чтобы вернуть информацию, нужно воспользоваться специальным ПО для восстановления данных, которое поддерживает такой тип RAID. Утилита Hetman RAID Recovery поддерживает почти все известные форматы RAID массивов, она поможет без труда восстановить удаленные данные. Программа поддерживает все популярные файловые системы. Она автоматически исправит любые ошибки логической структуры жестких дисков, просканирует дисковое пространство и отобразит содержимое.
Переустановка Windows Server или сбой в аппаратной части ПК
Сбой в работе операционной системы, например, в процессе обновления, может повлечь за собой появление критической ошибки, после которой ОС перестанет загружаться. В этом случае, самым простым решением остается ее переустановка. Но как быть с RAID5 массивом и всей хранящейся на нем информацией?
После переустановки ОС может не распознать содержимое накопителей, то есть в управлении дисками она отобразит их как «чужие».

Попробуйте сделать их импорт. Кликаем по иконке накопителя ПКМ, далее нажимаем «Импорт чужих дисков».

Указываем группу и Ок.

В следующем окне система отобразит список томов, которые она нашла на этих носителях, нажимаем Ок – подтверждаем операцию. После все накопители появятся в проводнике.

Случаются ситуации, когда импорт заканчивается неудачей и некоторые массивы как в нашем случае с RAID 5 по-прежнему остаются недоступными.

Или же после аппаратного сбоя и других непредвиденных ситуациях была повреждена часть метаданных. Или идет процесс бесконечной ресинхронизации, при которой диск остается недоступным для чтения или записи. Вы случайно удалили часть данных или отформатировали накопитель.

В этом случае вам поможет утилита Hetman RAID Recovery. Она автоматически просканирует выбранные носители, выведет все доступные данные, которые смогла найти. В окне программы отображаются правильные параметры массива. Осталось просканировать логический том и восстановить найденную информацию.

Кликаем ПКМ по иконке раздела, выбираем быстрый анализ.

Просматриваем результаты сканирования, если утилита не смогла найти нужные данные, то запустите полный анализ носителя.

После завершения сканирования, в результатах вам нужно отметить файлы, которые вы хотите восстановить, нажимаем кнопку «Восстановить». Пропишите путь к каталогу сохранения, обязательно укажите другой носитель, флэшку или сетевой диск, еще раз кликаем «Восстановить».

Когда процесс сохранения будет завершен, вы найдете все файлы в ранее указанном каталоге.
Поломка одного накопителя
В том случае если один или несколько носителей повреждены, а Hetman RAID Recovery не смогла расшифровать точные правильные параметры RAID5 массива, то на помощь придет встроенный RAID-конструктор.

Выберите пункт «Создание вручную» –Далее, укажите известные вам параметры, которые использовались при создании RAID5. Укажите тип массива, размер, порядок блоков, выберите носители, которые входили в ваш массив, обязательно укажите порядок расположения.

Недостающие заполните пустыми, кликнув по кнопке «с плюсиком».

После заполнения всех известных параметров нажмите Далее. Теперь заново собранный массив будет отображаться в менеджере дисков.

Кликаем по иконке ПКМ чтобы запустить анализ устройства. Далее, как в выше описанном примере, отмечаем нужные файлы и папки, которые вы хотите восстановить, нажимаем кнопку «Восстановить».

Даже если несколько дисков, входящих в этот RAID5, повреждены, то программа все равно способна восстановить с него данные. Но так как отсутствие более чем одного накопителя, для данного типа RAID является критическим, часть данных может быть повреждена.

Максимальное количество отсутствующих дисков повреждения файлов определяется типом Storage Spaces RAID.
- Простые (stripe) – требуют наличия всех дисков,
- Зеркальные (miror) и с применением четности (parity) могут компенсировать отсутствие одного диска,
- Трехсторонние зеркальные – способны продолжать работу после одновременного отказа двух дисков.
Заключение
При отсутствии большего количества дисков, чем позволяет конфигурация хранилища, файлы могут оказаться поврежденными или недоступными из-за отсутствия информации о избыточности. В таком случае восстановить утерянные файлы в полном объёме весьма затруднительно. Для предотвращения потери, не забывайте регулярно делать резервное копирование важных файлов.
Полную версию статьи со всеми дополнительными видео уроками смотрите в источнике.
Восстановление RAID-массивов может быть выполнено с помощью разных методик и приложений. Последовательность действий заключается в выявлении очередности, размера блоков и определении степени актуальности. Проблема лишь в том, что практически не существует коммерческого обеспечения, способного эффективно восстанавливать данные с RAID.
Особенности восстановления при сбое одного из дисков
Управление чередующими наборами и зеркальными томами имеет отличия от того, как строится управление томами иных типов. Для восстановления сбойного зеркального диска требуется выполнить определенные действия. Также можно выполнить расформирование зеркального набора. Для прекращения использования RAID потребуется удалить весь набор томов.
Расформирование зеркального набора является стандартной процедурой, которая выполняется при возникновении необходимости в форме отмене зеркалирования дисков либо создании нового зеркального набора. Если потребности в зеркалировании больше нет, можно произвести расформирование набора, что позволит работать с данными определенного диска.
Такой подход позволит использовать второй диск в иных целях. Если какой-либо диск сбоит, дисковые операции продолжат выполняться с применением другого диска. Для восстановления RAID (Windows) потребуется вначале его расформировать, а потом сформировать заново.
Восстановление RAID для ОС Windows
Восстановление рейд массива (Windows) может быть осуществлено с использованием специального программного обеспечения RAID Recovery for Windows. Интерфейс приложения представлен на рисунке 1.
")
Рис. 1 – Интерфейс приложения RAID Recovery (Windows)
Данное программное обеспечение позволяет восстановить данные неисправного RAID-массива в течение нескольких минут. Утилита работает с конфигурациями RAID-0 и RAID-5 с файловой системой NTFS.
Эффективное восстановление данных зачастую могут выполнить только опытные специалисты, поскольку в этом процессе есть свои сложности, разобраться с которыми не под силу новичкам. Поэтому рекомендуем обратиться в нашу компанию. Мы можем проконсультировать вас по телефону 8 (495) 280-18-99.
You may be using a RAID storage system for speed, data redundancy, or a combination of both. However, RAID drives are still susceptible to data loss. Due to the relatively complex nature of these storage systems, RAID data recovery is trickier than standard hard disk drives. It’s important to choose a good RAID data recovery program if you want to safely recover data from a RAID array.
Specifics of RAID Data Recovery
RAID data recovery significantly differs from regular data recovery from a hard drive or SSD. In most cases of data loss in a RAID, you will need to rebuild the RAID drive to its original parameters. This can be done by using specialized software or using professional help.
❗️
Note: If your RAID is completely inaccessible, it’s recommended you contact a professional data recovery service. A failed RAID rebuild attempt will cause further data loss.
A crucial step in RAID array recovery is knowing which RAID level are you using. The most common RAID configurations include:
|
RAID Type |
Description |
|
RAID 0 |
RAID 0 works on the principle of “striping” data across multiple disks, i.e. data is split across the drives, resulting in exponentially fast read and write speeds. While this is good for performance, RAID 0 doesn’t offer any data redundancy because even if one of the drives fail, all your data is rendered corrupt and inaccessible. |
|
RAID 1 |
A RAID 1 array mirrors the data on your drives. Essentially, your data is copied exactly as it is to all the drives in the RAID array, making RAID 1 excellent for data redundancy. A major drawback is that users only get half the effective storage space at double the cost. |
|
RAID 5 |
A level 5 RAID array stripes your data across the drives. In addition to that, it stores a parity checksum, a sort of integrity check for the data, on a separate drive. This allows the data to be striped across the hard drives, while providing data redundancy in case one of them fails. You need at least three hard drives to set up a RAID 5 array. |
|
RAID 6 |
A RAID 6 array works on the same principle as RAID 5. However, it uses two parity blocks to keep a check on the data. This means that a RAID 6 array can survive two hard disk failures without losing data. RAID 6 requires at least four storage drives in order to work. |
RAID storage systems either use a software or a hardware controller to ensure the RAID arrays work together. A common reason behind RAID data loss is a corrupt or failing RAID controller. One telltale sign of this is data loss, even though all individual drives are in full working order.
⚠️
Some RAID enclosures come with an eSATA or USB interface that lets them connect directly to a PC. But, if the RAID array is damaged, not detected by the PC, or there’s no compatible connection interface on the enclosure, you will have to manually rebuild the RAID array. The RAID rebuild process will take place on the PC you’ll use to perform RAID data recovery.
What Is Nested RAID
Explained above, are the basic RAID levels. But, you can combine two different RAID types according to your specific use case. This is called a nested or hybrid RAID. While there are various hybrid RAID types, the most common one is RAID 10 (RAID 1 + RAID 0).
RAID 10 combines the mirroring of RAID 0, with the data striping of RAID 1. A RAID 10 setup requires four disks and can survive two failed disks. Due to their nature, nested RAIDs require more number of disks than their regular counterparts.
Other nested RAID types include RAID 50 (RAID 5 + RAID 0) and RAID 60 (RAID 6 and RAID 0), which require a minimum of six and eight storage drives respectively.
RAID file recovery is complex, which makes it imperative that you choose a RAID recovery tool that caters to your particular RAID type and data loss scenario. To make your job easier, we’ve compiled a list of the best RAID data recovery programs along with necessary information such as the supported RAID levels, file systems, and operating systems.
1. Disk Drill
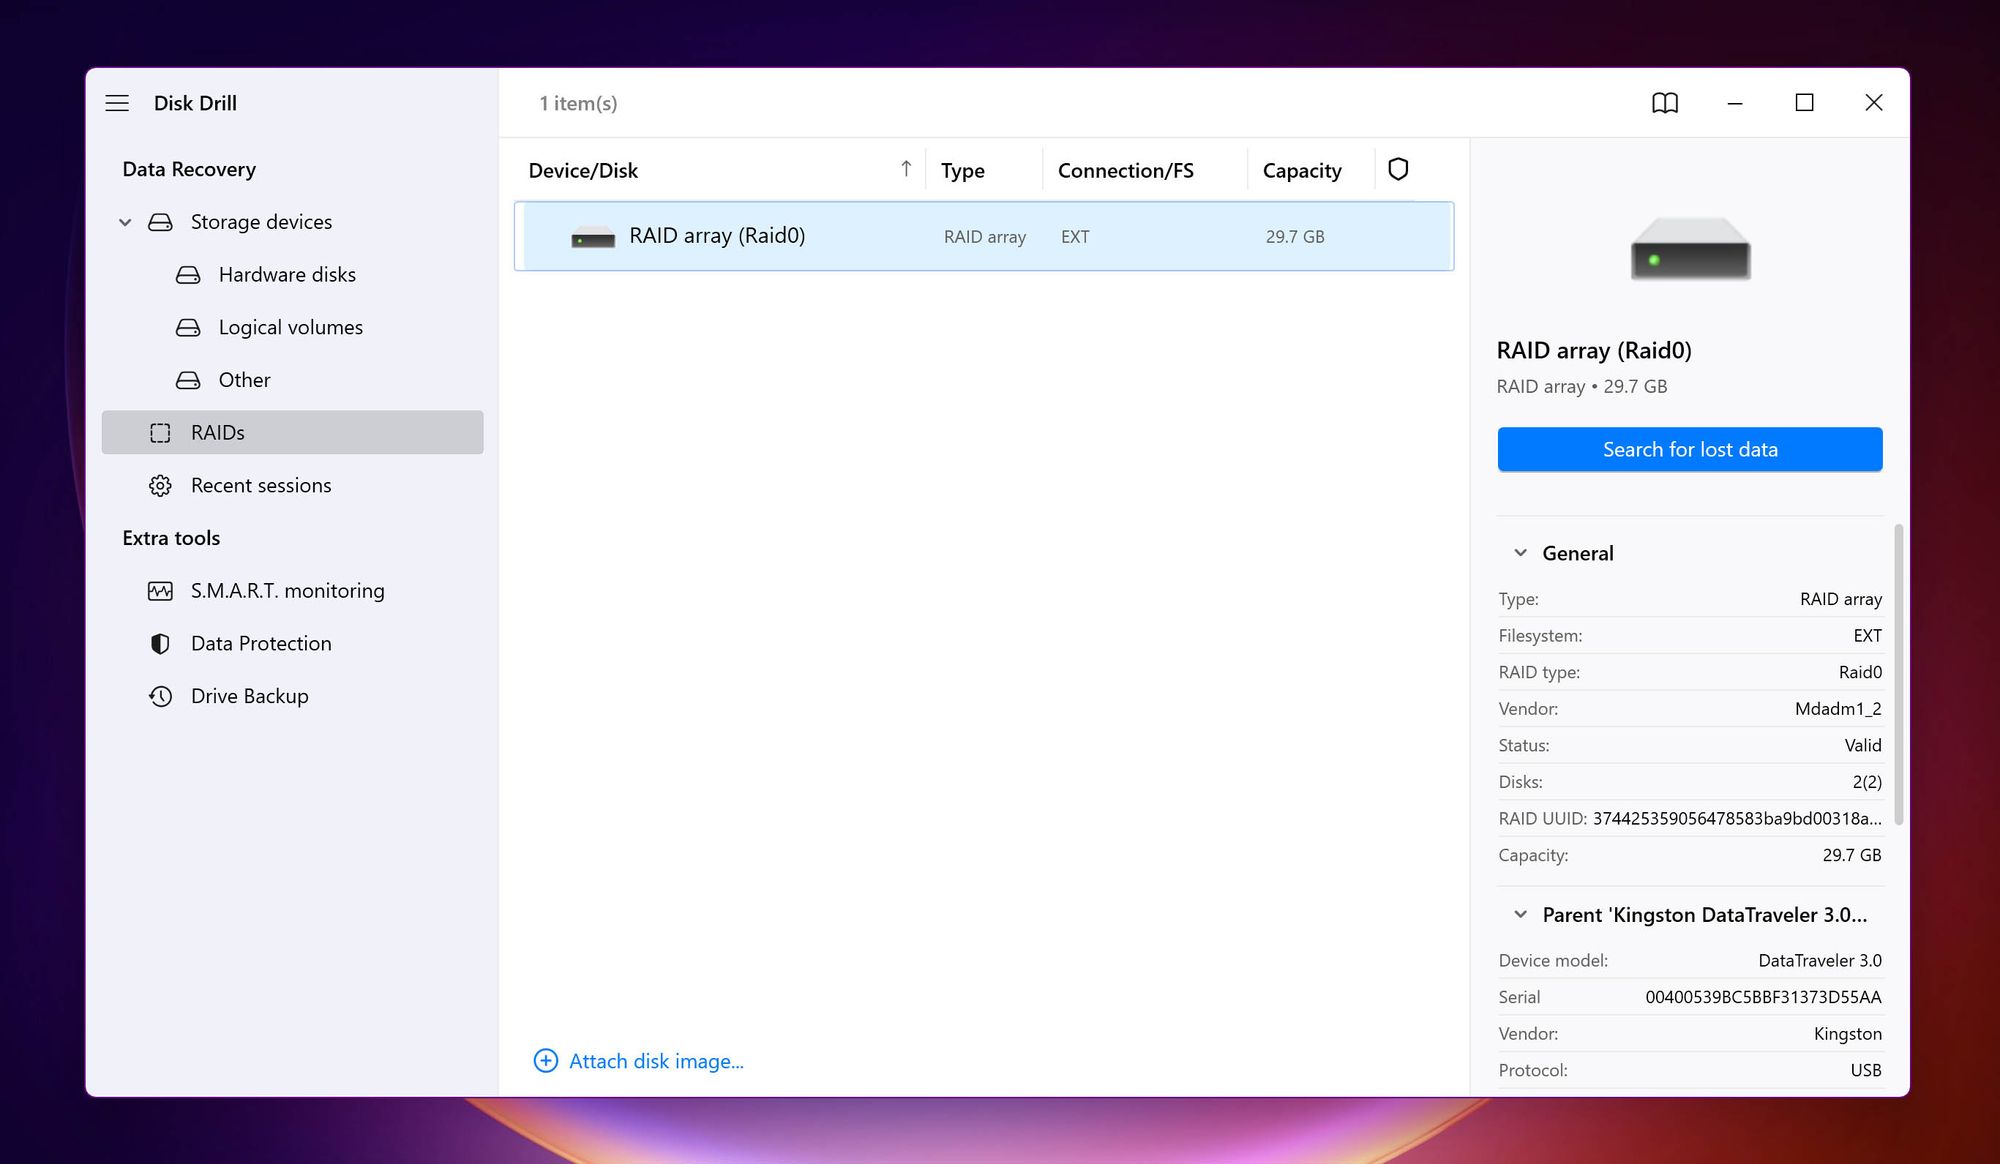
- 🗂️ Supported File Systems: FAT16 / FAT32, exFAT, NTFS / NTFS5, HFS / HFS+, APFS, ReFS, ext2 / ext3 / ext4
- ⚙️ Operating System Compatibility: Windows and macOS.
- 📊 Supported RAID Levels: Disk Drill for Windows and macOS supports Windows and Linux RAID levels such as RAID 0, RAID 1, RAID 10, RAID 1E RAID 5, RAID 6, JBOD. Only Disk Drill for macOS supports Apple RAID levels such as RAID 0, RAID 1, JBOD.
- 💰 Price: Disk Drill costs $89 for a lifetime license.
Disk Drill appears in several lists of the best data recovery apps in the market, and for good reason. In addition to Disk Drill’s excellent data recovery rate, the emphasis on user-friendliness makes data recovery from RAID drives a breeze. To recover data from a RAID setup, you simply need to:
- Connect the RAID setup to your PC.
- Open Disk Drill, and choose the RAIDs option on the left navigation bar.
- Select the RAID and click Search for lost data.
Most data recovery software vendors, including Disk Drill recommend that you connect the drives directly to your computer. Likewise, some NAS/RAID enclosures have USB/eSATA connectors that let you connect the array to your PC, eliminating the need to connect individual drives.
👀
For an in-depth look at the program, be sure to check out our Disk Drill data recovery review.
Pros
- The modular, easy to use interface makes Disk Drill suitable for beginners and experts alike.
- It lets you create a RAID disk image using the Byte-to-byte backup feature. You need to create individual disk images of each drive in the array, then attach the disk images to Disk Drill, and simply scan them as a RAID array.
- Excellent data recovery rate.
- Fast scan speeds.
- Filter recoverable files by type, size, recovery chances, and more.
Cons
- It does not support file systems such as XFS, ZFS, BTRFS, which are commonly found in NAS devices.
- Disk Drill cannot rebuild a RAID.
2. DiskInternals
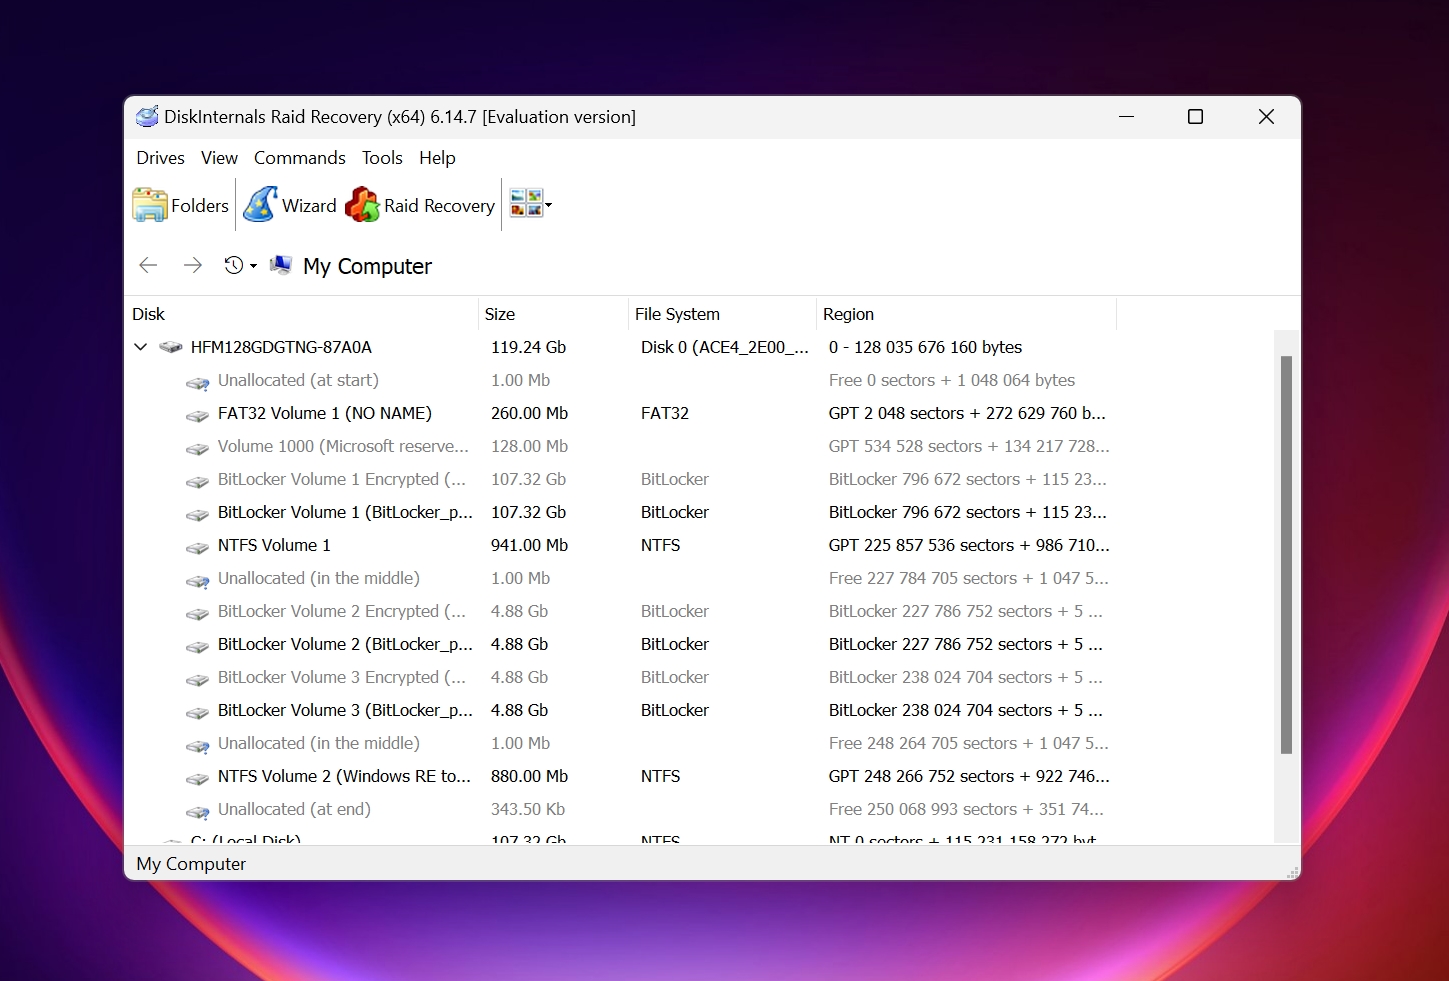
- 🗂️ Supported File Systems: FAT16 / FAT32, exFAT, NTFS / NTFS5, HFS / HFS+, APFS, ReFS, ext2 / ext3 / ext4
- ⚙️ Operating System Compatibility: Windows
- 📊 Supported RAID Levels: RAID 0, RAID 1, RAID 0+1, RAID 1E, RAID 5, RAID 50, RAID 5EE, RAID 5R, RAID 4, RAID6, RAID 60, JBOD, Microsoft RAID, MS Storage Spaces, Apple RAID, Linux RAID, ZFS RAIDZ, ZFS RAIDZ2
- 💰 Price: DiskInternals costs $249, $499, and $899 for data recovery from RAID arrays with up to 3, 6, and 8 disks respectively. For more than 8 disks, you will need to purchase the $1299 license.
DiskInternals RAID Recovery is quite adept at automatically detecting and rebuilding RAID arrays. The wizard-based data recovery process ensures that you don’t feel lost at any point while using the program. However, users should be prepared to wait, as RAID rebuilding and scanning takes a long time.
The primary area where DiskInternals falls short, is its pricing structure. While the pricing plans start at $249, they’re designed in a way that you’ll likely have to pay more to take full advantage of the program.
Pros
- Automatically detects and rebuilds RAID arrays.
- Supports a wide range of RAID types.
- There are two scan types available to the user–Fast Recovery Mode and Full Recovery Mode.
Cons
- Very pricey.
- Slow scan speeds.
- The free trial includes file preview, but not file recovery.
- Only compatible with Windows.
3. R-Studio
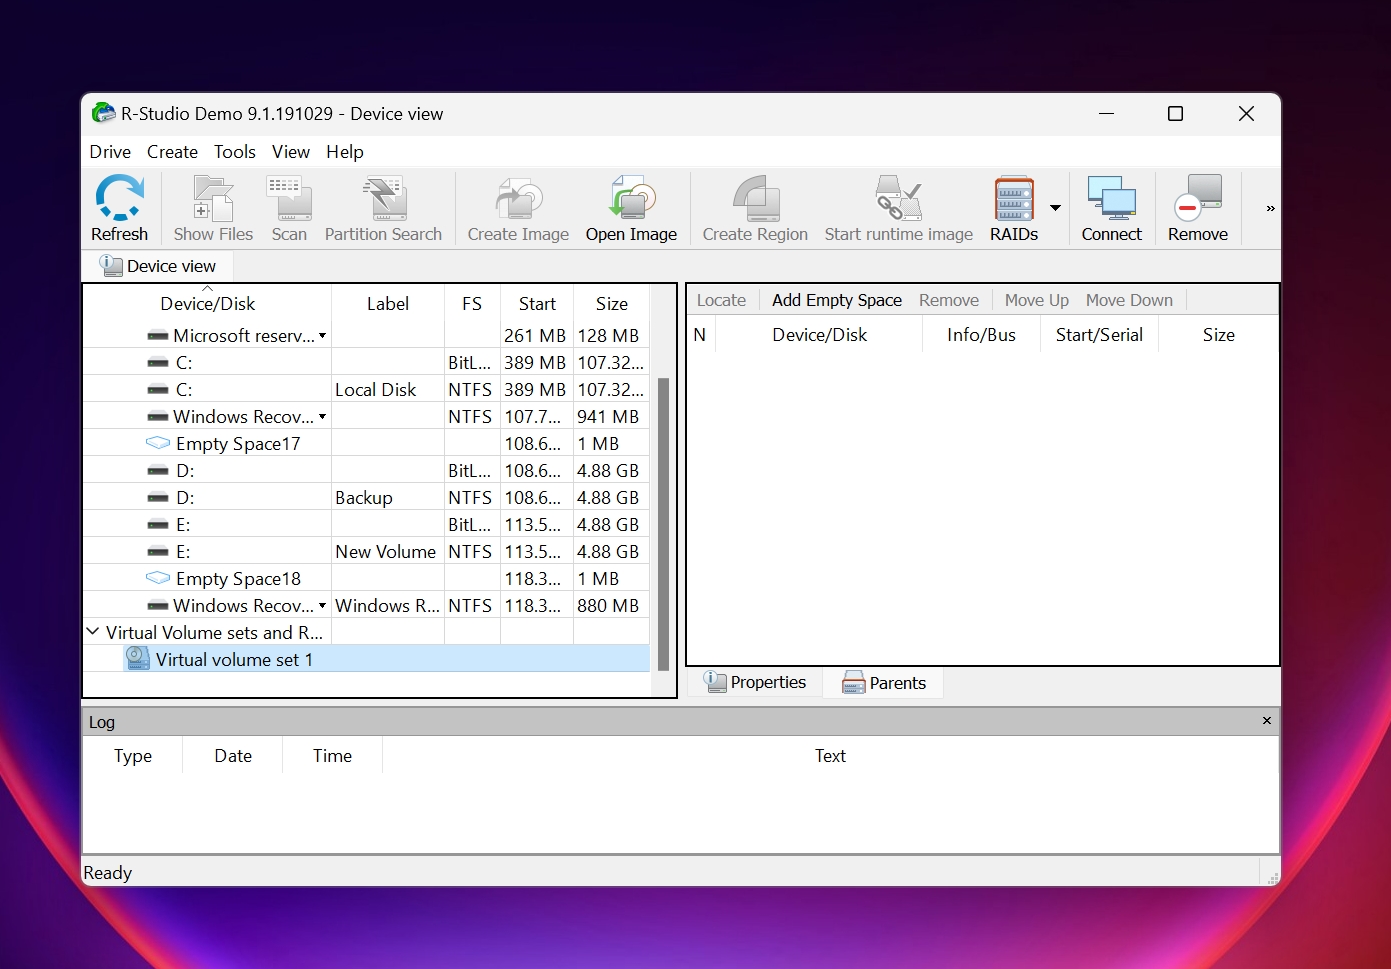
- 🗂️ Supported File Systems: NTFS, NTFS5, ReFS, FAT12/16/32, exFAT, HFS/HFS+, APFS, XFS, UFS1/UFS2 (FreeBSD/OpenBSD/NetBSD/Solaris) and Ext2/Ext3/Ext4 FS (Linux)
- ⚙️ Operating System Compatibility: Windows, macOS, and Ubuntu/Linux
- 📊 Supported RAID Levels: RAID 0, RAID 1, RAID 4, RAID 5, RAID 6, RAID 10 (1+0), RAID1E, RAID5E, RAID5EE, RAID6E, Custom Windows, Mac, and Linux RAID configurations.
- 💰 Price: Starts at $54.99, up to $899, depending on your needs.
A major name in the data recovery software world, R-Studio is an excellent choice for seasoned PC users and has numerous good recovery reviews across the web. It supports almost all RAID configurations under the sun, with support for custom RAIDs. A standout feature of R Studio, is its ability to create and recover data from virtual RAIDs. This lets you create a virtual copy and structure of the original RAID, in case the data loss was caused by severe corruption or drive failure and resulted in a faulty RAID.
The R-Studio user interface is complex, which may deter beginner PC users from using it. There is no stone left unturned when it comes to the sheer number of features on offer, but only technically proficient users will be able to use R-Studio to its full potential.
Pros
- Loaded with features.
- Create virtual RAID arrays, even if the original RAID configuration is faulty.
- Even though the program is difficult to use, R-Studio makes up for it with a detailed knowledge base.
- Supports custom file formats, even if R-Studio doesn’t recognize them natively.
Cons
- Complicated user interface.
- Doesn’t recover original file names and folder structures in many instances.
- You cannot view recoverable files until the scan is 100% complete.
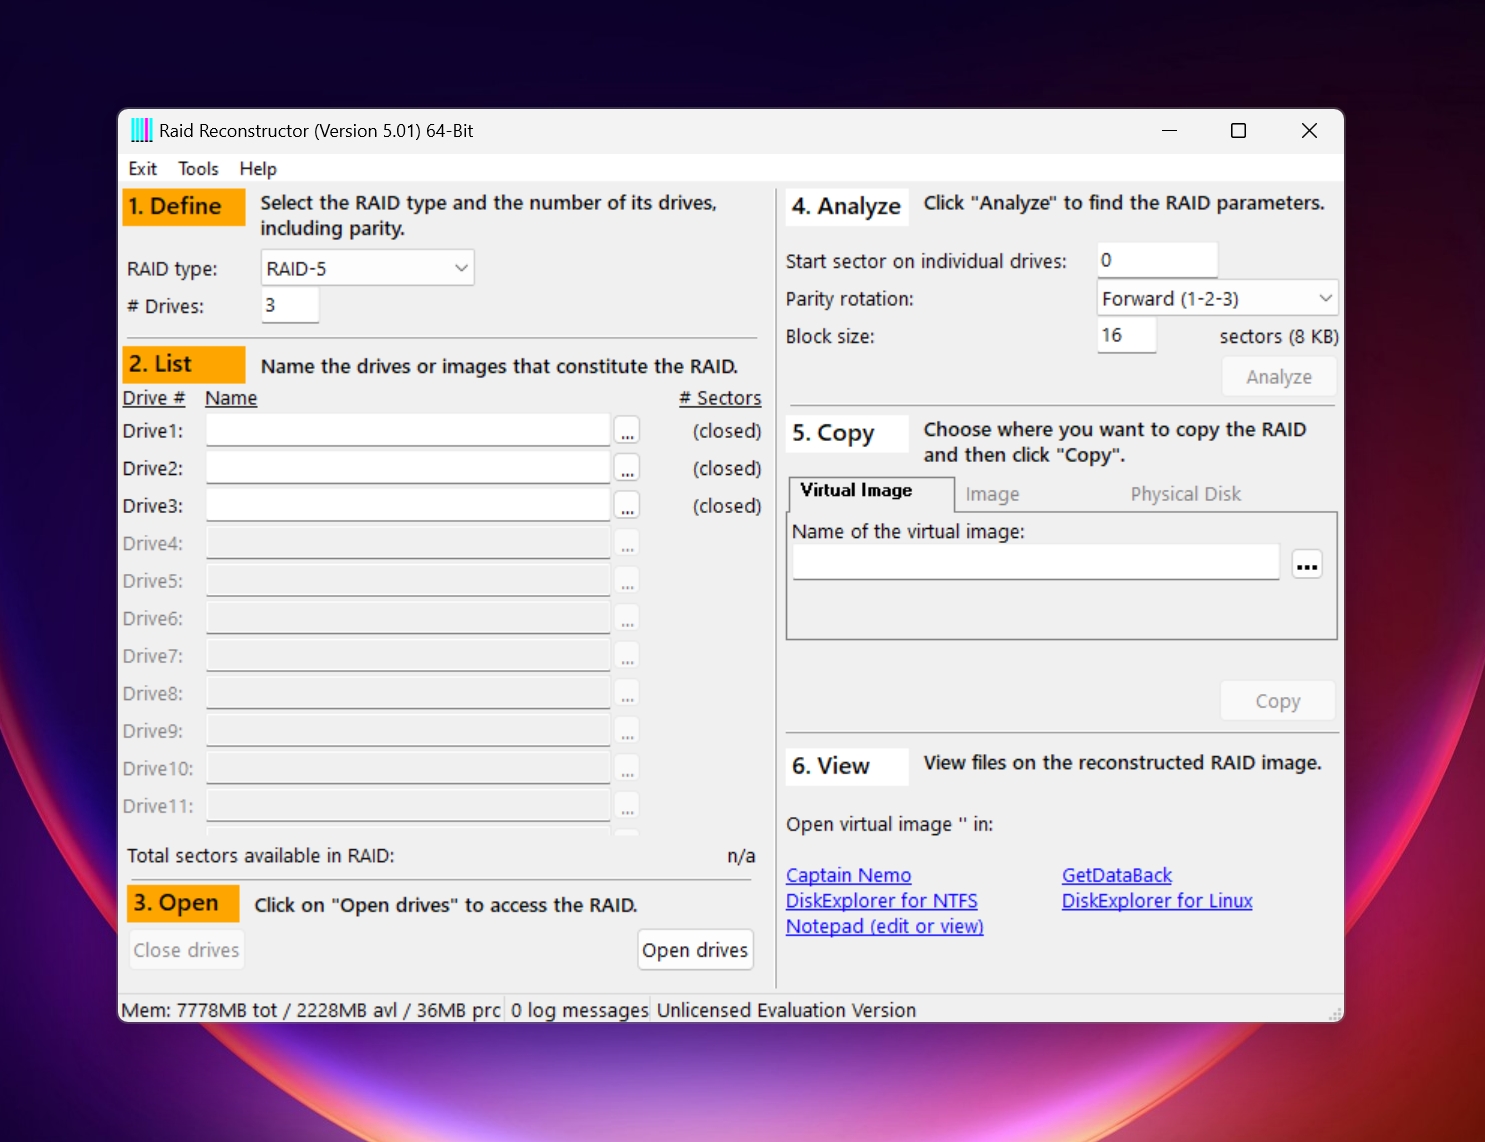
4. GetDataBack (RAID Reconstructor)
- 🗂️ Supported File Systems: NTFS, exFAT, FAT 12/16/32, EXT, HFS+, APFS.
- ⚙️ Operating System Compatibility: Windows
- 📊 Supported RAID Levels: RAID 0, RAID 5
- 💰 Price: $99 with free lifetime updates
Runtime Software’s RAID Reconstructor is a good companion to its data recovery counterpart, GetDataBack. You don’t need to know any RAID parameters to reconstruct your RAID setup using RAID Reconstructor. The software automatically analyzes your RAID drives and fills in the correct parameters. You can then create a virtual image of the RAID and use GetDataBack or some other data recovery program to recover the data.
At this time, RAID Reconstructor only supports RAID 0 and RAID 5 arrays.
Pros
- Automatically detects and fills in the RAID parameters.
- Supports up to 16 RAID drives.
- Read only design so you don’t lose any more data.
Cons
- Only supports RAID reconstruction, not RAID data recovery.
- Can only be used for RAID 0 and RAID 5 arrays.
- Doesn’t support NAS RAID arrays.
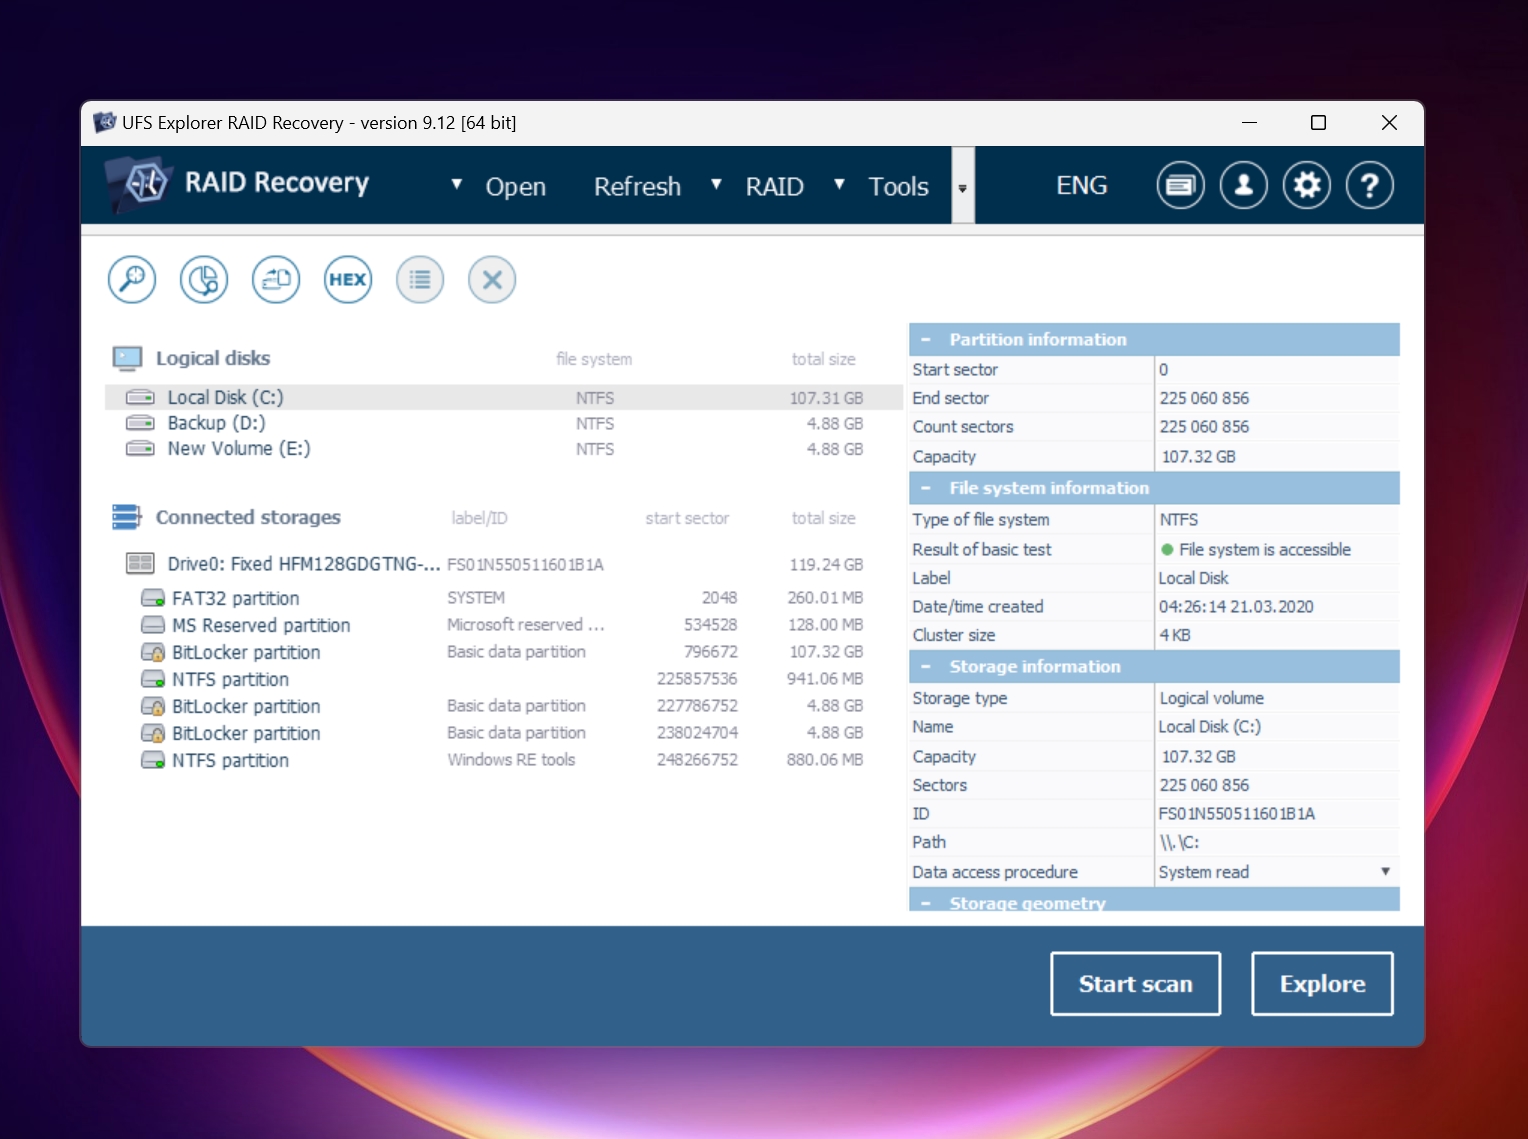
5. UFS Explorer
- 🗂️ Supported File Systems: NTFS, FAT, FAT32, exFAT, HFS+, APFS, Ext2, Ext3, Ext4, XFS, Extended format XFS, JFS, ReiserFS, UFS, UFS2, Adaptec UFS, big-endian UFS, Sun ZFS, BTRFS, BSD/Solaris: Simple/Stripe ZFS volumes
- ⚙️ Operating System Compatibility: Windows, macOS, and Linux
- 📊 Supported RAID Levels: RAID 0, RAID 1E, RAID 3, RAID 5, RAID 6, RAID 7, RAID 10, RAID 50, RAID 60 and other nested RAID levels, RAID 50E, ZFS, RAID-Z, RAID-Z2, RAID-Z3, Drobo BeyondRAID, Synology Hybrid RAID, BTRFS-RAID, MDADM, LVM, Apple Software RAID, Intel Matrix.
- 💰 Price: Starts at $139.95, up to $419.95, depending on the usage scenario.
UFS Explorer’s primary strength is its ability to recognize and recover data from almost every RAID combination imaginable. It automatically detects RAID parameters and virtually builds the RAID array. In case UFS Explorer RAID Recovery is unable to do that, you can use the RAID Builder tool within the UI to manually reconstruct the RAID array.
The program is only let down by its cluttered and unintuitive UI. It’s recommended that you refer to the UFS Explorer knowledge base before using the program.
Pros
- Recognizes all popular NAS vendors such as Drobo, Buffalo Technology (TeraStation, LinkStation), Synology, QNAP Systems, and more.
- Supports disk images.
- Can decrypt BitLocker and Apple APFS encrypted devices.
Cons
- Cluttered user interface.
- Expensive when compared to its competitors.
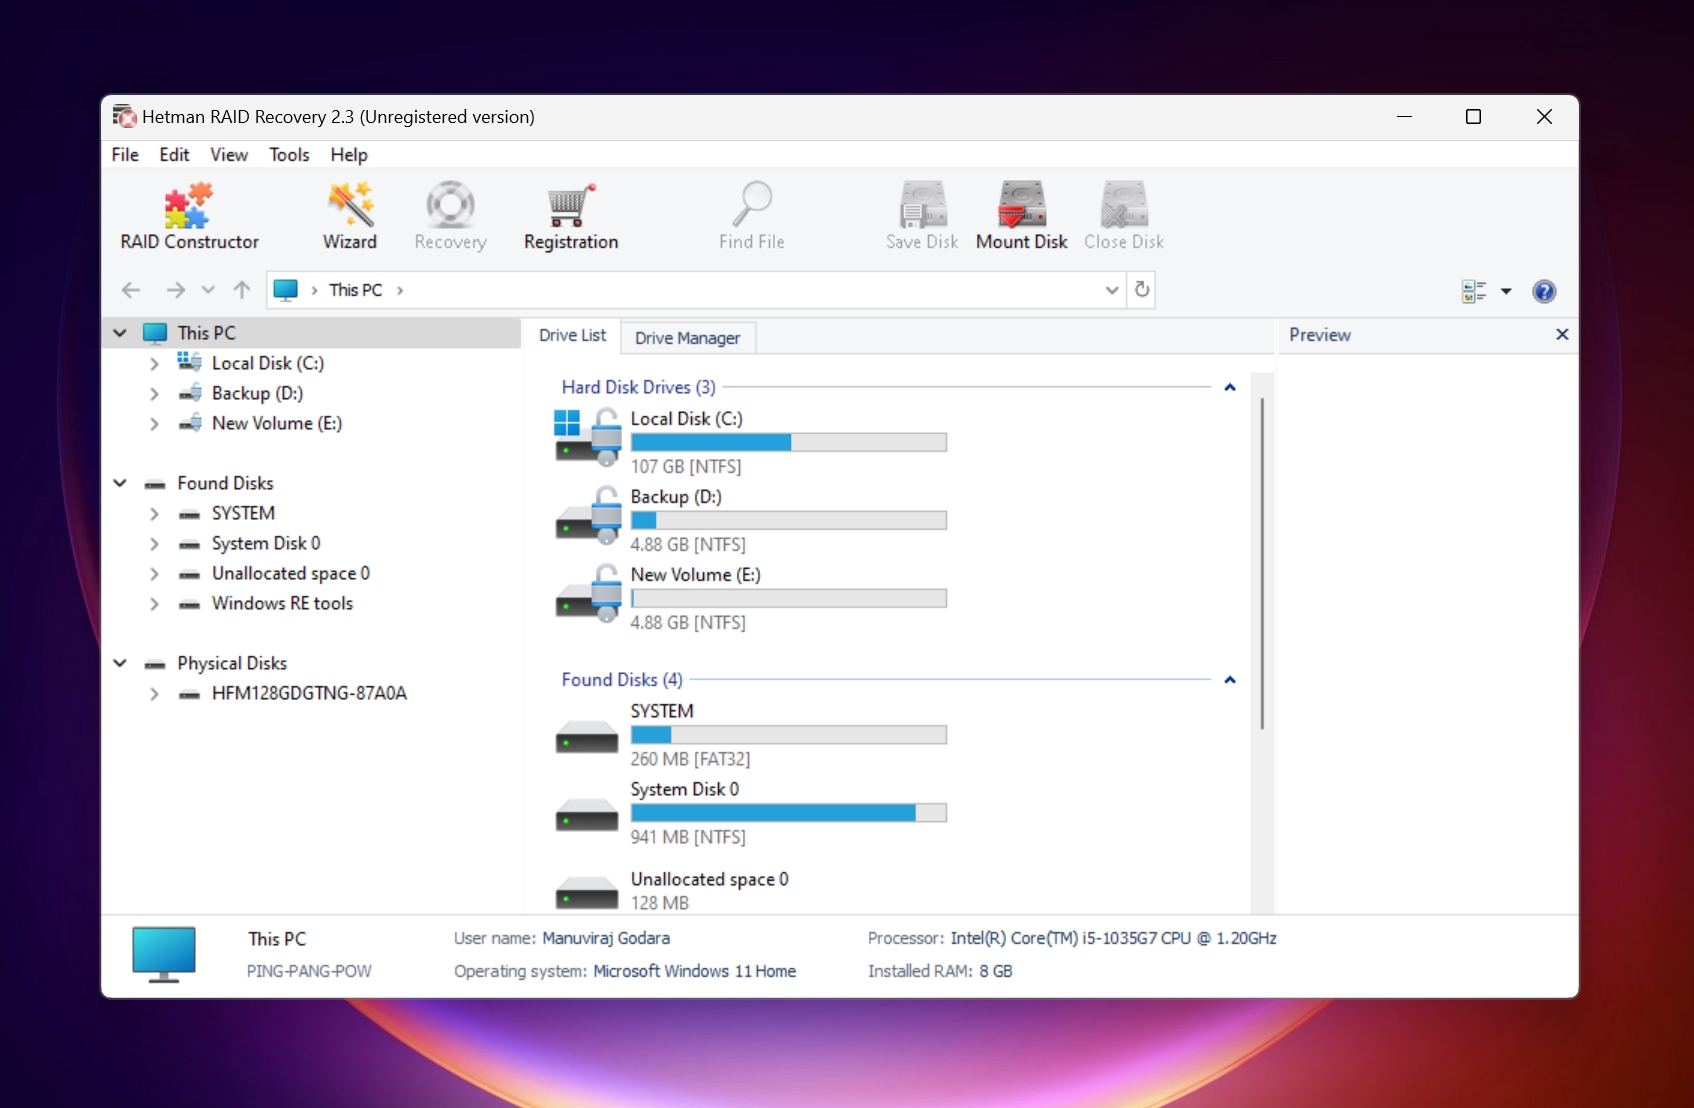
6. Hetman RAID Recovery
- 🗂️ Supported File Systems: FAT, exFAT, NTFS, ReFS, APFS, HFS+, Ext, ReiserFS, XFS, UFS, ZFS
- ⚙️ Operating System Compatibility: Windows
- 📊 Supported RAID Levels: JBOD, RAID 0, RAID 1, RAID 10, RAID 1E, RAID 5, RAID 50, RAID 6, RAID 60, RAID 2, RAID 3, RAID 4
- 💰 Price: $97.95
Hetman RAID Recovery is targeted at non-technical users and makes rebuilding a RAID, simple. The UI is easy to use, and even though it offers a plethora of features, you will not feel overwhelmed with options. The program supports NAS devices and can auto-rebuild the RAID, in case your NAS controller fails. In case a RAID drive fails within the array, you can connect it separately and recover the data as well.
The scan speeds of Hetman RAID Recovery are not the best, and scanning large RAID arrays may take a long time.
Pros
- Easy to use, while being feature loaded.
- Contains many stored presets of array combinations used by popular controller manufacturers. This saves time.
- Supports all major RAID levels.
- There is a portable version of the program too.
Cons
- Can only be installed on a Windows machine.
- The free trial doesn’t let you recover any files, only view them.
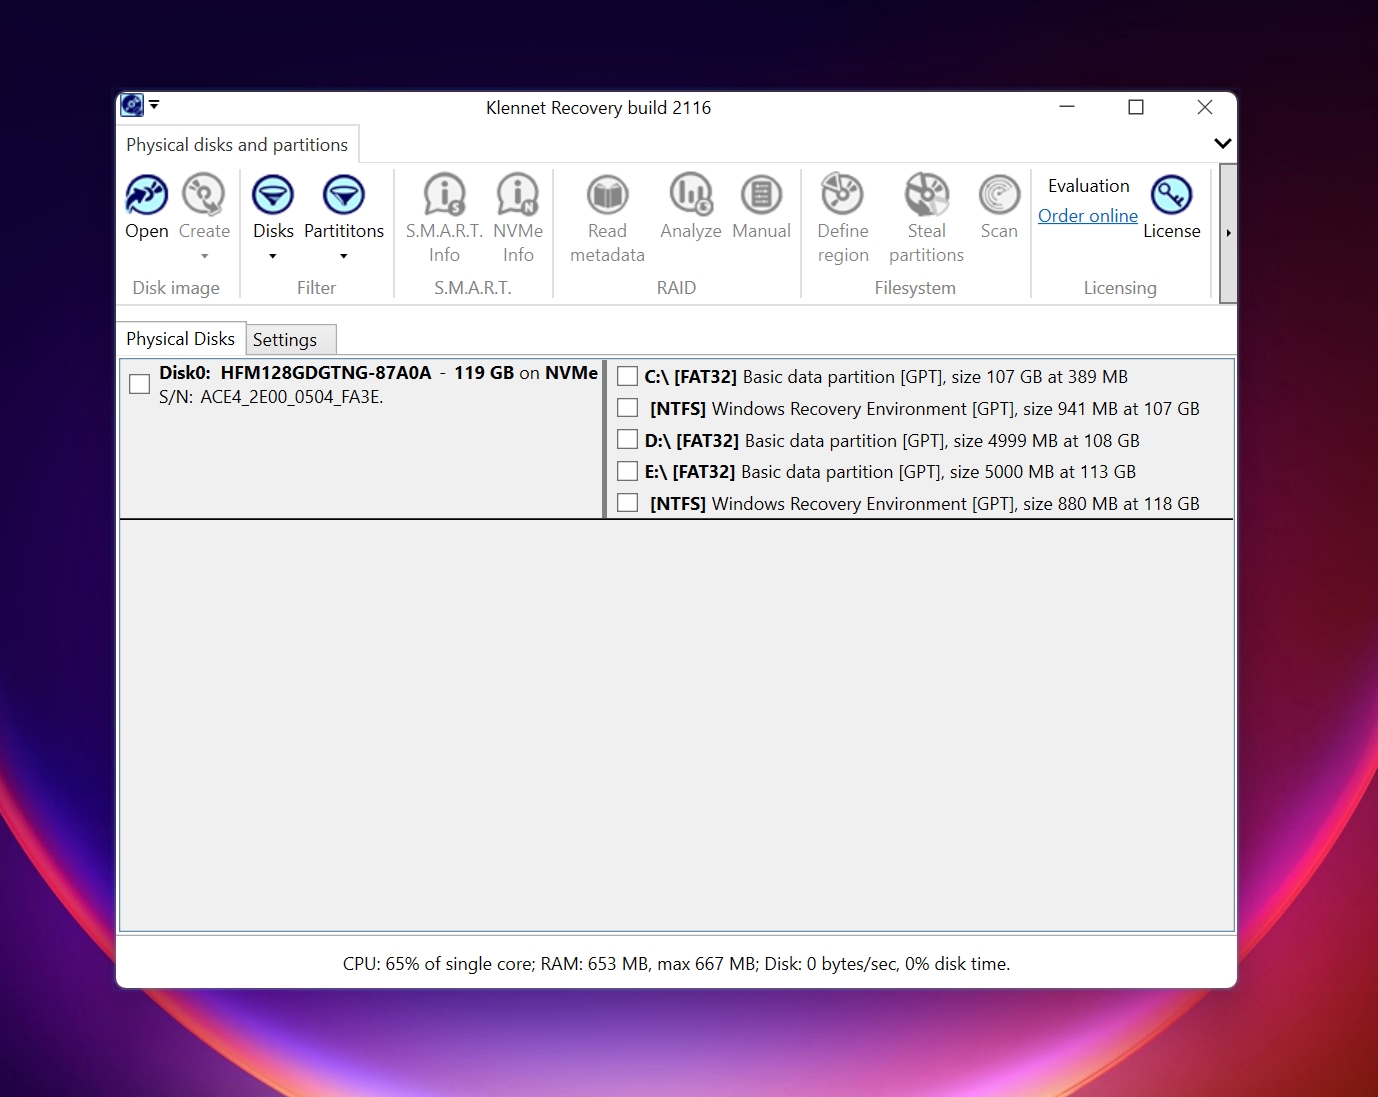
7. Klennet Recovery
- 🗂️ Supported File Systems: FAT16/32, exFAT, NTFS, ext 2/3/4 XFS 4/5
- ⚙️ Operating System Compatibility: Windows 10 and above.
- 📊 Supported RAID Levels: RAID 0, RAID 1, RAID 5.
- 💰 Price: Starts at $49.
With an installer size of only 1800 KB, Klennet Recovery is a bite-sized Windows 10 RAID recovery program. It supports data recovery from RAID 0, RAID 1, and RAID 5 level arrays. The program can also determine disk orders for RAID 0 and RAID 5.
Klennet Recovery is a successor to Zero Assumption recovery, which was around for more than 20 years before being discontinued. But, Klennet Recovery still lacks support for various common RAID levels and file systems, making it useful in very limited RAID data loss scenarios.
Pros
- Easy to use.
- Can create disk images.
- It has a file preview feature.
- Small installation size.
Cons
- Only works on Windows 10 and above.
- Limited file system and RAID level support.
FAQ
How to recover data from RAID drives?
Here is a quick guide on how to recover files from a RAID array:
- Download and install Disk Drill.
- Connect the RAID set if possible, else connect the individual drives to your computer.
- Open Disk Drill, select the drive and click Search for lost data.
- Click Review found items.
- Select the desired files and click Recover.
How much does RAID recovery cost?
It’s difficult to find good free RAID recovery software, so be prepared to shell out anywhere from $50 to $899, depending on the program. Professional RAID data recovery services are substantially more expensive, ranging from $300 to more than $2000, depending on the severity of the data loss and the complexity of the array.
Is RAID better than backup?
No, it’s recommended you use good data backup tools to back up your data separately to other storage drives as well as the cloud. RAIDs can serve as an added protective measure.
Which RAID method is best?
Different RAID levels serve different purposes. Selecting the best RAID level will depend on your specific needs, and the usage scenario. You can take advantage of nested RAIDs to get the best of both worlds, but be prepared to spend more money.
Conclusion
It’s important to choose a good RAID data recovery program due to the cost and importance of data involved in RAID arrays. Additionally, remember to act as quickly as you can because multiple drives failing one after the other is not as rare as you may think.
About article
This article was written by Manuviraj Godara, a Staff Writer at Handy Recovery Advisor. It was also verified for technical accuracy by Andrey Vasilyev, our editorial advisor.
Curious about our content creation process? Take a look at our Editor Guidelines.
How do you rate the article?
Submitted:
RAID 1, also known as disk mirroring, is a RAID configuration that provides redundancy by duplicating all data from one hard disk to a second disk (TechTarget, deft). This ensures continuous availability and high performance even if one disk fails. Disk failures are a common occurrence that can happen due to hardware faults, file system corruption, or human error. Recovering from RAID 1 disk failure in Windows 10 requires replacing the failed disk and rebuilding the array to restore redundancy.
This guide will walk through the end-to-end process of recovering from a failed disk in a RAID 1 array on a Windows 10 system. It covers identifying the faulty disk, replacing it, rebuilding the array, and restoring data from backup. Following these steps will help you quickly restore the redundancy and availability provided by RAID 1.
Prerequisites
Before attempting to recover a failed disk in a RAID 1 array in Windows 10, there are a few prerequisites to ensure a smooth process:
You’ll need administrator access on the Windows 10 machine to be able to reconfigure the RAID array. Without admin rights, you won’t be able to rebuild the array after swapping the failed disk.
It’s also crucial to have a recent backup of your data. RAID 1 provides redundancy, not backup. If there is corruption or accidental deletion of files, a backup allows you to restore lost or damaged data. As one expert suggests, “Never use a RAID as your backup system” (source). Maintain regular backups on external media.
Before beginning recovery, validate that you have an up-to-date backup. This gives you the flexibility to restore data if needed after rebuilding the RAID 1 array.
Identify the Failed Disk
The first step is to identify which disk has failed in the RAID 1 array. There are two main ways to do this in Windows 10:
1. Check Disk Management – Open Disk Management (press Windows Key + R then type diskmgmt.msc). Look at the disks listed and identify any that show a status of “Offline” or “Failed.” The offline/failed disk is the one that needs to be replaced.
According to ServerFault, you can also look at the disk number or port location listed in Disk Management to identify the failed disk (source).
2. Review system logs – Open Event Viewer, expand Windows Logs, and look in System. Scan for events with ID 11, which indicate a disk failure. The event log should specify the port or location of the failed disk.
LinkedIn recommends checking the model or serial number in the system logs to clearly identify the failed drive (source).
Replace the Failed Disk
Once you have identified which disk has failed in the RAID 1 array, the next step is to replace it with a new disk. This involves powering down the system, physically removing the failed disk, inserting a new disk, and formatting it so the system recognizes it.
Make sure to power down the system fully before proceeding. Then open up the computer case and locate the failed disk based on the disk identifier you noted earlier. Carefully remove the failed disk from the drive bay. Be sure to handle the disk properly to avoid any further physical damage.
Insert the replacement disk into the same drive bay, securing it into place. Power the system back on and boot into Windows. The system should detect the new drive and mark it as “Unallocated” space.
Using Disk Management in Windows, you will need to initialize the new disk to prepare it for use. Right-click on the unallocated space for the new disk and choose “Initialize Disk.” Accept the defaults. Once initialized, right-click on the unallocated space again and choose “New Simple Volume.” Walk through the prompts, formatting the new disk space into a basic volume that matches the original size of the failed disk.
The new disk is now ready as a replacement for rebuilding the RAID 1 array. Be sure to properly format any new drive to avoid compatibility issues. With the hardware replaced, move on to the software rebuild process.
[Add 1-2 citation URLs here sparingly according to instructions]
Rebuild the RAID 1 Array
Once the new disk is installed, you can rebuild the RAID 1 array using Windows Disk Management. Launch Disk Management and you should see the new disk listed as “Unknown” and “Not Initialized.” Right-click on this disk and select “Initialize Disk.” Choose GPT or MBR partition style, then right-click it again and select “New Simple Volume.” Follow the steps to make this new volume the same size as your original disk.
Right-click on the volume for your existing disk in the RAID 1 array and choose “Add Mirror.” Select the new disk you just created to add it to the mirrored set. The rebuilding process will now begin automatically. You can monitor the progress by going to the Disk Management console. The new disk will show a status like “Regenerating” or “% complete” as the data sync takes place.
The length of time to rebuild depends on the size of your disks and amount of data. It’s important not to interrupt the rebuilding process or you risk corrupting data. Once complete, Disk Management will show both disks as “Healthy” with matching sizes.
Restore Data from Backup
After replacing the failed disk and rebuilding the RAID 1 array, the next step is to restore your data from a backup.
To restore your data:
- Connect the external hard drive, NAS device, or other backup storage where your data is stored.
- Open File Explorer and navigate to the backup location containing your data.
- Select and copy the files and folders you want to restore.
- Navigate to the original locations on the RAID 1 array and paste the data to restore it to the previous locations.
- Take care to paste the data into the same folder structure to preserve the original organization.
- Continue this process until all desired data is restored from the backups.
With your files and folders restored to their original locations, your RAID 1 array should contain all your important data again after the disk failure and rebuild.
Be sure to verify that all data is accounted for by spot checking files and folders. Check for errors or missing data. Fully restoring from a backup ensures you avoid permanent data loss after a failed RAID 1 disk.
Verify Functionality
After rebuilding the RAID 1 array, it’s crucial to verify that everything is working properly before putting the system back into production. Here are some steps to confirm full functionality:
Check Disk Management – Open up Disk Management in Windows and examine the drive letters, volumes, and disk health. Look for any warnings or errors, and confirm the drive shows the expected full capacity.
Confirm data integrity – Spot check files on the array to verify the data rebuilt correctly. Open random files to check for errors or corruption. Run a checksum utility like md5sum on sample files to compare hashes against known good values.
Test read/write – Write new files to the array and read them back. Copy large files between drives and check the transfer speed. Ensure you can access all parts of the array without issue. Monitoring utilities like CrystalDiskInfo can help identify any latency or throughput problems.
If everything checks out, the rebuilt RAID 1 array can safely be put back into production. However, continue monitoring health and performance for a period of time to catch any emerging issues.
Monitor Health
Regular health monitoring is crucial for detecting issues early with RAID 1 arrays. There are a few key steps to monitor health:
Schedule regular checks – Set up automatic SMART checks on a routine basis, such as weekly or monthly. This will enable you to get notifications for concerning disk errors or failures before they become catastrophic. Many RAID controller utilities include scheduling capabilities.1
Monitor SMART data – Keep an eye on critical SMART attributes like Reallocated Sectors Count or Seek Error Rate. Degrading values can indicate problems before disk failure. Tools like Stellar Drive Monitor provide an overview of SMART data and send alerts on concerning values.2
Setting up regular SMART monitoring and checks allows you to be proactive and address problems early before they cause failures. This helps maximize uptime and availability.
Prevent Future Failures
To help prevent future RAID failures, it is important to follow RAID best practices such as proper ventilation and regular firmware updates. As noted by TechTarget, one key strategy is to “leverage self-monitoring and reporting” features of RAID controllers and disks to get early warnings of potential problems.
Proper ventilation and cooling is critical to prevent overheating which can lead to disk failures. Make sure the RAID enclosure has adequate airflow and the disks have sufficient spacing between them. Consider adding additional fans if needed. Also be sure to keep the area around the disks dust-free.
Be diligent about applying firmware and driver updates for the RAID controller and disks. Vendors often release updates to improve reliability and fix bugs. Staying current on the latest firmware can help avoid flaky behavior that leads to failures down the road.
Following RAID best practices like these can significantly improve the reliability and uptime of a RAID 1 array on Windows 10.
Conclusion
In summary, recovering from a RAID 1 disk failure in Windows 10 involves identifying the failed disk, replacing it, and rebuilding the array. Key steps include using Disk Management to find the failed disk, swapping in an identical replacement disk, initializing and formatting the new disk, and selecting the option to rebuild the mirrored set.
Once the rebuild process completes, it’s critical to verify full functionality by accessing all drives and running diagnostics. You’ll also want to restore any data from backups in case files were corrupted or lost. Going forward, monitor the health of the RAID 1 array and keep solid backups to prevent future data loss.
For more information, see Microsoft’s guide on repairing a mirrored space and Dell’s tips on RAID best practices. Maintaining redundancy remains critical to protecting against disk failures.