
Сегодня около 60% компаний в России используют удаленный формат работы, поэтому протокол RDP (Remote Desktop Protocol) стал одним из ключевых инструментов для доступа к рабочим компьютерам из любой точки мира. Пользователи Windows 10, Windows 11, Linux ежедневно используют RDP подключение для удаленной работы.
Однако, несмотря на широкое использование и шифрование данных, протокол подвержен множеству проблем и RDP ошибкам, которые могут серьезно затруднить работу команд.
В этой статье мы разберем типичные проблемы с протоколом, их причины и пошаговые инструкции по устранению. Поговорим о том, как диагностировать сбои, настраивать безопасные подключения и избегать ошибок в будущем.
Что такое RDP и зачем он нужен
Remote Desktop Protocol (RDP) — это протокол для удаленного доступа к компьютерам через сетевое соединение. Он создает защищенный канал между двумя устройствами, позволяя управлять удаленным RDP компьютером через графический интерфейс.
В работе участвуют:
- RDP-сервер — устройство, к которому осуществляется подключение, например офисный компьютер или сервер.
- RDP-клиент — устройство, с которого выполняется подключение, например домашний компьютер.
Протокол передает все действия пользователя с клиента на сервер. На экране клиента отображается рабочий стол удаленного компьютера, где вы можете работать, как если бы вы находились прямо за ним. По умолчанию протокол работает через TCP-порт 3389, а для безопасности использует 128-битное шифрование.
Протокол широко используют для решения различных бизнес-задач:
- Удаленная работа сотрудников: пользователи RDP могут подключаться к корпоративным сервисам из дома или в поездках. Это особенно полезно, если на рабочем компьютере установлены программы, недоступные на домашнем устройстве.
- Техническая поддержка: IT-специалисты используют протокол для устранения технических проблем пользователей. Они подключаются к компьютеру клиента и решают неполадки без необходимости личного присутствия. Это экономит время, особенно если офисы находятся в разных городах.
- Администрирование серверов: специалисты могут настраивать и обслуживать оборудование из любой точки мира, что упрощает поддержку IT-инфраструктуры компании.
Эти функции делают протокол незаменимым инструментом для компаний, которые стремятся к эффективной и безопасной удаленной работе.
В ОС Windows 10 и Windows 11 RDP можно подключить через приложение «Удаленный рабочий стол». В ОС Linux RDP не встроен по умолчанию и устанавливается через специальные приложения, например Remmina, Xfreerdp, Rdesktop.
Почему не работает RDP и как исправить ошибки.
Рассмотрим общие причины ошибок подключения к RDP и способы их диагностики, так как даже тщательная настройка RDP не гарантирует отсутствие проблем. Пользователи часто сталкиваются с ошибками, требующими диагностики и устранения. Бывает, что не подключается RDP клиент в Windows 10 после установки обновлений. Рассмотрим основные причины ошибок и способы их устранения.
Ошибка: «Подключение было запрещено» (недостаточные права)
При попытке подключения к удаленному компьютеру вы можете столкнуться с сообщением об ошибке: «Подключение было запрещено, так как учетная запись пользователя не имеет прав для удаленного входа в систему».
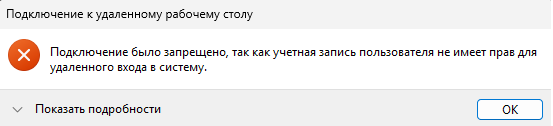
Windows строго контролирует, кто может подключаться через RDP. По умолчанию такой доступ есть только у членов встроенной группы «Пользователи удаленного рабочего стола».
Также ошибка может возникать, если:
- На компьютере установлены дополнительные ограничения через групповые политики.
- Служба удаленных рабочих столов настроена некорректно.
Решение через графический интерфейс
Чтобы быстро решить проблему, необходимо добавить нужного пользователя в группу, которая имеет права на удаленный доступ. Для этого выполните следующие шаги:
- На устройстве, к которому вы хотите подключиться, откройте окно «Выполнить», одновременно нажав клавиши Win и R.
- В появившемся поле введите команду lusrmgr.msc и подтвердите действие, нажав Enter. Это откроет инструмент управления локальными пользователями и группами.
- В левой части окна найдите и выберите раздел «Группы».
- Найдите в списке группу под названием «Пользователи удаленного рабочего стола» (или Remote Desktop Users) и дважды кликните по ней.
- В новом окне нажмите кнопку «Добавить», чтобы включить нового пользователя.
- Введите имя учетной записи, которой требуется предоставить доступ, и нажмите «Проверить имена», чтобы убедиться в правильности ввода.
- Подтвердите изменения, нажав OK. Теперь указанный пользователь сможет подключаться через RDP.
Решение через командную строку
Если вы предпочитаете работать с командной строкой или вам нужно автоматизировать этот процесс, можно использовать команду NET LOCALGROUP:
1. Откройте командную строку от имени администратора.
2. Для добавления локального пользователя выполните команду:
NET LOCALGROUP “Remote Desktop Users” имя_пользователя /ADD
3. Для добавления доменного пользователя используйте:
NET LOCALGROUP “Remote Desktop Users” домен\имя_пользователя /ADD
Эта команда немедленно предоставит указанному пользователю права на подключение через RDP.
Настройка через групповую политику
Если описанные выше способы не дали результата, вероятно, проблема кроется в настройках групповой политики домена. Чтобы внести необходимые изменения, выполните следующие шаги:
- Запустите редактор групповых политик. Для этого нажмите Win + R, введите gpedit.msc и нажмите Enter.
- Перейдите по пути: «Конфигурация компьютера» → «Конфигурация Windows» → «Параметры безопасности» → «Локальные политики» → «Назначение прав пользователя».
- Найдите политику с названием «Разрешить вход через службы удаленных рабочих столов» и откройте ее двойным кликом.
- Добавьте нужного пользователя или группу, нажав соответствующую кнопку.
- Подтвердите изменения, нажав OK.
- Чтобы применить изменения, откройте командную строку и выполните команду gpupdate /force.
Если устройство входит в домен, эти настройки могут регулироваться доменной политикой. В таком случае обратитесь к системному администратору для внесения изменений.
Ошибка: «Функции удаленного рабочего стола не удалось подключиться к удаленному компьютеру»
При попытке подключения к удаленному компьютеру вы можете столкнуться с сообщением об ошибке: «Функции удаленного рабочего стола не удалось подключиться к удаленному компьютеру».
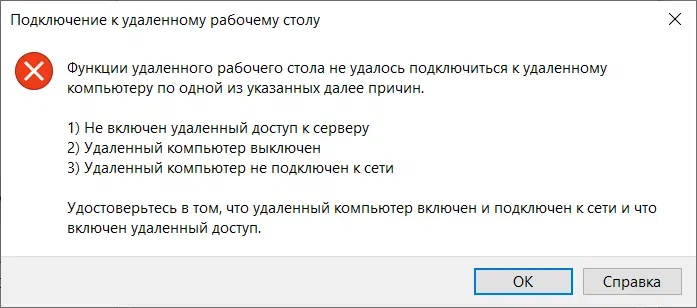
Эта ошибка может быть вызвана множеством факторов, что затрудняет ее диагностику. Среди возможных причин:
- На целевом компьютере не запущена служба удаленного рабочего стола или неправильно настроен RDP server Windows.
- Проблемы с конфигурацией порта RDP: служба может быть настроена на нестандартный порт, стандартный порт 3389 может быть занят другим приложением, или служба не прослушивает порт, несмотря на правильные настройки в реестре.
- Брандмауэр блокирует соединение.
- Возникли проблемы с уровнем безопасности или с аутентификацией.
- Параметры сетевого подключения конфликтуют друг с другом.
- Версии RDP-клиента и сервера устарели или несовместимы.
Проверка службы удаленного рабочего стола
Если не подключается RDP, начните с проверки активности службы удаленного рабочего стола на целевом компьютере. Если служба не запущена, подключиться не получится.
Для проверки и запуска службы:
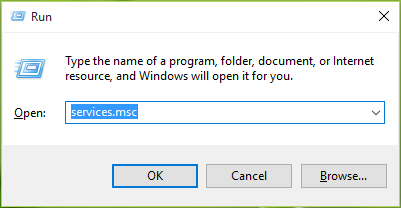
- На устройстве, к которому вы подключаетесь, откройте окно «Выполнить» (Win + R) и введите команду services.msc.
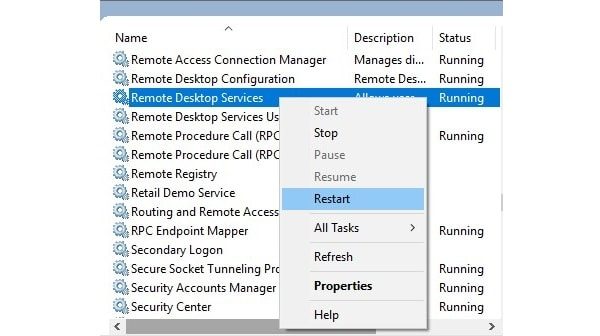
- В списке служб найдите «Удаленный рабочий стол» (Remote Desktop Services).
- Убедитесь, что ее состояние указано как «Запущено».
- Если служба остановлена, кликните по ней правой кнопкой мыши и выберите «Запустить».
- Также проверьте, установлен ли тип запуска как «Автоматически». Это гарантирует, что служба будет запускаться при каждой загрузке системы.
Если доступ к компьютеру ограничен, вы можете запустить службу удаленно через PowerShell при условии, что на устройстве активна служба WinRM:
Enter-PSSession -ComputerName ИмяКомпьютера -Credential Домен\Пользователь
Start-Service TermService
Set-Service TermService -StartupType Automatic
Проверка разрешения подключений в системе
На уровне системы Windows может быть настроена блокировка удаленных подключений. Чтобы убедиться, что подключения разрешены, выполните следующие шаги:
- На удаленном компьютере откройте «Свойства системы», используя комбинацию клавиш Win + Pause/Break.
- Перейдите на вкладку «Удаленный доступ».
- Убедитесь, что активирован флажок «Разрешить подключения удаленного помощника к этому компьютеру».
- Также проверьте, что в разделе «Удаленный рабочий стол» выбран один из предложенных вариантов.
Если физический доступ к устройству отсутствует, вы можете настроить эти параметры через реестр с использованием PowerShell:
Set-ItemProperty 'HKLM:\SYSTEM\CurrentControlSet\Control\Terminal Server\' -Name “fDenyTSConnections” -Value 0
Значение 0 означает, что подключения разрешены, а 1 — запрещены.
Настройка брандмауэра Windows
Брандмауэр Windows может препятствовать подключениям через RDP, даже если служба активна и подключения разрешены на системном уровне. Чтобы настроить брандмауэр, выполните следующие действия:
- На удаленном компьютере откройте «Брандмауэр Защитника Windows» через Панель управления.
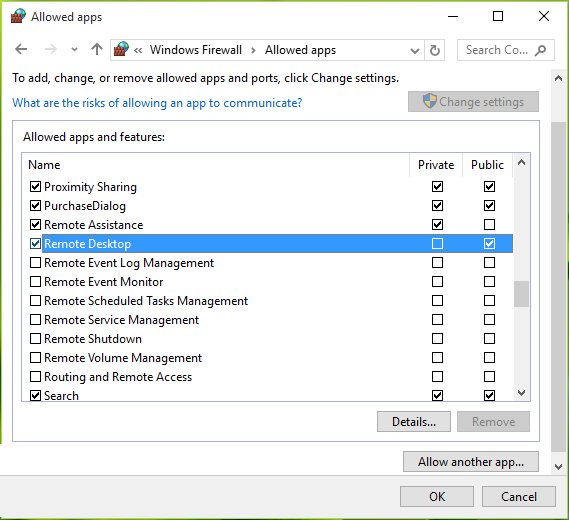
- Перейдите в раздел «Разрешить приложение или компонент через брандмауэр».
- Найдите в списке «Удаленный рабочий стол» и проверьте, что для него активированы флажки в колонках «Частная» и «Общественная» (в зависимости от типа сети).
Этот процесс также можно выполнить с помощью PowerShell, используя команду:
Enable-NetFirewallRule -DisplayGroup “Remote Desktop”
Проверка настроек порта RDP
Протокол по умолчанию работает через порт 3389. Если этот порт был изменен, вам нужно либо указать новый порт при подключении, либо вернуть стандартное значение, иначе RDP клиент не подключится. Чтобы проверить текущие настройки порта, выполните следующие действия:
- На удаленном компьютере откройте редактор реестра, используя комбинацию Win + R и команду regedit.
- Перейдите в раздел: HKEY_LOCAL_MACHINE\SYSTEM\CurrentControlSet\Control\Terminal Server\WinStations\RDP-Tcp.
- Найдите параметр PortNumber и проверьте его значение.
- Если значение отличается от 3389 (десятичное), вы можете:
4.1. Вернуть значение порта к 3389.
4.2. Указывать компьютер и порт в формате компьютер:порт при подключении.
После внесения изменений перезапустите службу удаленного рабочего стола.
Сброс настроек RDP в реестре
Если проблема вызвана повреждением настроек RDP, их можно восстановить таким образом:
- Откройте редактор реестра на удаленном компьютере.
- Перейдите по пути:
HKEY_LOCAL_MACHINE\SYSTEM\CurrentControlSet\Control\Terminal Server. - В этом разделе выполните следующие изменения:
3.1. Установите значение параметра fDenyTSConnections на 0, чтобы разрешить подключения.
3.2. Установите значение параметра fSingleSessionPerUser на 0, чтобы разрешить несколько сеансов для одного пользователя. - Перейдите в раздел: HKEY_LOCAL_MACHINE\SYSTEM\CurrentControlSet\Control\Terminal Server\WinStations\RDP-Tcp.
- В этом разделе проверьте и при необходимости измените следующие параметры:
5.1. Установите значение PortNumber на 3389 (стандартный порт).
5.2. Установите значение SecurityLayer на 1 (уровень безопасности).
5.3. Установите значение UserAuthentication на 1 (аутентификация пользователя).
После этого перезагрузите компьютер или перезапустите службу удаленного рабочего стола.
Ошибка: «Отсутствуют клиентские лицензии RDP»
Еще одна частая ошибка звучит так: «Удаленный сеанс отключен, поскольку для данного компьютера отсутствуют клиентские лицензии удаленного рабочего стола. Обратитесь к администратору сервера».

Ошибка возникает, когда сервер не может предоставить лицензию для подключения по RDP. Эта проблема характерна для Windows Server с установленной ролью Remote Desktop Services (RDS).
В отличие от стандартного RDP в «домашнем» Windows, серверные версии Windows требуют клиентских лицензий (Client Access Licenses, CAL) для подключения пользователей. Microsoft предоставляет 120-дневный льготный период после установки роли RDS, в течение которого можно работать без лицензий. Когда этот период закончится, подключения будут отклоняться с сообщением об отсутствии лицензий.
Чтобы выявить точную причину проблемы, используйте инструмент диагностики лицензирования RD:
- На сервере RDS откройте «Диспетчер лицензирования удаленных рабочих столов» (RD Licensing Diagnoser):
1.1. Нажмите Win + R, введите licmgr.msc и нажмите Enter.
1.2. Или найдите его в меню «Администрирование» → «Службы удаленных рабочих столов». - Запустите диагностику и проанализируйте результаты. Инструмент покажет:
2.1. Настроен ли сервер лицензирования.
2.2. Доступен ли сервер лицензирования.
2.3. Есть ли свободные лицензии.
2.4. Тип используемых лицензий (Per User или Per Device).
Настройка сервера лицензирования
Если сервер лицензирования не настроен:
- Откройте «Диспетчер серверов» (Server Manager).
- Перейдите в «Службы удаленных рабочих столов» → «Обзор» → «Задачи» → «Изменить свойства развертывания».
- В разделе «Лицензирование RD» укажите:
3.1. Сервер лицензирования (это может быть тот же сервер или другой).
3.2. Тип лицензии (Per User или Per Device).
Если у вас отсутствует роль RD Connection Broker, настройте параметры через групповую политику:
- Откройте редактор групповой политики (gpedit.msc).
- Перейдите в «Конфигурация компьютера» → «Административные шаблоны» → «Компоненты Windows» → «Службы удаленных рабочих столов» → «Узел сеансов удаленных рабочих столов» → «Лицензирование».
- Настройте параметры:
3.1. «Использовать указанные серверы лицензирования удаленных рабочих столов» — включите и укажите имя или IP-адрес сервера лицензирования.
3.2. «Задать режим лицензирования удаленных рабочих столов» — включите и выберите нужный тип лицензии.
Установка лицензий RDS CAL
Если лицензии не установлены или их недостаточно:
- Приобретите необходимое количество лицензий RDS CAL у Microsoft или авторизованного реселлера.
- Откройте «Диспетчер лицензирования удаленных рабочих столов» (licmgr.msc).
- Щелкните правой кнопкой мыши на сервере и выберите «Установить лицензии».
- Следуйте инструкциям мастера для ввода кода программы и кода авторизации продукта.
- После установки лицензий они должны отобразиться в консоли с указанием типа и количества.
Решение проблемы несовместимости версий
Если лицензии установлены для более новой версии Windows, чем та, что используется на сервере лицензирования, у вас есть три варианта:
- Обновить операционную систему на сервере лицензирования до версии, соответствующей лицензиям.
- Установить роль лицензирования RD на сервере с более новой версией Windows и перенести на него лицензии.
- Обратиться в Microsoft Clearinghouse, чтобы понизить версию лицензий до версии, соответствующей серверу.
Ошибка: «Учетные данные недопустимы»
При попытке подключения по RDP вы можете столкнуться с сообщением об ошибке: «Учетные данные, использованные для подключения, недопустимы. Введите новые учетные данные».

Эта ошибка указывает на то, что система не может аутентифицировать пользователя с предоставленными учетными данными. Существует несколько ключевых причин, из-за которых система может отклонить попытку входа:
- Неправильное указание имени пользователя.
- Проблемы с форматом учетных данных.
- Отсутствие прав доступа к RDP.
- Кешированные учетные данные.
Проблема с форматом учетных данных
В среде без Active Directory каждый компьютер управляет своими учетными записями независимо. Это означает, что учетная запись «Иван» на компьютере А не является той же учетной записью, что «Иван» на компьютере Б, даже если они имеют одинаковые пароли.
При подключении к удаленному компьютеру в рабочей группе необходимо явно указать, что вы хотите использовать учетную запись с удаленного компьютера:
- Используйте формат ИМЯ_КОМПЬЮТЕРА\имя_пользователя. Например: SERVER01\Администратор.
- Или используйте формат с точкой для явного указания локальной учетной записи: .\имя_пользователя. Например: .\Администратор.
Отсутствие прав на RDP-доступ
По умолчанию только члены группы «Администраторы» и «Пользователи удаленного рабочего стола» могут подключаться через RDP. Если ваша учетная запись не входит в эти группы, вы получите ошибку при попытке подключения. Решение:
- На удаленном компьютере откройте «Управление компьютером» (compmgmt.msc).
- Перейдите в «Локальные пользователи и группы» → «Группы».
- Дважды щелкните на группе «Пользователи удаленного рабочего стола».
- Нажмите «Добавить» и укажите нужную учетную запись.
- Нажмите OK и перезапустите службу удаленного рабочего стола.
Если у вас есть доступ через командную строку с правами администратора, вы можете выполнить:
net localgroup «Remote Desktop Users» имя_пользователя /add
Проблема с кешированными учетными данными
Windows сохраняет учетные данные, которые вы вводили ранее. Если вы изменили пароль или учетную запись, эти кешированные данные могут вызывать конфликт. Решение:
- Нажмите Win + R и введите control keymgr.dll или откройте «Панель управления» → «Учетные записи пользователей» → «Диспетчер учетных данных».
- В «Диспетчере учетных данных» найдите и удалите все записи, связанные с удаленным компьютером. Они могут начинаться с TERMSRV\имя_компьютера.
- После этого закройте «Диспетчер учетных данных» и попробуйте подключиться снова, введя актуальные учетные данные.
Ошибка: «Учетная запись заблокирована» (Brute Force защита)
Также вы можете столкнуться с сообщением об ошибке: «В целях безопасности учетная запись пользователя заблокирована из-за большого числа неудачных попыток войти в систему или изменить пароль. Подождите, затем повторите попытку или обратитесь к системному администратору или в службу технической поддержки».
Эта ошибка означает, что учетная запись пользователя заблокирована системой безопасности Windows. Чаще всего это происходит из-за превышения допустимого количества неудачных попыток входа — так система защищается от атак методом перебора пароля.
Если ваша учетная запись заблокирована, у вас есть несколько вариантов действий:
Дождаться автоматической разблокировки
Если настроена автоматическая разблокировка (параметр «Продолжительность блокировки учетной записи» не установлен в «0»), учетная запись разблокируется автоматически, когда истечет указанное время.
Разблокировка через консоль администратора
Если у вас есть доступ к серверу локально или через другую учетную запись с правами администратора:
- Откройте «Управление компьютером» (compmgmt.msc).
- Перейдите в «Локальные пользователи и группы» → «Пользователи».
- Щелкните правой кнопкой мыши на заблокированной учетной записи и выберите «Свойства».
- Снимите флажок «Учетная запись заблокирована» и нажмите OK.
Разблокировка через командную строку
Если у вас есть доступ к командной строке с правами администратора, то откройте ее и введите:
net user ИмяПользователя /active:yes
Разблокировка через PowerShell
Для доменных учетных записей в Active Directory можно использовать PowerShell:
Unlock-ADAccount -Identity ИмяПользователя
Настройка политики блокировки учетных записей
Чтобы больше не сталкиваться с этой ошибкой, настройте параметры блокировки учетных записей:
- Откройте «Локальная политика безопасности» (secpol.msc), нажмите Win + R, введите secpol.msc и нажмите Enter.
- Перейдите в «Политики учетных записей» → «Политика блокировки учетной записи».
- Настройте следующие параметры:
3.1. Пороговое значение блокировки учетной записи — количество неудачных попыток входа, после которых учетная запись блокируется (рекомендуется 5–10).
3.2. Продолжительность блокировки учетной записи — время, на которое блокируется учетная запись (рекомендуется 15–30 минут).
3.3. Сброс счетчика блокировки учетной записи через — время, через которое счетчик неудачных попыток сбрасывается (рекомендуется 15–30 минут).
Microsoft рекомендует настройку 10/10/10 — 10 неудачных попыток, блокировка на 10 минут, сброс счетчика через 10 минут в качестве базового уровня защиты.
Ошибка: «Не работает буфер обмена»
Буфер обмена в RDP позволяет передавать данные между локальным и удаленным компьютерами. За эту функцию отвечает специальная служба rdpclip.exe, которая запускается автоматически при установлении RDP-соединения. Эта служба может работать некорректно из-за сбоев, конфликтов или неправильных настроек.
Проблемы с буфером обмена могут возникать по следующим причинам:
- Сбой в работе службы rdpclip.exe.
- Отключена функция перенаправления буфера обмена в настройках клиента.
- Запрет на перенаправление буфера обмена в групповых политиках.
- Блокировка функции в настройках реестра.
- Проблемы с сетевым соединением или драйверами.
Перезапуск службы rdpclip.exe
Самый простой и эффективный способ восстановить работу буфера обмена — перезапустить службу rdpclip.exe на удаленном компьютере:
- На удаленном компьютере откройте Диспетчер задач (нажмите Ctrl + Shift + Esc или щелкните правой кнопкой мыши на панели задач и выберите «Диспетчер задач»).
- Перейдите на вкладку «Процессы» или «Подробности» (в зависимости от версии Windows).
- Найдите процесс rdpclip.exe или RDP Clipboard Monitor.
- Щелкните правой кнопкой мыши и выберите «Завершить процесс» или «Завершить задачу».
- После закрытия процесса нажмите Win + R для открытия окна «Выполнить».
- Введите rdpclip.exe и нажмите Enter для запуска процесса заново.
После перезапуска службы буфер обмена должен заработать. Если проблема не решена, переходите к следующим методам.
Проверка настроек клиента RDP
Возможно, функция буфера обмена отключена в настройках клиента:
- На локальном компьютере откройте «Подключение к удаленному рабочему столу» (mstsc.exe).
- Нажмите на «Показать параметры» в нижней части окна.
- Перейдите на вкладку «Локальные ресурсы».
- Убедитесь, что флажок «Буфер обмена» установлен.
- Если вы хотите копировать файлы, нажмите кнопку «Подробнее…» и установите флажок напротив «Диски».
- Нажмите OK и повторно подключитесь к удаленному компьютеру.
Настройка групповых политик
Если предыдущие методы не помогли, проблема может быть в групповых политиках. Проверьте и измените настройки на удаленном компьютере:
- Нажмите Win + R и введите gpedit.msc — запустится редактор локальной групповой политики.
- Перейдите по пути: «Конфигурация компьютера» → «Административные шаблоны» → «Компоненты Windows» → «Службы удаленных рабочих столов» → «Узел сеансов удаленных рабочих столов» → «Перенаправление устройств и ресурсов».
- Найдите политику «Запретить перенаправление буфера обмена».
- Дважды щелкните на ней и установите значение «Отключено» или «Не настроено».
- Нажмите OK для сохранения изменений.
- Откройте командную строку от имени администратора и выполните команду gpupdate /force для немедленного применения изменений.
- Перезапустите сеанс RDP: выйдите и подключитесь снова.
Проверка настроек реестра
Если проблема не решилась, проверьте настройки в реестре:
- Нажмите Win + R и введите regedit для запуска редактора реестра.
- Перейдите по пути: HKEY_LOCAL_MACHINE\SOFTWARE\Policies\Microsoft\Windows NT\Terminal Services.
- Найдите параметр fDisableClip. Если значение этого параметра равно 1, измените его на 0.
- Если вы хотите также разрешить копирование файлов, найдите параметр fDisableCdm и установите его значение в 0.
- Если указанных параметров нет, это означает, что они не настроены и не должны блокировать буфер обмена.
- Перезагрузите удаленный компьютер, чтобы применить изменения.
Как безопасно подключаться к RDP
Самая главная рекомендация — никогда не открывайте порт RDP для прямого доступа из интернета. Даже с надежными паролями и многофакторной аутентификацией это создает серьезный риск безопасности.
Лучше используйте один из следующих методов безопасного доступа:
- VPN — создает зашифрованный туннель для доступа к корпоративной сети.
- RDP Gateway — специальный сервер, который обрабатывает все RDP-подключения через единую, хорошо защищенную точку входа.
- SSH-туннелирование — перенаправляет RDP-трафик через защищенное SSH-соединение.
Для надежной аутентификации в RDP 10 и RDP 11 используйте пароли длиной не менее 16 символов, которые включают буквы разного регистра, цифры и специальные символы. Внедрите многофакторную аутентификацию для всех RDP-подключений — это затруднит несанкционированный доступ даже при компрометации пароля.
Обязательно включите Network Level Authentication (NLA). Эта функция требует аутентификации пользователя до установления полного соединения, что защищает от многих типов атак, включая BlueKeep.
Усильте сетевую защиту следующими способами:
- Измените стандартный порт 3389 на нестандартный — это снизит риск автоматизированных атак.
- Настройте брандмауэр Windows, чтобы разрешить RDP-подключения только с определенных IP-адресов.
- Через групповые политики установите высокий уровень шифрования.
- Настройте безопасную связь RPC через групповые политики.
Комбинация этих мер не гарантирует абсолютную безопасность, но значительно снижает риск компрометации ваших систем через RDP.
Когда протокол не работает, можно воспользоваться альтернативными решениями:
- TeamViewer — обходит многие ограничения сети, работает через NAT и брандмауэры.
- AnyDesk — отличается высокой скоростью работы даже на медленных соединениях.
- Chrome Remote Desktop — бесплатное решение, интегрированное с Google-аккаунтом.
- VNC — открытый протокол со множеством реализаций для разных платформ.
Эти инструменты могут стать временной заменой или постоянным решением для специфических сценариев.
Альтернативные решения: облачные рабочие столы
При постоянных проблемах с настройкой и поддержкой RDP хорошей альтернативой могут стать облачные рабочие столы. Поскольку инфраструктура обслуживается профессионалами, вы избежите многих технических сложностей.
Основные преимущества облачных рабочих столов:
- Доступ из любой точки мира через безопасное зашифрованное соединение.
- Можно использовать ресурсоемкие приложения и не думать о мощности локального устройства.
- Гибкое управление правами пользователей и контроль доступа.
- Повышенная безопасность данных, которые хранятся в защищенных дата-центрах.
- Отказоустойчивость и защита от DDoS-атак.
- Круглосуточная техническая поддержка.
Мы в mClouds предлагаем облачные рабочие столы с различными конфигурациями оборудования, включая высокопроизводительные серверы для работы с графическими приложениями и специализированным ПО.
Наш телеграм-канал
Пишем про облака, кейсы, вебинары
Подписаться
The Remote Desktop feature in Windows 11 operating system helps you to connect with differential device. You can use Remote Desktop on your Windows, Android, or iOS device to connect to a Windows PC from afar. If the Remote Desktop not working in Windows 11/10, this article will help you to fix it.
Remote Desktop not working is common issue under which client can’t connect to a remote computer. Additionally you don’t get error messages or any other symptoms that would hint to identify the root cause to fix the issue.
In this case, you can use below solutions that usually helps.
Page Contents
Fix 1: Check status of RDP protocol
Registry Disclaimer: It is recommended to create a System Restore point first, if you’re not familiar with registry manipulation.
1. Run regedit command to open Registry Editor.
2. Click File > Connect Network Registry.
3. Next, type name of the remote computer and select Check Names, and then select OK.
4. In left pane of Registry Editor window, navigate to:
HKEY_LOCAL_MACHINE\SYSTEM\CurrentControlSet\Control\Terminal Server

5. Make sure fDenyTSConnections DWORD is set to 0. If not, change its Value from 1 to 0, in order to enable RDP.
6. Repeat step 5 at this registry location as well:
HKEY_LOCAL_MACHINE\SOFTWARE\Policies\Microsoft\Windows NT\Terminal Services
Fix 2: Ensure GPO is not blocking RDP
1. Open administrative Command Prompt.
2. Execute this command:
gpresult /H c:\gpresult.html
3. Now open C:\gpresult.html file.
4. Locate Allow users to connect remotely by using Remote Desktop Services policy at Computer Configuration > Administrative Templates > Windows Components > Remote Desktop Services > Remote Desktop Session Host > Connections.
5. If the policy configuration is set to Disabled, check Winning GPO. Remove the blocking GPO to fix issue with RDP.
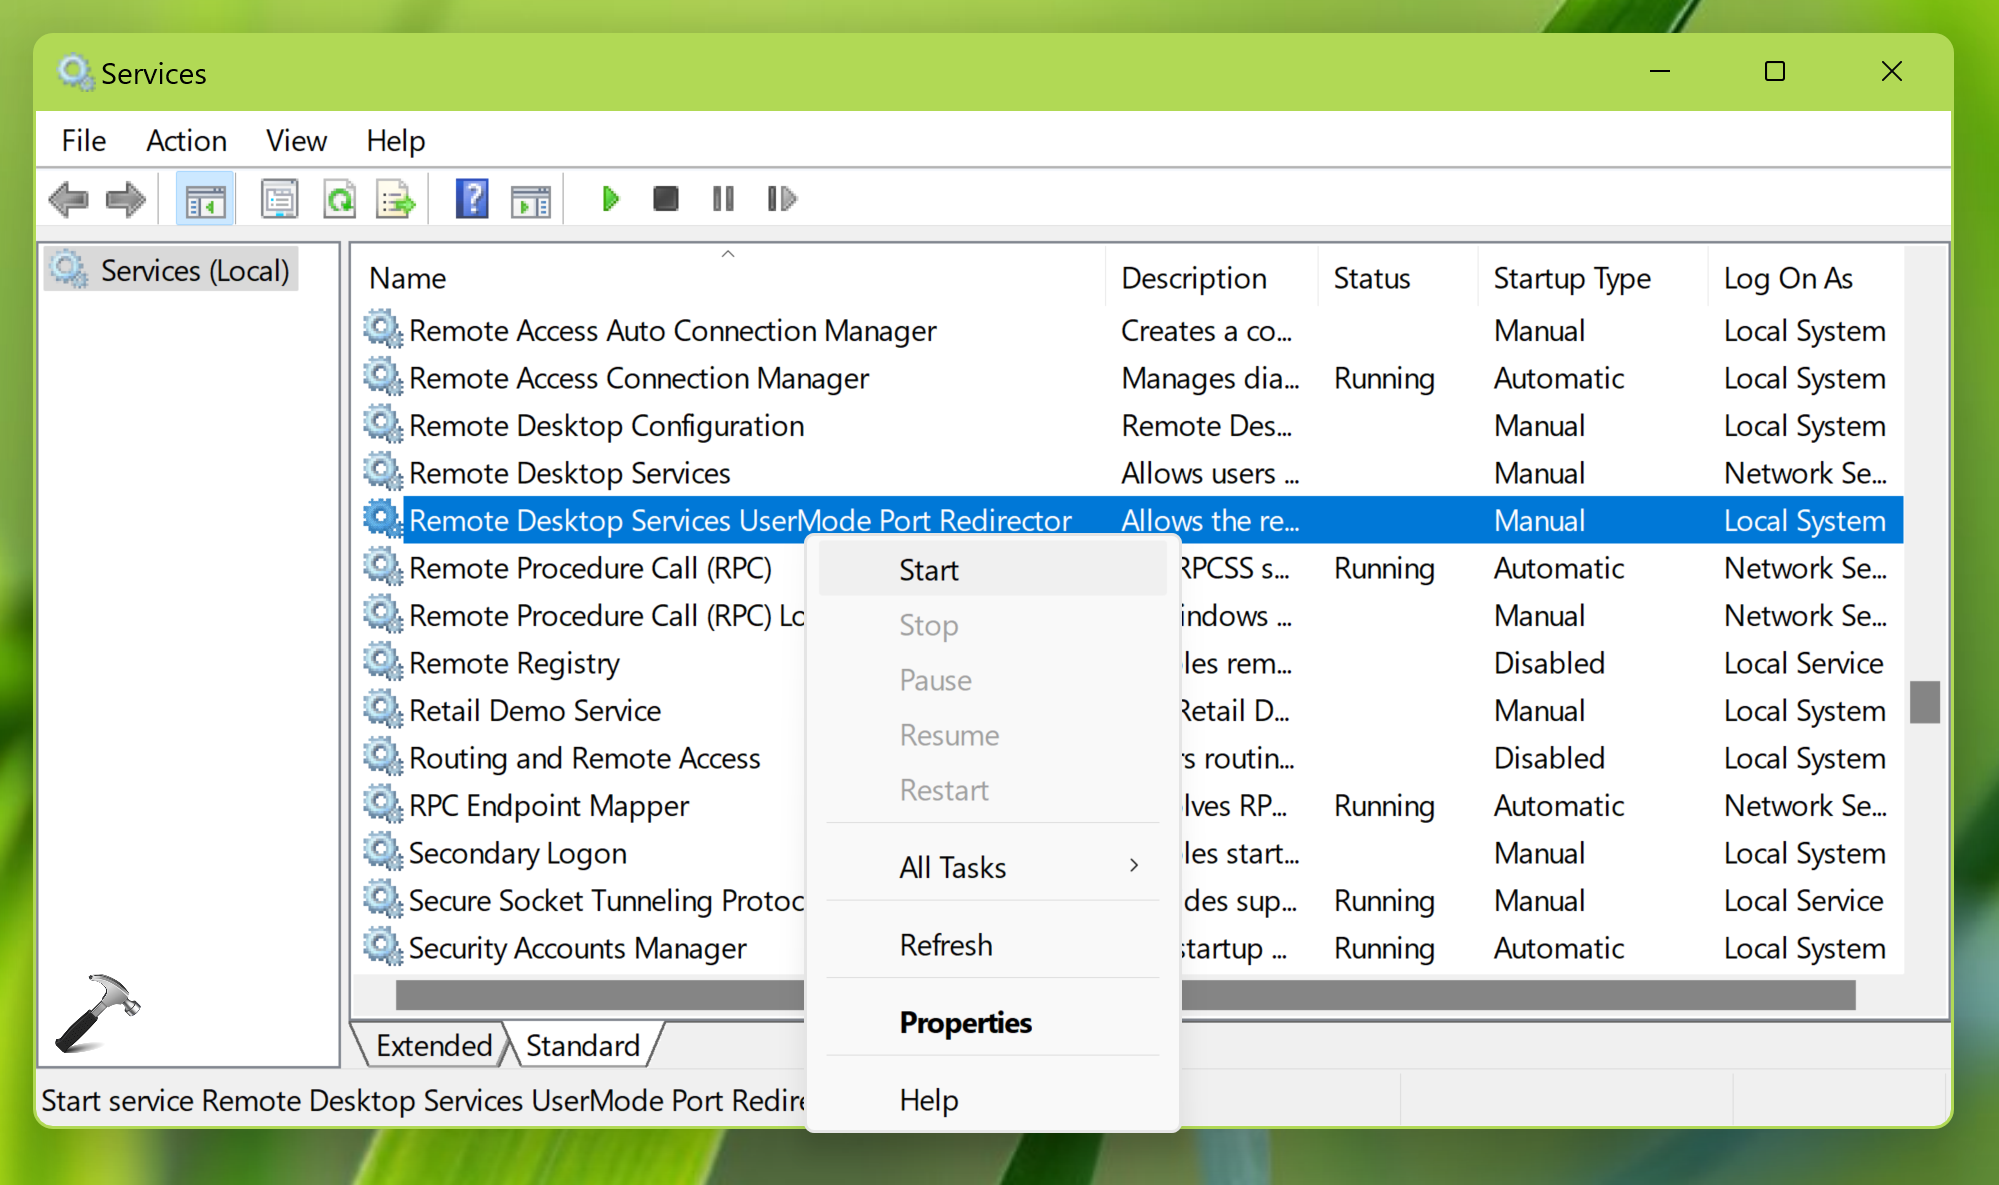
Fix 3: Check RDP services
In order to use Remote Desktop, the following two services must be running at the client machine and also at the remote computer. If either of these systems do not have these services running, you won’t be able to use Remote Desktop properly:
- Remote Desktop Services (TermService)
- Remote Desktop Services UserMode Port Redirector (UmRdpService)
Open Services snap-in by running services.msc command. Locate either of above two mentioned services, right click on it, select Start. Repeat same for other service.
Hope something helps!
RELATED ARTICLES
Remote Desktop is a powerful Windows 10 feature that allows users to remotely access and control their computer from anywhere, providing they have an internet connection. However, it can be incredibly frustrating when you’re ready to work or access files remotely, and you find that the Remote Desktop feature won’t connect. This issue can stem from a variety of causes, including network problems, incorrect settings, or system permissions. In this article, we’ll explore the common reasons why Remote Desktop might not connect in Windows 10 and provide clear, step-by-step solutions to get you back up and running.

Table of Contents
Firstly, make sure your internet connection is working fine. Try running a speed test (Speedtest by Ookla) to verify the same. If you have an extremely slow connection, some issues are bound to happen.
Method 1: Allow Remote Connections to your Computer
By default, remote connections are disabled and therefore, if you are trying to set up a connection for the first time, you need to manually enable the feature. Allowing remote connections is as simple as toggling on a single switch in the settings.
1. Open Windows Settings by pressing the Windows Key + I simultaneously. Click on System.
2. Move to the Remote Desktop tab (second last) from the left-hand pane and toggle on the switch for Remote Desktop.

3. If you receive a pop-up requesting affirmation on your action, simply click on Confirm.

Also Read: Fix The L2TP Connection Attempt Failed Error on Windows 10
Method 2: Modify Firewall Settings
Remote Desktop while being an extremely handy feature can also act as a doorway for hackers and allow them unrestricted access to your personal computer. To keep a check on your computer’s security, a remote desktop connection isn’t allowed through the Windows Firewall. You will need to manually allow Remote Desktop through the defender firewall.
1. Type Control Panel in either the Run command box or the start search bar and press enter to open the application.
2. Now, click on Windows Defender Firewall.
3. In the following window, click on the Allow an app or feature through the Windows Defender Firewall hyperlink.

4. Click on the Change Settings button.
5. Scroll down the Allow apps and features list and check the box next to Remote Desktop.
6. Click on OK to save the modification and exit.

Along with the Defender Firewall, an antivirus program you have installed on your computer may be blocking a remote connection from being set up. Temporarily disable the antivirus or uninstall it and check if you are able to create a connection.
Also Read: Access Your Computer Remotely Using Chrome Remote Desktop
Method 3: Enable Remote Assistance
If you are having trouble setting up a remote connection, try enabling remote assistance and then sending an invitation to the other user.
1. Double-click on the Windows File Explorer shortcut icon on your desktop to launch the application and right-click on This PC.
2. Click on Properties in the ensuing context menu.

3. Open Remote Settings.

4. Check the box next to ‘Allow Remote Assistance connections to this computer’.

5. Remote Assistance also needs to be manually allowed through the firewall. So follow steps 1 through 4 of the previous method and tick the box next to Remote Assistance.
To Send an Assistance Invitation:
1. Open the Control Panel and click on the Troubleshooting item.
2. On the left pane, click on Get help from a friend.
3. Click on Invite someone to help you. in the following window.

4. Choose any of the three methods to invite your friend over. For the purpose of this tutorial, we will continue with the first option, i.e, Save this invitation as a file. You can also directly mail the invitation.

5. Save the invitation file in your preferred location.

6. Once the file is saved, another window displaying the file password will open up. Carefully copy the password and send that to your friend. Do not close the Remote Assistance window until the connection is established, otherwise, you will need to create and send a new invitation.

Also Read: Fix Remote Desktop Cannot Connect to the Remote Computer
Method 4: Disable Custom Scaling
An important setting that often gets overlooked when setting up a remote connection is custom scaling. To those unaware, Windows allows users to set a custom size for their text, apps, etc. using the Custom Scaling feature. However, if the feature (custom scale) isn’t compatible with the other device, issues will arise in remotely controlling the computer.
1. Launch Windows Settings once again and click on System.
2. On the Display settings page, click on Turn off custom scaling and sign out.
3. Sign back into your account and check if you are able to connect now.
Also Read: How to Enable Remote Desktop on Windows 10
Method 5: Modify the Registry Editor
Some users have been able to solve the remote desktop won’t connect problem by modifying the Terminal Server Client folder in the Registry editor. Be extremely careful in following the below steps and making changes to the registry as any accidental mistake can prompt additional issues.
1. Press Windows key + R to launch the Run command box, type Regedit, and hit the enter key to open the Registry Editor.
2. Using the navigation menu on the left panel, head down to the following location:
HKEY_CURRENT_USER\Software\Microsoft\Terminal Server Client
3. Right-click anywhere on the right panel and select New followed by DWORD (32-bit) Value.

4. Rename the value to RDGClientTransport.
5. Double-click on the newly created DWORD Value to open its Properties and set Value Data as 1.

Method 6: Delete existing Remote Desktop Credentials
If you had previously connected to a computer but are now facing issues in connecting again, try deleting the saved credentials and starting all over again. It is quite possible that some of the details were changed and thus, the computers fail to connect.
1. Perform a search for Remote Desktop Connection using the Cortana search bar and hit enter when the results arrive.
2. Click on the Show Options arrow to reveal all tabs.

3. Move to the Advanced tab and click on the ‘Settings…’ button under Connect from anywhere.

4. Delete the existing credentials for the computer you are having a hard time connecting to.
You can also manually enter the IP address of a remote computer and edit or delete the credentials from the General tab itself.
Also Read: How to Setup Remote Desktop Connection on Windows 10
Method 7: Change Network Settings
For the sake of our digital security, remote desktop connections are only allowed on private networks. So if you are connected to a public network, switch to a more secure private one or manually set the connection as private.
1. Open Windows Settings once again and click on Network & Internet.
2. On the Status page, click on the Properties button under your current network.
3. Set the Network Profile as Private.

Method 8: Add the IP Address to the Host’s file
Another manual solution to the remote desktop won’t connect issue is adding the remote computer’s IP address to the host’s file. To know a Computer’s IP address, open Settings > Network & Internet > Properties of the currently connected network, scroll down to the end of the page, and check the IPv4 value.
1. Search for Command Prompt in the Start Search bar and select Run as Administrator.
2. Type the following command and press enter
cd C:/Windows/System32/Drivers/etc
3. Next, execute notepad hosts to open the host’s file in the notepad application.

4. Add the remote computer’s IP address and press Ctrl + S to save the changes.
If issues with the remote desktop feature only started after performing the most recent Windows Update, uninstall the update or wait for another one to arrive with the bug hopefully fixed. Meanwhile, you can use one of the several third-party remote desktop programs available for Windows. As mentioned earlier, TeamViewer and Anydesk are crowd favorites, free, and very easy to use. RemotePC, ZoHo Assist, and LogMeIn are a few great paid alternatives.
Recommended:
- Change Remote Desktop Port (RDP) in Windows 10
- A Comprehensive Guide to Discord Text Formatting
- 5 Ways To Remove Chromium Malware From Windows 10
- How to Show CPU and GPU Temperature on Taskbar
We hope this guide was helpful and you were able to fix Remote Desktop Won’t Connect in Windows 10. Still, if you have any doubts then feel free to ask in the comment section below.
Remote Desktop Connection is a quite useful application by Microsoft. It lets you connect to control your PC from a remote device. And, it is available for Windows, macOS, iOS and even for Android. RDC requires only a few details to establish a remote connection between two Computers. Like, IP address, User Name, or password if added. But, in Windows 10 this information isn’t enough. In Windows 10, Microsoft has added many security features. And, because of that, Windows 10 remote desktop not working problem occurs. So, if you’re facing any error while trying to connect in RDC application. Then, don’t worry, here are some solutions which you can try.
Why Remote Desktop Not Connecting or Working in Windows 10?.
There isn’t any single reason behind this problem. It could be an Internet, Firewall, Registry issue. Or, maybe some RDC settings are wrong. Also, it might be possible that you’re entering the wrong information, in Remote Desktop Connection. Well, whatever is the cause, I suggest you try all the solutions mentioned in this article.
SOLUTIONS – Windows 10 Remote Desktop Not Working.
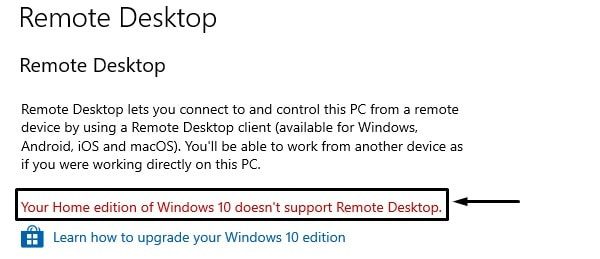
The solution for Windows 10 Home User.
Almost all Windows 10 laptop comes with Windows 10 home edition. And, if you don’t know, Windows 10 home edition doesn’t support “remote desktop” Application. So, if a remote desktop client is showing Error with multiple reasons. Then, it might be because of your Windows 10 edition.
- To check Windows 10 edition, Right-Click on the start button and then click on system option.
- Here, under Windows specifications, you will able to see your Windows edition.
- To check Remote Desktop support – Go to Windows 10 Settings App > System > Remote Desktop.
Install Windows 10 Pro Edition.
If you haven’t purchased Windows 10 home license yet. Then, you can download the ISO file of Windows. And, can install the Pro version of Windows. That comes with remote desktop full support. Alternatively, I suggest you use “Chrome remote desktop” App.
Use RDP Wrapper.
If you can’t install Windows 10 Pro, then you can try RDP Wrapper Library. This small tool will enable Remote Desktop Connection support in your Windows. Though, Currently, after Windows update, there is a problem occurring with this tool. But, I suggest you try it out.
1. Search for “RDPWrap”. And, open GitHub site and Download Zip file of the latest version.
2. Extract RDPWrap Zip file and then run “install.bat” file.
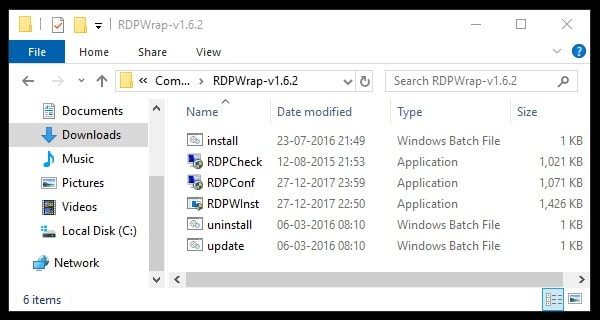
Command Prompt Window will get open and it will install RDP Wrapper for you. After a couple of seconds, it will ask you to enter a key. Press any key to close CMD Window.
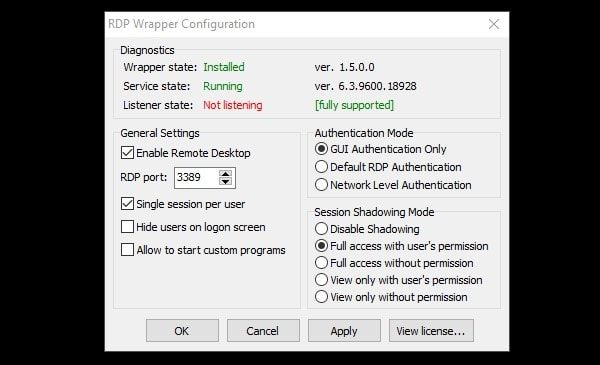
3. To check everything is up and running, run “RDPConf” file. For me, Listener state: Not listening error is coming. If you’re facing the same problem, feel free to Comment. I will share the solution soon.
After installing RDP Wrapper Library, you can run Remote Desktop Connection and try to connect. And, if still, Windows 10 Remote Desktop Not Working, then try next solution.
Use Remote Desktop Assistance (RDA).
Remote Desktop Assistance is a different program. The best part is, it is available on every edition of Windows. RDA is specially developed to help someone else, and, to get help from someone. Though, it works similarly to the RDC. Means you can access and control someone else PC. Or, someone else can access and control your Computer remotely.
But, it works on an invite basis. Means, if someone wants to access your Computer, you need to send them an invite with a password. Which you can send easily via Email. So you don’t need an IP address to connect.
On the Internet, You can find out many guides on RDA. So, here I am adding a small guide to access any Computer remotely by using RDA.
1. Open the Control Panel, Search for ‘Remote”.
2. Click on “Invite Someone to connect to your PC and help you, or offer to help someone else”.
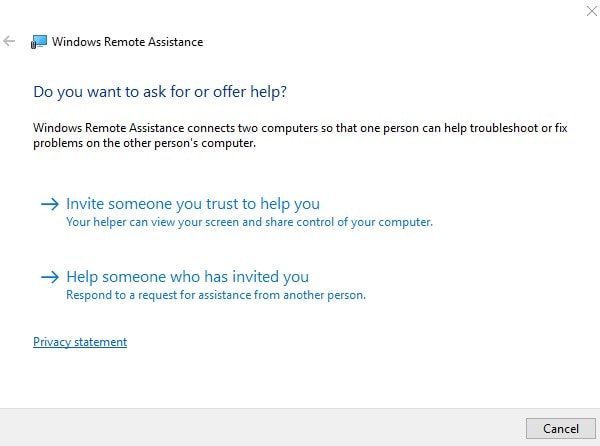
3. Now, you will get two options.
Invite someone you trust to help you. – If you want to give control of your Computer. Then, with this option, you can create an invite.
Help someone who has invited you. – And, if you want to access someone’s Computer. Then, you can use this option to select an invitation file. And, after that, you can enter the password to access.
4. To create an invite, click on the first option. On next window, click on “save this invitation as file”. And, then save invitation on the desktop.
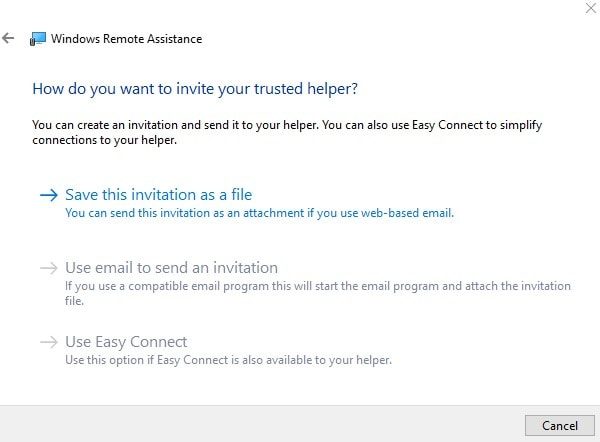
A password will also get generated immediately. Now, You have to send an invitation file and password to another Computer.
5. In another computer open the same Window, this time choose the second option. And, then click on “Use an invitation file”.
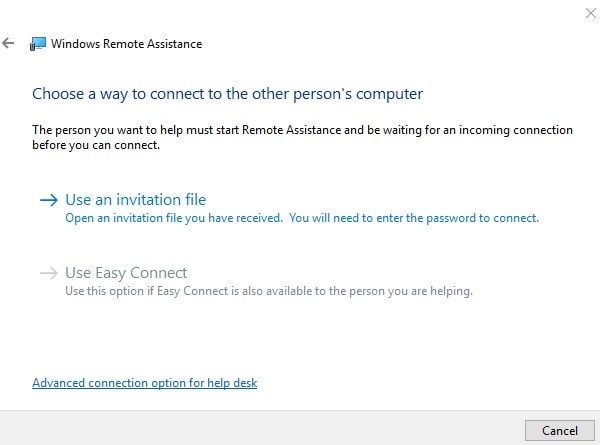
Select the invitation file received from the first Computer, and then click on OK.
Now, you just need to enter the password.
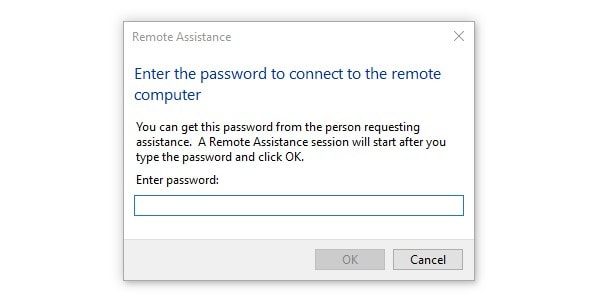
After entering the password, from the first computer, you have to give permission. Also, you have to request for the control, if you want to.
Allow Remote Desktop App in Windows Firewall.
If Remote Desktop App is not enabled in Windows Defender Firewall Settings. Then also Windows 10 Remote Desktop Not Working problem does occur. To enable remote desktop in Firewall, follow these instructions.
1. Click on the Start button and search for “Firewall”.
2. After that, from search results, click on Windows Defender Firewall.
3. From the left pane, Click on “Allow an app or feature through Windows Defender Firewall”.
4. Click on the ‘Change Settings” option and then look for “Remote Desktop”. Make sure now that, Remote Desktop is marked or not. (Also check Public and Private network option.)
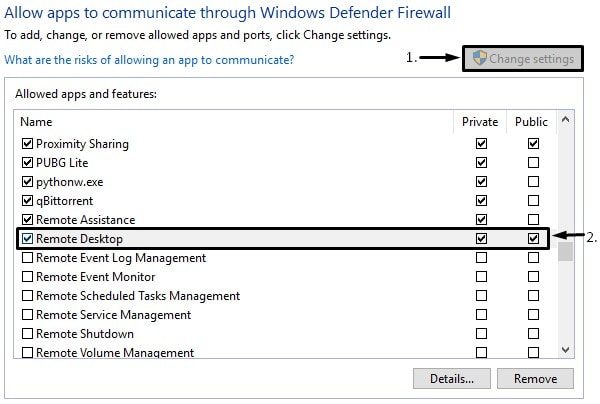
After making changes in Firewall settings, Click on OK to apply changes.
Allow Remote Connections in Computer.
If you’re trying Remote Desktop first time. Then, it might be possible that remote connections option is disabled from system settings. To allow remote connections to follow these steps.
1. Right-Click on This PC or My Computer and then click on properties.
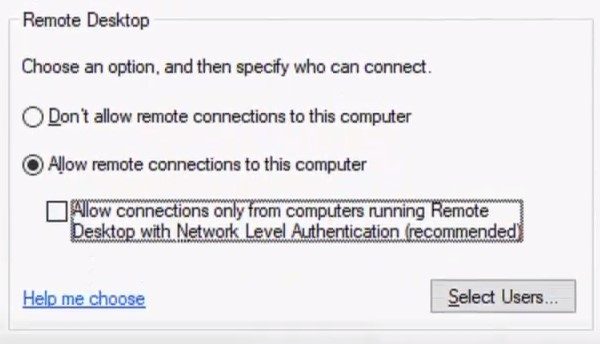
2. From the left side of properties Window, click on “remote settings” option.
3. Now, mark “Allow remote connections to this computer” option. And, then click on OK.
Hope, now Remote Desktop Not Working problem got resolved. If not then follow the next solution.
Restart Remote Desktop Connections Service.
There are services behind each Windows program. So, if something is not working then it’s Services might be the reason behind it. If remote desktop was working fine before and now it’s creating the problem. Then, first, restart RDC service. And then, you can set its startup type to automatic.
1. Press Windows + R key simultaneously, type services.msc and press enter.
2. Look for “Remote Desktop Connection” service. Right-Click on it and then choose restart option.
Also, if it solves your problem then open properties of it. And, then in startup type select ‘Automatic”.
Allow Edge Traversal.
This solution is suggested by a forum user. So, You can try it.
1. Open Control Panel and enable large icons view. (Click on then option next to View by.)
2. Click on “Windows Defender Firewall.
3. From the left side, click on “Advanced settings”.
4. Click on Inbound rules and then look for “Remote Desktop”.
5. Right-Click on it and then choose properties. In properties Window, click on “Advanced” tab.
6. In Edge Traversal section, select “Allow Edge Traversal” option using the drop-down menu. And, then click on OK to apply changes.
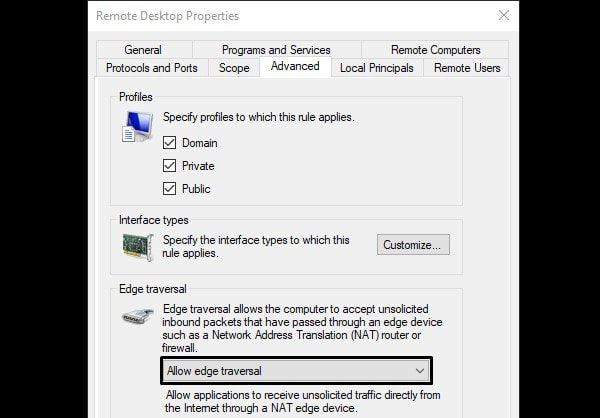
That’s it, and, this solution will solve “cannot connect to remote desktop” error.
Try Remote Desktop Connection Alternative.
If none of the above solutions able to fix “Windows 10 Remote Desktop Not Working” problem. Then, you can try some of its alternatives. One alternative, I have already mentioned “Remote Desktop Assistance”. Which you don’t need to download, it comes pre-installed with Windows. Also, if you don’t like it then try TeamViewer, it’s free for personal use. Or, you can read my article on “TeamViewer Alternative“.

In Windows 10 sometimes an error occurs in Remote Desktop Connection and because of this error, RDC fails to work.
Some of the users who are using the Remote Desktop feature faces the problem “remote desktop connection is not working anymore” Remote Desktop Connection or RDC is similar to the other features of Windows OS, it also depends upon its root services for execution.
You will notice that RDC stop working issue displays if any of the root services get unable to run.
Well, if you are the one who is facing the issue remote desktop connection not working windows 10, no need to worry about as we are here to help you out from this situation. This blog is for you only.
Thus, if you want to repair remote desktop windows 10, then without wasting time, just try out the below-given solutions one after another.
Why is My RDP Not Working?
There are several reasons for RDP not working in Windows 10. Here I am sharing some of the common ones. Many users are facing the error while trying to access another device remotely because Windows 10 restricted the access of another device or due to network connectivity errors.
Some users also reported that if there are any mismatch issues between the Windows Firewall than also the RDP connection issue appears.
Despite this, the antivirus program installed on the system can also cause the remote desktop connection not working issue in Windows 10.
So, here follow the given possible fixes to get rid of the Remote desktop has stopped working issue.
Method 1 – Allow Remote Desktop Via Windows Firewall
Sometimes remote desktop stopped working when Windows Firewall blocks it. To make sure that this service is blocked by a firewall or not you should check and allow it via Firewall by applying below given steps:
1: Go to the Control Panel and click Windows Firewall.
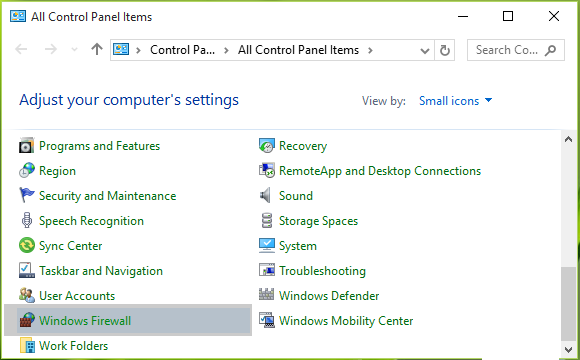
2: After it, click on the Allow an app or feature through Windows Firewall link present in the left pane.
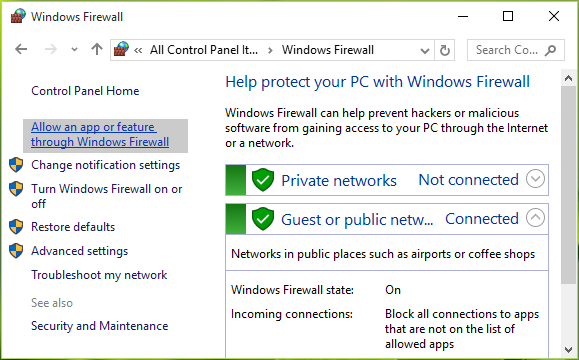
3: Navigate to the Allowed apps screen, click Change settings and then scroll down, check Remote Desktop entry in this list. Make sure that you’ve allowed this app for Public. Click OK.
After the completion of the above-given steps reboot your machine and it is hoped that the remote desktop stopped working issue must be fixed.
Method 2 – Check Dependency Services
1: Open the run dialogue box by pressing Windows + R and type services.msc in the Run dialog box, press Enter key to open Services snap-in.
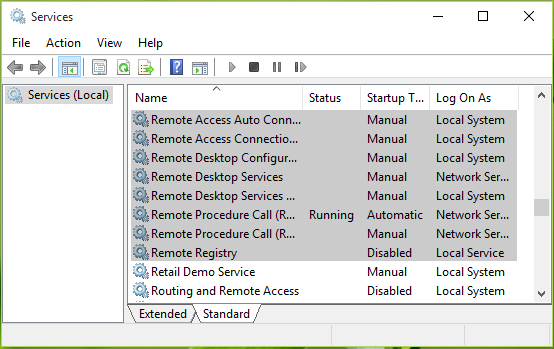
2: In the Services window, scroll down and check the status of all the service that contains “remote” term in their name. It is recommended that all of these services must be set either to Manual or Automatic plus none of them should have Disabled status. After the completion of this RDC will start working as expected.
Methods 3: Disable AutoLogin by Using Registry Editor
You can also try the registry editor in order to disable the autologin and that will definitely resolve remote desktop connection has stopped working windows 10.
1: First of all, you need to go to the “Search” bar and then type “Regedit”. After you see it in the search result, just open it.
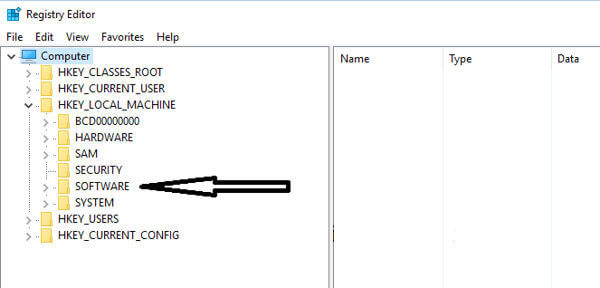
2: After this, you will see the Registry Editor window located in the left pane. Now, there you have to select HKEY_LOCAL_MACHINE.
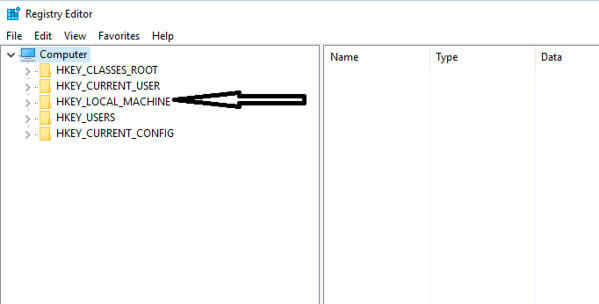
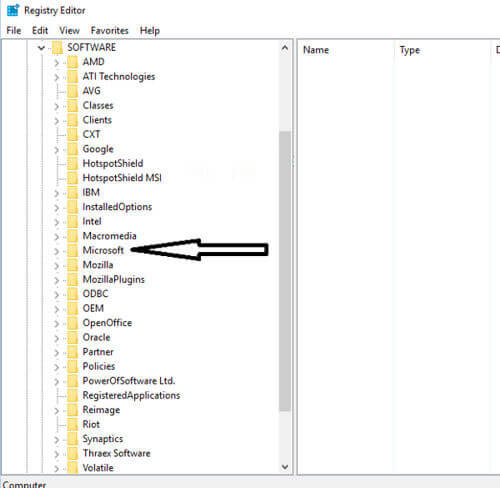
3: This will then reveal some of the folders before you do and then select “SOFTWARE” from the list to view their contents.
4: After this, try to look for “Microsoft” and then select it when you get.
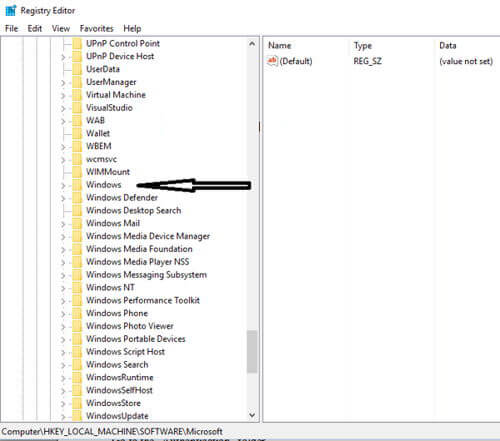
5: Now simply search for “Windows” in the sub-folders that lies at the very bottom of the parent’s folders when the list goes down in the alphabetic order.
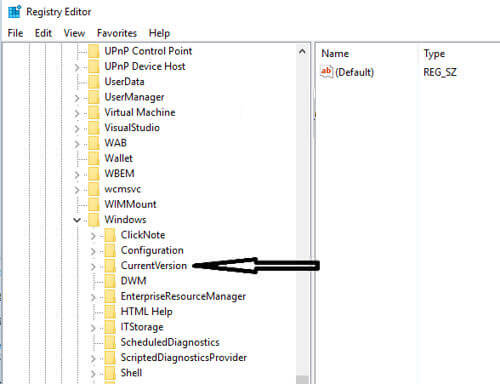
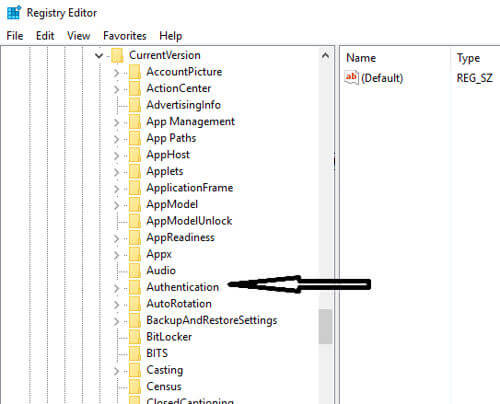
6: After this, you have to search for “CurrentVersion”.
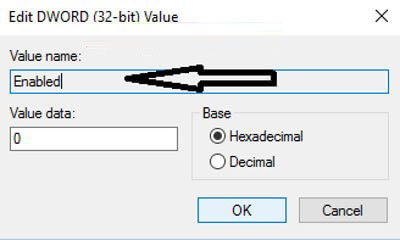
7: Now simply go to the folder named “Authentication”.
8: Now from there, select “LogonUI” just to view the content. When you see “user switch”, just click to edit this. There you will see “Enabled” written in the right pane which needs to be edited. Click this option and try to set it as “Disable” and set the value to zero.
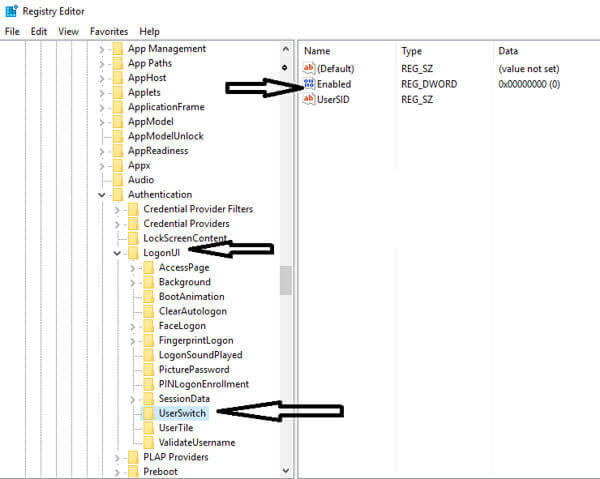
9: After this, just save the changes made by you by clicking “OK”.
With these steps, you will notice that this error does not exist anymore. So, you can then establish a smooth connection in Windows 10 with the remote desktop without any kind of interruptions.
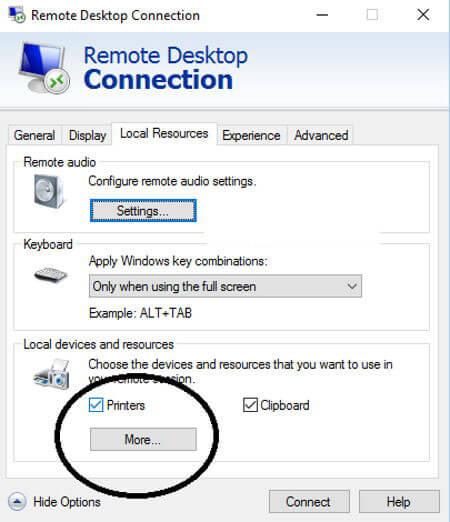
Method 4: Uncheck Printers Option in Remote Desktop Connection
If you notice that your connection crashes with the remote computer again and again then you should just uncheck the Printers option.
For this, you have to first go to Remote Desktop Connection with the use of a search bar. There, you will see its window where there is a category called “Local Devices and Resources” at the bottom of the screen.
You will there see a “Printer” option there and you will also notice that this option is marked by default. So, make sure that you uncheck this option and click “OK” to apply the changes.
Just try this and start connecting to the remote system that will definitely respond.
Method 5: Audio Playback in Settings
When you open the settings of Remote Desktop Connection, you will notice that the audio playback settings are by default ACTIVE for the remote computer. So, make sure that you disable these settings so that it could not damage the connection in any situation.
1: First of all, you have to go to the Search box and then type “Remote Desktop Connection” and then press the Enter key.
2: There you will see “Show Options” that are linked at the bottom. There, you just have to select this link to open the complete options.
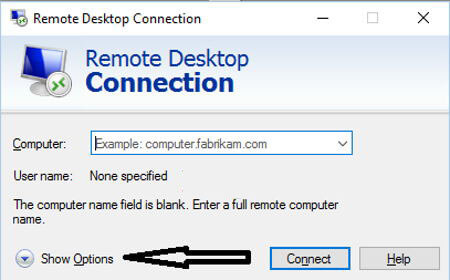
3: After this, you have to click the “Local Resources” tab that actually lies at the top of the window. There you will see the first category appears “Remote Audio”, make sure that you click the “Settings” tab in order to open the options.
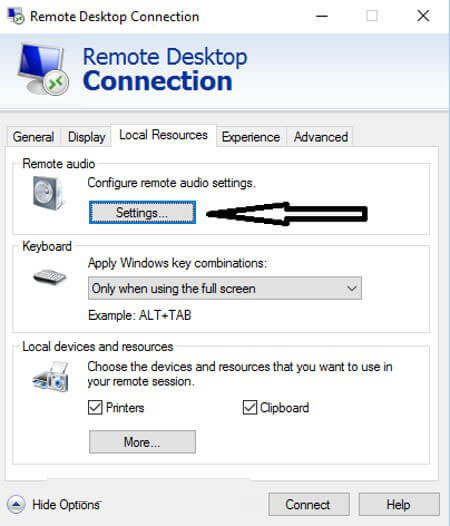
4: Now, you will see playback options where you have to select “Do not play” radio button and then click the option “OK”.
Method 6: Remove the Recently Installed Apps
It may happen that, due to the installation of any new app the feature of remote desktop gets corrupted. Thus, if you have installed some new app in your system, you should remove them to access the remote computer.
For example- FL studio is the best app that is used for music production, but there is more chance that it damages the connection between the Remote desktop and your computer. So, whenever you install FL studio it will install Vorbis.acm in your Windows system files.
You are required to check C:/Windows/System32 and look there for Vorbis.acm file. If this app exists there, you need to rename it as “Vorbis.acm.old” so that it cannot damage your system.
Well, manually uninstalling any program won’t remove the program completely some of its traces and registry entries are left behind. so it is best to use the third party uninstaller to remove the program completely.
Get Revo Uninstaller to remove the program completely
Method 7: Rename Bitmapped Images
If you want to resolve remote desktop connection stopped working windows 10 issue, firstly you are required to back up your previously used bitmap images.
When you will continue establishing a remote connection with your computer having the same setup the ‘Terminal Server Client‘ will saves the copy of images in your system.
How to do so:
- Press “Windows + R” to open the dialog box “Run“.
- Now type “%USERPROFILE%\AppData\Local\Microsoft\Terminal Server Client\Cache.”
- Here you will get some bitmaps files which should be renamed as “.bmc.old.”
- Now, try to connect them.
Try the above-given solutions to fix Remote Desktop Connection Stop working issue.
Best & Easy Solution to Fix Remote Desktop Connection Has Stopped Working
If the above manual solutions fail to work or if after Resolving the Remote Desktop Connection has stopped working issue your device runs slow then you can try the Window Repair Tool. This is a very advanced tool that detects the issue very easily by scanning once and thus fix the various errors of Windows 10.
With the help of this tool, you can fix any kind of error issue such as- application errors, registry corruption, DLL errors, damaged files or other common issues. The best thing is that it is very easy to use, moreover, it not only fixes the errors but also optimizes the Windows PC performance.
Get Windows Repair Tool to Fix Remote Desktop Connection Has Stopped Working
Conclusion
After trying the above all methods, you can easily resolve Remote Desktop Connection has stopped working error in Windows 10. All these methods are very easy to apply so that you can try it without any technical help.
However, if you are unable to follow the given manual solutions than feel free to run the Windows repair tool to fix the remote desktop connection not working Windows 10 error.
Hopefully, the above-given solutions will help you to get rid of RDC stop working issue.
Good Luck…!!
Hardeep has always been a Windows lover ever since she got her hands on her first Windows XP PC. She has always been enthusiastic about technological stuff, especially Artificial Intelligence (AI) computing. Before joining PC Error Fix, she worked as a freelancer and worked on numerous technical projects.