
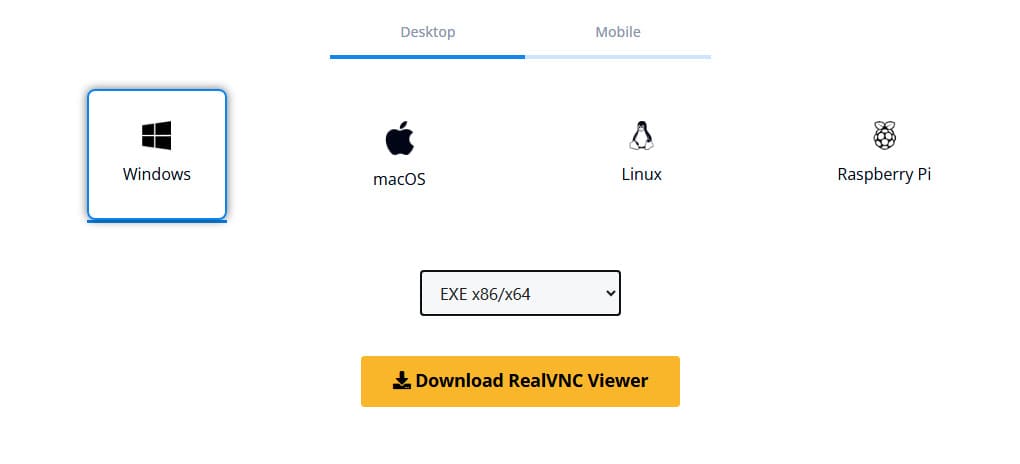
Download VNC Server for Windows to the devices you want to control.
For the best experience, install RealVNC® Viewer and RealVNC® Server
together using the RealVNC® Connect Setup app.
-
Desktop
-
Mobile
iOS
Scan me for the App Store
Android
Scan me for the Play Store
Thank you for downloading
Your download of VNC Server for has started.
Looking for RealVNC Viewer and RealVNC Server?
Streamline your setup experience with our RealVNC Connect Setup app
that helps you install both RealVNC Viewer and RealVNC Server in one go.
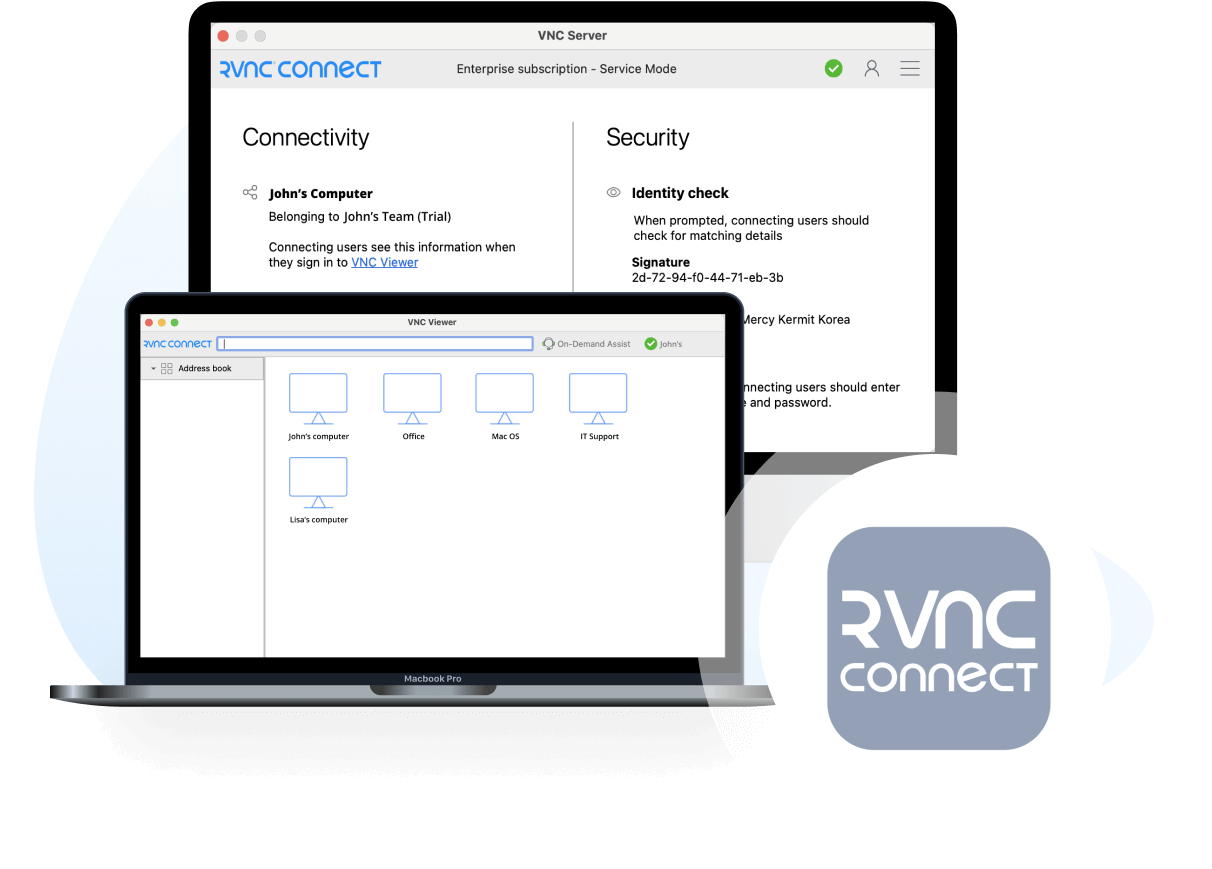
Get the full VNC® Connect experience
VNC Viewer and VNC Server are designed to work best together.
Use them both to experience enhanced security, more reliable connections, and access to exclusive features within VNC Connect.
Get started in three easy steps
1. Download
Install VNC Server on your remote devices.
2. Sign in/up
Sign in or Create an account (and claim a free 14-day trial).
3. Setup and Connect
Install VNC Viewer on your device and connect.
See how easy VNC Connect is to use
-
How to get started
How to get started with RealVNC Connect remote access
In this video, we’ll show you how quick and easy it is to get your first screen sharing session up and running using RealVNC Connect.
Tutorial: How to get started with RealVNC Connect remote access
Starting to use RealVNC Connect couldn’t be easier. You just need to create an account and get a free trial (no credit card required).
This video will show you how to provide unattended access to your Windows, Linux or Mac computer.
You will now be able to control your computer easily from anywhere in the world. If you want to continue to use the software after the 14-day trial, you can continue to do so seamlessly after buying a subscription.
Related downloads
Policy template files
Remotely configure and lock down programs using policy.
Frequently asked questions
Didn’t find the answer you were after? Check out our Help Center for more FAQs, technical docs and how-to guides.
VNC® Connect is the latest version of our remote access software for personal and commercial use. It consists of a VNC® Server app for the computer you want to control, which must be licensed, and a VNC® Viewer app that you are free to download to all the devices you want to control from.
The easiest thing to do is to run the installer on the computer you want to control and follow the instructions. For system administrators with an Enterprise subscription, there’s a range of deployment options.
Yes. Please contact support for more details.
Try VNC Connect today for free
В этой статье разберем, как подключиться к удалённому компьютеру для управления и наблюдения за ним. Для этого будем использовать приложение RealVNC, которая обеспечивает простую настройку удалённого доступа.
Приобрести оригинальные ключи активации Windows 11 можно у нас в каталоге от 1690 ₽
Шаг 1: Скачивание и установка VNC Viewer
1) Перейдите на официальный сайт RealVNC и скачайте VNC Viewer для вашей операционной системы.
Или скачайте VNC Viewer под windows напрямую с нашего сервера.
2) Установите приложение, следуя инструкциям мастера установки:
— Нажмите Далее.

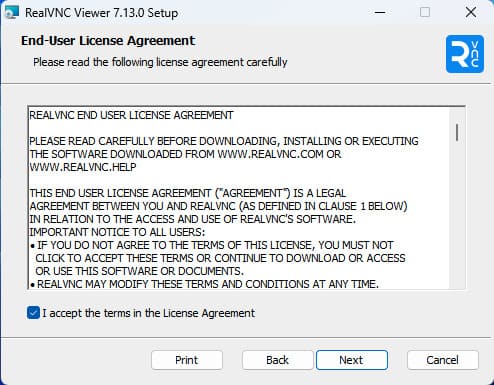
— Примите лицензионное соглашение, нажав Accept.
— Завершите установку.
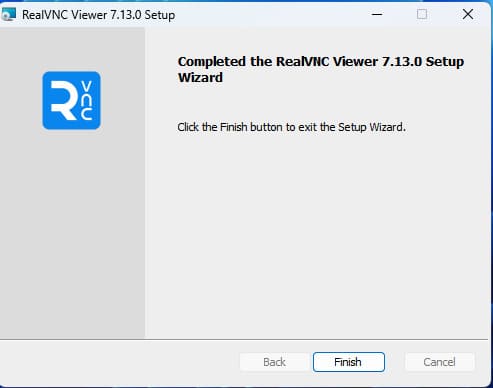
3) Запустите VNC Viewer.
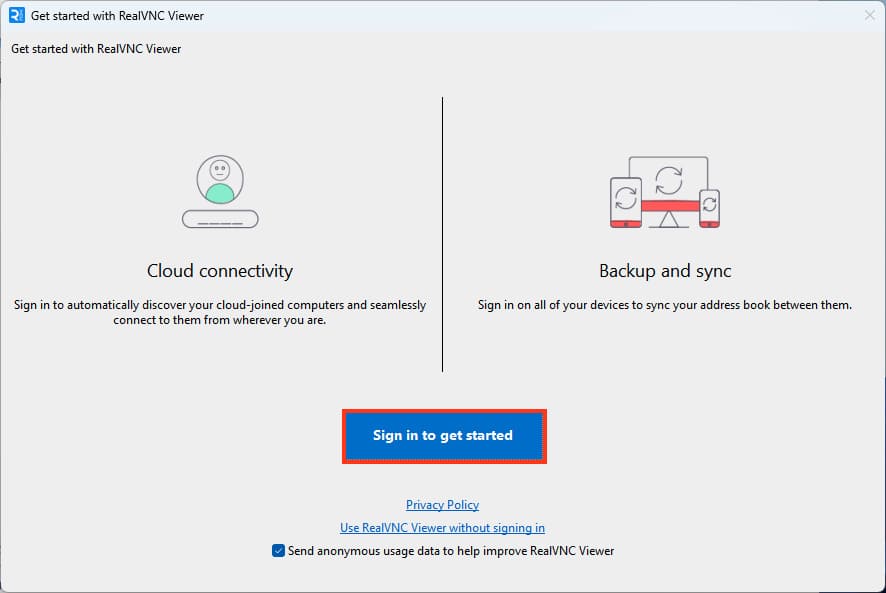
Шаг 2: Регистрация в VNC Viewer
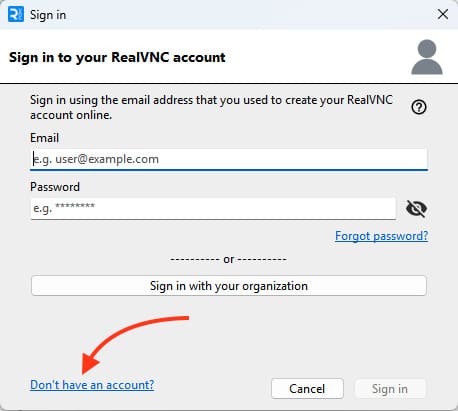
1) При первом запуске вам будет предложено войти в аккаунт или зарегистрироваться. Выберите Sign in to get started.
— Нажмите Don’t have an account для того чтобы начать регистрацию.
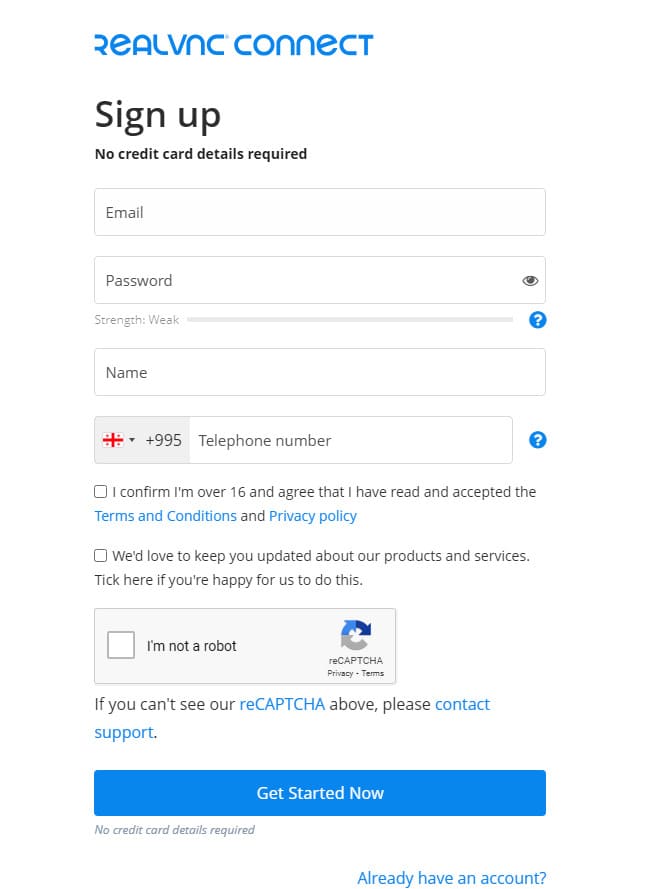
2) Заполните форму регистрации, указав вашу электронную почту и пароль (телефон указывать необязательно).
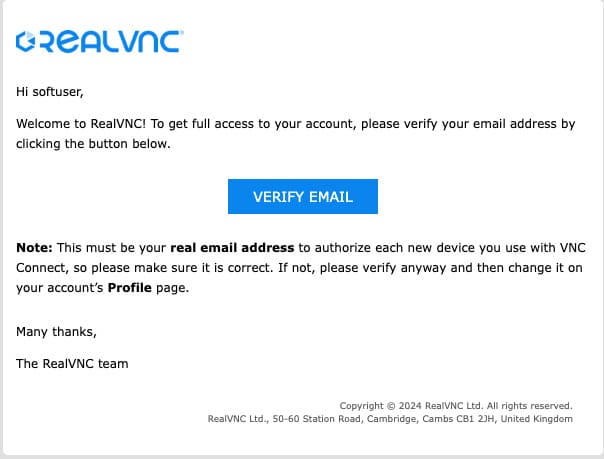
3) Проверьте электронную почту и подтвердите регистрацию, перейдя по ссылке в письме.
Шаг 3: Вход в VNC Viewer
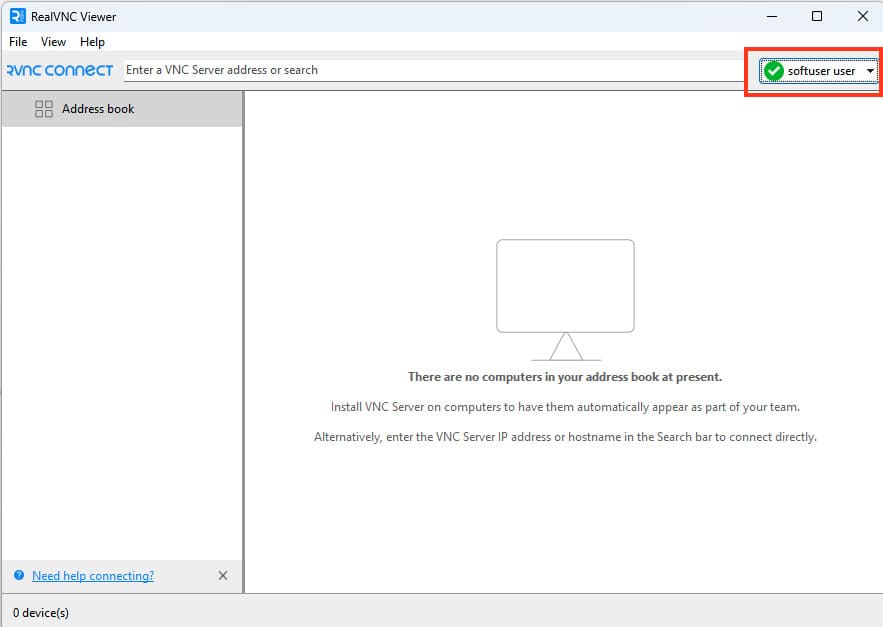
1) После подтверждения регистрации войдите в VNC Viewer под созданным аккаунтом.
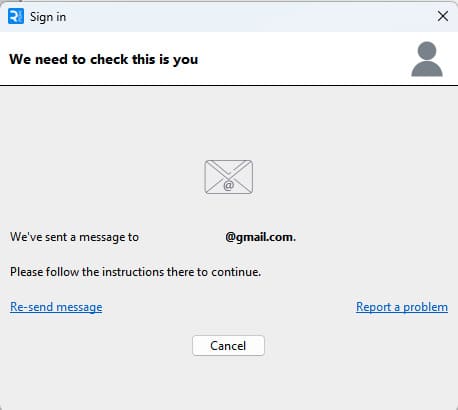
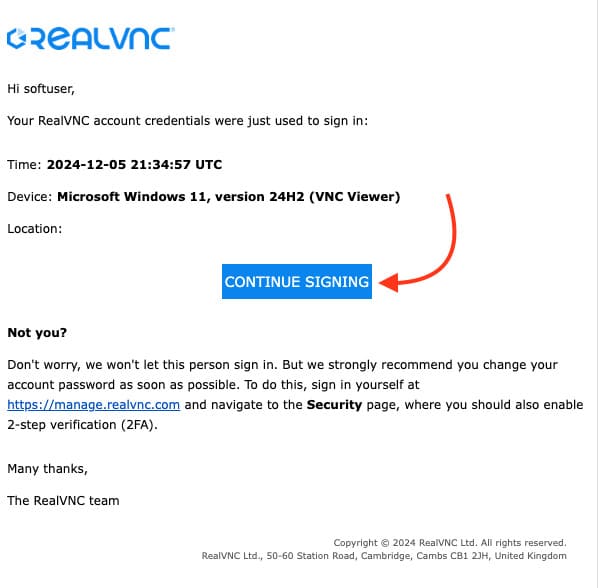
2) Приложение запросит подтверждение авторизации на электронную почту. Проверьте письмо и подтвердите вход.
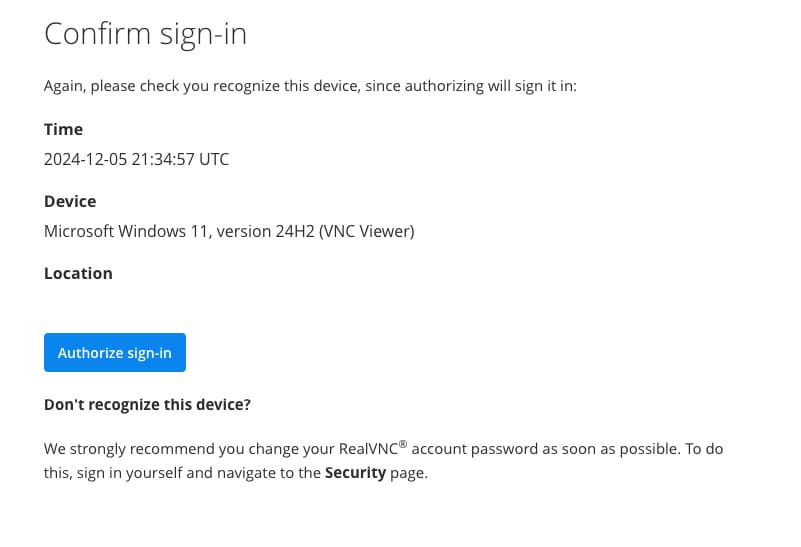
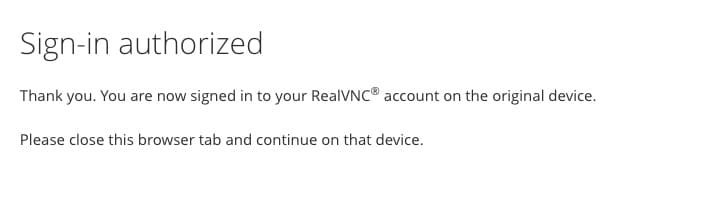
3) В правом верхнем углу появится зелёная галочка, подтверждающая, что всё активно.
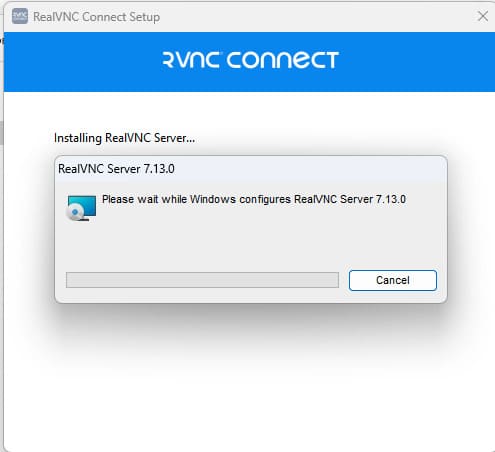
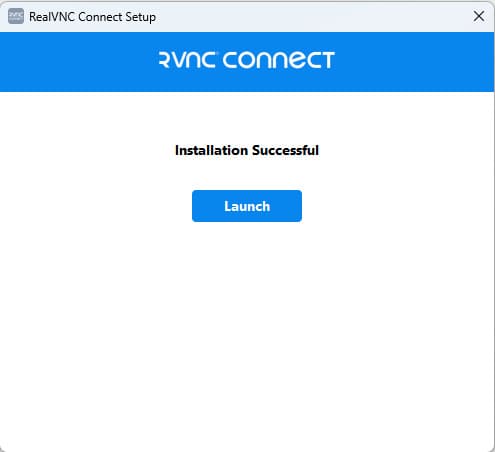
Шаг 4: Скачивание и установка VNC Connect (Server)
Важно: Устанавливать сервер нужно именно на машину, которую планируется удалённо контролировать.
1) Скачайте VNC Connect с официального сайта RealVNC.
Или скачайте VNC Connect под windows напрямую с нашего сервера.

2) Установите приложение, следуя стандартной процедуре.
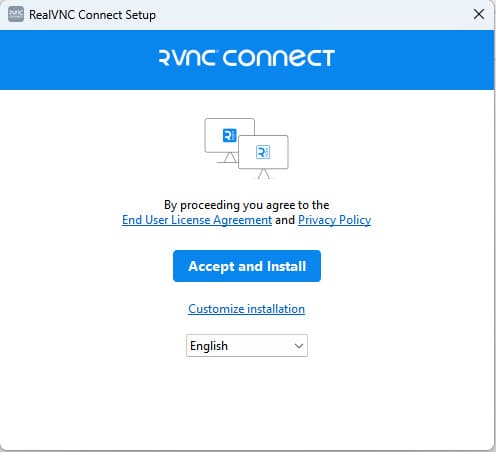
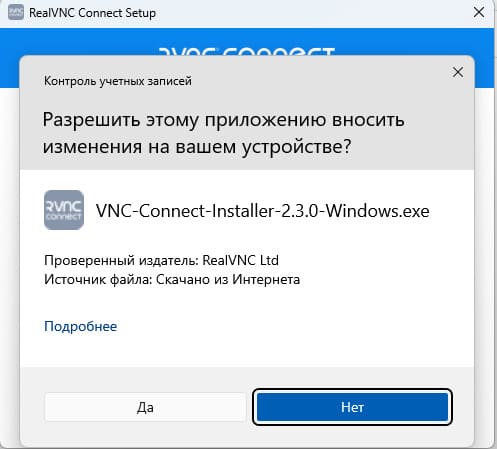
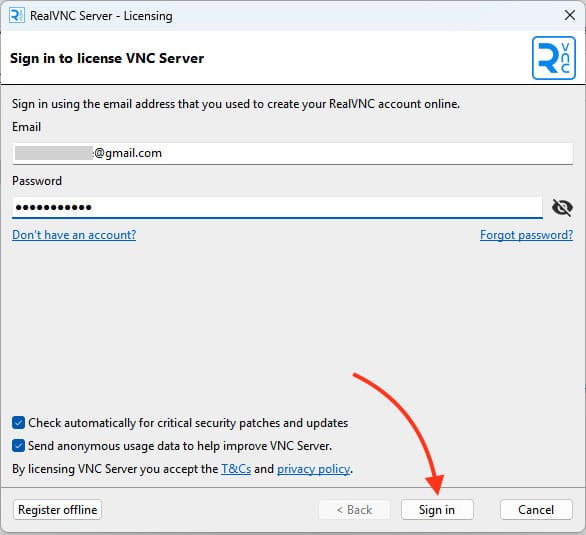
3) Войдите под ранее созданным аккаунтом.
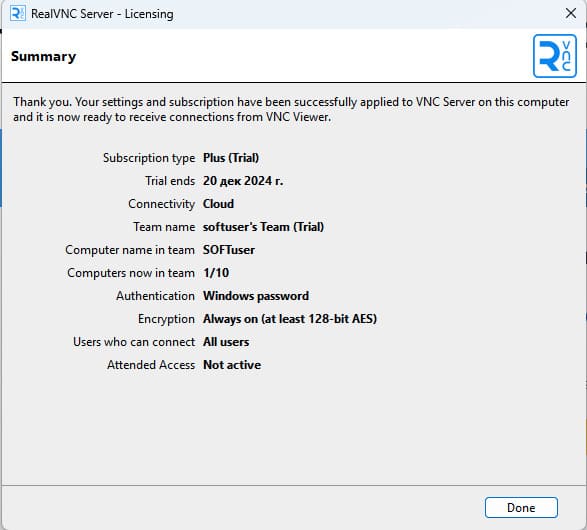
Шаг 5: Активация триал-версии
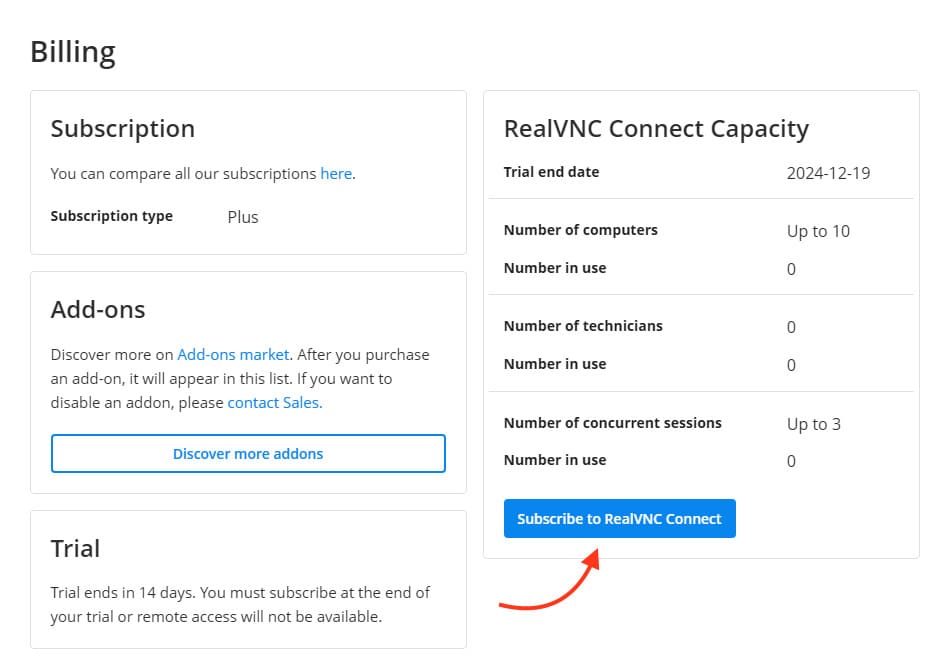
1) Если приложение выдает ошибку об отсутствии подписки, нажмите «Попробовать триал».

2) Вас перенаправят на сайт RealVNC, где нужно выбрать версию (в нашем случае мы выбрали Essential).
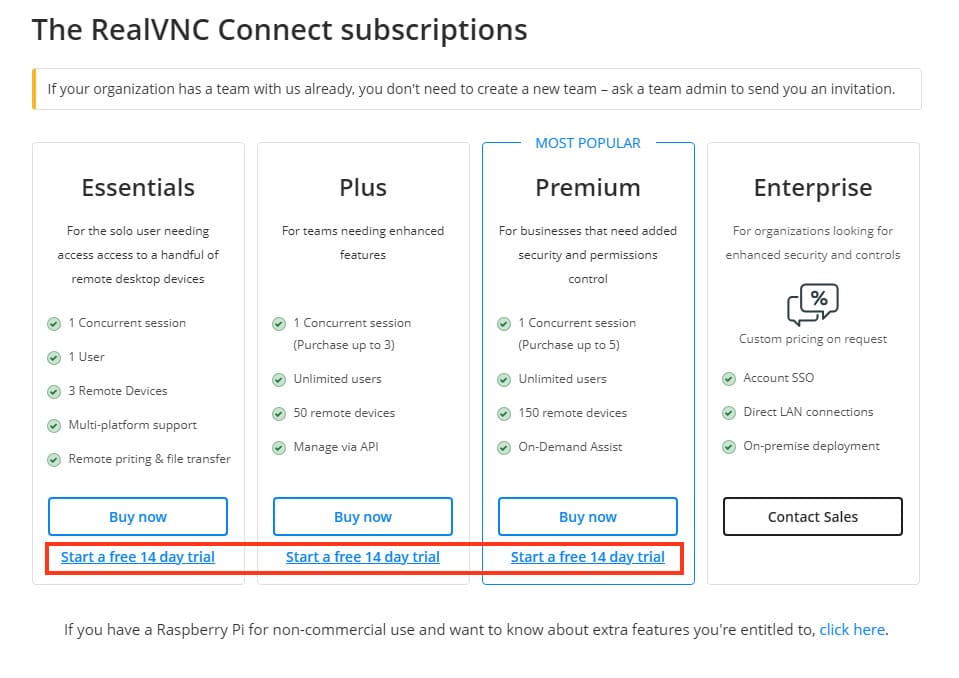
3) Нажмите Start a free 14-day trial, а затем подтвердите, нажав Subscribe to RealVNC Connect.
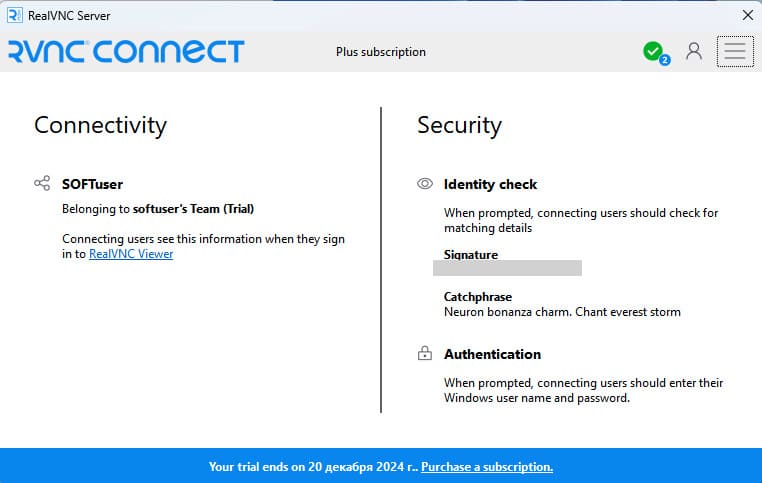
Шаг 6: Настройка VNC Connect
1) Войдите в VNC Connect повторно под своим аккаунтом.
2) Выберите способ аутентификации:
— Windows Password (вход с паролем от учётной записи Windows).
— VNC Password (рекомендуется для большей стабильности).
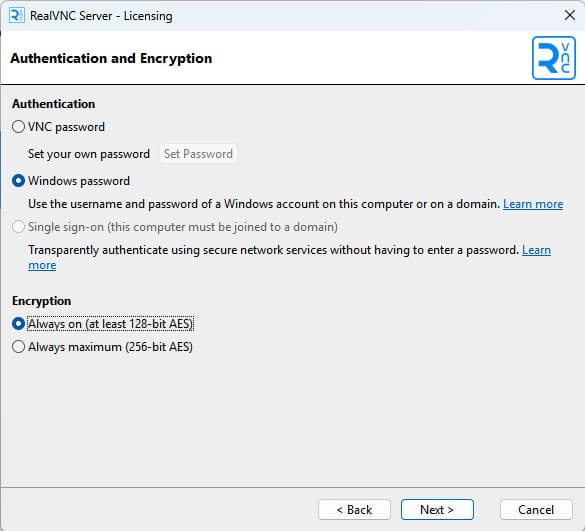
3) Если выбрали VNC Password:
— Задайте пароль для подключения.
— Укажите, кто может подключаться к компьютеру: все пользователи, только администратор или определённый пользователь.

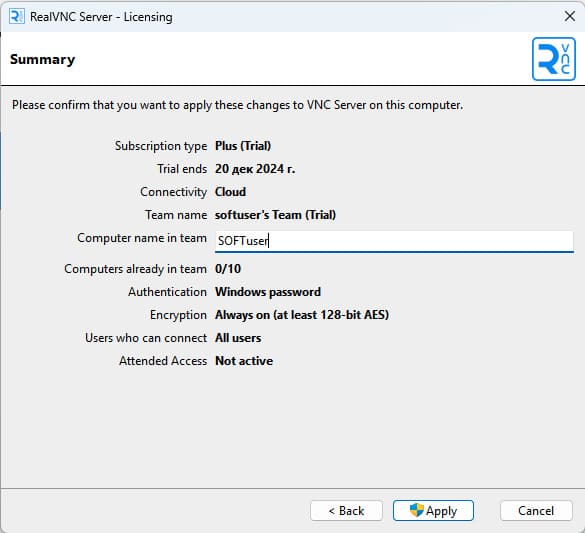
4) Введите имя сервера, чтобы завершить настройку.
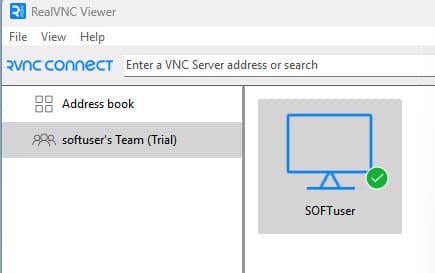
Шаг 7: Подключение через VNC Viewer
1) Перейдите на компьютер, где установлен VNC Viewer.
2) В главном меню вы увидите добавленный сервер, ваш ПК.
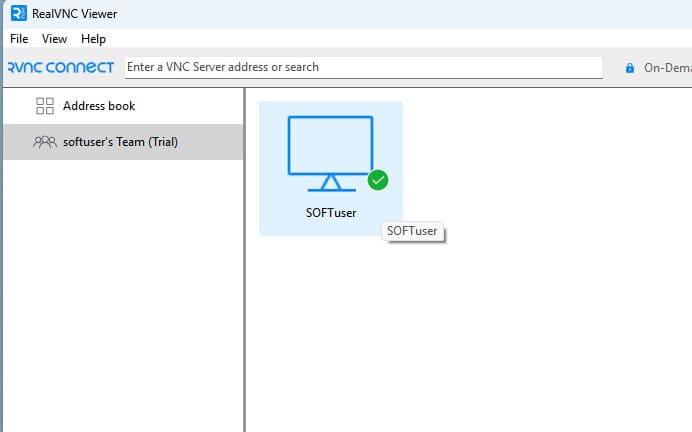
3) Дважды щёлкните по нему для подключения.
4) Введите логин и пароль:
— Если выбран Windows Password, используйте имя пользователя и пароль от Windows.
— Если выбран VNC Password, введите ранее созданный пароль.
Шаг 8: Решение проблем с подключением
Если вы не можете подключиться при вводе пароля от Windows:
1) Перейдите в настройки VNC Connect (Server).
2) В разделе Security измените параметр Authentication на VNC Password.
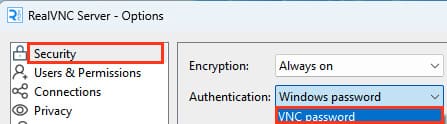
3) Нажмите Apply и задайте новый пароль.
4) Попробуйте подключиться снова, используя этот пароль.
В этот раз все должно пройти успешно и вы окажетесь на рабочем столе вашего другого ПК.
Дополнительные настройки
— Если нужно добавить устройство, не связанное с вашим аккаунтом, используйте IP-адрес удалённого компьютера.
— Для пассивного наблюдения за компьютером (без возможности управления) установите галочку «Просмотр» в настройках подключения.
Теперь вы успешно подключились к удалённому рабочему столу с помощью VNC Viewer и VNC Connect. Этот инструмент идеально подходит для управления компьютерами в локальной сети или через интернет.
Download TightVNC for Windows (Version 2.8.85)
TightVNC 2.8.85
runs on Windows XP and all later versions (see more details
here).
- Installer for Windows (64-bit)
(2,531,328 bytes) - Installer for Windows (32-bit)
(2,101,248 bytes) - download the GPL-licensed C++ source code
(3,017,746 bytes)
See What’s New in TightVNC 2.8.85 and all
previous versions.
Improved Viewer for Many Systems and Platforms
Remote Ripple is a free, cross-platform remote desktop viewer designed with
user-friendliness in mind and powered by our
Remote Core SDK.
As a newly released software, it may not have all the features of TightVNC Viewer, such as
listening mode. However, we are committed to actively developing and improving it. Give it a
try and let us know how we can make it even better for you!
Download Remote Ripple, our modern VNC client for Windows, Mac, iOS and Android
Need Monitoring and Managing Many VNC Remote Desktops?
Try MightyViewer, our Multi VNC Viewer for Windows. It shows many live remote desktops
together, allowing to take over one of them when needed. Use it for monitoring computer
classes, controlling factory hardware, managing remote desktops, administering users’ PCs,
and so on.
Download MightyViewer for Windows
(free download, no registration, no obligations)
TightVNC Licensing Terms
There are two licensing options available for TightVNC 2.x software:
- GNU GPL (GNU General
Public License version 2) — completely free but does not allow mixing with
closed-source products. - Commercial source code license. Unlike GPL, it allows integrating the software into
proprietary products, although it’s not free. Read more
about commercial licensing.
Older Versions of TightVNC
If you need a version working in Windows 95/98/ME, Windows NT 4.0, or in Unix-like systems
(including Linux), download TightVNC 1.3.10.
What is VNC?
VNC stands for Virtual Network Computing. It is a graphical desktop sharing system that allows you to remotely control and access a computer’s desktop environment over a network connection. With VNC, you can view and interact with the desktop of a remote computer from almost any location as if you were sitting in front of it.
VNC works by transmitting the graphical display of the remote computer and relaying user input from the local computer to the remote system. This enables you to control the remote computer’s mouse, keyboard, and other input devices, and see the remote desktop environment in real-time on your local machine.
Common Uses of VNC
VNC works by transmitting the graphical display of the remote computer and relaying user input from the local computer to the remote system. This enables you to control the remote computer’s mouse, keyboard, and other input devices, and see the remote desktop environment in real-time on your local machine.
Cross-Platform Remote Access: VNC allows you to access and control a remote computer from anywhere with an internet connection. This flexibility is valuable for individuals and businesses that need to access their computers or servers remotely, whether for work, administration, or support purposes. VNC is platform-independent, meaning it can be used to access and control computers running different operating systems, such as Windows, macOS, Linux, and Unix. This cross-platform compatibility allows you to connect to and interact with computers regardless of the operating system they are running.
Team Collaboration: VNC facilitates collaboration by allowing multiple users to connect to and view a remote desktop simultaneously. This feature is particularly useful for remote teams, as it enables colleagues to work together, share ideas, and collaborate on projects in real-time.
Troubleshooting and Support: VNC is commonly used by IT support professionals to remotely troubleshoot and fix issues on users’ computers. With VNC, support personnel can view the user’s desktop and interact with it as if they were physically present, making it easier to diagnose and resolve technical problems.
Cons of VNC
While VNC (Virtual Network Computing) is a widely used remote desktop protocol, it also has some limitations and drawbacks.
VNC can be bandwidth-intensive, especially when transmitting graphical data. This can result in slower performance and increased latency, particularly over slower or unreliable network connections. The user experience may suffer if there is significant lag or reduced responsiveness.
VNC has had security vulnerabilities in the past, making it potentially susceptible to unauthorized access or attacks. If not properly configured, VNC can pose security risks, such as weak encryption or authentication methods. It is crucial to implement strong security measures and keep the VNC software up to date to mitigate these risks.
Popular VNC Software
There are various VNC software implementations available, both open-source and commercial, that provide the necessary server and client components to establish VNC connections. Some popular VNC software includes RealVNC, TightVNC, UltraVNC, and TigerVNC.
Prerequisites
You already get the server login credentials
Once your server is deployed, the login credentials are usually sent to your registered email. You can also get server login information, including username, password, and port in the Database Mart control panel, please refer to guide on how to manage servers in Database Mart control panel.
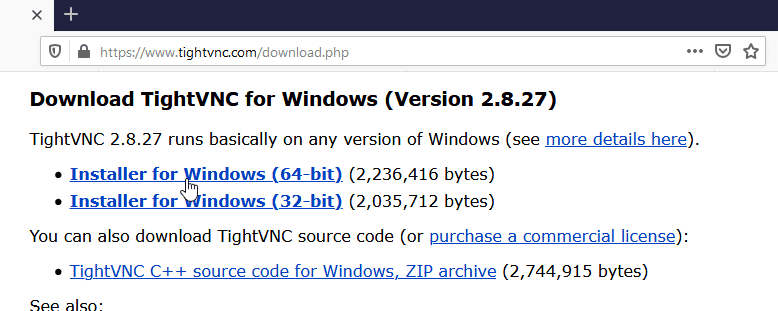
1. Install VNC on the Remote Windows Server
There are various VNC software. In this example, we will use TightVNC for demonstration. Search TightVNC server in browser. And click in to the TightVNC website.
Then, click the Get your free copy of TightVNC, followed by clicking the Installer for Windows. As the remote Windows server is 64-bit, we will choose the 64-bit version.
Once the file is downloaded, you can execute it to start the installation.
On the TightVNC Setup Wizard windows, click Next.
Check to accept the terms in the License agreement and click Next.
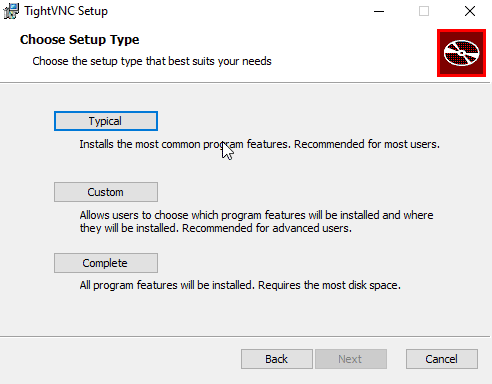
Choosing the Typical setup would be fine.
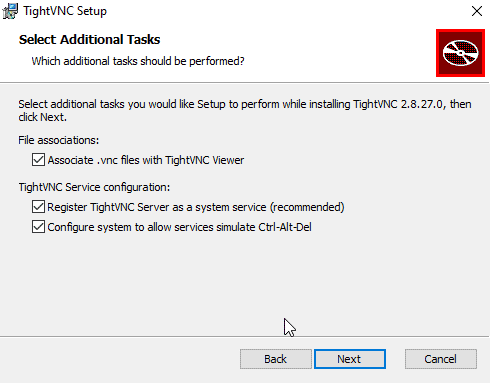
Here, we will keep the default options.
Finally, click Install to begin the installation process.
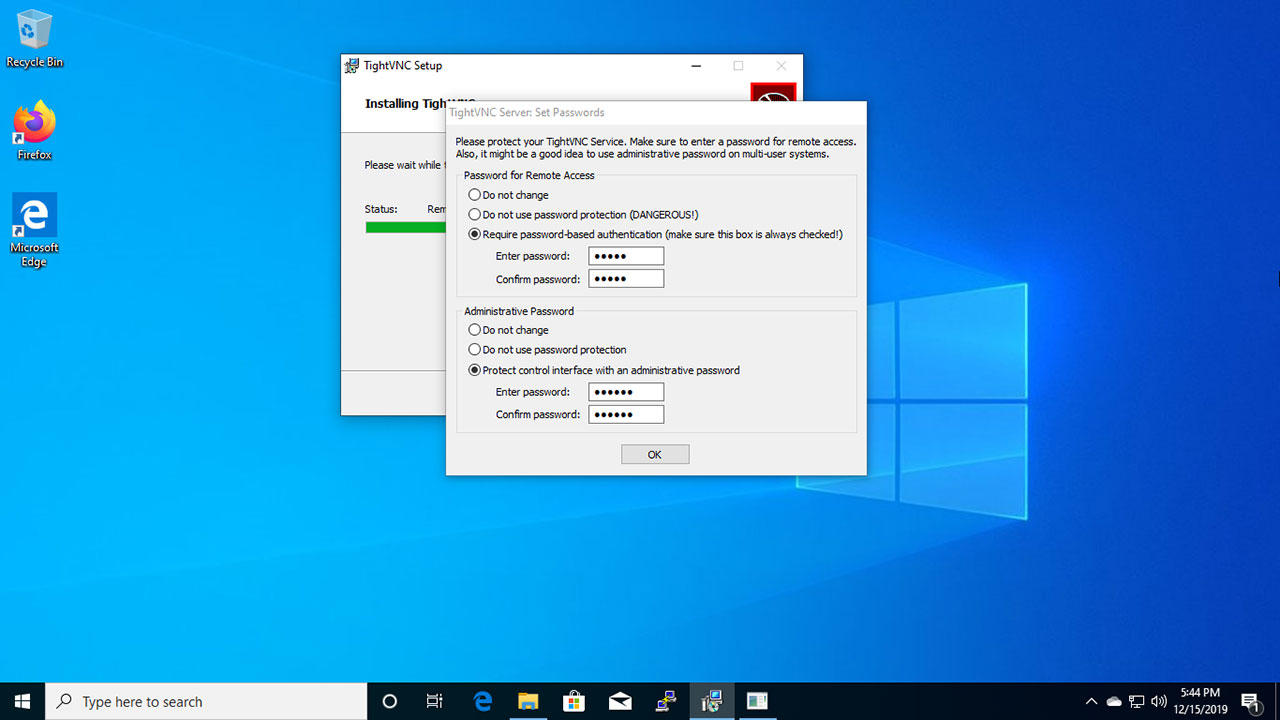
In this window, you are prompted to set the password for accessing the remote Windows server using VNC viewer. You can also set an administrative password for managing the VNC server.
After that, click Finish and the VNC server is installed.
2. Make sure to allow the VNC Server through Windows firewall of the Remote Windows Server
Normally, after the installation, an inbound rule for TightVNC is added to allow the VNC access. You can go to the Windows Firewall with Advanced Security to check the inbound rule.
Search Windows Firewall with Advanced Security and open the program.
Click the Inbound Rules on the left panel.
Locate the TightVNC. Then right-click it and click properties to view the firewall configurations.
3. Install VNC Viewer on you local devices
Now you need to install a VNC viewer on the device where you would like to initiate the connection. This is so that you can connect to the remote server from you local devices. In this instance, we use a Windows desktop.
Search for VNC viewer in the browser and click into the site. Here, we use the Real VNC as an example.
Choose Windows desktop and click Donwload VNC Viewer.
Once the file is downloaded, double-click it to start the installation. First, select the language you would like to use during the installation and click OK. Then, click Next to start the installation process.
Read the license agreement carefully and check to accept the terms, followed by clicking Next.
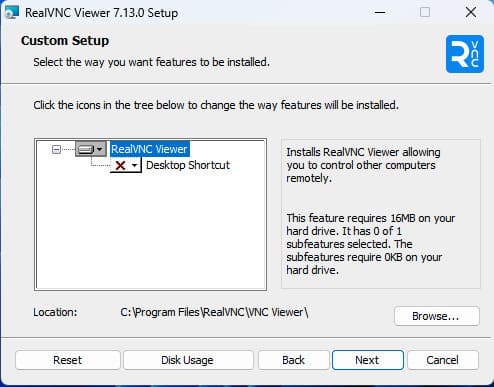
In the Custom Setup window, choose the feature you’d like to install and customize the location where you prefer to keep the file. Then click next to continue.
In this window, click Install to begin the VNC Viewer installation.
4. Use VNC to access the remote Windows server
Search VNC Viewer from the start menu and open the program.
Input your email and password to sign in to your RealVNC account. If you haven’t registered an account, clicking Cancle would be fine.
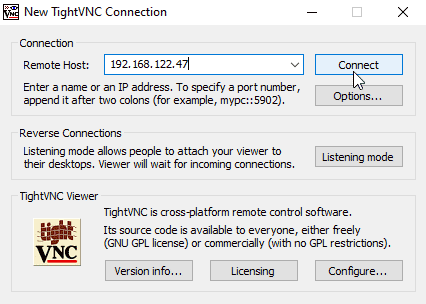
Click File > New connection at the top left corner.
After that, input the IP of your Remote Windows server and click OK.
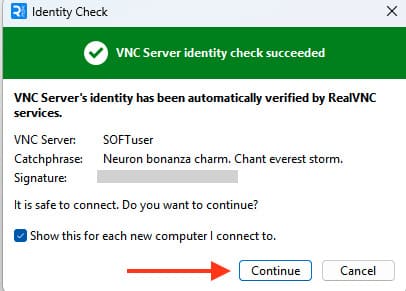
You should see the connection is added. Right-click it and choose Connect.
After that, click Continue in the pop-up window.
Then, you will be prompted to input the password for accessing the VNC server. This is the password you set during the VNC server installation.
When you reach here, you have connected to the server successfully.
Move the mouse to the top of the screen, you can pull the tab down, where you can perform various functions, like zoom in and zoom out.
Click the send Ctrl + Alt + Del to unlock the screen. You will need to input the password for the administrator account on the remote server. With the password authentication passed, you should be logged in to your remote server as below.
Wrap up
By following these steps, you can harness the convenience and flexibility of VNC to connect to remote servers with ease and efficiency. Remember to prioritize security by implementing encryption, strong passwords, and limiting remote access to authorized users. While VNC can be a powerful tool for remote server management, it’s crucial to stay vigilant and keep the software up to date to address any potential security vulnerabilities.
n this tutorial, we are going to install VNC server on Windows 10, which can enable you to connect to your Windows 10 PC from a remote computer. The VNC (Virtual Network Computing) is a great choice if you need a free alternative to the Windows Remote Desktop (RDP).
Installing TightVNC Server On Windows 10
There are several free VNC servers available for Windows 10, we are going to use TightVNC software.
First, Download TightVNC Server from http://tightvnc.com/download.php.
Run the setup file and continue with the Typical install option.
TightVNC should be set to run as a system service.
Set Passwords for Remote Access and control interface.
That’s all we need to do. VNC Server on Windows 10 listen on port 5900. The TightVNC server automatically configures Windows Firewall to allow incoming connections, so you don’t need to worry about Windows firewall.
Connecting to the desktop remotely
On the remote computer, a VNC viewer should be installed. There are several VNC viewers available, you can use the TightVNC viewer which is available for Windows, Linux and macOS.
Enter your Windows 10 computer’s IP address to connect.
The user will then be prompted for their remote access password.
We can reset Remote Access password from the Control interface. Double click the VNC Tray icon to open the Control interface.
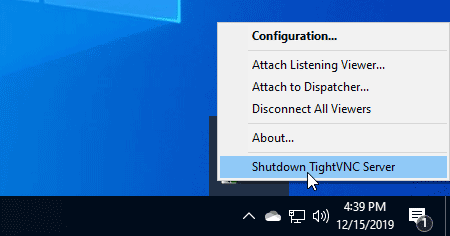
Starting and Stopping VNC Server
To Stop VNC Server, right click the VNC icon on the Windows tray bar and click «Shutdown TightVNC Server».
To Start VNC, Go to Start Menu and click «Start TightVNC Service».