
Download VNC Server for Windows to the devices you want to control.
For the best experience, install RealVNC® Viewer and RealVNC® Server
together using the RealVNC® Connect Setup app.
-
Desktop
-
Mobile
iOS
Scan me for the App Store
Android
Scan me for the Play Store
Thank you for downloading
Your download of VNC Server for has started.
Now create an account to manage your devices and get a 14-day free trial to access all VNC Connect features.
Looking for RealVNC Viewer and RealVNC Server?
Streamline your setup experience with our RealVNC Connect Setup app
that helps you install both RealVNC Viewer and RealVNC Server in one go.
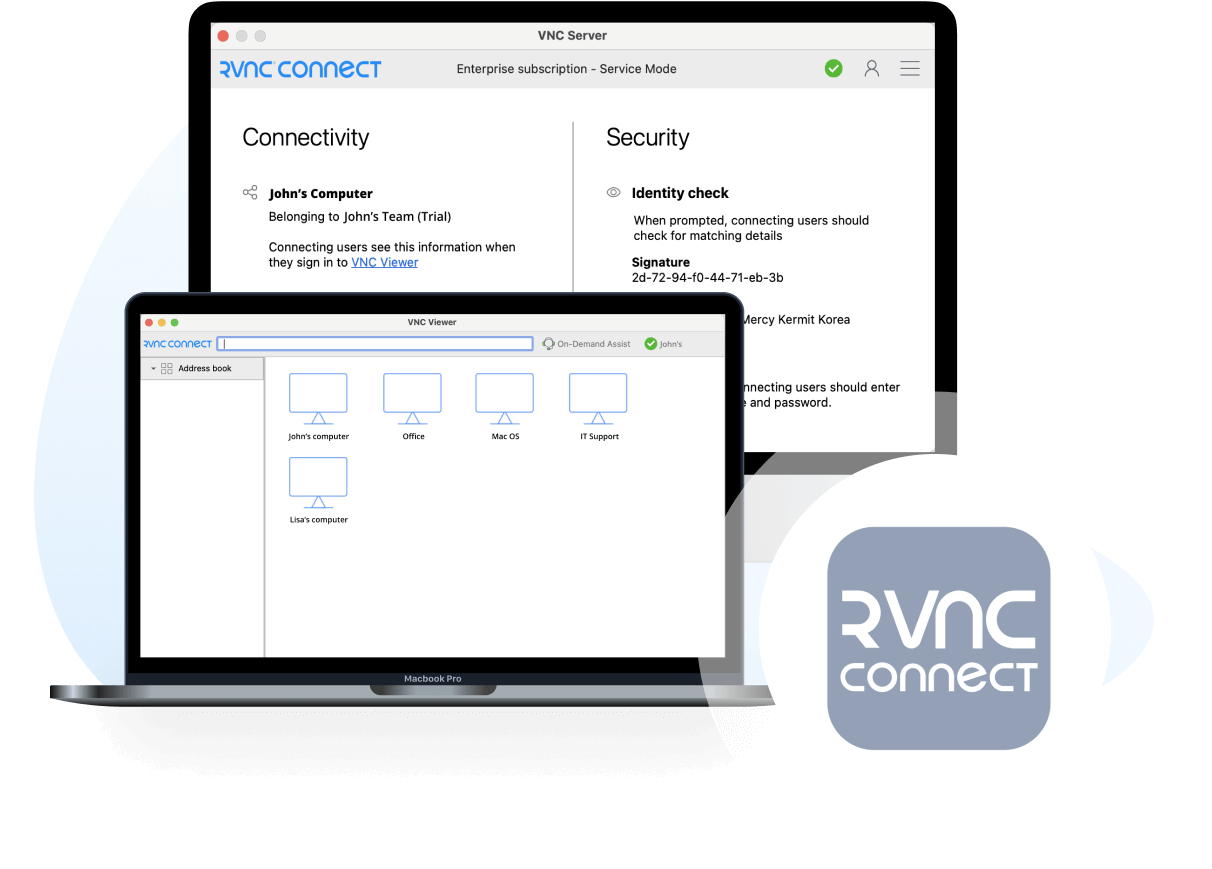
Get the full VNC® Connect experience
VNC Viewer and VNC Server are designed to work best together.
Use them both to experience enhanced security, more reliable connections, and access to exclusive features within VNC Connect.
Get started in three easy steps
1. Download
Install VNC Server on your remote devices.
2. Sign in/up
Sign in or Create an account (and claim a free 14-day trial).
3. Setup and Connect
Install VNC Viewer on your device and connect.
See how easy VNC Connect is to use
-
How to get started
How to get started with RealVNC Connect remote access
In this video, we’ll show you how quick and easy it is to get your first screen sharing session up and running using RealVNC Connect.
Tutorial: How to get started with RealVNC Connect remote access
Starting to use RealVNC Connect couldn’t be easier. You just need to create an account and get a free trial (no credit card required).
This video will show you how to provide unattended access to your Windows, Linux or Mac computer.
You will now be able to control your computer easily from anywhere in the world. If you want to continue to use the software after the 14-day trial, you can continue to do so seamlessly after buying a subscription.
Related downloads
Policy template files
Remotely configure and lock down programs using policy.
Frequently asked questions
Didn’t find the answer you were after? Check out our Help Center for more FAQs, technical docs and how-to guides.
VNC® Connect is the latest version of our remote access software for personal and commercial use. It consists of a VNC® Server app for the computer you want to control, which must be licensed, and a VNC® Viewer app that you are free to download to all the devices you want to control from.
The easiest thing to do is to run the installer on the computer you want to control and follow the instructions. For system administrators with an Enterprise subscription, there’s a range of deployment options.
Yes. Please contact support for more details.
Try VNC Connect today for free
Время на прочтение4 мин
Количество просмотров715K
Работа с VNC-клиентом. Материал ориентирован на неопытного пользователя.
1. Установка VNC-клиента
2. Подключение VNC-клиента к удаленному компьютеру
3. Отключение VNC-клиента от удаленного компьютера
4. Тюнинг VNC-клиента
5. Частые проблемы
Для работы с удаленным компьютером по VNC на компьютере пользователя нужно запустить программу-клиент (VNC viewer, VNC client). Эта программа передает на удаленный компьютер данные о нажатиях на клавиши и о движениях мыши, сделанных пользователем, и показывает информацию, предназначенную к выводу на экран.
1. Установка VNC-клиента
Для ОС Windows можно бесплатно скачать и инсталлировать VNC-клиент UltraVNC и TightVNC.
Mac OS X начиная с версии 10.5 имеет поддержку VNC-клиента в RemoteDesktop. Для предыдущих версий можно использовать VNC-клиенты JollysFastVNC и Chicken.
Для Linux ветви Debian (Ubuntu) VNC-клиент устанавливается из репозитория командой:
apt-get install vncviewer
Для ветви RedHat (CentOS, Fedora) — командой:
yum install vnc
Для FreeBSD VNC-клиент (TightVNC) устанавливается из пакетов командой:
pkg_add -r tightvnc
2. Подключение VNC-клиента к удаленному компьютеру
Для подключения VNC-клиента к удаленному компьютеру требуется указать его IP-адрес или DNS-имя, и номер дисплея (по умолчанию, :0) или номер TCP-порта (по умолчанию, 5900). Если VNC-сервер требует авторизации, то при подключении к нему VNC-клиент запросит пароль. Обратите внимание, что пароль доступа к VNC-серверу не связан с каким-либо аккаунтом (учетной записью пользователя) на удаленном компьютере, а служит только для ограничения доступа к дисплею VNC-сервера.
После установки соединения и открытия экрана, в зависимости от настроек VNC-сервера может потребоваться авторизация пользователя на виртуальном сервере или может быть открыта уже запущенная рабочая сессия какого-либо пользователя.
Так как на компьютере одновременно могут работать несколько VNC-серверов, для их разделения используют параметр номер дисплея. Например, один VNC-сервер может быть запущен на дисплее :0, другой — на дисплее :1. Каждому номеру дисплея соответствует номер TCP-порта, на котором VNC-сервер принимает соединения. Номер порта для дисплея получается прибавлением номера дисплея к базовому номеру порта — 5900. Дисплею :0 соответствует TCP-порт 5900, дисплею :1 — порт 5901.
3. Отключение VNC-клиента от удаленного компьютера
При закрытии окна VNC-клиента или после выхода из окружения средствами рабочего стола, в зависимости от настроек VNC-сервера, рабочая сессия пользователя может закрыться с остановкой всех используемых программ, или продолжать работу и быть доступной снова при повторном подключении к VNC-серверу.
4. Тюнинг VNC-клиента
Большое количество передаваемой на экран информации влечет за собой повышенные требования к скорости канала — к его пропускной способности и времени передачи пакетов. Нахватка пропускной способности приводит к некомфортным задержкам при больших изменениях показывамой на экране информации — открытии новых окон, скроллинге и т.д. Особенно большие задержки будут возникать при показывании фотографий и других изображений или элементов интерфейса, имеющих большое количество цветов и сложные формы.
Главный параметр, который влияет на объем передаваемых данных — алгоритм кодирования передаваемой графики. Для уменьшения объема и, соответственно, ускорения работы, рекомендуется использовать алгоритмы Tight, ZLib, ZRLE — по сравнению с несжатыми данными (Raw), они обеспечивают сжатие в десятки раз, заметно нагружая процессор. Эти алгоритмы кодирования обеспечивают комфортную работу даже на каналах со скоростью 256-512 Кбит/сек.
Для сокращения объема передаваемой по сети информации также можно устанавливать высокий уровень сжатия (Compression Level, Compression Value), низкий уровень качества JPEG (JPEG Quality) и включать режим уменьшения количества цветов (-bgr233, Restricted colors). Самый большой эффект из них при заметном снижении качества изображения дает режим уменьшения количества цветов — объем передаваемой информации уменьшается в 1.5-3 раза, соответственно, в 1.5-3 раза ускоряется отображение на экране.
JPEG применяется алгоритмом кодирования Tight для сжатия участков экрана, содержащих фотографии и другие сложные изображения с большим числом цветов. Использование Tight+JPEG сокращает в 2-5 раз объем передаваемых при этом данных. Другие алгоритмы кодирования JPEG не поддерживают.

1. Выпадающего меню «Система -> Параметры»
Объем передаваемых данных и скорость отображения на канале 1 Мбит/сек при открытии выпадающего меню «Система -> Параметры» (на рисунке меню выделено зеленым пунктиром):
| Полноцветный режим | 256 цветов (BGR233) | |||
|---|---|---|---|---|
| Объем | Время | Объем | Время | |
| ZLib | 11 Кб | 0.09 сек | 7 Кб | 0.06 сек |
| HexTile | 208 Кб | 1.6 сек | 118 Кб | 0.95 сек |
| Raw | 248 Кб | 2 сек | 128 Кб | 1 сек |
5. Частые проблемы
Не удается подключиться к VNC-серверу
Нужно проверить:
- есть ли доступ к интернету;
- отвечает ли виртуальный сервер на пинги;
- запущен ли на виртуальном сервере VNC-сервер;
- нет ли по пути файервола, закрывающего доступ к TCP-порту VNC-сервера;
- правльно ли указан номер дисплея или TCP-порт VNC-сервера (номер порта = 5900 + номер дисплея).
Медленная работа через достаточно быстрый канал
Если VNC-клиент не может согласовать с VNC-сервером использование алгоритм кодирования графики с компрессией данных, выбирается алгоритм по умолчанию — Raw, который передает данные без сжатия. Также кодирование без сжатия или с низким уровнем сжатия может автоматически выбираться VNC-клиентом при работе через быструю локальную сеть. Данную проблему можно исправить, принудительно указав в настройках VNC-клиента алгоритм кодирования с высоким уровнем сжатия — ZLib, ZRLE, Tight.
Однако, для некоторых сочетаний клиента и сервера такое решение может быть бесполезным из-за ошибок в согласовании алгоритма кодирования. Например, клиент TightVNC с сервером RealVNC часто могут работать только с кодировкой Raw. Решением в этом случае будет смена VNC-клиента или VNC-сервера.
Другие статьи этой серии:
VNC — удаленный доступ к компьютеру по сети. Введение в VNC.
Установка VNC-сервера на VDS и рекомендации по тюнингу
P.S. Если есть замечания, добавления, вопросы — пишите в комменты, по ним буду дописывать статью.
n this tutorial, we are going to install VNC server on Windows 10, which can enable you to connect to your Windows 10 PC from a remote computer. The VNC (Virtual Network Computing) is a great choice if you need a free alternative to the Windows Remote Desktop (RDP).
Installing TightVNC Server On Windows 10
There are several free VNC servers available for Windows 10, we are going to use TightVNC software.
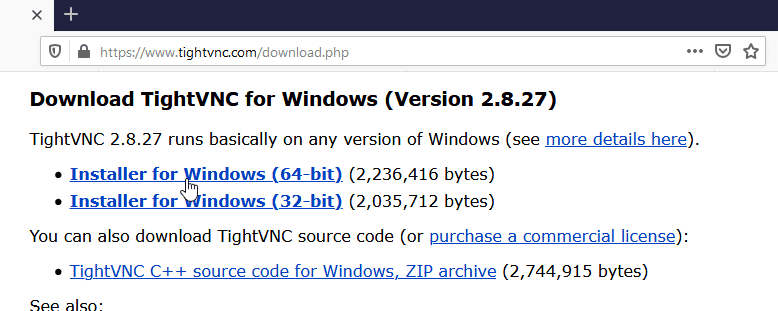
First, Download TightVNC Server from http://tightvnc.com/download.php.
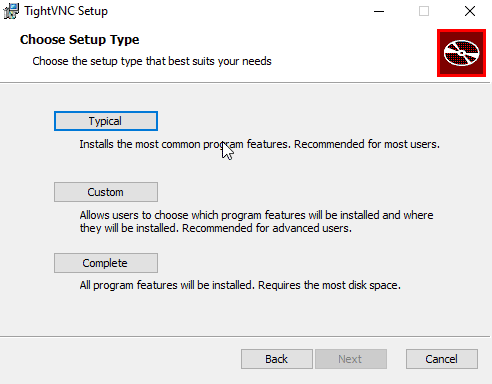
Run the setup file and continue with the Typical install option.
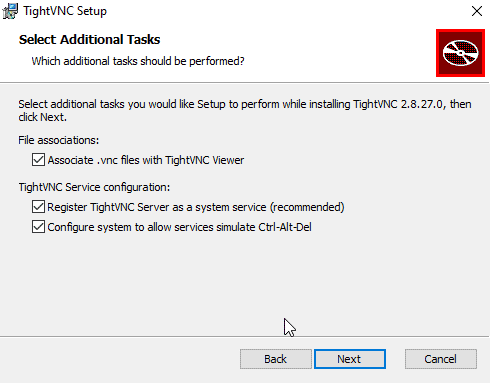
TightVNC should be set to run as a system service.
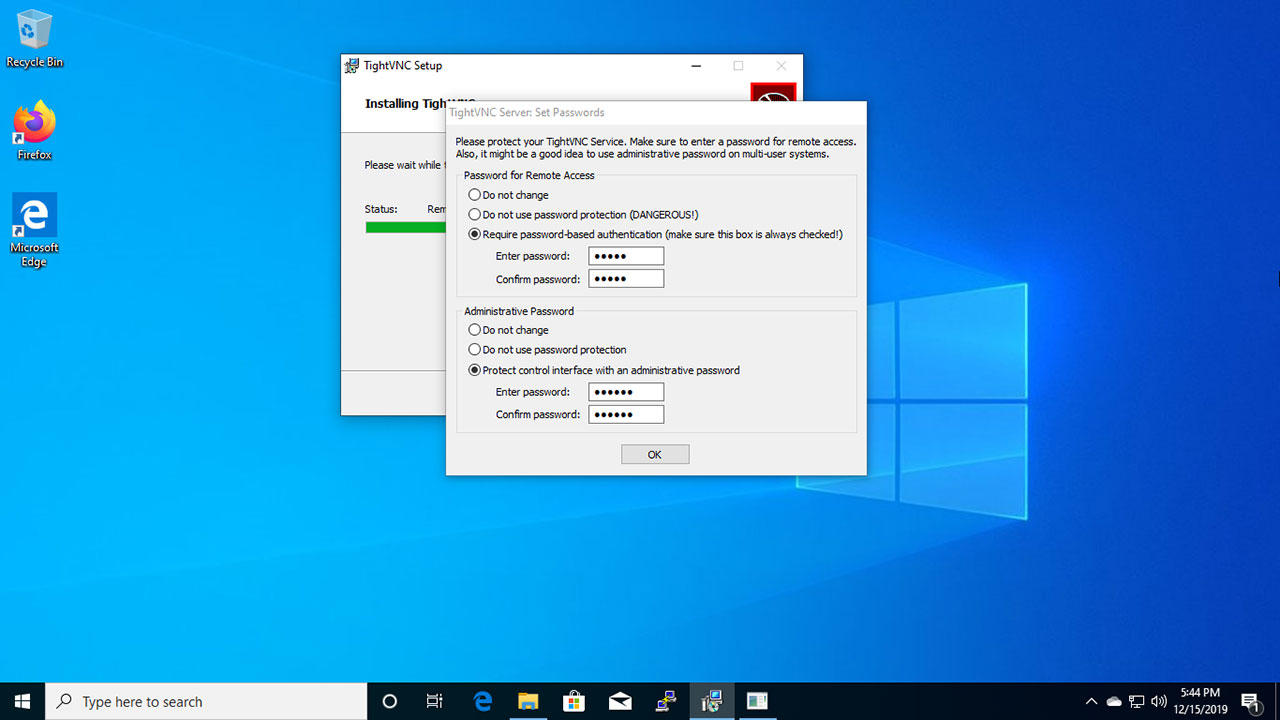
Set Passwords for Remote Access and control interface.
That’s all we need to do. VNC Server on Windows 10 listen on port 5900. The TightVNC server automatically configures Windows Firewall to allow incoming connections, so you don’t need to worry about Windows firewall.
Connecting to the desktop remotely
On the remote computer, a VNC viewer should be installed. There are several VNC viewers available, you can use the TightVNC viewer which is available for Windows, Linux and macOS.
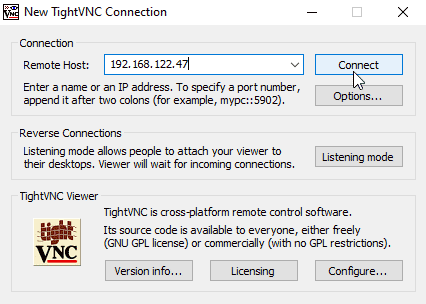
Enter your Windows 10 computer’s IP address to connect.
The user will then be prompted for their remote access password.
We can reset Remote Access password from the Control interface. Double click the VNC Tray icon to open the Control interface.
Starting and Stopping VNC Server
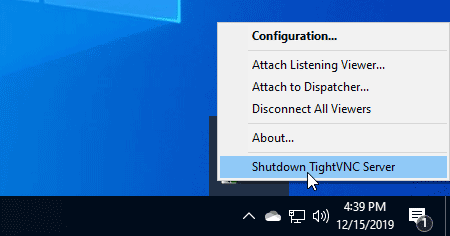
To Stop VNC Server, right click the VNC icon on the Windows tray bar and click «Shutdown TightVNC Server».
To Start VNC, Go to Start Menu and click «Start TightVNC Service».
What is VNC?
VNC stands for Virtual Network Computing. It is a graphical desktop sharing system that allows you to remotely control and access a computer’s desktop environment over a network connection. With VNC, you can view and interact with the desktop of a remote computer from almost any location as if you were sitting in front of it.
VNC works by transmitting the graphical display of the remote computer and relaying user input from the local computer to the remote system. This enables you to control the remote computer’s mouse, keyboard, and other input devices, and see the remote desktop environment in real-time on your local machine.
Common Uses of VNC
VNC works by transmitting the graphical display of the remote computer and relaying user input from the local computer to the remote system. This enables you to control the remote computer’s mouse, keyboard, and other input devices, and see the remote desktop environment in real-time on your local machine.
Cross-Platform Remote Access: VNC allows you to access and control a remote computer from anywhere with an internet connection. This flexibility is valuable for individuals and businesses that need to access their computers or servers remotely, whether for work, administration, or support purposes. VNC is platform-independent, meaning it can be used to access and control computers running different operating systems, such as Windows, macOS, Linux, and Unix. This cross-platform compatibility allows you to connect to and interact with computers regardless of the operating system they are running.
Team Collaboration: VNC facilitates collaboration by allowing multiple users to connect to and view a remote desktop simultaneously. This feature is particularly useful for remote teams, as it enables colleagues to work together, share ideas, and collaborate on projects in real-time.
Troubleshooting and Support: VNC is commonly used by IT support professionals to remotely troubleshoot and fix issues on users’ computers. With VNC, support personnel can view the user’s desktop and interact with it as if they were physically present, making it easier to diagnose and resolve technical problems.
Cons of VNC
While VNC (Virtual Network Computing) is a widely used remote desktop protocol, it also has some limitations and drawbacks.
VNC can be bandwidth-intensive, especially when transmitting graphical data. This can result in slower performance and increased latency, particularly over slower or unreliable network connections. The user experience may suffer if there is significant lag or reduced responsiveness.
VNC has had security vulnerabilities in the past, making it potentially susceptible to unauthorized access or attacks. If not properly configured, VNC can pose security risks, such as weak encryption or authentication methods. It is crucial to implement strong security measures and keep the VNC software up to date to mitigate these risks.
Popular VNC Software
There are various VNC software implementations available, both open-source and commercial, that provide the necessary server and client components to establish VNC connections. Some popular VNC software includes RealVNC, TightVNC, UltraVNC, and TigerVNC.
Prerequisites
You already get the server login credentials
Once your server is deployed, the login credentials are usually sent to your registered email. You can also get server login information, including username, password, and port in the Database Mart control panel, please refer to guide on how to manage servers in Database Mart control panel.
1. Install VNC on the Remote Windows Server
There are various VNC software. In this example, we will use TightVNC for demonstration. Search TightVNC server in browser. And click in to the TightVNC website.
Then, click the Get your free copy of TightVNC, followed by clicking the Installer for Windows. As the remote Windows server is 64-bit, we will choose the 64-bit version.
Once the file is downloaded, you can execute it to start the installation.
On the TightVNC Setup Wizard windows, click Next.
Check to accept the terms in the License agreement and click Next.
Choosing the Typical setup would be fine.
Here, we will keep the default options.
Finally, click Install to begin the installation process.
In this window, you are prompted to set the password for accessing the remote Windows server using VNC viewer. You can also set an administrative password for managing the VNC server.
After that, click Finish and the VNC server is installed.
2. Make sure to allow the VNC Server through Windows firewall of the Remote Windows Server
Normally, after the installation, an inbound rule for TightVNC is added to allow the VNC access. You can go to the Windows Firewall with Advanced Security to check the inbound rule.
Search Windows Firewall with Advanced Security and open the program.
Click the Inbound Rules on the left panel.
Locate the TightVNC. Then right-click it and click properties to view the firewall configurations.
3. Install VNC Viewer on you local devices
Now you need to install a VNC viewer on the device where you would like to initiate the connection. This is so that you can connect to the remote server from you local devices. In this instance, we use a Windows desktop.
Search for VNC viewer in the browser and click into the site. Here, we use the Real VNC as an example.
Choose Windows desktop and click Donwload VNC Viewer.
Once the file is downloaded, double-click it to start the installation. First, select the language you would like to use during the installation and click OK. Then, click Next to start the installation process.
Read the license agreement carefully and check to accept the terms, followed by clicking Next.
In the Custom Setup window, choose the feature you’d like to install and customize the location where you prefer to keep the file. Then click next to continue.
In this window, click Install to begin the VNC Viewer installation.
4. Use VNC to access the remote Windows server
Search VNC Viewer from the start menu and open the program.
Input your email and password to sign in to your RealVNC account. If you haven’t registered an account, clicking Cancle would be fine.
Click File > New connection at the top left corner.
After that, input the IP of your Remote Windows server and click OK.
You should see the connection is added. Right-click it and choose Connect.
After that, click Continue in the pop-up window.
Then, you will be prompted to input the password for accessing the VNC server. This is the password you set during the VNC server installation.
When you reach here, you have connected to the server successfully.
Move the mouse to the top of the screen, you can pull the tab down, where you can perform various functions, like zoom in and zoom out.
Click the send Ctrl + Alt + Del to unlock the screen. You will need to input the password for the administrator account on the remote server. With the password authentication passed, you should be logged in to your remote server as below.
Wrap up
By following these steps, you can harness the convenience and flexibility of VNC to connect to remote servers with ease and efficiency. Remember to prioritize security by implementing encryption, strong passwords, and limiting remote access to authorized users. While VNC can be a powerful tool for remote server management, it’s crucial to stay vigilant and keep the software up to date to address any potential security vulnerabilities.
Начинающие разработчики часто сталкиваются со сложностью в администрировании Unix-систем. Привычный способ подключения через SSH-туннель или веб-интерфейс для многих оказывается сложным на первых порах. Чтобы не потерять мотивацию в своих начинаниях, часто используются программы с графическим интерфейсом, позволяющие вести удаленную связь с сервером. В них пользователь может администрировать сервер точно так же, будто он работает за своим компьютером. За все это отвечает особая система VNC, о которой мы сегодня и поговорим. Что такое VNC и как с помощью нее подключиться к серверу, разберемся далее.
Что такое VNC
VNC (от англ. Virtual Network Computing) – система, позволяющая подключаться к удаленному компьютеру через протокол RFB. Алгоритм работы реализован следующим образом: для соединения используется специальная программа либо панель управления VMmanager, в нее вводятся данные для авторизации, и в результате пользователь получает полноценный доступ к запрашиваемой системе. С помощью этого протокола мы можем работать с компьютером, который находится в другой точке планеты.
Близким по понятию является соединение по RDP, но такой способ обычно ассоциируется с ОС Windows. VNC же больше относится к системам Linux, но также поддерживает и Windows, MacOS, Chrome, iOS, Android и даже Raspberry Pi.
Программное обеспечение распространяется в свободном доступе. Популярные утилиты, которые можно скачать – Ultra VNC remote access tools, TightVNC и VNC Viewer. Подробнее о том, как ими воспользоваться, мы поговорим чуть позднее, а пока давайте рассмотрим преимущества подключения по ВНС.
Комьюнити теперь в Телеграм
Подпишитесь и будьте в курсе последних IT-новостей
Подписаться
Особенности VNC
Удаленное подключение обычно осуществляется через протоколы RDP и SSH – они чаще используются для получения доступа к VDS. Но если есть они, зачем использовать ВНС?
Вот некоторые особенности, полезные для некоторых сценариев:
- Возможность сессионного коннекта, благодаря которому разрешено подключаться нескольким пользователям.
- VNC-клиент может подключаться к любой другой операционной системе.
- Поддержка мобильного приложения на iOS и Android.
Важно: для соединения сервер должен использовать KVM. Это аппаратная виртуализация, позволяющая воссоздать физический сервер на виртуальной машине. Также существует другая виртуализация под названием OpenVZ – она разрешает запускать несколько ОС на одной машине.
Как только вы убедитесь, что сервер использует KVM, можно переходить к подключению по ВНС. О том, как это сделать, мы поговорим уже в следующем разделе.
Подключаемся к серверу по VNC
Существует два способа подключения к VDS/VPS по VNS: через панель управления VMmanager и с помощью VNC-клиента. Первый вариант подразумевает установленную панель с приобретенной лицензией. Второй – установленную на компьютер программу (Ultra VNC remote access tools, TightVNC или VNC Viewer). Давайте рассмотрим, как всем этим можно воспользоваться и подключиться к VDS/VPS.
Способ 1: Через панель управления VMmanager
Перед тем как воспользоваться панелью, ее нужно установить к себе на сервер и получить лицензию. На Ubuntu это реализуется посредствам выполнения команд в консоли. Рекомендуем установить к себе на компьютер помощник для удаленного соединения PuTTY, чтобы легко вводить команды в консоль без каких-либо хлопот.
Устанавливаем ПУ:
yum install wget
- Загружаем установщик ISPsystem:
wget http://cdn.ispsystem.com/install.sh
- Устанавливаем VMmanager:
sh install.sh --release 5.221.0 VMmanager
- Далее перед нами отобразится окно выбора – нажимаем 1 и жмем «Enter».


Таким образом на машине будет установлена панель управления. Чтобы в нее войти, нужно в браузере ввести ссылку: https://<IP Server>:1500/vmmgr. В результате будет отображено окно, где нужно активировать лицензию либо воспользоваться ознакомительной версией.

Как только регистрация будет завершена, мы получим доступ к самой панели. Там переходим в раздел «Управление» -> «Виртуальные машины» и в правой части окна кликаем по кнопке «VNC».
Далее будет запущена консоль, в которой следует ввести логин и пароль от VDS.

Вот такими несложными действиями мы смогли подключиться к VDS/VPS через VMmanager. Теперь давайте рассмотрим более простой способ с использованием специальной утилиты.
Способ 2: Через VNC-клиент
Как мы говорили ранее, существует множество различных программ, позволяющих подключаться по протоколу RFB. Не будем рассматривать все возможные варианты, а разберемся в работе утилиты VNC Viewer.
Подключаемся через VNC-клиент:
Почему не удается подключиться?
Ошибки подключения могут быть связаны со следующим:
- отсутствует подключение к интернету;
- виртуальная машина не отвечает на пинги;
- на машине не запущен VNC-сервер;
- файрвол перекрывает доступ к TCP-порту;
- неправильно указан номер порта после двоеточия.
На этом наша статья подходит к концу. Надеемся, что у вас не осталось вопросов, и подключение к серверу по VNC прошло без затруднений. Спасибо за внимание!
