
- Topics
- VMware Tools
- Item Size
- 50.0M
What’s the reason I uploaded it? Well it’s because when installing VMware Tools, aero is broken in that build, so I’m presenting you VMware Tools 7.1. This version have been tested on Windows 7 Build 6801 and aero worked fine for me so maybe it could for you.
- Addeddate
- 2023-06-26 10:45:21
- Identifier
- vmware-tools-7.1
- Scanner
- Internet Archive HTML5 Uploader 1.7.0
plus-circle Add Review
plus-circle Add Review
comment
Reviews
There are no reviews yet. Be the first one to
write a review.
Previously, when you installed Windows 7 SP1 as a guest OS, you could install VMware Tools without problem.
However, since VMware Workstation 16, some warnings and an error occur if the guest OS is not up to date.
- Warnings displayed when installing VMware Tools on Windows 7
- Installation of prerequisites
- Install VMware Tools on Windows 7
1. Warnings displayed when installing VMware Tools on Windows 7
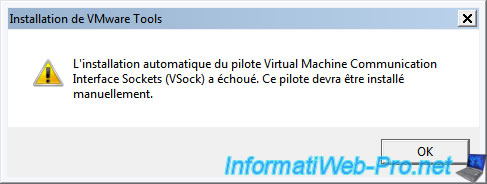
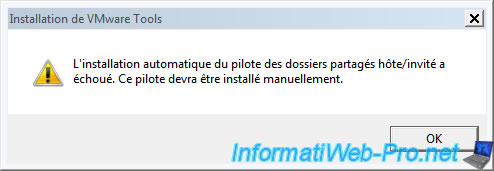
To begin, warnings will be displayed regarding the installation :
- VSock Virtual Machine Communication Interface Sockets driver
- Host Guest Shared Folders driver
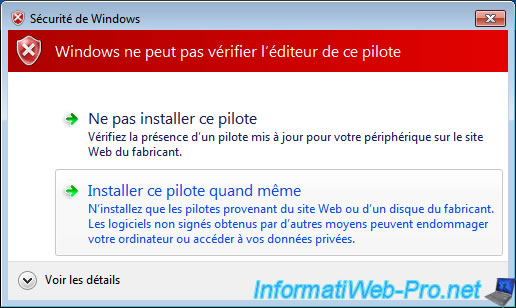
Then, you will get a «Windows can’t verify the publisher of this driver software» error.
This is because VMware has updated the certificates used to sign these drivers using the SHA-2 encryption algorithm. Except that this algorithm is not supported by default by Windows 7.
2. Installation of prerequisites
To find out about the prerequisites required for installing the VMware Tools of VMware Workstation 16 on Windows 7, simply consult the informations regarding VMware Tools 11.1.5.
As you can check on the VMware site, you will see that this new version of VMware Tools requires Windows 7 SP1 with the KB4474419 update.
To get started, install Windows 7 SP1 if you haven’t already.
Otherwise, download the service pack 1 of Windows 7 from the Microsoft Update catalog and install it in the virtual machine.

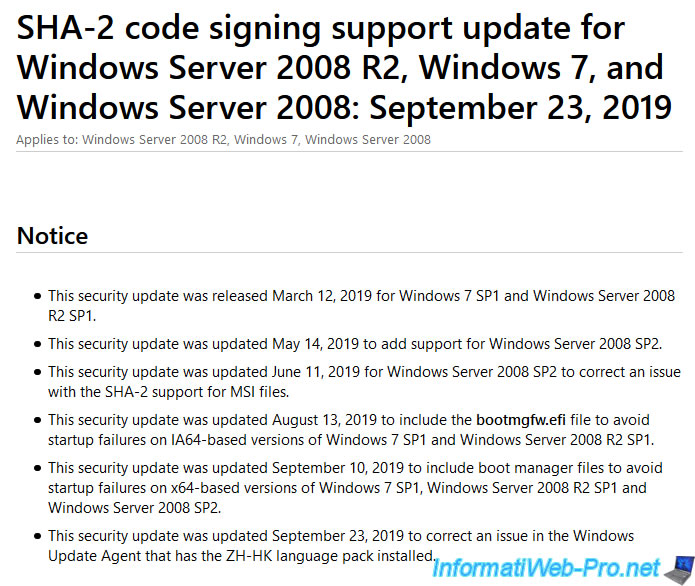
If you click on the «KB4474419» link referenced on the VMware site, you will arrive on a page : SHA-2 code signing support update …
As you can see, this update will add support for the SHA-2 algorithm for code signing.
This will allow Windows 7 to be able to correctly check the signature of the various drivers that will be installed by VMware Tools in your virtual machine.
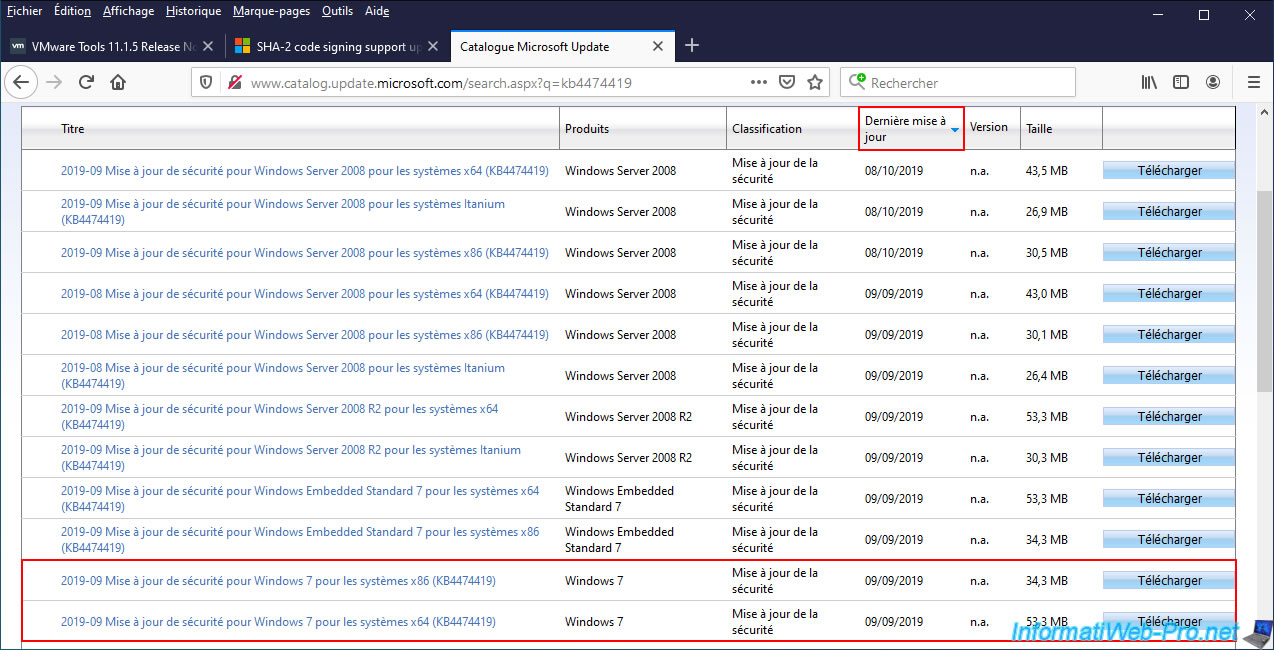
To download this update, you can use Windows Update or download it manually from the Microsoft Update Catalog by clicking on this link : KB4474419.
On the site that appears, sort the list by date of the last update to find the most recent version of this Windows update and download the one adapted to the architecture of Windows 7 that you have installed :
- Windows 7 x86 : Windows 7 in 32-bit
- Windows 7 x64 : Windows 7 in 64-bit
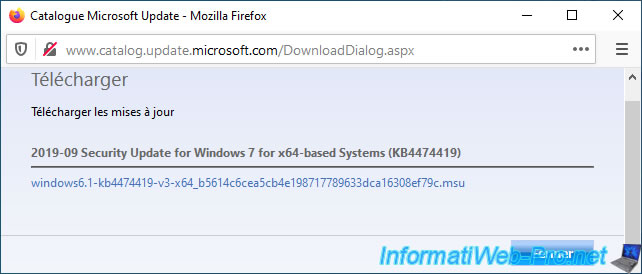
Once you click on the «Download» button, you will have a small window like this with a download link.
Just click on it to download this update.
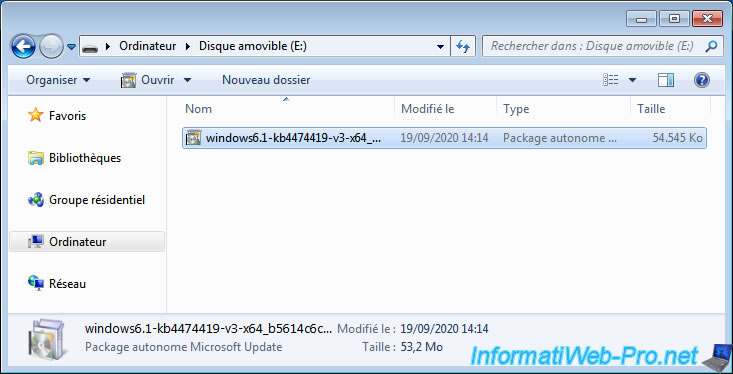
To transfer this update to the virtual machine, you have several options :
- download it directly from the virtual machine
- store it on an USB key and plug it virtually into your virtual machine from the VMware Workstation interface.
Indeed, drag/drop and VMware Workstation shared folders don’t work for the moment since VMware Tools are not installed in your virtual machine.
Launch the downloaded file and a window will appear telling you : Security Update for Windows (KB4474419).
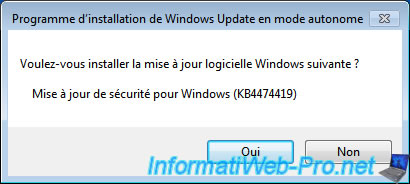
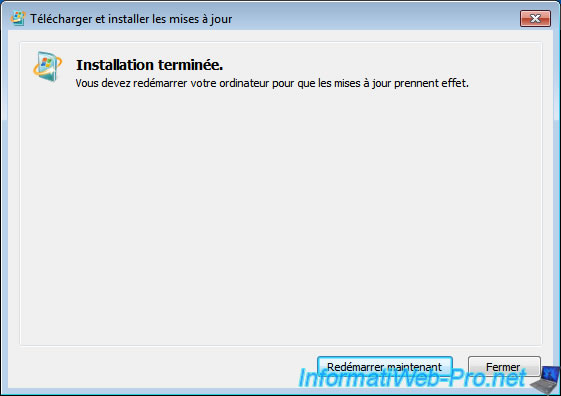
Wait while this Windows update is installed.
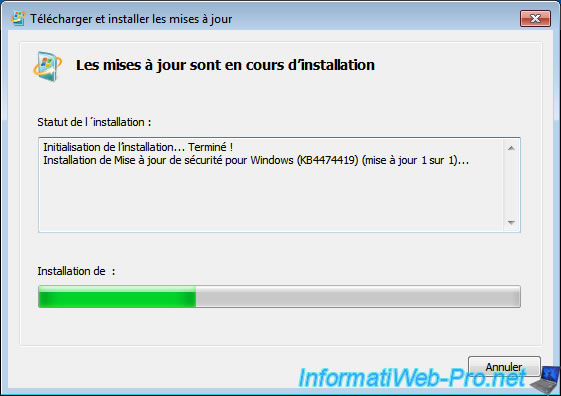
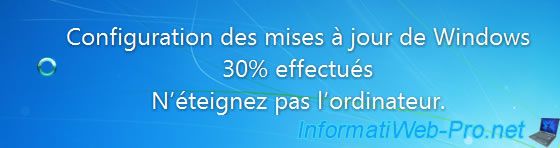
Restart the virtual machine after its installation is complete.
The «Configuring Windows updates» message appears while restarting the virtual machine.
Now, you can install VMware Tools by clicking on : VM -> Install VMware Tools.
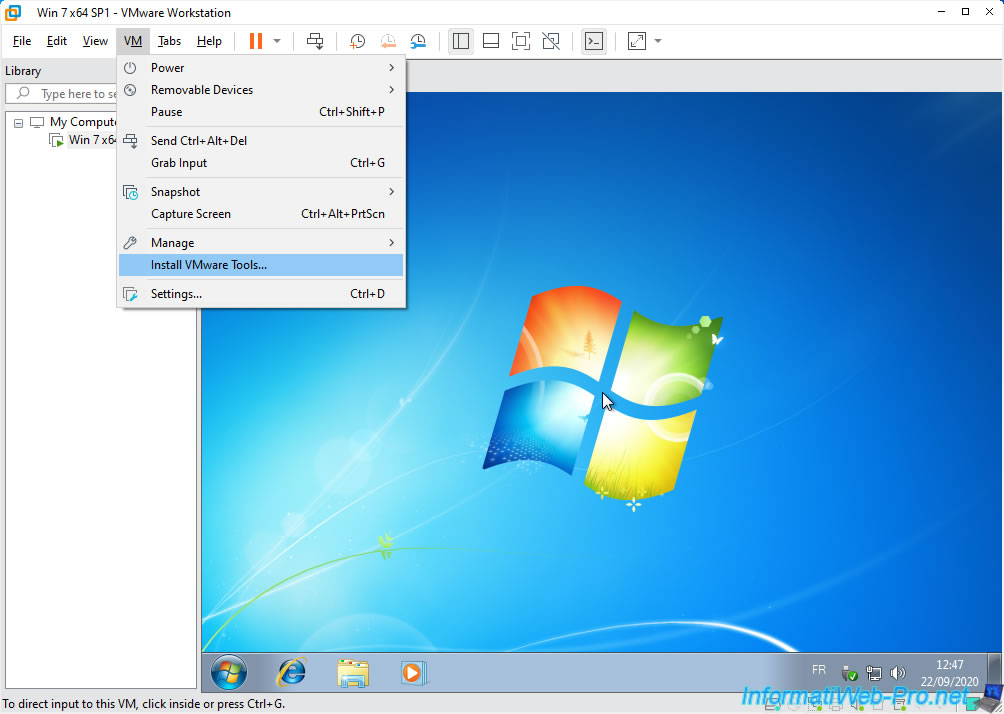
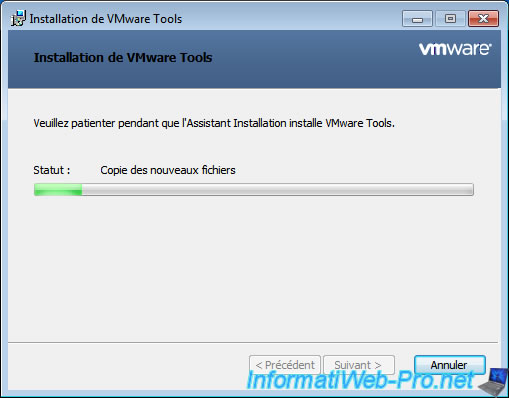
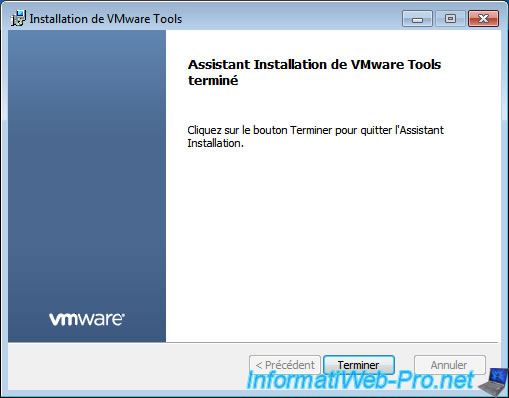
Wait while the VMware Tools install.
As expected, the installation completes without any warning and without any error.
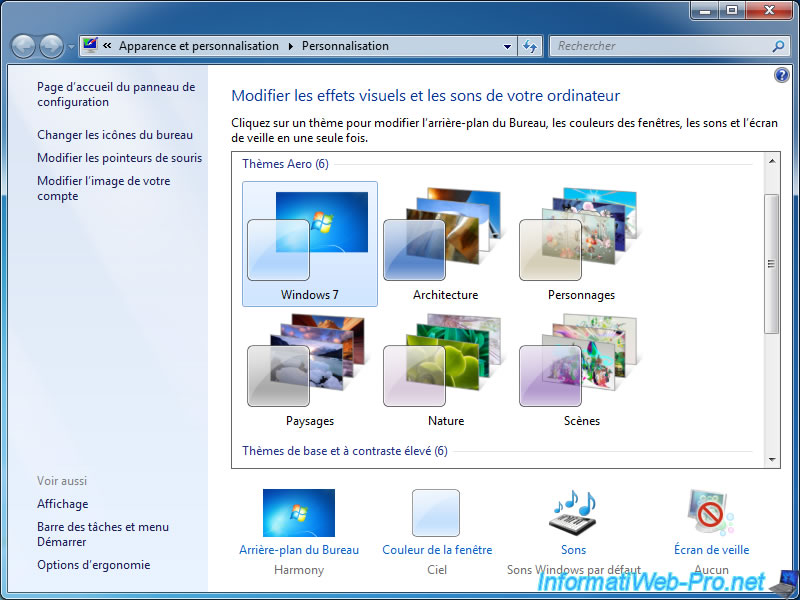
Once the virtual machine has restarted, don’t forget to activate Windows 7 aero, by right-clicking «Personalize» on the desktop, then clicking on the «Windows 7» Aero theme.
As of 12/11/2020, VMware no longer signs Tools for Windows Vista with SHA-1, so you need Windows 7 SP1 or later to use the latest version.
However, you can use an older version of VMware Tools, which is here: https://media.githubusercontent.com/media/thepwrtank18/thepwrtank18/master/VMware%20Tools%20for%20Windows%207%20RTM%20and%20Vista.iso
Link is dead. Instead, here’s a full on guide.
Step 0: Foreword
This is an unsupported operating system, with unsupported drivers. Use this at your own risk.
Step 1: Preparation
You will need:
- Either a:
- x64 Windows Vista ISO
- x64 Windows Vista Disc + Reader
- VMware Workstation (Pro or Player) 15.x, or Pro 16.x and higher.
- An old version of the VMware Tools ISO (10.3.5 to be precise), from here
Step 2: Creation
Note: Do not let VMware scan your ISO or disc, Easy Install may use the wrong version of Windows, whether a wrong edition or architecture.
Make a VM. If you have Pro or Player 15.x, do what you normally do. If you have Pro 16.x, make sure compatibility is set to Workstation 15.x (in Custom settings). After that, customize the settings you want. (Player does not support custom settings, so you either need to get 15.x, which is what you need anyway, or Pro 16.x and higher.)
Step 3: Modification
Make sure you have your ISO or disc selected in the VM options. If there’s a floppy disc or extra DVD drive with «autoinst» or the like on it, remove that drive.
Step 4: Installation
Install as usual. When it tells you to create a user profile, don’t do that for now. Go to the VM settings, then put in the VMware Tools ISO you got earlier. Don’t install VMware Tools via VM>Install VMware Tools. After that, press Shift+F10 in the VM. Put in D:\setup64.exe.
Step 5: Initialization
Do the VMware Tools installation as usual. When it says if it wants to restart the machine, say «Yes», then go to VM>Power>Reset. When it reboots, do the setup as normal. Let it monitor your computer’s performance, as drivers are installed.
Прочитано: 3 769
Сейчас я распишу те действия, которые нужно сделать, чтобы установить в гостевую систему (Windows 7 x86/x64, Server 2008/R2) утилиты «VMware Tools” для взаимодействия с виртуальной средой внутри «ESXi”.
Предположим, Вы установили систему, далее что бы исключить задержки при обработке виде-информации, на виртуальной консоли управления виртуальной машины нужно установить комплект «VMware Tools”.
Запускаем виртуальную машину, после проходим по меню:
“VM” – «Guest” – «Install/Upgrade VMware Tools”, после этого в систему монтируется диск и появляется окно автозапуска установщика, см. скриншот для наглядного понимания, о чем я говорю:
Устанавливаем, на одном из шагов нужно будет выбрать, что именно ставить – конечно же, полный комплект утилит.
После нужно перенастроить драйвер видео, делается это так:
На англоязычной системе:
“Start” – “Control Panel” – “Display” – “Change Display settings” – “Advanced settings” – “Adapter” – “Properties” – “Driver” – “Update Driver…”.
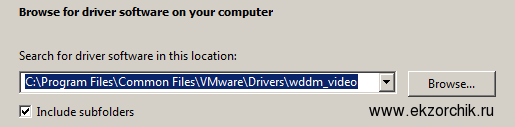
“Browse my computer for driver software” и указываем: – через “Browse…” путь до драйвера.
“C:\Program Files\Common Files\VMware\Drivers\wddm_video”
Или действия на русскоязычной системе:
«Панель управления» – «Экран» – «Настройка разрешения экрана» – «Дополнительные параметры» – «Адаптер» – «Свойства» – «Драйвер» – «Обновить» – Выполнить поиск драйвера на этом компьютере и указываем путь ниже::::
“C:\Program Files\Common Files\VMWare\Drivers\wddm_video”
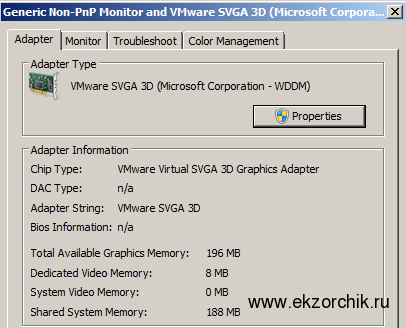
В итоге у Вас должно получиться, вот так:
Adapter Type = VMware SVGA 3D (WDDM)
И не забудьте, что после установки «VMware tools” обязательно следует перезагрузить систему. Вот собственно и весь процесс установки утилит. На этом всё, с уважением, ekzorchik.
It is crucial to install VMware Tools on your Microsoft Windows 7 virtual machine. This will increase performance and improve integration. Not only that, but you will also get better graphics performance. This will improve the response time between you and your host PC.
Plus, you will gain ease of use by increasing mouse and keyboard responsiveness. You will also get access to better LAN features. In this guide, I will explain the steps to build VMware Tools on a Windows 7 VM.
Benefits of Installing VMware Tools for Windows 7
First of all, I want to mention that with VMware Tools, you can increase the performance of your virtual machines. Thus, you can improve your user experience and provide better usage. Plus, when you install on Microsoft Windows 7, you will also gain:
- Improved Graphics Performance: You will significantly improve the graphics capabilities of your guest machine. Thus, you will make your graphical interface more fluid and more responsive.
- File Sharing Capabilities: You will enable file sharing between the host machine and your guest machine. You can operate it to drag and drop files or access mapped drives.
- Clipboard Functionality: Copying & pasting your text, images, and files will be more effortless. In particular, you will speed up your data transfer and increase productivity.
- Time Synchronization: You will automatically synchronize your VM’s clock with your host machine. Obviously, if you have time-related tasks, you will prevent errors by ensuring consistency.
- Improved Mouse Interaction: You can move your mouse cursor smoothly between the host and guest systems. Plus, you will eliminate problems such as cursor lag.
Why Should I Install Windows 7 Virtual Drives in VMware?
As you know, technology is constantly evolving, but sometimes you may need old applications. So, virtual PCs give us a good solution for this. VMware makes it incredibly easy for us to manage these digital environments.
Here are the main reasons why we need to install Windows 7 virtual drives:
- Legacy Application Support
By running Windows 7 on a virtual machine, we can experience old applications. For this reason, we can use software that does not work on new versions of Windows. This development eliminates the need for us to search for old hardware.
- Testing and Development
VMs are the ideal testbeds for us to experiment with any software. Additionally, you can experiment without affecting your primary operating system. Moreover, you can safely explore different scenarios on a stable system.
- Safe Browsing Experience
You can reduce security risks by running legacy browsers in a VM. For example, you can isolate threats in a virtual environment before they affect your central system. This is an effective strategy to increase your knowledge & experience in cybersecurity.
- Resource Efficiency
Modern PCs also have the power to run multiple virtual OSes at the same time. VMware also preserves the performance of existing hardware by using resources efficiently.
- Easy Backup and Recovery
For example, you can easily create backups with snapshots in a Windows 7 VM. Additionally, you can quickly revert to a previous state if a problem occurs.
- Cost Effective Solution
Old physical systems are expensive to maintain and troubleshoot. So, a virtual OS like Windows 7 reduces our costs. We also save physical space by reducing our energy consumption.
In short, we get all these benefits by installing the hardware drivers of the Windows 7 VM.
How to Build VMware Tools on Guest Machine
Usually, if your host PC has Internet, you will automatically install VMware Tools when installing the VM. If you still can’t install it, that’s okay, so you will need to install it manually.
Now, let’s install Guest software on Win7 OS step by step.
Step 1
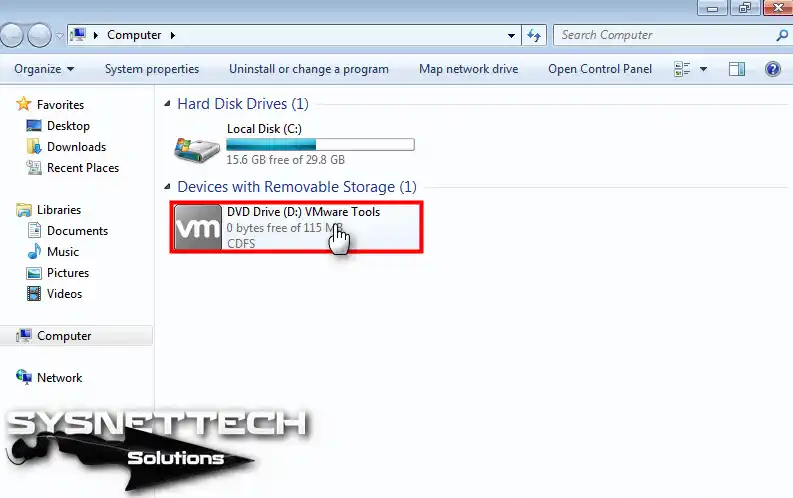
As you can see below, the driver software is not installed on the Win7 guest machine. You can obviously understand and verify this by the fact that your screen resolution has not changed.

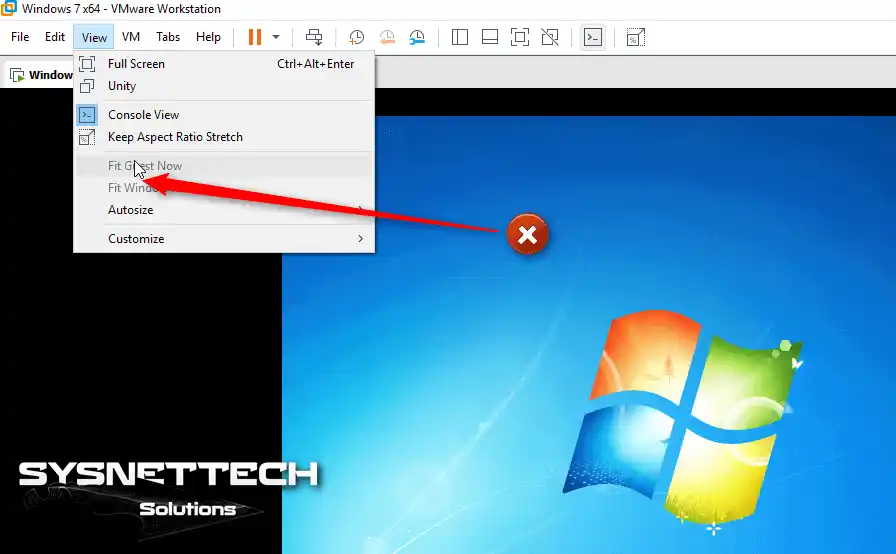
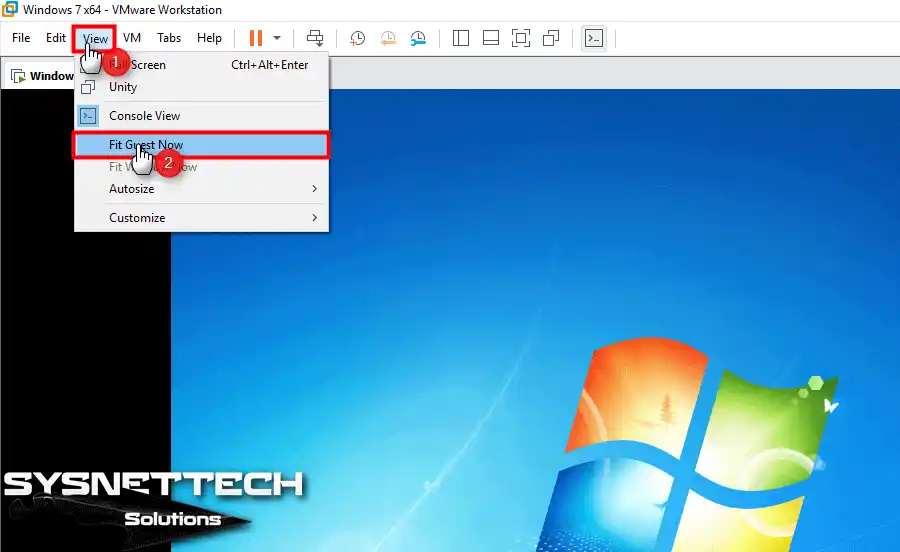
Step 2
Here, if you installed the drivers for your guest machine, View / Fit Guest Now would be active, as in the image below. However, after the installation process, you can automatically fix the screen resolution of your VM.
However, since VM Tools is not installed at the moment, this option is inactive.
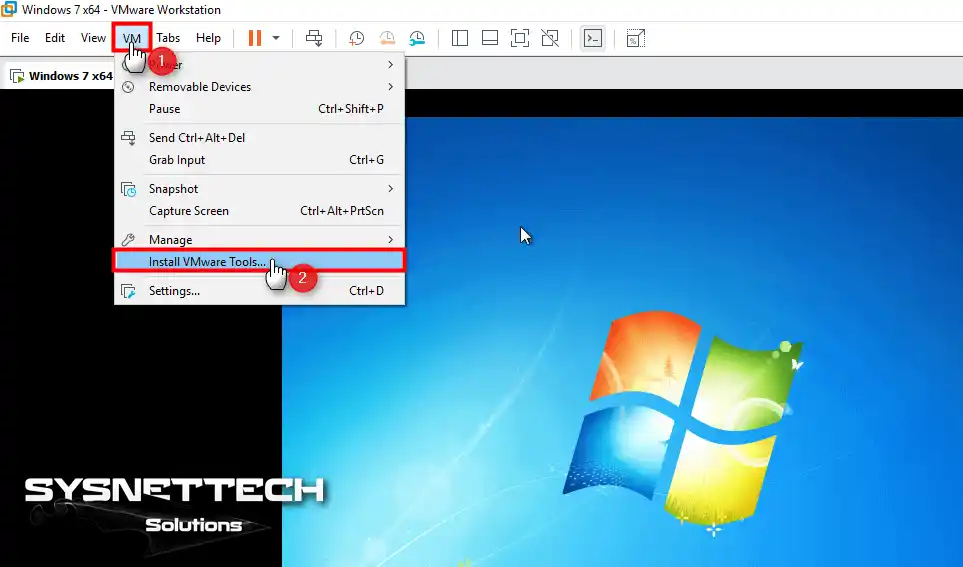
Step 3
To get rid of this situation, you should install the VMware tool on your guest machine. If you are ready, click on the VM / Install VM Tools option to install the additional software.
Step 4
You have mounted the image of the VM tools to the system. Then open My Computer and double-click the drive to start the wizard.
Step 5
We need to confirm that the wizard will start so the User Account Control pops up. Here, allow the running of files from the CD/DVD drive and proceed.

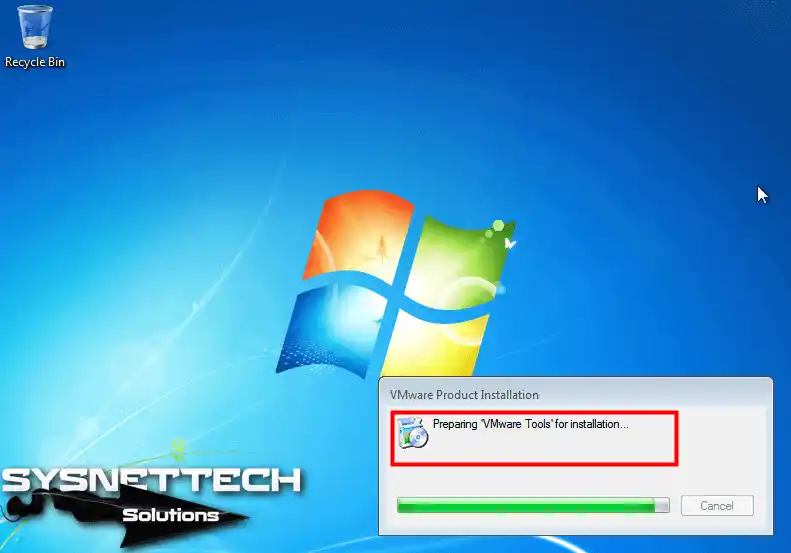
Step 6
The wizard prepares the drivers for your Windows 7 guest machine.
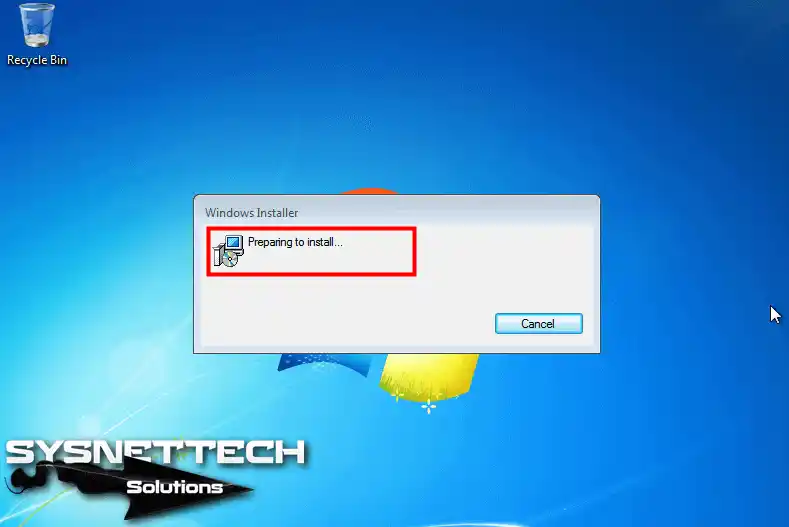
Step 7
Now, wait patiently for the installation process.
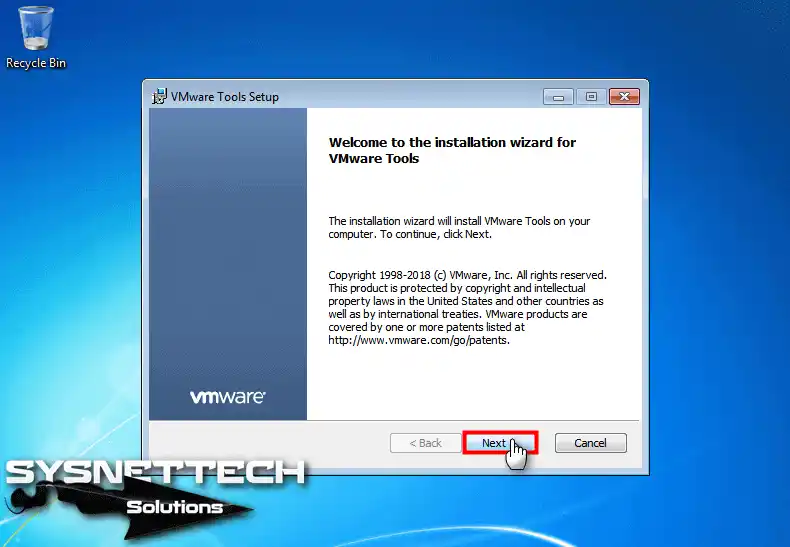
Step 8
Proceed through the Setup window, reading the legal rights regarding the VM tools.
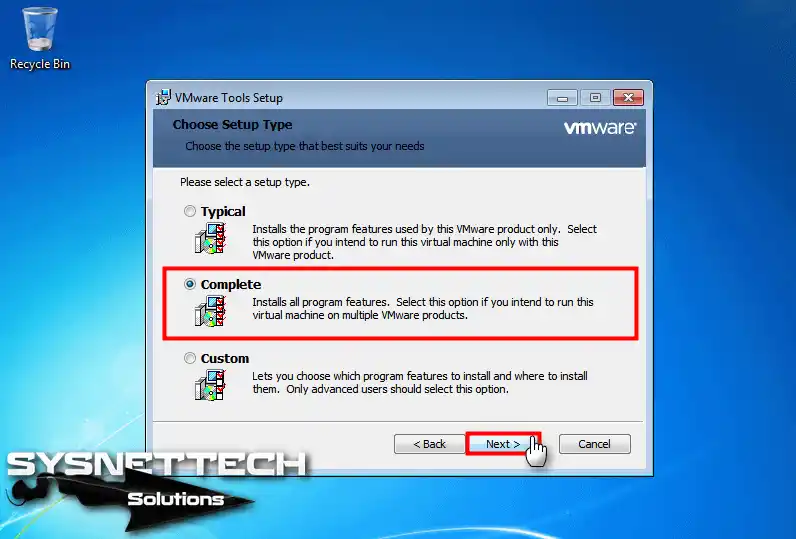
Step 9
When installing VM Tools on your Guest PCs, I definitely recommend that you select the Complete option. If you install all of these tools, you will prepare your virtual machine for new technologies in the future. That means you can run it on different VMware platforms.
Now, choose the Complete option and click Next to continue.
Step 10
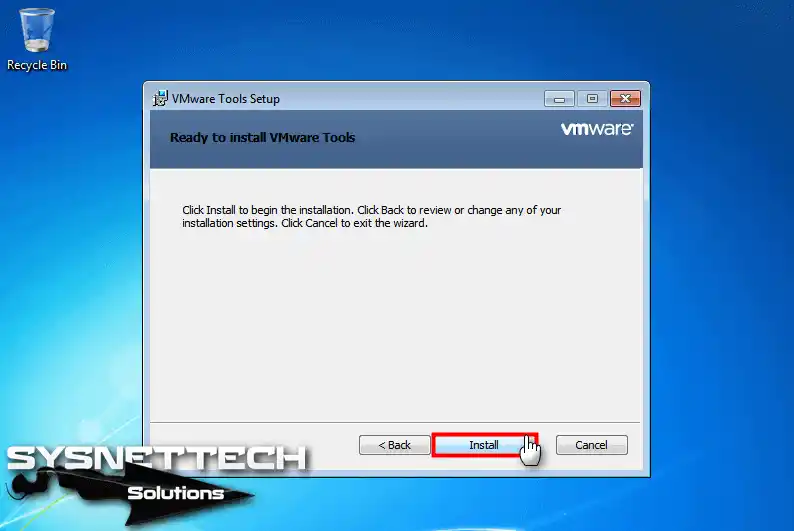
The wizard is now ready to install VMware Tools, so continue by clicking Install on the relevant screen.
Step 11
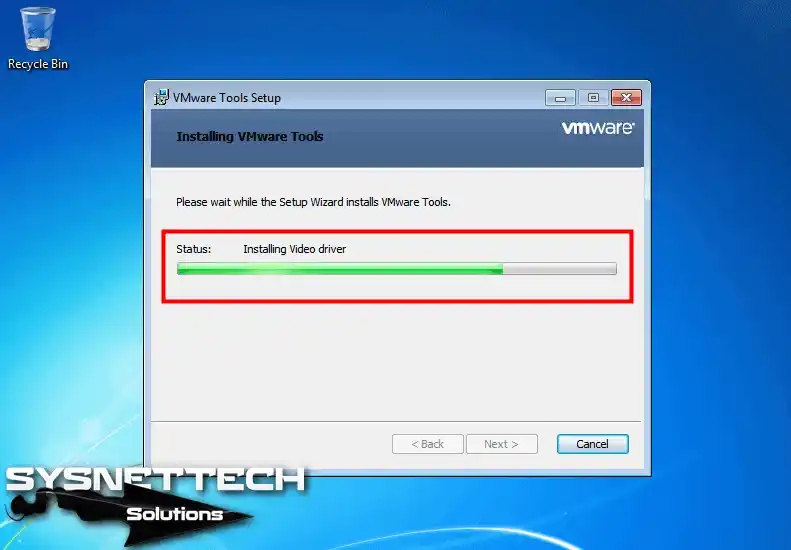
Wait while the wizard installs VMware Tools on your Windows 7 virtual PC.
Step 12
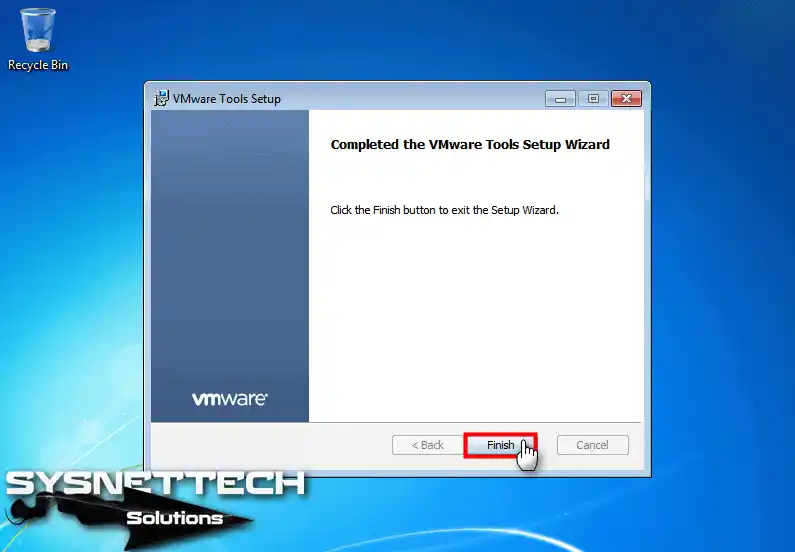
Now, you have installed the drivers for your VM’s virtual hardware.
Step 13
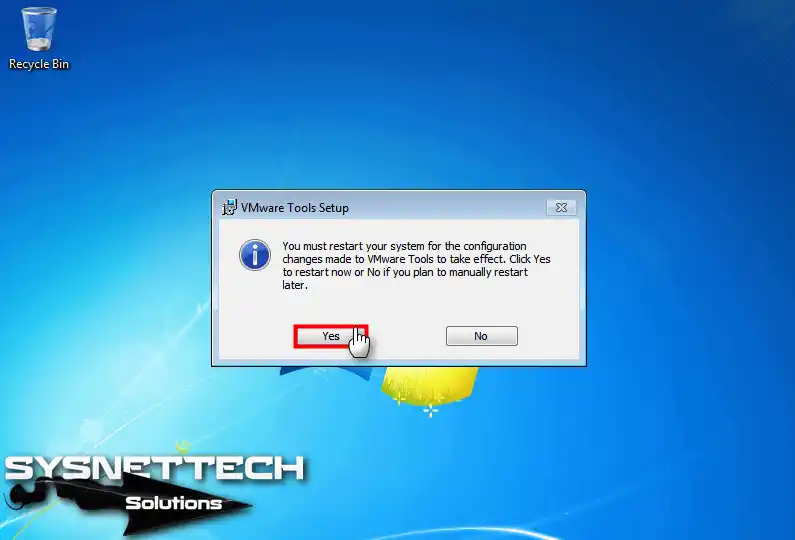
Restart your virtual PC to enable VMware services.
Step 14
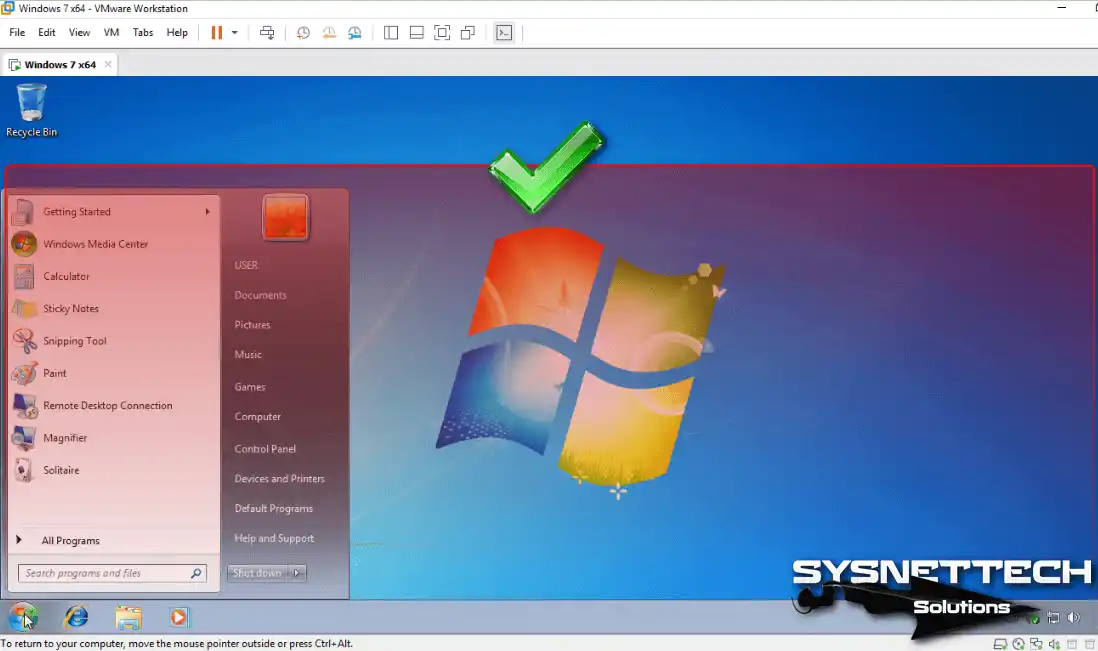
Now your Fit Guest Now option is active. Click on the relevant option to adapt the Win7 screen settings to your host’s panel.
Step 15
As soon as you click on the Fit Guest Now option, you will have changed the resolution of your VM.
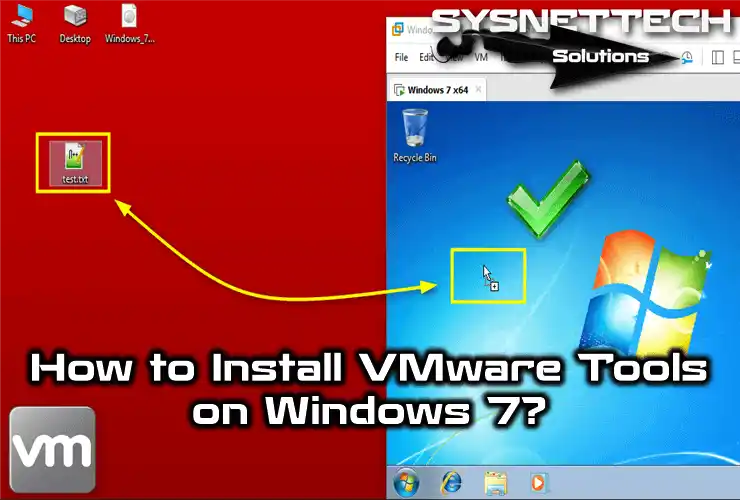
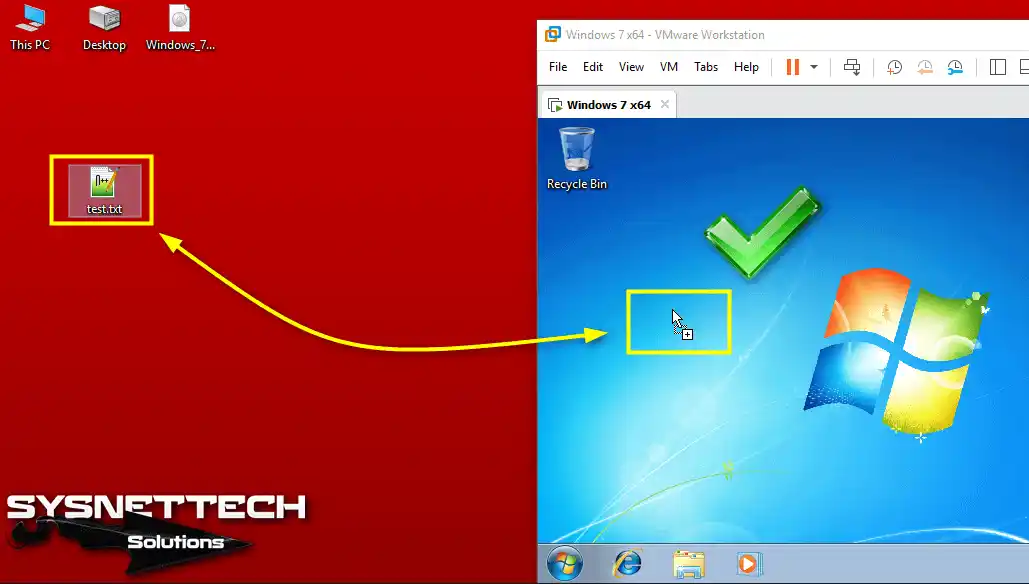
Step 16
You can now transfer files between your physical PC system and your Win7 VM!
How to Setup Guest Software on Win 7 VM ⇒ Video
You can also increase the performance of your Windows 7 in VMware Workstation with our detailed video guide. For this, check out our YouTube tutorial video below. Finally, if you find our content helpful, we would like you to support us.
Frequently Asked Questions (FAQ)
- What if I encounter problems during installation?
If you are having trouble installing VMware Tools, first make sure your Windows 7 VM is up to date. Verify that you have the correct permissions to install additional software. Check that the ISO file was properly installed. If necessary, try uninstalling and reinstalling the existing installation. You can check the VMware website for specific error messages.
- Can I uninstall VM Tools?
Yes, you can uninstall this driver package like any other application. First, go to Control Panel > Programs > Programs & Features, find VM Tools in the list, and click Uninstall.
- Does it work with all versions of Windows 7?
Yes, it works with all of VMware Tools, including Home, Professional, and Ultimate. Just make sure it’s the same version of VMware Pro software that you’re using.
- Is it necessary to update regularly?
Yes, I recommend you always keep this driver package up to date. That is, every update includes bug fixes, new features, and better performance. If so, you are using a newer version of VMware Workstation. In that case, you can easily follow the updates of this software through the interface.
- How can I verify that VM Tools was installed successfully?
After installation and reboot, look for its icon in the system tray. Also, go to the Control Panel to check the installation. In this way, you can check if VM Tools is listed in Programs and Features.
Final Word
As a result, you have increased the efficiency of your Windows 7 guest system. In addition, of course, you can speed up your workflow by making GPU improvements.
One of the best parts of using VM is file sharing. You can share your documents quickly from both systems. You can also work smoothly with better mouse functionality.
Now, you can use old apps on your Win7 OS. For example, you are forced to use this system for an old machine in a manufacturing company. Because the software of this invention they made in the past works on this OS. Now you can solve such problems on your new generation PC!
If you are still having trouble with the configuration, we have a complete guide. I also explained how to use all these features in our article Installing Windows 7 with VMware. If you read it, you will see that there is only one solution on the Internet.