
Do you want to uninstall Xerox Phaser 3124 3.04 completely from the computer? Do you receive strange errors when uninstalling Xerox Phaser 3124 3.04? Do you fail to install the updated version or other program after uninstalling Xerox Phaser 3124 3.04? Many computer users can not completely uninstall the program for one reason or another. If some files and components of the program are still left in the system, that means the program is not completely removed and uninstalled. Those leftovers will slow down your computer and stuff your system with invalid files as well as result in many problems for your life, such as strange error popups and unable to install other programs. There are many methods to uninstall the program, please see below:
Manually Uninstall Xerox Phaser 3124 3.04 with Windows Add/ Remove Programs
Windows Add/ Remove Programs offers users a way to uninstall the program and every Operating System has Add/ Remove Programs feature.
* Click Start menu and run Control Panel.
* Locate Xerox Phaser 3124 3.04 and click Change/ Remove to uninstall the program.
* Follow the uninstall wizard and uninstall the program.
Manually Uninstall Xerox Phaser 3124 3.04 with Build-in Uninstaller
Most computer programs are installed with its build-in uninstaller that can also help uninstall the program.
* Click Start menu and move your mouse to All Programs.
* Find Xerox Phaser 3124 3.04 folder and click on its Uninstaller.
* Follow its uninstaller and uninstall the program.
To run its uninstaller, you can also
* Go to the folder where the program is installed.
* Locate its uninstaller usually named as unins000.exe or uninstall.exe
* Double click on its uninstaller and follow it to uninstall the program.
Please know that both of Windows Add/ Remove Programs and its build-in uninstaller can only uninstall the main executable files of the program, but not all program files and components. Some invalid files may be left in system registry and folders. To completely remove Xerox Phaser 3124 3.04, you need to get rid of those remnants, otherwise, it will slow down your PC and block you installing other incompatible programs.
To thoroughly delete its files, please follow the steps:
* Run Registry Editor
* Find and delete all registry entries of the program in HKEY_CURRENT_USER\Software, HKEY_LOCAL_MACHINE\SOFTWARE and HKEY_LOCAL_MACHINE\Software\Microsoft\Windows\CurrentVersion\Run\eg ui
* Find and delete all files of the program in system folders C:\Program Files\, C:\Document and Settings\All Users\Application Data\ and C:\Documents and Settings\%USER%\Application Data\.
Video Guide: How to edit registry
Note: We only recommend advanced computer users to manually edit registry and remove
Xerox Phaser 3124 3.04, because deleting any single registry entry by mistake will lead to severe problem or even system crash.
A Better Way to Uninstall Xerox Phaser 3124 3.04 with Added Benefits
There is a much easier and safer way to uninstall Xerox Phaser 3124 3.04 completely. A third party uninstaller can automatically help you uninstall any unwanted programs and completely remove all of its files and free up your hard disk space. Especially when users can not find the program in Add/ Remove Programs or its build-in uninstaller, a third party uninstaller can save your much time and frustration.
Download Certified Xerox Phaser 3124 3.04 Uninstaller !!
How can Uninstall Xerox Phaser 3124 Completely from Computer
Xerox Phaser 3124 removal has been a tough problem on your PC? Do you need an effective way to uninstall Xerox Phaser 3124 quickly with simple steps? Don’t worry, you will be able to solve the problem via the following removing instructions of the program.
Get Bloatware Uninstaller Now
Xerox Phaser 3124 may be great in providing its specific function for the users, but it also can turn out to be a problem when the program get some running issues or you don’t want to keep it on your computer any more. In this case, removing Xerox Phaser 3124 will be the common and also effective means to resolve the problem, and the real difficulty just come out when people try to uninstall Xerox Phaser 3124 from their PCs.
What usually make people to remove Xerox Phaser 3124
- Xerox Phaser 3124 is not compatible with other installed applications
- Program gets a corrupted issue unexpectedly
- Xerox Phaser 3124 is not as good as the user expected, and need to be erased from the computer
- Xerox Phaser 3124 should be uninstalled first and reinstalled on the PC
- The application is regarded by the user and some websites as a suspect malware
Most common problems of removing the software
- Xerox Phaser 3124 program is not available on the Windows uninstall panel
- Xerox Phaser 3124 can’t be removed from the Windows and always receive a notification
- Nothing happen when click on the uninstall button on Windows
- Xerox Phaser 3124 or the related process still keep running on the computer after removing it
- Some files and traces of the program still can be found
- Removing process running for a long time and does not come to the end
If must be a headache if encountering such a problem on the computer, and there are still many other problems people might come across when perform the program removal on their own computers. Therefore, you should know the right way about how to uninstall Xerox Phaser 3124 from PC, or the way to fix/avoid the removing issue on the computer. Here are just several options that can support you to remove the application well.
How can uninstall Xerox Phaser 3124 well on PC? Check these guides
Option 1: Use the product’s uninstall tool
There are many applications in nowadays provides an uninstall process on the program’s installation folder, or the publisher gets an uninstaller which is specifically used to remove its own products. To remove Xerox Phaser 3124 in this way, please refer to the following uninstall instructions:
- 1. Right-click on Xerox Phaser 3124 icon on the desktop, and select «Open file location»
- 2. Scroll down the list of files and find the uninstall process, usually named «uninst000», «Uninstall», or «Uninstaller»
- 3. Double click on the uninstall process to start the removal
- 4. Follow the uninstall wizard to finish the removal, and restart your computer
- 5. Open the directory of the installation folder again, and make sure everything has been cleared well
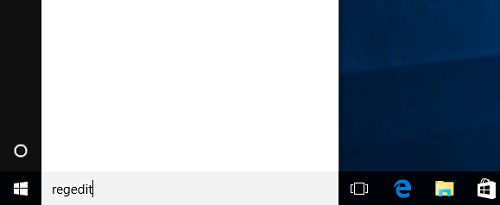
- 6. Click on the Windows button on the bottom-left-corner, and enter «regedit» on the search box
-

- 7. Click to open «regedit» or Registry Editor on the search result
-
- 8. Unfold the registry group inside, and find out those registry keys or entries which contains the program’s name
- 9. Back up these files, and then remove them from your computer system

Note: once problems occur after deleting the registry, please restore the back-up registry to Registry Editor.
When using the publisher’s uninstaller, you should download and install the uninstall application additionally, and choose to uninstall Xerox Phaser 3124 from its interface. Similar to the above removal, you should restart your computer after finish the uninstall process, and clear its remnants again which are still staying on the PC.
Things you need to know about Registry Editor
Registry Editor is a place that stores many important registry keys and entries which closely related to the system operation and program’s performance on the computer, removing a wrong file inside usually cause serious problem for the system, so you should be very careful when you have to manually delete some registries inside.
Get Bloatware Uninstaller Now
Option 2:Remove it with Windows uninstall feature
Windows system provide an uninstall feature in Control Panel that support the user to remove unwanted program on the PC, to access this applet in different operating system, you can follow these instructions:
- 1. Open the uninstall panel on Windows system
- 2. Select Xerox Phaser 3124 on the programs list, click on Remove/Uninstall button
-
- 3. Confirm the program removal, and complete the removing steps with guides
- 4. When finish, reboot the computer
- 5. The same to the removing steps in Option 1, you should clear the leftovers in the installation folder as well as Registry Editor
Option 3:Uninstall Xerox Phaser 3124 with Bloatware Uninstaller
If you want to totally avoid the risky manual removal of registry, and handle Xerox Phaser 3124 uninstall more easily and quickly, taking a professional uninstall tool will be a great help for you, because it can count all of the files (including registry keys and temporary files) and provide a complete and automatic removal, thus, many risky and annoying manual steps could be skipped can you can totally remove Xerox Phaser 3124 on the PC more quickly.
Bloatware Uninstaller is an advanced uninstall utility that can give a good example about how uninstall Xerox Phaser 3124 well:
- 1. Install and launch the uninstaller on PC
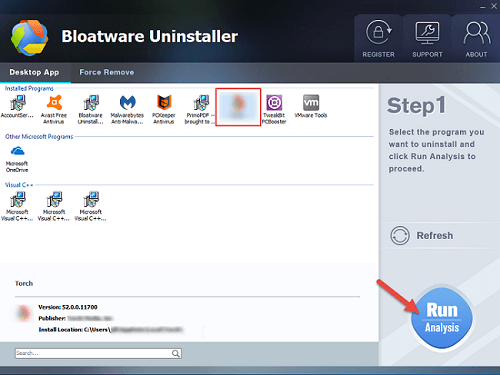
- 2. Find and select Xerox Phaser 3124 from the programs list, and click on Scan button
-
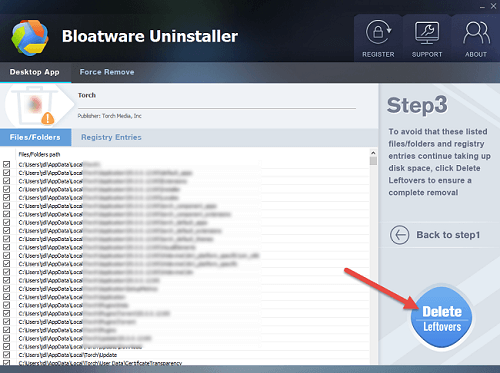
- 3. When all of files being detected, click on the uninstall or remove button
-
- 4. Follow the uninstall wizard to remove all of components from the computer
-
- 5. Exit the uninstaller when finish, and reboot the computer system

Get Bloatware Uninstaller Now
This is a very effective way to uninstall Xerox Phaser 3124 and other applications, while the manual removal usually resulted in an unsuccessful removal, and the most important point is it is much easier for the common user to take and get rid of the program they want. So it is currently the best way we found and would like to recommend you to remove unneeded programs with a good app uninstaller.
How do you remove VMware Player that won’t uninstall on a PC? Is there a quick way to uninstall VMware Player and properly remove its leftover files, folders, registry files and other junk? You are probably on this post because you can’t uninstall VMware Player from your PC. In the windows 10 control panel for app removal, you may find the “Modify” and “Uninstall” are greyed out when selecting Vmware and there is no “uninstall.exe” file in the VMware Player installation folder. This is a big issue for people who don’t want VMware Player on their computers. Are you looking for the right way to uninstall VMWare Player? In this post, we’ll show you the most comprehensive and effective removal steps to help you fully uninstall VMware Player and all traces of this program.
About VMware Player:

VMware Player, as known as VMware Workstation Player, is a perfect solution for students, faculty, businesses and corporate users who need a small sandbox environment for testing or control. This desktop virtualization application is now up to version 15.5 and it is available for free for personal use. However, commercial organizations require commercial licenses to use it. With VMware Workstation Player, you can create, run, evaluate, and share software running in a virtual machine on a Windows or Linux PC. That means, you are able to run a second, isolated operating system on a single PC. In this virtual machine, you can try a new operating system, deliberately execute malware, develop software for other platforms or create system-level snapshots that can be instantly restored on demand. VMWare Player includes features that enable users to create and configure their own virtual machines for optimal performance and access any devices connected to their PC. So you will find your experience with VMware Workstation silky smooth and very productive. VMWare Player has excellent support for hardware compatibility and it is the original, best, and virtualization solution used by employees, training organizations, students, contractors and many other people.
VMware Player Removal:
VMware Player might bring you a lot of benefits, but there are chances you may want to uninstall this program. For example, your PC doesn’t meet the minimum PC requirements to use VMware Workstation Player so your computer will be extremely slow when VMware Player is running in the background. Or you may want to upgrade your VMware Workstation version to a higher version so you must uninstall the older version first. Some users uninstall VMware Player because of unexpected errors like “VMware Player cannot connect to the virtual machine. Make sure you have rights to run the program and to access all directories it uses and rights to access all directories for temporary files” happens while powering on VMware Player. They need uninstall and reinstall VMware Player for troubleshooting. Whatever the reason is, it turns out VMware Player removal is a difficult task. If you go to Windows 10’s Apps & features or control panel to uninstall, you will find the Uninstall button is grayed out and unclickable. This can be a problem. So today, we’re going to show you how to effectively remove VMware Player from your Windows 10 PC when it won’t let you uninstall.
Try Uninstallor Now
The Most Common Ways That You Uninstall VMware Player in Windows 10:
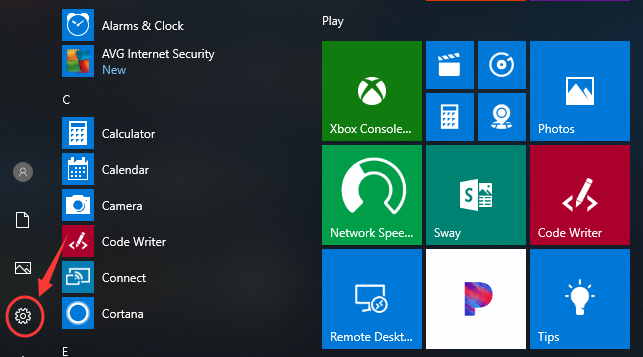
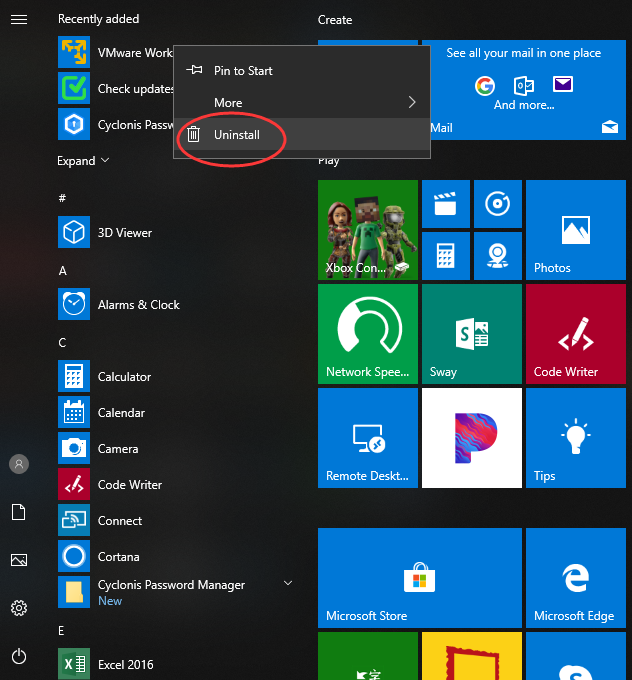
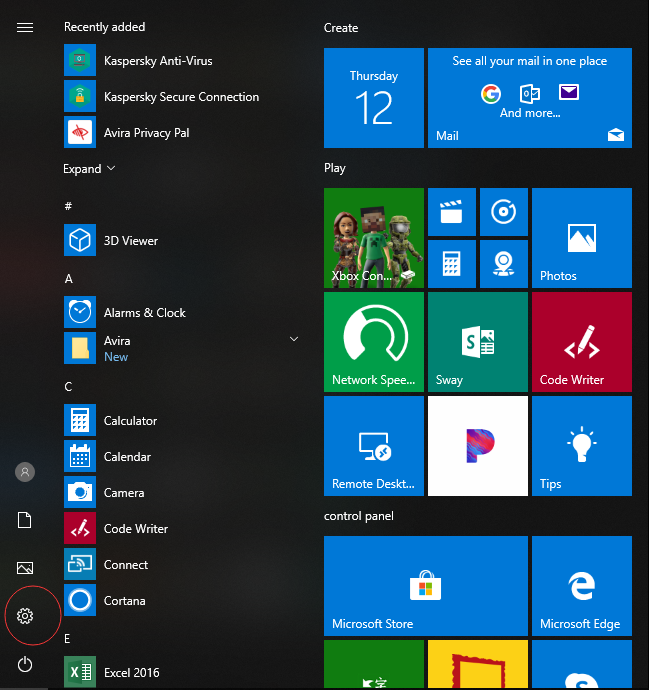
Method 1: Removal from Start Menu

You can uninstall VMware Player directly from the Start menu. To do this, go to Start > All apps and find the VMware Player. Right-click on it and then click Uninstall from the drop-down menu that appears. If you can’t find VMware Player in the Start menu, or it won’t let you uninstall, you can try other methods listed below.
Method 2: Removal from The Settings Menu
In some cases, you cannot find an app or program that you want to uninstall in the Start menu. So, you can try this way to remove it from the Settings Menu.
Here’s what you need to do:
1. Go to Start->Settings.
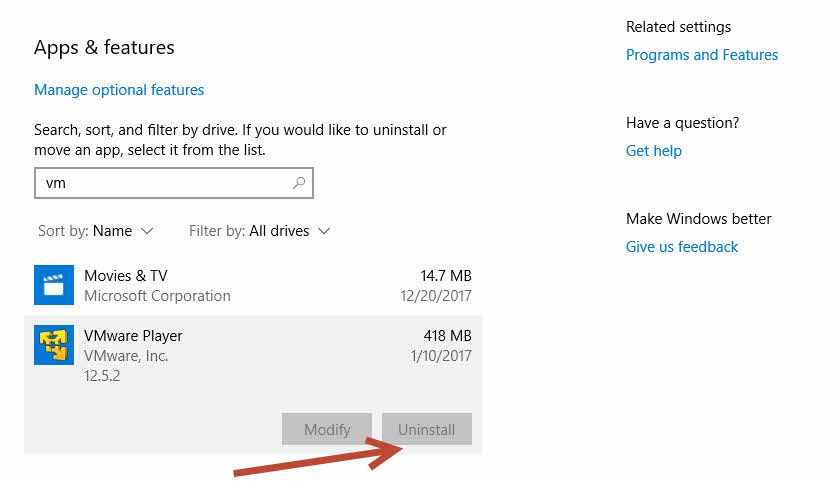
2. Choose System and then click Apps & features. Here, you’ll see a full list of applications and programs on your computer, sorted by size. You can use the search box at the top of the screen to search for apps, and you can resort the list by name or by install date.
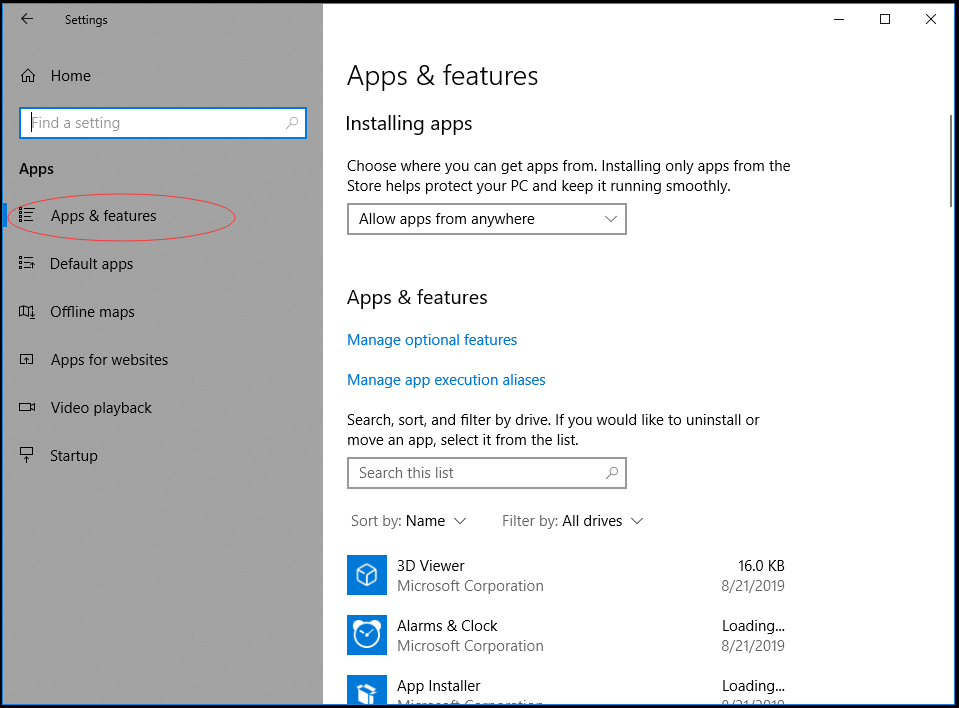
3. Select VMware Player and Click Uninstall to start the removal process. If things go well, you will see a pop-up window informing you that the app and its related info will be uninstalled, then you just need to hit Uninstall to confirm the removal. However, in some cases (like the image shows below), VMware Player won’t let you uninstall and you will see the Uninstall option is grayed out. Don’t worry. Keep reading and find out the proper way to remove VMware Player completely.

Method 3: Removal through the Add/Remove Programs Control Panel
If the above methods are not working, you can try uninstalling VMware Player from Control Panel first. Control Panel option is still available in the latest edition of Windows 10. Please note that you can only uninstall the desktop programs from here, but not apps. Do the following:
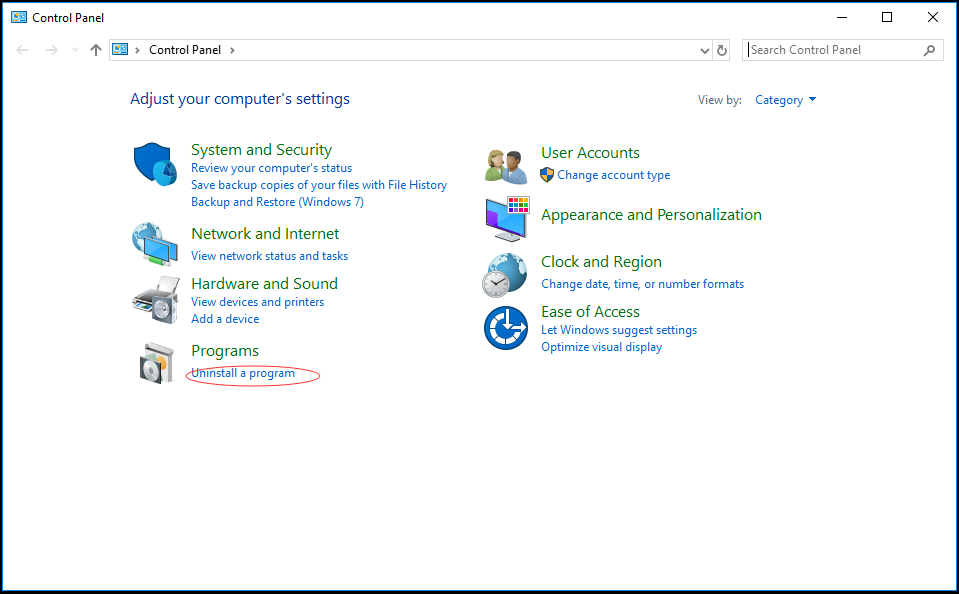
1. Right-click on the Start button (Windows logo button at the bottom-left corner of the desktop) and then click Control Panel to open it.
2. Go to Programs and Features (or go to Uninstall a Program if your Control Panel is in the category view).
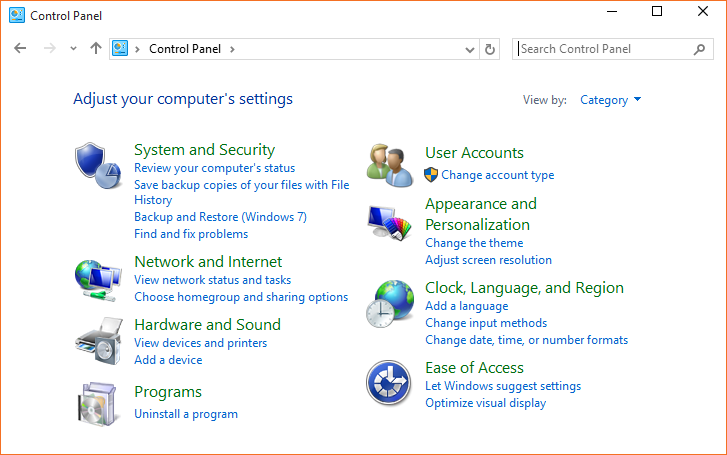
3. Right-click VMware Player and select Uninstall.
In general, you’ll see a pop-up window asking if you’re sure you want to uninstall this program, click Yes and click through the uninstall wizard, if applicable. After it is done, it will prompt the users to Reboot their computer to take effect.
But, in some cases, Windows may refuse you to uninstall VMware Player from control panel because it’s a stubborn program. You may find VMware Player is not listed in the Programs and Features window or there is no “Uninstall” option to let you perform the task. In that case, you can try to remove VMware Player manually instead.

How to uninstall VMware Player manually?
When VMware Player fails to get uninstalled, you can manually remove the program and all its leftovers like registry keys, folders, files and shortcuts. Here is our detailed guide on how to manually remove VMware Player and all its traces:
1. Open the Start menu, type %programfiles% and %appdata% into the search bar – strictly one at a time – and hit enter.
This will open system folders where you can find the related folders for VMware Player. Delete the ones with the name of VMware Player from both system folders.
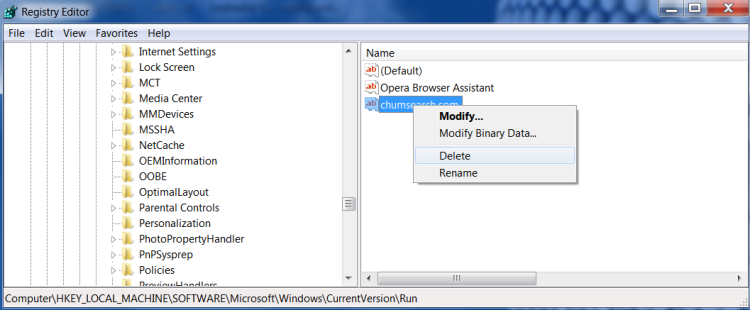
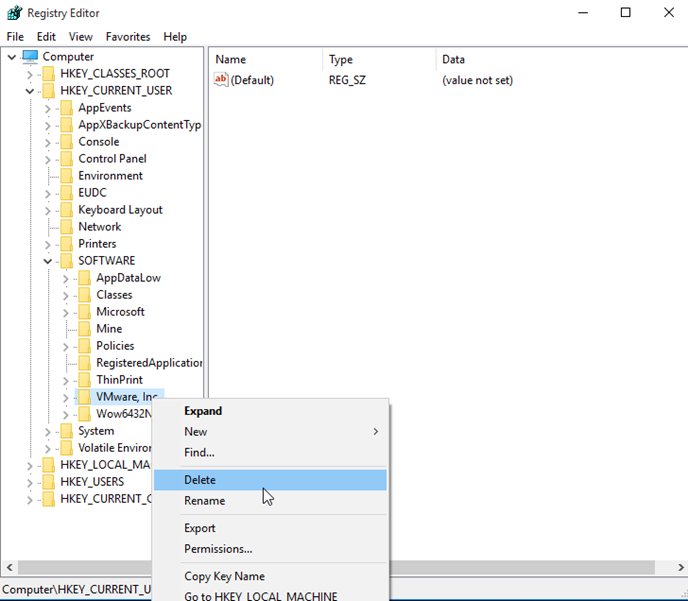
2. Next, you have to delete VMware Player entries from Windows registry:
Press Windows + R, and type in regedit in RUN box, then press Enter. It’ll open Registry Editor.
Locate the following keys:
- HKEY_CURRENT_USER\Software\Microsoft\Windows\CurrentVersion\
- HKEY_LOCAL_MACHINE\SOFTWARE\Microsoft\Windows\CurrentVersion\
- HKEY_LOCAL_MACHINE\SOFTWARE\Wow6432Node\VMware, Inc.\Installer\VMware Workstation
- >HKEY_LOCAL_MACHINE\SOFTWARE\Classes\Applications\vmware.exe
If these branches have registry entries that are responsible for VMware Player, delete them. To do this, right-click on the desired file and click Delete.
Note:
Make sure to take a backup before deleting anything from Windows Registry so that you can restore it later if something goes wrong. If the above-mentioned methods didn’t help in uninstalling VMware Player, then it’s better to rely on a third-party uninstaller.
Uninstallor is one of the most excellent uninstallers that can recognize all the trash files left behind by a program after it is uninstalled and help you delete common leftovers like registration files, empty folders, dll files and task schedule etc with only 3 easy steps. It is very useful when the program you want to uninstall is not showing up in Control Panel or Settings in Windows 10, or you get errors while uninstalling. If you don’t fancy dealing with program leftovers, just let Uninstallor take care of everything for you.
Try Uninstallor Now
The Most Recommended Method to Uninstall VMware Player in Windows 10
Method 4: Uninstall VMware Player Using A Removal Tool (Recommended)
Compared to the Windows built-in uninstaller, Uninstallor can do a better job of deleting an application completely. Here’s how it works:
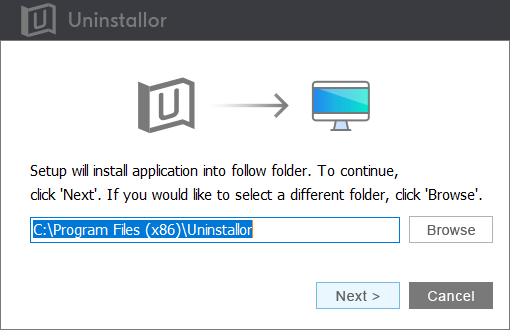
1. Download & Install Uninstallor on your machine. Uninstallor is quite lightweight and the installation is straightforward. The only option you have is to let you create a program shortcut to the desktop.
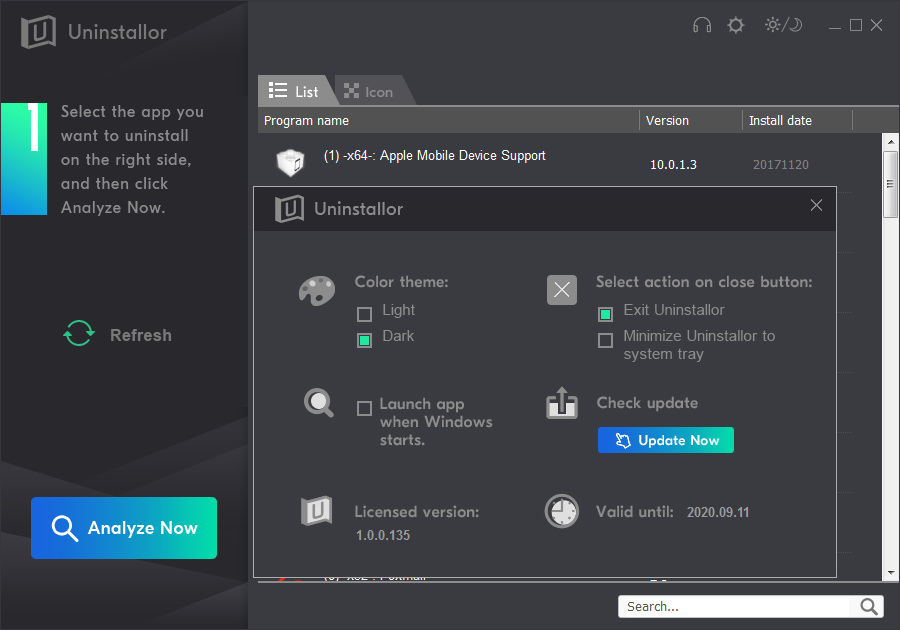
2. Launch Uninstallor. Uninstallor comes with an easy-to-use interface and it lets you switch to dark or light theme as you wish.
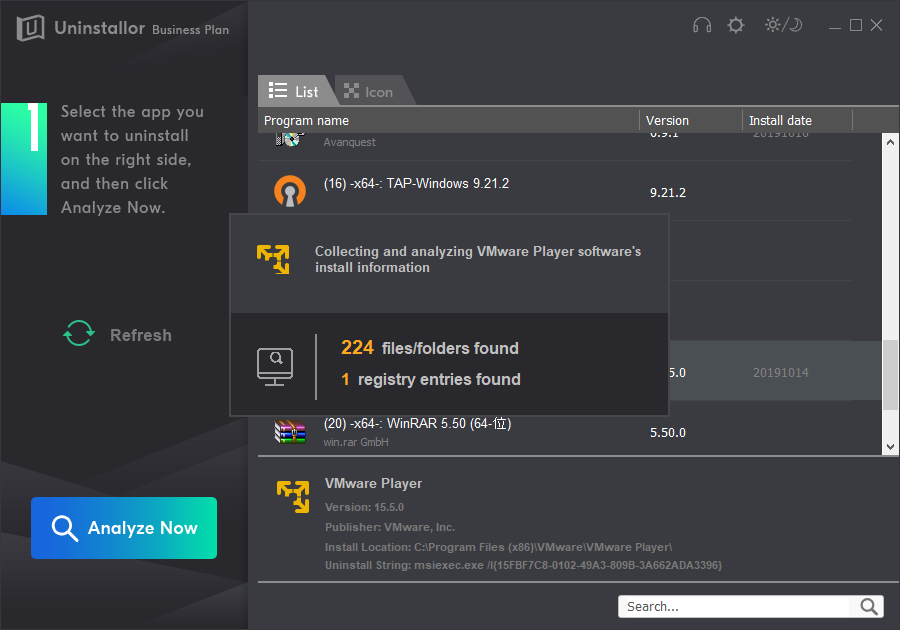
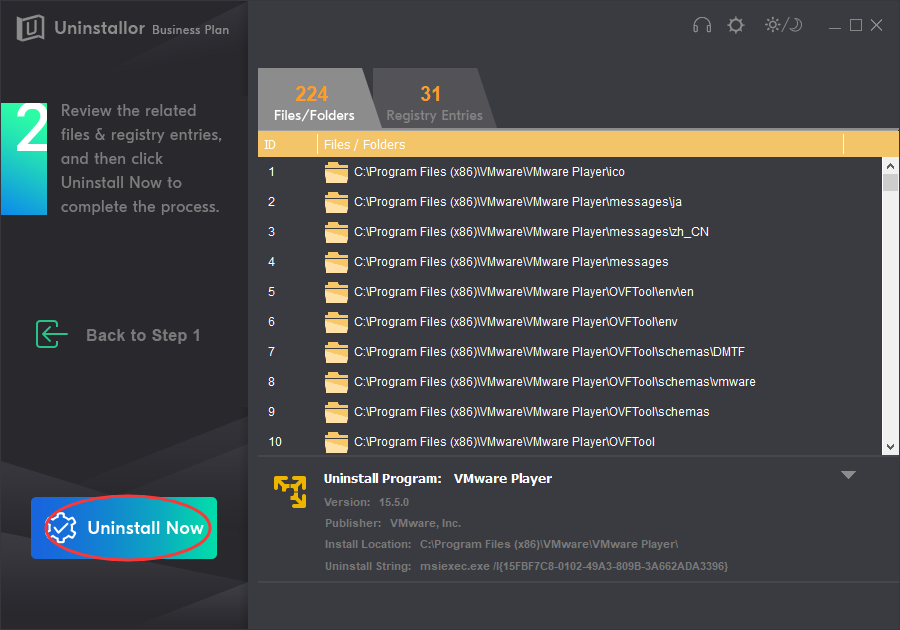
3. Scan for program components. Select the program that you want to uninstall and click on “Analyze Now” button. It will analyze all the data associated with the uninstalled program and searches for all leftover files.
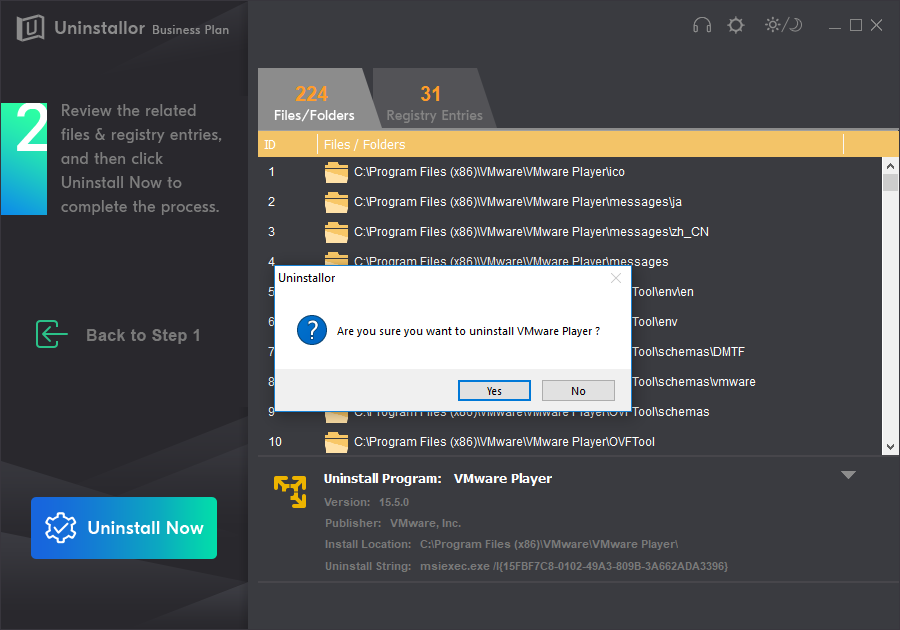
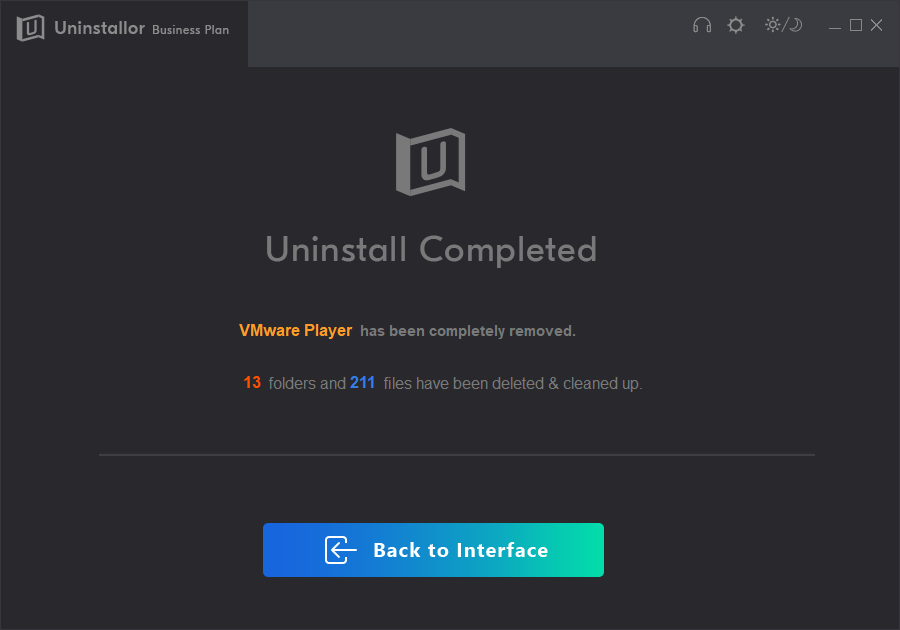
4. Perform complete removal. Click on “Uninstall Now” button to uninstall VMware Player completely. Next, you need to click on “Yes” to confirm the removal.
5. Wait until the uninstallation is completed. When the process is completed, restart your computer to take effect.
Conclusion:
Sometimes it just happens. You want to uninstall VMware Player from your computer, but Windows doesn’t let you do that, so have no choice to delete the Program files/vmware folder, VMware services and a bunch of files all over your system folder and registry manually. However, the manual removal process requires expertise. If you have never edited or cleaned your registries in the past, you’d better avoid doing it yourself because any mistake could kill your server, or any of its most important functions. You can use Uninstallor to complete the removal job instead. There are many third-party uninstallers to choose from, and Uninstallor is one of the best that can analyze all of a program’s connections and offer a complete removal of the program, its folders and files, and its registry entries. Uninstallor is a must-have program that ensures you leave nothing behind on your PC when they uninstall VMware Player. Now you will have mastered the approaches to get rid of VMware Player completely. If you still have difficulties in uninstalling VMware Player, you are welcome to contact our expert for instant help.
Try Uninstallor Now
Published by Tony Shepherd & last updated on October 30, 2019 8:07 am
Windows 10 is a great operating system and works great…oh well at least when it’s working it works great. When it’s not working, you will probably be banging your head on the wall and yelling why. Recently I just had a moment like that. I was using VMWare Workstation Player 12 and decided to upgrade to Player 14, so I need to uninstall Player 12 first. It should be a simple task in Windows 10, right? It turned out it is not that simple. I clicked Start->Settings->Apps, and found VMWare Workstation Player 12 in the list, but both the “Modify” and “Uninstall” buttons are greyed out.
So a simple task in Windows 10 turned out to be a big research on how to uninstall VMWare Workstation Player 12 in Windows 10. Do you feel me?
After quite a bit research, here are some ways to uninstall VMWare Player 12, or any program, in Windows 10.
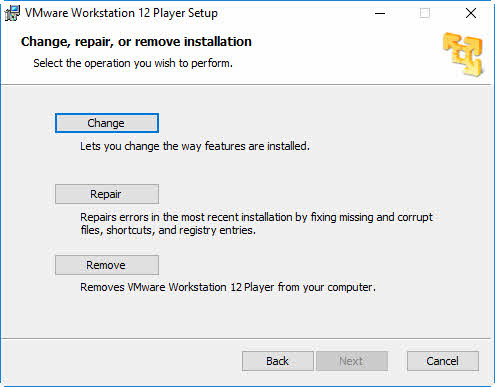
1. If you still have the original setup executable file for VMWare Player 12, just run the installer again and it will give you three options: Change, Repair, or Remove. You can click “Remove” to uninstall VMWare Player 12 from your computer.
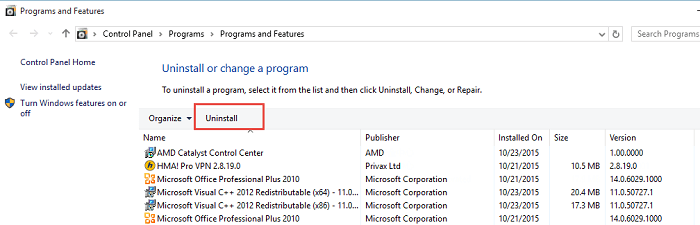
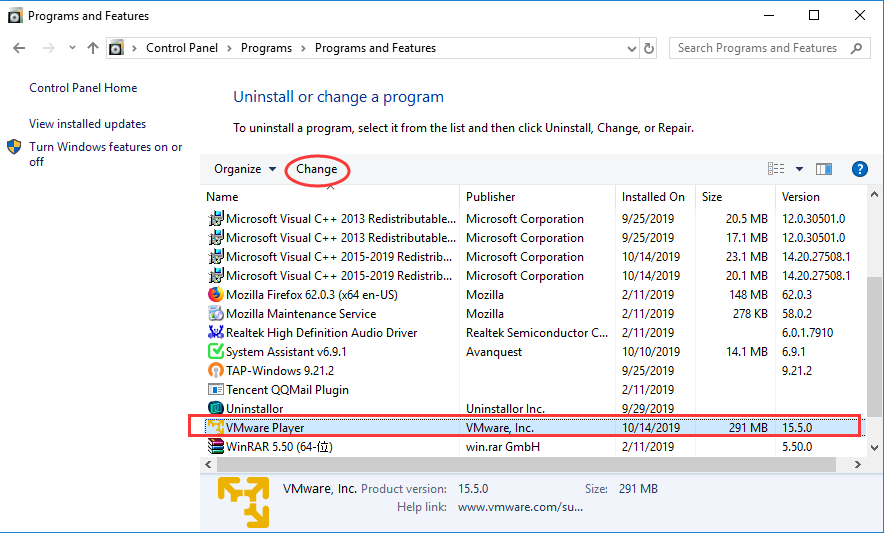
2. If you don’t have the original setup executable file, then click the “Programs and Features” on the top right corner at shown in the screenshot above. You will be redirect to the old “uninstall or change program” window in the Control Panel. Search the list for VMWare and click “Change” button after selecting the program.
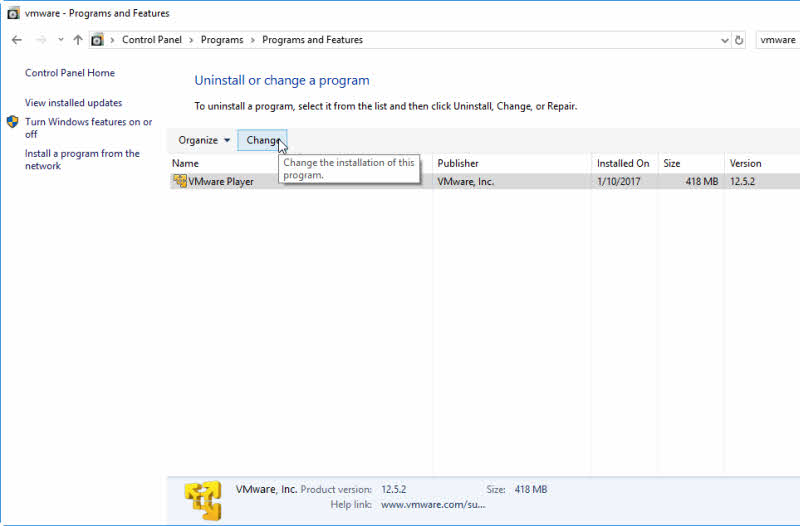
Then, VMWare Player installer will start and you will see the same screen above to change, repair, or remove the program.
(In Windows 10, click Start, then type “Control Panel” and click it from the list, then click “Uninstall a program” will take you to the same screen as above.)
If all the above failed, then you can use a tool from Microsoft to uninstall your program.
1. Download Microsoft Program Install and Uninstall Troubleshooter
WARNING: This tool may reboot your computer automatically after troubleshooting, so make sure you save your work, close all other programs before launching the tool. You have been warned.
2. Double-click the downloaded file (the file extension is .diagcab) to launch it
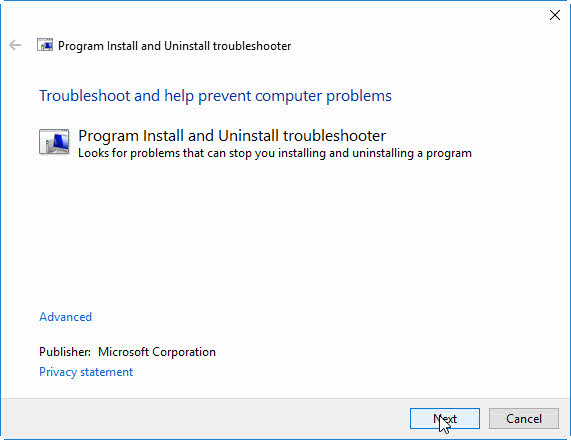
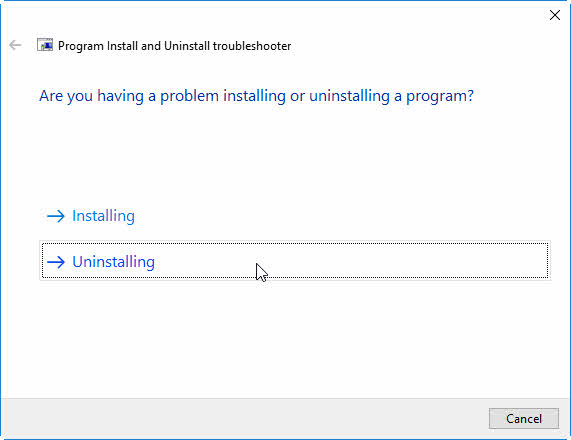
3. Click Next, then choos Uninstalling
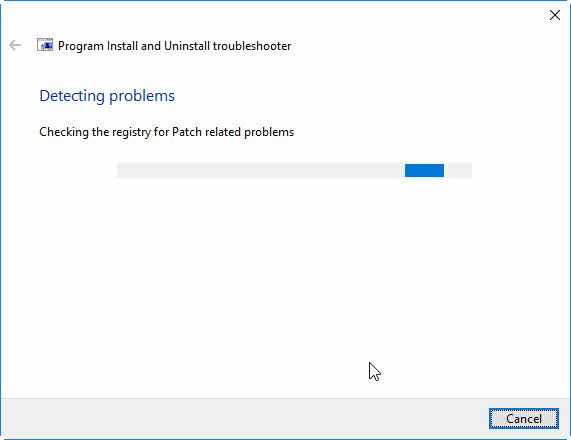
4. Wait while the tool is checking the issue
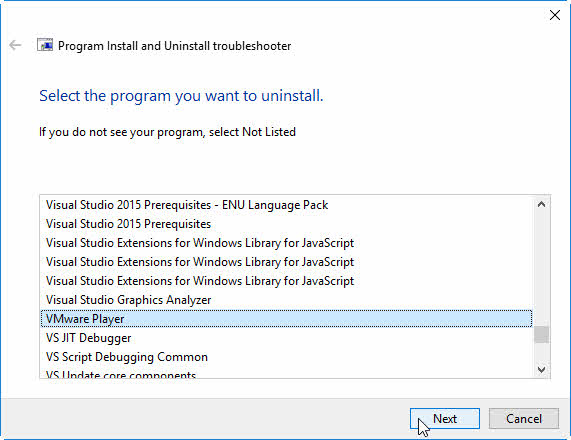
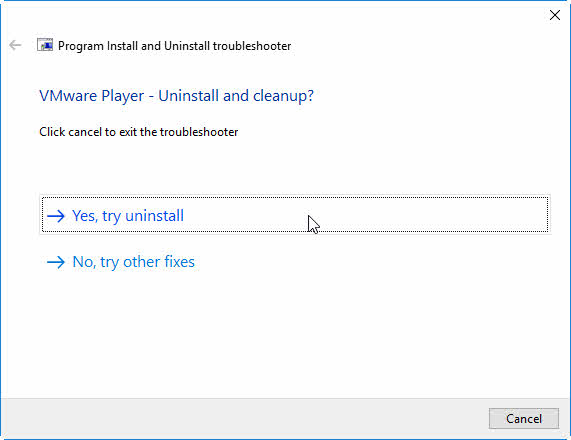
5. Choose the program you are trying to uninstall (or install). In my case, it is VMWare Player. Click Next to continue
6. Confirm that you would like the tool to uninstall the program
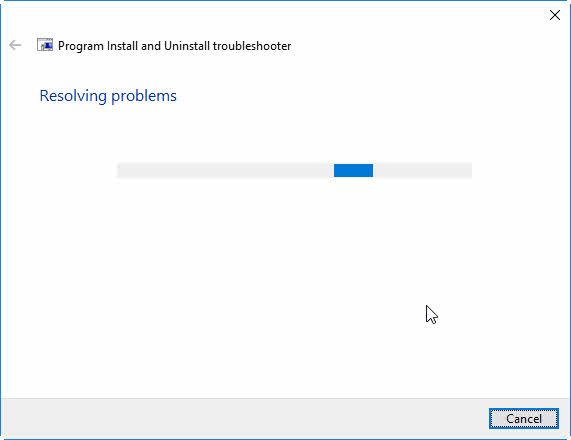
7. Hang tight while the tool is trying to uninstall the program
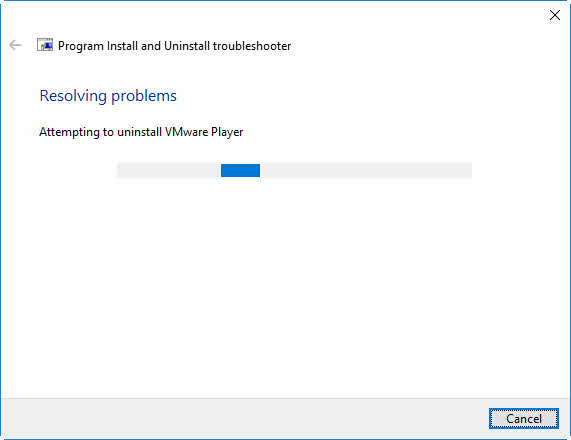
In my case, the tool automatically reboot my computer. And after the reboot, VMWare Player 12 was uninstalled.
Please let me know if this helped you.
2.3
3
votes
Article Rating
How do I completely uninstall VMware Player from Windows 10? Lately I decided to upgrade my VMware Player to the latest version, but it tells the software can’t be installed as a version of the product exists on the PC. I have to uninstall VMware Player before I can install the paid version. I tried to uninstall it via standard way, the Windows Application window, but it told me that I don’t have permission to uninstall. Have you ever been in this situation? How to fix the problem?
VMware Player Review
VMware Player (VMware Workstation Player) is a desktop virtualization application which allows users to use a second and isolated operating system on a single PC by setting up virtual machine. Virtual machine works as a software container which has the capability to run its own operating system and execute applications like a physical machine. VMware Player provides mature and stable solutions for local desktop virtualization and has been chosen by a number of users around the world. What kinds of people need this tool? Users who need a small sandbox environment for testing or control would like this tool. When users set up and run the virtual machine, they don’t need to reboot the PC and the main desktop environment won’t be affected by the second operating system. It is possible for users to have different privacy settings, tools and networking configurations to keep their host system secure and private.
If users create a virtual machine to let their teams view important data, they can run restricted VM. The data will be encrypted and password-protected. In this way, only authorized users can access the data. It also is a great tool which helps users learn about operating systems, applications and how they work. They can run a server environment on a desktop PC easily without interfering with the host desktop. VMWare Workstation Player only lets users run one virtual machine at a time. To run multiple virtual machines at the same time, or switch to the open source VirtulBox, you will be required to upgrade to the paid version VMware Workstation Pro Player or Fusion Pro.
Decide to Uninstall VMware Player?
Despite of a number of advantages and useful functions, some users decide to quit VMware Player for different reasons. VMware Player may consume much of your memory on the system. When users run VMware Player, there are many programs including VMware Authorization Service, VMware Authentication Service, VMware Registration Service, VMware DHCP Service, VMware NAT Service, VMware USB Arbitration Service, VMware Workstation Server and VMware WSX Service etc. running in the background. To use this program, you should ensure you have enough memory to run the 64-bit host operating system. The minimum PC requirements are a 1.3 GHz or faster 64-bit processor and 2GB RAM. If you have 2 GHz and 4GB RAM, the program will run better. If your PC does not meet the minimum requirement, the app takes a long time to respond and always makes the system freeze up.
Sometimes, VMware Player encounters errors and stops working. For example, users see “Error while powering on: Internal error.” Some users complain that they constantly see error like “VMware Player cannot connect to the virtual machine. Make sure you have rights to run the program and to access all directories it uses and rights to access all directories for temporary files.” They try many methods after contacting the customer support, but the error still appears frequently. That is so annoying. Sometimes, the program performs poorly and displays a dreaded MSI error. Some users try to use this program for work, but they don’t understand English and Japanese. Hence, they have to switch to another program. Sometimes, VMWare Player cannot be upgraded directly, and users are required to reinstall the software. However, the software can’t be uninstalled and the new won’t install. If you decide to uninstall VMware Player, you need to uninstall it completely for future reinstalling and cleaning invalid files.
Live Chat With Support Now
Download Now
Fail to Uninstall VMware Player?
According to a recent research, most users have difficulties when they try to uninstall VMware Player. What problems do you have when trying to uninstall this software? Let’s discuss the commons problems you may have during the removal process. You may not be able to find it on the programs list of Windows removing panel, or get some strange errors or alerts when conducting the removal.
According to some users, VMware Player does not appear on the program & features window. You may try to look for it on settings. However, the “modify” and “uninstall” buttons are greyed out when you select VMware Player in settings for app removal. You may get stuck and don’t know where to continue.
Sometimes, the uninstall button in control panel works. However, the process is interrupted by unknown errors. The most common errors are “You don’t have sufficient permission to uninstall VMware Player” and “the software can’t be uninstalled due improper configuration.” For insufficient permission, you can try to use the same user account which installs the VMware earlier to uninstall it. If the program was installed in an incorrect way or was corrupted, you might need to reinstall the software to finally uninstall it.
Some of you may be able to finish the software uninstalling task. However, VMware Player still can be founded on the PC. Its files and folders still exist on hard disk. Sometimes, Windows’ built-in uninstall tool, “Add/Remove Programs” and “Programs and Features” does not 100% remove VMware Player. Especially when you try to uninstall stubborn software, its leftovers are difficult to remove. They hide deep on system, and you need to locate and remove them accurately.
How to Completely Uninstall VMware Player from Windows 10?
Most users fail to uninstall VMware Player due to different reasons, so we provide both manual and automatic solution for removal. You can use Windows add/remove feature to remove software and clean leftovers manually. If you are in a rush and need quick solution, you can use Uninstallor to uninstall VMware Player automatically. With few clicks, the software will be deleted completely.
Option 1: Uninstall VMware Player Manually via Windows Add/Remove Feature
To uninstall software completely, you need to use Windows add/remove feature to remove the VMware files, VMware services, registry entries and various components for the products manually. Hence, there are two parts in this solution. You have to uninstall software first and then clear leftovers completely. There are three methods to uninstall the software at first part.
Part 1: Uninstall Software
Method 1: Uninstall via Start Menu
Step 1: press Windows key and look for VMware Player on the Start menu.
Step 2: right click on VMware Player icon and select uninstall option. You will be redirect to the “uninstall or change program” window.
Step 3: select VMware Player, and click Uninstall button on the top and confirm the action. Finish the uninstalling process with prompts.
Method 2: Uninstall via Control Panel
Step 1: type “control panel” in search box on taskbar. Click “control panel” on the popup list to open it.
Step 2: click “Uninstall a Program” under Program menu. It will open “Programs and Features.”
Step 3: locate and select VMware Player. Click Uninstall button on the top. If Uninstall button is not available, click Change button and follow the wizard to proceed. When it opens uninstall panel, click Next option to continue the Setup Wizard. Check if you can see Remove option during the Setup Wizard. Click Remove option, and mark all options to uninstall the software successfully.
Method 3: Uninstall via Settings
Step 1: click “Start” button at bottom left. At left side of the Start menu, click Settings icon which looks like a gear.
Step 2: on Windows Settings screen, click “App” menu. Next, select “Apps & Features” tab.
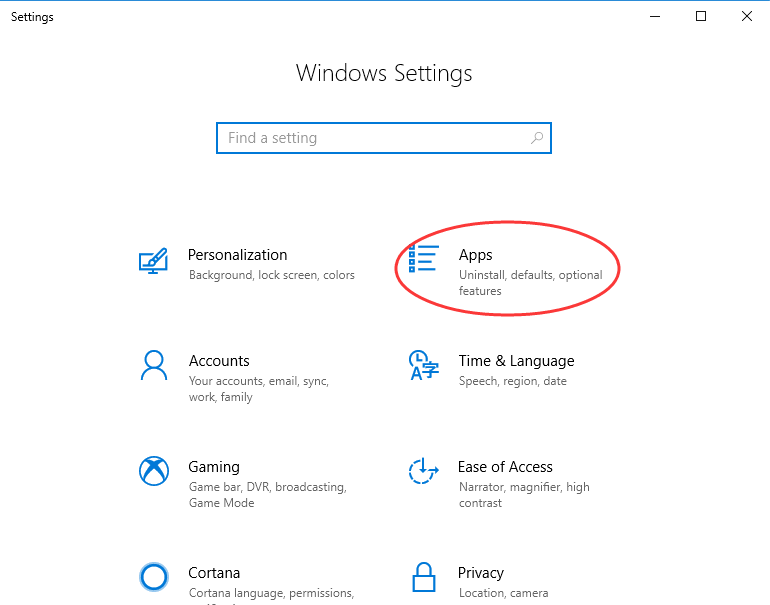
Step 3: scroll down to select VMware Player, and a menu with “Uninstall” and “Modify” will appear. Click Uninstall, and perform the removal with prompts.

Part 2: Clean VMware Player Leftovers
When you uninstall VMware Player, you only delete the executable files. For complete uninstallation, you will have to clear the invalid registry entries, services and app data manually. That not only lets you free up disk space used by VMware Player, but also helps you avoid software conflict and other issues. Before making any registry modifications, we suggest you back up your registry data to avoid issues caused by wrong operations.
Firstly, press Windows +R keys. A dialog will appear.
Secondly, type “regedit” in the blank and click “OK” to open Registry Editor.

Thirdly, press “Ctrl” + “F” keys to open search box. Type VMware Player and search for results. Unfold the registry group to accurately locate the VMWare Player registry. Right click on related files and folders, and click Delete option. Locate all invalid registry entries and delete them one by one.
- HKEY_CLASSES_ROOT\Installer\Features\AE11A35A5900F39468AF1AE5A8684A50
- HKEY_CLASSES_ROOT\Installer\Products\AE11A35A5900F39468AF1AE5A8684A50
- HKEY_LOCAL_MACHINE\SOFTWARE\Classes\Installer\Features\AE11A35A5900F39468AF1AE5A8684A50
Lastly, click My Computer and select Tools tab. Click Folder options and select View tab. Choose Show hidden devices from the View menu. Click Apply, then OK and exit the window. Next, search for VMware Player on your hard disk. Remove all founded items.
- C:\Program Files(X86)\VMware\
Live Chat With Support Now
Download Now
Option 2: Use Uninstallor to Uninstall VMware Player Automatically
If VMware Player still won’t uninstall after trying all the methods. You will need the third-party uninstaller. Uninstallor is a powerful utility which helps you uninstall VMware Player within two minutes. You only need to tell it which program you would like to uninstall, and follow its wizard to proceed. There is no need to locate and clean leftovers manually. Uninstallor will do the entire job for you.
Firstly, download and install Uninstallor on your PC. Uninstallor is lightweight and easy to install.

Secondly, once you run Uninstallor, it loads the list of software you install on the PC. Scroll down to select VMware Player and click “Analyze Now” button. The program will provide the best solution to uninstall VMware Player after analyzing it.

Thirdly, click “Uninstall Now” button, and the program will uninstall the software and locate leftovers for you automatically.
Fourthly, simply click “Remove Now” button to clean all associated files and folders. In this way, VMware Player is completely uninstalled.

Conclusion
Based on your own situation, choose manual or automatic solution to uninstall VMware Player. If you choose manual solution, simply follow our step-by-step guide to proceed. If you are not good computer, the manual solution may not suit you. On one hand, it does not guarantee a successful and 100% removal. You have to locate and delete all associated folders and files. On the other hand, it requires computer skills and patience to edit registry data. If you removed files of other applications or system programs, it could cause blue screen, application crashes and other serious problems. We suggest you seek help from computer experts or use a professional uninstaller. Uninstallor is an excellent option because it includes software package, custom fix and remote support. With few clicks, you can uninstall stubborn, problematic and unwanted software without any problem.

Live Chat With Support Now
Download Now
Published by on November 29, 2019 9:08 am, last updated on December 27, 2019 2:22 am