
With the SCSI paravirtual controller (PVSCSI) offered by VMware ESXi, you have the ability to increase storage performance, but also reduce CPU usage through paravirtualization.
This is very useful for applications causing a large number of inputs / outputs (I/O) at the storage level, as is the case with database servers, for example.
- Prerequisites for using the SCSI paravirtual controller
- Create a vrtual machine with a VMware SCSI paravirtual controller (PVSCSI)
- Install Windows and VMware paravirtual SCSI driver (PVSCSI)
- Install VMware Tools
- SCSI paravirtual controller visible in device manager
1. Prerequisites for using the SCSI paravirtual controller
To be able to use this SCSI paravirtual controller, several prerequisites are necessary :
- if you want to add this SCSI paravirtual controller to an existing virtual machine (where the guest operating system is already installed), VMware Tools must be installed there
- the virtual hardware of your virtual machine must be version 7 (= VMware ESXi / ESX 4.x or equivalent in other VMware products) or later
- the operating system must support this type of controller.
Note that 3 «pvscsi-WindowsX.flp» virtual floppy disks exist on VMware ESXi. This allows you to provide the correct driver when installing Windows if you want to install Windows on the disk connected to the SCSI paravirtual controller.
Limitations :
- virtual machines using a SCSI paravirtual controller (PVSCSI) can’t be part of a MSCS cluster (Windows Server Failover Cluster).
- disks connected to a SCSI paravirtual controller (PVSCSI) may not have optimal performance if you have taken snapshots on the affected virtual machine or when the host’s RAM is overloaded
Sources :
- Add a Paravirtual SCSI Controller in the VMware Host Client
- vSphere Virtual Machine Administration — Storage Controller Limitations (page 115)
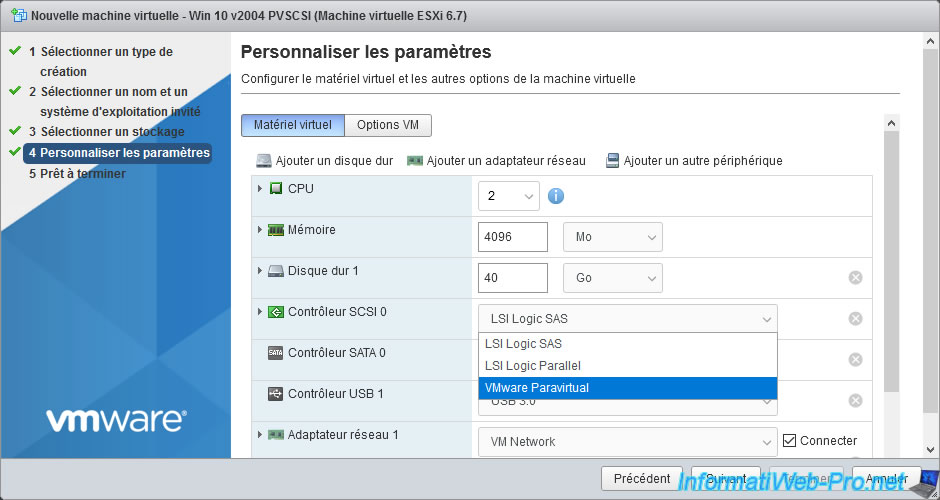
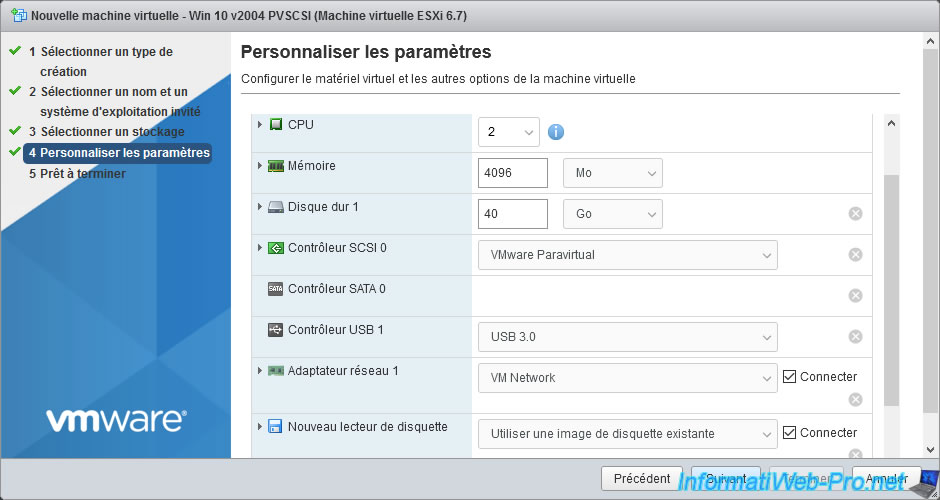
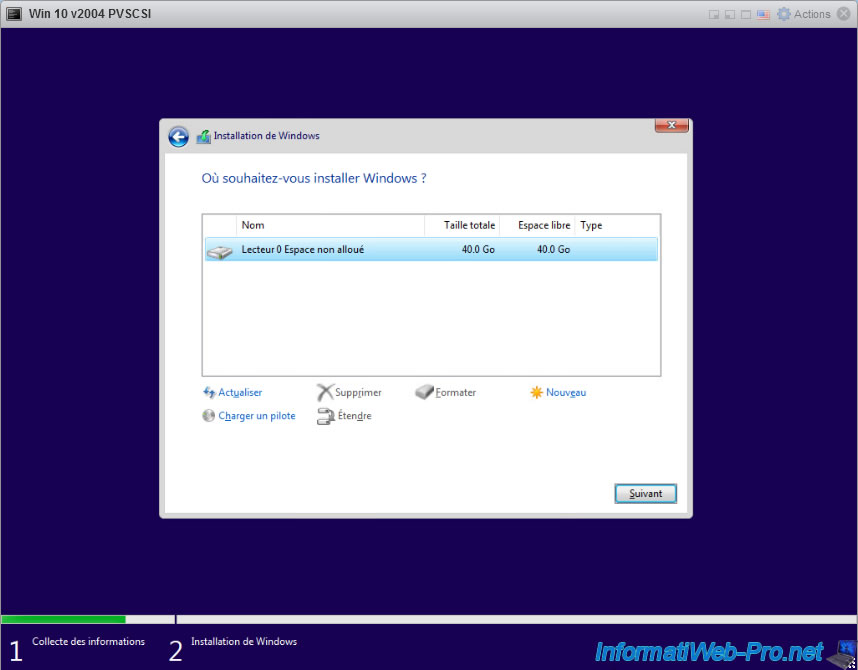
2. Create a vrtual machine with a VMware SCSI paravirtual controller (PVSCSI)
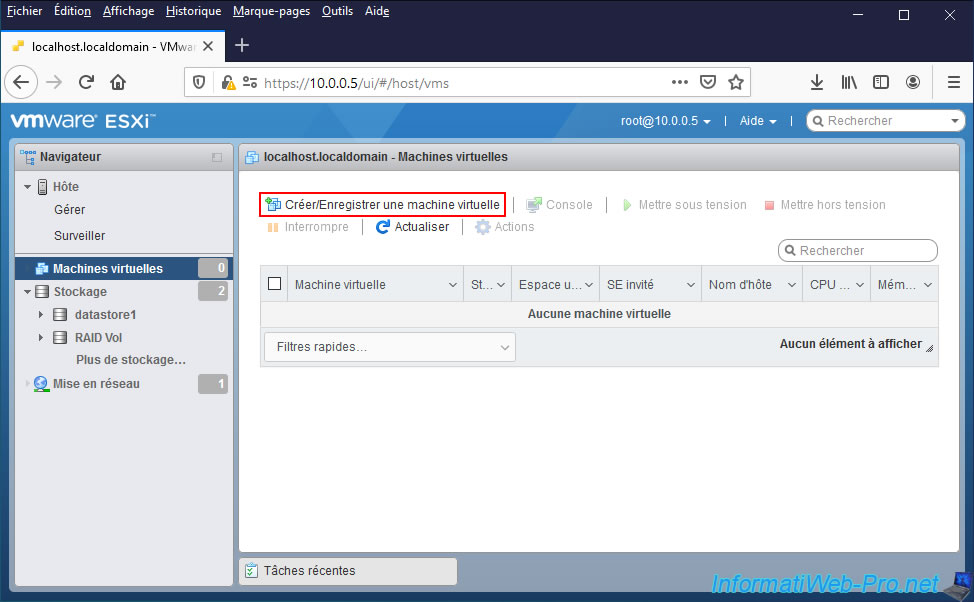
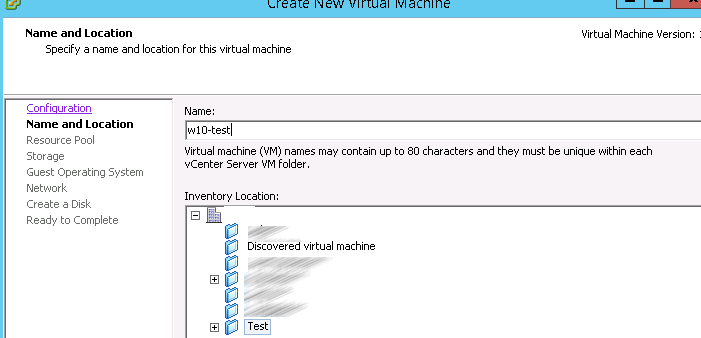
To create a new virtual machine, go to «Virtual Machines» and click on «Create / Register VM».
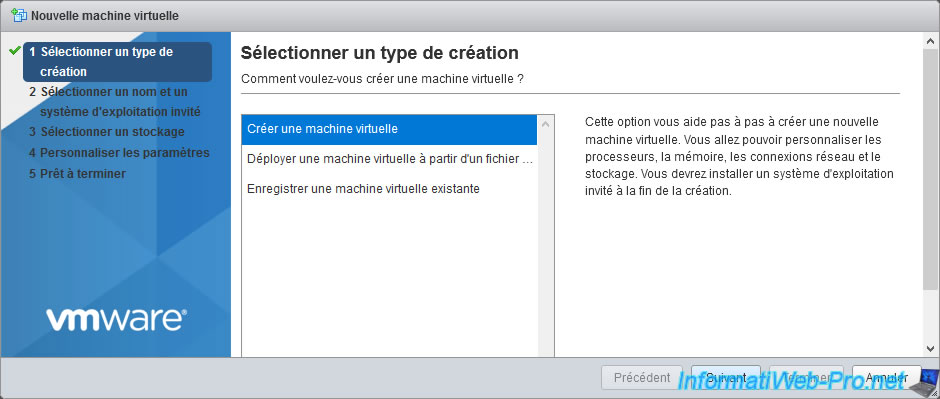
Select «Create a new virtual machine» and click Next.
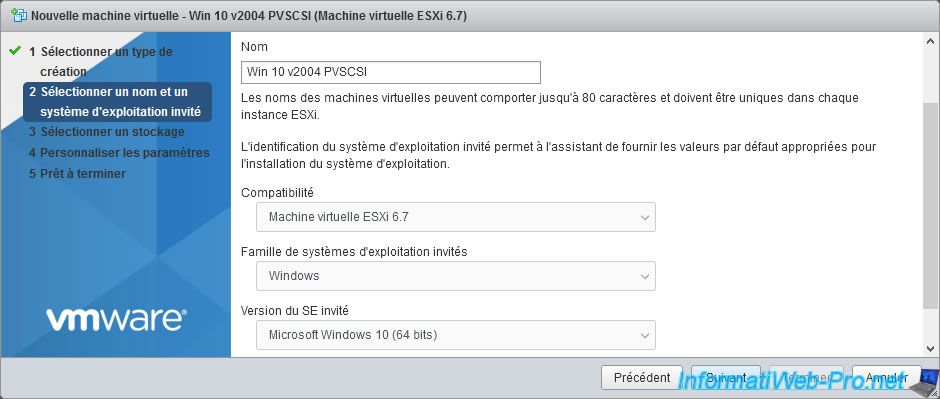
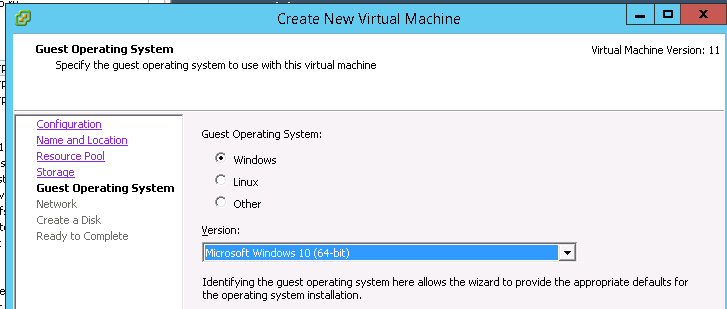
Provide a name, choose the compatibility level (minimum ESXi / ESX 4.x), as well as the family and version of the guest operating system (OS).
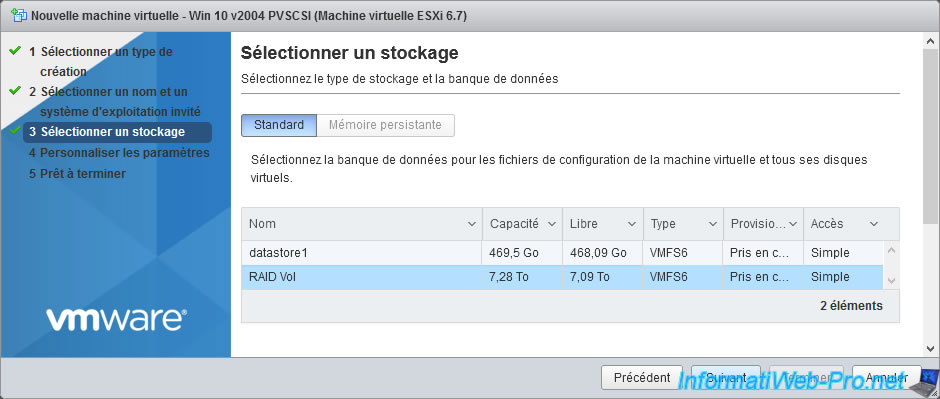
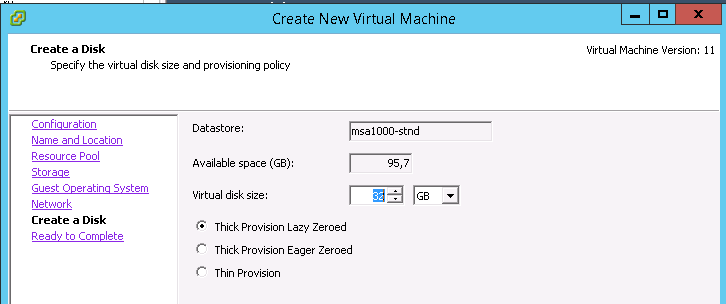
Select the datastore where you want to store your virtual machine.
Select «VMware Paravirtual» for the SCSI controller.
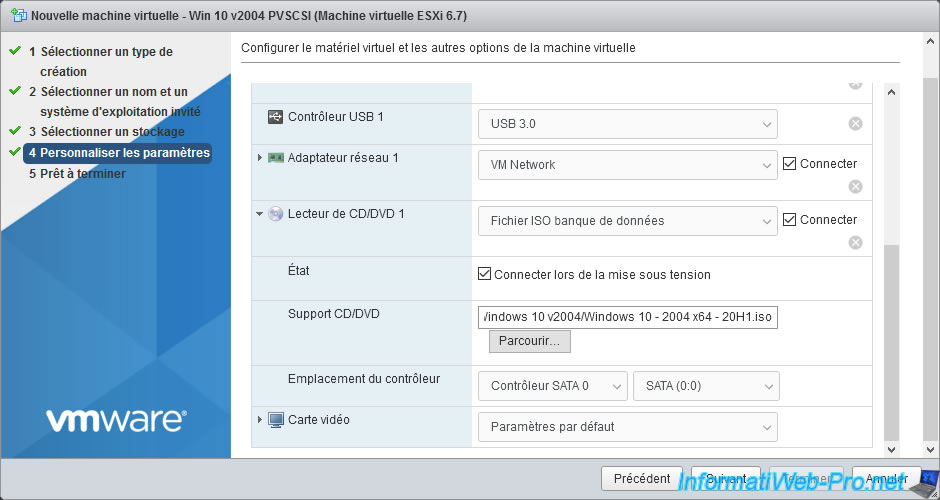
Select the ISO file for the version of Windows you want to install in the virtual machine.
In our case : Windows 10 in version 2004 (20H1) x64.
In order for the Windows installer to detect the virtual hard disk connected to our SCSI paravirtual controller (PVSCSI), we will need to provide it with the virtual floppy disk containing the driver for this SCSI paravirtual controller (PVSCSI).
To do this, click on : Add other device -> Floppy drive.
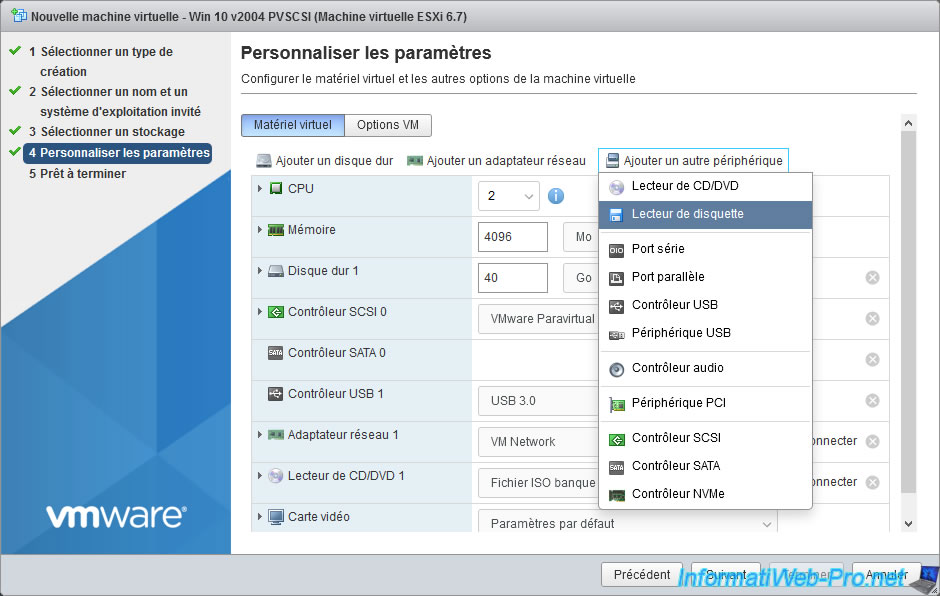
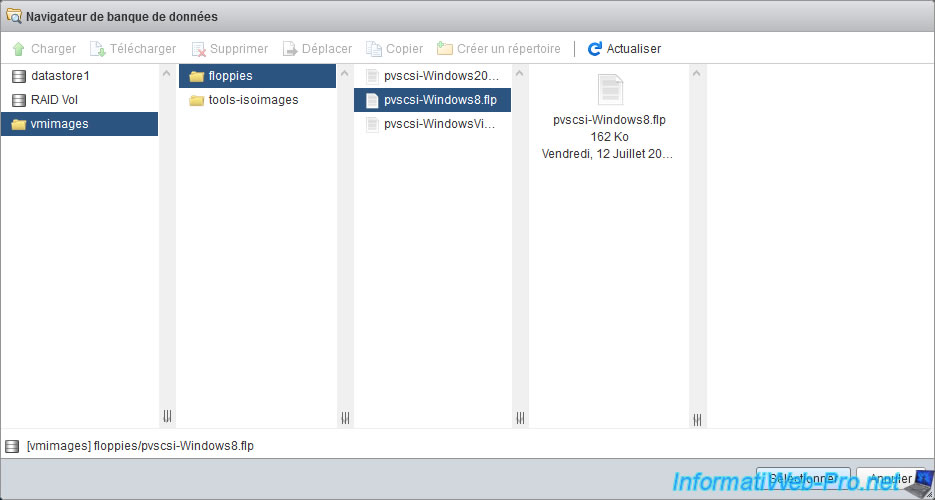
In the datastore browser that appears, go to «vmimages/floppies» and select the virtual floppy disk suitable for your version of Windows :
- pvscsi-Windows2008.flp : for Windows Server 2008 R2 and 2008
- pvscsi-Windows8.flp : for Windows 10, 8.1, 8 and Windows Server 2016, 2012 R2 and 2012 server versions
- pvscsi-WindowsVista.flp : for Windows 7 and Vista
Now, click on Next.
A summary is displayed.
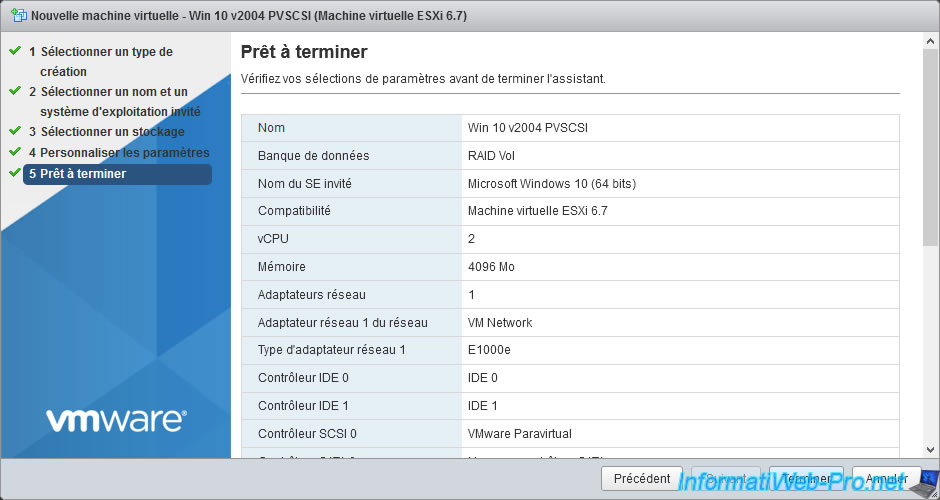
If you look a little lower, you will see that :
- the SCSI controller 0 used will be of type «VMware Paravirtual»
- the virtual hard disk will be connected to this SCSI controller 0
- the «/vmimages/floppies/pvscsi-Windows8.flp» floppy is inserted in the floppy drive of the virtual machine

3. Install Windows and VMware paravirtual SCSI driver (PVSCSI)
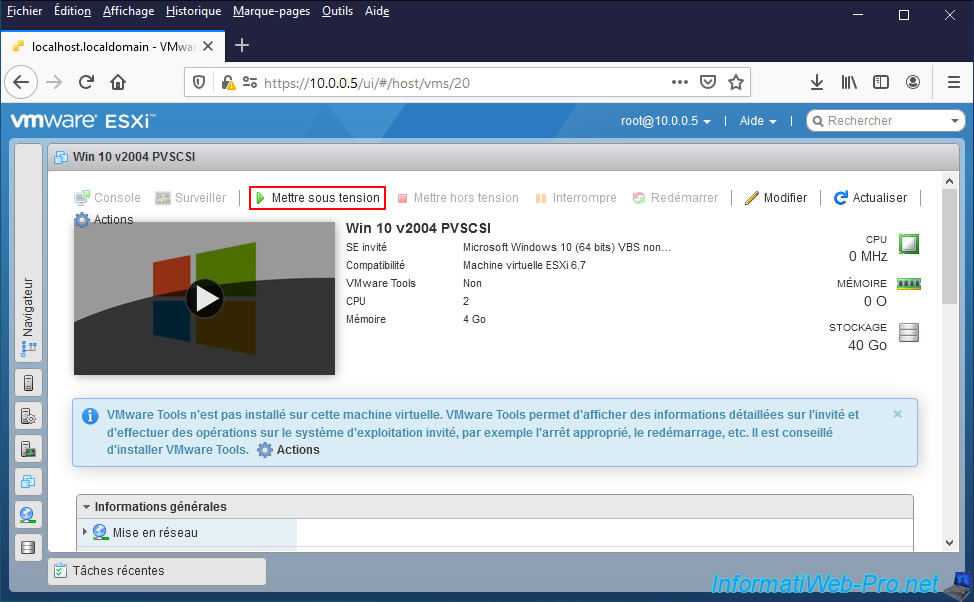
To begin, start the virtual machine by clicking on «Power on».
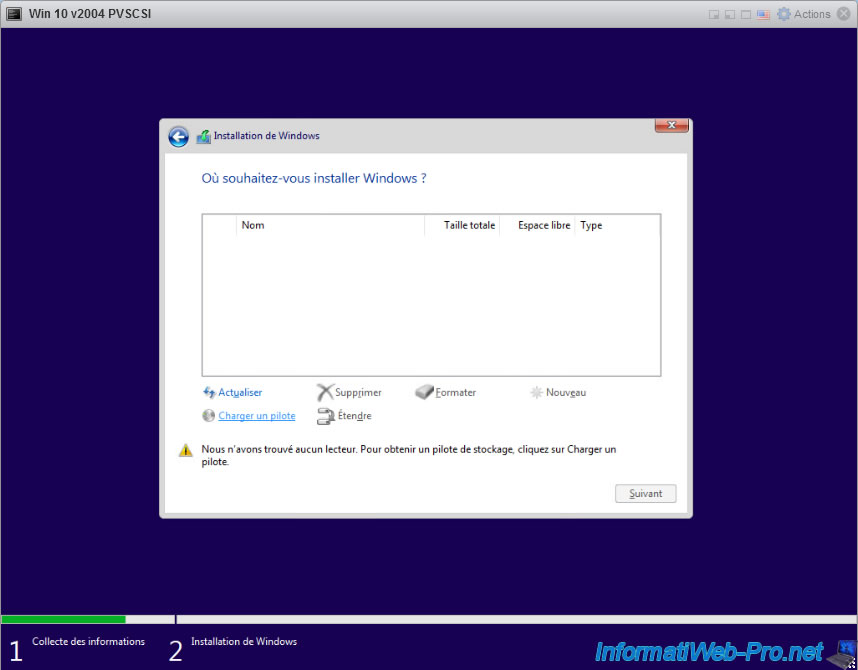
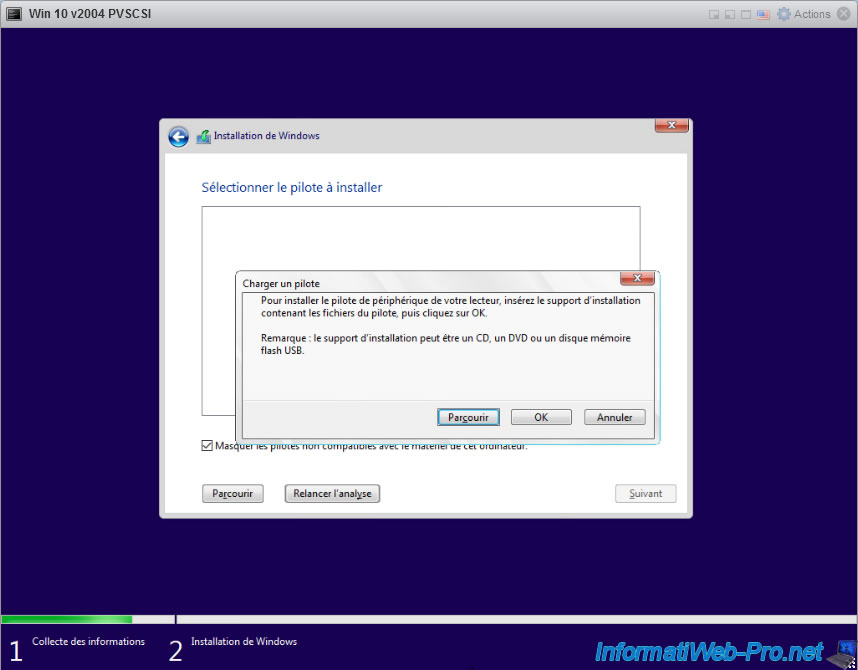
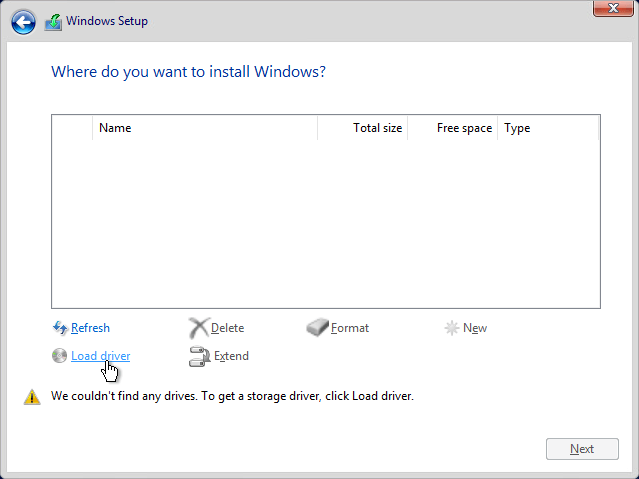
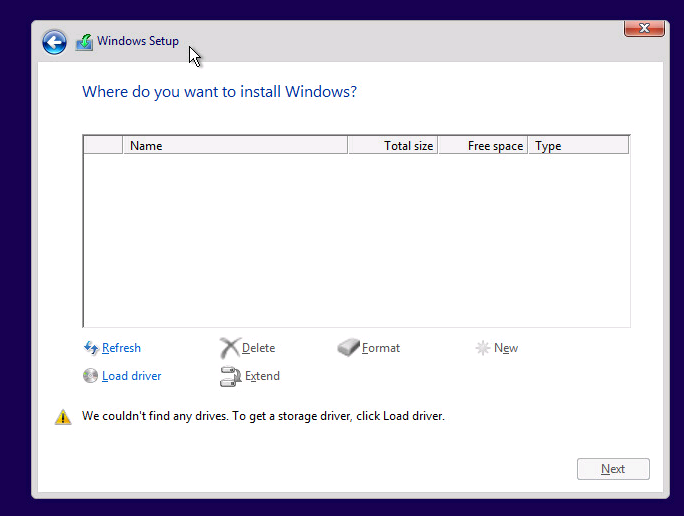
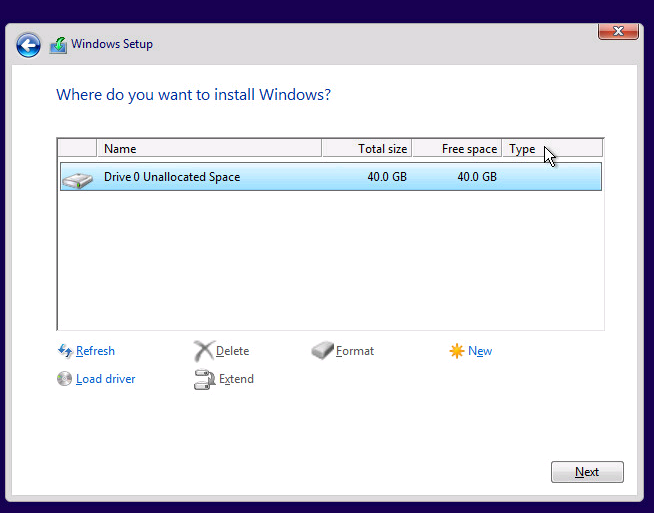
At the step listing the disks available in your virtual machine, the list will be empty and the Windows installer will display this warning :
Plain Text
We couldn't find any drives. To get a storage driver, click Load driver.
Click on : Load driver.
Note : the procedure is identical for Windows 7 and later, as well as for their server versions since Windows Server 2008.
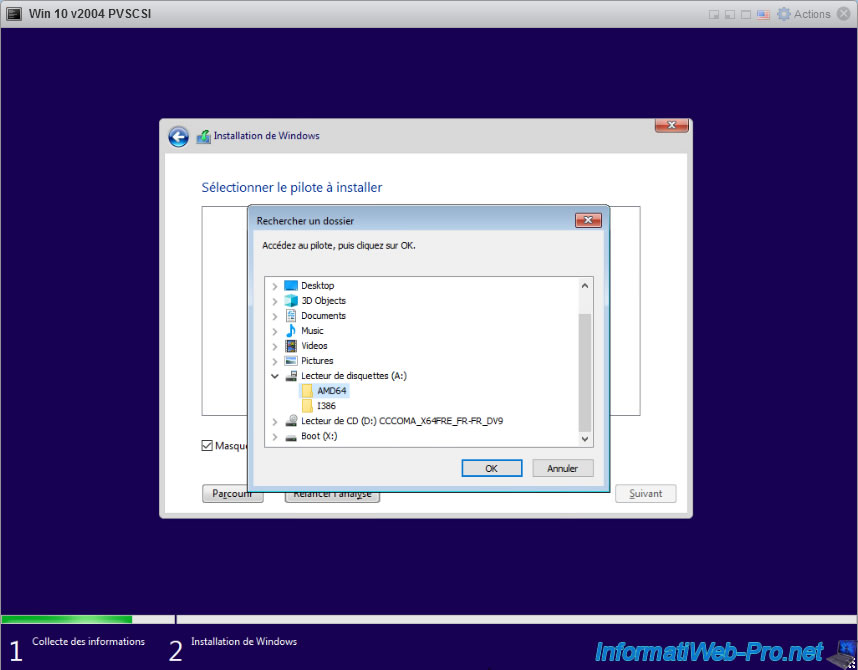
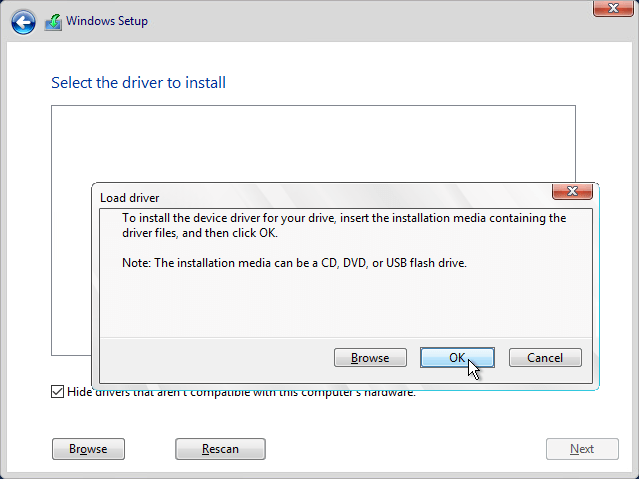
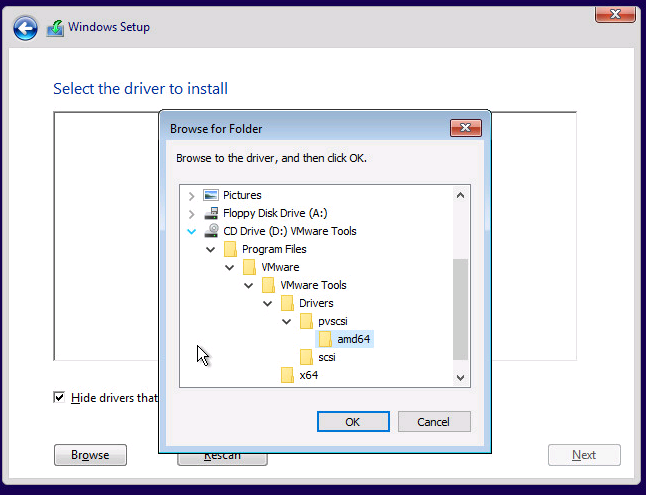
In the «Load driver» window that appears, click on : Browse.
Deploy the «Floppy disk drive» node and select the folder corresponding to the Windows architecture you want to install :
- AMD64 for the 64-bit (x64) version of Windows
- I386 for the 32-bit (x86) version of Windows
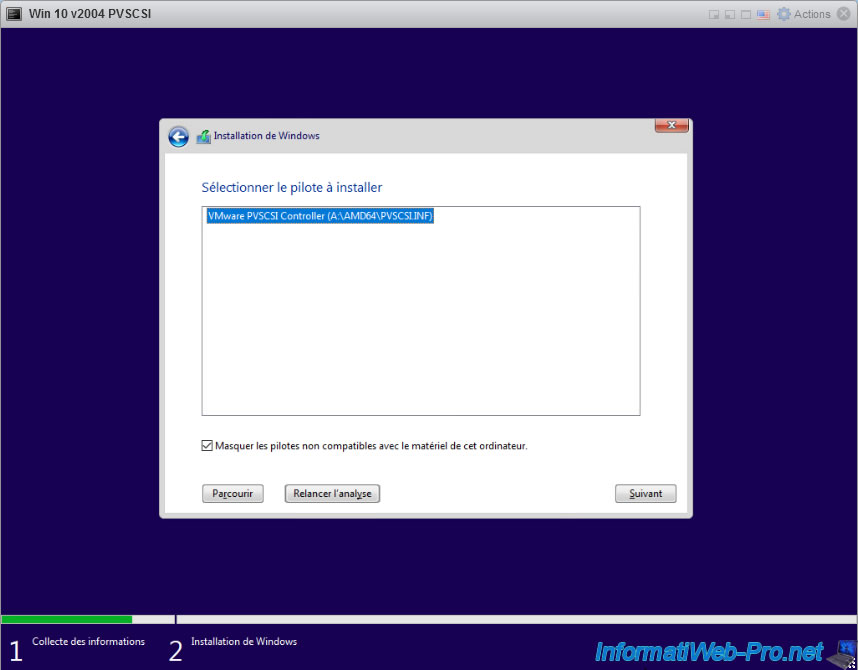
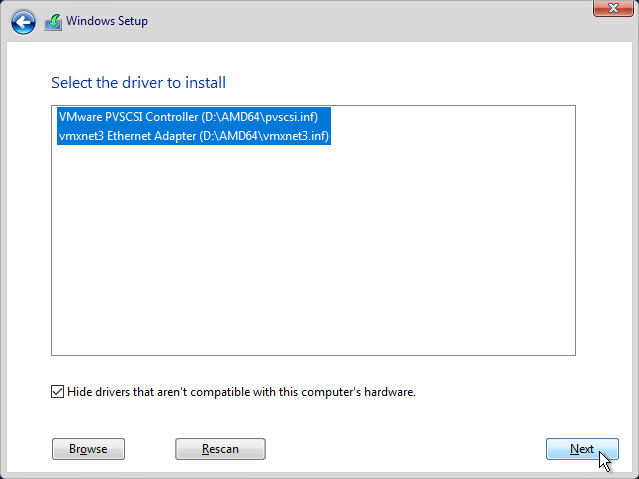
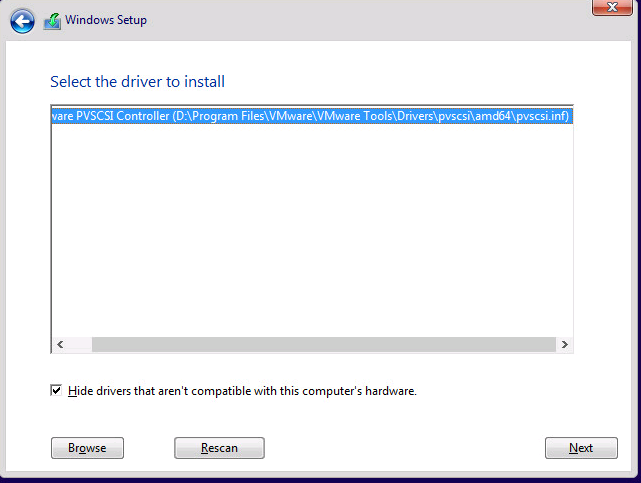
If the PVSCSI driver suitable for the version of Windows you are trying to install has been found on the virtual floppy disk, Windows will show you the «VMware PVSCSI Controller» driver.
Otherwise, you have not inserted the correct «pvscsi-WindowsX.flp» virtual floppy disk. In this case, try with the other virtual floppy disks available on your VMware ESXi hypervisor.
If this still doesn’t work, your version of Windows is not supported for this type of controller.
Make sure the «VMware PVSCSI Controller» driver is selected and click Next.
Wait while installing this «VMware PVSCSI Controller» driver.
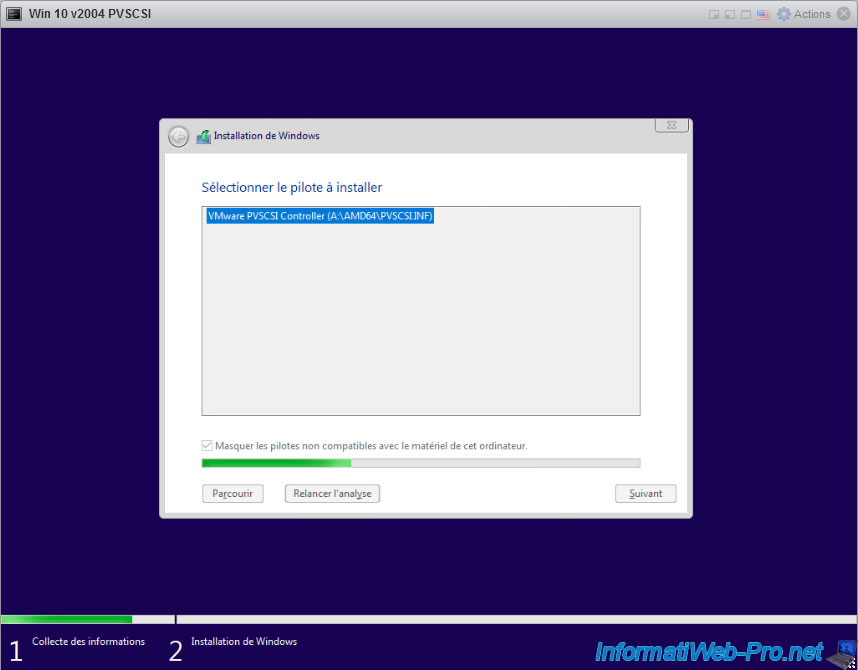
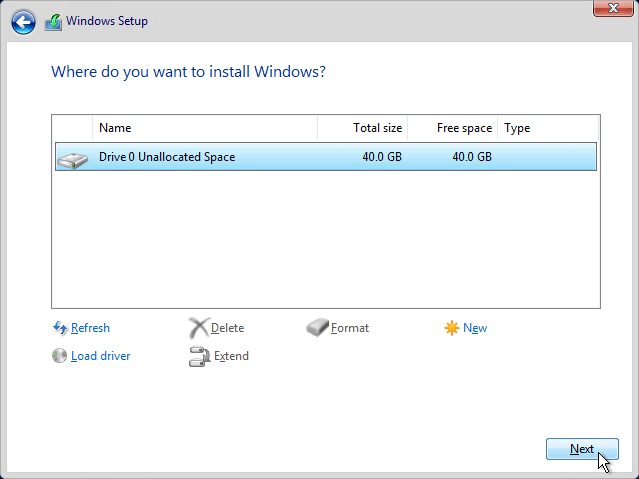
Once the driver is installed, the Windows installer will automatically return to the list of detected disks and a drive 0 will appear with unallocated space.
This proves that Windows is now able to use your SCSI paravirtual controller.
Select this drive 0 and click Next (or partition it if you wish before starting Windows setup).
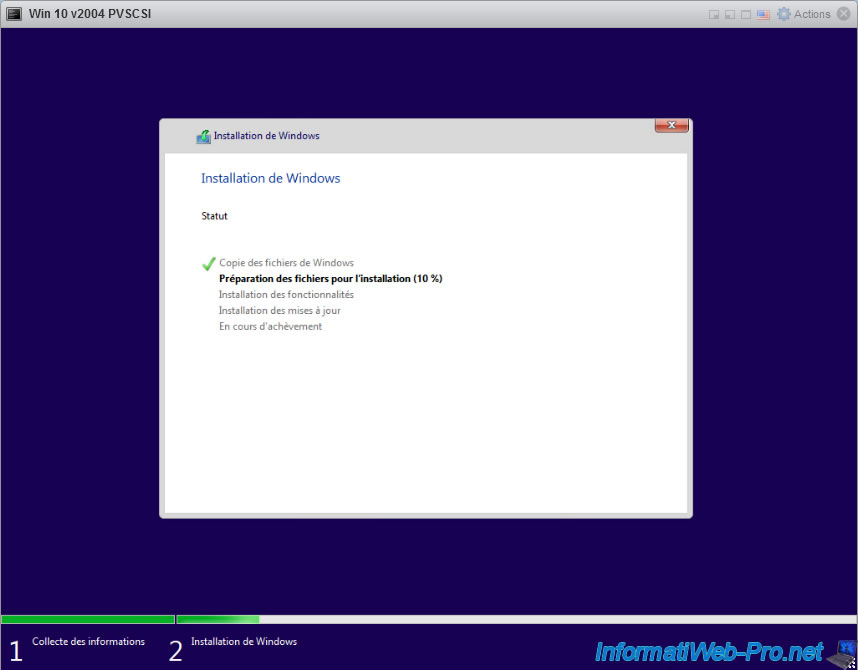
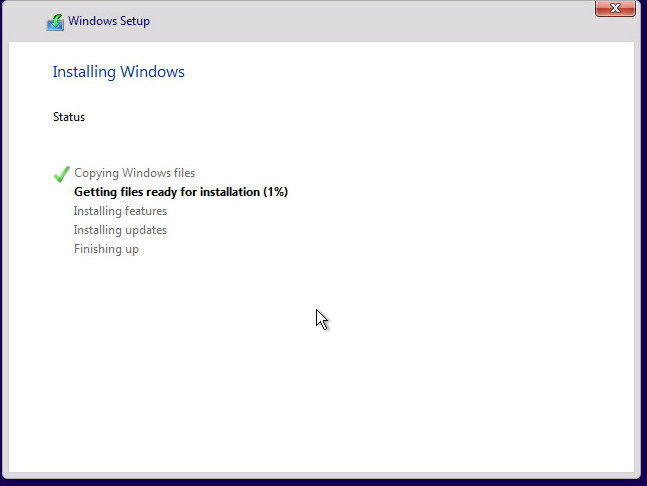
Windows installation begins.
4. Install VMware Tools
Once Windows is installed, don’t forget to install VMware Tools to install the rest of the drivers for your virtual machine.
After VMware Tools are installed, you will need to restart your virtual machine.
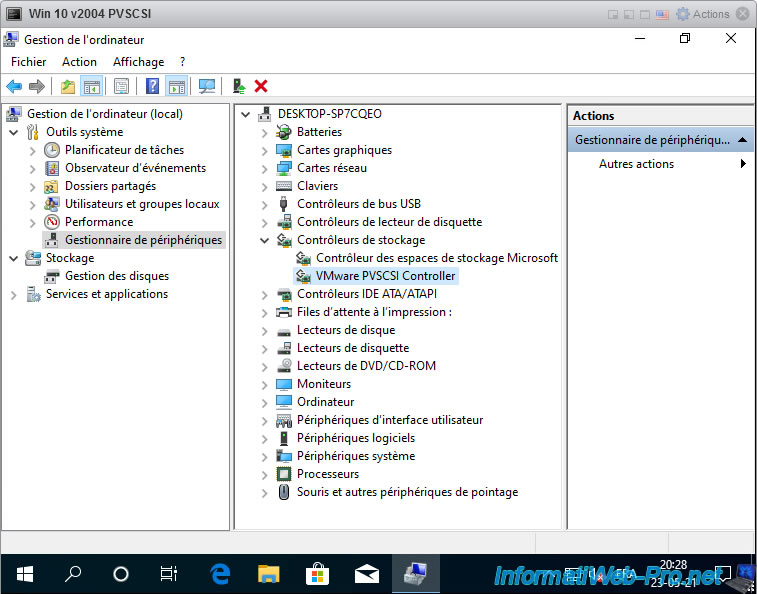
5. SCSI paravirtual controller visible in device manager
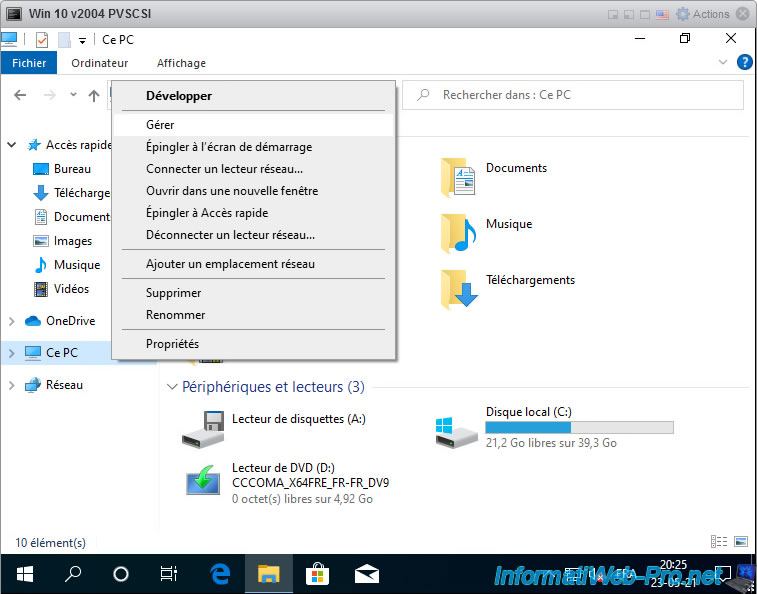
To see if the driver is installed correctly, open Device Manager.
To do this, right click «Manage» on «This PC» (or «Computer»).
In the «Storage controllers» section of Device Manager, you will find the «VMware PVSCSI Controller».
Установка Windows на vSphere с VMXNET3 и PVSCSI
При установке Windows Server или Windows 10 на VMware vSphere предлагается использовать драйвера E1000 для сетевой карты и LSI Logic SAS как SCSI контроллер. Но это не самые эффективные драйвера для данной конфигурации. VMXNET3 и VMware Paravirtual более эффективны, но они не входят официальные выпуски как Windows Server так и Windows 10.
VMware давал возможность использовать VMware Paravirtual предоставляя образы floppy дисков с драйверами. Но сейчас даже floppy диск подключить нетривиальная задача, устаревшее оборудование (Cannot add Floppy Drive, Parallel Port or a SCSI Device from vSphere Client 7 (78978)).
А для сетевой карты и этого не было.
Пришлось сделать ISO образ с этими драйверами
Скачать ISO образ с драйверами VMXNET3 Ethernet Adapter и VMware PVSCSI Controller для установки Windows на VMware vSphere
Драйверы взяты из VMware-Tools-windows-11.1.1-16303738.zip
Инструкция
При выборе места установки, нажмите на Load driver
Временно подключите к виртуальной машине образ с драйверами вместо образа с Windows, и нажмите OK
Выберите оба драйвера (или только тот, что нужен) и нажмите Next
Подключите обратно образ с установщиком Windows и нажмите кнопку Refresh.
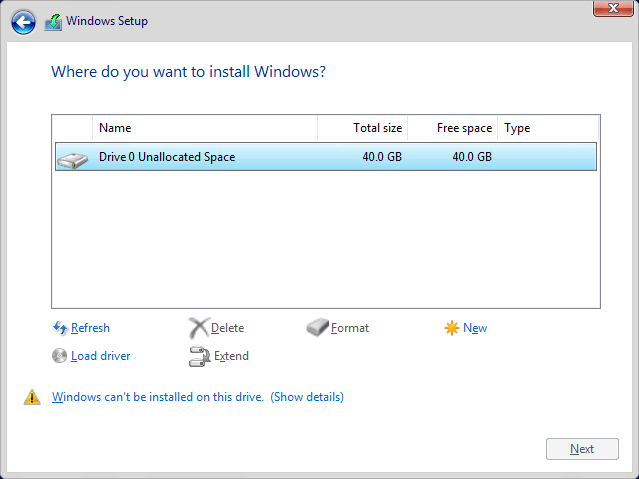
Надпись Windows can’t be installed on this drive пропадет. Она появлялась только потому, что образ с Windows был отключен.
Всё, продолжайте установку как обычно.
WHAT:
When you are creating a new Virtual Machine, there are four SCSI controller adapters available. The default adapter is the LSI Logic SAS, which is good enough for most VMware environments. However, for solutions where Virtual Machines require maximum performance, VMware offers the VMware Paravirtual adapter, aka PVSCSI.
“VMware Paravirtual (PVSCSI) adapters are high-performance storage adapters that can provide greater throughput and lower CPU utilization. They are best suited for environments where hardware or applications drive a very high amount of I/O throughput, such as SAN environments. PVSCSI adapters are not suited for DAS environments.”
To configure and install the PVSCSI Adapter for a fresh Windows installation, you need to use specific drivers, but don’t worry, VMware provides these drivers…
@Virtual Machine Creation
During the creation of a New Virtual Machine, you need to configure the virtual hardware to use the PVSCSI adapter.
- Wait until you get to Customize hardware section.
- Under Virtual Hardware, expand New SCSI controller.
- Under the Change Type drop-down list, select VMware Paravirtual.
Besides the default CD/DVD Driver that you’ll use to the Windows Installation, you’d need a second unit to mount the PVSCSI drivers.
@Still under Virtual Hardware.
- Click ADD NEW DEVICE, and select CD/DVD Driver
- Select the prior added New CD/DVD Driver.
- Under the Client Device drop-down list, select Datastore ISO File.
From Select Files / Datastores:
- Under the vmimages folder, select tools-isoimages.
- Select Windows.iso and click OK.
Note: If the vmimages folder doesn’t load the files. Finish the VM creation, then come back to these settings with the Edit option. Try to load the files one more time.
@During Windows Installation
- Boot the Virtual Machine from the Windows (OS) drivers. During the Windows Setup, wait until you reach Type of Installation and select Custom.
- Click Load driver.
- Click Browse.
- From the New CD/DVD Driver, browse: Program Files / VMware / VMware Tools / Drivers / pvscsi / Win8 / amd64.
- Click OK.
- The new driver is ready to be installed, select it and click Next to Install it.
- Wait until de driver is loaded, select your hard disk (Driver) and click OK.
- Windows installation will start under the PVSCSI controller.
For more information about PVSCSI or if you want to know to change an existing LSI Logical SAS Driver to PVSCSI, see KB1010398.
Juan Mulford
Hey there! I’ve been in the IT game for over fifteen years now. After hanging out in Taiwan for a decade, I am now in the US. Through this blog, I’m sharing my journey as I play with and roll out cutting-edge tech in the always-changing world of IT.
1 January
2021
If you haven’t already upgraded your Windows servers to Windows 2019, then you will probably be doing so soon enough. That means that it’s time to review the steps you take in building out your virtual machines (VMs). Are you running your VMs from a SAN? Then during this refresh, you should really take the time to consider using the VMware Paravirtual SCSI (PVSCSI) driver.
VMware Paravirtual (PVSCSI) adapters are high-performance storage adapters that can provide greater throughput and lower CPU utilization. They are best suited for environments where hardware or applications drive a very high amount of I/O throughput, such as SAN environments. PVSCSI adapters are not suited for DAS environments.“
VMware, https://kb.vmware.com/s/article/1010398
When building new VMs there are four options you can choose from for their SCSI controller. The default LSI Logic SAS driver that is automatically selected for you will work just fine in most environments. That said, when you want to guarantee maximum performance from your VMs you will need to use the PVSCSI. Why wouldn’t you want to allow your VMs their max performance? It’s simple enough to do. Heck, do it and make a “golden image” template so you can easily redeploy it if you don’t want to repeat the steps on each VM everytime. It’s just a couple of clicks now for better performance later. Here we go…
- Launch the vSphere Client and log in to an ESXi host or vCenter Server.
- Select create a new virtual machine.
- In the vSphere Client, right-click on the virtual machine and click Edit Settings.
- Click the Hardware tab.
- Click Add.
- Select Hard Disk.
- Click Next.
- Choose any one of the available options.
- Click Next.
- Specify the options you require. Options vary depending on which type of disk you chose.
- Choose a Virtual Device Node and specify whether you want to use Independent mode. For data disks, choose a Virtual Device Node between SCSI (1:0)to SCSI (3:15). For a boot disk, choose Virtual Device Node SCSI (0:0) or choose the Virtual Device Node that boots in the order you require.
Note: To set a disk to use Independent mode there must be no snapshots associated to the virtual disk, if there are existing snapshots commit them before changing the disk type.
- Click Next.
- Click Finish to complete the process and exit the Add Hardware wizard. A new disk and controller are created.
- Select the newly created controller and click Change Type.
- Click VMware Paravirtual and click OK.
- Click OK to exit the Virtual Machine Properties dialog.
- Power on the virtual machine.
- Install VMware Tools. VMware Tools includes the PVSCSI driver.
- If it is a new virtual disk, scan and format the hard disk within the guest operating system.
Tags: Paravirtual, Paravirtual SCSI, PVSCSI, SCSI, storage adapters, VMWare, VMware Tools, Windows
Copyright 2022. All rights reserved.
В этой статье мы рассмотрим особенности установки операционной системы Windows 10 на виртуальную машину, запущенную в среде VMware. В данном примере в качестве хостовой платформы виртуализации используется VMWare ESXi 6.0.
Официально установка WIndows 10 в качестве гостевой ОС в продуктах VMWare поддерживается в следующих версиях ESXi:
- ESXi 5.5, ESXi 5.5 Update 1, Update 2 и Update 3
- ESXi 6.0 и выше
Для установки нам понадобится образ Windows 10 в формате ISO. Его можно скачать с MSDN ил создать самому с помощью утилиты Media Creation Tool. В этом примере мы будем использовать образ Windows 10 x64 Professional. Загрузите его на хранилище VMFS или подключите каталог с образом по сети с помощью NFS.
С помощью браузера или клиента vSphere откройте консоль управления VMware. Нам нужно создать новую виртуальную машину (ВМ). Выберите нужный хост ESXi, щелкните по нему ПКМ и выберите пункт New Virtual Machine.
В качестве типа ВМ выберите Typical.

Укажите имя виртуальной машины (w10test) и логический каталог, в котором она будет расположена.
Выберите VMFS датастор, в котором будут храниться файлы виртуальной машины.

В качестве версии гостевой операционной системы выберите Microsoft Windows 10 (64-bit).
Совет. Даже если Windows 10 отсутствует в списке поддерживаемых операционных систем (например, в старых версиях ESXi), вы можете попробовать выбрать в качестве версии ОС Microsoft Windows 8 (64bit), ядро Windows у которой является сходным.
Выберите размер виртуального диска (*.vmdk). Windows10 x86 требует как минимум 16 Гб места на диске, Windows 10 x64 – 20 Гб.
На результирующем экране отметьте галку “Edit the virtual machine settings before completion”.
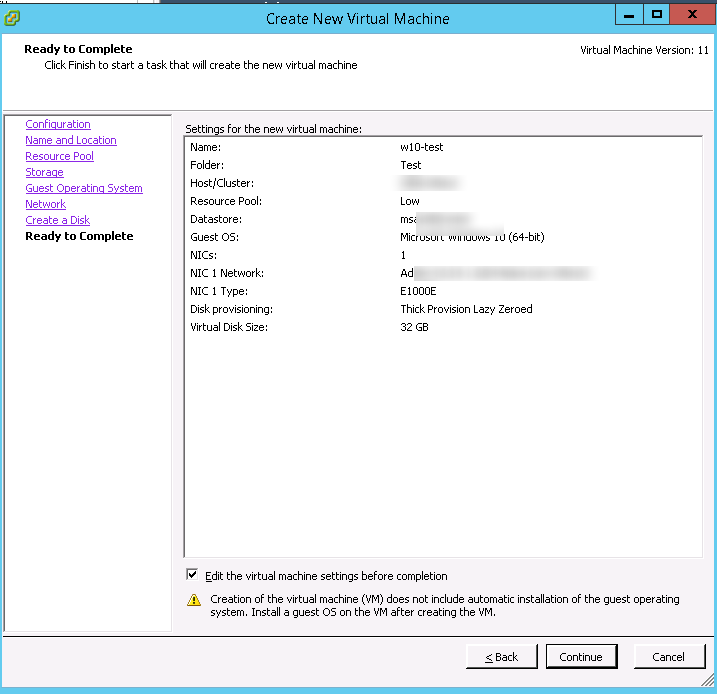
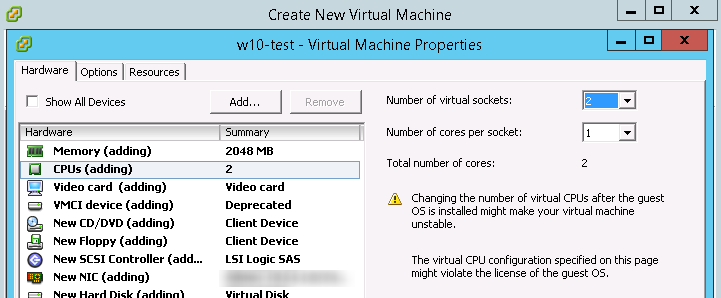
В свойствах ВМ укажите как минимум 1 Гб оперативной памяти для 32 битной Windows 10 и 2 Гб для x64, добавьте дополнительный виртуальный CPU.
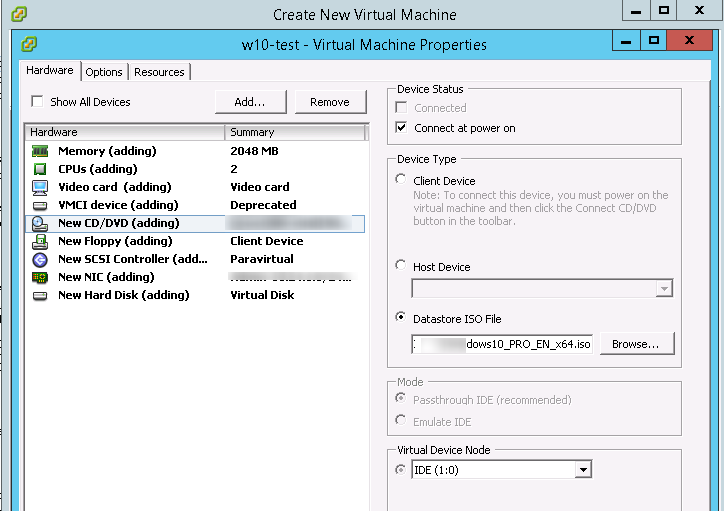
Теперь в настройках ВМ выберите CD/DVD привод. И подключите ранее загруженный ISO файл с образом Windows 10 (Datastore ISO File->Browse). В настройках укажите, что CD/DVD привод должен быть подключен при загрузке (Connect at power on). Нажмите Finish для запуска создания ВМ.
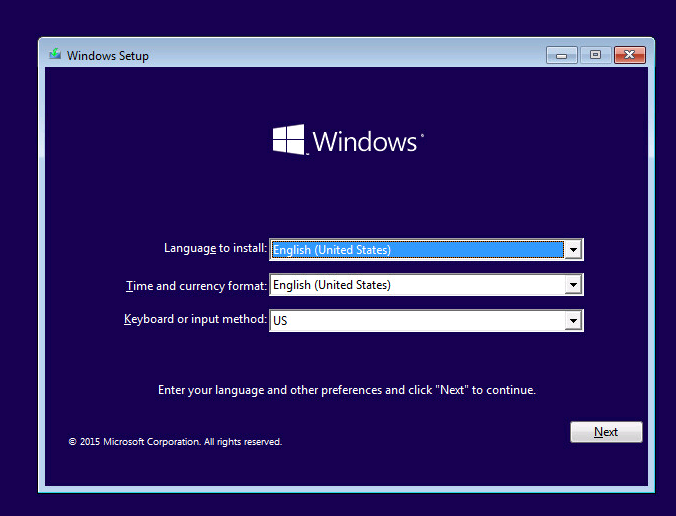
После того, как ВМ появится в консоли vSphere, запустите ее. Автоматически запустится мастер установки Windows 10.
Укажите языковые настройки системы и нажмите Next.
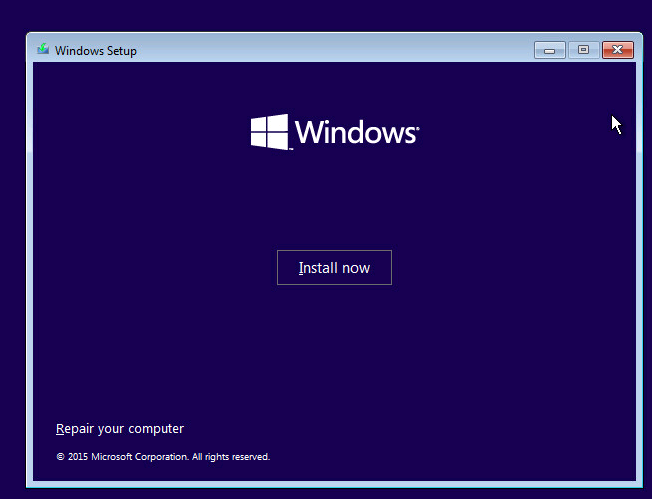
На следующем этапе нажмите единственную имеющуюся кнопку Install now.
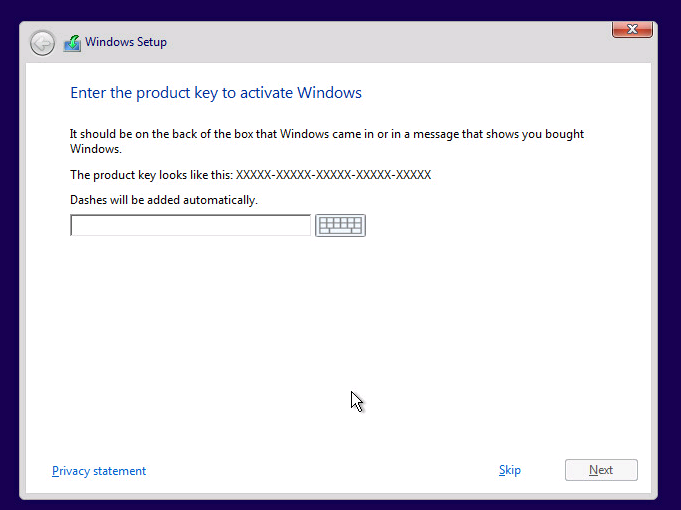
Укажите свой ключ продукта для Windows 10 или пропустите этот шаг.
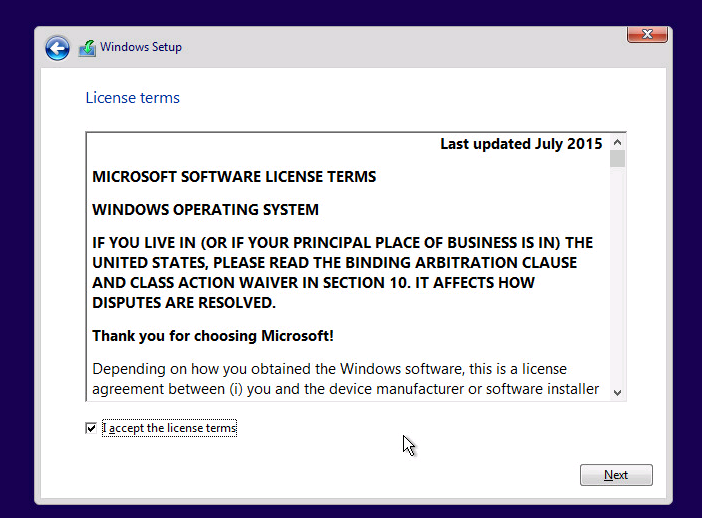
Соглашаемся с лицензионным соглашением Microsoft.
И выбираем тип установки Custom (advanced).
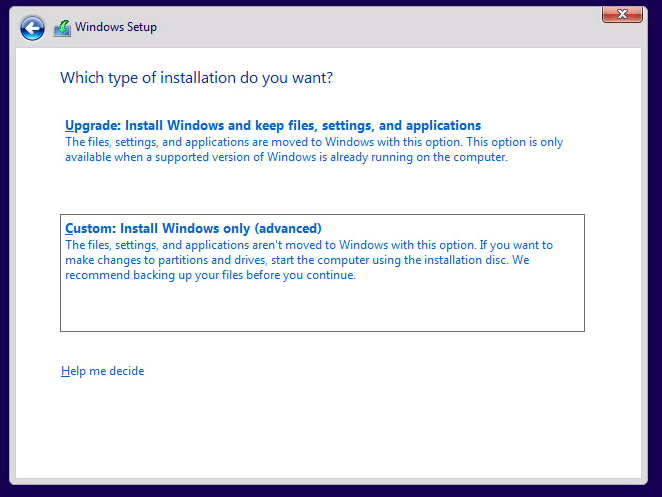
Совет. В нашем случае, в качестве виртуального SCSI контроллера мы использовали адаптер VMware Paravirtual (для контролера LSI Logic parallel процедура аналогичная). В установщике Windows 10 отсутствуют драйвера для данного контроллера, и мастера не видит локального диска виртуальной машине, показывая ошибку “We couldn’t find any drives». Чтобы загрузить драйвер, контроллера, нажмите «Load driver».
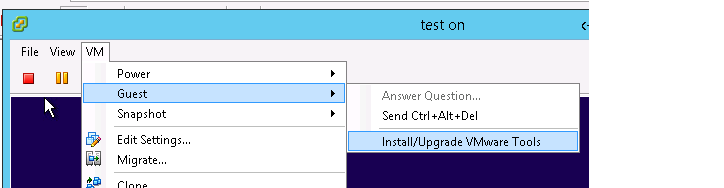
В данном случае нам нужно загрузить драйвер pvscsi. Проще всего это сделать, смонтировав диск с VMTools. В консоли ВМ выберем Guest > Install/Update VMware Tools.
Или же можно смонтировать .iso образ VMware Tools вручную:
Вернитесь к экрану установки Windowsи нажмите кнопку Load Driver. Чтобы загрузить драйвер SCSI нажмите Browse и перейдите в папку D:\Program Files\VMWare Tools\Driver\pvscsi\amd64\ (путь для Windows 10 x64).
В списке драйверов выберите VMWare PVSCSI Controller (D:\Program Files\VMWare Tools\Driver\pvscsi\amd64\pvscsi.inf) и нажмите Next.
После успешной загрузки драйвера, установщик Windows 10 увидит контроллер дисков и сам диск. В настройках ВМ опять измените смонтированный ISO на установочный диск Windows 10.
Нажмите кнопку Next и установочная программа Windows 10 автоматически создаст все нужные разделы на неразмеченной области диска (либо вы можете создать разделы в ручную на свое усмотрение).
Дождитесь пока установщик скопирует и распакует установочные файлы.
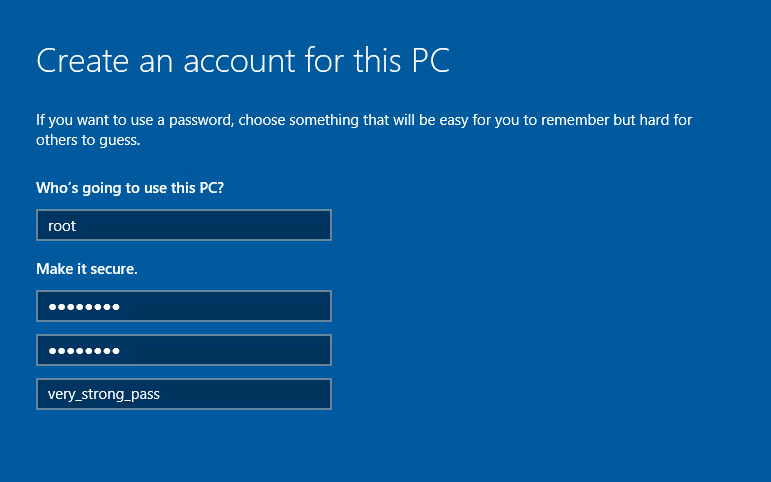
После окончания установки, ВМ перезагрузится. Вам останется указать ключ продукта (или опять пропустить этот шаг), и указать имя пользователя компьютера и его пароль.
Последнее, что осталось выполнить — установить в гостевой Windows набор утилит VMWare tools. Проще всего это сделать, выбрав в консоли ВМ пункт Guest > Install/Update VMware Tools.
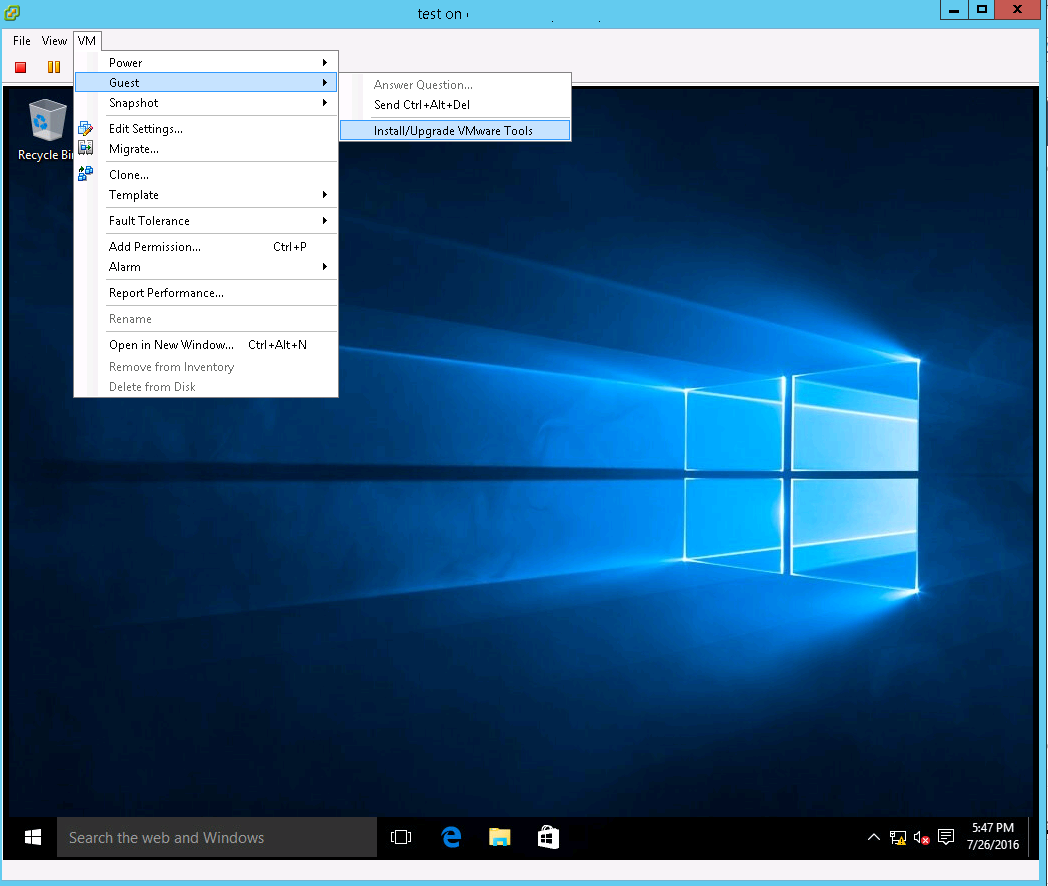
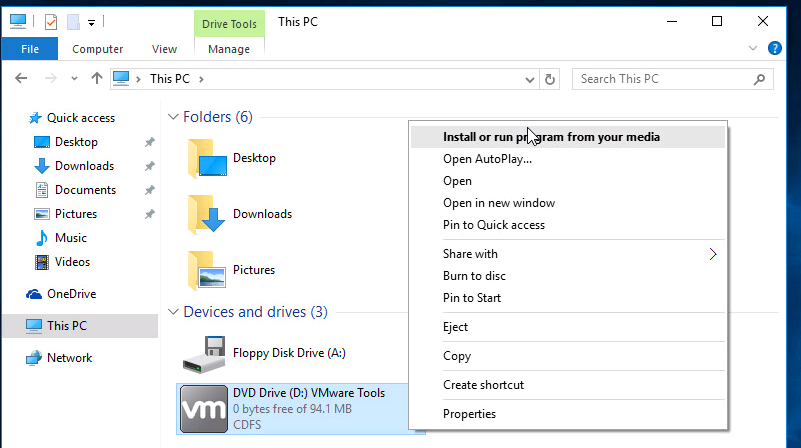
Если программа установки не запустится автоматически, щелкните в проводнике ПКМ по виртуальному DVD приводу (как правило, ему назначается буква D:) и выберите пункт Install or run program from your media.
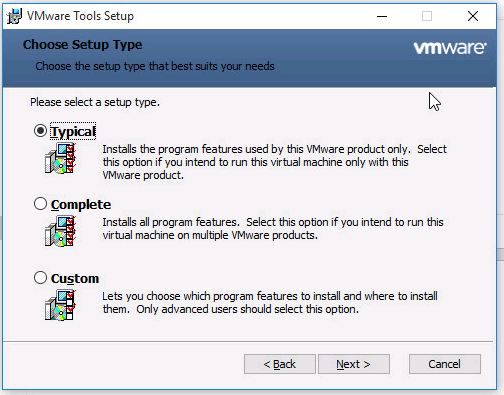
В качестве типа установки выберите Typical. После окончания установки, инсталлер попросит вас перезагрузить компьютер.
Совет. Можно выполнить и «тихую» установки VMware Tools с подавлением запроса на перезагрузку. Для этого в гостевой Windows нужно с правами администратора выполнить команду:
setup.exe /S /v /qn REBOOT=R
Итак, вы развернули на сервере VMware ESXi виртуальную машину с Windows 10, которая полностью готова к использованию.