
Чтобы у вас была возможность сконвертировать машину, вам нужно её предварительно запустить в VMware Player или VMWare Workstation (чтобы снять lock-in).
Только после этого вы сможете сделать все процедуры, описанные ниже.
Для того чтобы сконвертировать виртуальную машину (ВМ) VMware в виртуальную машину (ВМ) VirtualBox нам понадобиться следующая программа:
VMware vCenter Converter Standalone
Скачать ее можно либо с просторов Интернета либо с официального сайта (предварительно нужно зарегистрироваться).
Или скачать отсюда Download.
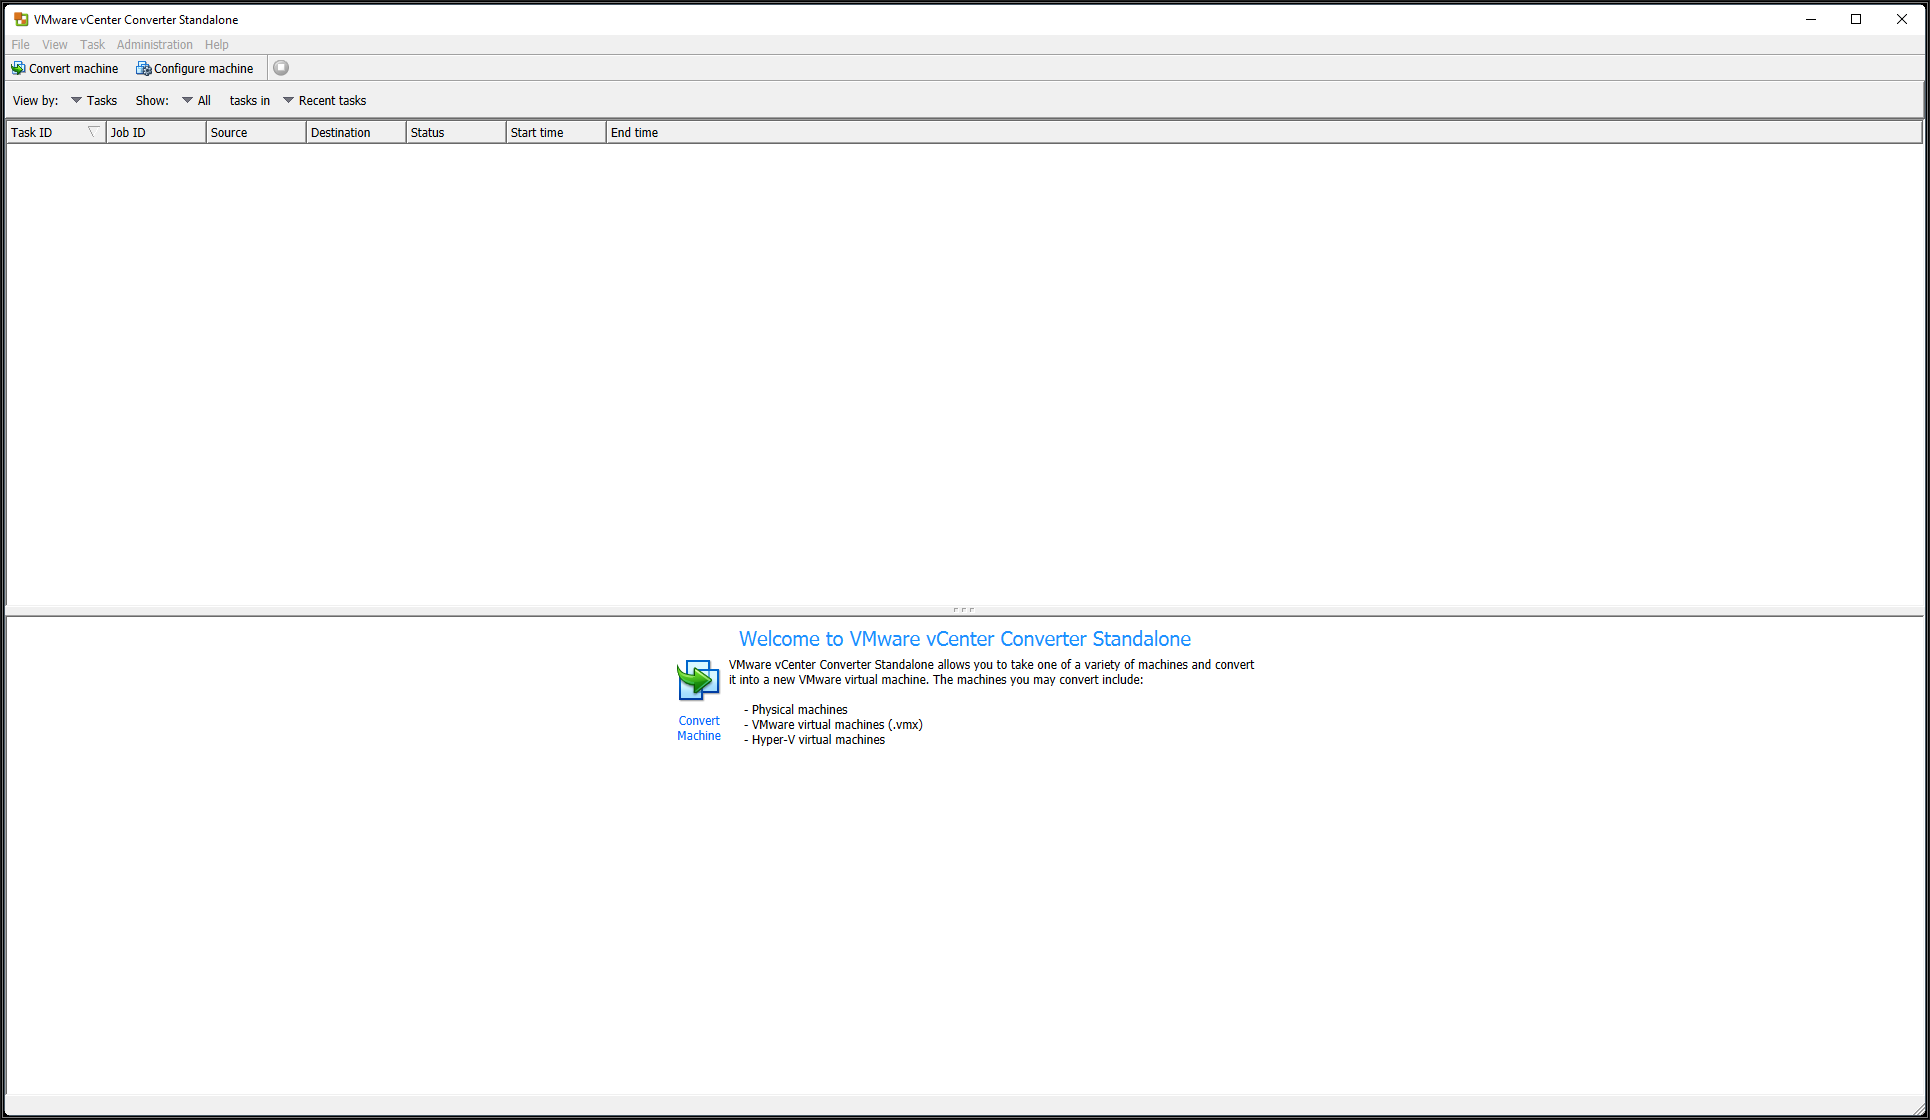
После установки VMware vCenter Converter Standalone, запускаем его от имени администратора.
Выбираем пункт:
Convert machine
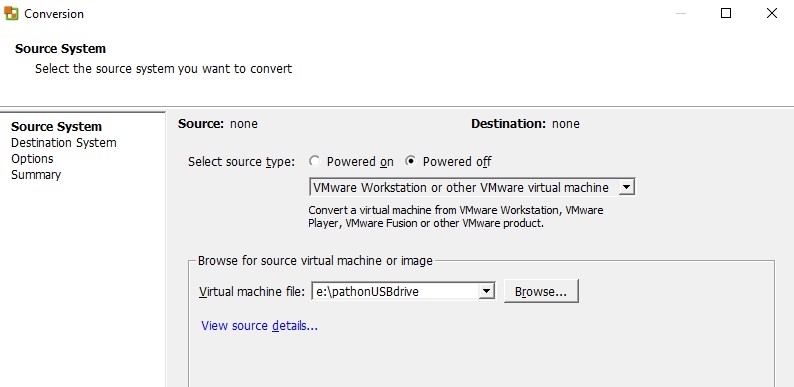
Source System
Select source type:
Powered off
VMWare Workstation or other VMWare virtual machine
Указываем путь к VMX-файлу виртуальной машины (У меня это C:\VMs\InfoSearch\DEMO NEW7\Server 2003.vmx)
Destination System
Select destination type:
VMWare Workstation or other VMWare virtual machine
Select VMWare Product:
VMWare Workstation 11.x/12.x
Затем при необходимости меняем имя ВМ и указываем расположение, где будет находится новая ВМ ( у меня это C:\VMs\Default)
В меню Options можно оставить всё по умолчанию.
В VirtualBox в настройках ВМ обязательно активировать пункт:
Включить I/O APIC
Запускаем виртуальную машину (нужно подождать 3-4 минуты).
В ВМ удаляем Vmware Tools. Перезагружаемся. Устанавливаем VirtualBox Guest Additions.
Образ с уже настроенной машиной
P.S. Комбинация Ctrl+Alt+Delete нажимается комбинацией Host_Key+Delete, где Host_Key — хост-комбинация — у меня это клавиша Right Ctrl (можно изменить в настройках).
P.P.S Попробую через некоторое время запустить ВМ под KVM.
You are not very likely to bump into Windows 2003 physical servers anymore – but nevertheless that just happened to me a week ago. The task was clear – this server needs to be virtualized into a vSphere 7 environment, running vSAN.
The problem with this task is that to convert (P2V) a 2003 server you need to install vCenter Converter 6.2 on it, since the latest release 6.3 simply doesn’t work on 2003 servers (It won’t install).
Next problem is that vCenter Converter 6.2 doesn’t work with vSAN 7 – only “traditional storage” can be used as target – but in this case there were no other storage than vSAN that could be used as target.
What to do? – read on…
So, since we can install vCenter converter 6.2 on 2003 physical servers and we can use vSAN 7 as target in version 6.3 – the solution is simple then – both products must be used in combination.
First thing to do is to find some temporary storage that can be used to host a copy of the complete 2003 server that is target for the conversion – I used an USB hard drive.
Next thing is to install vCenter converter on the 2003 physical server. Install the server, agent and the client.
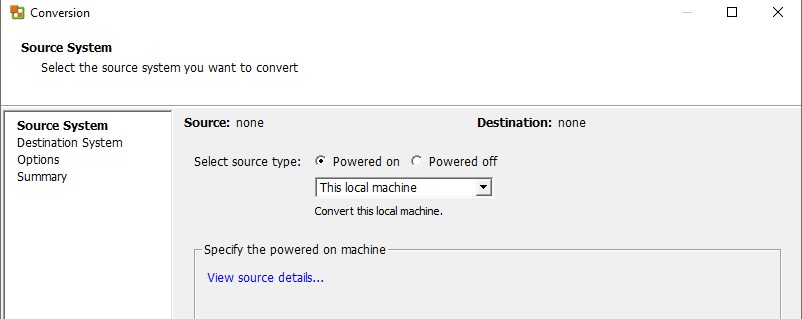
Now make and offline P2V of the server by using the option to convert “this local machine”
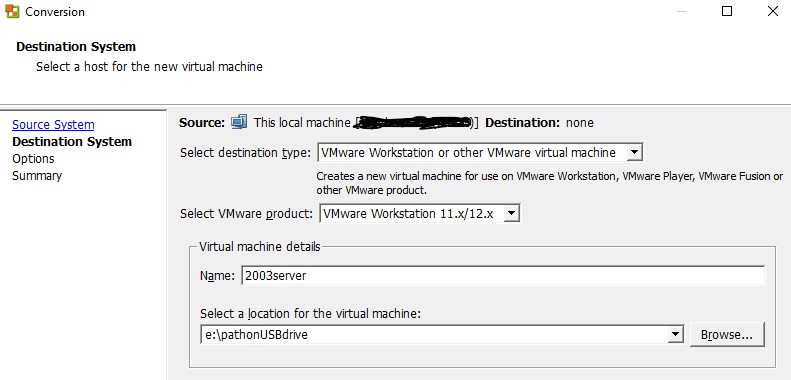
Select the path of the USB drive where the machine should be located.
REMEMBER TO DESELECT THE USB DRIVE UNDER “OPTIONS” AS SOURCE DRIVE (next screen)
Carry on and convert the server down to the USB drive!
When the conversion has finished you can disconnect the USB drive and connect it to a (newer) host that runs vCenter converter 6.3, and import it from there, into vSphere 7 / vSAN
Thats it!
I used these two versions of vCenter converter:
VMware-converter-en-6.2.0-7348398.exe (build 8466193 did NOT work!)
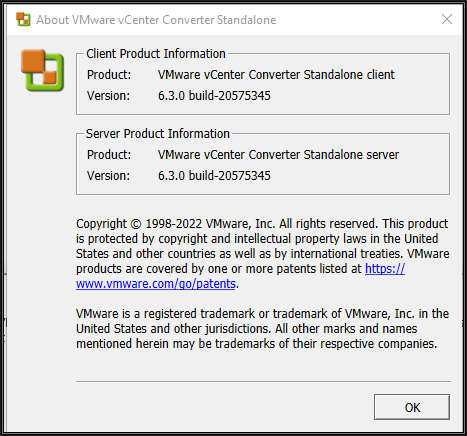
VMware-converter-en-6.3.0-20575345.exe
Please follow and like my blog:
If you need to complete a Physical to Virtual (P2V), Virtual to Virtual (V2V) conversion to a VMware product (VMware Workstation, Player or VMware vSphere (ESXi) ) for FREE, then there is some good news, after a long break VMware have finally released VMware vCenter Converter Standalone 6.3
The last build of VMware vCenter Converter Standalone 6.2 was released in 2018, In February 2022 it was removed from download by VMware due to a reported security issue. On the 11th October 2022, VMware released a new version of vCenter Converter Standalone 6.3 Build 20575345. This version should now be used to replace the older version with the documented security issue.
vCenter Converter Standalone 6.3 mainly has the security issue resolved but does also have some internal fixes.
vCenter Converter Standalone 6.3 can be installed on the following Microsoft Windows operating systems. You cannot upgrade to 6.3, from 6.2 you will need to uninstall 6.2, reboot your computer and install 6.3.
-
- Windows Server 2012 (64-bit)
- Windows 8.1 (32-bit and 64-bit)
- Windows Server 2012 R2 (64-bit)
- Windows 10 (32-bit and 64-bit)
- Windows Server 2016 (64-bit)
- Windows Server 2019 (64-bit)
- Windows 11 (64-bit)
- Windows Server 2022 (64-bit)
- Windows Server 2022 (64-bit)
Converter Standalone 6.3.0 supports the following guest operating systems:
-
- Windows Server 2012 (64-bit)
- Windows 8.1 (32-bit and 64-bit)
- Windows Server 2012 R2 (64-bit)
- Windows 10 (32-bit and 64-bit)
- Windows Server 2016 (64-bit)
- Windows Server 2019 (64-bit)
- Windows 11 (64-bit)
- Windows Server 2022 (64-bit)
- CentOS 6.x (32-bit and 64-bit)
- CentOS 7.x (64-bit)
- Red Hat Enterprise Linux 6.x (32-bit and 64-bit)
- Red Hat Enterprise Linux 7.x (64-bit)
- Ubuntu 14.04 LTS (32-bit and 64-bit)
- Ubuntu 16.04 LTS (32-bit and 64-bit)
Please note the following, as with all releases of VMware vCenter Converter Standalone, when an operating system vendor discontinues an Operating System, VMware also removes the support from VMware vCenter Converter Standalone. With the release of VMware vCenter Converter Standalone 6.0, Microsoft Windows XP Professional SP3 (32-bit and 64-bit) support has been removed, the last version that supported Microsoft Windows XP Professional SP3 (32-bit and 64-bit) was VMware vCenter Converter Standalone 5.5.3.
Microsoft Windows Server 2003 support ended on July 14, 2015, because of the need to migrate these physical servers to VMware vSphere (ESXi), I am noticing more Experts Exchange questions on How To P2V Microsoft Windows Server 2003?
VMware vCenter Converter Standalone 6.2 does not have support for P2V a Microsoft Windows Server 2003 server. VMware or Windows Server 2003 R2 SP2 (32-bit and 64-bit).
Microsoft Windows Server 2003 SP2 (32-bit and 64-bit) support was removed from VMware vCenter Converter Standalone, after VMware vCenter Converter Standalone 5.0, and support for Microsoft Windows NT 4.0 SP6 and Microsoft Windows 2000 SP4 was removed after VMware vCenter Converter Standalone 4.0.1. See the following table
VMware vCenter Converter Standalone 6.3 is a free product, but it does have some limitations, P2V and V2V have
to be conducted manually, also you may find some conversions troublesome and difficult.
If you have a budget for P2V/V2V software, there are other commercial products that do exist, and we have used, which you may want to investigate.
If you have a large estate of physical machines to migrate, these products have a scheduler and can perform automated workflows, but these are commercial products and not FREE like VMware vCenter Converter Standalone 6.3.
The products are listed below:-
- Carbonite Move Powered by DoubleTake (was Double-Take MOVE)
- Microfocus Platespin Migrate (was NETIQ)
- Acronis Backup
- Veritas System Recovery Server Edition
- Paragon Virtualization Manager Professional
- Easus P2V Copy
- Veeam Agent for Microsoft Windows 5.0 (this is FREE!) and I wrote an EE Article here about it here (personally I think it’s better than «VMware Converter»
HOW TO: Perform a Physical to Virtual (P2V) Conversion the easy way from a computer backup (image)
If the operating system is Windows 2000 or Windows NT 4.0, select VMware vCenter Converter Standalone version 4.0.1. for Windows 2003, use 5.5.3. Support for legacy operating systems has been removed from v6.3.
If you have recently upgraded to vSphere vCenter Server 6.5, and are looking for the Convert/Import vCenter plugin which existed with 4.x, it’s no longer available and has been removed, and you will need to use VMware vCenter Converter Standalone 6.3 for your conversions.
And if you do use VMware vCenter Converter Standalone 6.3, and you want to make your transfers 60% faster there is no longer the requirement, to disable SSL, which was a common modification required with VMware vCenter Converter Standalone 5.0
Hints and Tips can be found in my other EE Articles, which discuss Physical to Virtual conversions and VMware vCenter Converter Standalone.
- HOW TO: FAQ VMware P2V Troubleshooting
- HOW TO: Synchronize changes when completing a P2V or V2V with VMware vCenter Converter Standalone 5.1
- HOW TO: Shrink or Reduce a VMware Virtual Machine Disk (VMDK) using VMware vCenter Converter Standalone v5.5.2
- HOW TO: Migrate physical, virtual and cloud-based workloads with real-time replication to VMware vSphere (ESXi) using Double-Take MOVE
VMware Product downloads here (you will need to create a login for VMware and login to download)
- Download VMware vCenter Converter 6.3 here
- VMware vCenter Converter Standalone 6.3 Release Notes
- VMware vCenter Converter Standalone 6.3 User Guide
If you have issues, you may want to consult the following articles and guides
- Read fellow Expert Bestway’s article.
- Best Practice Video Guide here.
Some Videos I’ve developed for Experts Exchange members to show the VMware vCenter Converter process.
- A Tutorial video by me:- Restore a Virtual Machine using the FREE VMware vCenter Converter to VMware vSphere 4.x, 5.0 ESXi 4.x, ESXi 5.0, ESX 4.0
- A Tutorial video by me:- Backup VMware vSphere 4.x, 5.0 ESXi 4.x, ESXi 5.0, ESX 4.0 for FREE using VMware vCenter Converter
- A Tutorial video by me:- VMware vCenter Converter Standalone Process at work
- A Tutorial video by me:- VMware vCenter Converter Standalone 5.0 Convert monolithic sparse to monolithic flat for use with VMware vSphere 4.x 5.0 ESXi 4.x 5.0
Basic VMware Articles Series:
These articles are also applicable to VMware vSphere Hypervisor ESXi 5.0, 5.5, 6.0.
- Part 1: HOW TO: Install and Configure VMware vSphere Hypervisor 5.1 (ESXi 5.1)
- Part 2: HOW TO: Connect to the VMware vSphere Hypervisor 5.1 (ESXi 5.1) using the vSphere Client
- Part 3: HOW TO: Create an ISO CD-ROM/DVD-ROM image (*.iso), and MD5 checksum signature, for use with VMware vSphere Hypervisor 5.1 (ESXi 5.1)
- Part 4: HOW TO: Upload an ISO CD-ROM/DVD-ROM image to a VMware datastore for use with VMware vSphere Hypervisor 5.1 (ESXi 5.1) using the vSphere Client, and checking its MD5 checksum signature is correct.
- Part 5: HOW TO: Enable SSH Remote Access on a VMware vSphere Hypervisor 5.1 (ESXi 5.1)
- Part 6: HOW TO: Create your first Linux Virtual Machine on a VMware vSphere Hypervisor 5.1 (ESXi 5.1) Host Server
- Part 7: HOW TO: Create your first Windows Virtual Machine on a VMware vSphere Hypervisor 5.1 (ESXi 5.1) Host Server
- Part 8: HOW TO: Install VMware Tools for Windows on a VMware Windows virtual machine on a VMware vSphere Hypervisor 5.1 (ESXi 5.1) Host Server
- Part 9: HOW TO: Install VMware Tools for Linux on a VMware Linux virtual machine on a VMware vSphere Hypervisor 5.1 (ESXi 5.1) Host Server
- Part 10: HOW TO: Backup (Export) and Restore (Import) virtual machines to VMware vSphere Hypervisor 5.1 for FREE
- Part 11: HOW TO: Suppress Configuration Issues System logs on the host are stored on non-persistent storage
- Part 12: HOW TO: Configure and Replace the SSL Certificate on a VMware vSphere Hypervisor 5.1 (ESXi 5.1) Host Server
- Part 13: HOW TO: Configure basic networking on a VMware vSphere Hypervisor 5.1 (ESXi 5.1) Host Server
These articles apply to VMware vSphere Hypervisor 6.5.
- Part 1: HOW TO: Install and Configure VMware vSphere Hypervisor 6.5 (ESXi 6.5)
- Part 2: HOW TO: Connect to the VMware vSphere Hypervisor 6.5 (ESXi 6.5) using the vSphere (HTML5 Web) Host Client 6.5
- Part 3: HOW TO: Create an ISO CD-ROM/DVD-ROM image (*.iso), and MD5 checksum signature, for use with VMware vSphere Hypervisor 6.5 (ESXi 6.5)
- Part 4: HOW TO: Upload an ISO image to a VMware datastore for use with VMware vSphere Hypervisor 6.5 (ESXi 6.5) using the vSphere Host Client, and checking its MD5 checksum signature is correct.
- Part 5: HOW TO: Enable SSH Remote Access on a VMware vSphere Hypervisor 6.5 (ESXi 6.5)
- Part 6: HOW TO: Suppress Configuration Issues and Warnings Alert displayed in Summary status for ESXi 6.5 after enabling SSH or ESXi Shell
- Part 7: HOW TO: Create your first Windows Virtual Machine on a VMware vSphere Hypervisor 6.5 (ESXi 6.5) Host Server
- Part 8: HOW TO: Install VMware Tools for Windows on a VMware Windows virtual machine on a VMware vSphere Hypervisor 6.5 (ESXi 6.5) Host Server
- HOW TO: Deploy and Install the VMware vCenter Server Appliance 6.5 (VCSA 6.5)
These articles apply to VMware vSphere Hypervisor 6.7.
- Part 1: HOW TO: Install and Configure VMware vSphere Hypervisor 6.7 (ESXi 6.7
- Part 2: HOW TO: Connect to the VMware vSphere Hypervisor 6.7 (ESXi 6.7) using the vSphere (HTML5 Web) Host Client 6.7
- Part 3: HOW TO: Create an ISO CD-ROM/DVD-ROM image (*.iso), and MD5 checksum signature, for use with VMware vSphere Hypervisor 6.7 (ESXi 6.7)
- Part 4: HOW TO: Upload an ISO image to a VMware datastore for use with VMware vSphere Hypervisor 6.7 (ESXi 6.7) using the vSphere Host Client, and checking its MD5 checksum signature is correct.
- Part 5: HOW TO: Enable SSH Remote Access on a VMware vSphere Hypervisor 6.7 (ESXi 6.7)
- Part 6: HOW TO: Suppress Configuration Issues and Warnings Alert displayed in Summary status for ESXi 6.7 after enabling SSH or ESXi Shell.
- HOW TO: Update VMware ESXi 6.7 GA to ESXi 6.7U3(a) in 5 easy steps.
- HOW TO: Update VMware ESXi 6.7 GA to ESXi 6.7U3(a) direct from VMware.
Previous articles in this VMware vSphere 7.0 series are here.
- Part 1: HOW TO: Install and Configure VMware vSphere Hypervisor 7.0 (ESXi 7.0)
- Part 2: HOW TO: Connect to the VMware vSphere Hypervisor 7.0 (ESXi 7.0) using the vSphere (HTML5 Web) Host Client 7.0
- Part 3: HOW TO: Create an ISO CD-ROM/DVD-ROM image (*.iso) and MD5 checksum signature
- Part 4: HOW TO: Upload an ISO image to a VMware datastore for use with VMware vSphere Hypervisor 7.0 (ESXi 7.0) using the vSphere Host Client and checking its MD5 checksum signature is correct.
- Part 5: HOW TO: Enable SSH Remote Access on a VMware vSphere Hypervisor 7.0 (ESXi 7.0)
- Part 6: HOW TO: Suppress Configuration Issues and Warnings Alert displayed in Summary status for ESXi 7.0 after enabling SSH or ESXi Shell.
- Part 7: HOW TO: Create your first Windows Virtual Machine on a VMware vSphere Hypervisor 7.0 (ESXi 7.0) Host Server
- Part 8: HOW TO: Install VMware Tools for Windows on a VMware Windows virtual machine on a VMware vSphere Hypervisor 7.0 (ESXi 7.0) Host Server
- Part 9: HOW TO: Create your first Linux Virtual Machine on a VMware vSphere Hypervisor 7.0 (ESXi 7.0) Host Server
- Part 10: HOW TO: Install VMware Tools for Linux on a VMware Linux virtual machine on a VMware vSphere Hypervisor 7.0 (ESXi 7.0) Host Server
- Part 11: HOW TO: Install open-vm-tools for Linux on a VMware Linux virtual machine on a VMware vSphere Hypervisor 7.0 (ESXi 7.0) Host Server
- Part 12: HOW TO: Update VMware ESXi 6.7 to ESXi 7.0 GA in 5 easy steps
- HOW TO: What is a VMware vExpert?
- Part 13: HOW TO: Update VMware ESXi 6.7 to ESXi 7.0 GA direct from VMware.
- Part 14: HOW TO: P2V a Windows XP computer to VMware vSphere Hypervisor 7.0 (ESXi 7.0)
- HOW TO: Make Microsoft Hyper-V and VMware Workstation function side by side
- Part 15: HOW TO: Backup (Export) and Restore (Import) virtual machines to VMware vSphere Hypervisor 7.0 for FREE
- Part 16: HOW TO: Update VMware ESXi 7.0 GA to ESXi 7.0bs direct from VMware.
- Part 17: HOW TO: Update VMware ESXi 7.0 GA to ESXi 7.0b direct from VMware.
- Part 18: HOW TO: Update VMware ESXi 7.0 GA to ESXi 7.0bs in 5 easy steps
- Part 19: HOW TO: Update VMware ESXi 7.0 GA to ESXi 7.0b in 5 easy steps
- Part 20: HOW TO: Install and Configure VMware vSphere Hypervisor 7.0 (ESXi 7.0 ARM) on a Raspberry Pi 4
- Part 21: HOW TO: Deploy and Install VMware vSphere vCenter Server 7.0 (VCSA 7.0)
- Part 22: HOW TO: Install and Connect a VMware vCenter Server 7.0 in linked mode.
- Part 23: HOW TO: BOOT VMware vSphere Hypervisor 7.0 (ESXi 7.0 ARM) from an iSCSI LUN for the Raspberry Pi 4
- Part 24: HOW TO: Update VMware ESXi 7.0U2 to ESXi 7.0U2a direct from VMware.
- Part 25: HOW TO: Update VMware ESXi 7.0U2 to ESXi 7.0U2a in 5 easy steps.
and new for 2021 Hancock’s VMware Half Hour Video Series
- Part 1: HOW TO: Install and Configure VMware vSphere Hypervisor 7.0 U2 (ESXi 7.0.2).
- Part 2: HOW TO: Connect to the VMware vSphere Hypervisor 7.0 U2 (ESXi 7.0.2) using the vSphere Host Client.
- Part 3: HOW TO: HOW TO: Create an ISO CD-ROM/DVD-ROM image (.iso), and MD5 checksum signature, for use with ESXi 7.0.
- Part 4: HOW TO: Upload an ISO image to a VMware datastore for use with VMware vSphere Hypervisor 7.0.
- Part 5: HOW TO: Enable SSH Remote Access on a VMware vSphere Hypervisor 7.0 (ESXi 7.0).
- Part 6: HOW TO: Suppress Configuration Issues and Warnings Alert displayed in Summary status for ESXi 7.0.
- Part 7: HOW TO: Create your first Windows Virtual Machine on a VMware vSphere Hypervisor 7.0 (ESXi 7.0) Host Server.
- Part 8: HOW TO: Install VMware Tools for Windows on a VMware Windows virtual machine on a VMware vSphere Hypervisor 7.0 (ESXi 7.0) Host Server
- Part 9: HOW TO: Create your first Linux Virtual Machine Ubuntu 20.04 LTS Server on a VMware vSphere Hypervisor 7.0 (ESXi 7.0) Host Server.
- Part 10: HOW TO: Create your second Virtual Machine Ubuntu 20.04 LTS Desktop on a VMware vSphere Hypervisor 7.0 (ESXi 7.0) Host Server.
- Part 11: HOW TO: Install VMware Tools for Linux on a VMware Linux virtual machine on a VMware vSphere Hypervisor 7.0 (ESXi 7.0).
- Part 12: HOW TO: Install open-vm-tools for Linux on a VMware Linux virtual machine on a VMware vSphere Hypervisor 7.0 (ESXi 7.0).
- Part 13: HOW TO: Backup (Export) and Restore (Import) virtual machines to VMware vSphere Hypervisor 7.0 for free.
- Part 14: HOW TO: P2V a Windows XP computer to VMware vSphere Hypervisor 7.0 (ESXi 7.0).
- Part 15: HOW TO: Shrink or Reduce a VMware Virtual Machine Disk (VMDK) using VMware vCenter Converter Standalone v6.2.0.1.
- Part 16: HOW TO: Update VMware ESXi 7.0U2 to ESXi 7.0U2a direct from VMware.
- Part 17: HOW TO: Update VMware ESXi 7.0U2 to ESXi 7.0U2a in 5 easy steps.
- Part 18: HOW TO: Update VMware ESXi 7U1 (7.0.1) to VMware ESXi 7U2a (7.0.2) using an ISO image.
- Part 19: HOW TO: Update VMware ESXi 7.0U1 to ESXi 7.0U2a using VMware vSphere Lifecycle Manager (vLCM).
- Part 20: HOW TO: Rollback VMware vSphere Hypervisor 7.0 U2a using VMware Hypervisor Recovery Mode.
- Part 21: HOW TO: Deploy and Install VMware vSphere vCenter Server 7.0 (VCSA 7.0).
- Part 22: HOW TO: Add VMware vSphere Hypervisor ESXi 7.0 Hosts to VMware vSphere vCenter Server 7.0.
- Part 23: HOW TO: Update VMware vSphere vCenter Server 7.0 (VCSA 7.0) using the (VAMI) Appliance Management Interface.
- Part 24: HOW TO: Cross vCenter Server vMotion (export) between standalone vCenter Servers 7.0 not linked to the current SSO domain.
- Part 25: HOW TO: Add a Synology NAS providing NFS Storge to VMware vSphere Hypervisor ESXi 7.0.
- Part 26: HOW TO: Create a VMware vSphere Cluster add an EVC Baseline and then present a Synology NAS to multiple hosts in the cluster.
- Part 27: HOW TO: Migrate VMware vCenter Server 7.0 in an enabled EVC VMware vSphere 7.0 Cluster of ESXi 7.0 hosts using «Andy’s Towers of Hanoi solution»
- Part 28: HOW TO: FIX the Warning System logs on host are stored on non-persistent storage, Move system logs to NFS shared storage.
- Part 29: HOW TO: FIX No coredump target has been configured. Host core dumps cannot be saved.
- Part 30: HOW TO: FIX VMware vSphere Hypervisor (ESXi) Host vulnerability L1 Terminal Fault’ (L1TF) Speculative-Execution in Intel processors: CVE-2018-3646, CVE-2018-3620, and CVE-2018-3615
- Part 31: HOW TO: Add a Synology NAS providing iSCSI Storage to VMware vSphere Hypervisor ESXi 7.0 Part 1
- Part 32: HOW TO: Add a Synology NAS providing iSCSI Storage to VMware vSphere Hypervisor ESXi 7.0 Part 2
- Part 33: HOW TO: Deploy and Use the Synology Storage Console for VMware to Add iSCSI LUNs and NFS exports to VMware vSphere Cluster ESXi Hosts
If you found this tutorial helpful, please do click the Thumbs-Up icon below. This lets me know what is valuable for EE members and provides direction for future articles. If you have a related question based on this article, please click here.
Thank you very much!
Regards, Andy
Posted Aug 16, 2015 11:31 AM
Hello.
I’m an IT admin and recently my company inherited a particular old server running Windows 2003.
My only concern is the HW failing on me so my immediate thought was to convert the server into a VM, which is something I last did 4 or 5 years ago, but the process is now a bit different. The VCC Standalone is now a small client software/agent that is installed on the physical server. No more Converter CD to boot the server in offline mode.
This way I have to install something on the server and I void the contract. If anything goes bad they will cut my head off…
Is there any way I can somehow create a boot CD with VCC standalone? This way I wouldn’t install anything on the server (not voiding the contract).
*** Read just in case you’re wondering why I need this ***
A two company merger made me responsible for a hand full of old physical servers, most of them still on Windows 2003.
These servers are out of support from both OS vendor and hardware vendor! :smileyshocked:
For now, our biggest concern is with theirs (now ours too…) accounting server. We are forced by national law to maintain accounting records for 15 years and we can be held responsible if we fail to do so. They can penalize us very hard and can shut us down.
Now, the other company let this happen because they decided to stop using this accounting software 8 years ago and they started using another product, which means we still have 7 years ahead of us…
The hardware is a «white label» server for which they say they had a contract but I couldn’t find any evidence. Two 72GB SATA 8 years old RAID 0 hdd’s ready to die on my hands. Yep, you read it right, RAID 0. :smileyshocked: Apparently 72GB (RAID 1) was somehow not enough for a Windows 2003 installation with MSSQL and the accounting software. Ridiculous!
They stopped paying the HW contract because they decommissioned the accounting software and thought they could just let the server be there for 15 years rotting and not being responsible for it.
No backups either. This company apparently never had a backup plan because they didn’t have an IT admin. Makes me wonder how they got this far…
Just to spice things further, this old accounting software has a valid contract but the contract says that we can’t install anything on the server or else we void the contract. :smileyshocked:
They say they added that clause to the contract because the company «we bought» didn’t want to pay contracts for both the new and the old accounting software. So they made up a contract that if the accounting software stops due to a bug they will solve it. But if it’s because of a Windows update or some software that we installed or some HW problem, we are responsible and we have to deal with it. I’d rather not pay contract, period…
Bottom line, one thing lead to the other and now I have a time bomb ticking in my hands.
On the board meeting they laughed and said that’s why they pay me…
Too bad they don’t have a clue.
*** End of explaining ***
Introduction
VMware vCenter Converter can run on a wide variety of computers, and is compatible with the most widely used versions of the Microsoft Windows and Linux operating systems. With this migration tool you can perform the following tasks:
- In a fast and reliable way convert local and remote physical machines into virtual machines
- Complete multiple conversions simultaneously with a centralized management console and an intuitive conversion wizard.
- Convert other virtual machine formats, such as Microsoft Hyper-V, Microsoft Virtual PC and Microsoft Virtual Server or backup images of physical machines.
Installing the VmWare VCenter Converter package
Taking into account that we already have the installation package, we will proceed with the execution of it. This tool can be installed on any computer that is within the LAN of our servers or it can be installed on the same server that we are going to virtualize, since we have the option to convert virtual as a Standalone.
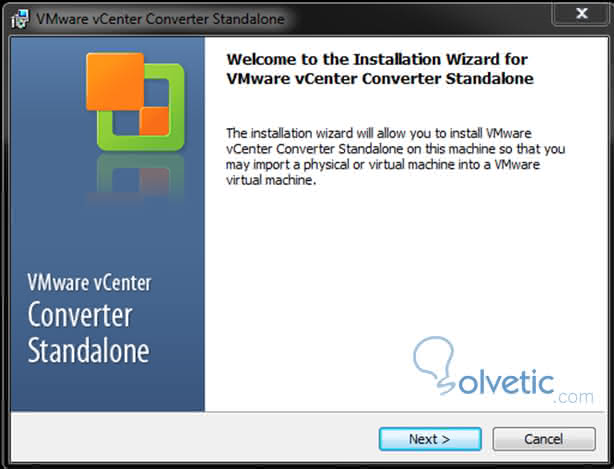
On the Welcome screen, we will give you «NEXT»
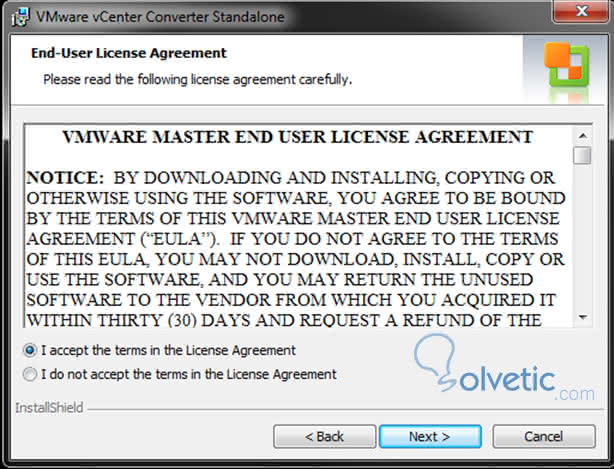
On this screen we should read the licensing agreement; Once read, if we agree with the license agreement, we will give the option «I ACCEPT THE IN THE LICENSE AGREEMENT» and then «NEXT»
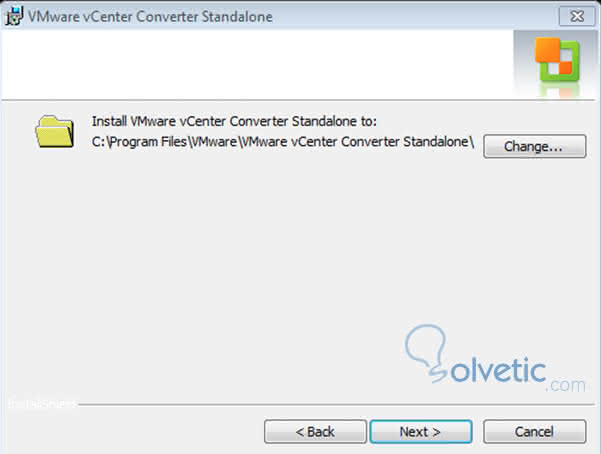
In this screen you will indicate the installation path of the VmWare VCenter Converter. We give «NEXT»
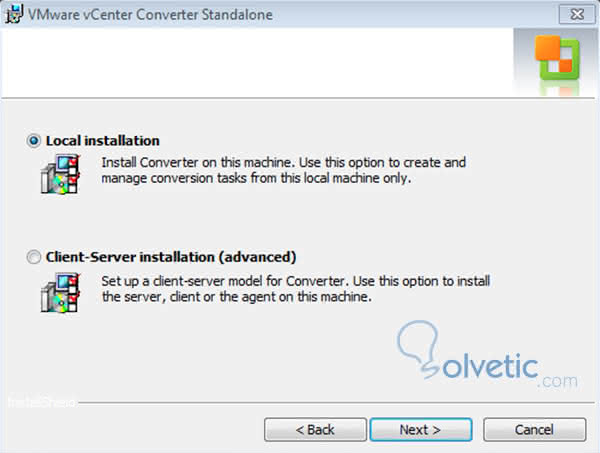
Here we will simply choose the Local Installation, then «NEXT».
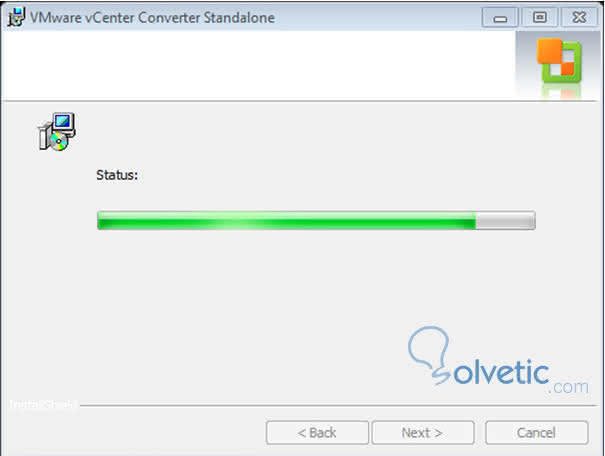
In this screen we will give you «INSTALL» , it will start with the installation process.

At the end of the installation we will give you «FINISH» and it will be executed.
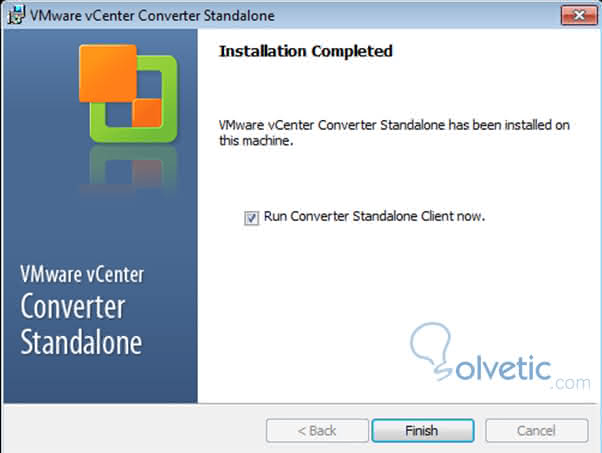
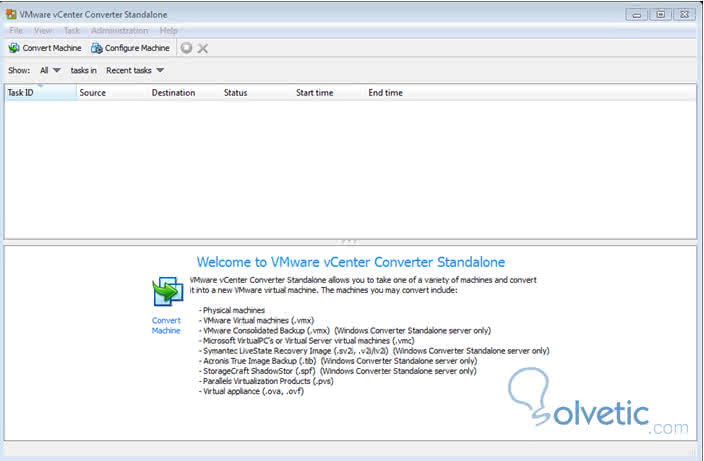
Here we have the tool executed, ready to be used !!
Convert a physical server to virtual
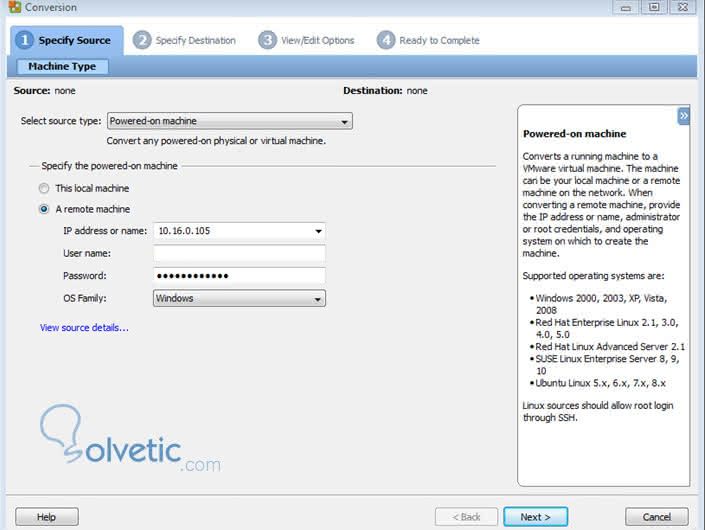
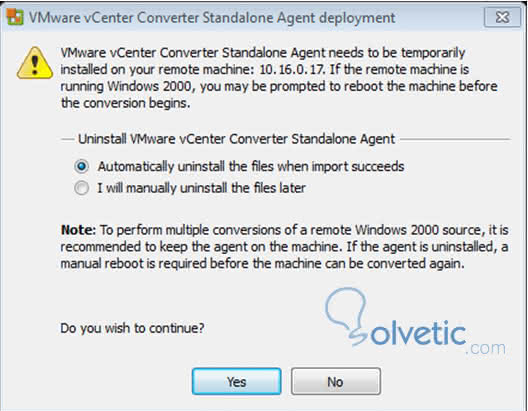
To start the Conversion process we will give «CONVERT MACHINE». The following window will appear where we will choose in this case «POWERED ON MACHINE», then we will choose «A REMOTE MACHINE» and we will place the IP address of the Server to be virtualized, a user and password with the Administrator’s powers of the Server. And we will give you «NEXT». Then connect to the computer and ask us if we want to automatically install the virtualization agent. We will give you «YES».
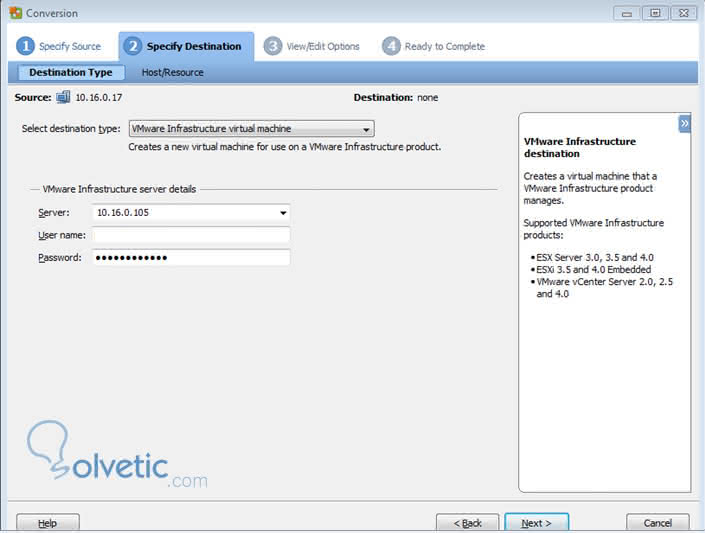
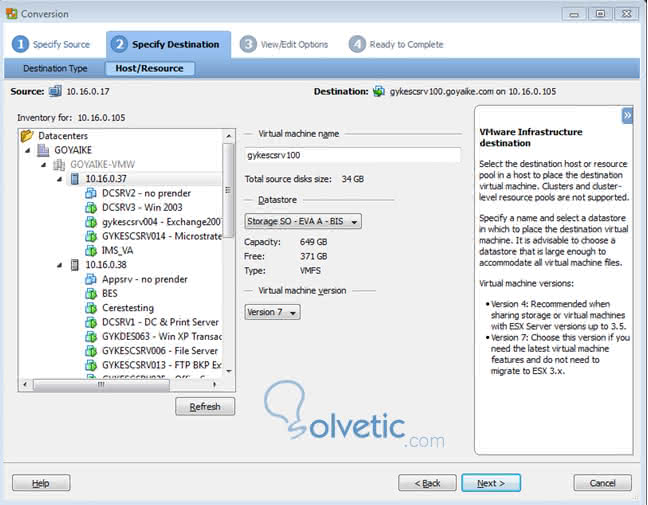
In this screen we will indicate the HOST where the virtualized server will be located. In this case I have a VCenter installed, and I place the IP of my CLUSTER. We complete this data and give «NEXT»
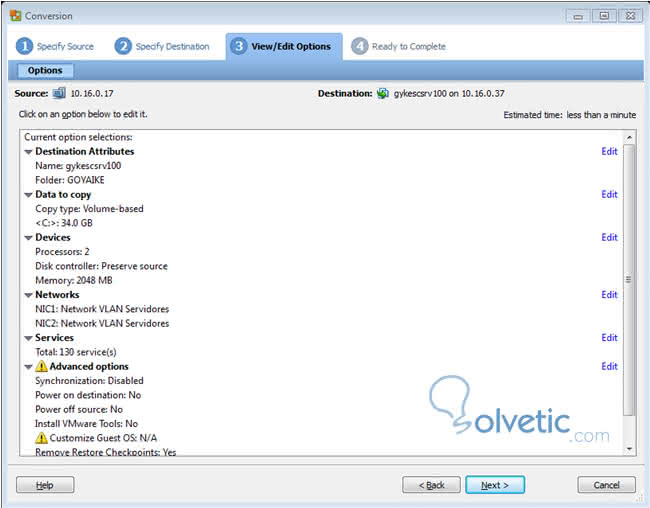
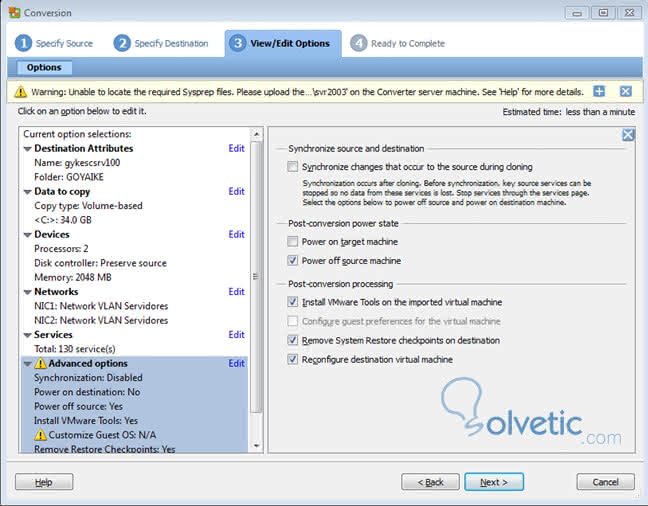
Here we will have the different configuration options of the equipment to be virtualized. If we go to «ADVANCED OPTIONS» , we will have post installation options. In this case we will choose the options that appear on the screen. We will give you «NEXT» .
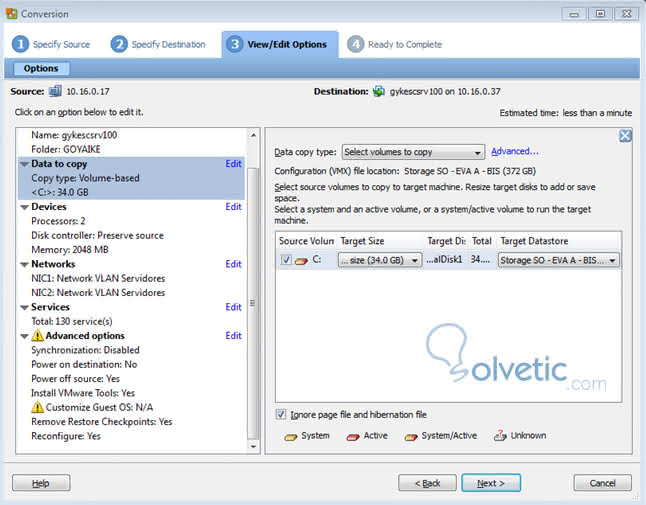
In this screen I will stop a moment to explain to you the importance of the option «DATA TO COPY», It is about choosing which partitions you want to virtualize. You can keep its original size. Linux partitions are shown as «unknown». Once the option is chosen, we will give it «NEXT».
Here we will choose the HOST where we will want the Server and the DataStore to be hosted. We will give you «NEXT».
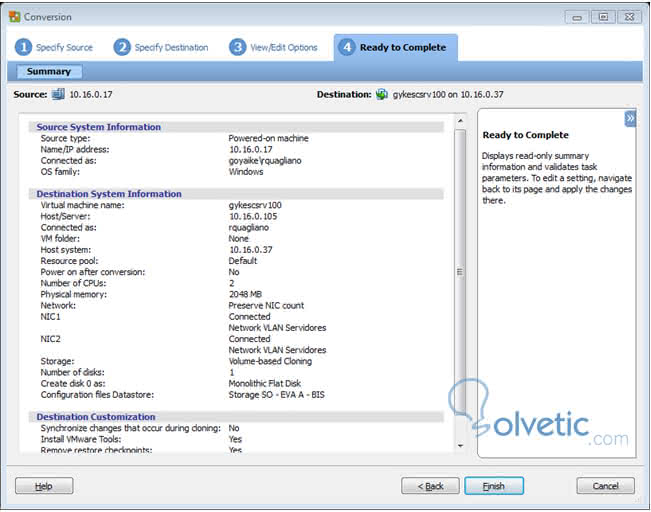
We will see the detail of everything we set up for virtualization. If everything is OK, we will give you «FINISH».
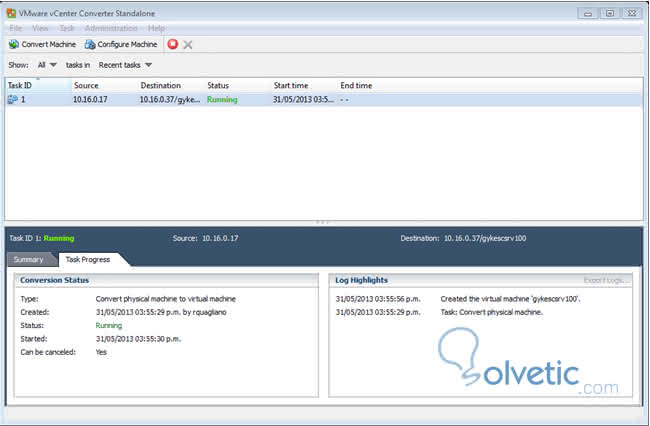
The task will appear in RUNNING, where we hope it will be 100% complete and we will have our physical server already virtualized.
This tool is very useful when it comes to the migration and implementation of our virtualized data center.