

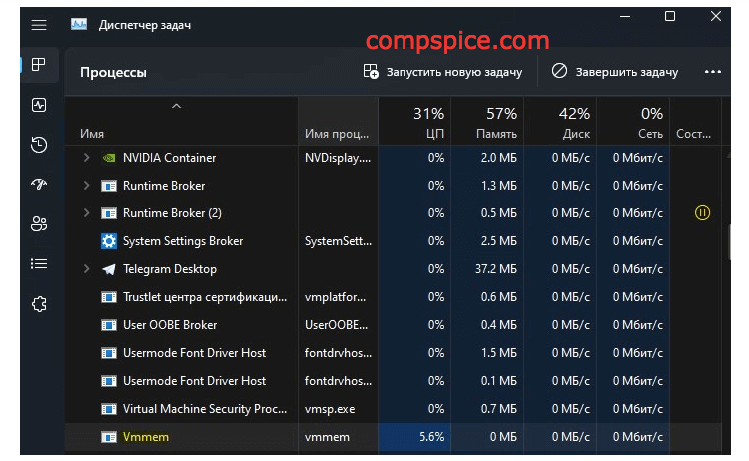
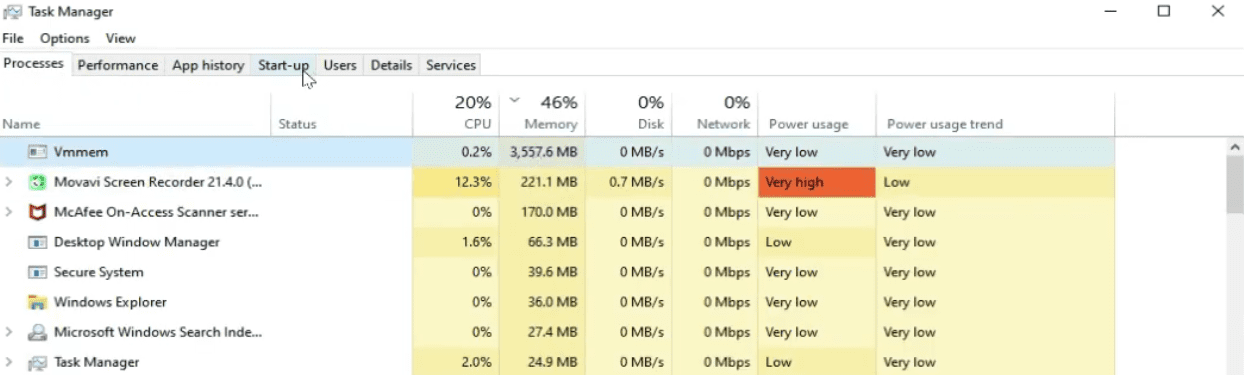
Vmmem – This is a process for displaying the resources consumed by virtual running Hyper-V machines in Windows 11/10, which can be seen in the task manager.
The Vmmem process can be seen in the task manager and if the virtual machines are currently running, then you can notice that Vmmem consumes a lot of computer or laptop resources and loads the CPU, memory or disk. This applies not only to virtual machines, but also to WSL (Linux Subsystem).
How to fix PC load by Vmmem process in Windows 10, 11
The Vmmem process can use CPU, Memory, and Disk only if WSL is running or virtual machines are enabled. In addition, Vmmem can suddenly load your PC components and this is due to the fact that some actions have taken place on the virtual machine, for example, updates for the system have begun to be installed.
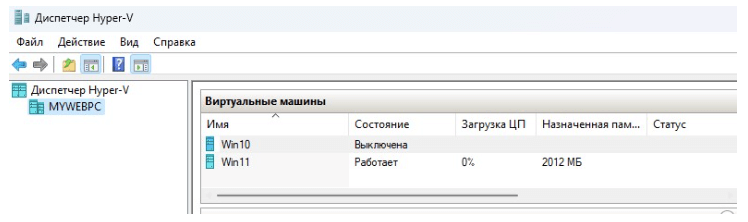
- First of all, write in the start menu search “Hyper-V Manager” and run. See which machine is consuming a lot of resources. There may be some activity going on in the virtual machine at the moment. Complete all actions in the virtual machine and turn it off by right-clicking on the running machine and Shut down.
! In the parameters of the created virtual machines, you can limit the use of processor cores and the allocation of RAM. This will help reduce the load on the Vmmem process and the system as a whole, but does not guarantee fast further operation of Hyper-V virtual machines.
- If WSL (Linux subsystem) will work, then it must be disabled. To disable WSL, run a command prompt as an administrator and enter the command below:
wsl --shutdown
Restart PC
- If the processes associated with the WSL2 service are frozen and not working correctly, then this may be the reason for the high load on the Windows 11/10 system by the Vmmem process, and restarting the WSL2 service may help fix this. Enter the following command run with elevated rights and enter:
Restart-Service LxssManager
Logging out of Docker Desktop (container software) helped some users on the Microsoft forum.
Back to top button
Процесс «vmmem» внезапно начал потреблять немыслимые объемы оперативной памяти на вашем компьютере? Ничего страшного — это лечится.
Начнем, пожалуй, с самого очевидного. Опытные пользователи ОС Windows 10, которые заметили, что процесс «vmmem» внезапно (!) начал потреблять для своей работы огромные объемы ОЗУ, должны в срочном порядке обратиться к тех. документации «Windows Subsystem for Linux» (WSL и WSL2).
А теперь для обычных пользователей.
В последнее время с такой проблемой часто сталкиваются обладатели ВМок (виртуальных машин) для Linux, которые настраивались через WSL2 с GUI. Определить причину таких нагрузок довольно сложно, так как возникают они спонтанно, чуть ли не в случайные моменты работы ОС. Довольно часто нагрузка на ОЗУ начинается сразу же после выхода со спящего режима.
Что такое процесс «vmmem» и почему он потребляет много памяти
WSL потребляет огромное количество памяти, даже когда, условно говоря, не работает. На актуальных сборках «десятки» на работу WSL уходило до 80% памяти, однако в последних версиях подсистемы этот порог был уменьшен до 50% (макс. 8Гб). «vmmem» — это системный процесс Windows; оперативная память для ВМ, если простыми словами.
Главная причина за чрезмерным расходом ОЗУ на «vmmem» — это предварительная настройка ВМ. Все верно, в данном случае виноват пользователь, который занимался настройкой ВМки, а именно какое количество ресурсов ПК (ЦП, ОЗУ, диск и сеть) будет выделятся на работу ВМ. Возможно, кто-то немного перегнул палку, недооценил ресурсоемкость таких задач? Хорошо, что все можно исправить.
Как исправить высокие затраты по памяти от «vmmem»
Сейчас мы покажем вам, как перезагрузить WSL через Командную строку:
- нажмите WIN+R, вставьте в пустую строку значение CMD и нажмите комбинацию CTRL+SHIFT+ENTER;
- вставьте в консоль команду wsl —shutdown и нажмите ENTER;
- если команда не сработала, перейдите с помощью системного Проводника в следующую директорию:
- C:\Users\your-username\
- откройте с помощью Блокнота (или любого другого текстового редактора) файл wslconfig;
- добавьте в файл следующие строки и сохраните изменения:
- [wsl2]
guiApplications=false
- [wsl2]
- перезагрузите ПК, чтобы полностью (!) завершить процесс «vmmem».
Примечание: Внеся вышеуказанные изменения в файл wslconfig, вы больше не сможете использовать GUI-приложения Linux на своем ПК.
Вот что мы рекомендуем: пересмотрите настройки ВМ и снизьте объем ресурсов ПК, которые будут выделяться для ее работы. Кроме того, обратите внимание на программы, работающие на фоне системы. И обязательно, обязательно установите последние обновления для Windows 10. Процесс «vmmem» — это системная служба Windows, а не какой-то вредоносный элемент, от которого необходимо избавиться.
Your day-to-day operations are lagging on Windows PC or Laptop, even when no resource intensive app is running in the background.
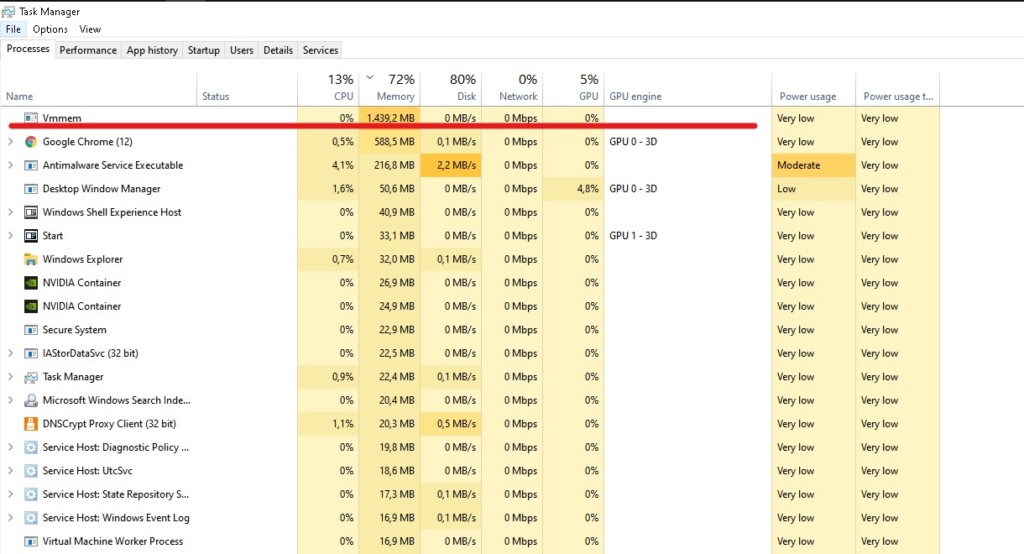
And then you spot Vmmem.exe process in the Task Manager, taking up a large chunk of RAM and processor.
Vmmem is a VM memory management tool but it takes a lot of RAM and other resources but not much is talked about it.
Meanwhile, it is slowing down your computer so you have to fix the Vmmem memory and CPU issue.
So we will learn to use the command prompt and PowerShell to shut down the Vmmem process. This will free up your computer resources.
Along with that, you will also learn to shut down manager virtual machines running in the background to further free up the RAM.
Table Of Contents
- What is Vmmem process?
- Why Vmmem using high memory in Windows 11/10?
- Solutions to Vmmem High Memory and CPU Usage for Windows
- Manually Restart the WSL
- Disable the Running Virtual Machine
- Limit WSL RAM Usage
- Increase the Allotted Resources
- Is It Possible to End the Vmmem Process?
- How do I fix high memory usage?
- Fix Vmmem High Memory and CPU Usage Issue
What is Vmmem process?
The Vmmem process is like a manager for virtual activities on your Windows computer. If you are running Linux on your Windows through WSL or using other virtual tools, Vmmem helps handle the memory and resources they use.
Think of it as a backstage crew member ensuring the show goes on without any glitches.
Why Vmmem using high memory in Windows 11/10?
Heavy Workload in WSL2 or Virtual Machine: When running intensive tasks within the Windows Subsystem for Linux 2 (WSL2) or another virtual machine, the resources are required by the Vmmem process.
Insufficient System Resources (RAM, CPU): Virtualization inherently requires a portion of system resources to create and manage virtual instances.
If your system is already nearing its resource limits, enabling virtualized environments can strain the system further, leading to Vmmem high memory and CPU usage.
Memory Management Issues in WSL2 or VMs: WSL2, and some VMs, may sometimes allocate a lot of memory for tasks but might not release it back to the system promptly or efficiently after those tasks are complete.
This can make it appear as though Vmem is using more memory than it should.
Solutions to Vmmem High Memory and CPU Usage for Windows
You can start by manually closing all the Linux-based applications, along with WSL. This can fix Vmmem high memory issue.
But if that doesn’t work out then you can try the following solutions.
Manually Restart the WSL
You can manually force the restart of the Windows Subsystem for Linux through the command prompt. This will make sure that all the processes are shut down and have a fresh restart.
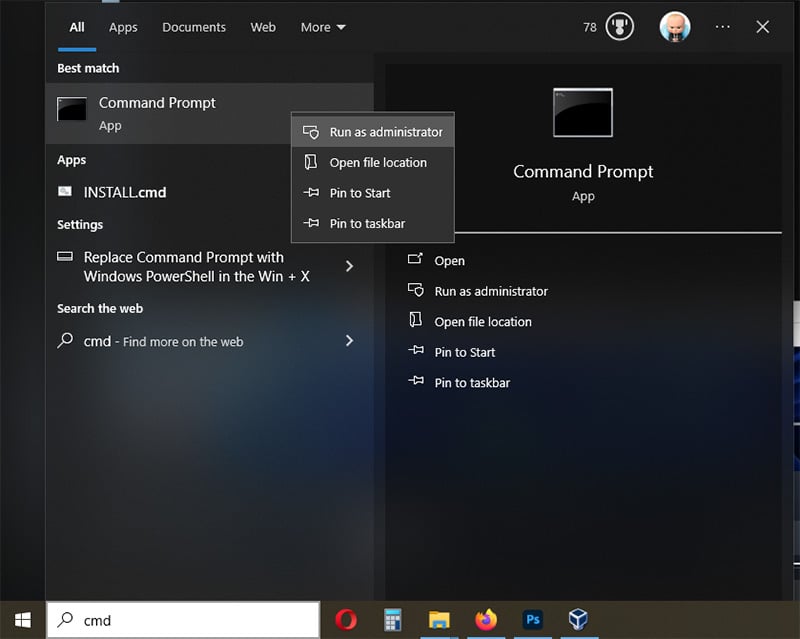
1. Head to the command prompt from the Start Menu with the administrator rights.
2. Now type the following command and press enter.
wsl --shutdown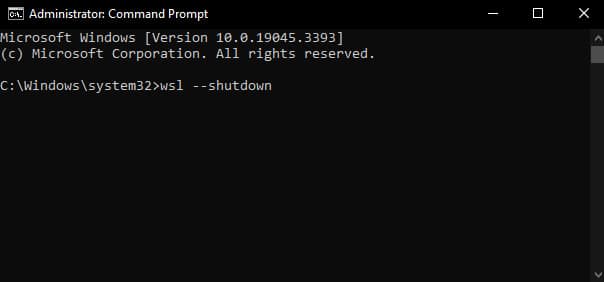
This will close the Vmmem process by shutting down the WSL on your computer.
Disable the Running Virtual Machine
Sometimes manually forcing a shutdown to WSL doesn’t work. In such cases, you can turn off all the virtual machines running in the background, saving your memory and resources.
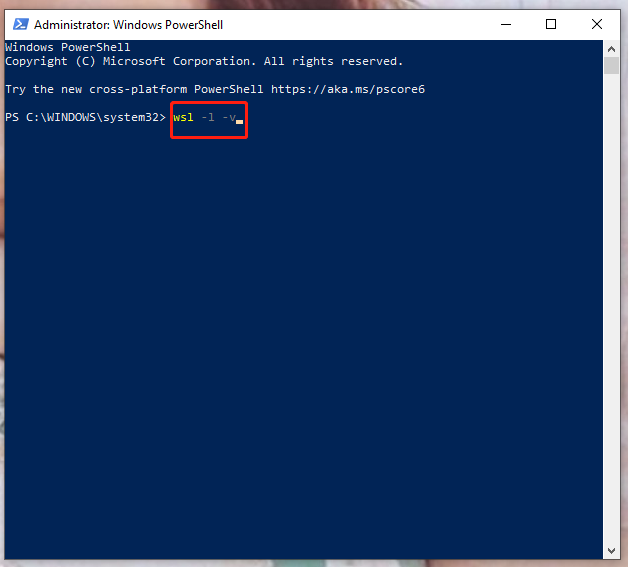
1. Open Windows PowerShell in administrator mode by pressing Windows + X.
2. Write the following command and press enter to list the virtual machines running right now.
wsl -l -v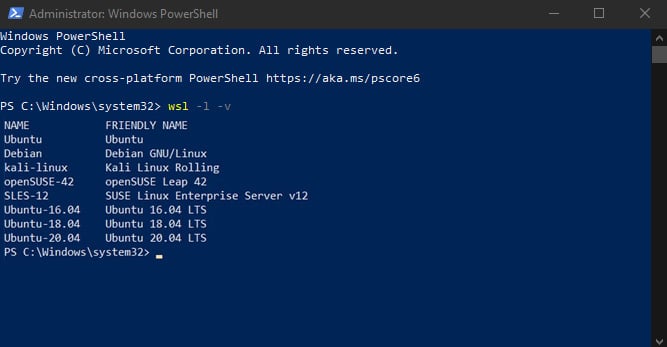
3. After seeing the names, enter the following command along with the virtual machine’s name to shut it down.
wsl -t nameofvmReplace nameofvm is the virtual machine’s name that is running on your computer, which we pulled in the last step.
So, for instance, if the virtual machine’s name is Debian then the command will be as:
wsl -t Debian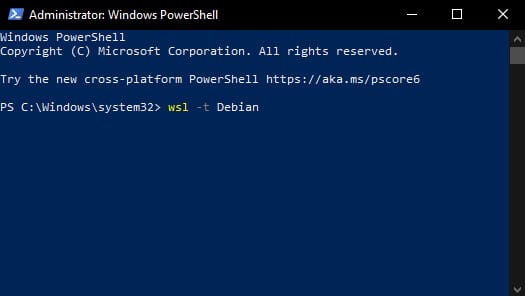
Limit WSL RAM Usage
You can configure WSL to limit its resource consumption, ensuring it doesn’t overload your system. However, this feature is exclusive to WSL 2, which is compatible only with Windows Builds 18362 or later.
We will use the Windows Powershell in administrator mode to edit the config file in the following manner.
1. Open the Windows Powershell in administrator mode by pressing Windows + X.
2. Now type the following and then press enter
"c:\Username\admin\.wslconfig"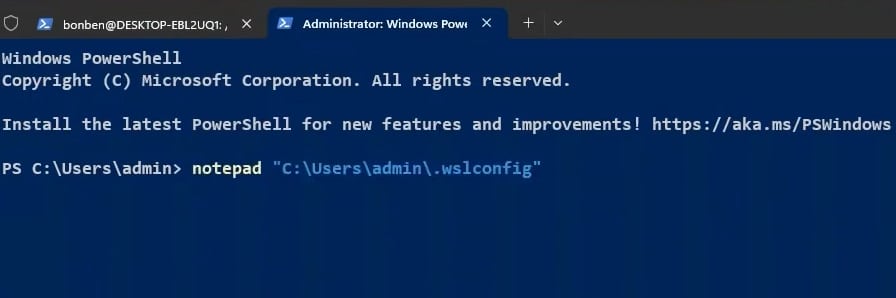
3. And then click Yes for the prompt that will ask you to create a new notepad file.

4. Then type the following for the configuration of the maximum memory you want to allow for WSL2.
You can change the RAM by replacing the number. We kept it at a modest 2GB to strike a balance between the computer and the WSL.
[wsl2]
memory=2GB
5. After that, close the notepad and save changes to the notepad file.

6. Now type wsl –shutdown and press enter to restart the WSL servicer.
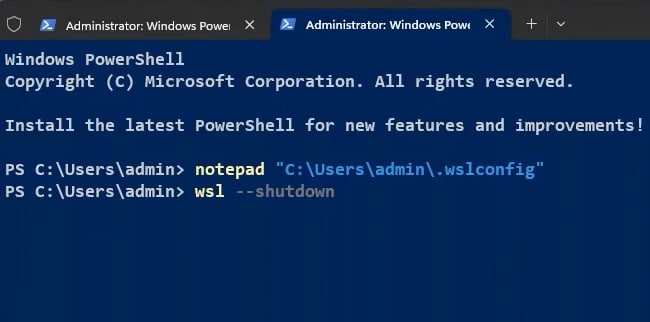
7. Next, type wsl and press enter to start restart the WSL.
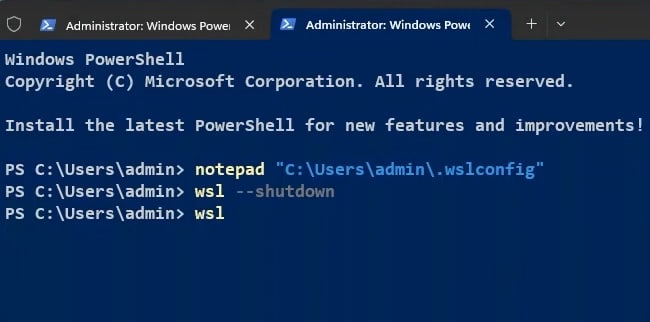
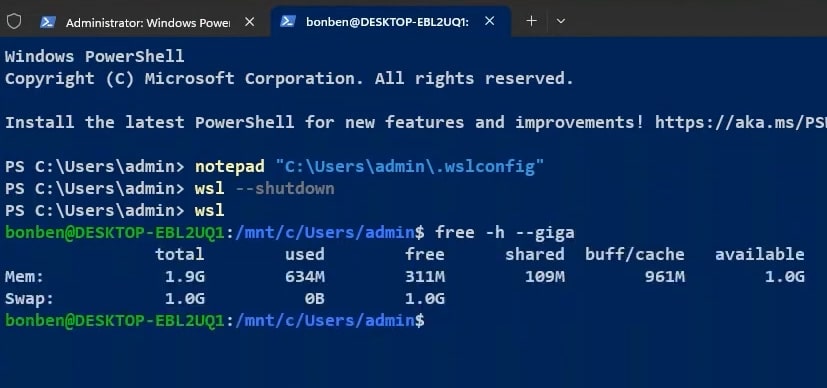
8. Then type free -h –giga and press enter to check whether RAM usage, will be reduced to the set limit.
Increase the Allotted Resources
You have limited RAM and a modest processor but WSL is taking all of it. It can be solved by changing allotted resources through the Hyper-V manager.
Hyper-V Manager is a tool by Microsoft that lets you create and manage virtual computers on your actual computer.
Imagine your computer is a big building, and with Hyper-V Manager, you can create several mini-rooms (virtual computers) inside it.
So Hyper-V Manager can be responsible for high Vmmem resource usage. And here is how you can reduce the RAM and CPU usage.
1. Open the Hyper-V manager
2. Right-click on your virtual machine and head to Settings.
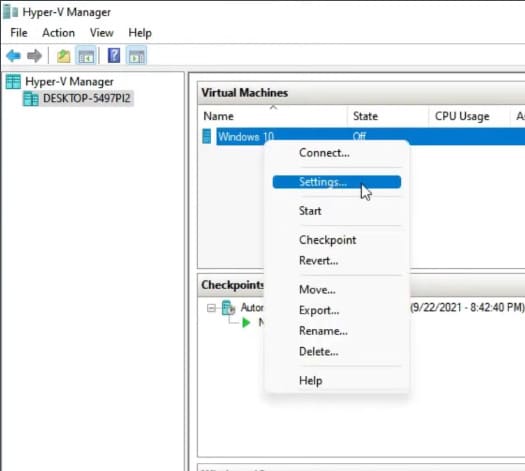
3. Now head to the memory section from the left sidebar.
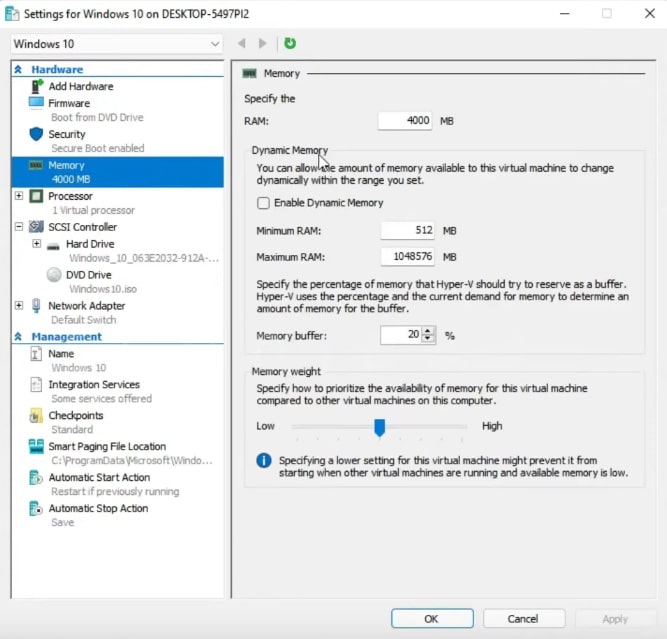
4. Reduce the memory usage under RAM and bring it under a comfortable margin for your computer.
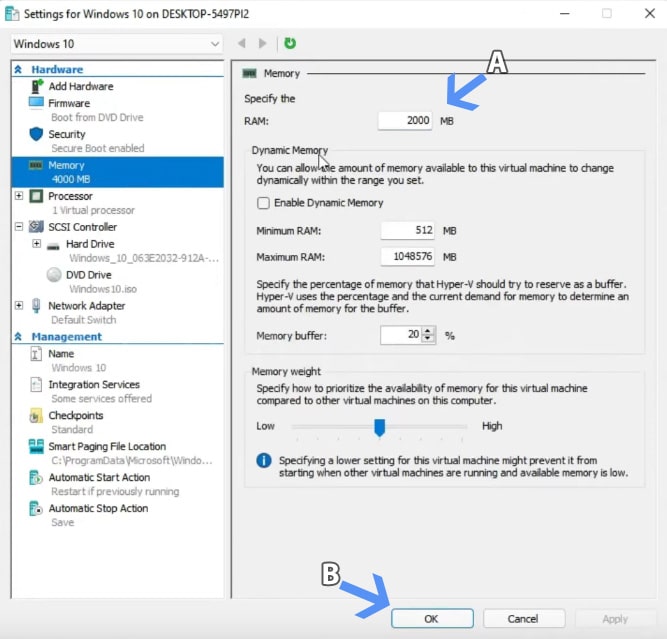
Then untick the Enable Dynamic Memory if it is ticked, from the Dynamic Memory subsection. After that, click OK to save the settings.
Is It Possible to End the Vmmem Process?
No, you cannot directly end the Vmmem process through the Task Manager in the same way you might terminate other processes.
The Vmmem process represents the memory used by the virtual machine or container manager in Windows.
Terminating it via Task Manager isn’t allowed because it would disrupt the functioning of the virtualized environments.
How do I fix high memory usage?
To address this, first, identify the specific service causing high usage by checking the processes within WSL or VM.
Reduce the number of running processes or containers if possible. If it is Docker-related, consider limiting its memory usage in Docker settings.
Additionally, ensure you have the latest Windows updates and WSL version, as Microsoft occasionally releases optimizations. If not in use, consider disabling or uninstalling WSL or the relevant virtual machine application to free up memory.
Fix Vmmem High Memory and CPU Usage Issue
You can fix Vmmem high memory issue on a software level but sometimes the problem is beyond that.
Problems can also stem from hardware malfunctions, especially with outdated components. Therefore, if you have aging hardware, consider replacing them.

Amaan Rizwan
Anything and everything because titles should not define us. A non-fiction lover. Khalid Hosseini and Ruskin Bond fan. Aspiring to be better than yesterday.
-
Home
-
News
- Solutions to Vmmem High Memory and CPU Usage Windows 10/11
Solutions to Vmmem High Memory and CPU Usage Windows 10/11
By Aurelie | Follow |
Last Updated
Vmmem process high memory and high CPU usage is a very common phenomenon when running a virtual machine. However, how to fix it seems a little troublesome. This guide on MiniTool Website will provide you with some easy and effective workaround for you!
What Is Vmmem?
The vmmem process is a process that describes to you how much resources are being used by virtual machines. This process is closely associated with the virtual machine on your device. In other words, it cannot run if you don’t operate any virtual machine.
As soon as you notice that the vmmem process is consuming a lot of CPU and memory usage, it represents that the virtual machine on your PC is consuming lots of resources. Therefore, you may ask, “How to fix vmmem high memory usage and CPU usage?” Don’t fret, we’ll seek out some feasible solutions for you.
Tips:
Experience peak PC performance with MiniTool System Booster — Free up RAM for a smoother computing journey.
MiniTool System Booster TrialClick to Download100%Clean & Safe
How to Fix Vmmem High Memory and CPU Usage Windows 10?
Restart WSL from CMD
WSL (Windows Subsystem for Linux) is an indispensable component of Windows 10/11. It is dedicated to providing virtualization solutions for Windows users while sometimes, it will become the culprit of vmmem high usage issue due to unsmooth operation. Restarting it is an effective way to revert it to a normal state.
Step 1. Type cmd in the search bar to locate Command Prompt and right-click it to choose Run as administrator.
Step 2. Copy & paste the following command and hit Enter to shut down WSL.
wsl –shutdown
Step 3. If the command doesn’t work, you can head to the next location by pasting it to the navigation bar in File Explorer.
C:\Users\your-username\.wslconfig
Step 4. Now add the following code to your Notepad and save it.
[wsl2]
guiApplications=false
Step 5. After rebooting your PC, check how much RAM vmmem takes up in Task Manager.
Step 6. In case you need to use the utility of Linux, you’d better restart the WSL service. Search Windows PowerShell in the Windows start menu and run it as an administrator.
Step 7. Type the following command and hit Enter to restart the WSL service.
Restart-Service LxssManager
Adjust the Allotted Memory of Your Virtual Machine
The direct reason for vmmem high CPU usage and high memory usage is that you may allow the virtual machine to use a lot of RAM without your knowledge. In this condition, the best way is to adjust your virtual machine hence avoiding taking tons of system resources.
Disable the Running Virtual Machine
If none of the methods above work for you to address vmmem Windows 10 high memory usage, you can try terminating the running virtual machine.
Step 1. Type powershell in the search bar to find Windows PowerShell and run it as an administrator.
Step 2. Type the following code in the command line and hit Enter. This action will show you a list of all running virtual machines on Windows 10.
wsl -l -v
Step 3. Close those running virtual machines by employing the following command:
wsl -t kali-linux
Warning: The “t” stands for terminate. The kali-linux is just an example of the running process on your PC, you should replace it with the actual one.
About The Author
Position: Columnist
Aurelie is a passionate soul who always enjoys researching & writing articles and solutions to help others. Her posts mainly cover topics related to games, data backup & recovery, file sync and so on. Apart from writing, her primary interests include reading novels and poems, travelling and listening to country music.
Windows 10 features a wealth of different processes that all come together to provide an optimal user experience. Some of these processes function in the background and are potentially harmless. In addition, you can see these using the Task Manager. Some, however, appear to be safe initially but soon become hazardous for the overall system resources on a Windows PC. In cases like these, you will see a major decrease in the device’s performance, ultimately leading you to seek out a solution.
One of these troublesome processes is Vmmem. At first, this utility feels like a bug as it causes excessive memory usage. This is an abnormal scenario, and you have to deal with the issue to restore your device’s optimal performance. This guide will cover how to fix Vmmem high memory usage in Windows 10, so keep reading for multiple solutions to this issue.
What is Vmmem in Windows 10?
Vmemm high memory usage in Windows 10
“Vmmem” in Windows 10 appears as a process, similar to how other services have their place in the Windows 10 Task Manager. Whenever it pops up and doesn’t appear to be using many system resources, you might as well ignore it since it’s pretty much harmless at that stage.
However, if the process is measuring up to consume a lot of memory on your end, say about 90%-100% of the total RAM available on the device, that is where trouble will spring up, making it necessary to take a closer look at the process at hand. Upon more careful inspection, it turns out that Vmemm relates to all the virtual machines running on your Windows PC.
It is a system-created process that surfaces to describe to the user how much resources are being utilized by virtual machines on the device. When you don’t have any virtual machine operating, you’re less likely to see the Task Manager’s Vmmem process rise.
However, if you’d like to know how virtual memory works on a Windows PC, check out our guide on everything you need to know about virtual memory. With that being said, let us get right into the best methods that have proved to fix the Vmmem high memory usage in Windows 10.
Fixing the Vmmem high CPU and memory usage issue in Windows 10
We have compiled the best ways people have employed to fix the Vmmem high memory usage issue in Windows 10. Follow the listed guidelines and try replicating them on your end carefully.
Restart the PC
Let us start this whole scenario with an easy-to-follow solution. Although this one is quite the oldest ones in the book, many people cannot deny the effectiveness of a simple reboot. It often helps PCs get a fresh restart, quite literally, and absorb some breathing room. Moreover, restarting your device automatically kills unwanted background processes, so you’re automatically freeing up many system resources.
In addition, the Vmmem high memory usage issue can result from a temporary spike in virtual machine utilization. Therefore, it is undoubtedly worth restarting your PC before jumping into the more complicated and time-consuming end of the fixes.
Adjust the allotted memory for running virtual machines on your Windows PC
One common mistake that most people commit is inadvertently allowing a high amount of RAM for their virtual machines running on the device. Now, this is the most straightforward cause of Vmmem’s high memory usage issue since you’re the one actually at fault here. In this case, all you have to do is readjust the virtual machine that you’re currently executing, so it doesn’t eat away a ton of system resources.
If you’re using software like Virtualbox on Windows, we can help you configure your virtual machine optimally. Check out this specialized guide for more information. You need to optimize the amount of allotted memory to your virtual machines, so they can utilize a stable level of RAM and not go overboard.
Try going through this potential fix to see if it brings any favorable results. If you’re still unable to get Vmmem back to a normal level, the issue might be more deep-rooted. Let’s get into the next fix.
Shut down WSL
WSL is short for Windows Subsystem for Linux. It is an integral component of Windows 10 and Windows 11 as well. This utility’s main purpose is to offer a virtualization solution for Windows users. It makes it possible to execute Linux binaries with the help of a virtual machine.
This process is one of the most essential services in Microsoft Windows that plays a crucial role in virtualization. You can even use WSL to run Linux apps on Windows 10 and Windows 11. If you want to find out how to do that exactly, check out this guide.
Now, WSL doesn’t always run smoothly. Sometimes, it is the main cause behind the Vmmem high memory usage issue. Therefore, in this potential solution, we will try fixing the problem by temporarily shutting down WSL to see if Vmmem starts reverting to a normal resource utilization level.
The following steps are going to explain how to do that.
1. The first step is to open the Command Prompt on your Windows PC. Please make sure that you run the application as an administrator to avoid any future mishaps.
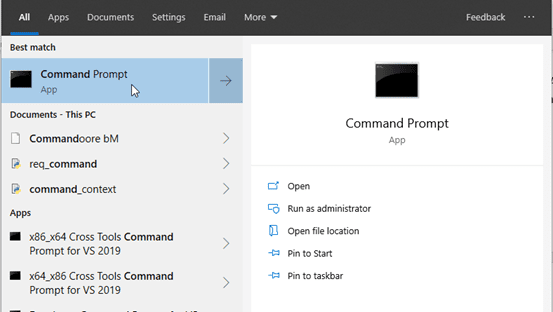
Opening Command Prompt
2. After opening the Command Prompt, you will have to enter the following command into the operational tool that we have running. Following the input, this specific command will do the trick for us.
wsl --shutdown

Rebooting the WSL service
3. After inputting the last step, the Terminal will return you with your username, affirming that the command above was a success. However, you are not quite done yet. It’s necessary to restart your PC at this stage to continue the process. Do that from your Windows Start menu and move forward.
Restarting the PC
4. After restarting your PC, check your Task Manager to see if Vmmem is still consuming an undesirable amount of RAM or other system resources. If the problem seems to be fixed now, it’s worth rebooting the WSL service again in case you ever want to employ the functionality of Linux again on your Windows PC.
Otherwise, if you leave WSL shut down, forget about being able to use Linux. Therefore, open Windows Powershell to continue from here on out. Search for it in the Windows Start menu, and don’t forget to run the app as an administrator to avoid future issues.
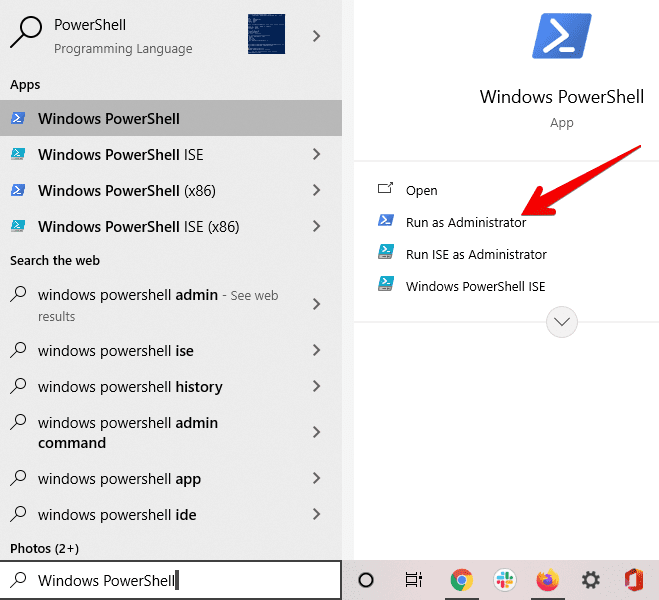
Running Windows Powershell as an administrator
5. After Windows Powershell launches, type in the following command to kickstart the WSL service again. Press the “Enter” key when you are done.
Restart-Service LxssManager
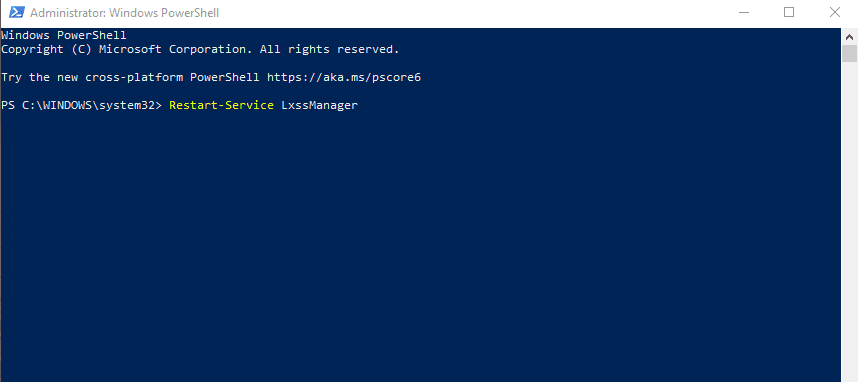
Restoring the functionality of WLS
That’s about it for this fix! If you’ve managed to fix the Vmmem high memory usage issue on your end, congratulation! However, if nothing has worked so far, you need to try out the final solution that we have coming up next in this guide.
Terminate the running virtual machines
If no other solution has proved fruitful for you so far, you have no other option but to opt for the through-and-through of all running virtual machines on your Windows PC. Again, we will be paying attention to the ever-convenient Windows Powershell command-line interface to finalize this process. To get started, open Powershell first as an administrator. That will allow you to enter the forthcoming commands successfully.
After opening Powershell on the device, you will have to get started by entering a command. This command will allow you to enlist a list of all the different virtual machines running on Windows 10 concurrently. Check out the following and use it in your Command Prompt to continue.
wsl -l -v

Running the initial WSL command
After using that last command, Windows Powershell will return you with a list of different virtual machines running in the background. From here, we will have to check the status of each opened virtual machine and confirm which ones are functioning. If 2-3 processes actively show the status “Running,” we recommend you close all of them to check if the Vmmem high memory usage issue is fixed.
To close the virtual machine, you need to use the name of the process running. For instance, if Kali-Linux is being used, you can effortlessly employ the following command in Windows Powershell.
wsl -t kali-linux
The “-t” part stands for “terminate.” You should understand that you will enter the name of the process that’s specific to your PC. It may or may not be Kali-Linux, so don’t think the command above is set in stone and valid for all cases. For instance, you could have Ubuntu running on the desktop. In that case, the following command will be used.
wsl -t Ubuntu
In prevalent cases, that’s all there is to share about the Vvem high memory usage issue! Whenever you’re faced with a problem like this, make sure you know how to deal with it.
Conclusion
Windows 10 and Windows 11 are exceptionally regulated operating systems that comprise various processes. In most scenarios, these options grant the possibility of using a Windows PC optimally, making all possible things clearer to perceive. However, sometimes, these processes don’t work well for users and start springing more trouble than resolutions.
Worry not, however, because, in this guide, we have talked about some of the most effective ways to fix Vmmem’s high memory usage in Windows 10. You can start with a simple restart with a reasonable likelihood of getting the issue fixed and continue onto more involved fixes when things do not look to improve.