
В операционной системе Windows 10 была разработана мощная функция, позволяющая пользоваться любым принтером сразу же после подключения без установки драйверов. В ранних версиях системы такой опции предоставлено не было, и из-за этого пользователи нередко встречались с ошибкой «Локальная подсистема печати не выполняется». Сегодня она может появиться и в Windows 10 из-за сбоев в функционировании компьютера. Далее мы поговорим с вами о том, какие существуют способы решения данной проблемы и как ими воспользоваться.
За передачу данных на принтер и печать документов отвечает служба «Диспетчер печати». Она должна быть обязательна включена, если вы планируете распечатать какой-либо файл. Поэтому, если она не активна, то иногда может отображаться ошибка «Локальная система печать не выполняется».
Таким образом, начнем мы с проверки функционирования данной службы, а затем разберем остальные методы решения проблемы.
Способ 1: Включение службы печати
Управление любой службой в Windows осуществляется в окне «Службы». Чтобы его открыть и активировать службу печати, выполняем следующее:
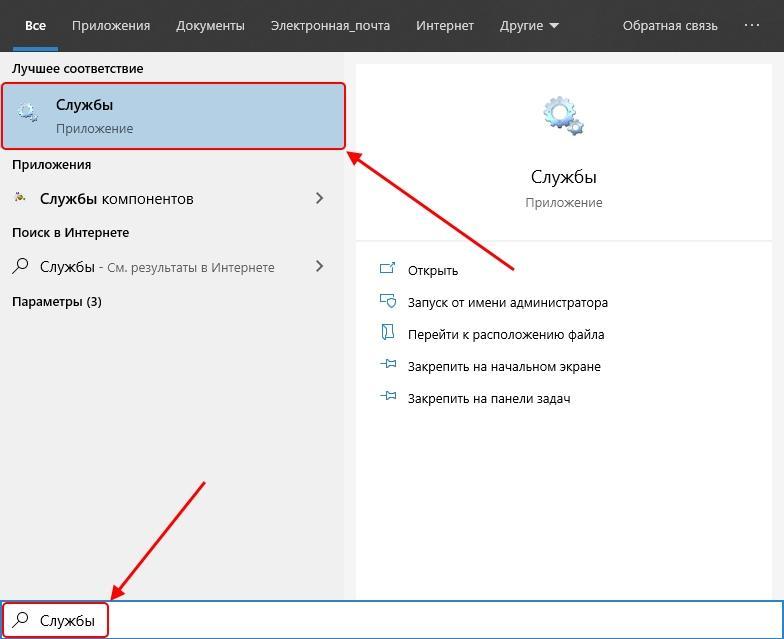
- Запускаем меню «Пуск» и вводим запрос «Службы». Затем переходим по первому результату.

Открываем список доступных служб
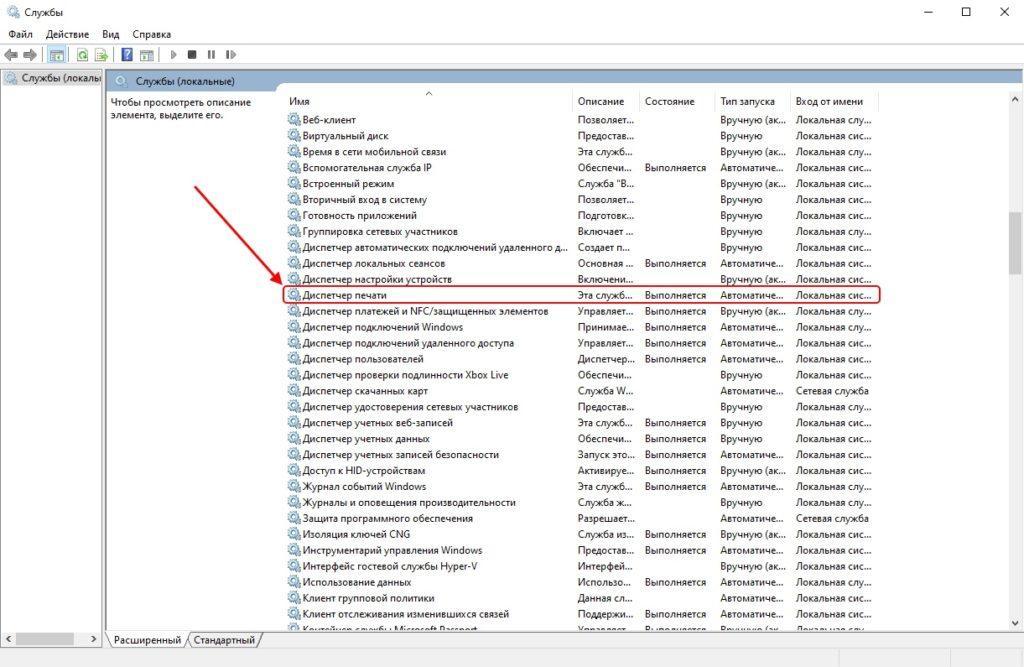
- В отобразившемся окне находим строку под названием «Диспетчер печати» и кликаем по ней двойным щелчком мыши.

Переходим в настройки службы
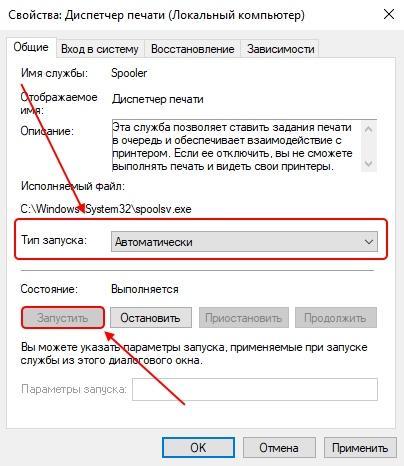
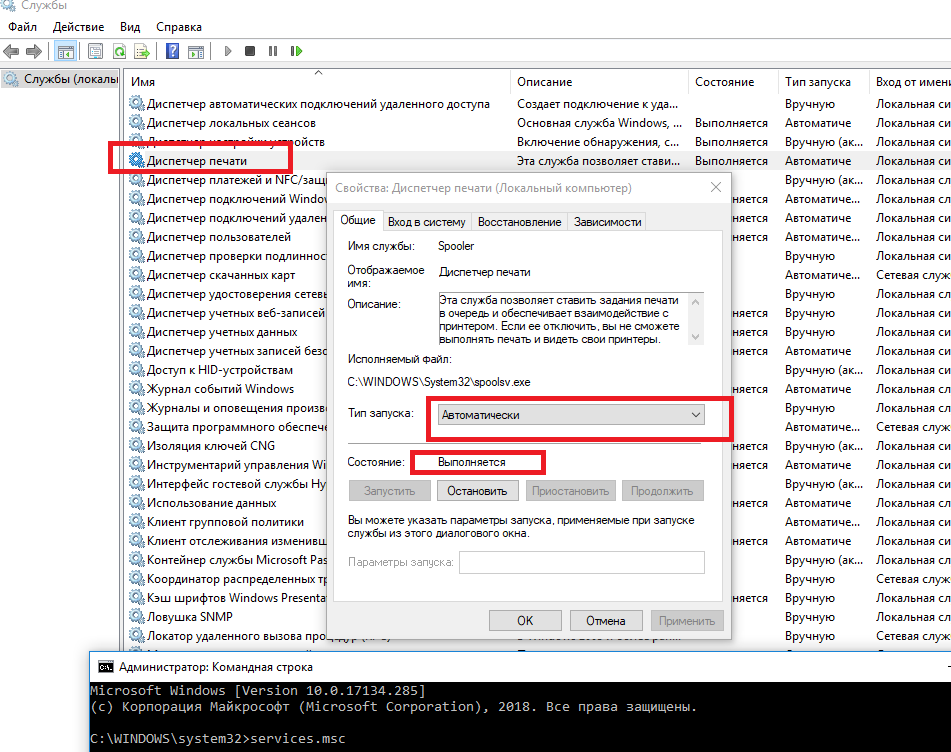
- Далее проверяем, установлен ли тип запуска в режиме «Автоматически». Если нет, то выбираем данный режим. Затем смотрим немного ниже на строку «Состояние». Если указано «Выполняется», то все окей. Иначе активируем службу с помощью кнопки «Запустить».

Активируем службу
Если после активации службы «Диспетчер печати» вы перезагрузили компьютер, но служба перестала работать, то стоит воспользоваться редактором реестра и проверить ошибку, которая мешает запуску. Сразу хочу обратиться к менее опытным пользователям: не копайтесь в реестре, а просто следуйте нижеуказанной инструкции, потому как из-за незнания реестра можно заиметь для себя новые проблемы.
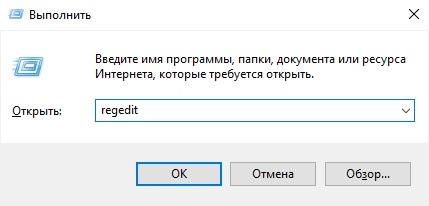
- Открываем окно «Выполнить» с помощью комбинации клавиш «Win+R» и переходим по запросу «regedit».

Запускаем редактор реестра
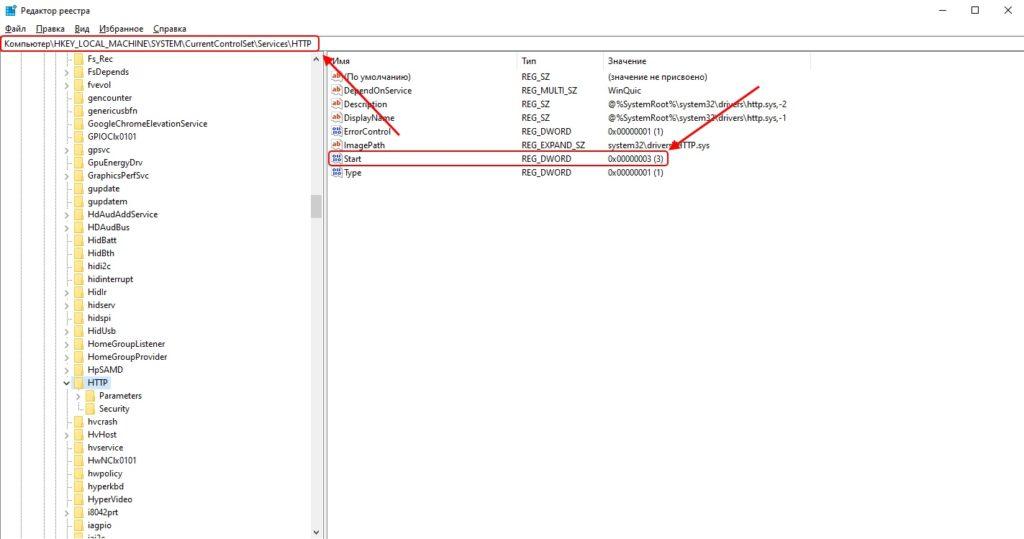
- Далее в строку запроса, расположенную в верхней части реестра, вставляем путь HKEY_LOCAL_MACHINE\SYSTEM\CurrentControlSet\services\HTTP и открываем параметр «Start» в правой части окна.

Открываем параметр Start
- В появившемся окне устанавливаем значение «3» и нажимаем на кнопку «ОК».
Изменяем значение параметра Start и сохраняем изменения
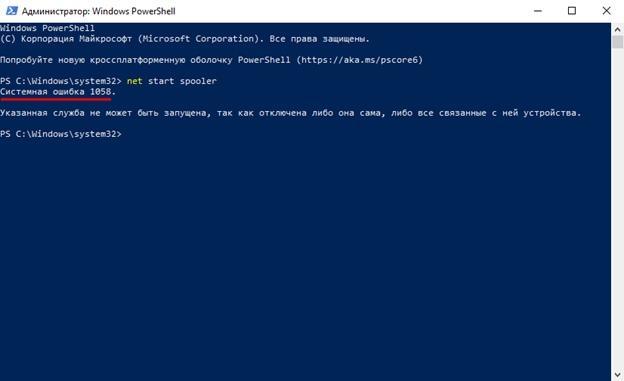
Теперь осталось перезагрузить компьютер и проверить работоспособность службы печати. Если и сейчас она не активна, то остается узнать код ошибки и обратиться с ним на форум Microsoft. Посмотреть код можно через командую строку:
- Кликаем правой кнопкой мыши по меню пуск и открываем «Windows PowerShell (администратор)» либо «Командная строка (администратор)».
Включаем командную строку
- Далее вводим запрос «net start spooler». Если служба исправна, то она автоматически запуститься, в противном же случае вы просто увидите код ошибки.

Смотрим на указный код ошибки
С кодом ошибки вы уже сможете пойти на форум Microsoft и легко найти там варианты решения проблемы.
Способ 2: Средство исправления неполадок
В Windows 10 функционирует специальное средство для обнаружения и исправления ошибок, которое также может помочь и с нашей проблемой. Воспользоваться им можно следующим образом:
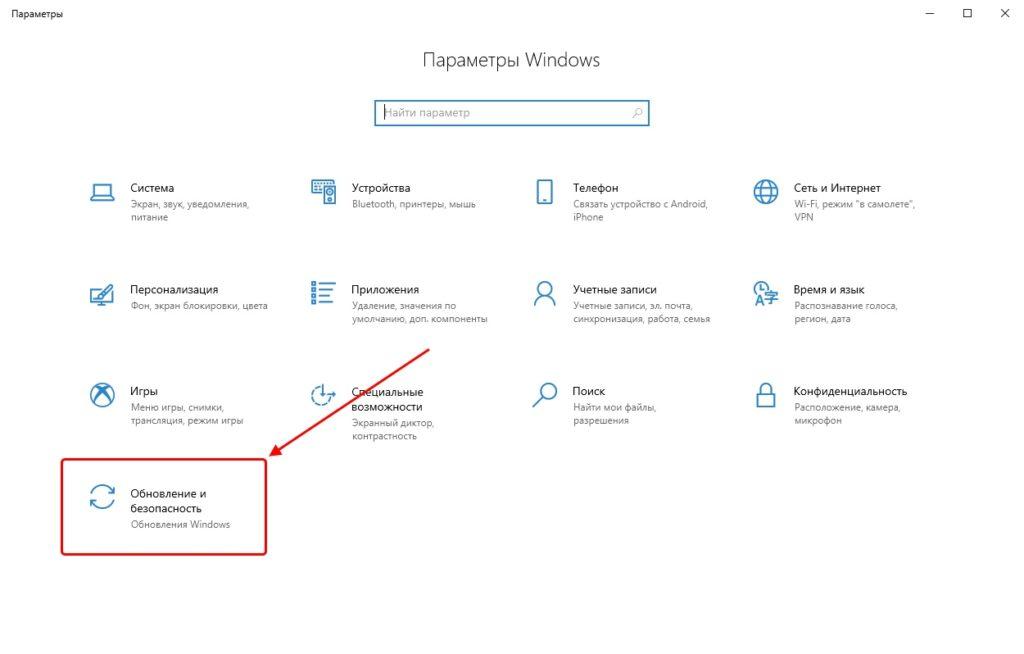
- Запускаем параметры компьютера путем сочетания клавиш «Win+I» и открываем раздел «Обновление и безопасность».

Переходим в раздел обновления и безопасности
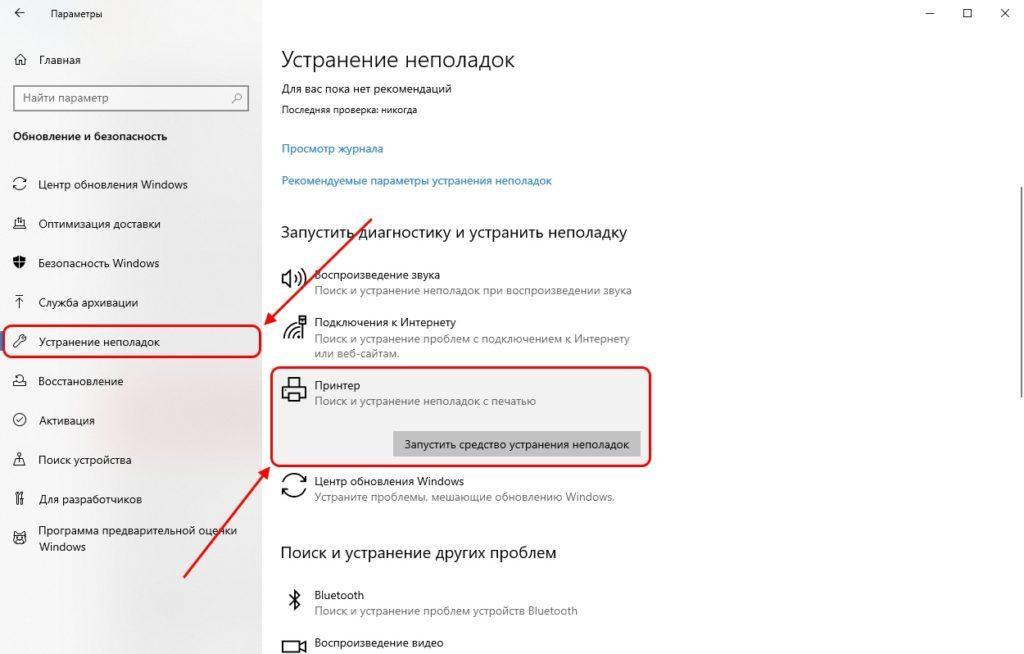
- Далее открываем окно «Устранение неполадок» и в разделе «Запустить диагностику и устранить неполадку» находим принтер и запускаем средство устранения неполадок.
Запускаем утилиту
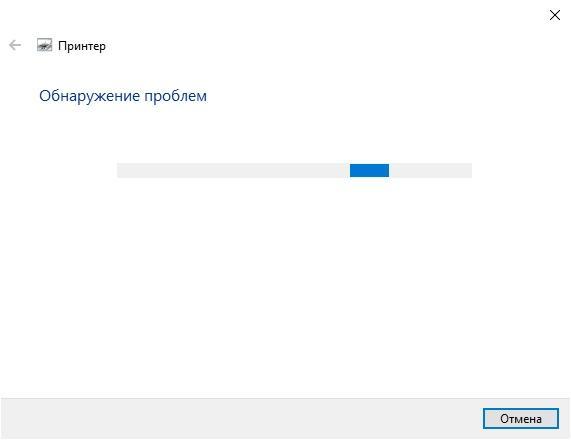
- Дожидаемся завершения обнаружения ошибок и смотрим на результат.

Ждем, пока утилита закончит поиск проблем
Если модуль устранения неполадок не выявил проблем, то следуем дальше.
Способ 3: Чистка очереди печати
Когда вы отправляете документы в печать, они автоматически помещаются в очередь, которая очищается после удачной распечатки документов. Поэтому при малейших сбоях с используемым оборудованием или системой появляются ошибки с локальной подсистемой печати. В таких случаях необходимо вручную произвести очистку очереди через свойства принтера или командную строку.
Чтобы это сделать, воспользуемся инструкцией:
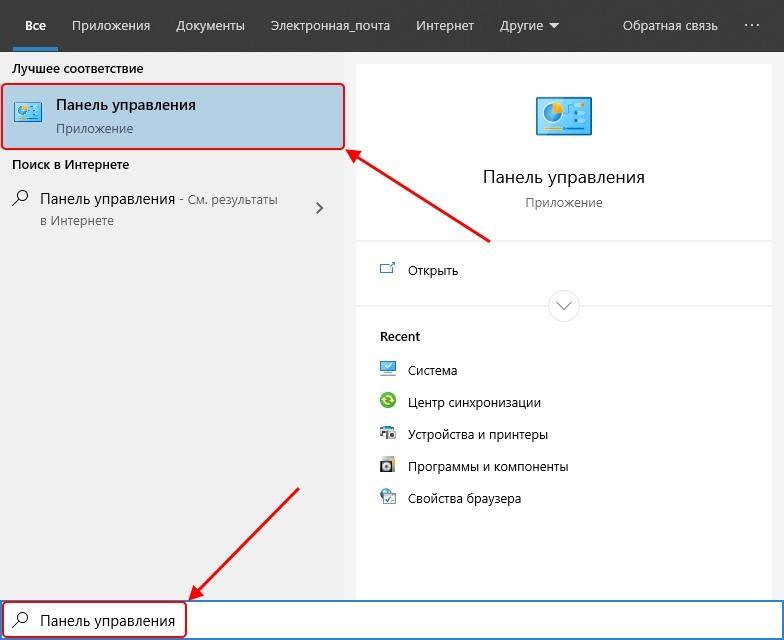
- Открываем «Пуск» и вводим запрос «Панель управления», а затем переходим по первому результату.

Открываем панель управления
- Далее открываем раздел «Устройства и принтеры».

Открываем список доступных принтеров
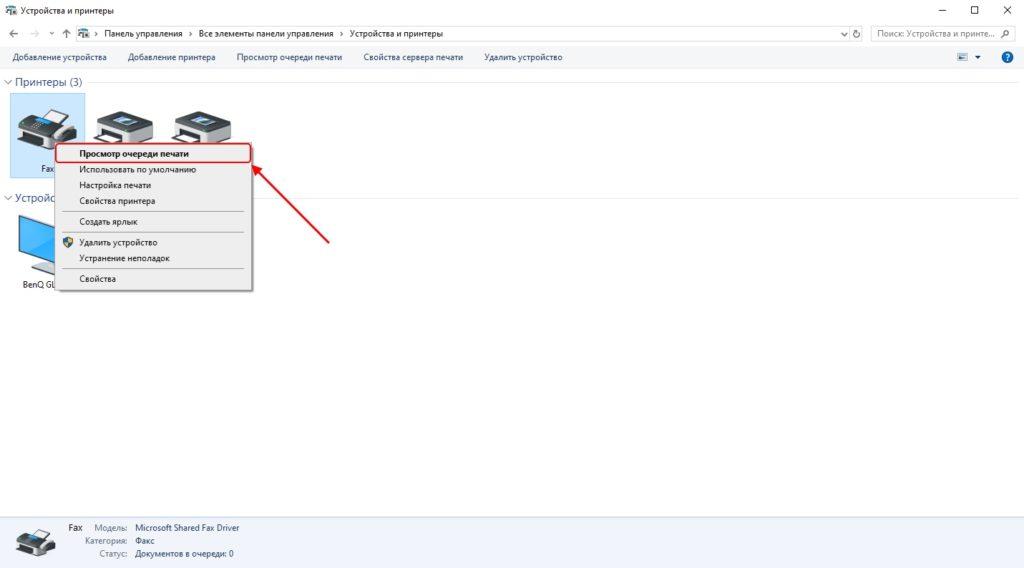
- Выбираем свой принтер и кликаем по нему правой кнопкой мыши для перехода в меню просмотра очереди печати.
Смотрим очередь печати принтера
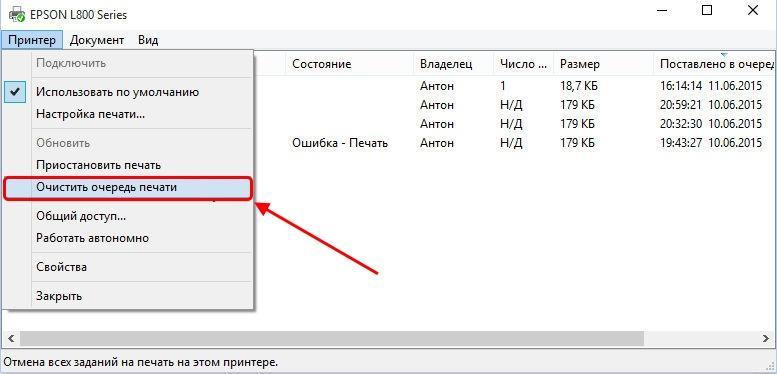
- Далее открываем выпадающее меню и используем опцию «Очистить очередь печати».

Очищаем очередь печати

Если после попытки очистить очередь печати появится сообщение о невозможности выполнить операцию, то стоит прибегнуть к другому способу:
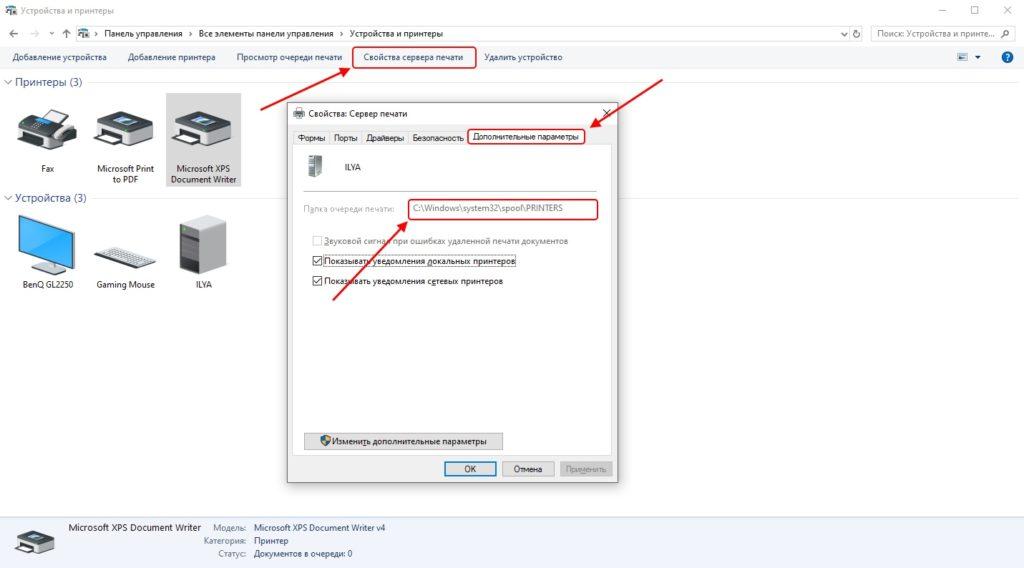
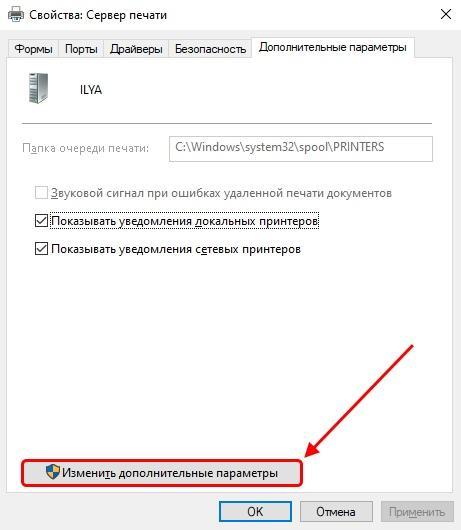
- Снова открываем меню «Устройства и принтеры» и выбираем свой принтер. В верхнем меню выбираем «Свойства сервера печати» и переходим в раздел «Дополнительные параметры». В нем смотрим на путь, указанный после строки «Папка очереди печати».
Указанная строка показывает, где расположена папка печати
- Если в строке введен путь C\windows\system32\spool\Printers, то переходите к следующему способу. Если адрес не тот, введите его самостоятельно с помощью кнопки «Изменить дополнительные параметры».

Вписываем указанный путь
- Запускаем командную строку от имени администратора (подробнее можете посмотреть в способе 1) и поочередно вводим команды:
del %systemroot%\system32\spool\printers\*.shd /F /S /Q
del %systemroot%\system32\spool\printers\*.spl /F /S /Q
net start spooler.
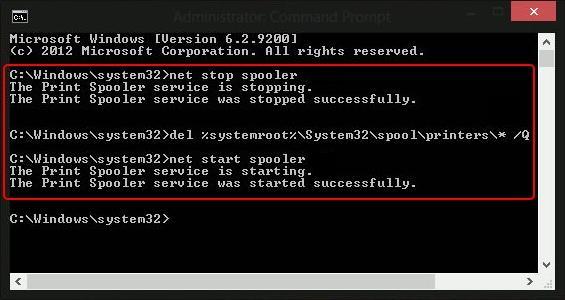
Запускаем указанные команды
По окончании выполнения инструкции перезагрузите компьютер и попробуйте распечатать какой-нибудь документ, чтобы убедиться в нормальном функционировании службы.
Способ 4: Проверка компьютера на вирусы
Кроме всего вышесказанного, повлиять на работу могут и различные вирусы. В таких случаях требуется сканировать компьютер с помощью специального программного обеспечения или утилит. Они должны выявить зараженные объекты, исправить их и обеспечить корректную работу периферийного оборудования. Воспользоваться всем этим очень просто, достаточно загрузить проверенное антивирусное средство. Например, для этого хорошо подходит ESET NOD32, но вы можете найти и другую программу в Интернете.
Чтобы ей воспользоваться, нужно всего лишь открыть программу и нажать на кнопку «Просканировать компьютер».
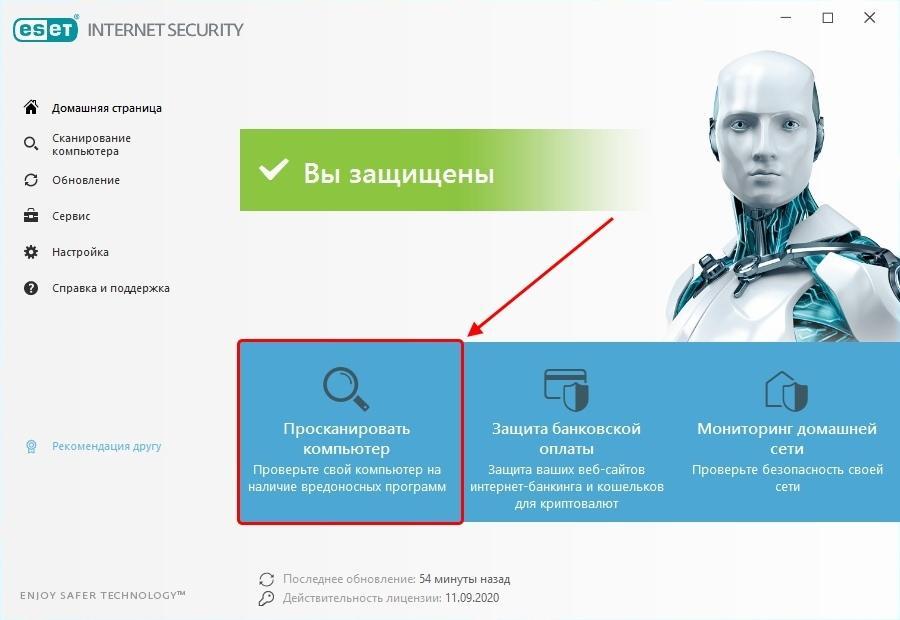
Сканирование компьютера в среднем занимает от одного до трех часов
Способ 5: Восстановление системы
Если ошибка «Локальная подсистема печати не выполняется» появилась после загрузки или установки какой-либо программы, то стоит воспользоваться средством восстановления системы. Для этого воспользуемся пуском и введем в поисковике запрос «Восстановление». Затем откроем первый результат в отобразившемся списке.
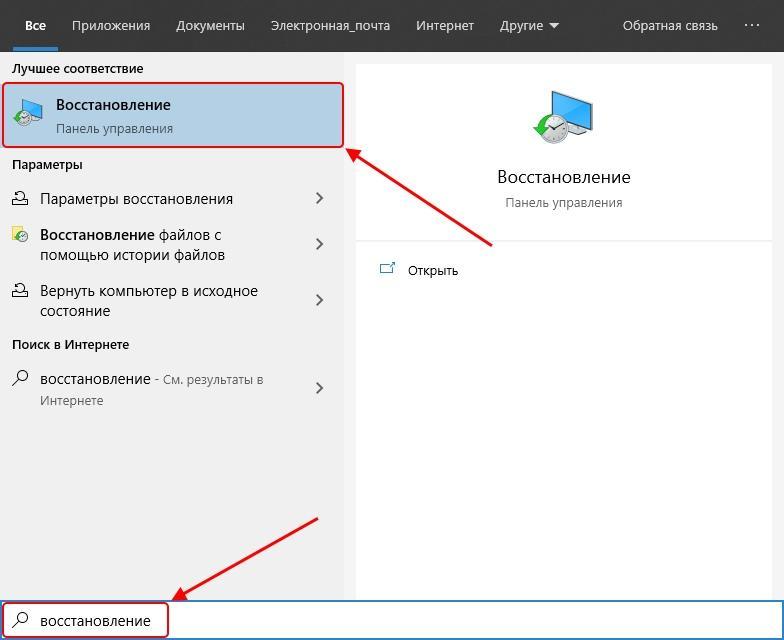
Раскрываем основные настройки восстановления системы
Далее открываем окно «Запуск восстановления системы».
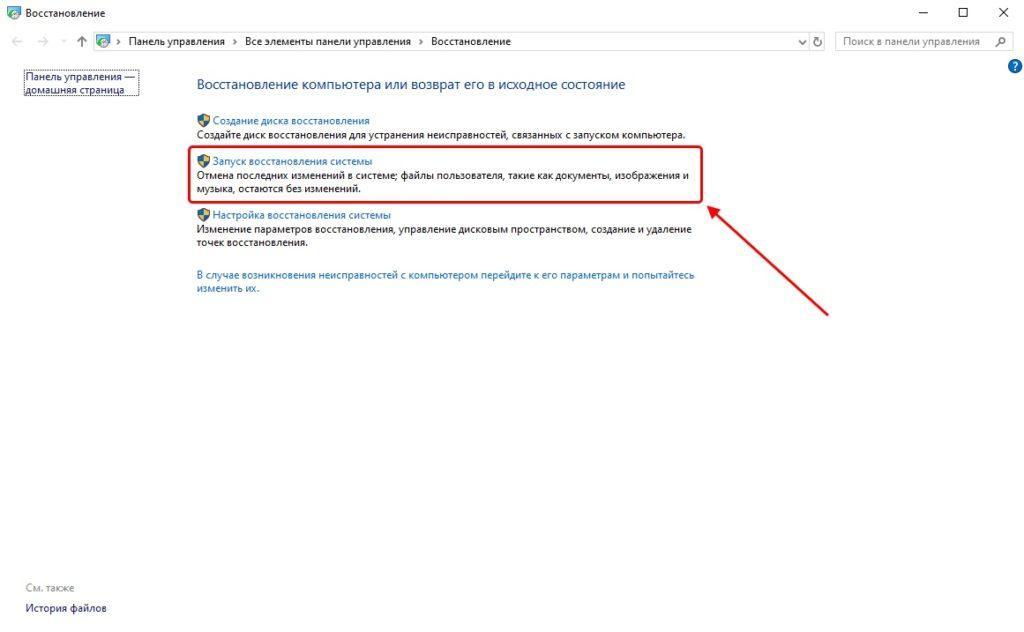
Запускаем средство восстановления системы
После этого откроется окно, через которое вы сможете доступным способом восстановить ОС Windows 10.
Способ 6: Переустановка драйвера принтера
Драйвер принтера обеспечивает его нормальное функционирование с любой операционной системой. Иногда он устанавливается не совсем корректно, из-за чего и появляются ошибки различного рода, в том числе и упомянутая сегодня. Исправить ситуацию можно с помощью переустановки драйвера. Сначала его нужно полностью удалить из системы. Сделать это можно нижеуказанным способом:
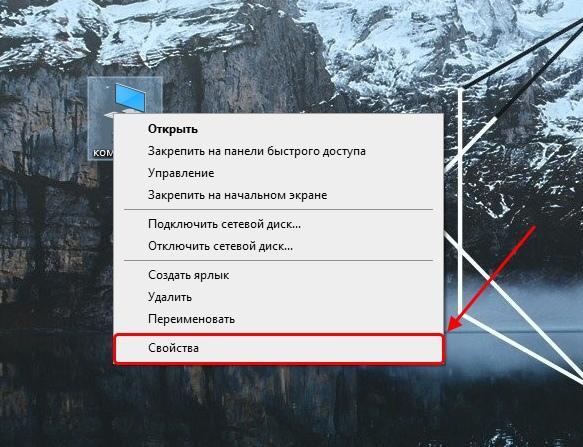
- Кликаем на рабочем столе по проводнику «Этот компьютер» правой кнопкой мыши и выбираем «Свойства».

Открываем свойства основные компьютера
- Затем переходим в раздел «Диспетчер устройств».

Открываем полный список драйверов
- В отобразившемся окне будут предоставлены все установленные драйверы на данный момент. Найдите в нем драйвер от принтера и кликните по нему правой кнопкой мыши. Затем в выпадающем меню выберите «Удалить устройство».

Далее вам останется только скачать драйвер с официальной страницы производителя.
На этом я заканчиваю разбор ошибки «Локальная подсистема печати не выполняется». Надеюсь, приведенные выше способы помогли вам разобраться с решением этой ошибки, и вы без особого труда нашли подходящий способ исправления неполадки.
Загрузка …
Post Views: 6 042
The Print Spooler Service is basically a software program in Windows operating system, which has been specifically designed to manage printers and print jobs issued from the computer.
Sometimes, the Print Spooler service stops working, in which case you will have to manually Start or Restart the Print Spooler Service on your computer.
Depending on your preference, you can Start, Stop and Restart Print Spooler Service using the Task Manager, Command Prompt, and Services.
Start, Stop, Restart Print Spooler in Windows 10/11
If you find the need to Stop, Start or Restart the Print Spooler Service, you can find below 3 different ways to Stop, Start, Restart the Print Spooler Service on your Windows 10/11 computer.
Advertisement
1. Start, Stop, Restart Print Spooler Using Task Manager
Perhaps the easiest way to Start, Stop or Restart the Print Spooler Service in Windows 10/11 is by using Task Manager.
1. Right-click the Start button and select Task Manager.
2. On Task Manager screen, switch to Services tab, right-click on Spooler entry and click on Start.

Similarly, you can Restart Print Spooler by right-clicking on the Spooler entry and selecting the Restart option.

Note: The Restart option may not be available if the Spooler is not working.
3. At any time, you can Stop the Print Spooler Service by right-clicking on the Spooler entry and selecting the Stop option.

2. Start, Stop, Restart Print Spooler Service Using Services
Another way to Start, Stop or Restart the Print Spooler service is by going to the Services screen on your Windows 11/10 computer.
1. Right-click on the Start button and click on Run.
2. In the Run command window, type services.msc and click on OK.
Advertisement
3. On the Services screen, right-click on Print Spooler and click on the Restart option.

Also, make sure that Print Spooler service is set to Start Automatically. If it is not, double-click on the Print Spooler entry. On the next screen, change the startup type to Automatic.

4. Click on Apply and OK to save this change to the Print Spooler service on your computer.
After this, make sure you restart the computer and you should be able to Print.
3. Stop, Start, Restart Print Spooler Using Command Prompt
If you like using the Command Prompt, you can use the “net user” Command to Start and Stop the Print Spooler.
1. Type CMD in the Search bar > right-click on Command Prompt in the search results and select Run as Administrator option.
2. In Command Prompt window, type input net stop spooler and press the Enter key to Stop Printer Spooler on your computer.

If the problem is being caused by a corrupted Print Queue, open the File Explorer and navigate to C:\Windows\System32\Spool\Printers and delete all contents in the Printers folder.
3. Go back to Command Prompt, type net start spooler and press the Enter key to start print spooler.

After this, you should be able to Print from the computer, without encountering any error codes.
Download Windows Speedup Tool to fix errors and make PC run faster
The Print Spooler is software built into the Windows operating system that temporarily stores print jobs in the computer’s memory until the printer is ready to print them. This service spools print jobs and handle interactions with the printer. If you turn off this service, you won’t be able to print or see your printers.

In some circumstances, you may need to stop and/or restart the service. In this post, we will show you three ways to enable or disable Print Spooler Service on Windows 11/10.
You can enable or disable print Spooler Service on Windows 11/10:
- Via Services
- Via Command Prompt
- Via System Configuration
Let’s see the description of each of the methods.
1] Enable or disable the Print Spooler Service via Services

Do the following:
- Press Windows key + R to invoke the Run dialog.
- In the Run dialog box, type
services.mscand hit Enter to open Services. - In the Services window, scroll and locate the Print Spooler service.
- Double-click on the entry to open its properties window.
- In the properties window, on the General tab, move to the second section titled Service status section and click the Start button in order to enable the service.
- To disable this specific service, click the Stop button.
Related: Print Spooler Service keeps stopping automatically
2] Enable or disable the Print Spooler Service via Command Prompt
Do the following:
- Invoke the Run dialog.
- In the Run dialog box, type
cmdand then press CTRL + SHIFT + ENTER to open Command Prompt in admin/elevated mode. - In the command prompt window, type the command below and hit Enter to enable the Print Spooler service.
net start spooler
- To disable the service, type the command below and hit Enter.
net stop spooler
You can now exit CMD prompt.
3] Enable or disable the Print Spooler Service via System Configuration

Do the following:
- Invoke the Run dialog.
- In the Run dialog box, type
msconfigand hit Enter to open System Configuration utility. - In the launched console, switch to the Services tab, the middle one, and locate the Print Spooler service.
- To enable Print Spooler service, check the box, and then click the Apply button.
- To disable Print Spooler service, uncheck the box and then click the Apply button.
A reboot of the machine is very necessary for this method because the changes will be accomplished accurately after rebooting.
How do I enable Print Spooler?
You can enable Print Spoler via the Services Manager app in Windows 11/10. The Services Manager app let users manage Microsoft and third-party services. You can start and stop services via the Services Manager app. If the Print Spooler Service is stopped or not running on your system, you will not be able to use your printer. To enable or start Print Spooler Service, open the Services Manager app and locate Print Spooler. Once you find it, right-click on it and select Start. We have explained different ways to enable and disable Print Spooler Service on Windows 11/10 in this article.
What happens if I disable Print Spooler?
Print Spooler is responsible for managing the print jobs sent from your system to the printer. If you disable the Print Spooler Service, you will not be able to carry out print jobs on your system. Sometimes, you may have to disable Print Spooler. For example, if your printer is not working properly or Windows is displaying an error message while printing. In this case, clearing the print queue may help. But for this, first, you have to disable Print Spooler, then clear the print queue, and then start the Print Spooler again.
Where can I find Print Spooler?
You will find the Print Spooler service in the Services Manager app. Open the Services Manager app and scroll down to locate the Print Spooler service. Here, you can manage it by starting, stopping, or disabling it. You can also change its Startup Type (Automatic or Manual).
That’s it!
This post will be helpful if The Print Spooler Service is not running on your computer.
Obinna has completed B.Tech in Information & Communication Technology. He has worked as a System Support Engineer, primarily on User Endpoint Administration, as well as a Technical Analyst, primarily on Server/System Administration. He also has experience as a Network and Communications Officer. He has been a Windows Insider MVP (2020) and currently owns and runs a Computer Clinic.
Reader Interactions
Вы можете столкнуться с ошибкой «Локальная подсистема печати не выполняется» как при попытке подключить новый принтер, так и при открытии настроек уже настроенного локального принтера или при отправке на печать любого документа. Эта ошибка может появиться как в Windows 10, так и в Win 7 или 8.1.
Текст сообщения об ошибке может немного отличаться в зависимости от того, какое действие вы пытаетесь выполнить с объектами в подсистеме печати. Например:
Ошибка открытия принтера.
Windows не удается подключиться к принтеру.
Локальная подсистема печати не выполняется. Перезапустите подсистему или перезагрузите компьютер.
Или
Не удалось открыть мастер добавления принтеров. Локальная подсистема печати не выполняется.
В английской версии Windows ошибка может выглядеть так:
Windows can’t open Add printer. The local Print Spooler service is not running, Please restart the Spooler or restart the machine.
Windows cannot connect to the printer, The local Print Spooler service is not running.
В первую очередь нужно проверить, запушена ли служба печати (Print Spooler). При отключенной службы печати вы можете столкнуться с ошибкой 0x000006ba.
- Для этого откройте консоль управления службами (services.msc);
- В списке служб найдите службу «Диспетчер печати» (Print Spooler);
- Убедитесь, что служба запущена (состояние – «Выполняется»), а тип запуска «Автоматический»;
- Перезапустите службу;

- Если служба не запущена, измените тип запуска службы и запустите ее;
- На вкладке зависимости убедитесь, что служба Print Spooler зависит от служб Удаленный вызов процедур RPC (Remote Procedure Contro) и HTTP службы (HTTP Service). Для корректной работы службы печати данные службы должны быть запущены. Если зависимости не настроены, вы можете восстановить их командой:
sc config spooler depend= RPCSS
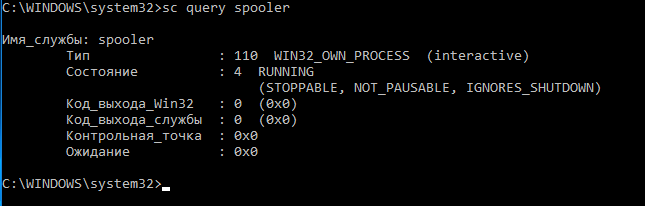
Так же вы можете проверить статус службы печати из командной строки, выполнив команду:
sc query spooler
В этом примере видно, что служба запушена (Running).
Если служба «Диспетчер печати» отсутствует или не запускается, попробуйте очистить очередь печати и удалить файлы в папке C:\windows\system32\spool\Printers (при остановленной службе печати). Затем проверьте, включен ли компонент печати Windows:
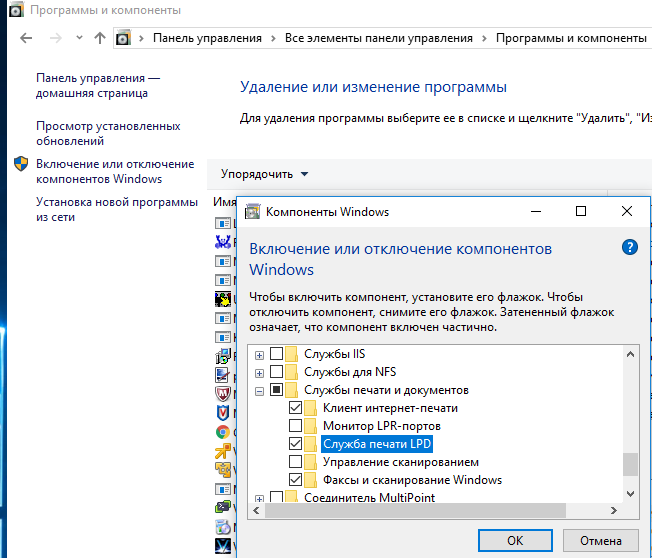
- Перейдите в Панель управления -> Все элементы панели управления -> Программы и компоненты –> Включение или отключение компонентов Windows
- В списке компонентов найдите раздел «Службы печати и документов»;
- Убедитесь, что включены службы: Клиент интернет-печати, Служба печати LPD и Факсы и сканирование Windows;

- Можете попробовать переустановить компоненты: отключите их, сохраните изменения, а потом включить заново.
Если ошибка «Локальная подсистема печати не выполняется» появляется при попытке подключения общего сетевого принтера с другого компьютера, попробуйте подключить сетевой принтер через локальный порт (в качестве имени порта используется адрес принтера в формате \\PCName1\HP2000). Процедура подключения сетевого принтера через локальный порт подробно описана в статье Печать на сетевом принтере на Windows 10 из-под XP.

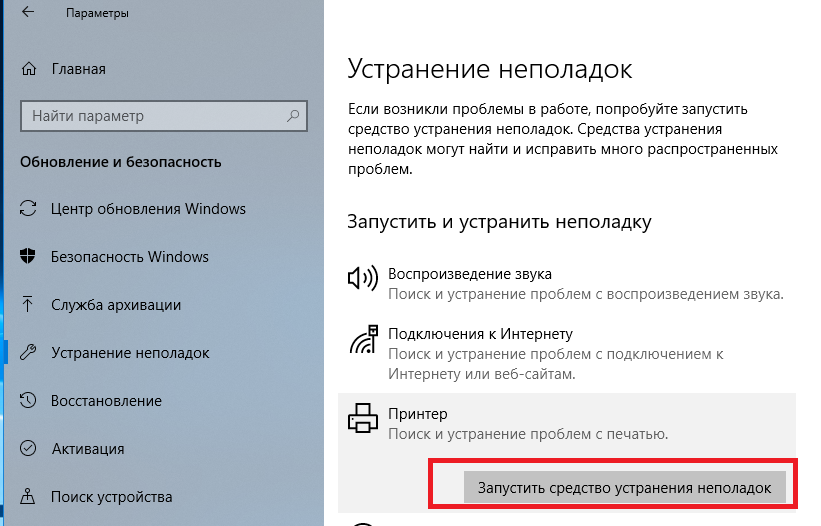
Если ничего не помогло, запустите мастер исправления проблем с печатью: Параметры -> Обновления и безопасность -> Принтер (Поиск и устранение проблем с печатью) -> Запустите средство устранения неполадок.
Также проверьте целостность системных файлов с помощью команд:
sfc /scannow
или
dism /Online /Cleanup-Image /RestoreHealth
,
If you cannot print in Windows 10/11 because the Print Spooler service is not running, continue reading below to fix the problem.
Imagine that you have a lot of documents to print and the printer is not doing the only job it is supposed to do – that is, printing documents. This could be due to a number of reasons, including a faulty print spooler.
One of the common printing errors reported is that «The Printer Spooler service is not running.» The Print Spooler is a component in Windows 10/11 that transfers print requests from the computer to the printer. Once the print spooler service is corrupted or disabled, the printer won’t be able to print.
This guide contains several methods to fix the «Printer Spooler service is not running» & «Printer Spooler service cannot start» problems in Windows 10.
FIX: Print Spooler service Cannot Start / Print Spooler not running in Windows 11/10.
- Run Printer troubleshooter.
- Start or Restart the Print Spooler service.
- Delete Print Spooler jobs.
- Uninstall & re-Install Printer.
- FIX Print Spooler problem in Registry.
- Restore Print Spooler service from another computer.
Method 1: Run the Printer troubleshooter.
Windows 10/11 offers an advanced print troubleshooting tool that can help you solve the «Print Spooler Service no running» problem immediately.
1. Search for Troubleshoot settings and click Open.

2. Select Additional troubleshooters.

3. Locate and click the Printer item and click Run the troubleshooter.

4. Let the troubleshooter to run and select Apply this fix if prompted to fix the problem.

5. Once completed, check if the printer now works.
Method 2: Start/Restart the Print Spooler service.
If the print spooler service stopped, documents accumulate in the print queue and the printer does not print. So, proceed and start (or restart) the print spooler service.
1a. Press Windows + R keys to open the Run widget.
1b. Type: services.msc and press Enter.
2. Locate the Print Spooler service and then double click on it.

3a. Ensure that the Startup Type is Automatic and click Start button to start the service. If it’s already running, click Stop and then click Start to restart the service.
3b. Finally ensure that the Service status is Running and click OK.

4a. The print service also depends on the following three (3) services to work properly:
- DCOM Server Process Launcher
- Remote Procedure Call (RPC)
- RPC Endpoint Mapper
4b. if the print spooler service cannot start, check if the Status of the above services is Running, and if not apply the steps 3a & 3b above to start the service(s).

5. When done, try to print a document and see if the problem is solved.
Method 3. Delete Print Spooler pending jobs.
1. Follow the step 1-3 on method 2 above and STOP the Print Spooler service.
2a. Press Windows + R keys to load the Run dialog box.
2b. In run command box, type (copy/paste) the following command and click OK:
- %systemroot%\System32\Spool\Printers
3. Press CTRL + A to select the files in the ‘Printers’ folder and Delete all of them.
4. Start the Print Spooler service and try to print.
Method 4: Uninstall the Printer.
Another effective way to deal with the printer spooler error’s is to uninstall the printer driver and other printer’s related software and to reinstall the printer. This method often solves printing problems, especially if the printer’s driver is corrupted. To uninstall the printer:
1a. Press Windows + R keys to load the Run dialog box.
1b. Type devmgmt.msc and press Enter to open the device manager.
2a. in the Device Manager window, expand Printers.
2b. Right-click on the Printer and select select Uninstall device. (At warning prompt, select Uninstall to proceed.)

2c. When done, close Device Manager.
3a. Press Windows + R keys to load the Run dialog box.
3b. Type appwiz.cpl in the search box and press Enter.
4. Check if there is any printer software installed and if so Uninstall it.

3. Once completed, reboot the PC and let Windows to install the printer drivers. If Windows doesn’t install the printer driver navigate to printer’s manufacturer support site and download and install the latest driver for the printer.
4. After printer installation, try to print.
Method 5: FIX Print Spooler not running issue in Registry.
1a. Press Windows + R keys to load the Run dialog box.
1b.Type regedit and hit Enter to open the Registry Editor. (Click Yes in the Confirmation Prompt that appears).
2. In registry navigate to this location:
- HKEY_LOCAL_MACHINE\System\CurrentControlSet\Control\Print\Environments\Windows x64\Print Processors
3a. Right click at Print Processors and select Export to backup the registry key.

3b. Type a filename for the registration file (e.g. «PrintProcessors.reg») and save the file to your desktop. *
* Note: If something goes wrong, double-click the saved registration file on your desktop to restore the registry.

4. Now expand the ‘Print Processors’ key and delete any other folder under it except the winprint folder. (Basically, right-click on each other folder and select Delete). *
* Note: If there are not other folders other than the winprint folder skip to next method.

5. When done restart your computer and then try to print.
Method 6. Restore Damaged Print Spooler service from another PC.
If the after following the above methods the printer spooler service is not running, this indicates that the executable file of the service (spoolsv.exe), or the Print Spooler service registry key is corrupted or damaged.
At such a case if you have another working machine running the same OS, apply the below steps:
1. On the working machine:
a. Follow the steps 1-3 to export and save the ‘Print Processors’ registry key to a USB disk.
b. Copy the «spoolsv.exe» file from «C:\Windows\System32» folder to the USB disk.
2. On the machine with the print spooler problem:
a. Plug the USB disk with the files copied from the working machine.
b. Double-click at «Print Processors.reg» and import the key to the registry.
c. Copy the «spoolsv.exe» file from the USB to «C:\Windows\System32» folder (choose yes to replace the file).
d. Finally restart the PC and try to print.
That’s it! Which method worked for you?
Let me know if this guide has helped you by leaving your comment about your experience. Please like and share this guide to help others.
If this article was useful for you, please consider supporting us by making a donation. Even $1 can a make a huge difference for us in our effort to continue to help others while keeping this site free:
- Author
- Recent Posts
Konstantinos is the founder and administrator of Wintips.org. Since 1995 he works and provides IT support as a computer and network expert to individuals and large companies. He is specialized in solving problems related to Windows or other Microsoft products (Windows Server, Office, Microsoft 365, etc.).