
IIS is short for Internet Information Service, which allows programmers or users to exchange static and dynamic web content with end-users. It is a flexible and general-purpose web server by Microsoft running on the Windows operating system.
Users can easily host, manage and deploy web applications to serve requested HTML pages or files. But before using the IIS server, users must install it on the Windows system.
This article will provide all the necessary steps which will guide you to install the ISS server on Windows 2012 and 2016.
What is an IIS server?
As we have discussed, an IIS server is an extensible web server by Microsoft to make sharing and delivering of information across LANs and WANs efficient. It uses different protocols for communication and accepts and responds to the client’s computer requests using HTTP, SMTP, and FTP.
Follow the steps below to download the IIS server on Windows 2012 and 2016:
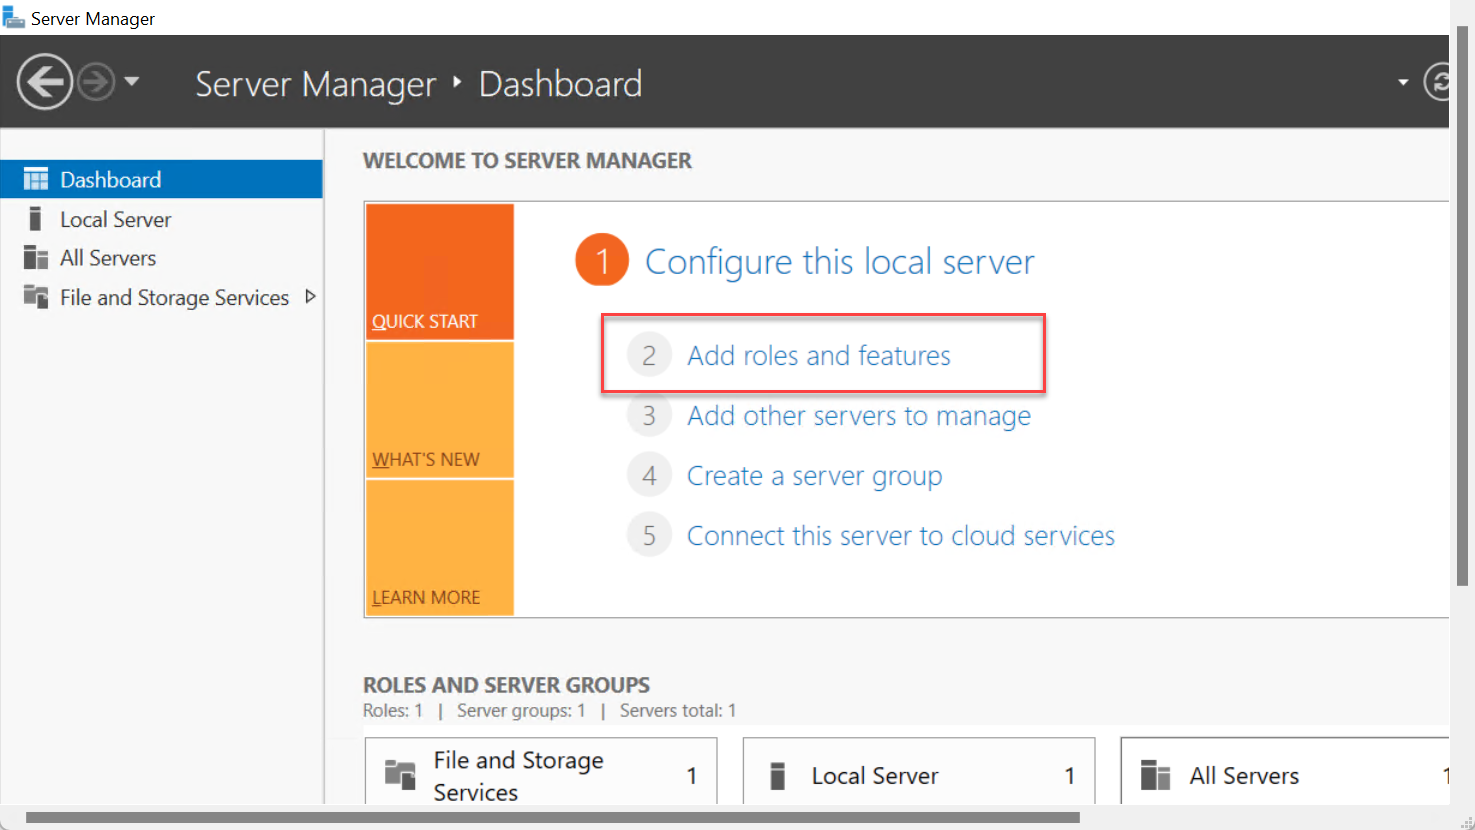
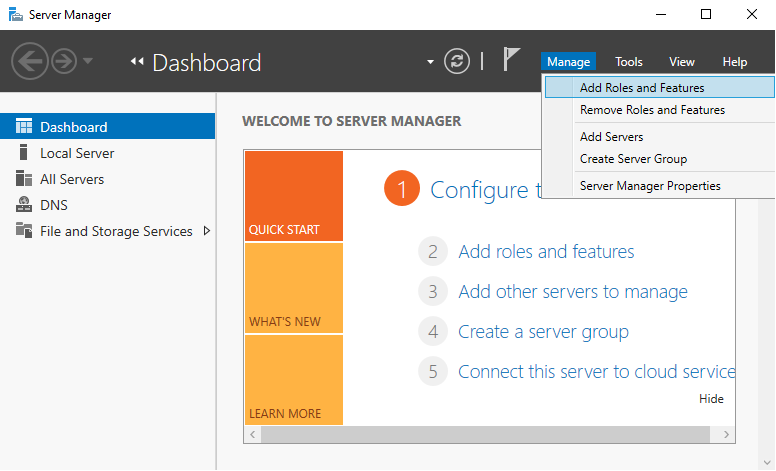
Step 1: Open the Start page and go to Server Manager.
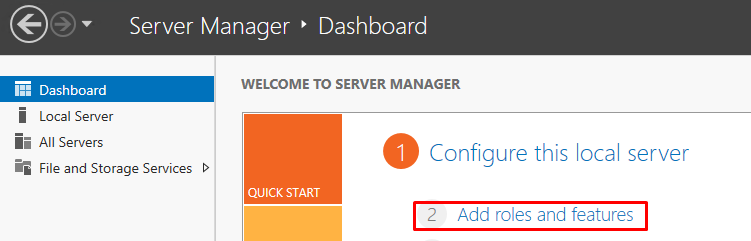
Step 2: Go to the navigation pane, and click on Dashboard.
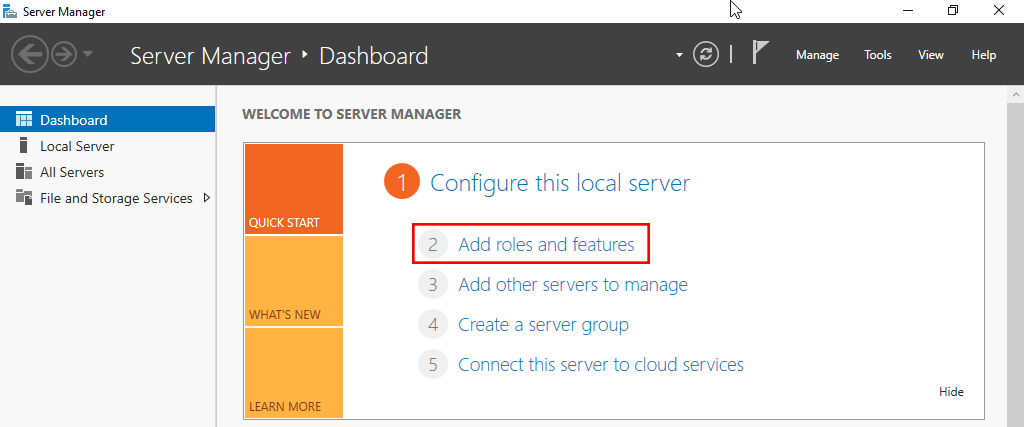
Step 3: Click on Add roles and features.
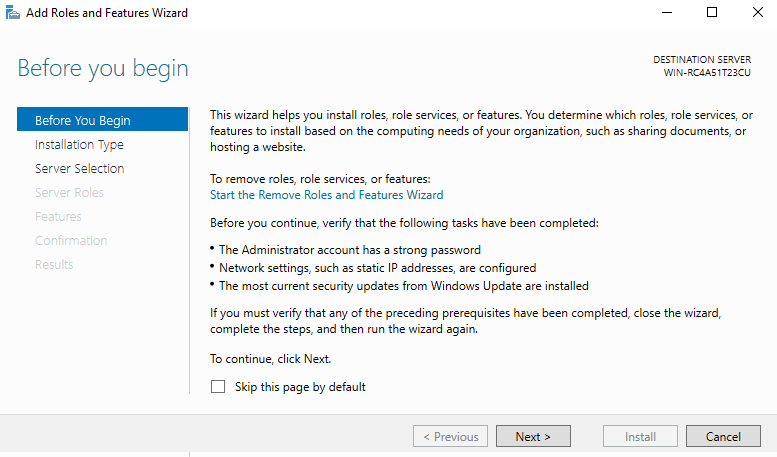
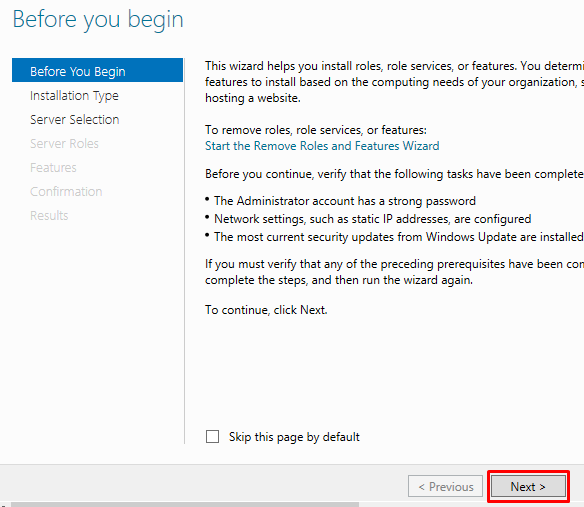
Step 4: Go to the Add Roles and Features Wizard >> Before You Begin page, and click the «Next» option.
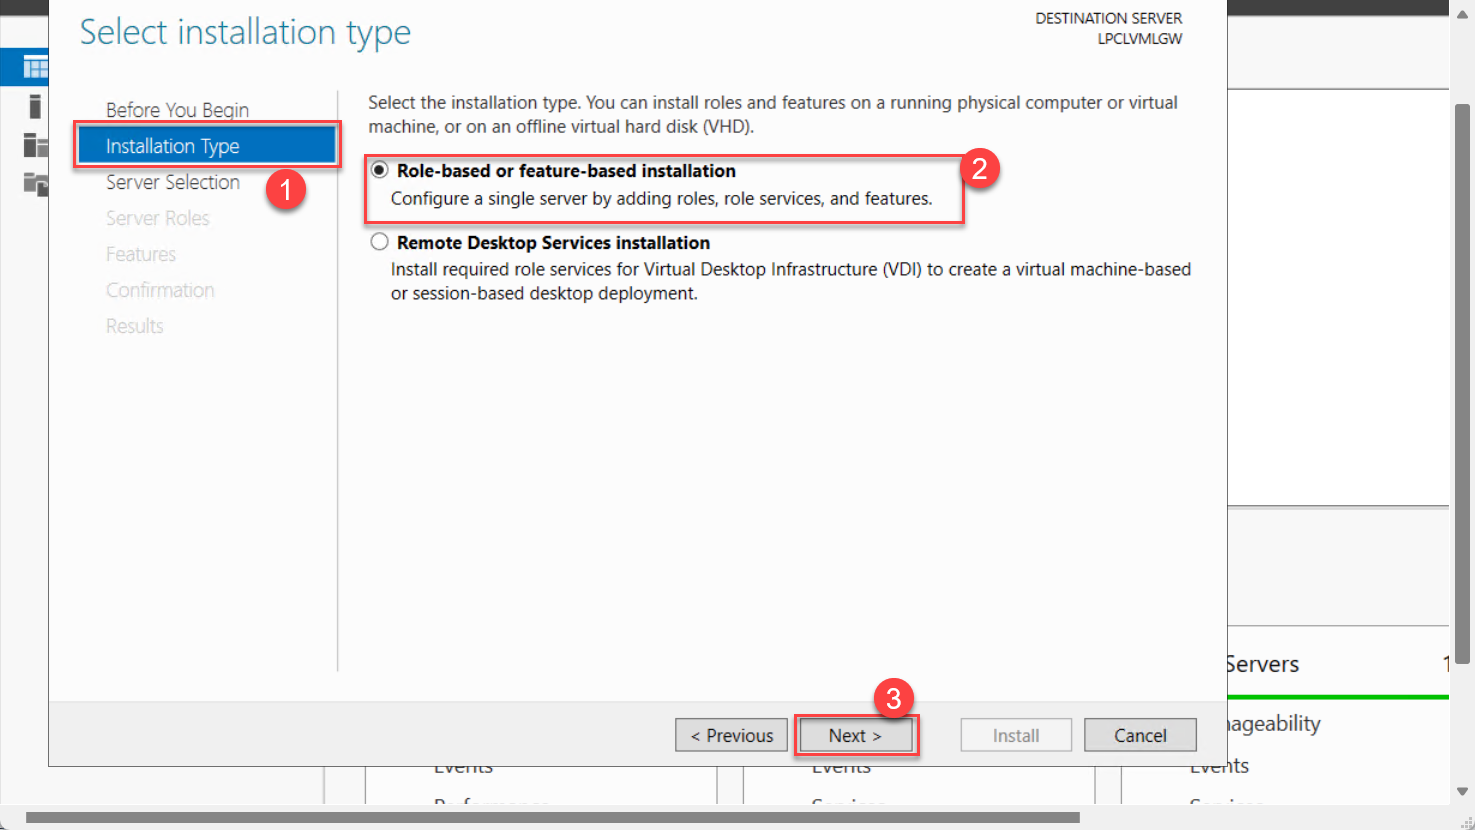
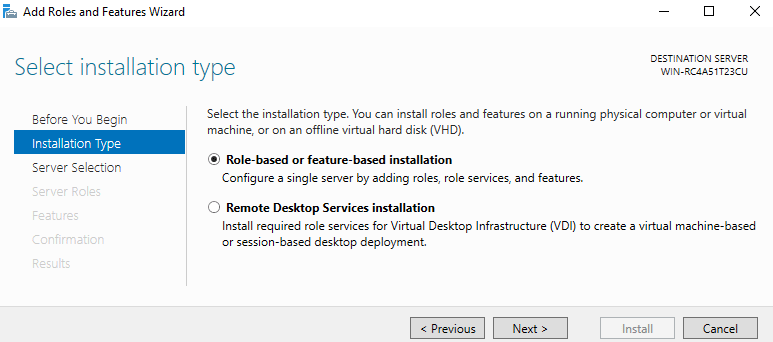
Step 5: It will direct users to the Select Installation type page, click on Role-based or feature-based installation and then click the “Next” button.
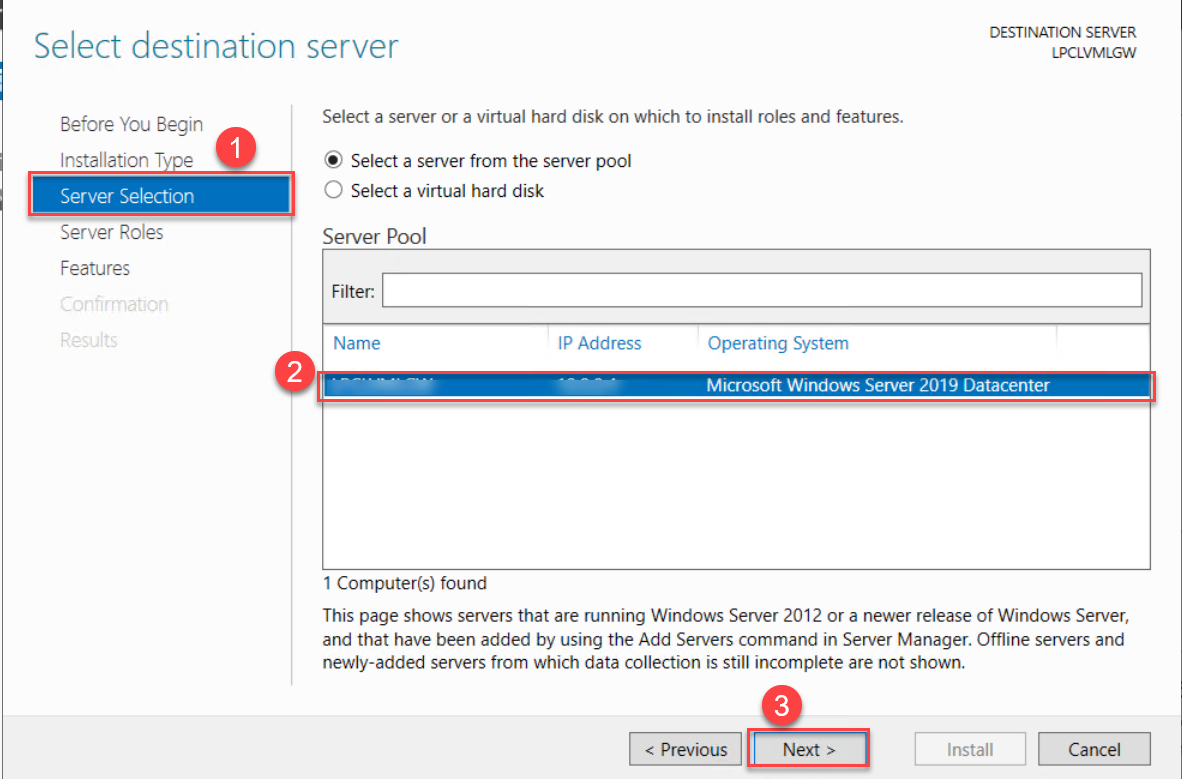
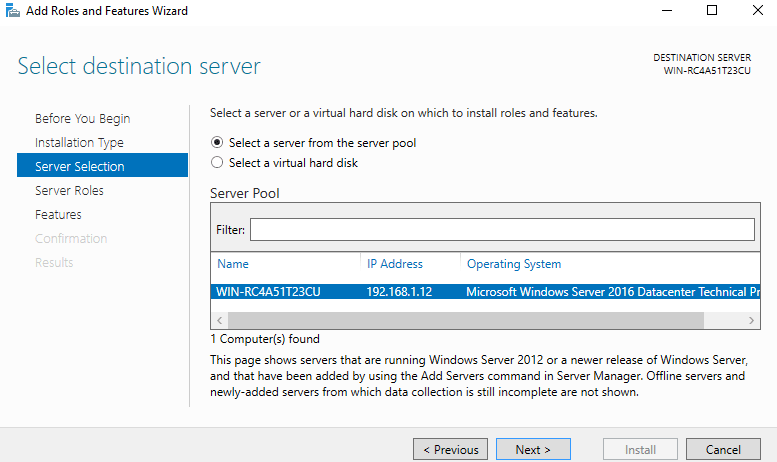
Step 6: The above step will direct users to the Select destination server page where they need to click on the Server Selection >> Select a server from the server pool and users can select a server from the Server Pool list.
Step 7: Click the Next option.
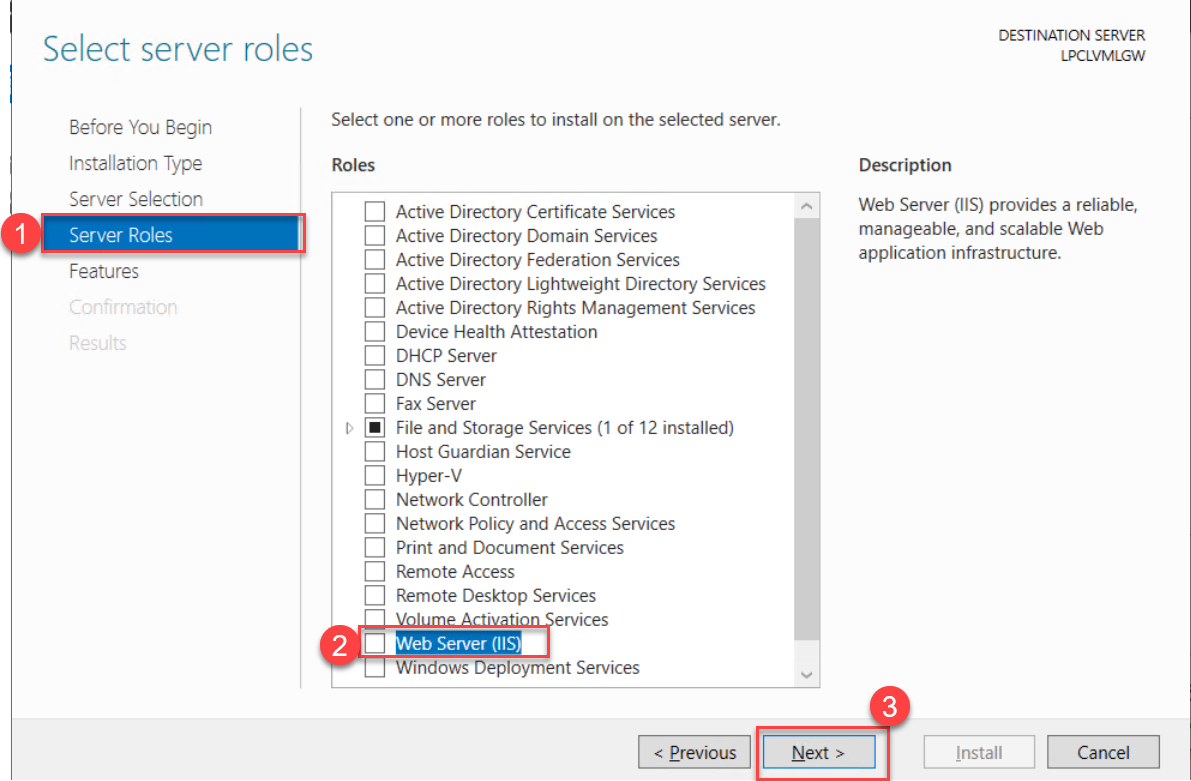
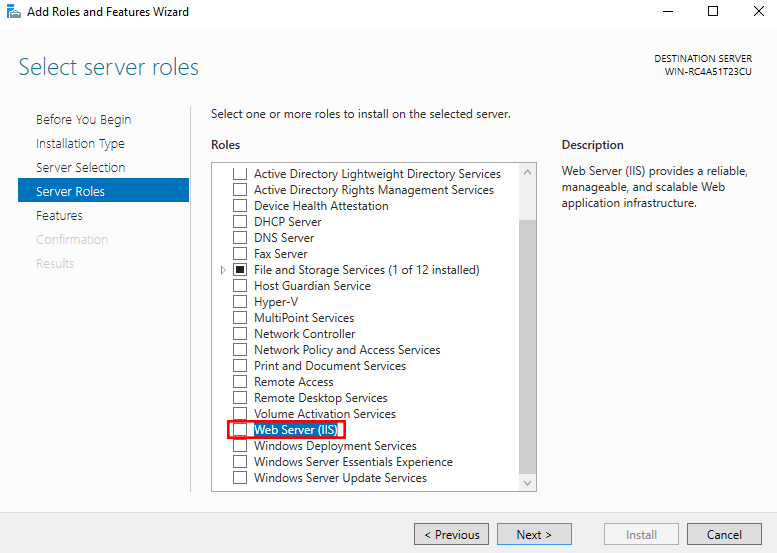
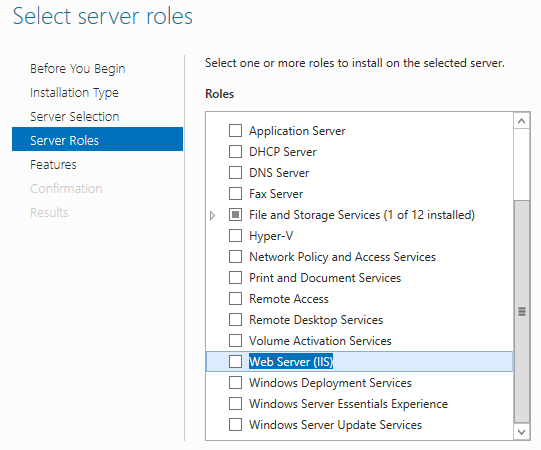
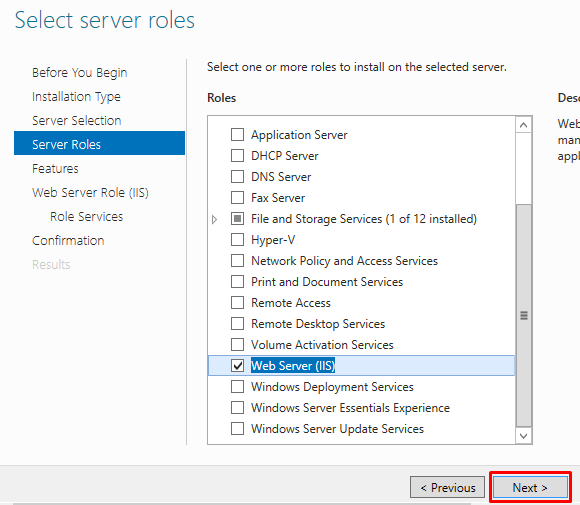
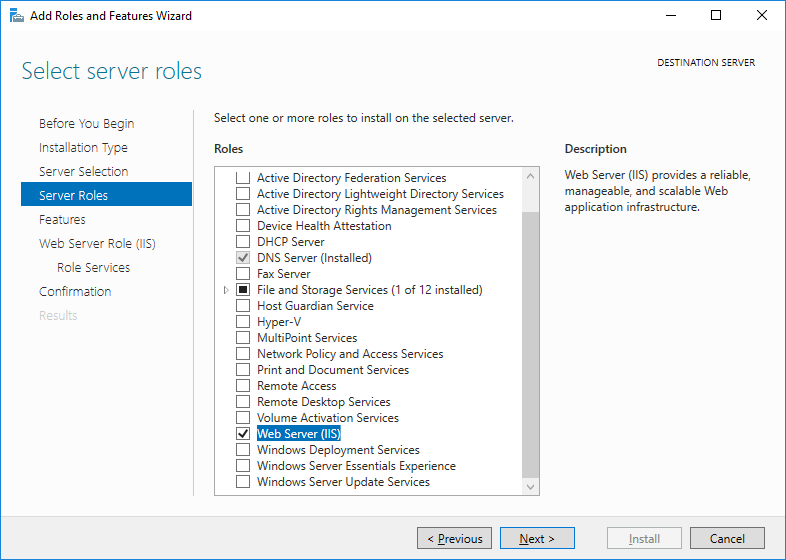
Step 8: Go to the Select Server Roles window, click the Web Server (IIS) option, and click the Next button.
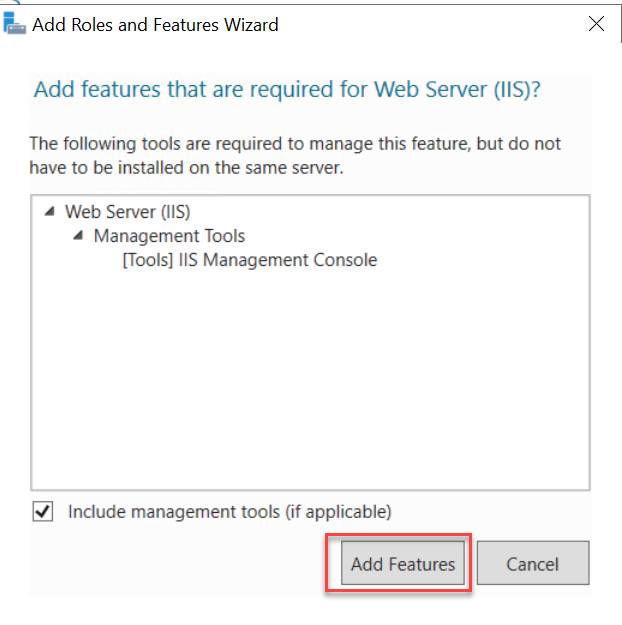
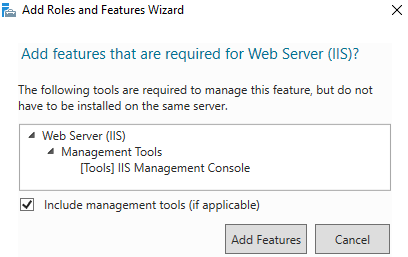
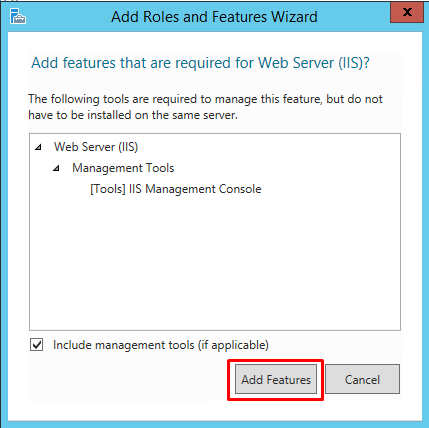
Step 9: In the Add Roles and Features Wizard, users will find “Add features that are required for Web Server (IIS)” dialog box that appears on their screen, and then select Add Features.
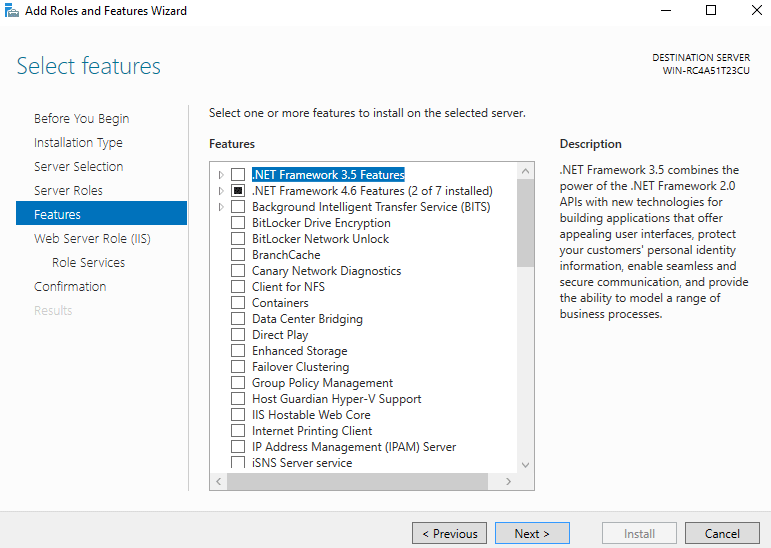
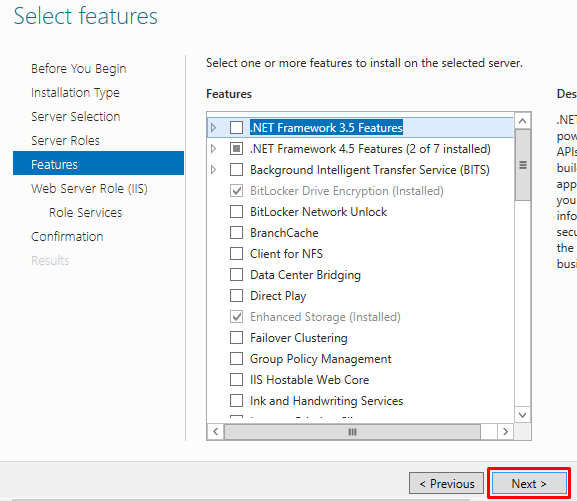
Step 10: In the Select features page, click the «Features» option, and users will see .NET Framework N.NN.

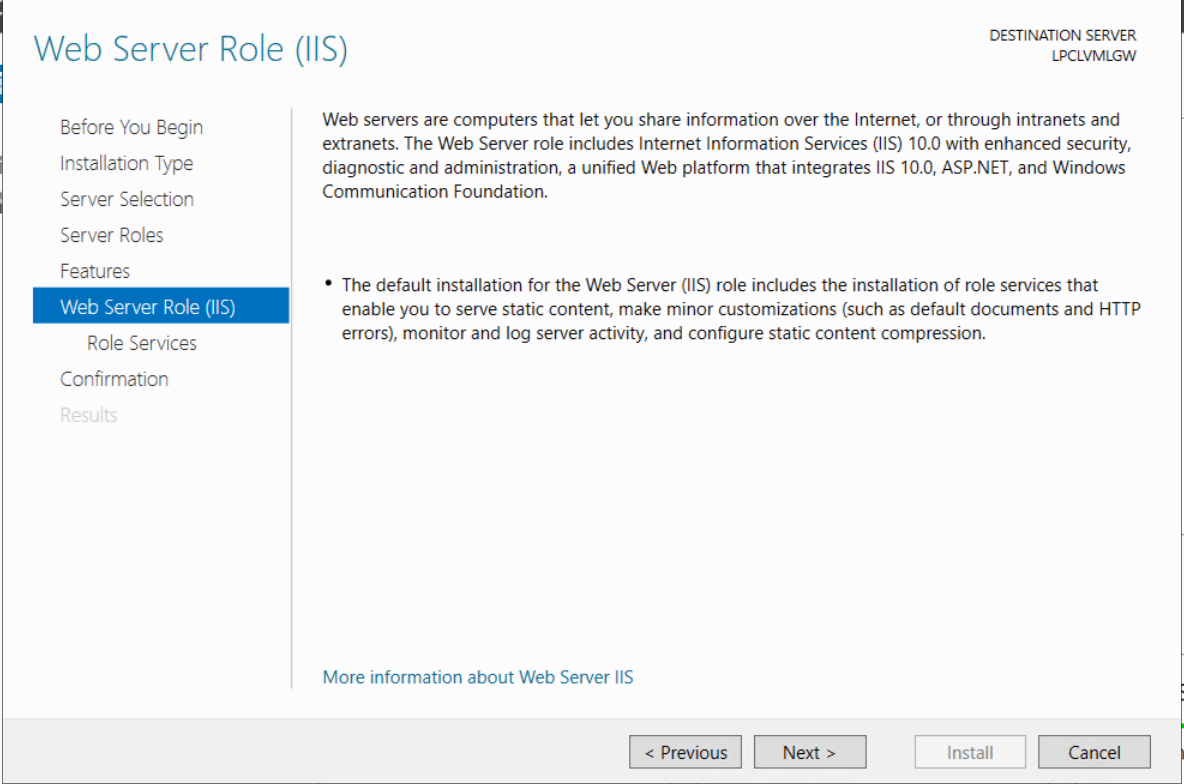
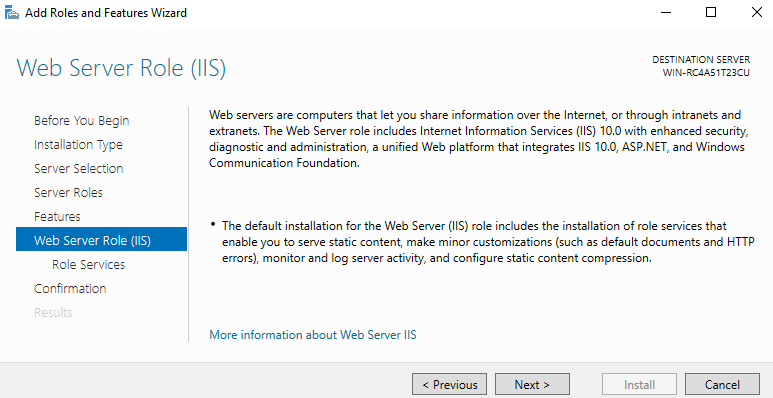
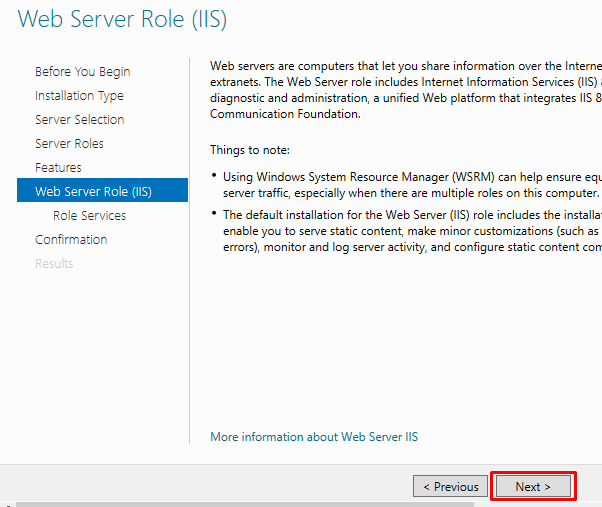
Step 11: Users will find the Web Server Role (IIS), go to Web Server Role (IIS) and click “Next.”
Step 12: In the Select features page, click the «Features» option, and users will see .NET Framework N.NN.
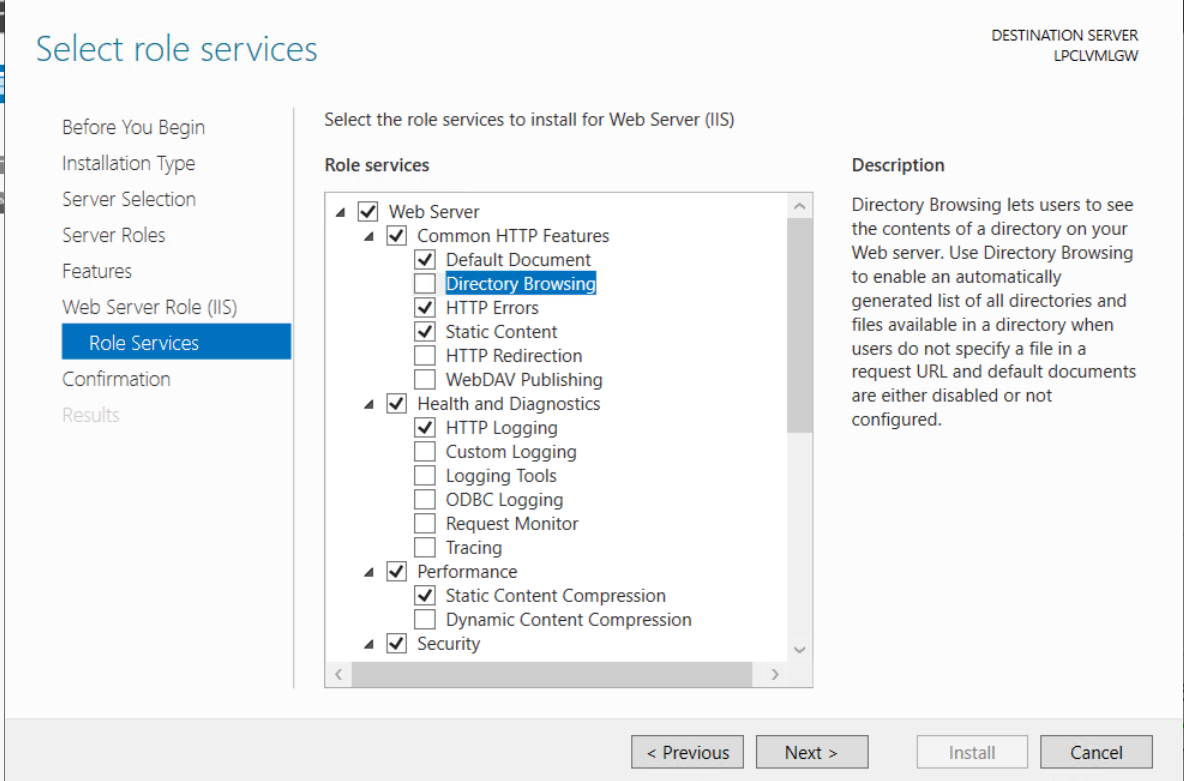
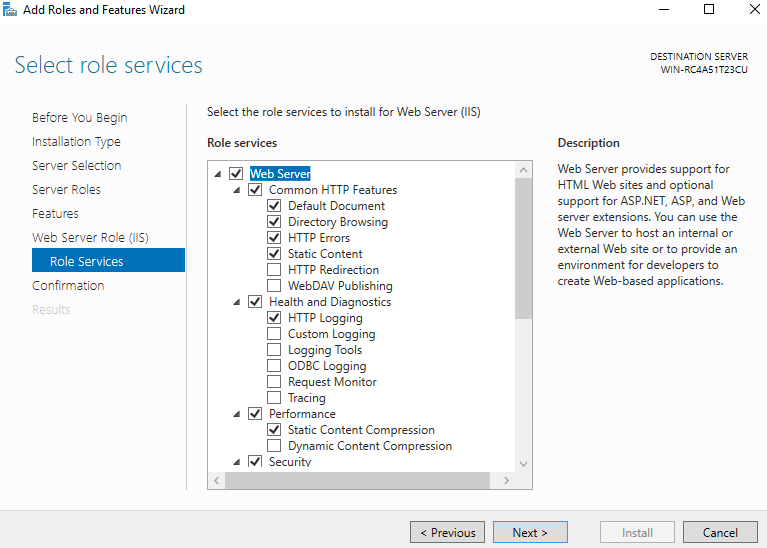
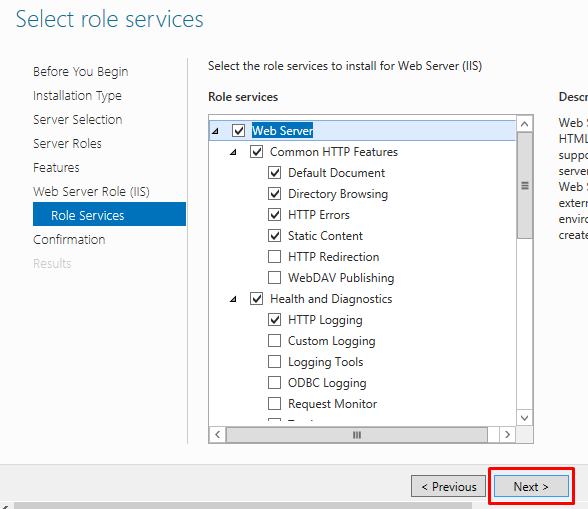
Then, this will proceed to the next page. i.e., select role services page, where users need to verify that they have these following role services pre-selected at a minimum.
Under the Common HTTP Features
- Select Default Document
- Select Default Browsing
- Select HTTP Errors
- Select Static Content
Under the Application Development
- Select .NET Extensibility 3.5 (if users have installed the .NET Framework 3.5)
- Select .NET Extensibility 4.5, 4.60, or 4.70
- Select ASP.NET 3.5 (if users have installed the .NET Framework 3.5)
- Select ASP.NET 4.5, 4.60, or 4.70
- Select ISAPI Extensions
- Select ISAPI Filters
Under the Security option
- Select Request Filtering
- Select Windows Authentication
Under the Management Tools
- Select IIS Management Console (it is optional)
Then click on Next.
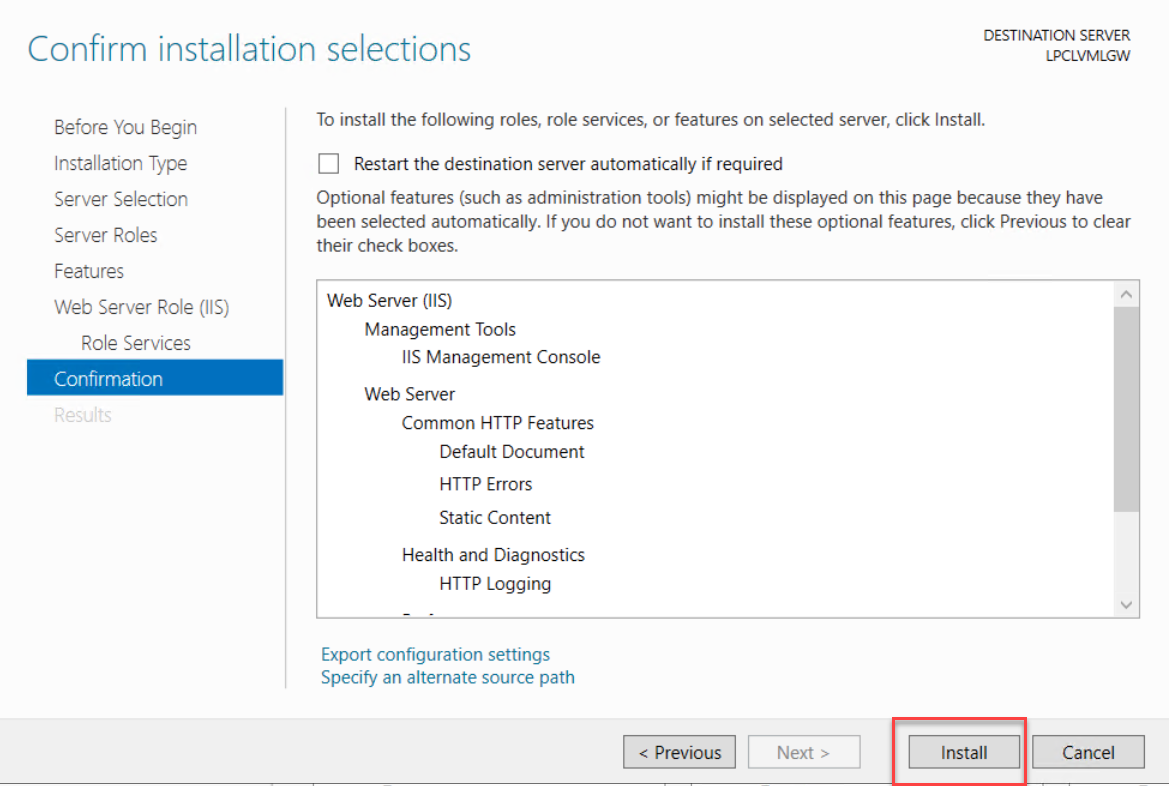
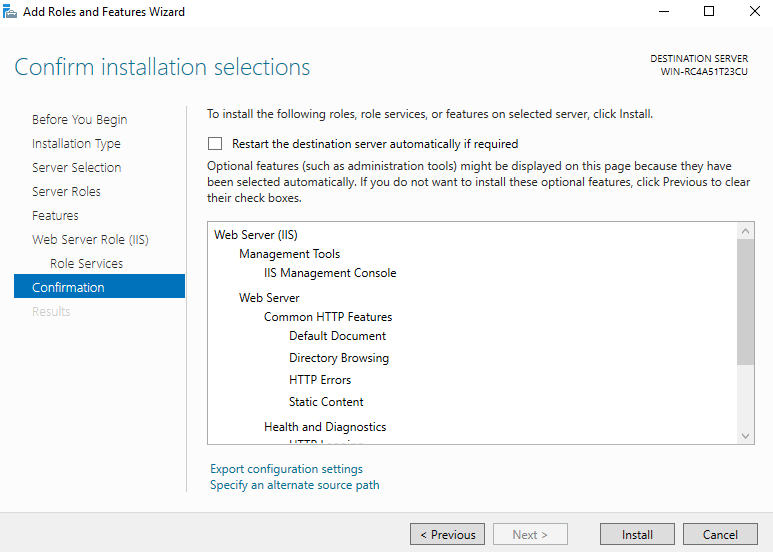
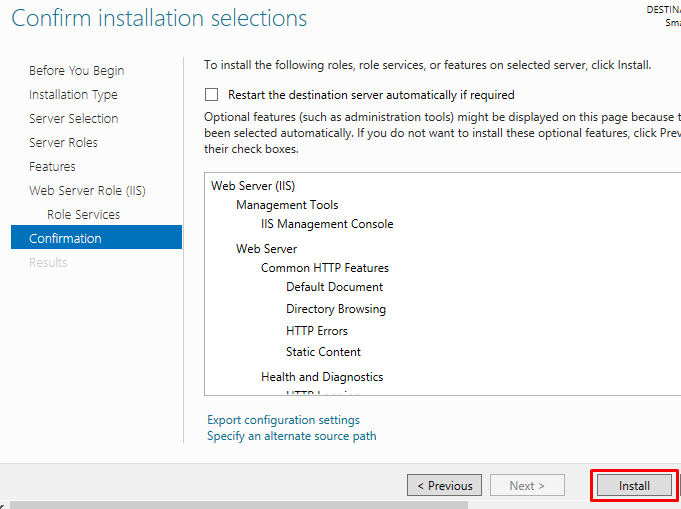
Step 13: After this, users go to the Confirm installation selections page, click on Confirmation and select the Install button.
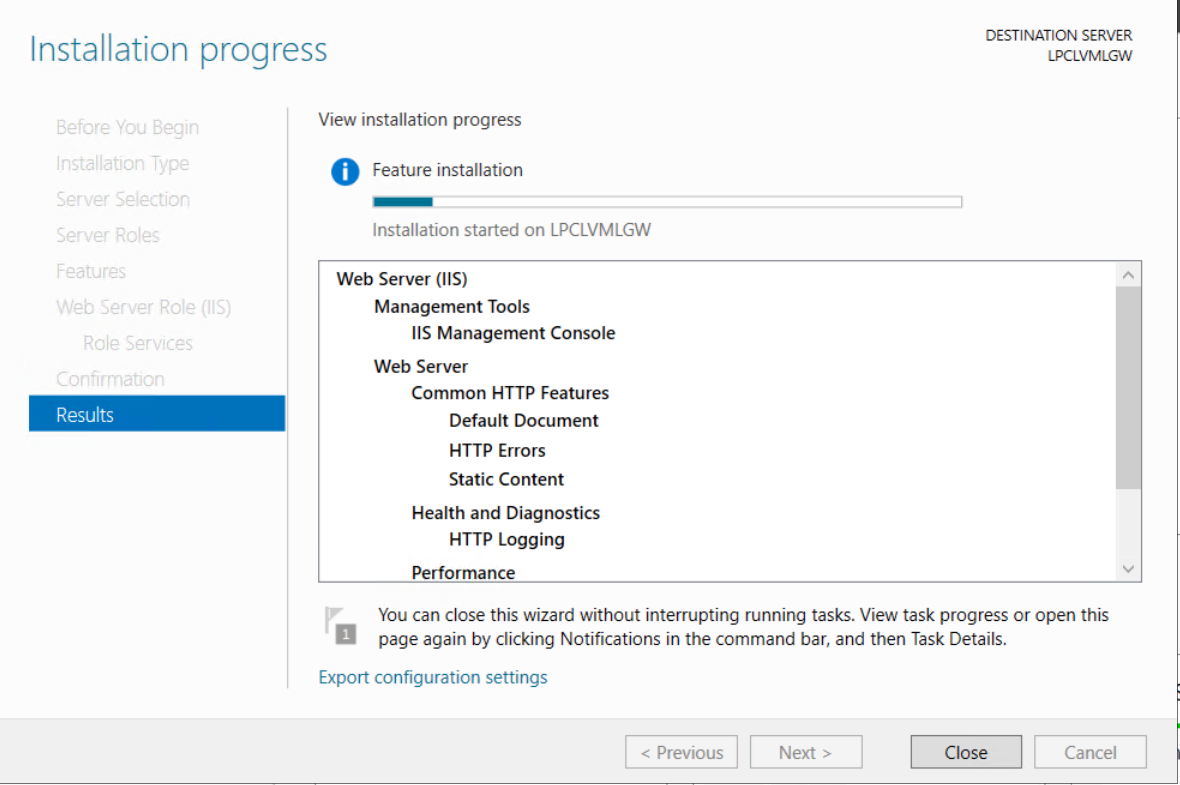
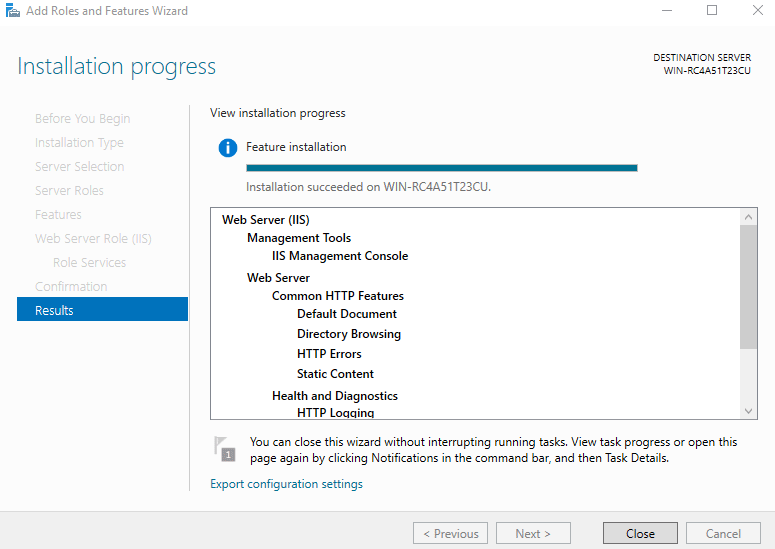
Step 14: Then, on the Installation progress page, users verify that their installation finished successfully and click the Close option.
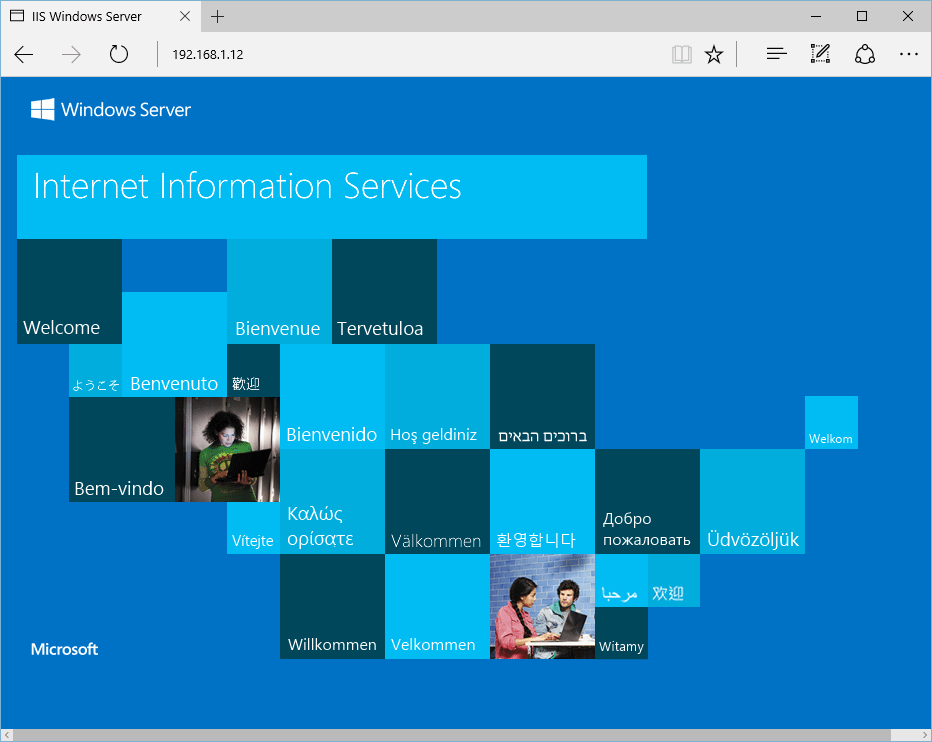
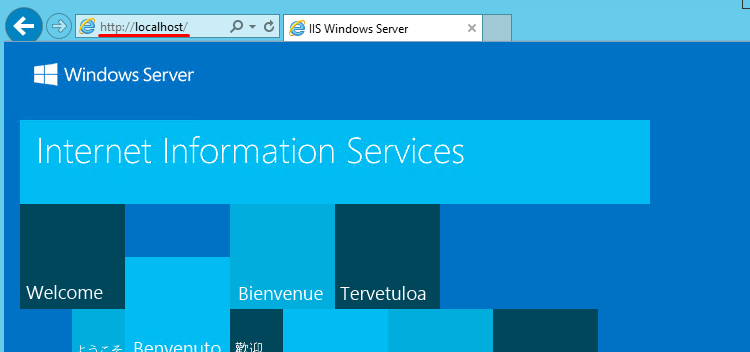
Step 15: Users have to start their browser to verify that they got the web server installed correctly. Then type https://localhost in the address.
Step 16: It will open the default website, which should display an IIS image.
Conclusion:
We hope you successfully installed the IIS server in Windows 2012 and 2016. Even today, IIS is one of the prevalent choices for several web application hosting services or web developers. It is because of the reason that the IIS server provides different features, and programmers and users can integrate this with other Microsoft products.
This article also caters to what IIS is, how it works, and a deep-dyed step-by-step procedure to configure IIS on the Windows server.
Posted by
on August 24, 2016
Here we’re going to show you how to install the Internet Information Services (IIS) web server version 10.0 in Microsoft’s Windows Server 2016 operating system.
This can be done both with PowerShell or through the GUI, we’ll cover both methods here.
Install IIS With PowerShell
If you don’t have the GUI installed or just want to use the PowerShell command line interface (CLI) instead, follow these steps. This method is a lot faster than going through all of the GUI options.
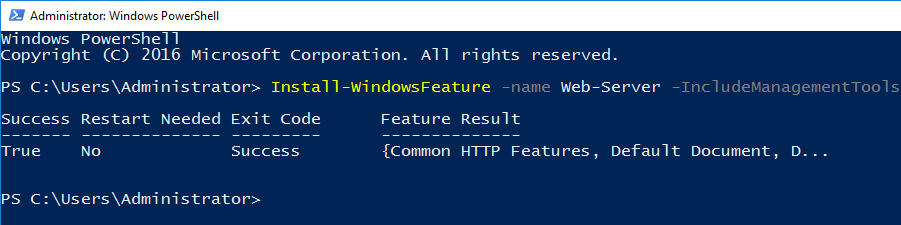
- Open PowerShell with administrative privileges and run the Install-WindowsFeature cmdlet as shown below.
Install-WindowsFeature -name Web-Server -IncludeManagementTools

Here we include the management tools so that you can manage IIS on this server, as these are generally installed when using the GUI, making this PowerShell command equivalent with the GUI method below. If you do not plan on managing IIS through this server then you may prefer to not include this option.
- Once the installation has succeeded, you’ll be returned to the PowerShell prompt. At this point IIS should be running on port 80 by default with the firewall rule “World Wide Web Services (HTTP Traffic-In)” enabled in Windows firewall automatically.
- We can perform a simple test by opening up a web browser and browsing to the server that we have installed IIS on. You should see the default IIS page.

Install IIS Through GUI
If your server has the graphical user interface component installed you can also install IIS by following these steps.
- Open Server Manager, this can be found in the start menu. If it’s not there simply type “Server Manager” with the start menu open and it should be found in the search.

- Click the “Add roles and features” text.

- On the “Before you begin” window, simply click the Next button.

- On the “Select installation type” window, leave “Role-based or feature-based installation” selected and click Next.

- As we’re installing to our local machine, leave “Select a server from the server pool” with the current machine selected and click Next. Alternatively you can select another server that you are managing from here, or a VHD.

- From the “Select server roles” window, check the box next to “Web Server (IIS)”. Doing this may open up a new window advising that additional features are required, simply click the “Add Features” button to install these as well. Click Next back on the Select server roles menu once this is complete.


- We will not be installing any additional features at this stage, so simply click Next on the “Select features” window.

- Click Next on the “Web Server Role (IIS)” window after reading the information provided.

- At this point on the “Select role services” window you can install additional services for IIS if required. You don’t have to worry about this now as you can always come back and add more later, so just click Next for now to install the defaults.

- Finally on the “Confirm installation selections” window , review the items that are to be installed and click Install when you’re ready to proceed with installing the IIS web server.

No reboot should be required with a standard IIS installation, however if you remove the role a reboot will be needed.
- Once the installation has succeeded, click the close button. At this point IIS should be running on port 80 by default with the firewall rule “World Wide Web Services (HTTP Traffic-In)” enabled in Windows firewall automatically.
- We can perform a simple test by opening up a web browser and browsing to the server that we have installed IIS on. You should see the default IIS page.

As you can hopefully see, it’s quite a lot faster to use PowerShell to perform the same task.
Summary
As shown we can easily install the IIS web server in Windows Server 2016 with both the PowerShell command line or the graphical user interface.
В статье расскажем, как установить службу Internet Information Services (IIS) на серверы с операционной системой Windows Server 2019. Инструкция подойдет и для ОС Windows Server 2016.
IIS (Internet Information Services) — набор сервисов от компании Microsoft для работы веб-сервера и других интернет служб. IIS устанавливается на сервер и работает с протоколами HTTP/HTTPS, POP3, SMTP, FTP, NNTP.
Чтобы приступить к установке, зайдите на сервер с правами администратора.
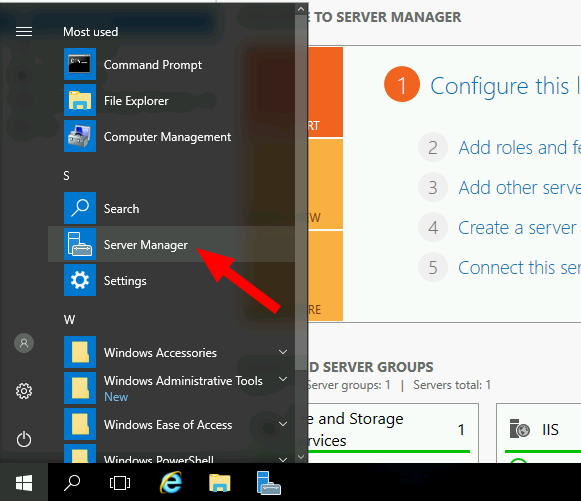
«Диспетчер серверов» (Server Manager) будет уже запущен (запускается автоматически при старте ОС) или запустите его вручную из меню «Пуск».
То же самое можно сделать через панель «Локальный сервер» (Local Server) — «Управление» (Manage).

Выберите тип установки «Установка ролей или компонентов» (Role-based or feature-based installation) и нажмите «Далее» (Next).
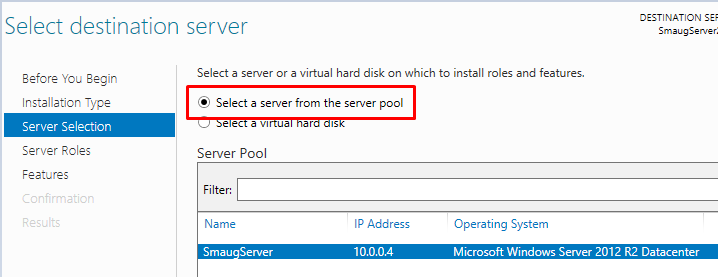
Выберите сервер из пула серверов (Select a server from the server pool) и отметьте имя вашего сервера. Нажмите «Далее» (Next).
Обратите внимание, что служба FTP по умолчанию не устанавливается. Если в дальнейшем вам понадобятся новые роли, то вы сможете их добавить без переустановки IIS.
При необходимости отметьте «Автоматический перезапуск конечного сервера» (Restart the destination server automatically if required), если пункт не выбран, то перезагрузите сервер самостоятельно после окончания установки.
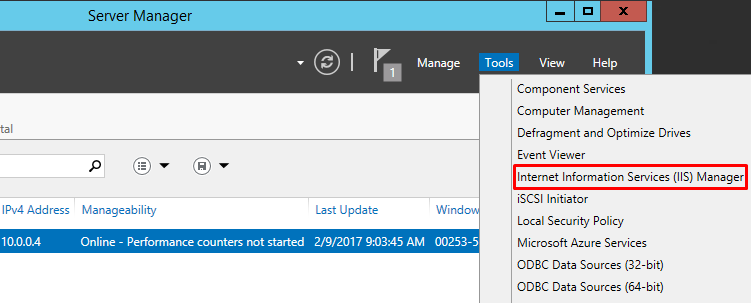
Запустите «Диспетчер серверов» (Server Manager) из меню «Пуск» (Start).
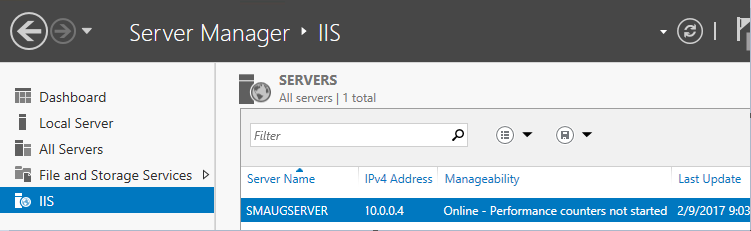
В списке содержимого появится установленная служба IIS.
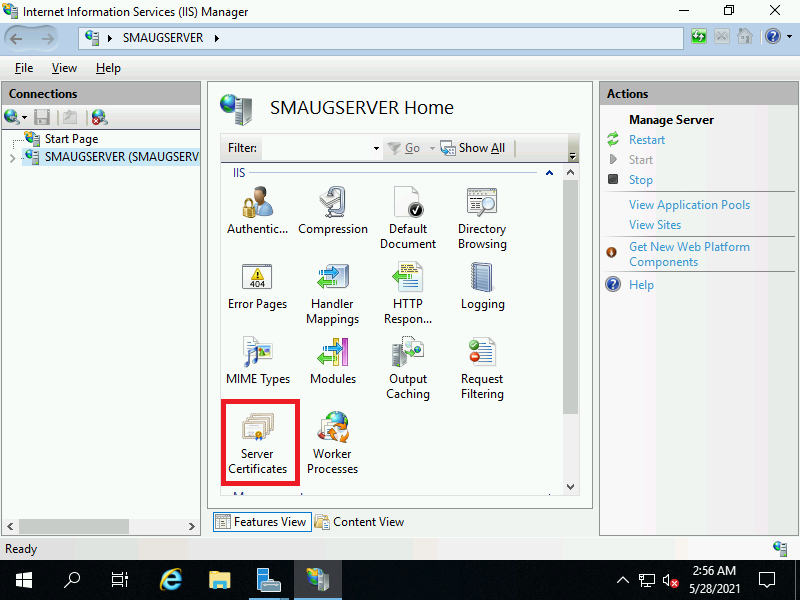
Панель «Просмотр возможностей» (Features View)
Возможности, доступные вам в службе IIS, перечислены на панели Просмотр возможностей (Features View). Отсюда управляйте возможностями IIS, настраивайте и перезапускайте. Например, настройте SSL-сертификаты.
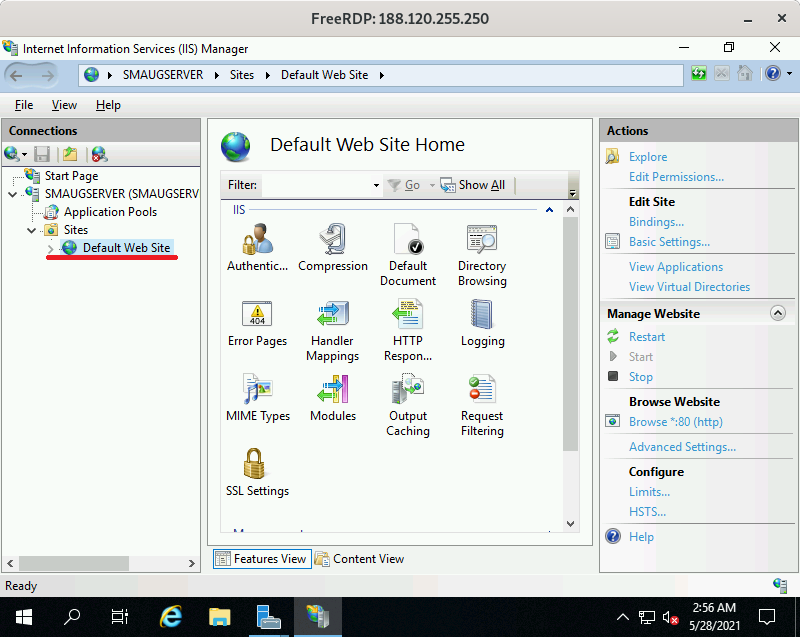
Сразу после установки IIS по умолчанию создается пустой сайт Default Web Site.
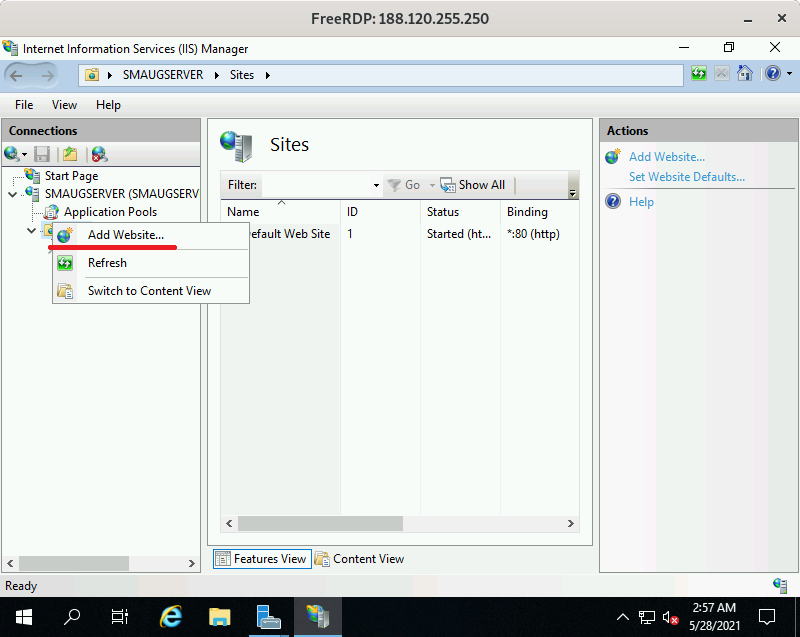
Добавьте сайты, которые будут обслуживаться этим веб-сервером. Для этого в контекстном меню пункта «Сайты» (Sites) на вкладке «Подключения» (Connections) выберите «Добавить сайт» (Add Website).
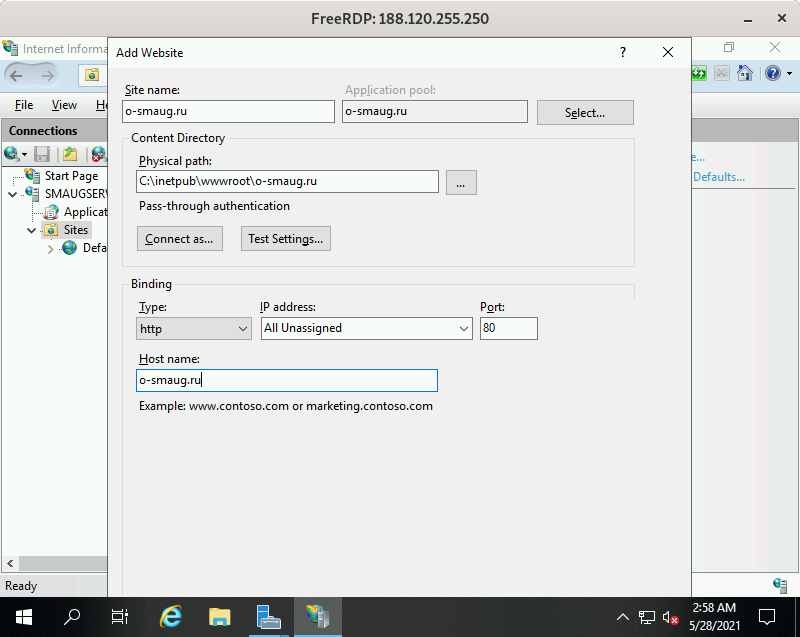
Заполните поля формы данными о сайте и нажмите ОК.
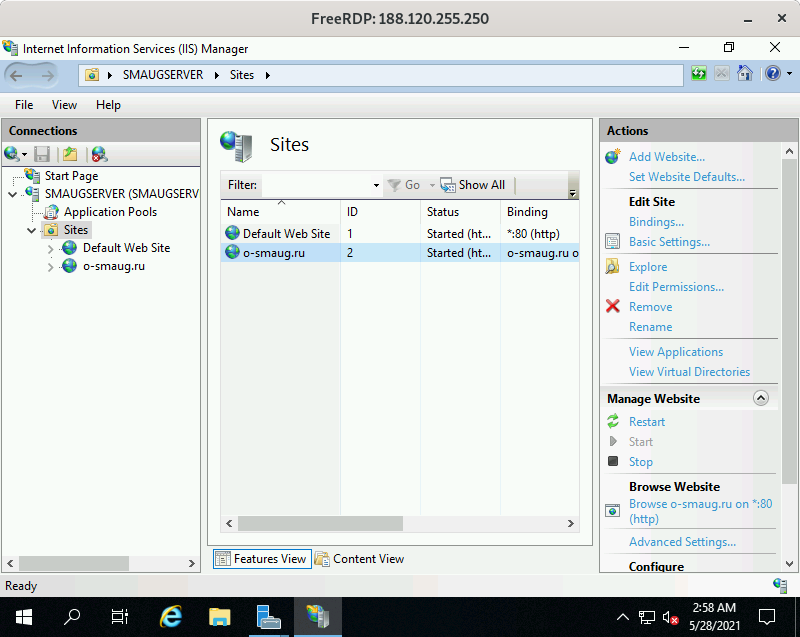
В списке сайтов IIS появится только что добавленный.
Этот материал был полезен?
Для ArcGIS Web Adaptor необходимо включение IIS и определенных компонентов IIS в Windows Server 2016. Установка не будет продолжена, если IIS не обнаружен, или не включены его отдельные компоненты.
Если вы уже активировали IIS, но обязательные компоненты IIS отсутствуют, появится сообщение программы установки с указанием отсутствующих компонентов IIS. Вы можете разрешить программе установки автоматически включить отсутствующие компоненты IIS. В зависимости от политики безопасности вашей организации вам может потребоваться вручную включить обязательные компоненты IIS.
Более подробно о том, как включить IIS и обязательные компоненты IIS в Windows Server 2016, описано ниже.
- Откройте Диспетчер сервера и щелкните Управление > Добавить роли и компоненты. Щелкните Далее.
- Выберите Установка на основе роли или на основе объекта и щелкните Далее.
- Выберите нужный сервер. Локальный сервер выбирается по умолчанию. Щелкните Далее.
- Включите Веб сервер (IIS) и щелкните Далее.
- Для установки Web Adaptor, дополнительных компонентов не требуется, поэтому щелкните Далее.
- В диалоговом окне Роль веб-сервера (IIS) щелкните Далее.
- Убедитесь, что в диалоговом окне Выбрать сервисы ролей включены перечисленные ниже компоненты веб-сервера. Щелкните Далее.
- Проверьте правильность всех настроек и щелкните Установить.
- По окончании установки щелкните Закрыть для выхода из мастера.
Обязательные компоненты IIS
Компоненты IIS, указанные ниже, соответствуют минимальным требованиям для запуска Web Adaptor. Если установлены другие компоненты IIS, их не нужно удалять.
- Веб-сервер
- Общие HTTP-компоненты
- Документ по умолчанию
- Статическое содержимое
- Безопасность
- Фильтрация запросов
- Базовая аутентификация
- Аутентификация Windows
- Разработка приложений
- .NET Extensibility 4.6
- .NET Extensibility
- ASP.NET 4.6
- ASP.NET
- Дополнительные модули ISAPI
- Фильтры ISAPI
- Общие HTTP-компоненты
- Инструменты управления
- Консоль управления IIS
- Совместимость функций управления IIS 6
- Совместимость метабазы IIS 6
- IIS скрипты и инструменты управления
- Сервис управления
Отзыв по этому разделу?
Поднимаем IIS на Windows Server 2016. Настроим фичи по своему усмотрению.
Ссылки
Установка IIS в Windows 10
Установка IIS в Windows Server 2012 R2
Установка
Запускаем Server Manager Manage → Add Roles and Features.
Запускается мастер добавления ролей и фич.
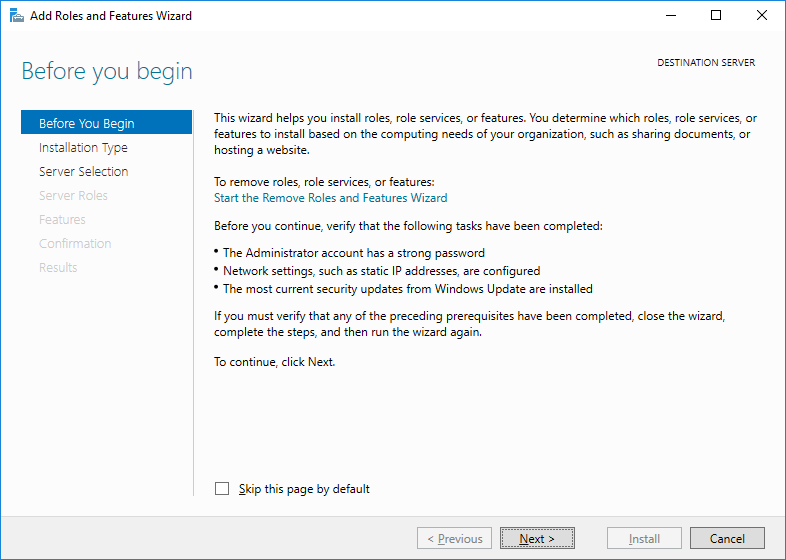
Открывается приветственная вкладка. Можно установить галку «Skip this page by default», чтобы не отображать эту страницу при последующих установках. Next.
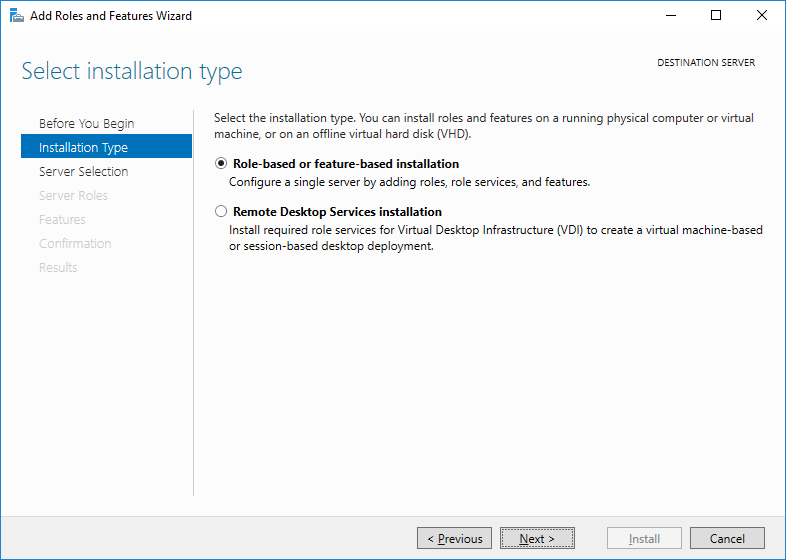
Открывается вкладка «Installation Type». Оставляем «Role-based or feature-based installation». Next.
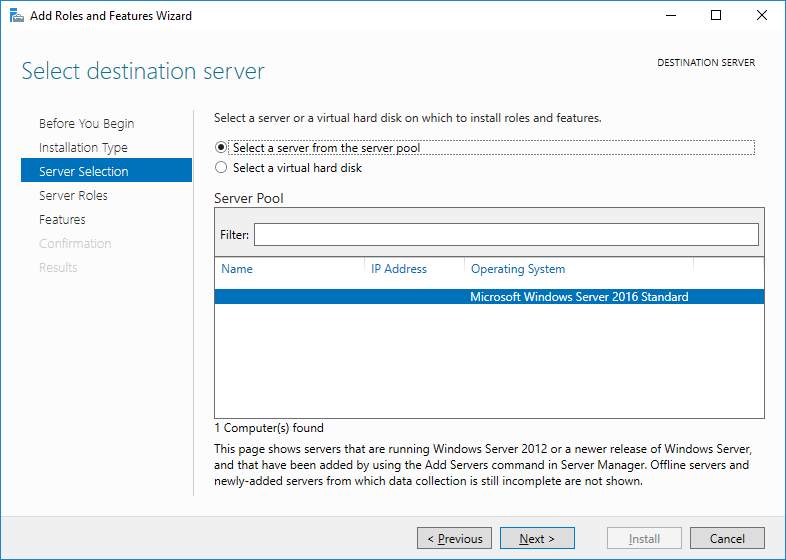
Открывается вкладка «Server Selection». Выбираем текущий сервер. Next.
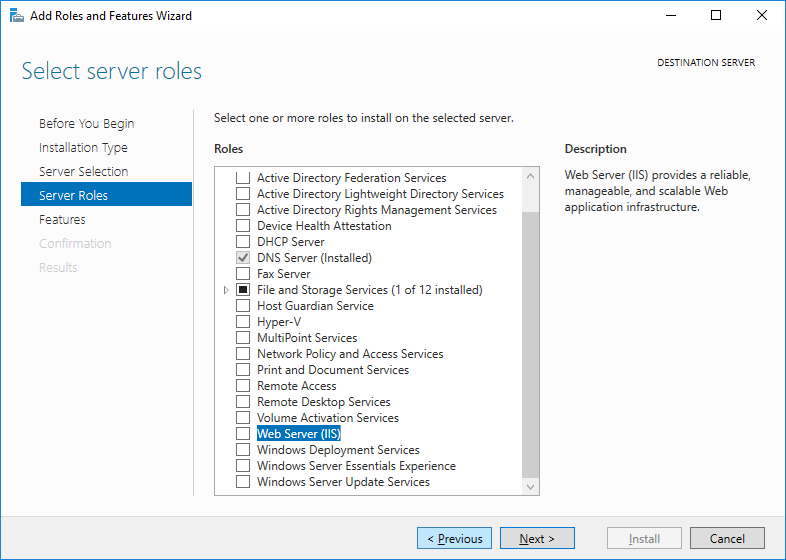
Открывается вкладка «Server Roles». Ставим галку на «Web Sever (IIS)». Всплывает окошко.
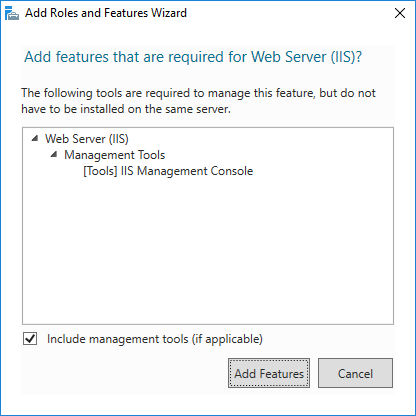
Нам предлагают установить обязательные фичи — это «IIS Management Console», поскольку сервером IIS нужно управлять. нажимаем «Add Features».
Next.
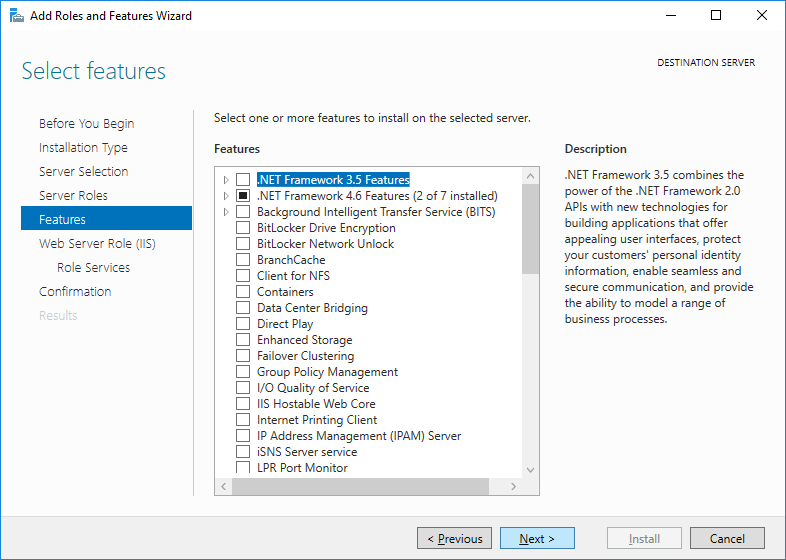
Открывается вкладка «Features». Next.
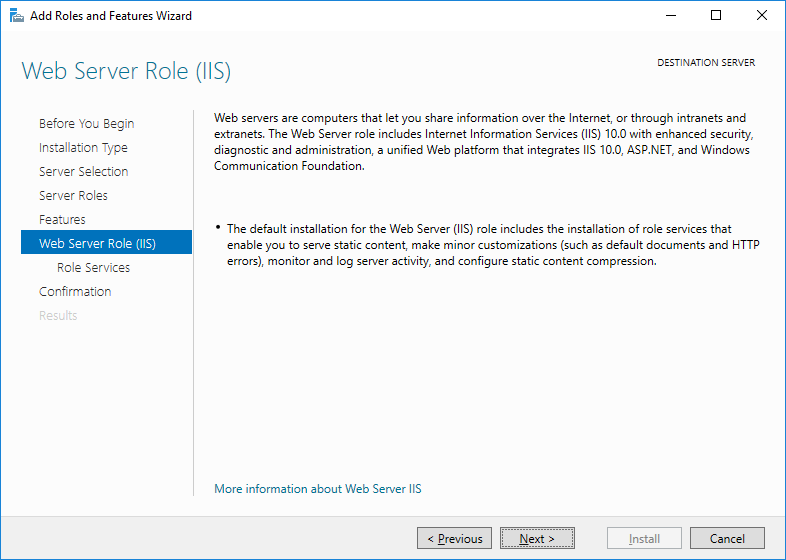
Открывается вкладка «Web Server Role (IIS)». Next.
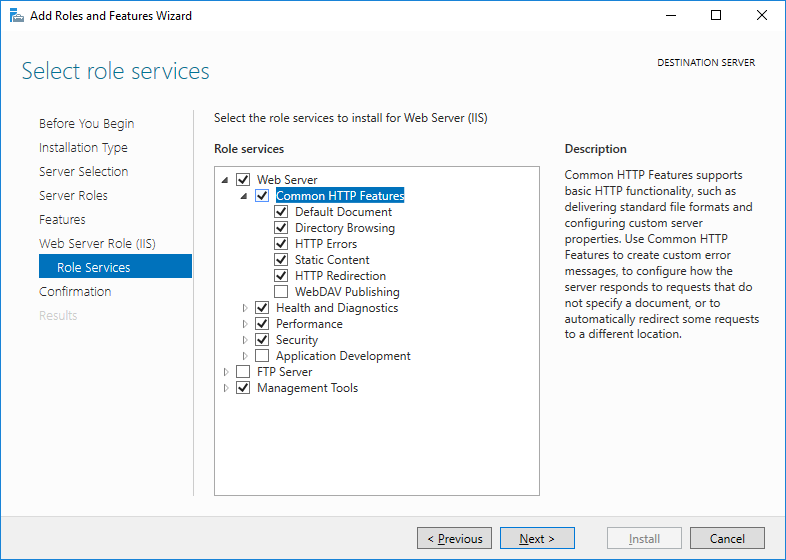
Открывается вкладка «Role Services». Здесь нужно выбрать компоненты, которые будут стоять в IIS. Настраиваем «Common HTTP Features».
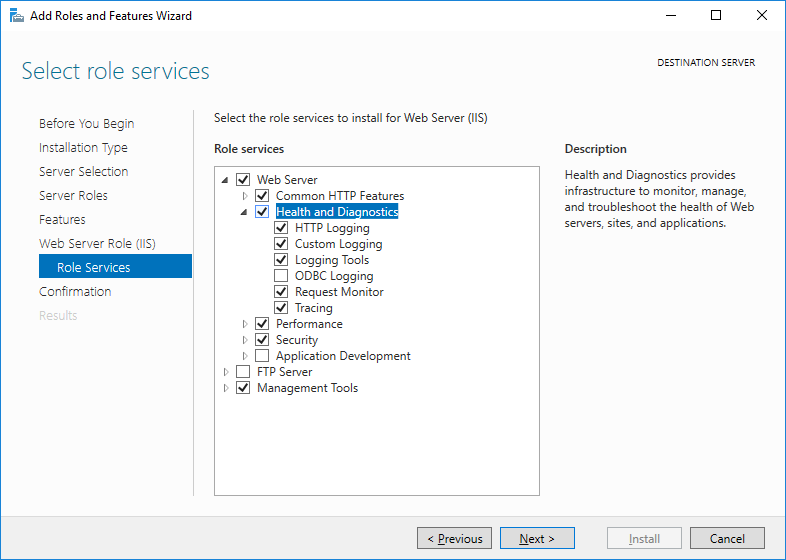
Настраиваем «Health and Diagnostics».
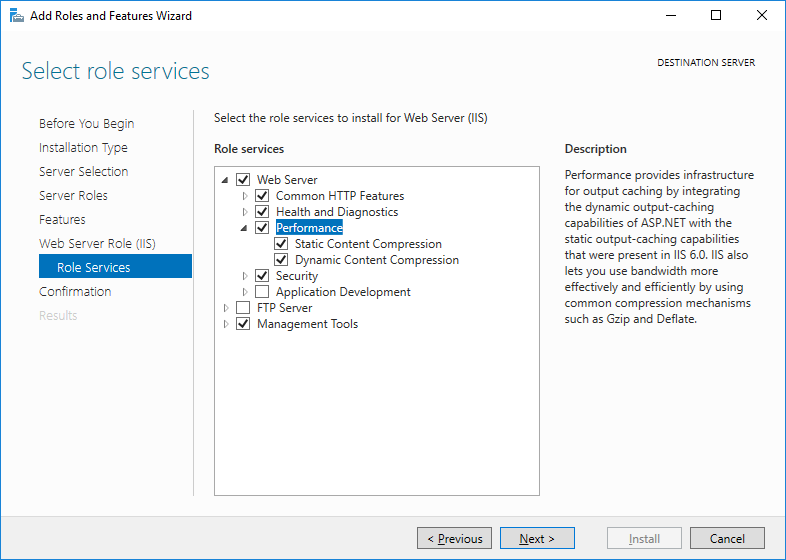
Настраиваем «Performance».
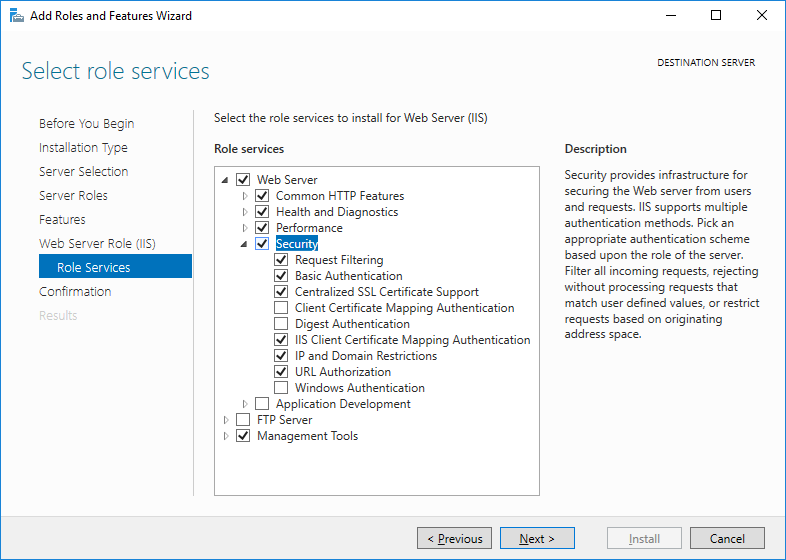
Настраиваем «Security».

Настраиваем «Application Development». При установке некоторых галок может потребоваться доставить некоторые фичи.
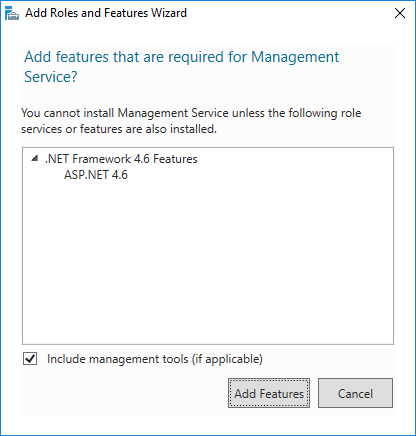
Add Features.

Настраиваем «Management Tools». Next.

Открывается вкладка «Confirmation». Проверяем всё, если не против перезагрузить сервер. то устанавливаем галку «Restart the destination server automatically if required». Install.
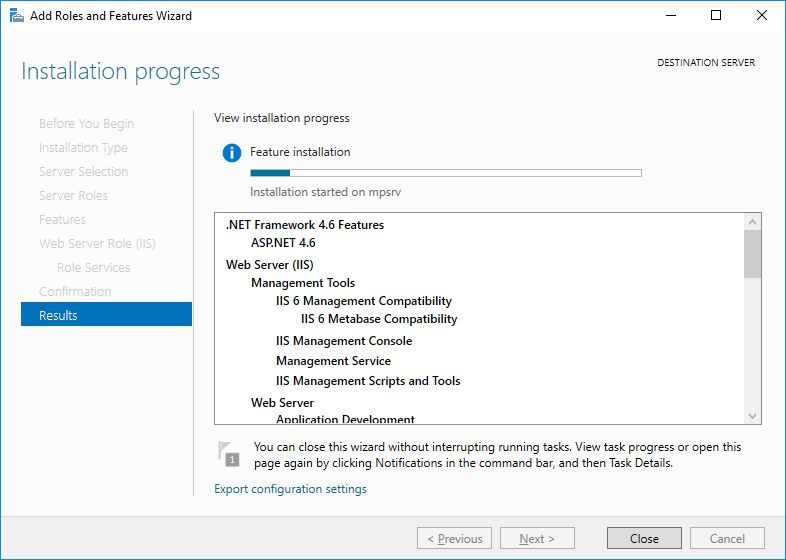
Начинается установка.
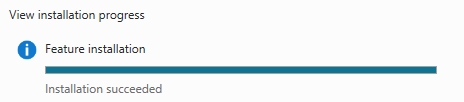
Installation succeeded.