
Стандартная функциональность операционной системы Windows 10 не позволяет пользователю открывать новые директории в отдельных вкладках Проводника, что часто вызывает неудобства. Однако существуют сторонние средства в виде программного обеспечения, после установки которых в Виндовс добавляется данная функция. Сегодня мы предлагаем ознакомиться с четырьмя различными вариантами создания вкладок в Проводнике, чтобы в итоге выбрать подходящий и использовать его на постоянной основе.
Способ 1: Clover
Функциональность программы Clover сосредоточена именно на добавлении вкладок в Проводник. Их внешний вид реализован в стиле вкладок браузеров, поэтому многим пользователям даже не придется привыкать к изменениям. Единственная трудность возникает на этапе инсталляции, поскольку установщик Clover выполнен на китайском языке.
Скачать Clover с официального сайта
- На официальном сайте утилиты вас интересует «Free Download».
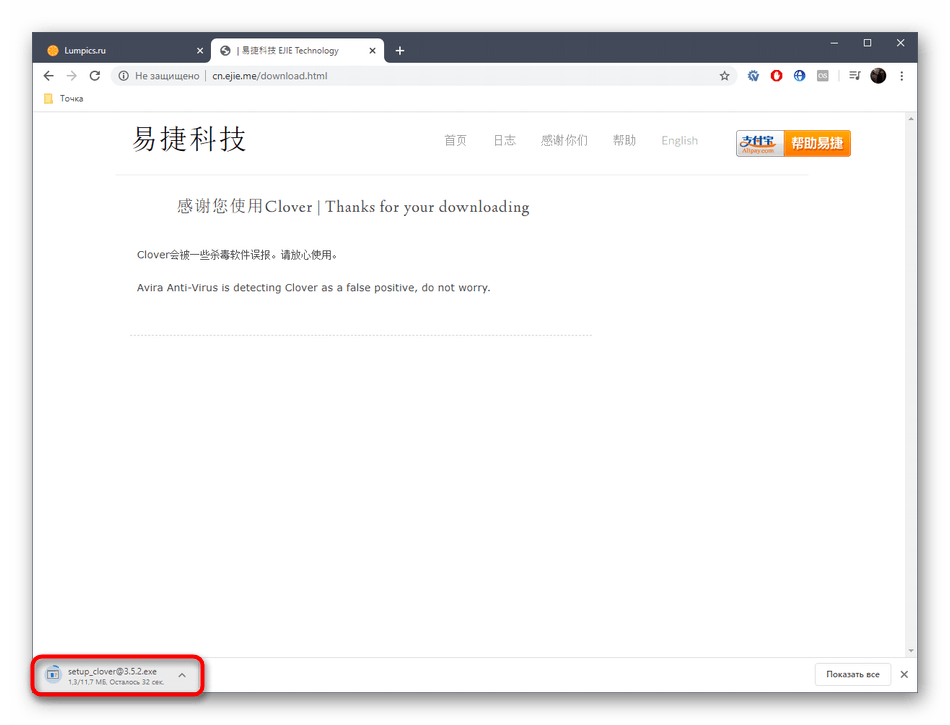
- После завершения загрузки исполняемого файла запустите его через браузер или место, куда он был помещен на локальном хранилище.
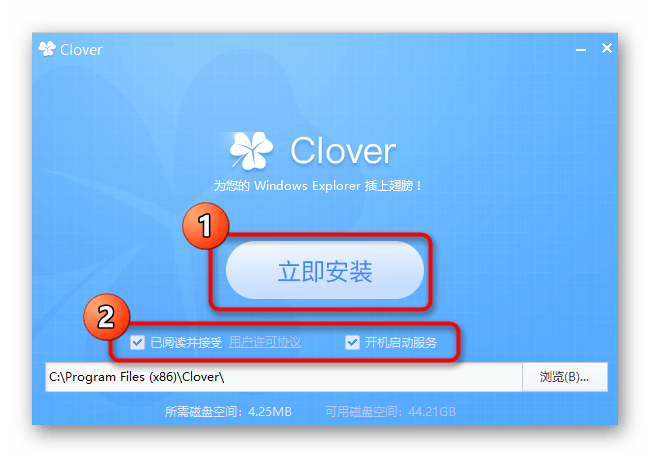
- Сейчас предстоит разобраться с двумя пунктами, которые по умолчанию отмечены галочками. Некоторые пользователи ошибочно полагают, что они отвечают за автоматическую установку рекламных приложений или ненужного контента, однако в данном случае это не так. При установке первой галочки подтверждаются условия лицензионного соглашения, а вторая отвечает за автоматический запуск Clover при старте операционной системы. Отметьте эти два пункта, а затем кликните по большой кнопке для начала инсталляции.
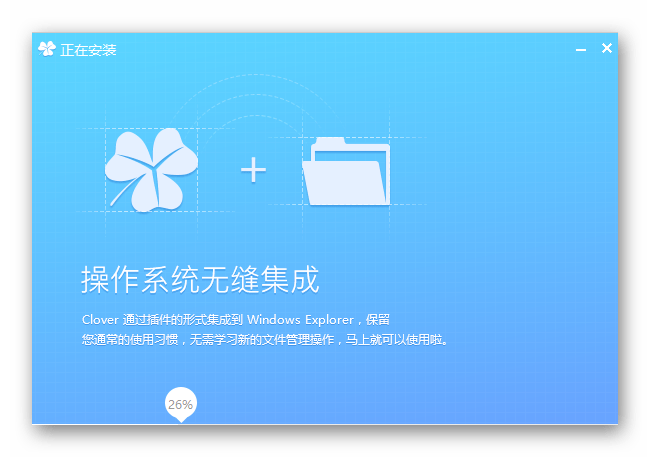
- Этот процесс не займет много времени, а за прогрессом можно будет следить при помощи полоски с процентами.
- После появится уведомление об успешном окончании инсталляции. Закройте данное окно и запустите Clover для того, чтобы вкладки в Проводник интегрировались автоматически.
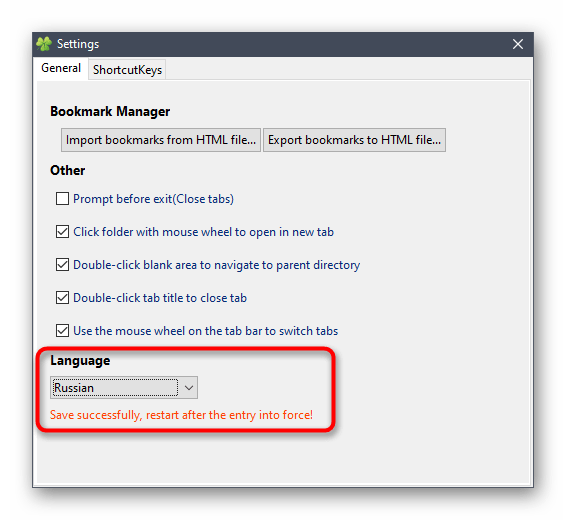
- Слева возле вкладок появится значок гаечного ключа. Нажмите по нему для открытия всплывающего меню и перейдите в настройки.
- Здесь устанавливается русский язык интерфейса.
- Дополнительно ознакомьтесь со стандартными сочетаниями клавиш, которые позволяют быстро управлять утилитой, например, открывая новые вкладки или возвращая закрытые ранее.
- Если вы хотите открыть каталог в качестве новой вкладки, зажмите его ЛКМ и передвиньте на верхнюю панель.
- Вкладка автоматически добавилась. Теперь ее можно перемещать или закрыть по необходимости.


Способ 2: BrightExplorer
BrightExplorer — самая простая и легкая в освоении программа из нашего сегодняшнего списка, однако она может не понравиться некоторым пользователям из-за особенностей реализации внешнего вида. Если вас не устраивают рассмотренные выше варианты, следует обратить внимание на эту утилиту, установить ее и проверить работоспособность.
Скачать BrightExplorer с официального сайта
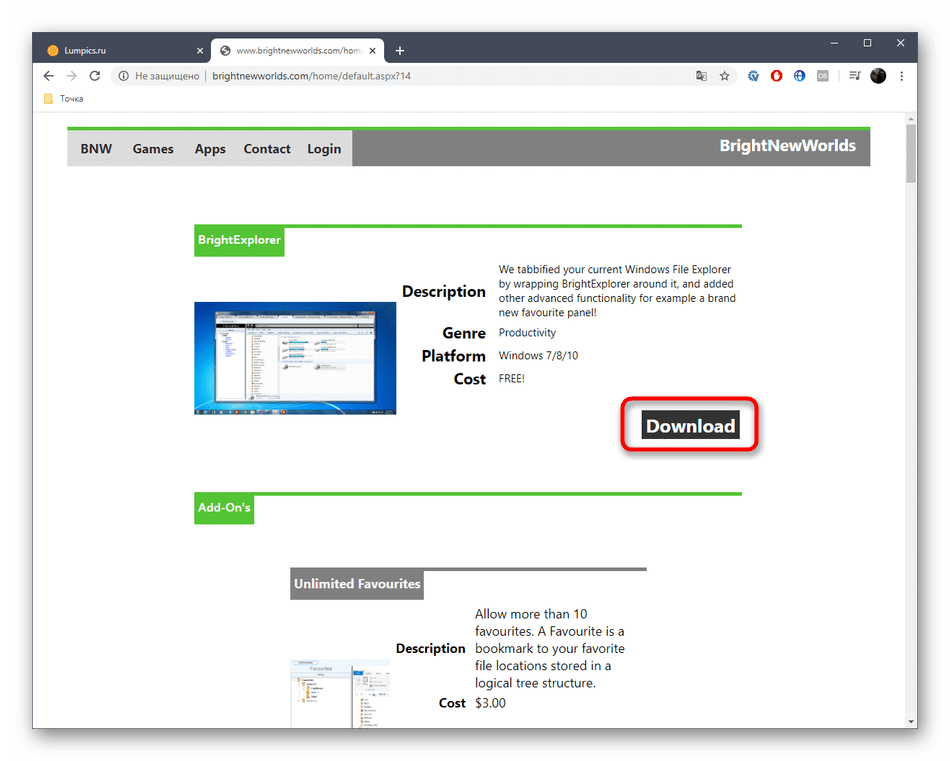
- Воспользуйтесь предыдущей ссылкой, чтобы перейти на официальный сайт BrightExplorer и загрузить оттуда данный софт.
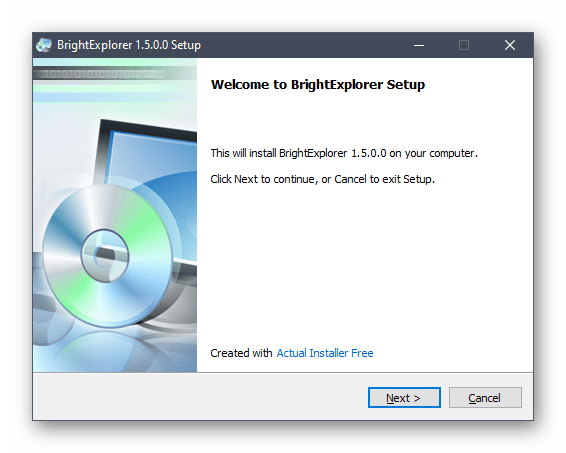
- После скачивания следуйте простой инструкции по инсталляции, которая отобразится в соответствующем окне.
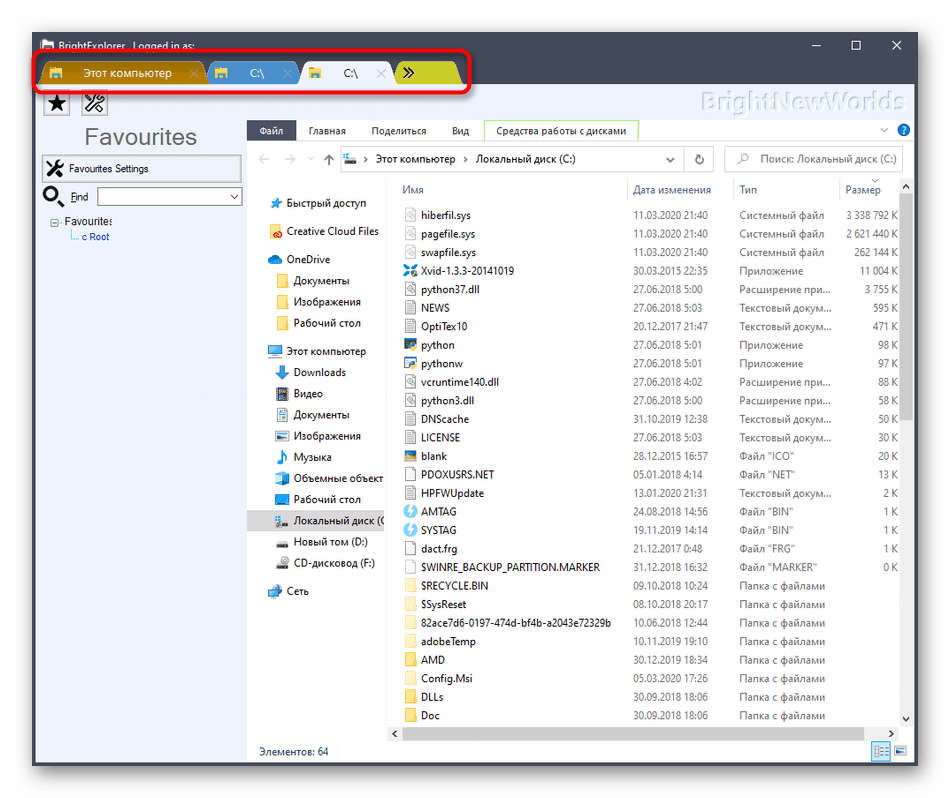
- При первом же запуске BrightExplorer будет интегрирована в Проводник. Здесь при помощи раздела «Favourites» вы можете настраивать панель быстрого доступа, добавляя различные каталоги и файлы.
- Новая вкладка открывается путем выбора соответствующего пункта из контекстного меню или перемещением каталога на верхнюю панель.

Больше никаких особенностей у BrightExplorer не имеется, но хотелось бы уточнить одну деталь. Если уже открыто одно окно Проводника и вы запускаете второе, например, выбрав раздел «Изображения» в Пуске или любую папку на рабочем столе, это расположение автоматически создастся в виде новой вкладке в уже активном окне, что не всегда является удачным решением.
Способ 3: Explorer++
В качестве последнего способа сегодняшнего материала хотим рассмотреть программу Explorer++, которая является заменой стандартного Проводника с расширенной функциональностью. Стоит учитывать, что этот софт не добавляет вкладки в обозреватель, а устанавливается параллельно и запускается как отдельное приложение.
Скачать Explorer++ с официального сайта
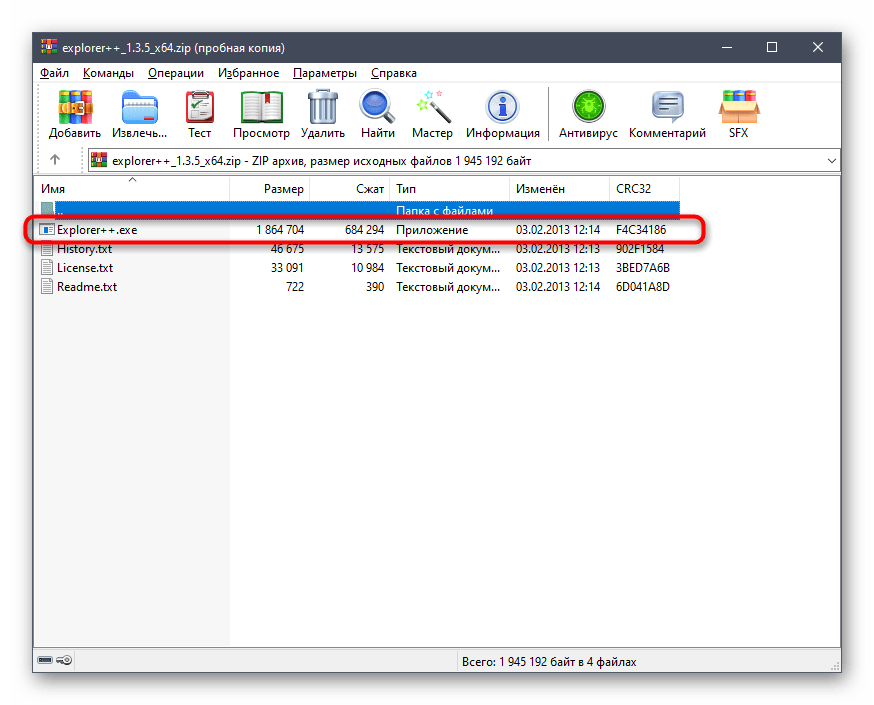
- При скачивании Explorer++ со страницы разработчиков учитывайте разную разрядность сборок, чтобы точно получить совместимую с операционной системой версию.
- Вы можете распаковать исполняемый файл из архива или каждый раз запускать его из этого каталога. Explorer++ работает в портативном режиме, поэтому не требует предварительной инсталляции.
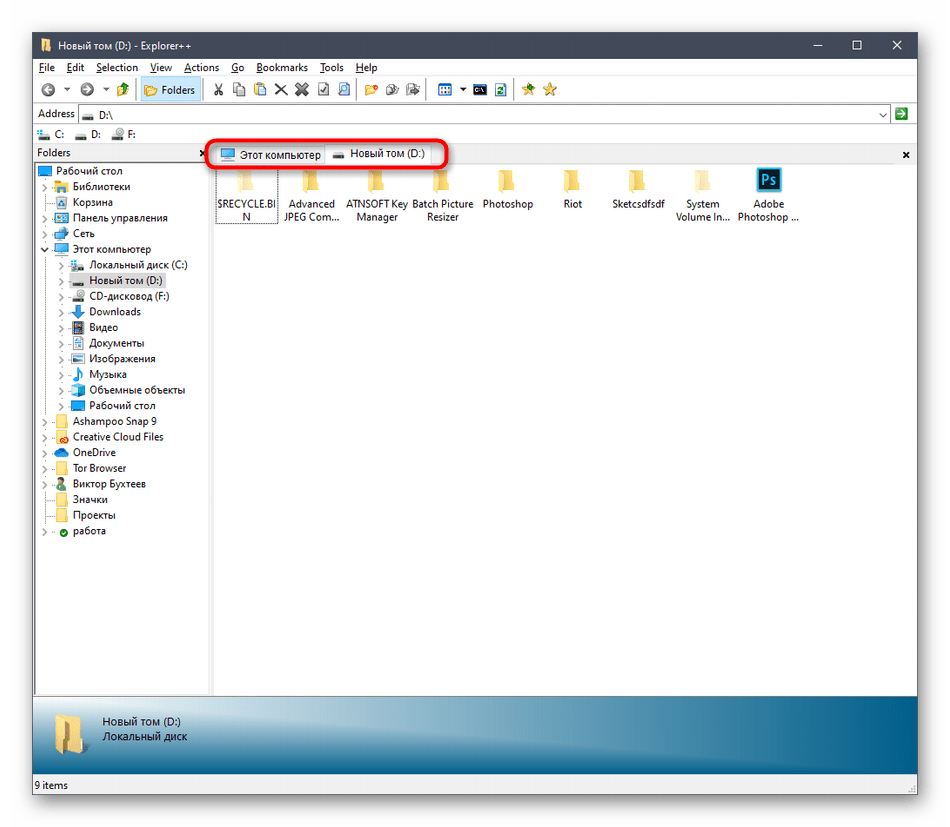
- После запуска ПО обратите внимание на реализацию обозревателя. Все каталоги выполнены в древовидном виде, а на панели справа отображается текущее расположение и все активные вкладки.
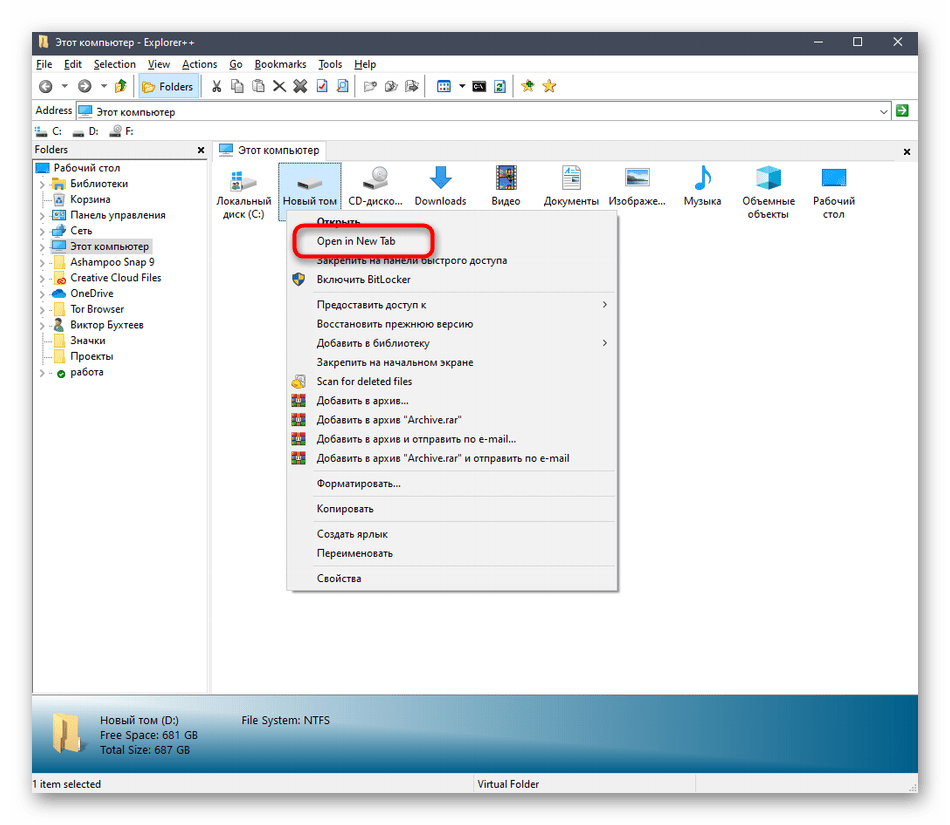
- Щелкните ПКМ по любому из каталогов, чтобы открыть его в новой вкладке, выбрав для этого пункт «Open in New Tab» в соответствующем контекстном меню.
- Логический том жесткого диска только что открылся в новой вкладке, к которой можно переместиться и начать взаимодействие.
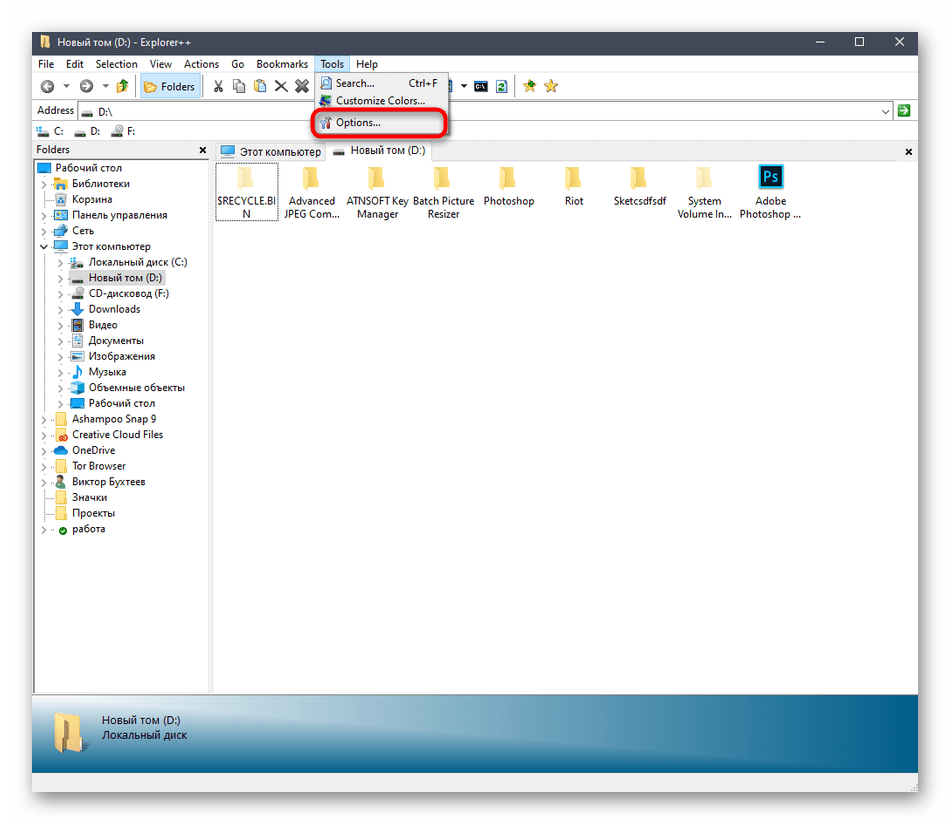
- Все настройки, связанные с работой Explorer++, находятся в разделе «Options», переход к которому происходит через меню «Tools».
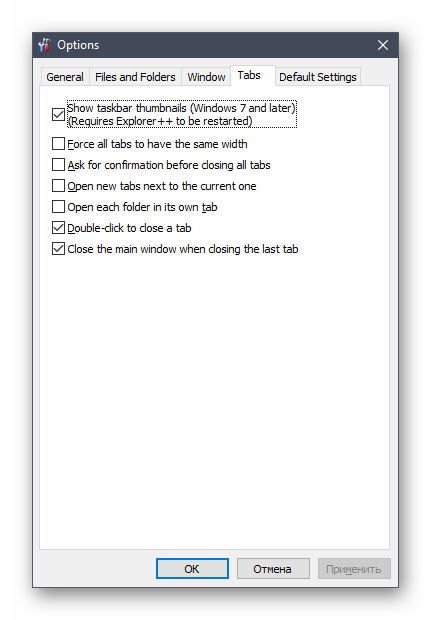
- Здесь вы самостоятельно выбираете принцип открытия, закрытия вкладок и дополнительные параметры, связанные с ними.


Как видите, управление рассмотренным приложением не является чем-то сложным. Однако не всех пользователей устраивает подобная альтернатива стандартному Проводнику, поэтому мы поставили программу Explorer++ на последнее место.
Конечно, это были далеко не все программы, которые добавляют вкладки в обозреватель Виндовс 10, но их все мы не можем рассмотреть в рамках одного материала, поэтому и выбрали только самые интересные и популярные решения.
Наша группа в TelegramПолезные советы и помощь
-
Home
-
News
- How to Enable Tabs in File Explorer on Windows 10?
By Stella | Follow |
Last Updated
The tabs feature in File Explorer is a highly convenient function for Windows users, yet it is not available on Windows 10. Nevertheless, you can enable tabs in File Explorer on Windows using third-party apps like Files. In this post, MiniTool Software introduces how to use this app to enable you to experience File Explorer tabs on Windows 10.
Is It Possible to Enable Tabs in File Explorer on Windows 10?
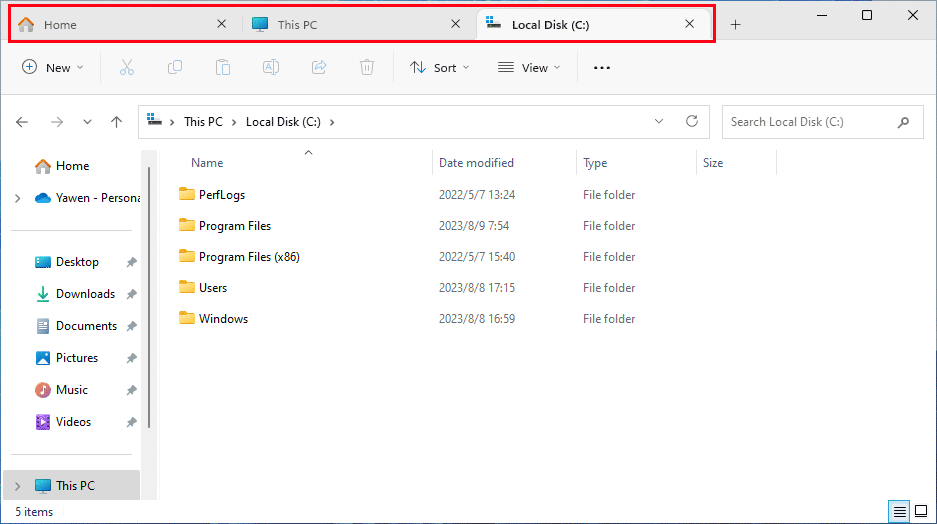
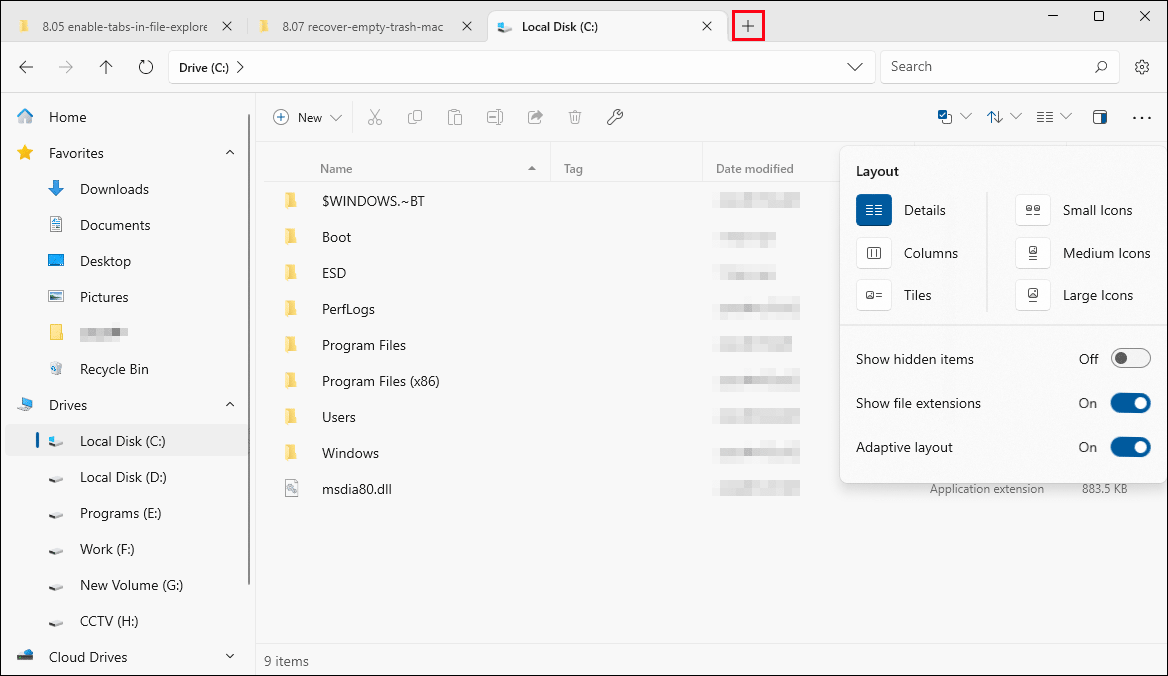
Microsoft has added tabs in File Explorer on Windows 11 and it is a very famous feature. For me, this function is very useful. Tabs in File Explorer works like tabs in web browser. When I want to open another folder in File Explorer, I don’t need to open File Explorer again and again to locate the folder. I just need to click the Plus icon to open a new tab in File Explorer and then go to the target folder.
However, you might discover that this feature is not supported on Windows 10. But many Windows 10 users want to use tabs in File Explorer. Is it possible to enable Windows 10 File Explorer tabs? Indeed, you can install a third-party app on Windows 10 to help you make tabs available in File Explorer.
You can try the Files app.
Recommendations
MiniTool ShadowMaker
You can use MiniTool ShadowMaker to backup files on your Windows computer. This backup software can back up files, folders, partitions, disks, and systems easily and quickly.
MiniTool ShadowMaker TrialClick to Download100%Clean & Safe
MiniTool Power Data Recovery
If your important files and folders get lost or deleted by mistake, you can try MiniTool Power Data Recovery to get them back. This software works on all versions of Windows. And it can recover all kinds of files like photos, videos, music files, audio files, documents, and more.
MiniTool Power Data Recovery FreeClick to Download100%Clean & Safe
How to Enable File Explorer Tabs on Windows 10?
The Files app is developed by Filex Community. It has a Multitask with tabs feature, which can avoid multiple windows and keep your desktop clutter-free with tabs. This is the feature you need to enable tabs in File Explorer on Windows 10.
Of course, you need to download it on your device if you want to use it. This app is available in Microsoft Store, but you can also free download the Insider Preview version from Files’s official site.
Download the Files App for Free
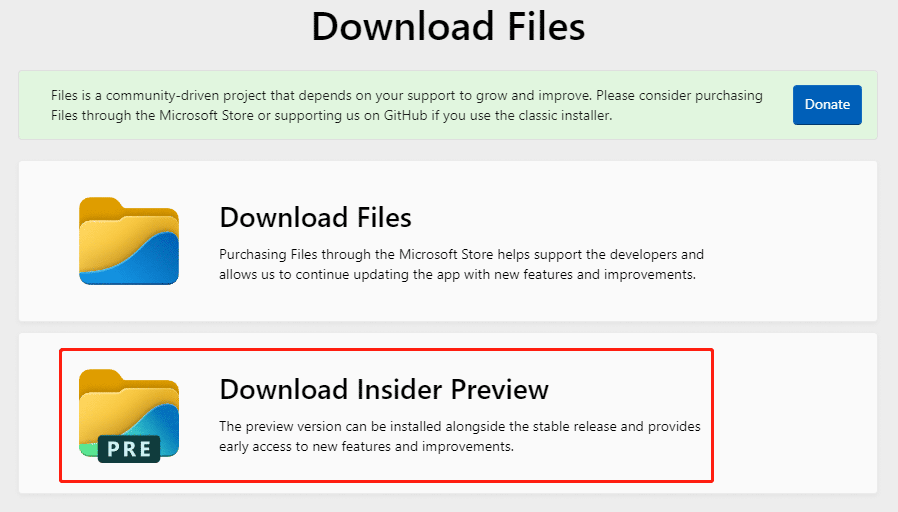
Step 1: Go to https://files.community/download.
Step 2: Click the Download Insider Preview section to download the Files.preview app installer on your device.
Step 3: Open the installer and follow the on-screen instructions to install the Files app on your device.
Get the Files App from Microsoft Store
You can also purchase the official version of the Files app from Microsoft Store.
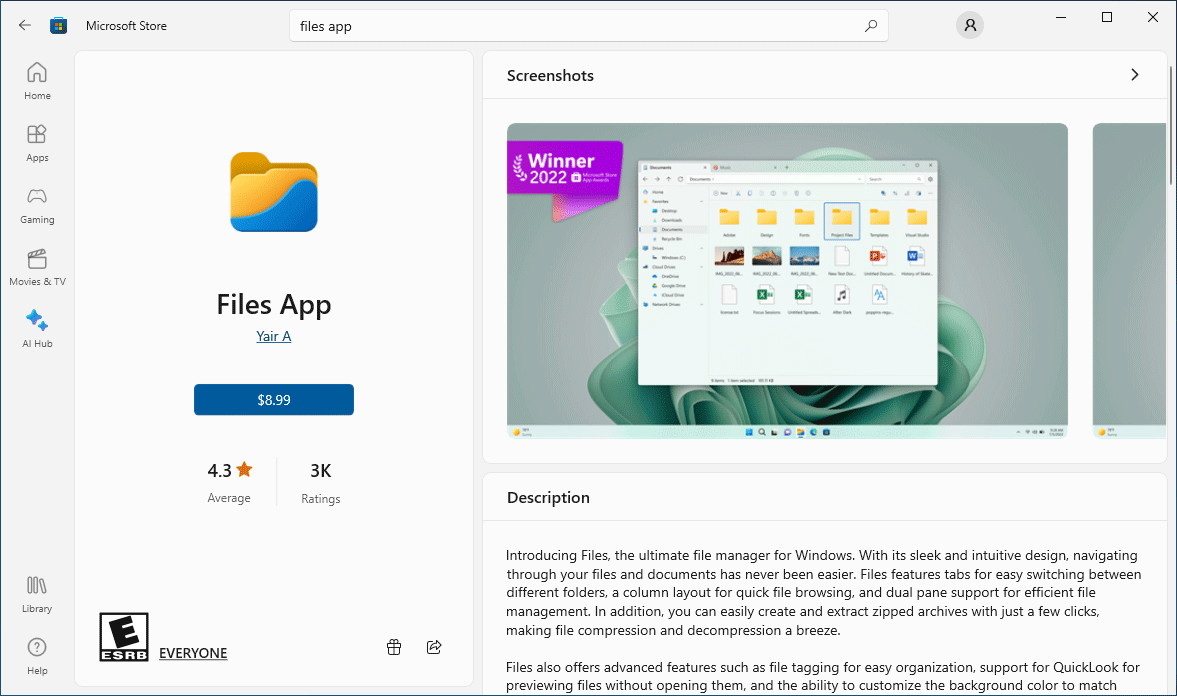
Step 1: Open Microsoft Store.
Step 2: Type Files app into the top search box and press Enter. Files App should be the first search result. You need to click it to continue.
Step 3: Click the blue button with price to purchase this app and install it on your Windows 10 computer.
Now you can open the Files App and use the tabs features. At the same time, you can also discover other interesting features.
For example, you can use the Dual Pane feature to view and manage two folders side by side, tag files and folders, view and edit archives, and more. Just enjoy it!
Bottom Line
See! It is so easy to enable tabs in File Explorer on Windows 10: you can just install the Files app on your device and then try the Multitask with tabs feature. We hope this is the thing you want.
About The Author
Position: Columnist
Stella has been working in MiniTool Software as an English Editor for more than 8 years. Her articles mainly cover the fields of data recovery including storage media data recovery, phone data recovery, and photo recovery, videos download, partition management, and video & audio format conversions.
Windows file explorer is a built-in feature of Windows OS. If you have opened two tabs, you can easily manage them. But what if you have open so many tabs at once? You will find it difficult to manage them. You need to go through each folder minimize each one so that you can try to locate a file that takes a lot of time for you to search. I will show you how to get file explorer tabs in Windows 10.
I have provided a simple solution of this problem. Just like the Google chrome tabs, you can enable the tab features in the File explorer in windows 10. In this way, we can easily navigate through each tab easily. You will have tabs in file explorer and this will be easier for you to locate a file or a folder if you’re working in a Windows operating system environment.
File explorer tabs will make our task easy to navigate the folders especially if you are working with more than two tabs. To get this feature on your windows 10, you have to follow the steps carefully and the procedure is quite simple. This feature is not provided by windows 10 but we have to install the third-party software. First, let’s take a look on requirements.
Prerequisites
You must meet the following requirements in order to follow the steps. The requirements are given:
- Windows Operating System (windows 7, 8, 10 etc.)
- ExplorerMax software
Also Read: How to Change Mouse Pointer Color in Windows 10?
Download And Install the ExplorerMax Software
QTTabBar will make our task easy. I have shown the step by step procedure to download and install this time saving software. The whole procedure is given below:
1) First, download the ExplorerMax software.
2) After downloading, double-click on the software.
3) Click on Install button, the installation will begin.
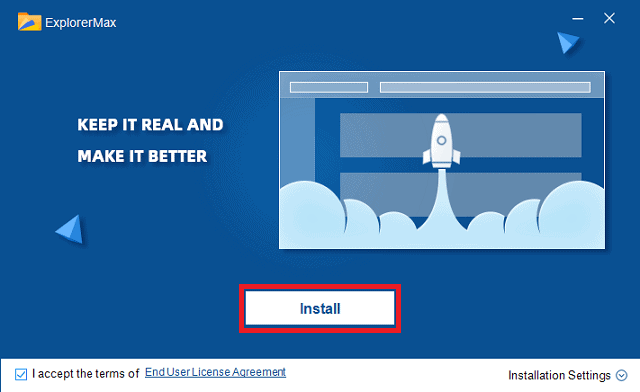
4) After installation, click on Start N0w.
5) Now, we are ready to use.
How to Use Explorer Max?
After installing this incredible software, you just have to launch it. It has premium plan that adds extra functionality to it. But recommend you to stick with its free version since the free plan offers amazing features. However, if like this software then, you can purchase it at a reasonable price.
Now, open This PC and you will see that it will open with Explorer Max. It has beautiful interface and easy to use. In the top bar, you will see tabs just like Google chrome and other browsers.
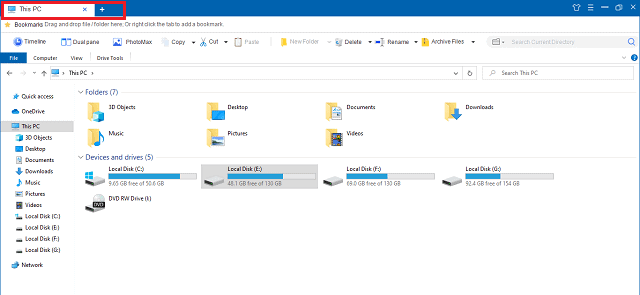
Similarly to add a new tab, click on the plus icon right to the tab and a new tab will be opened for you in no time. In the same way, you can close the tab easily. If you know how to use Chrome, you can easily use this software. It provides some additional features as well that we will discuss them later on.
Now, you can open as many tabs as you need. This is the basic feature of explorer max. In this way, you can easily navigate the tabs in a very short time.
Extra Features Of Explorer Max
I hope you got my first point, how to get file explorer tabs in windows 10. Explorer Max provides so many features and we will explore the main important features. Some of the highlighting features are explained below:
1) Open Folder in New Tab
Just like the Chrome, you can now open the folder or drive in a new tab. This is very useful feature when you want a particular folder to open in new tab i.e., don’t want to leave the current tab. Now, it is possible with this software. To do it, follow the given steps:
1) Navigate to the folder, you want to open in new tab.
2) Right-Click on the folder or drive.
3) Click on Open in new window.
4) The folder will be open in new tab.
5) That’s it.
2) Copy the Path
In chrome, we right-click on any link and copy its address. Similarly by using this amazing tool, we can copy the path of any file. This feature is particularly useful when you are working on command prompt or CLI (Command Line Interface) mode. Follow the given steps to copy the path:
1) Navigate to the desired file or folder.
2) Right-Click on the file.
3) Click on Copy the path
4) The path of a file has been copied.
Also Read: How to Change Wi-Fi Password in Windows 10?
3) History
This feature is also available in windows 10 but Explorer Max take it to the next level. As the name suggest, we can see the history and clear it as well. The history is divided into categorizes like today, yesterday, last week and last month. To explore this feature, follow the steps:
1) In the menu bar of explorer max, click on Timeline
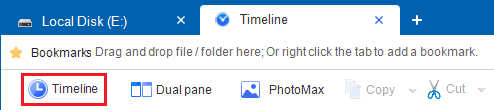
2) It will display the history.
3) You can see the history according to documents, videos, folders and many more.

4) To clear the history, hit on Clear history.
5) This is also an incredible feature.
4) Dual Pane
Moreover, we can divide the screen into two parts. To the right of the timeline, we find the option dual pane. By clicking on this button, the screen will be divided into two parts. Now, you can work on two windows simultaneously. This is very useful when you need to copy the files from one folder to another.
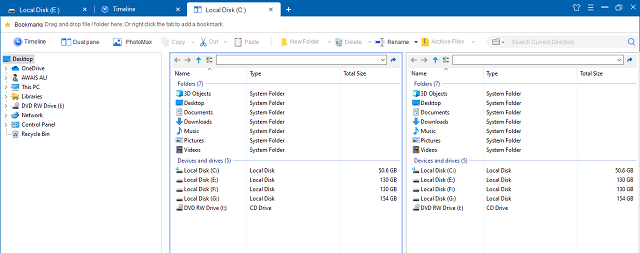
This is also a time saving feature that can be used by using the explorer max software. You can but it’s premium version if this software is really impressing you.
5) Extract/Archive Files
If you are using the winrar or 7zip software then, you are going to uninstall after using this amazing feature because this tool provided you a facility to zip and unzip the files, the same task done by winrar. To do it, follow the procedure given below:
1) Select the file or number of file, you want to zip.
2) Click on Archive Files, in the menu bar

3) The tool will start packing the files into one book.
4) To unzip them, just select it and click on Extract Files.
5) I hope you find it very helpful.
One of the most frustrating things about Windows File Explorer is that you can’t have different folders open in separate tabs. It’s a great all-around solution to save time and declutter your desktop, but Windows has historically been against the change.
In 2019, Microsoft added the “Sets” tab management feature to Windows 10, but they soon removed the feature for good. So, what are your options? This article will share eight of the best Windows 10 file management tools that enable tabs in File Explorer.

1. XYplorer
XYplorer is often cited as one of the best File Explorer alternatives and has been around for over 20 years. One of the benefits of XYplorer is that it’s an entirely portable app requiring no installation. This means you can transport it on a USB drive and quickly access it on any computer.
Besides a tabbed browser, XYplorer offers several functions, including an advanced search, a customizable interface, dual pane view, and support for scripts. XYplorer also has a very clean, modern UI and is easy to use. The latest version (22.50.0100) supports Windows Server 2003 to Windows 11.

XYplorer is available as a 30-day free trial, and the full version has a one-time fee of $39.95.
2. Total Commander
Total Commander is probably the most well-known file manager for Windows and has been around for around the same time as XYplorer. It even has an Android version.
Total Commander offers several features that users find helpful, including a dual-pane view, an enhanced search function, a tabbed interface, and several tools for organizing and synchronizing directories. The downside is that Total Commander has an old-looking UI that’s cluttered and relatively confusing.

Total Commander version 10.00 is downloadable as a 5MB executable file and supports all versions of Windows up to Windows 11 (32-bit and 64-bit). Total Commander offers a functional demo of the program, which lasts for 30 days, then it must be registered. A lifetime registration costs approximately $42.00.
3. Directory Opus
Directory Opus has support from Windows Server 2003 to Windows 11. Its features are similar to Total Commander and XYplorer, including a dual-pane, tabbed interface, multiple customizations, powerful searching, support for various file types and archives, and a portable USB version.

Directory Opus has two versions: Directory Opus Light ($40.00) and Directory Opus Pro ($70.00). The Light version includes all the features a home user needs, while the Pro edition contains highly configurable and much more complex functionalities. For the Pro version, dual and five computer licenses are also available at additional cost. Directory Opus also offers a 60-day free trial.
4. QTTabBar
While the first three apps in this list are standalone file managers, QTTabBar is an addition to File Explorer. Beyond a tabbed interface, it also supports plugins, scripting, and limited customizations.
To activate QTTabBar, download and install the program from their official download page. Next, open File Explorer and select the View tab.

Then, select Options and click QTTabBar.

You will now have access to tabs in the normal Windows File Explorer.

QTTabBar is free donationware available for Windows 7, 8, 8.1, 10, and 11.
5. Altap Salamander
Atlap Salamander is another free two-panel file manager for Windows. It looks similar to Total Commander, though much more modern, and has all the necessary features a light user would require.

Atlap stands out from its alternatives because it features a handful of networking features, including FTP, FTPS, SCP, and SCFP protocol support. It also integrates with a password manager and provides the option to encrypt files.
Atlap Salamander is a freeware that supports Windows 10, 8.1, and 7 (32-bit and 64-bit).
6. Free Commander
Free Commander is a great free alternative to some of the paid file managers we’ve listed. It has a stack of features, including a tabbed dual-pane interface, an optional tree view, a built-in file viewer, and much more.

Free Commander’s straightforward interface resembles Total Commander or Atlap Salamander but is much cleaner. It takes a simple approach to adding features to Windows File Explorer without confusing elements that most people wouldn’t use.
Free Commander is entirely free, portable, and supports Windows XP, Vista, 7, 8, and 10 in 32-bit or 64-bit.
Explorer++ is another free tabbed interface file manager designed to increase your productivity in Windows without using system resources. It’s portable, lightweight, and effortless. It largely resembles File Explorer but has more features.

If you’re looking for a file manager that’s simply a more advanced File Explorer, this is the choice for you. It doesn’t have as many functions and customizations as other options on this list, but it’s a great introduction to file managers.
Since it’s entirely portable, Explorer++ is available for all versions of Windows. It’s also completely free.
8. Double Commander
Last but not least, we have Double Commander. Like Free Commander, Double Commander is a free and entirely open-source mimic of the original Total Commander.
If the UI of the alternatives wasn’t for you, Double Commander might be the right choice. It has all the necessary features, including a two-pane view, built-in file viewer, archive support, an extended search function, and support for commands and plug-ins.

The most recent version is multi-platform and should work on all current versions of Windows, including Windows 10 and Windows 11. Double Commander also offers a portable version.
A New Level of Productivity
To the dismay of many users, File Explorer has remained essentially unchanged throughout the years. So if you’re looking for a file manager that can provide the features neglected by Windows Explorer, hopefully this list will help you decide.
Do you use a different file manager? Let us know in the comments!
Related Posts
- How to Fix a “This file does not have an app associated with it” Error on Windows
- How to Fix an Update Error 0x800705b4 on Windows
- How to Resolve “A JavaScript error occured in the main process” Error on Windows
- How to Fix the Network Discovery Is Turned Off Error on Windows
- How to Change Folder Icons in Windows
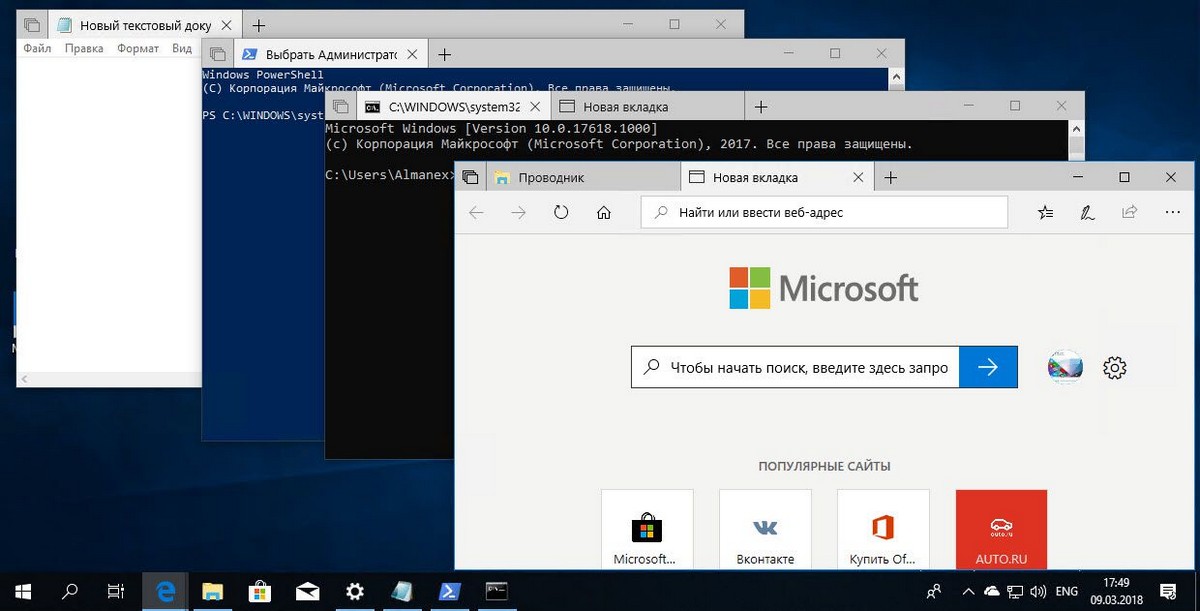
Последние версии Windows 10 включают в себя реализацию функции Tabbed Shell, называемую Вкладки. Она позволяет группировать приложения точно так же, как вкладки в браузере. Когда функция «Вкладки Приложений» включена, пользователь может комбинировать окна из разных приложений в виде вкладок. Вот как вы можете открыть папку в Проводнике на новой вкладке.
Основная идея данной функции — предоставить пользователю возможность эффективно организовать рабочее пространство: открытые веб-сайты в браузере, документы в текстовом редакторе — все приложения, связанные с одной задачей, могут быть сгруппированы в одном окне.
Вот официальное описание этой функции:
Вкладки: помогают поддерживать привязку веб-страниц, документов, файлов и приложений, оставаясь всего в одном клике. Когда вы закрываете окно, которое включает в себя группу вкладок, мы поможем вам вернуть эти вкладки в следующий раз, когда вы его откроете. Будь то позже в течение дня или через пару недель, Вкладки разрабатываются, чтобы помочь вам сохранить важные вещи вместе.
Вкладки приложений: теперь большинство приложений смогут добавлять вкладки приложений и веб-страниц. Когда вы выберете ссылку например — электронной почты, она откроется на новой вкладке рядом с приложением, которое вы использовали. Кликните мышкой кнопку (+) в приложении откроется новая вкладка, которая поможет вам перейти к следующему местоположению. Возможно, вы уже знаете, что в ней открыть, или вам просто нужно немного вдохновения. Здесь вы сможете выполнить поиск в компьютере и Интернет, получать доступ к настраиваемым каналам, открывать часто используемые веб-сайты и приложения.
Существует несколько способов открыть папку на новой вкладке Проводника Windows 10.
Чтобы открыть папку на новой вкладке в Проводнике файлов, выполните следующие действия.
Просто нажмите сочетание клавиш Ctrl + T. См. Раздел «Сочетания клавиш» в статье Как включить поддержку вкладок в проводнике Windows 10.
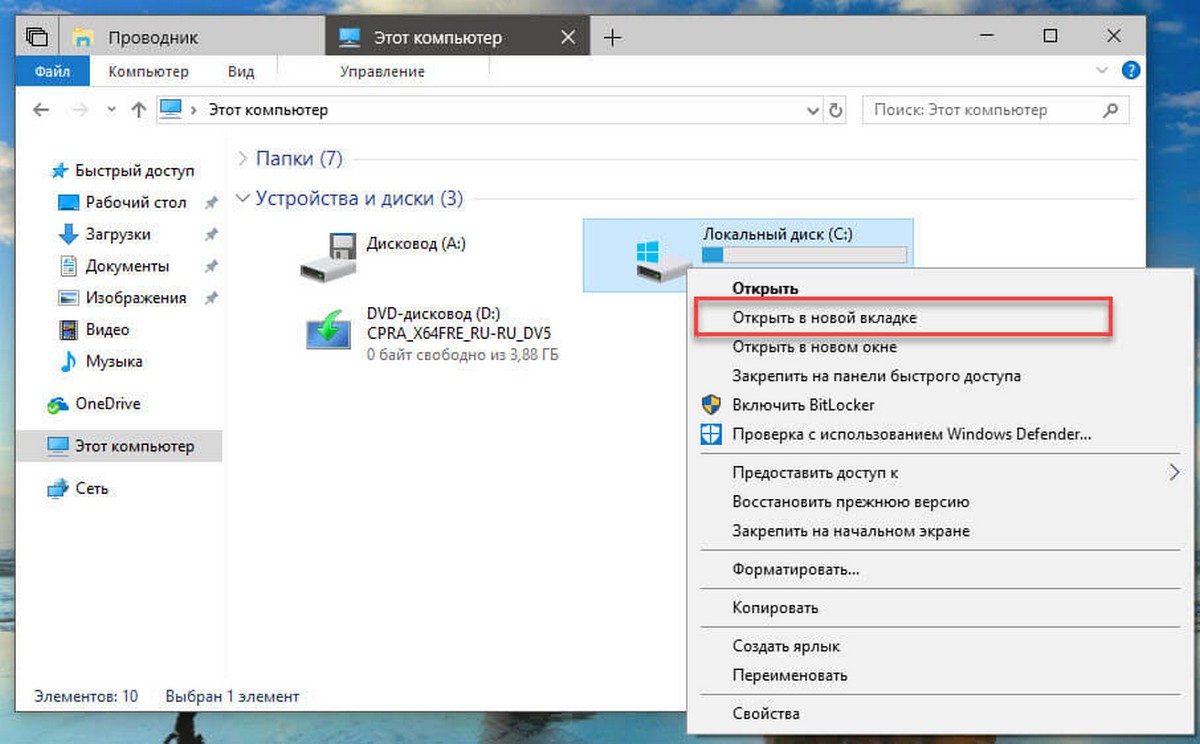
Или кликните правой кнопкой мыши по нужной папке и выберите в контекстном меню «Открыть в новой вкладке».
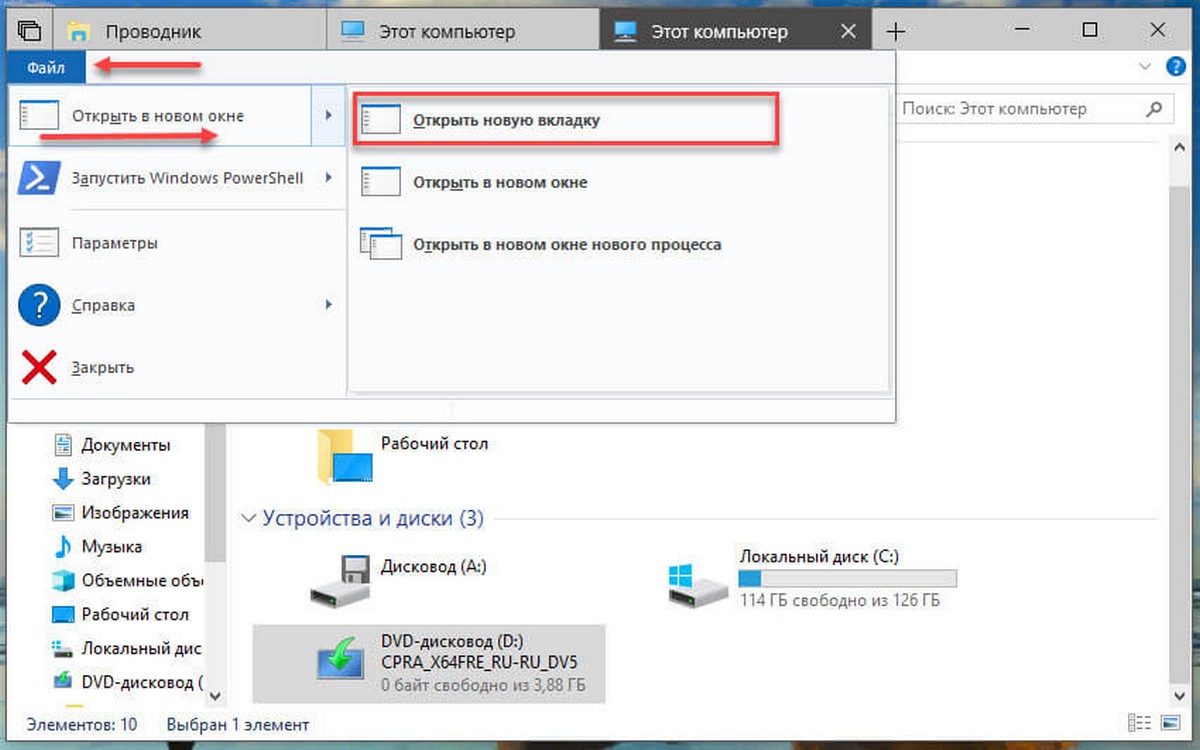
Наконец, вы можете кликнуть меню «Файл» в пользовательском интерфейсе ленты проводника (Ribbon) и выбрать «Открыть новое окно» → «Открыть новую вкладку».
Вы получите что-то вроде этого:
Примечание: Окончательная версия функции Вкладки будет доступна в Windows 10 Redstone 5. Но все может измениться, если Microsoft изменит приоритет новой функции Вкладки для выпуска с Redstone 4.
Возможно, вам будет интересно прочитать «Как исключить определенные приложения из наборов вкладок в Windows 10».