
Уровень сложностиПростой
Время на прочтение6 мин
Количество просмотров97K
Статья о том как установить себе «macOS Monterey» в виртуальной машине на обычном PC без покупки для этой цели макбука или айМака.
По идее это просто туториал как получить у себя на обычном PC систему macOS и Xcode, но так как я тут нахожусь в состоянии «Отхабренный» я могу отправлять статьи только в «Профильные хабы». По этой статье больше бы подошло «Tutorial», но такого хаба я не нашёл и поэтому выбрал наиболее близкие хабы по теме статьи: «Настройка Linux» и «Разработка под iOS». И КДПВ тоже я выбрал идиотскую — просто сделал скриншот со своего компа где продемонстировал версию macOS и версию установленного у меня Xcode.
Итак сама статья.
Понадобилась мне macOS внезапно, то есть не macOS, а конкретно Xcode. Но Xcode, гад, существует только в версии для macOS, поэтому и macOS понадобилась.
Никаких macbook и никаких iMac у меня нет, только обычный PC. Поэтому ничтоже сумняшеся, куда деваться, полез в интернеты, читать как можно заиметь macOS не покупая компьютер от Apple. Перерыл кучу ссылок. Hackintosh (https://hackintosh.com/) отмёл сразу, у меня компу уже лет семь и он по железу уже не подойдёт для установки Хакинтоша. Решил обойтись малой кровью — в виртуалке попробовать установить macOS. Так как платные программы не особо люблю, то искал исключительно установку макоси в VirtualBox ибо он бесплатен и у меня он уже был установлен.
Только вот не сработали у меня эти рекомендации и руководства из интернета. Вернее сработали, но я смог установить в VirtualBox лишь «macOS Catalina» трёхлетней давности, а более поздние версии macOS, то есть (в порядке повышения версий от «Catalina») ни «Big Sur», ни «Monterey», ни «Ventura», ни тем более бету «Sonoma» установить не удалось.
Делать нечего, установил я что удалось установить, то есть «Catalina». А в «Catalina», блин, в «Swift SDK» не оказалось тех функций которые мне были необходимы. Они появились в более позднем «Swift SDK», в версии для «iOS 16.0», которого для «macOS Catalina» три года назад ещё не существовало, в «Catalina» была максимальная версия «Swift SDK» для «iOS 14.0» и не выше. И подумал я тогда: «А чего это я как дурак сижу с установленной в виртуальной машине «macOS Catalina», которому уже три года и до сих пор старьё такое запускаю в котором «Swift SDK» не отвечает современным традициям, а Xcode 12.4, максимальная версия для «Catalina», даже отказывается читать современные исходники от Xcode четырнадцатой и пятнадцатой версии, посылает меня далеко и надолго? Надо бы мне постараться и ВИРТУАЛЬНУЮ macOS установить посвежее чем Catalina!». Подумал я так и… Сказано — СДЕЛАНО! Решил я сгруппировать все знания которые я до этого нашёл в интернете, добавить к ним до чего додумался сам и попробовать таки установить вместо «macOS Catalina» версию посвежее.
Сначала решил попробовать вместо бесплатного VirtualBox бесплатный VMware Player, в интернете прочёл что с ним проблем почему-то меньше в отношении именно macOS. Установил его и попробовал в нём последовательно, с понижением версии macOS, начиная с текущей и ниже до Catalina, установить следующее (начал со самой старшей на нынешнее время, с «Ventura». Ибо «Sonoma» хотя и самая распоследняя версия, но она пока ещё в бете находится, так что «macOS Ventura» пока что последняя АКТУАЛЬНАЯ версия на сегодняшний день):
-
«macOS Ventura» — не вышло, трапается в kernel panic при установке.
-
«macOS Monterey» — не вышло, уходит в бесконечный цикл «Система готова к установке, нажмите «Continue», далее я нажимаю «Agree» и «Continue», после «Monterey» час устанавливается, перегружается и опять выходит точно туда же, в самое начало установки: «Система готова к установке, нажмите «Continue».
-
«macOS Big Sur» — не вышло по причине того, что он как только перешёл в режим установки то сразу же мышь у меня в нём стала нажиматься с пяти раз хорошо если на шестой, а мышиный курсор двигался такими рывками, что я даже не смог ни разу нажать «Continue» для продолжения установки — пытаюсь выбрать язык системы в самом начале инсталляции, а после не могу мышь подвести к кнопке «Continue» — прыгает по экрану, бегает туда-сюда и всё, а мне не даётся! Минут пятнадцать попробовал мышь подвигать и плюнул я на этот «Big Sur».
-
«macOS Catalina» — вот он установился вообще без проблем, как до этого у меня установился в VirtualBox. Но это у меня и в VirtualBox до этого было, так что это не интересно, я хотел чтобы версия macOS была посвежее.
После посидел ещё немного, поразмышлял, подумал, скачал с торрентов уже не Player, а полноценный VMware Workstation Pro версии 17.0.0 и установил. Да, кракнутый. Но куда же деваться? Попробовал установить в него все версии macOS про которые высказался выше. Точно такая же фигня — или трап при установке, или выходит в бесконечный цикл при установке, или мышиный курсор вообще не адеватен — ни сдвинуть его толком, ни нажать — тормозит как не пойми что и прыгает по экрану так что не поймать. А вот Catalina опять установился «на ура», без проблем вообще. НО МНЕ ЖЕ НАДО БЫЛО ВЕРСИЮ ВЫШЕ ЧЕМ CATALINA!
Полез опять в интернеты, нашёл статью что в VMware просто так macOS не пойдёт, «VMware Workstation» изначально заточен на Linux, Windows, Solaris, QNX и т.д., а мудрая фирма Apple запретила товарищам из VMware делать официальную виртуализацию macOS потому что фирма Apple хочет ЕДИНОЛИЧНО владеть всеми OS’ами и никому их не хочет давать, даже виртуализировано. Полазил по интернетам подальше, нашёл «VMware Unlocker» специально для гостевых систем от Apple чтобы «VMware Workstation» мог воспринимать macOS. Скачал. Пропатчил свой «VMware Workstation». Повторил свою эпопею по установке macOS начиная от текущей версии Ventura и понижая номер версии если установка окончилась фейлом.
-
«macOS Ventura» — опять не вышло, теперь Ventura как ранее Monterey уходит в бесконечный цикл «Система готова к установке, нажмите «Continue», я нажимаю, Ventura полтора часа устанавливается, перегружается и опять: «Система готова к установке, нажмите «Continue»
-
«macOS Monterey» — УРА! ВЫШЛО! УСТАНОВИЛСЯ! Патч от «VMware Unlocker» реально помог!
Но я решил пойти дальше, решил попробовать проапгрейдить Monterey штатным, в нём же предусмотренным способом до Ventura. Зашёл уже в свежеустановленном «macOS Monterey» в апдейты и сказал ему обновиться до Ventura. В результате он скачал образ Ventura, минут сорок после этого его устанавливал, обновлялся, пошёл на перезагрузку и БАЦ! Опять! Опять бутлуп, «Система выполнила некорректную операцию. Нажмите любую клавишу для перезагрузки или подождите несколько секунд для автоматической перезагрузки». И всё, начался бесконечный цикл таких перезагрузок.
Восстановил опять «macOS Monterey» из предварительно сделанного бекапа (ведь известно что пользователи компов деляться на три типа: первые это те кто ещё не делает резервные копии, вторые это те, кто уже делает, и третьи это те, кто восстанавливает систему из сделанных копий — вот я оказался в третьей категории, восстановил ранее сделанный бекап «macOS Monterey»). После восстановления попробовал опять средствами самого macOS зайти в апдейты, но попросил теперь обновить «macOS Monterey» не до Ventura, которая macOS 13, а до более новой версии самого Monterey — у меня он установился 12.0.1, а апгрейд предлагал его обновить до версии 12.6.9
И он, блин, прекрасно обновился до версии 12.6.9, прекрасно перезагрузился и прекрасно заработал! Без всяких кернел паников и без бутлупов!
Установил себе на него Xcode 14.2, это конечно не как на Ventura можно поставить Xcode 15, но 14.2 это всё же не 12.4 как у меня на Catalina было. Да и «Swift SDK» установился для «iOS 16.0».
И да, в VMware Workstation macOS, даже Catalina, работает чисто субъективно побыстрее чем в VirtualBox. Не знаю почему.
В общем получил я у себя полноценную более-менее последнюю версию macOS, пусть не «Ventura», а предыдущая до «Ventura» версия, но всё не «Catalina» времён динозавров и умерших давно мамонтов.
Так что просидел я с восьми утра одного дня до восьми утра следующего дня, безвылазно сидел за компом, 24 часа получается, практически не вылезая из него. Давно я такие «компьютерные марафоны» не совершал, с 90-х годов.
В процессе этого моего дневно-ночного изыскания ни одно животное не пострадало  Все произведённые операции выполнялись на моей основной системе «Fedora Linux 38», на Windows не проверял за неимением Windows, но думаю что на Windows это пройдёт без особых изменений, так же — я лично не вижу никакой разницы.
Предупреждаю что ссылки по которым я брал весь описанный выше софт я не скажу. Вернее бесплатные скажу, а те, по которым платный софт не скажу (в принципе я же названия этого софта озвучил выше, так что кому надо тот по названиям в интернете найдёт). Перечисляю ниже софт в порядке его установки, то есть софт под номером 2 должен быть установлен после софта под номером 1, а софт под номером 3 должен быть установлен соответственно после софта под номером 2.
-
VMware Workstation Pro 17.0.0 (ссылку не скажу т.к. это платная версия, ищите сами по названию)
-
VMware Unlocker, это open source, так что тут пожалуйте ссылку:
https://github.com/paolo-projects/unlocker
Он и под Windows, и под Linux. На версии VMware Workstation Pro 17.0.0 под Linux работает точно, проверено лично.
-
Образ непосредственно «macOS Monterey» версии 12.0.1 тоже ищите сами в интернете, Apple хочет за это денег поэтому ссылку не дам, но находится этот образ довольно легко.
-
И ОБЯЗАТЕЛЬНО после установки ( ПОСЛЕ УСТАНОВКИ !!! ) «macOS Monterey» в «VMware Workstation» установить «VMware Tools». Иначе не будет ни копирования через клипборд из гостевой машины в виртуальную и обратно, и разрешение в гостевой машине «macOS Monterey» будет только 1024×768 и поменять его никак. Но официально скачать с сайта VMware эти «VMware Tools» проблематично: VMware хочет чтобы вы сначала зарегистрировались, а после неделю не даёт ничего скачивать, типа «проверяет ваши данные». А через неделю вполне может дать отлуп по причине того что VMware, к примеру, не понравилась одна буква в вашей фамилии. На «VMware Tools» тоже ссылку не дам потому что это «за регистрацию» на сайте VMware и за их ПЛАТНЫЙ «VMware Workstation», а совсем не просто так, но в интернете находится где скачать эти пресловутые «VMware Tools» для гостевой системы macOS тоже элементарно, по словам «VMware Tools».
После установки macOS надо будет ПРЯМО ИЗ ЭТОЙ ВИРТУЛЬНОЙ МАШИНЫ скачать этот «VMware Tools for macOS», запустить и согласиться со всеми пунктами установки.
Ну вот в принципе. Вот я и всё сказал. Такой вот маленький tutorial получился.
How to install macOS Catalina 10.15 on VirtualBox under Windows.
Small tutorial with all the sources that allowed me to install MacOS Catalina on VirtualBox under Windows.
This tutorial explains how to install macOS Catalina on a virtual machine. Customizable resolution and video memory.
Do not hesitate to open an exit in case of a problem or for any technical question.
Prerequisites
VirtualBox
- Go to this website and download VirtualBox and the Extension Pack.
- Once downloaded, install VirtualBox and the Extension Pack.
Required files
All the necessary files except VirtualBox, the Extension Pack and the macOS ISO are available by downloading the repository.
- Download the ISO of macOS Catalina 10.15 (8.3GB).
- Download the VMware Tools.iso file.
- Download the Boot.vmdk file.
Activate the Virtualization Technology
The virtualization technology is available for Intel and AMD processors under different names. For Intel, it is named VT-X and for AMD, it is named AMD-V. This technology must be enabled in order to run macOS Catalina on VirtualBox.
To activate the virtualization technology option, you need to access either the BIOS or the UEFI of your computer. In order to do this, you need to know the key·s required when booting your PC. It can be one of these keys: F1, F2, F10, F12, or DEL (may require pressing the Fn key).
How to activate Intel’s VT-X virtualization technology?
Once on your BIOS or UEFI, you need to find the Virtualization Technology, VT-X or VT option which is usually found in the Advanced options. Make sure you set this option to Enabled.
How to activate AMD’s AMD-V virtualization technology?
Once on your BIOS or UEFI, you need to find the Secure Virtual Machine Mode, AMD-V or SVM Mode option which is usually found in the Advanced options. Make sure you set this option to Enabled.
How do I know if virtualization technology is enabled on my computer?
Open the Task Manager and in the Performance tab check the Virtualization field is enabled.
Configuration of the virtual machine
-
Run VirtualBox.
-
Create a new virtual machine. Enter the name you want, select Mac OS X for the type and Mac OS X (64-bit) for the version.
-
Select the amount of RAM. The minimum is 4096MB, but for best performance, I recommend setting it to 8192MB.
-
Create a VDI virtual disk with a fixed size and a minimum of 80GB.
-
Click on your virtual machine and open the Settings options.
- In System ➜ Motherboard, set the Chipset to PIIX3.
- In System ➜ Processor, set the number of CPUs to a minimum of 2.
- In Display ➜ Screen, set the Graphics Controller to VMSVGA.
- In USB, enable the USB controller and check USB 3.0 (xHCI) Controller.
- In Storage, click on the disk button with a green
+and add the macOS Catalina ISO file. - In Storage, click on the hard disk button with a green
+and add theBoot.vmdkfile.
-
Click OK to confirm the changes.
-
Open a command prompt as administrator and type these commands:
Make sure to replace theVirtual Machinewith the name of your virtual machine.cd "C:/Program Files/Oracle/VirtualBox/" VBoxManage.exe modifyvm "Virtual Machine" --cpuidset 00000001 000106e5 00100800 0098e3fd bfebfbff VBoxManage.exe setextradata "Virtual Machine" "VBoxInternal/Devices/efi/0/Config/DmiSystemProduct" "iMac11,3" VBoxManage.exe setextradata "Virtual Machine" "VBoxInternal/Devices/efi/0/Config/DmiSystemVersion" "1.0" VBoxManage.exe setextradata "Virtual Machine" "VBoxInternal/Devices/efi/0/Config/DmiBoardProduct" "Iloveapple" VBoxManage.exe setextradata "Virtual Machine" "VBoxInternal/Devices/smc/0/Config/DeviceKey" "ourhardworkbythesewordsguardedpleasedontsteal(c)AppleComputerInc" VBoxManage.exe setextradata "Virtual Machine" VBoxInternal2/EfiGraphicsResolution 1920x1080 VBoxManage.exe modifyvm "Virtual Machine" --vram 256The values in the last two lines can be changed.
- The first is the resolution. It can be:
1280×720,1920×1080,2560×1440,2048×1080,3840×2160,5120×2880. - The second is the video memory. It can be a number between 0 and 256. The minimum is 128 and the best is 256.
- The first is the resolution. It can be:
Installation of macOS on the virtual machine
- Start the virtual machine.
- After a few lines of white text on a black background, the macOS installation screen for Catalina should appear.
- Select your language.
- Click on Disk Utility and format the
VBOX HARDDISK Media. - Close the tab and click on Install macOS.
- Continue and accept the terms of the software license agreement.
- Select the hard drive and click Install.
- Important step: during the automatic restart of the virtual machine, stop it.
- Restart the virtual machine and press the
Esckey to open the BIOS. - Move to the Boot Manager menu with the arrow keys and select EFI Internal Shell.
- A few random yellow, gray and white texts should appear. Press
Escand it should get toShell> _. - Type
install.nshand pressEnter. - After a few moments, you will be on the macOS Catalina configuration pages.
- Follow the basic configuration steps and you will be on the macOS Catalina desktop as soon as possible.
Change resolution and video memory
-
Shut down the virtual machine.
-
Open the Settings options and in Storage, eject the macOS Catalina ISO file.
Then click on the disk button with a green+and add theVMware Tools.isofile. -
Restart the virtual machine.
-
Double-click on the VMWare Tools disk and click on Install VMWare Tools.
-
The extension should be blocked, so open the Security and Privacy section in the System Preferences and click Open anyway.
-
Once the installation is complete, restart the virtual machine. Note that the installation may need to be performed twice.
-
Open the Terminal application and type this command:
Replace the1920 1080value with the same value as the screen resolution you set earlier.sudo /Library/Application\ Support/VMware\ Tools/vmware-resolutionSet 1920 1080 -
To automate this command every time you start your system, open the Automator application.
-
Choose Application, open Utilities and add Run Shell Script.
-
Set the Shell to
/bin/bashand type this command line:
Replace the valuepasswordwith the macOS password for your virtual machine.
Replace the1920 1080value with the same value as the screen resolution you set earlier.echo "password" | sudo -S /Library/Application\ Support/VMware\ Tools/vmware-resolutionSet 1920 1080 -
Click on file and save it in Applications.
-
Open the System Preferences and click on Users & Groups.
-
In Login Items, click on the
+button and add the application.
Sources
- French website — Comment installer macOS Catalina 10.15 sur VirtualBox sur Windows?
https://www.tech2tech.fr/comment-installer-macos-catalina-10-15-sur-virtualbox-sur-windows - How to change screen resolution of macOS on VirtualBox?
https://techsviewer.com/how-to-change-screen-resolution-of-macos-on-virtualbox - How to increase the display memory to 256 MB and change the screen resolution under macOS Catalina on VirtualBox?
https://www.youtube.com/watch?v=gDwFdGUsBOo
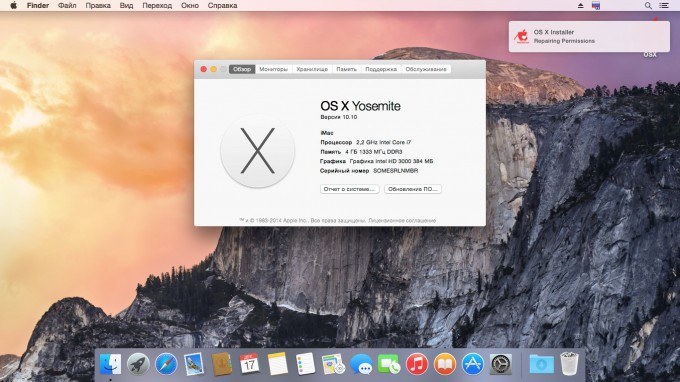
Mac, как и вся продукция Apple, отличается безупречным качеством исполнения. За это её чтят и любят, но есть люди, которые сомневаются в покупке данного аппарата. Безусловно, каждый может зайти в любой «реселлерский» магазин и посмотреть в живую на технику Apple, но не всем хватает на это времени. Именно для них (да и просто для любознательных) создана эта инструкция.
Познакомимся с операционной системой с OS X Yosemite через ваш домашний ПК посредством виртуальной машины. Не считая времени загрузки, процесс установки и настройки займет у вас не более получаса!
Внимание: исходя из политики Apple, данная операционная система не устанавливается на продукцию других компаний. Поэтому нам придется использовать сторонний образ ОС, созданный на основе оригинального. Всё, что вы делаете, вы делаете на свой страх и риск.
Лучшая виртуальная машина для нашей задачи – VirtualBox. Она достаточно мощная, имеет простой интерфейс, да и бесплатная.
Для работы данного метода убедитесь в том, что ваш процессор поддерживает технологию виртуализации (этот параметр включается в БИОСЕ).
Загрузка, установка и настройка дистрибутива
1. Загружаем дистрибутив с официального сайта. Нам нужна VirtualBox 4.3.26 for Windows hosts.

2. Во время установки программа вас оповестит о том, что ей требуется установить некоторые патчи для сети, чтобы интернет мог работать на виртуальной машине. Нажимаем “Yes” и ждём окончания установки утилиты.
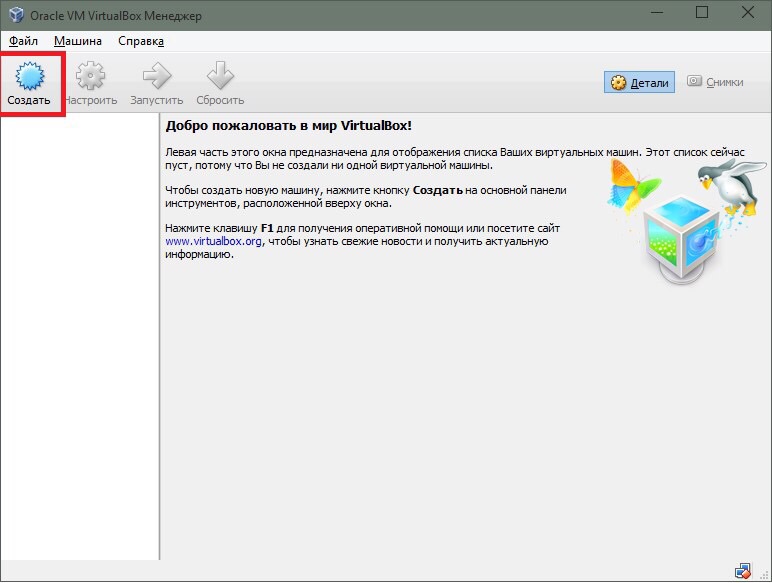
3. После установки открываем программу и мы видим окно приветствия. Нажимаем кнопку «Создать». Перед нами появляется окошко первоначальной настройки будущей операционной системы.
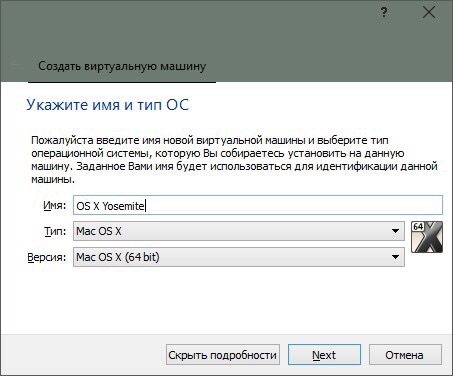
4. Называем нашу виртуальную машину и указываем тип OS X (32 bit/64 bit на выбор).
Памятка: если вам нужна будет «ось» для дальнейшего пользования и у вас 64-битный процессор, то не выставляйте настройки под 32-битную систему для 64-битных приложений. 64-битная ось медленнее запускает 32-битные приложения (OS X Yosemite работает исключительно на х64 процессорах).
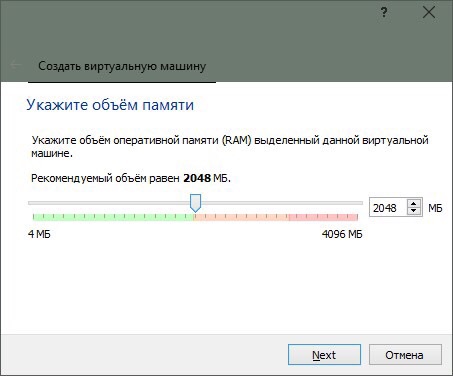
5. Указываем, сколько требуется оперативной памяти для системы. По-хорошему, ей нужно не более 4ГБ ОЗУ, но можно и больше, в зависимости от ресурсов вашего ПК. Я задал 4 ГБ.
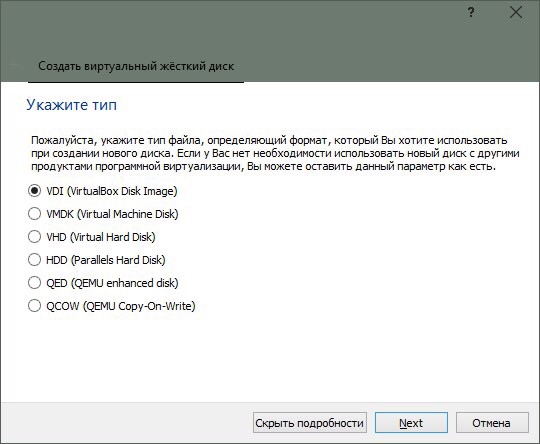
6. Нам также потребуется создать виртуальный жёсткий диск для нашей будущей машины. Именно на нём будут храниться все файлы ОС и всё то, что вы на ней будете создавать. Он берёт от физического «харда» лишь часть, размер которой вы задаёте сами. Выбираем первый пункт и идём дальше.
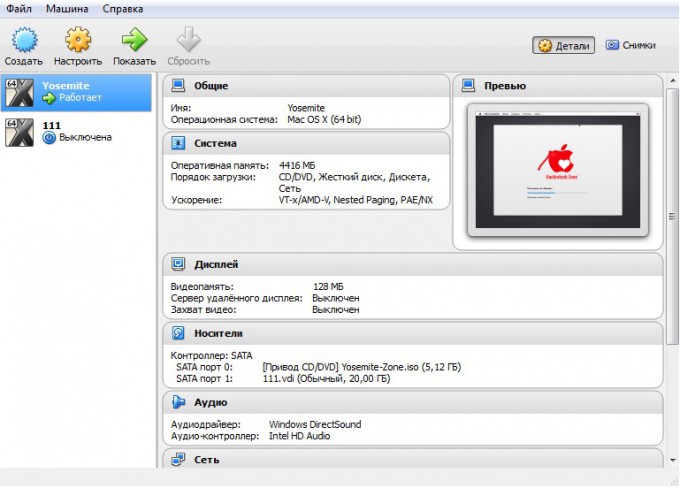
7. После этого заходим в раздел «Настройки->Система» и отключаем там EFI.
8. Теперь остается лишь запустить на ней OS X Yosemite. Нажимаем «Запустить» и в открывшемся диалоговом окне выбираем необходимый образ.
Памятка: для пущей верности можно задать для программы эмуляцию ноутбука от Apple. Открываем командную строку Windows (cmd.exe) и вставить:
1. cd C:\Program Files(x86)\Oracle\Virtualbox\ (стандартный путь установки)
2. VBoxManage setextradata *название_вашей_виртуальной_машины* VBoxInternal2/SmcDeviceKey “ourhardworkbythesewordsguardedpleasedontsteal(c)AppleComputerInc”
Установка и запуск OS X Yosemite
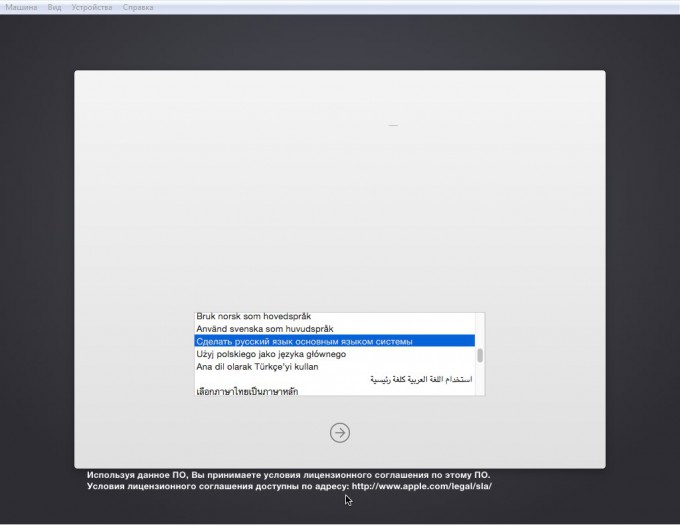
Итак, наша система загружается.
1. Выбираем русский язык и переходим к следующему шагу – настройке жёсткого диска для «операционки». Так как он создается изначально в файловой системе NTFS (которая не работает с OS X), нам придется немного «пошаманить».
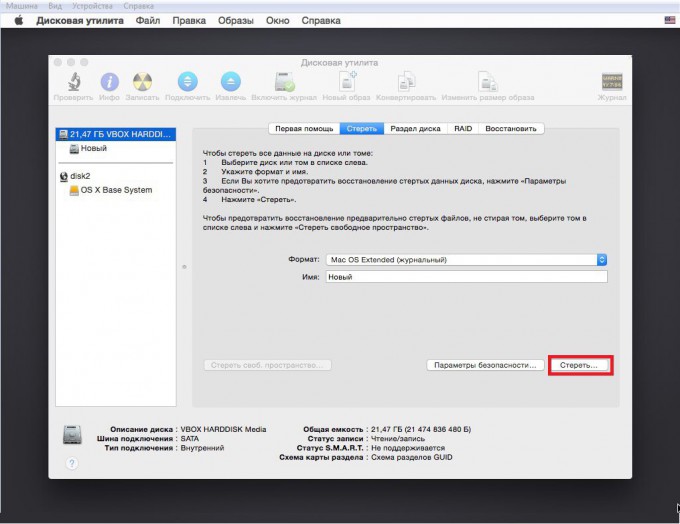
2. В верхней панели заходим в «Утилиты->Дисковая утилита». В левом крае экрана выбираем наш новоиспечённый жёсткий диск, на который будет производиться установка, затем в правой части окна открываем вкладку «Стереть» и стираем диск. После этого в нём будет создан чистый раздел под ОС.
3. Переходим в верхнем «тулбаре» обратно в установщик (нажимаем на «Дисковая утилита» и выбираем «OS X Installer») указываем только что отформатированный под наши нужды «хард», жмём «Продолжить» и ожидаем окончания установки.
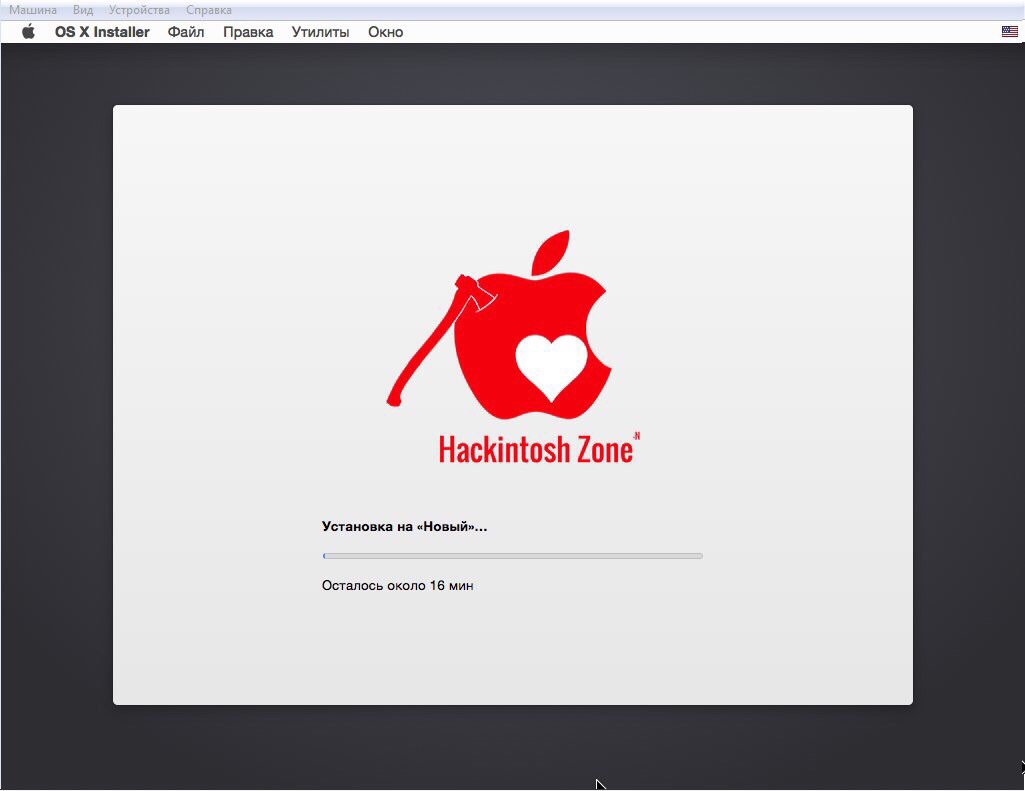
4. И вот, момент истины – OS X Yosemite готова к работе!
Пропускаем этап авторизации через iCloud, задаём логин/пароль для пользователя и, пожалуй, на этом всё.
Вот и всё! Добро пожаловать в дивный новый мир OS X. Делитесь вашим опытом работы с ОС от Apple в комментариях
(25 голосов, общий рейтинг: 4.08 из 5)
iPhones.ru
Mac, как и вся продукция Apple, отличается безупречным качеством исполнения. За это её чтят и любят, но есть люди, которые сомневаются в покупке данного аппарата. Безусловно, каждый может зайти в любой «реселлерский» магазин и посмотреть в живую на технику Apple, но не всем хватает на это времени. Именно для них (да и просто для любознательных)…
Артём Баусов
@Dralker
Главный по новостям, кликбейту и опечаткам. Люблю электротехнику и занимаюсь огненной магией.
По всем вопросам пишите в Telegram: @TemaBausov
О преимуществах и недостатках macOS можно долго спорить, однако лучший вариант в них разобраться – попробовать самому. Для этого вовсе не обязательно покупать дорогостоящую технику — можно воспользоваться одним из нескольких эмуляторов, представленных далее.
Строго говоря, полноценного эмулятора macOS в прямом смысле слова на Windows 10 нет: операционная система от Эппл обладает сопоставимыми с этой ОС системными требованиями, отчего эмулятор если и появится, то будет требовать мощное «железо» для работы. Тем не менее, всегда можно воспользоваться средством запуска виртуальных машин, которых существует две: Oracle Virtualbox и VMware Workstation Player. Начнём с последнего.
VMware Workstation Player
Решение от компании VMware, бесплатное для некоммерческого использования, известно богатыми возможностями по установке гостевой системы и работе с ней. В целом интерфейс этой программы выглядит более продуманным и удобным для конечного пользователя.
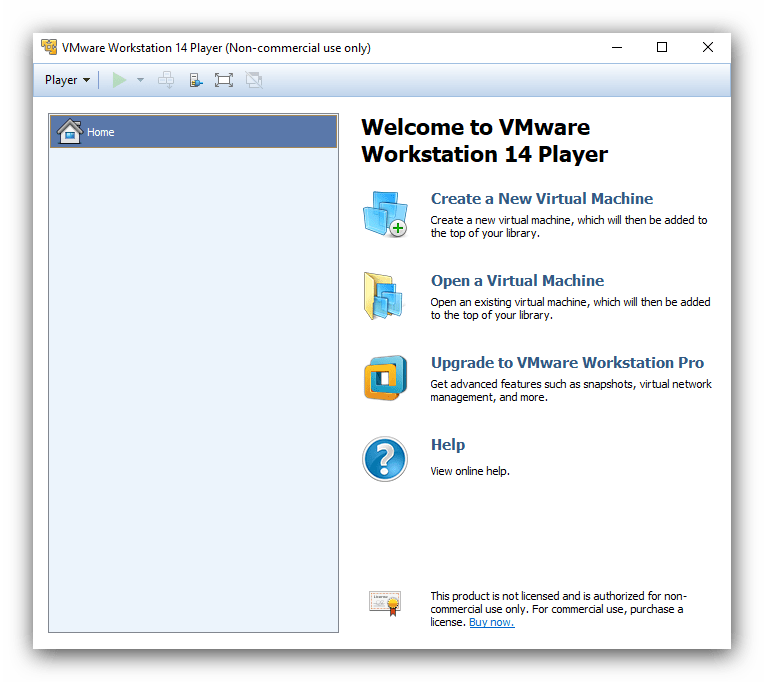
Программа удобна в настройке и использовании, однако русская локализация отсутствует. В отличие от Virtualbox, о которой далее мы еще расскажем, рассматриваемая программа позволяет создавать новую виртуальную машину без установки ОС, что требуется для некоторых специфических версий «яблочной» операционки. Также можно задать динамический виртуальный накопитель или сделать его в виде частей.
Кроме того, в пользу ВМваре говорит и улучшенная в сравнении с конкурентом поддержка трёхмерной графики и средств для разработчиков. Впрочем, функцией создания виртуальной среды по шаблону для макОС воспользоваться не получится, всё нужно настраивать вручную. Здесь пользователям пригодится самостоятельный ввод ID процессора, что важно для пользователей компьютеров с процессорами AMD, которые «яблоком» не поддерживаются.
Если говорить о недостатках, то они, увы, есть. Кроме отсутствия русского языка в интерфейсе и невозможности создания по шаблону отметим также нехватку функции снимков состояния (доступно в платной Pro-версии) и проблемы с запуском macOS на компьютерах с процессором от AMD.
Скачать VMware Workstation Player
Oracle VirtualBox
Средство VirtualBox от Oracle на просторах СНГ более известно, чем предыдущее решение и, следовательно, более популярно. Первая причина популярности – модель распространения приложения и открытый исходный код. Вторая – полная и качественная локализация на русский язык.

Рассматриваемое решение выгодно отличается от VMware Workstation Player официальной поддержкой macOS – правда, только на хостах с другой системой от Apple. Впрочем, и в версии для Windows 10 установка «яблок» возможна без особого труда, но в этом случае не надейтесь получить поддержку на официальном сайте Oracle. Конкретно поддерживаемая версия макОС ограничивается Snow Leopard или High Sierra на 32- или 64-битных версиях Виндовс соответственно, однако новейшую Catalina тоже можно установить, пусть и не без труда.
Читайте также: Установка macOS на VirtualBox
ВиртуалБокс имеет множество тонких настроек, в которых новичок наверняка запутается, но специалист сумеет тонко сконфигурировать среду под свои нужды. Для тех, кто не привык заморачиваться с настройкой, присутствует возможность загрузить готовую машину и импортировать её в программу, что порой представляет собой единственный выход для пользователей некоторых специфических конфигураций ПК.

Говоря о минусах, упомянем нестабильность – в релиз стараются выпускать хорошо протестированные версии, однако порой случаются накладки. Также отметим трудности в установке macOS: если в VMware всё можно прописать заранее в опциях самой программы, то в VirtualBox не обойтись без задействования командной строки. Кроме того, работа с 3D-графикой в виртуальной среде с ОС от Apple не поддерживается
Скачать Oracle VirtualBox
Заключение
Таким образом, мы познакомились с двумя решениями для эмуляции macOS на Windows 10. Как видим, ни один, ни другой не обеспечивают полноценного опыта использования макОС, однако «виртуалки» вполне достаточно для проверки, готов ли пользователь перейти на устройство с этой системой.
Наша группа в TelegramПолезные советы и помощь
Quick Links
-
What Files Do You Need to Create a macOS Virtual Machine on Windows 10 and Windows 11?
-
Download macOS Monterey Virtual Image
-
How to Create a macOS Monterey Virtual Machine With VirtualBox
-
How to Create a macOS Monterey Virtual Machine Using VMware Workstation Player
-
macOS Virtual Machines for AMD Hardware
-
macOS Monterey Virtual Machine Installation Complete
Windows 10 and Windows 11 are great operating systems. They have their quirks and annoyances, but which operating system doesn’t? Even if you’re beholden to Microsoft and Windows, you can still shop around.
What better way to do that than from the safe confines of your existing operating system with a virtual machine? This way, you can run macOS on Windows, which is perfect for using Mac-only apps on Windows.
So, here’s how you install macOS in a virtual machine on Windows, making a virtual Hackintosh that lets you run Apple apps from your Windows machine.
The instructions for installing the macOS virtual machine still work, but this article is no longer updated as of February 2025.
What Files Do You Need to Create a macOS Virtual Machine on Windows 10 and Windows 11?
Before delving into the «how-to,» you need to download and install the essential tools. The tutorial details how to create macOS virtual machines using both Oracle VirtualBox Manager (VirtualBox) and VMware Workstation Player (VMware Player).
- Download the latest version of VirtualBox
- Download the latest version of VMware Player
You need a copy of macOS, too. Although macOS Sequuoia (macOS 15) is the latest version of the operating system at the time of writing, it’s easier to install a previous version, macOS Monterey, in a virtual machine on Windows. As such, this guide will focus on installing macOS Monterey in a virtual machine running on Intel and AMD hardware, using either VirtualBox or VMware Player.
The code snippets that an AMD system requires to boot a macOS Monterey using VMware on AMD hardware differ from the Intel code, but you can find the tutorial and the code snippet in the sections below.
Something else to note before you get stuck into the macOS virtual machine tutorials is that I found it much easier to log in to my iCloud account on the VMware Player virtual machine compared to the VirtualBox virtual machine. Your mileage is highly likely to vary, and unfortunately, although this is a working version of macOS on Windows, not all of the features you’re installing macOS for will work.
Download macOS Monterey Virtual Image
Use the download links below to download the macOS Monterey image for both VirtualBox and VMware.
Download: macOS Monterey Virtual Machine Image
Download: VMware Player Patch Tool
Once your download finishes, right-click the file and select «Extract to macOS Monterey» using an archive tool like WinZip or 7-Zip.
How to Create a macOS Monterey Virtual Machine With VirtualBox
Before creating the macOS virtual machine, install the VirtualBox Extension Pack. It includes fixes for USB 3.0 support, mouse and keyboard support, and other useful VirtualBox patches.
Download: VirtualBox Extension Pack for Windows (Free)
Scroll down, select All supported platforms to download, then double-click to install.
1. Create the macOS Monterey Virtual Machine
These instructions detail how to install a macOS Monterey virtual machine in VirtualBox on an Intel-based machine.

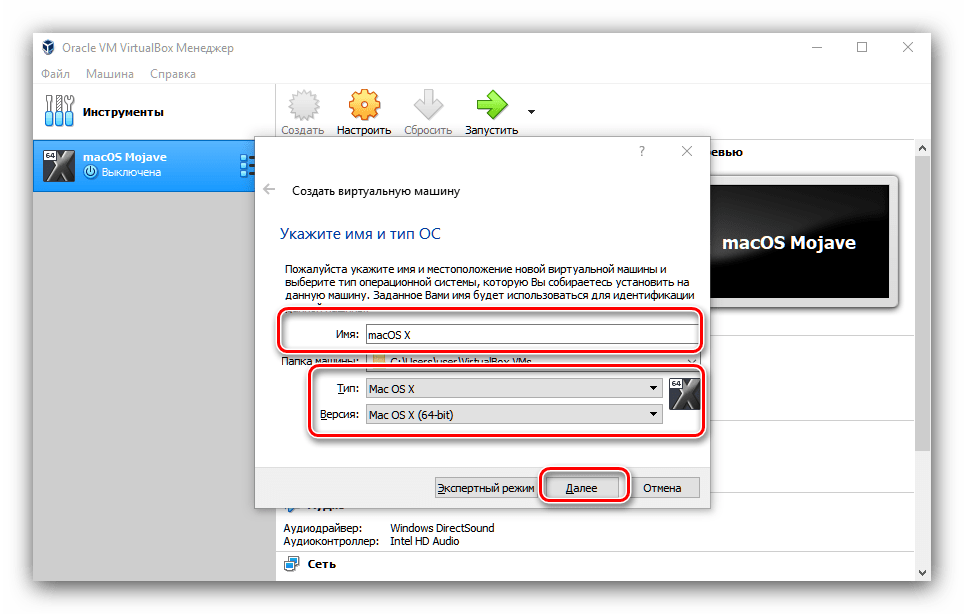
- Open VirtualBox. Select New. Type macOS. VirtualBox will detect the OS as you type and will default to Mac OS X. You can leave this as is.
- Regarding the virtual machine name, make it something memorable yet easy to type. You’ll need to input this name in a series of commands, and it is frustrating to type a complicated name multiple times!
- Next, set the amount of RAM the macOS virtual machine can use. I would suggest a minimum of 4GB, but the more you can give from the host system, the better your experience.
- Remember, you cannot assign more RAM than your system has available, and you need to leave some memory available for the host operating system.
- Now, select Create a hard disk now and select Create. On the next screen, select Virtual Hard Disk, then set the disk size to a minimum of 50GB, but ideally more if you can spare the space.
macOS Monterey requires at least 35GB of storage.
2. Edit the macOS Monterey Virtual Machine Settings
Don’t try to start your macOS Monterey virtual machine yet. Before firing the virtual machine up, you need to make a few tweaks to the settings. Right-click your macOS virtual machine and select Settings.
- Under System, remove Floppy from the boot order. Ensure the Chipset is set to ICH9.
- Select the Processor tab. Assign two processors. If you have a CPU with power to spare (such as an Intel Core i7 or i9 with multiple extra cores), consider assigning more. However, this isn’t vital.
- Make sure the Enable PAE/NX box is checked.
- Under Display, set Video Memory to 128MB.
- Now, under Storage, select the blank disc under Storage Devices. Next, select the disk icon alongside Optical Drives. Browse to and select your macOS Monterey disk image.
- Finally, head to the USB tab and select USB 3.0, then press OK.
3. Use the Command Prompt to Add Custom Code to VirtualBox
It still isn’t quite time to fire up your macOS Monterey virtual machine. In its current configuration, VirtualBox doesn’t work with your macOS disk image.
To get it up and running, you have to essentially patch VirtualBox before the macOS virtual machine will function. To do this, you need to enter some code using the Command Prompt. All the details are below.
Start by closing VirtualBox. The commands will not execute properly if VirtualBox or any associated processes are running. Once closed, press the Windows key + X, then select Command Prompt (Admin) from the menu.
If your menu only shows the PowerShell (or Windows Terminal option on Windows 11), type command into your Start menu search bar. Next, right-click the Best Match, and select Run as Administrator.
Use the following command to locate the Oracle VirtualBox directory:
cd "C:\Program Files\Oracle\VirtualBox\"
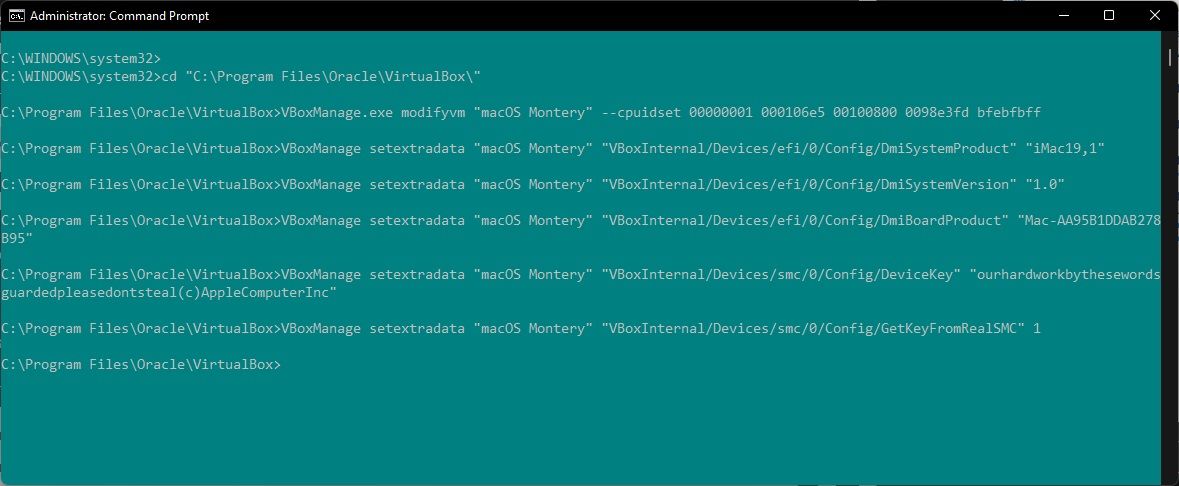
Now, enter the following commands one by one. Adjust the command to match the name of your virtual machine. For instance, my virtual machine name is macOS Monterey. Here are the commands:
        VBoxManage.exe modifyvm "macOS Monterey" --cpuidset 00000001 000106e5 00100800 0098e3fd bfebfbff
VBoxManage setextradata "macOS Monterey" "VBoxInternal/Devices/efi/0/Config/DmiSystemProduct" "iMac19,1"
VBoxManage setextradata "macOS Monterey" "VBoxInternal/Devices/efi/0/Config/DmiSystemVersion" "1.0"
VBoxManage setextradata "macOS Monterey" "VBoxInternal/Devices/efi/0/Config/DmiBoardProduct" "Mac-AA95B1DDAB278B95"
VBoxManage setextradata "macOS Monterey" "VBoxInternal/Devices/smc/0/Config/DeviceKey" "ourhardworkbythesewordsguardedpleasedontsteal(c)AppleComputerInc"
VBoxManage setextradata "macOS Monterey" "VBoxInternal/Devices/smc/0/Config/GetKeyFromRealSMC" 1
After the completion of the commands and presuming you encountered no errors, close the Command Prompt.
4. Boot Your macOS Monterey Virtual Machine
Reopen VirtualBox. Double-click your macOS virtual machine to start it. You will see a long stream of text, followed by the Apple logo. On the next screen, select your language of choice, then Continue.
- Next, select Disk Utility. You create a clean drive for macOS Monterey to install to.
- In the Disk Utility, select VBOX HARDDISK MEDIA from the Internal drive column.
- After selecting the drive, head to the Erase option found at the top of the utility.
- Give your drive a name, set the Format to Mac OS Extended (Journaled), and the Scheme to GUID Partition Map.
- Select Erase.
- Once complete, you can exit the Disk Utility back to the Monterey recovery screen. From here, you should select Install macOS Monterey.
- Select the drive you created in the Disk Utility, followed by Continue.
At this point, the installation says it’ll take a few minutes. However, in my experience, this isn’t correct. The initial installation phase took around 15 minutes, but then you land on a second installation screen after the macOS Monterey virtual machine restarts.
The initial installation time on that screen begins at around 29 minutes. However, once it reaches Less than a minute remaining and you get your hopes up—don’t.
It took another two hours for the installation to complete from this point, but I’ve also read reports of people waiting for upwards of three or four hours. Worse, there is no way to tell if the installation is ongoing or if you’re just wasting your time.
If you can afford the time, leave it for several hours, and hopefully, when you come back, you’ll be staring at the macOS Monterey Welcome page.
5. Take a macOS Monterey Virtual Machine Snapshot
Once you complete the macOS setup, take a snapshot within VirtualBox. Head to Machine > Take Snapshot, give your snapshot a name, and wait for it to process. If anything breaks or the Monterey virtual machine corrupts, you can head back to the snapshot to restore your previously good installation.
But the virtual machine snapshot is just a backup precaution. You can close your macOS virtual machine as you would with your regular computer, as the macOS virtual machine is installed on its own storage device.
How to Create a macOS Monterey Virtual Machine Using VMware Workstation Player
Prefer VMware over VirtualBox? You can create a macOS Monterey virtual machine using VMware that works exactly the same as VirtualBox. And, just as with VirtualBox, VMware also requires patching before the macOS Monterey virtual machine will work.
This part of the tutorial works for Intel and AMD systems. AMD users must use the second code snippet when editing the virtual machine VMX file. Read through the tutorial to see what this means exactly.
1. Patch VMware Workstation Player
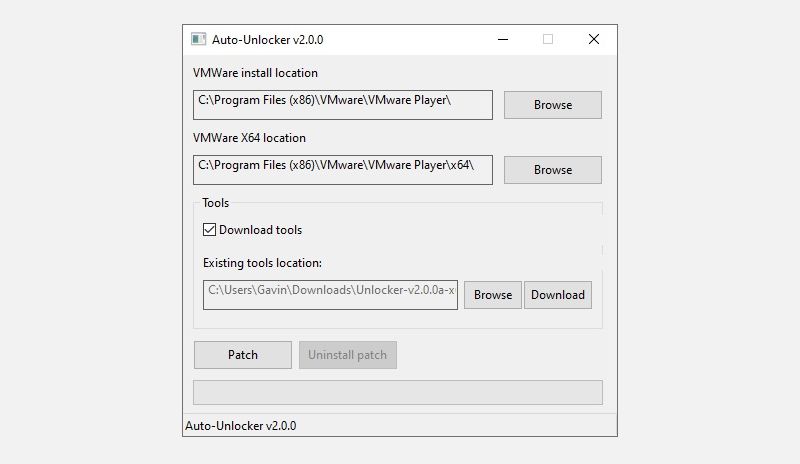
In the «Download macOS Monterey Virtual Image» section is the VMware Player Patch Tool. Before commencing any further, download the latest version of the patch tool.
- Browse to the location you downloaded the patch tool to. Extract the contents of the archive. This process works best when the folders are on the same drive (e.g., the VMware root folder and extracted archive are both found on the C:\ drive).
- Make sure VMware is completely closed. In the Unlocker folder, right-click the win-install command script and select Run as Administrator. The script will open a Command Prompt window, and the patch script will run.
Do pay attention. The script whizzes by, and you need to keep watch for any «File not Found» messages.
The most common reason for a «file not found» or a «system cannot find the file specified» message is installing VMware Workstation Player in a different location to the default folder and executing the patch from a different directory.
Once the patch completes, you can open VMware.
2. Create the macOS Monterey Virtual Machine with VMware
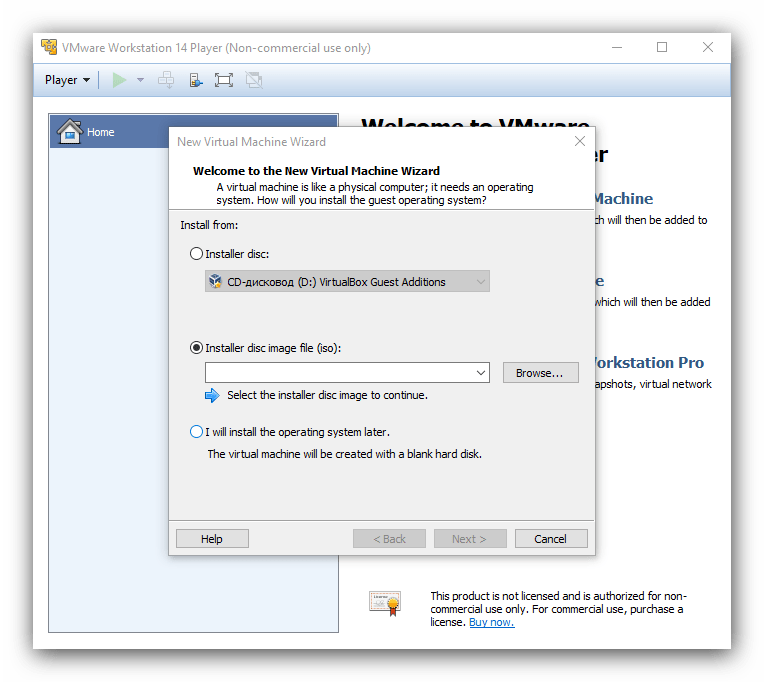
- Select Create a New Virtual Machine. Choose I will install the operating system later.
- Now, select Apple Mac OS X, and change the Version to macOS 12. If you don’t see the macOS options, it is because the patch didn’t install correctly.
- Next, you need to choose a name for your macOS Monterey virtual machine. Choose something easy to remember, then copy the file path to somewhere handy—you’re going to need it to make some edits in a moment.
- On the next screen, set a disk size of 50GB or larger and select Store virtual disk as a single file. Complete the virtual disk creation wizard, but do not start the virtual machine just yet.
3. Edit the macOS Monterey Virtual Machine Settings
Before you can boot the virtual machine, you must edit the hardware specification.
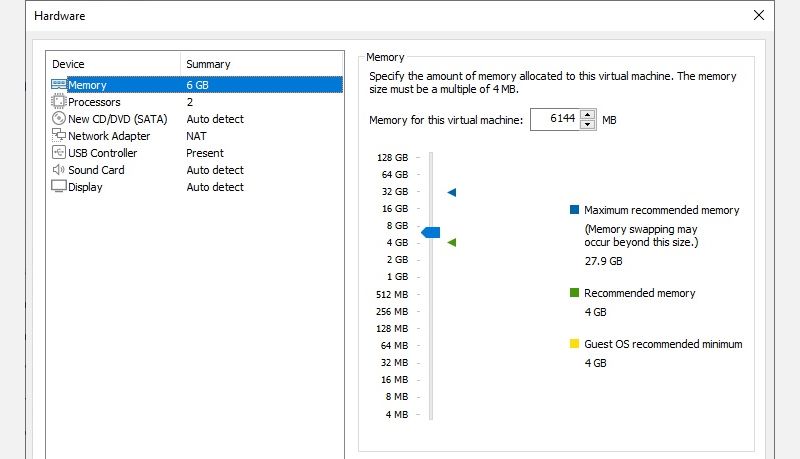
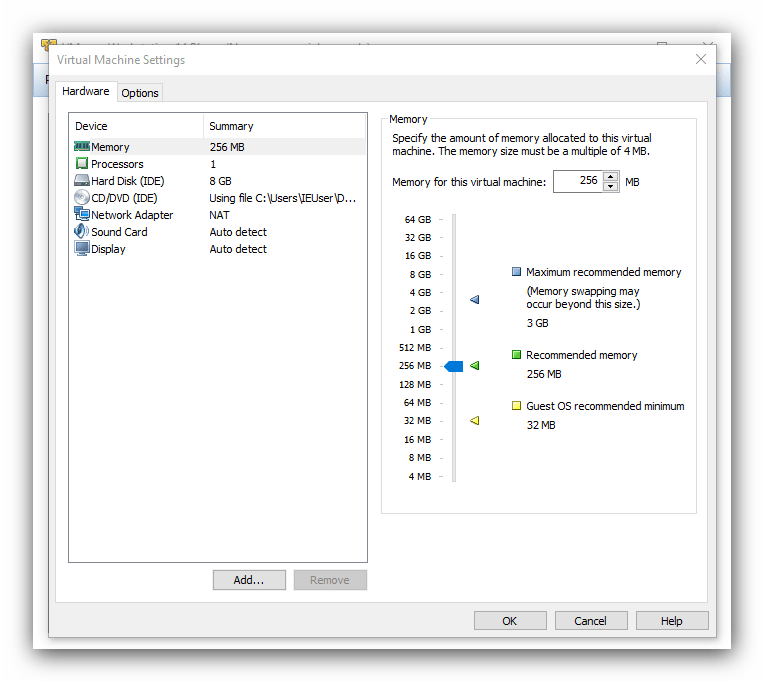
- From the main VMware screen, select your macOS Monterey virtual machine, then right-click and select Settings.
- Bump the virtual machine memory up to at least 4GB. You can allocate more if you have RAM to spare.
- Under Processors, edit the number of available cores to 2 (or more if available).
- Now, select New CD/DVD (SATA) > Use ISO image file. Browse to the macOS Monterey ISO file and select it.
- Close the Hardware window, and select Finish.
However, don’t start the VMware Workstation Player macOS Monterey virtual machine just yet. There are still some edits to make to configuration files.
4. Edit the macOS Monterey VMX File for Intel Hardware
This section is for Intel users. It involves the final set of edits you need to make before switching your VMware macOS Monterey virtual machine on!
Close VMware. Head to the location you stored the macOS virtual machine. The default location is:
C:\Users\YOURNAME\Documents\Virtual Machines\YOUR MAC OS X FOLDER
Browse to macOS Monterey.vmx, right-click, and select Open with > Notepad (or your preferred text editor). Scroll to the bottom of the configuration file and add the following line:
        smbios.reflectHost = "TRUE"
hw.model = "MacBookPro14,3"
board-id = "Mac-551B86E5744E2388"
smc.version = "0"
Save, then Exit.
You can now open VMware, select your macOS Monterey virtual machine, and fire it up!
5. Edit the macOS Monterey VMX File for AMD Hardware
This section is for AMD users. Like the above section, AMD users must also edit the VMX file before proceeding. The AMD edit involves a few more lines than the Intel version, but you can copy and paste the data into the file.
Close VMware. Head to the location you stored the macOS virtual machine. The default location is:
C:\Users\YOURNAME\Documents\Virtual Machines\YOUR MAC OS X FOLDER
Browse to macOS Monterey.vmx, right-click, and select Open with > Notepad (or your preferred text editor). Scroll to the bottom of the configuration file and add the following lines:
        cpuid.0.eax = “0000:0000:0000:0000:0000:0000:0000:1011”
cpuid.0.ebx = “0111:0101:0110:1110:0110:0101:0100:0111”
cpuid.0.ecx = “0110:1100:0110:0101:0111:0100:0110:1110”
cpuid.0.edx = “0100:1001:0110:0101:0110:1110:0110:1001”
cpuid.1.eax = “0000:0000:0000:0001:0000:0110:0111:0001”
cpuid.1.ebx = “0000:0010:0000:0001:0000:1000:0000:0000”
cpuid.1.ecx = “1000:0010:1001:1000:0010:0010:0000:0011”
cpuid.1.edx = “0000:0111:1000:1011:1111:1011:1111:1111”
Save, then Exit.
You can now open VMware, select your macOS Monterey virtual machine, and fire it up!
6. Configure and Install the macOS Monterey Virtual Machine
After launching the macOS Monterey virtual machine, you’ll have to configure the storage drive before installation.
- Next, select Disk Utility. You create a clean drive for macOS Monterey to install to.
- In the Disk Utility, select VMware Virtual SATA Hard Drive Media from the Internal drive column.
- After selecting the drive, head to the Erase option found at the top of the utility.
- Give your drive a name, set the Format to APFS, and the Scheme to GUID Partition Map.
- Select Erase.
- Once complete, you can exit the Disk Utility back to the Monterey recovery screen. From here, you should select Install macOS Monterey.
- Select the drive you created in the Disk Utility, followed by Continue.
The installation process takes a while, but it is faster than VirtualBox. Once macOS Monterey loads, you can configure the operating system as you see fit.
7. Install VMware Tools to Your macOS Monterey Virtual Machine
You now need to install VMware Tools, which is a set of utilities and extensions that improve mouse handling, video performance, and other useful things.
With the macOS virtual machine running, head to Player > Manage > Install VMware Tools.
The installation disc will appear on the macOS desktop. When the option appears, select Install VMware Tools, then allow it access to the removable volume. Follow the guided installer, which will require a restart on completion.
Troubleshooting
A couple of things can go wrong during the macOS virtual machine installation in VMware Player Workstation.
- If you cannot see «Apple Mac OS X» during the virtual machine creation wizard, then you need to revisit the patch process. Ensure every process associated with VMware Player is off.
- If you receive the message «Mac OS X is not supported with binary translation» when starting the virtual machine, there is a strong chance you need to activate virtualization in your BIOS/UEFI configuration.
- If you receive the message «VMware Player unrecoverable error: (vcpu-0)» when starting the virtual machine, you need to head back to the macOS Monterey.vmx configuration file to ensure you added the extra line and saved the edit.
- If you’re running AMD hardware and get stuck at the Apple logo, first power off the virtual machine. Now, head to Settings > Options > General. Change the Guest operating system to Microsoft Windows and the Version to Windows 10 x64. Press OK, then attempt to power up the virtual machine again. Once the Apple logo passes, power down the virtual machine, then set the Guest operating system option back to Apple Mac OS X, selecting the correct version.
macOS Virtual Machines for AMD Hardware
For a long time, Apple used Intel hardware to power its desktops and laptops. Configuring a macOS virtual machine using Intel hardware is easier because the hardware specifications are very similar. With AMD, the opposite is true. Because Apple does not develop macOS on AMD hardware, creating a macOS virtual machine on an AMD system is trickier.
In the future, macOS virtual machines running on AMD or Intel machines may become even more difficult. Apple’s M1 and M2 chips use different instructions sets from AMD and Intel, using an ARM-based architecture to deliver much better performance, power, and battery life. Ironically, it’s much easier to install Windows 11 on an M1 Mac than macOS on Windows 10 or Windows 11.
macOS Monterey Virtual Machine Installation Complete
You have two options to choose from for your macOS Monterey virtual machine. Both options are great if you want to give macOS a try before making the switch from Windows and enjoy some of the best Apple apps on offer.