
Provide feedback
Saved searches
Use saved searches to filter your results more quickly
Sign up
This post is a step-by-step tutorial on how to set up a Windows Server 2016 VM inside of VirtualBox. The prerequisites for this exercise are having a 64 bit computer running a 64 bit edition of Windows. You will want to have at least 16 GB of RAM as it is barely possible to even install the VM with only 8 GB or RAM. Here we also assume that you have VirtualBox already installed on Windows. The final prerequisite for this post exercise is your general knowledge and experience with IT, as we will not be explaining each step in detail, however all of the steps are included.
Seven Steps
- Create a virtual network
- Create a VM
- Connect the VM to the virtual network
- Install Windows Server 2016
- Install VirtualBox Guest Editions
- Configure a Static IP Address on Server
- Rename the Server
Create a virtual network
The first thing is to create a virtual network within VirtualBox. It is easy to do. It will allow the VM to access the Internet and communicate with other VMs.
- In VirtualBox, File menu, Preferences, Network tab. Click the little plus button on the right side of the screen (Adds new NAT network).
- Click the little tol wrench and give it a name like “MainNatNetwork” or whatever you like.
- Change the IP address under the Network CIDR to 192.168.0.0/24
- Leave the network options at checked for Supports DHCP and unchecked for Supports IPv6.
- Don’t worry about port forwarding
- Click OK
- Now we are done with this part. Click OK.
Create a VM with VirtualBox
- You have already downloaded Windows Server 2016 Trial ISO file.
- Click the New button in VirtualBox
- Click Expert Mode at the bottom of the screen
- Give it a name in the Name box, such as a company or person name. It is the name of the inventory of VirtualBox
- Leave the type at Microsoft Windows
- In the version, look for Windows 2016 (64 bit) and choose it.
- Choose 4096 MB for memory (you can go to 1 GB or 2 GB if you are low on RAM on your PC.)
- Leave the Create a virtual hard disk now checked.
- Click the Create button
- Choose the file location. Normally you would just leave it as is to put it in the same location as the VM
- File size should be about 80 GB. Change it from the default of 32GB.
- Storage on the physical hard disk should be set to dynamically allocated.
- Leave the hard disk file type to VDI (VirtualBox Disk Image)
- Click Create button.
- We are done with this section.
Connect the VM to the virtual network
Mount the Windows Server 2016 file. To mount an ISO means to virtually insert a CD into a virtual computer.
- Open VirtualBox
- Select the VM that we want to mount the ISO to (the one we just created)
- Press Ctrl+S (S is for Settings)
- Click the Storage tab on the left side
- Select the empty disk icon in the Storage Tree section
- Under the attributes there is another disk icon on the right hand side.
- Click it and click on Choose Virtual Optical Disk File
- Locate the ISO file you have already downloaded and click on the file.
- Click Open
- Navigate over to the Network tab
- Under the Adapter 1 tab at the top, go to Attached to drop downloaded and
- select Nat Network.
- Under the Name, select the one we created earlier.
- Click OK
At this point, our VM is on the Nat Netork and has the Windows Server 2016 ISO mounted. Next we will install Windows Server 2016.
Install Windows Server 2016
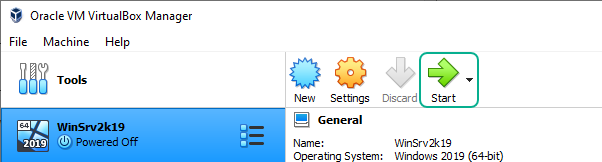
- Open VirtualBox if it is not already open.
- Select the VM and choose Start.
- You will need to do some scrolling (guest edition tools are not yet installed)
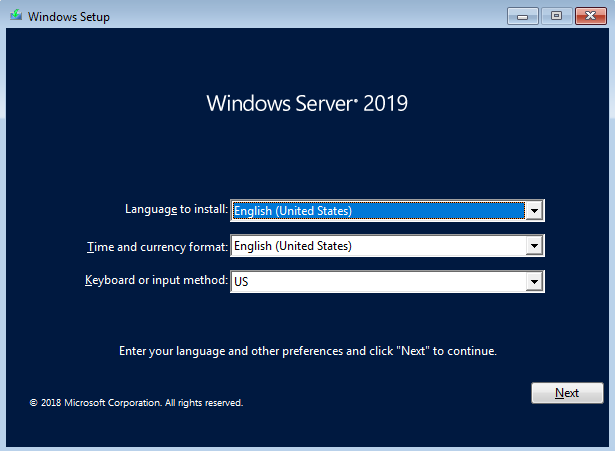
- Windows Setup starts.
- Leave language time and currency set as English United States.
- Leave the keyboard set to US.
- Click Next
- Select the version of Windows Server. Select Datacenter Evaluation (Desktop Experience)
- You caould choose Standard if you want.
- Click Next
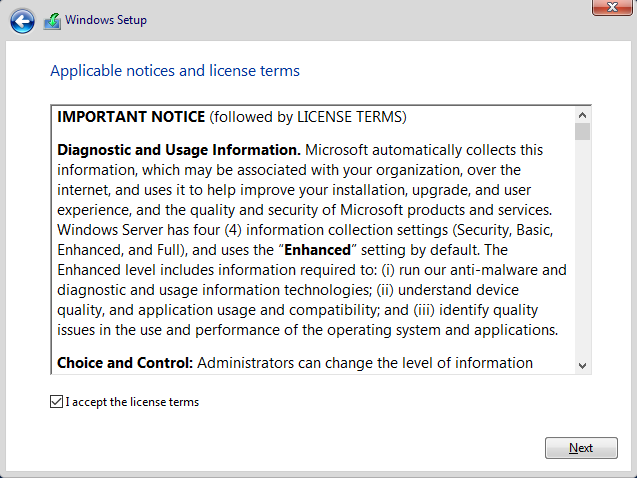
- Accept the licence terms and click Next
- The type of installation should be Custom, not Upgrade.
- Choose the drive you want to install it on.
- You can optionally create partitions if you need to.
- Now Windows begins to install. This will take some time.
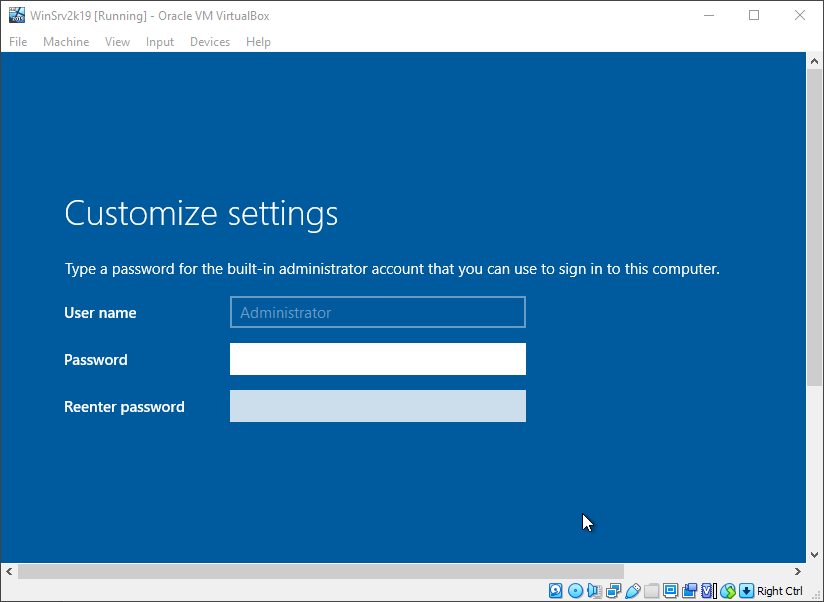
- Set the username and password of the Administrator account.
- Don’t forget the password!
- Press Enter
- Log in screen appears. Press right control and delete key
- Enter your password and you should see the desktop.
Install VirtualBox Guest Editions
This allows for copy-paste between host computer and VM and sets the screen size to fit.
- Open your VM and log in to the Windows Server.
- In the VirtualBox menu of the Server VM, click Devices, Insert Guest Edition CD image…
- Click the pop up at the bottom right that says CD Drive (D:)…
- Click Open folder to view files
- Double click the file called VBoxWindowsAdditions
- Next, Next, Install.
- For all of the popups we want to go ahead and click Install and be sure to have the Always trust software from Oracle Corporation checked.
- At the end of the wizard, click manually reboot later.
- Click Finish.
Configure a Static IP Address on the Server
- In Server Manager, select Local Server on the left.
- Select the link to the right of the word Ethernet that says IPv4 address assigned by DHCP, IPv6 enabled.
- Right click on the Ethernet icon and choose Properties
- Uncheck IPv6 check boxSelect IPv4 and choose Properties button
- Click Use the following IP address and add the IP addresses listed below.
- IP address 192.168.0.10 and press the Tab key
- SubnetMask: 255.255.255.0
- Default gateway: 192.168.0.1 (IP address of the network itself)
- Preferred DNS Server: 127.0.0.1
- Alternate DNS server: 8.8.8.8 (we will use Google’s here)
- Click OK. Click Close.
Rename the Computer
- Still under Local Server in Server Manager, click the existing computer name at the top of the screen
- Click Change
- Enter in a new name in the box such as your company abbreviation followed by “DC01”
- “DC” stands for Domain Controller.
- Click OK. Close the Server’s window.
- Go ahead and restart the computer (click Restart Now) and log in. (right Ctrl and Delete)
- Adjust the window size and notice that it should now fit so you don’t have to scroll anymore. Nice.
Test Connectivity
Can the Server connect out to the Internet? Let’s test that.
- Click the Start button
- Type in cmd and press enter
- When Command Prompt pops up, right click it and select pin to taskbar
- Type ping google.com
- You should get a reply
- Now type in ipconfig and press enter
- Observe what the IPv4 address is. It should be what we set it to earlier as 192.168.0.10
- Type exit and press enter to close the Command Prompt window.
- We’re done with this part.
Get to Know Your Server
At this point we are ready to learn more about the GUI of Windows Server 2016. Consult other documentation that explains how to navigate around Server Manager. If all went well your server is up and running. Now is the time (if you need to) to do a little research on networking and Windows domains. You may want to know a little bit about TCP/IP, DNS, DHCP among other things. The next steps for your server in your VM is to make your new server a Domain Controller.
In this post I’m going through the steps required for setting up a Windows Server 2019 VM in Oracle VirtualBox on a Windows 10 host.
In a previous post, I’ve covered how to build an Ubuntu VM and install SQL Server on it.
Prerequisites
- Oracle VirtualBox – I’m currently using version 6.1.40
- Windows Server 2019 evaluation ISO
- Sufficient drive space – In my example I’ll be creating two dynamically allocated virtual disks (C drive – 80GB, D drive – 40GB)
Creating the VM in VirtualBox
I’ll start by building a new VM.

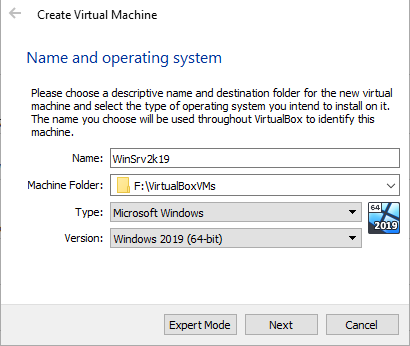
I then specify the VM’s name, its folder, OS type and version – Windows Server 2019 64-bit.
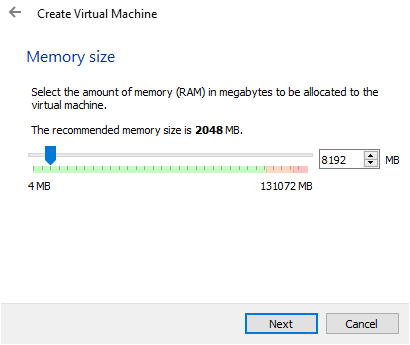
I proceed by allocating 8GB of RAM to the VM.
In the next prompt I leave “Create a virtual hard disk now.” and press “Create”. Then leave the hard disk file type as VDI (VirtualBox Disk Image) and press “Next”. And set the storage to “Dynamically allocated” before pressing “Next” again.
I set the size of the virtual disk to 80GB – this will be my C drive.

After the VM is created, I right click on it and go into its settings.

In the “Processor” tab of the “System” section I increase the core count to 4.

Now to add a second virtual disk drive – this will be the 40GB D drive.
I go into the “Storage” section and press the “add hard disk” button.

Then, in the “hard disk creator” menu, I press “Create Disk Image”.

Afterwards I follow the same steps as when creating the initial virtual disk for the VM. I leave VDI as the disk file type, press “Next”, set it to “Dynamically allocated”, set its size to 40GB and then press “Create”.

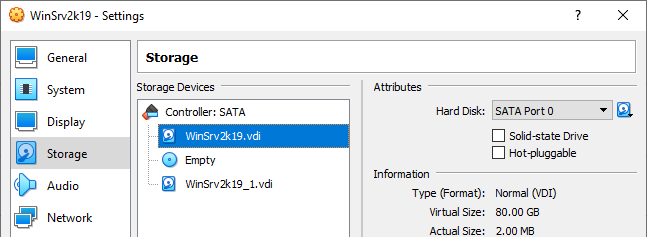
Once created, I select the new disk and click “Choose” to attach it to the VM.

Now the VM has 2 disk drives and one optical drive.
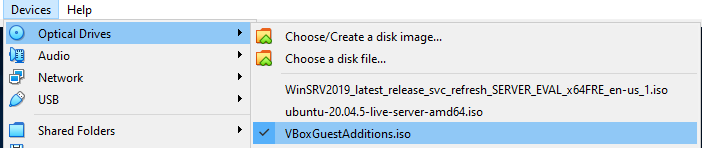
While I’m in the “Storage” section, I also attach the Windows Server 2019 Evaluation ISO by selecting the optical drive, expanding the disk drop-down menu and clicking on “Choose a disk file…”.

This opens up a file explorer window in which I can navigate to where I’ve downloaded the “WinSRV2019_latest_release_svc_refresh_SERVER_EVAL_x64FRE_en-us_1.iso” file so that I can attach it to the VM’s optical drive.

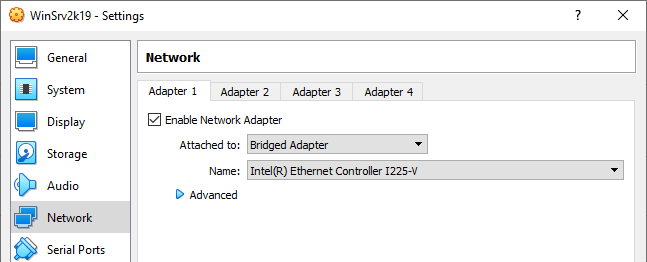
Afterwards, I navigate to the Network section set the network as bridged since I want the VM to be accessible from the rest of the LAN.
This concludes the configuration part of blank VM.
Installing Windows Server 2019 on the VM
Time to start up the VM and proceed with the OS installation part.
Once VM boots up I elect the language and regional settings that I want to use.
And click “Install now” in the next screen.

I opt to install the Windows Server 2019 Standard Evaluation with desktop experience.

Accept the EULA.
For installation type I click on “Custom”, because there’s really no previous version of the OS to upgrade from.

I then proceed with the partition configuration part.
First, I select the disk that’s going to end up being the system drive, click on “New” and then “Apply” in order to create a new partition.

Click “Ok” on the prompt informing me about the creation of additional system partitions.

Proceed to do the same for the second partition.

Now I can select the partition on which the OS should be installed and click on “Next” to begin the installation.

After the install process finishes, the VM reboots and a prompt to “press any key to boot from CD/DVD” appears, I just wait for the prompt to time-out since I want to boot directly in Windows.
Once the OS boots up, it asks for an admin password to be set up.
At the logon screen I send the Ctrl+Alt+Delete input to the VM.

And log into Windows. At this point I can eject the installation media and mount the VBoxGuestAdditions disk. If it doesn’t show up in the drop down list, it is located in “C:\Program Files\Oracle\VirtualBox\”.
Once the disk is mounted, I navigate to it in File Explorer and proceed with the installation of the guest additions. I reboot the VM when the install process prompts me.
One last and optional part – after the VM boots up again I run the following commands in admin PowerShell to rename the VM, but also make sure that the current network profile is set to private so that the firewall won’t block me if I try to connect to SQL Server or anything else that I might install later.
|
Rename-Computer WinSrv2k19 get-netconnectionprofile | Select -ExpandProperty name | %{ set-netconnectionprofile -name $_ -networkcategory «private» } |

In case of poor VM performance
If you notice that your VM is slow, freezes or crashes, you might want to check out this post for a potential fix.
Started by Максим Гузеватов, 28 November 2020, 11:53
Previous topic — Next topic
0 Members and 1 Guest are viewing this topic.
Установил на виртуал бокс 3 машины: вин сервер 2016, вин7 и вин10. Хочу потестировать минисеть, 2016 в виде сервера собственно и 2 клиентские машины подключенные к ней с будущим созданием домена и тд и тп.
Вопрос в настройке адаптеров на машинах. Если я правильно понял, то у сервера нужно в адаптерах выбрать:
1. NAT — он получил настройки IP и остлаьные от моего домашнего компа на вин10
2. Какой адаптер выбрать вторым для создания локальной сети внутри виртуал бокса? (вирутальный адаптер или внутренняя сеть)
У клиентской вин7 какие адаптеры выбрать ,чтобы он увидел сервер внутри виртуалбокса и мог вылазить также в инет?
У вин10 какие адаптеры, такие же как у вин7 ?
Все ваши виртуальные машины должны использовать одну и ту же виртуальную сеть. Если вам, кроме этого, нужен еще и выход в интернет, без создания виртуальной сетевой инфраструктуры, то ставьте везде NAT.
То есть всем трем виртуальным машинам первым адаптером выставить NAT, вторым — всем Виртуальный адаптер хоста?
Мне бы для начала хотя бы, чтобы они видели друг друга внутри виртуалки, потом чтобы они увидели физический комп
Зачем такие сложности, если честно, то я ничего не понял из ваших схем. NAT — это разновидность виртуального коммутатора с функциями роутера, если говорить проще. Подключив все виртуальные машины к этому коммутатору вы поместите их в отдельную виртуальную сеть с возможностью выходить в интернет и получать сетевые настройки от некого виртуального роутера.
Для заявленных в первом сообщении целей этого более чем достаточно.
Оставил у всех только NAT — win7 и win10 видят друг друга, их видит и win2016, а вот win7 и win10 не видят win16 в этих конфигурациях.
Сетевое обнаружение включено везде
Ну это уже не проблемы сети, настраивайте дополнительные параметры общего доступа. Потому что, сдается мне, сетевое обнаружение в Server 2016 вы так и не включили.
Сетевое обнаружение включено. Везде только по одному адаптеру NAT. Win2016 видит только сам себя, win7 и win10 видят только друг друга
В общем они все начали видеть друг друга, когда первым адаптером у них у всех NAT, а вторым у всех — внутренняя сеть, если оставить всем трем только один адаптер NAT, то win7 u win10 видят друг друга, но не видят win2016, a win2016 видит только себя, но не видит win7 u win10. Почему так я не понял
Потому что так была настроена сеть, точнее не настроена. Скорее всего сеть NAT сервер видит как общественную и не включает для нее сетевое обнаружение.
А как надо: частную или предприятия? Точнее, как правильно в этом случае? И в будущем, с любой точки зрения как правильно настраивать такие вещи , применительно к виртуализации?
Виртуализация тут роли не играет. Настраиваете точно также как и обычную сеть. Это либо частная, либо домашняя/предприятия в более старых версиях.
А возможно внутри уже созданной этой вирутализации создать еще одну отдельную подсеть, которая будет видна только вин2016,но не будет видна компьютерам вин7 и вин10?
Ну почему нельзя, можно. Создайте еще один виртуальный коммутатор и подключите к нему только сервер. Или настройте VLAN. В общем — много вариантов.
Через менеджер сетей хоста создать еще один виртулаьный адаптер? А как тот же сервер поймет к какому из них нужно по умолчанию подключиться и как уже созданные машины на вин7 и вин10 поймут,что им нужно работать по первому вирт. адаптеру,а новые вирт.машины (допустим обе на вин10) должны будут быть в друго сети и должны быть видны только серверу,а не машинам из первой подсети на вин7 и вин10 ?
Не виртуальный адаптер, а виртуальный коммутатор. Потом для нужных виртуальных машин создайте еще один виртуальный адаптер и подключите к этому коммутатору.
Что из этого Вы подразумеваете под виртуальным коммутатором?
Quote from: Максим Гузеватов on 10 December 2020, 20:00Что из этого Вы подразумеваете под виртуальным коммутатором?
Это всё виртуальные коммутаторы. Разного типа. Они могут быть подключены или не подключены к хосту (через виртуальный сетевой адаптер), могут иметь или не иметь NAT и базовые сетевые службы и т.д. и т.п.
- Записки IT специалиста — Форум
-
►
Серверные операционные системы -
►
Windows Server 2012/2016/2019 -
►
WIn server 2016 на virtualbox и настройка сети