
It’s Sunday afternoon and Deb is feeling poorly…but not so poorly that she’s not offering considerable editorial input into this post. In between the sniffles and requests for lemsip etc…she’s throwing in various comments relating to various icons from the sci-fi genre. To be fair, I have borrowed her laptop as it’s the only one in the house running Windows 7.
I will attempt to minimize the in-jokes and references but I thought I’d better go on record and report the fact that I am under some duress here. Honestly, some people are soooo geeky !
What I want to do in this post is to go through :
- setting up VirtualBox and running Ubuntu as a guest os
- getting the Guest desktop to display in a full screen
- getting the Number Keypad to work in the VM
- setting up a directory so that files can be shared between guest and host
The Three Laws
Just a quick note about terminology.
Host – is the Windows 7 OS that we’re going to install all this stuff on
Guest – is the Ubuntu machine that we’re going to be running in the Virtual Machine
To boldly go…
The first steps in our brave new (virtual) world ( don’t worry, she’s got to go to the loo sometime), is to install the Oracle VirtualBox VM. You can get it from here.
Next, we need to get a copy of Ubuntu. Best bet is to use the latest Long-Term Support version ( currently Ubuntu 10.04.2) from here.
Just follow the wizard steps to install VirtualBox.
When you configure the new VM through the wizard, select the appropriate Operating System ( in this case, Linux) and Version (Ubuntu) then accept all of the other defaults for now.

When you actually start the new VM for the first time, you’ll be presented with the First Run Wizard. Moving swiftly on ( before Deb gets in with any Harry Potter references), you’ll get a screen asking you to Select Installation Media.
Just select the Ubuntu iso you downloaded earlier.

Once you get Ubuntu desktop up, then click the install icon on the desktop. Note – at this point, you’re Numeric Keypad will not be working. We’ll fix this a bit later, but for now, you need to use the number keys above the letters on your keyboard.
Once you’ve done this, you need to make sure that the virtual cd/dvd is removed from the virtual cd/dvd drive before you virtually re-start the virtual machine. Hmmm, no response. Somehow I think she may not have seen Tron.
Anyway, the easiest way to do this is to go to the VirtualBox Devices Menu, select CD/DVD Devices / Remove Disk From Virtual Drive
When you reboot, you should now be running the installed version of Ubuntu and not just the live CD image in the VM.
We can rebuild him….
Moving swiftly on from Deb’s musings on the subject of exactly which bits of Steve Austin were bionic, the next step is to install Guest Additions in Ubuntu.
Before doing this it’s a good idea to run Update Manager in the Ubuntu guest ( System / Administration / Update Manager). This is because, if you have a linux kernel update, it does tend to mess up the Guest Additions installation and require a re-install.
With Ubuntu up and running in the VM, go to the VirtualBox Devices Menu and select Install Guest Additions.
This should load a CD into the virtual drive. You then need to navigate to the cd in Nautilus ( Places / Computer/ CD/DVD Drive) and then click autorun.sh. When prompted, just click the Run button.
Once the installation is complete, do a shutdown of the virtual machine ( removing the virtual CD/DVD first).

I canna change the laws o’ physics
However, we can now start to address some of the issues with which we are currently faced.
First up is getting the Ubuntu Guest to display fill-size in fullscreen mode. This is especially useful if you happen to have two monitors at your disposal as you’ll be able to use one for the host and one for the guest.
With Ubuntu shut down, amend the Display settings for the VM in VirtualBox. The Video Memory should be set to 64MB and the Enable 3D Acceleration checked.

Now, when you go into the Ubuntu System Menu and select Preferences / Monitor, Ubuntu should recognize the monitor type VBX. Additionally, you’ll also be able to increase the resolution to something in-line with what’s running on the host.
Once these changes have been made, switching the VM to fullscreen mode ( VirtualBox Menu, Machine / Fullscreen) should now result in the desktop taking up all of the available real-estate.
The Numeric Keypad can also be enabled by means of settings in the Ubuntu System/Preferences Menu. This time, go to Keyboard.
First of all, in the Mouse Keys tab, uncheck Pointer can be controlled using the keypad.
Secondly, in the Layouts tab, click Options… and under Numeric Keypad Layout Selection check Legacy. The Number pad should now work.

Sub-space transmissions
Although the clipboard is set to be bi-directional by default, it would seem that, with the Win7 host / Ubuntu guest combination at least, you can only cut and paste from the Host to the Guest and not the other way around.
You can, however, set one or more host directories to be visible to the guest OS and use this as a means of transferring files between the two.
First, we need to create the shared folder in windows ( I slapped mine on my Windows Desktop). Let’s assume it’s called vShare.
Now we need to set it up in Virtual Box. So, with the Ubuntu VM powered down, go into Settings / Shared Folders. Select the folder you want to use as the share and click OK. Note – you shouldn’t check either the Read-Only or Auto-Mount boxes. Also, avoid underscores in the folder name as these don’t seem to work too well for some reason.

Now, when you start the Ubuntu guest again, you need to mount the share ( note that the mount-point name in the guest needs to be different from the name of the shared folder on the host) :
$ sudo mkdir /mnt/hostShare
$ sudo chmod 777 /mnt/hostShare
$ sudo /sbin/mount.vboxsf –w vShare /mnt/hostShare
Note that if you’ve chosen a different name for your shared folder, use the name of the folder that’s shown in the VirtualBox Devices / Shared Folders dialog box.
To get the share to load everytime you startup the Guest os, you need to edit /etc/rc.local and add the following line :
/sbin/mount.vboxsf -w vShare /mnt/hostShare
To make it easier to get to from within the host, you can put a symbolic link on the desktop :
$ ln –s /mnt/hostShare $HOME/Desktop/host_share
A folder called host_share should now appear ( or materialize, if you prefer, ) on your Ubuntu desktop.
Escaping the Mirror Universe
By now, you will have noticed that, by default, Ubuntu has it’s Window control buttons on the left of the Window title bar rather than the right. If this is starting to get on your nerves…
On the Ubuntu Desktop, hit Alt + F2.
In the Run Application box that appears , type in gconf-editor and hit Run.
In the tree menu in the left-hand pane now navigate to apps/metacity/general
Right-click button_layout in the right-hand pane then click Edit Key.
Change the settings to menu:maximize,minimize,close
The buttons should now magically have switched sides.
The Final Frontier
As I’ve nearly exhausted Deb’s supply of Star Trek references, I’ll leave you with this thought :
Klingon programs do not have parameters, they have arguments…and they ALWAYS WIN THEM !
Back in 1993, I discovered that I could get paid money for doing fun stuff with computers.
Over the years, I’ve specialised in Oracle Databases as a developer, a DBA and sometimes, an architect.
It’s my evil alter-ego — The Antikyte — who writes a blog about my various technical adventures.
Yes, that is his Death Star parked in the Disabled Bay.
I currently live in the South-West of England with Deb, my long-suffering wife.
View all posts by mikesmithers
Многие, и я в том числе, держат на своих компьютерах несколько операционных систем. Почему бы и нет? Тем более, когда это необходимо. Особенно, когда некоторые программы работают только в Windows, и ни через Wine, ни за ради бога они не запускаются. Приходится скакать из системы в систему, либо пользоваться виртуальными машинами. В частности, Virtualbox позволяет создать образ VMDK c установленным разделом Windows. Об этом и пойдет речь.
В сети много подробных инструкций, как в Linux через Virtualbox запустить Windows 7, уже установленную на физический диск. Основной принцип заключается в создании образа .vmdk из реального раздела жесткого диска с помощью внутренней команды Virtualbox. Как правило, это выглядит так:
$ VBoxManage internalcommands createrawvmdk -filename /home/$USER/sdb.vmdk -rawdisk /dev/sda
Но для загрузки системы этого недостаточно. Нужна либо копия загрузчика MBR, либо iso-образ загрузчика GRUB, установленных на вашей машине.
Опишу, вкратце, основные способы установки на примере Ubuntu (Gnome).
Естественно, Windows 7 присутствует, Virtualbox уже установлен, и пользователь входит в группу «vboxusers».
Если нет, то:
$ sudo adduser $(whoami) vboxusers
Добавляем пользователя в группу «disk», для того, чтобы запускать vboxmanage без рута и не заморачиваться с правами созданных разделов, командой:
$ sudo adduser $(whoami) disk
Для применения изменений:
$ /usr/bin/gnome-session-save --logout
Реальный раздел с Windows должен быть загрузочным (активным). Для проверки:
$ fdisk -l
Звездочкой будет отмечен загрузочный диск.
Если нет, то используем fdisk, gparted или кому что нравится.
Моя разметка (в дальнейшем буду приводить свои данные):
Устр-во Загр Начало Конец Блоки Id Система

/dev/sda1 1 26 208813+ 83 Linux

/dev/sda2 27 2637 20972857+ 83 Linux

/dev/sda3 * 2638 7859 41945715 7 HPFS/NTFS

/dev/sda4 7860 60801 425247745 f W95 расшир. (LBA)

/dev/sda5 7860 10470 20971520 7 HPFS/NTFS

/dev/sda6 10471 60338 400556032 83 Linux

/dev/sda7 60338 60801 3718144 82 Linux своп / Solaris
Далее первый способ с «поддельным» MBR:
Устанавливаем пакет mbr:
$ sudo apt-get install mbr
Ставим копию mbr в файл. Ваш настоящий mbr никуда не денется:
$ sudo install-mbr --force /home/$USER/.myBootRecord.mbr && sudo chmod +rwx /home/$USER/.myBootRecord.mbr
Создаем VMDK-образ:
$ VBoxManage internalcommands createrawvmdk -filename /home/$USER/VirtualBox/Windows7.vmdk -rawdisk /dev/sda -partitions 3,5 -mbr /home/$USER/.myBootRecord.mbr -relative
Если все правильно, должно выдать «…created successfully»
Создаем виртуальную машину:
Задаем имя, к примеру, Windows7.
Задаем размер памяти, к примеру, 1024 МБ.
Отмечаем «Загрузочный диск», «Использовать существующий жесткий диск» и выбираем созданный файл Windows7.vmdk.
Виртуальная машина создана.
Теперь правим свойства машины:
В разделе «Система» на вкладке «Материнская плата» отмечаем IO APIC. Обязательно ставим галочку на CD/DVD-ROM. Он должен стоять первым в порядке загрузки. Все остальное по желанию.
В разделе «Носители» SATA контроллер должен быть Windows7.vmdk.
Теперь ищем DVD диск, с которого устанавливалась Windows, либо iso-образ установочного DVD. Добавляем в IDE контроллер привод оптических дисков (реальный или образ).
Все остальное — кто на что горазд.
Запускаем машину.
При первом запуске должно выдать: «Press any key to boot from cd or dvd». Восстанавливаем загрузчик Windows. Думаю, все знают, как это делать. После восстановления извлекаем установочный диск. Все. Windows должна запускаться как обычно.
Так вот, в этом способе присутствует очень огромный минус: при обычном запуске Windows, не через виртуальную машину, придется так же восстанавливать загрузчик. И так каждый раз.
Теперь второй способ с GRUB (v. 0.97), записанный в iso-образ (инструкции в сети разнятся, в зависимости от системы):
Создаем директорию:
$ mkdir -p .iso/boot/grub
Копируем файл в созданную директорию:
$ cp /usr/lib/grub/i386-pc/* .iso/boot/grub
Создаем iso-образ с GRUB:
$ genisoimage -R -b boot/grub/stage2_eltorito -no-emul-boot -boot-load-size 4 -boot-info-table -iso-level 2 -input-charset utf-8 -o grub.iso /home/$USER/.iso/
Создаем VMDK-образ:
$ VBoxManage internalcommands createrawvmdk -filename /home/$USER/VirtualBox/Windows7.vmdk -rawdisk /dev/sda -partitions 3,5 -relative
Далее создаем и настраиваем виртуальную машину так же как и в первом способе, за исключением пункта «Носители». Для IDE контроллера выбираем созданный grub.iso.
А теперь третий способ, который, почему то, я нигде в сети не встретил, по крайней мере, относящийся к Virualbox.
Может быть кому-то это покажется элементарным, но все же:
загрузка с помощью GRUB2 (v. 1.97) записанный в iso-образ.
Создаем директорию:
$ mkdir -p ~/.iso/boot/grub
В этой директории любым способом создал файл grub.cfg следующего содержания:
(Раздел menuentry «Windows 7» скопировать со своего grub.cfg, расположенного по адресу /boot/grub/)
insmod part_msdos

set default=0

set timeout=0

menuentry "Windows 7 (loader) (on /dev/sda3)" --class windows --class os {

 insmod part_msdos

 insmod ntfs

 set root='(/dev/sda,msdos3)'

 search --no-floppy --fs-uuid --set=root C070671099FC2625

 chainloader +1

}
Здесь убрано все лишнее, GRUB проскакивает быстро и незаметно.
Создаем iso-образ с GRUB2:
$ grub-mkrescue --output=/home/$USER/.iso/grub.iso /home/$USER/.iso/
Создаем VMDK-образ:
$ VBoxManage internalcommands createrawvmdk -filename /home/$USER/VirtualBox/Windows7.vmdk -rawdisk /dev/sda -partitions 3,5 -relative
Далее создаем и настраиваем виртуальную машину так же как и во втором способе.
Так же выбираем grub.iso.
Едиственный нюанс: при автоматической установке дополнений гостевой оси, образ этого iso заменится на VBoxGuestAdditions.iso. Поменяйте его обратно.
Еще раз повторюсь, в примерах используются мои настройки. Вносите изменения.
Для справки:
Ноутбук Asus M50VM (Core2Duo T9400 2.53GHz, RAM 4058MB, GeForce 9600M)
OS: основная Linux Mint 11 Katya 2.6.38-12-generic (x86_64), вторая Windows 7 64 bit
Virtualbox 4.1.6
Как правило, я работаю с ноутбука под Windows. Но иногда нужно иметь
локальную рабочую копию Linux сервера, например, для разработки.
Конкретно
в этом частном случае важно, чтобы окружение максимально соответствовало
окружению на тестовых и боевых серверах. Поэтому я сразу отмёл cygwin, и
обратил внимание на виртуализацию. Лично мне, приглянулся VirtualBox от
Oracle. Они мне за рекламу не заплатили, но я всё равно о них напишу, так
как инструмент оказался очень удобным и бесплатным. Пользуюсь с 2012 года.
Итак, в этой статье я опишу, как установить linux на windows без
KDE/GNOME графической оболочки (за ненадобностью). При этом мне лично
удобно ходить на него через привычный PuTTY — точно также, как я хожу на
продакшн боевые и тестовые сервера. И кроме этого, я хочу пользоваться для
работы с приложениями в виртуалке своими привычными клиентами, установленными
на Windows: SFTP-клиент, веб-броузер, и т.д. Чаще всего я ставлю Debian, поэтому
описывать установку буду именно этого Linux дистрибутива. Однако вам никто
не мешает поставить любой другой дистрибутив. Один раз VirtualBox мне помог
с установкой старой программы, которая отказалась работать под Windows7, но
без проблем завелась на WindowsXP в виртуалке.
Поехали.
Скачиваем VirtualBox на сайте Oracle, устанавливаем. В процессе нет ничего особенного, кроме установки
виртуальных сетевых адаптеров — обязательно соглашаемся на просьбу Windows
подтвердить их установку.
Скачиваем дистрибутив Debian Linux в формате ISO. Я обычно использую
зеркало Yandex для этого. Выбираем папку с версией дистрибутива, далее
выбираем архитектуру i386 — это важно, т.к. при создании хоста я выбрал
Debian 32bit. Далее выбирайте по вашему вкусу. Лично мне не хочется скачивать
большой дистрибутив — я выбираю сетевой установщик (netinstall), благо интернет
всегда под рукой.

Пока дистрибутив скачивается, запускаем VirtualBox и создаём новый Host
(см. скриншот), далее солашаемся на предложеный объём памяти
(1 гигабайт) и объём жесткого диска (8 гигабайт). Естественно, никто не мешает
подкрутить объёмы так, как вам нужно. Формат файла жесткого диска я оставляю
по-умолчанию — VDI. Выбор между динамическим и фиксированным виртуальным
жестким диском расписан в диалоговом окне предельно ясно: если скорость его
работы важна, то создаём фиксированный. Если важно по максимуму сэкономить
место на жестком диске Windows, то — динамический. Кстати, динамический,
в отличие от фиксированного, по вполне понятным причинам, создаётся моментально.

Дистрибутив скачался, хост мы создали. Приступаем к настройке. Первое, что
нужно сделать — это скормить виртуалке дистрибутив, чтобы при запуске
сразу же запустилась установка Linux. Для этого
выбираем хост в списке и жмём «Настроить». Далее, идём в раздел «Носители»,
выбираем там оптический привод в контроллере IDE, и загружаем туда образ
свежескаченного дистрибутива (см. скриншот).

Затем, нас интересует раздел «Сеть». Дело в том, что по-умолчанию, хост имеет
лишь один виртуальный сетевой интерфейс, который «смотрит» в доступный
на Windows по-умолчанию Интернет через виртуальный NAT. По этой причине,
открыть консоль Linux я смогу только через окно VirtualBox, а мне хочется
пользоваться привычным для меня PuTTY. По этой же причине, закачать и скачать
файлы я смогу только через настройку общих папок, что для меня также непривычно
и неудобно — я хочу пользоваться обычным SFTP-клиентом под Windows. Ну и самое
главное — при разработке web-приложений, я хочу пользоваться привычным и
уже настроеным веб-броузером под Windows. Через NAT, все эти удобства не
проходят. Поэтому я создаю ещё один локальный сетевой интерфейс для виртуалки,
вручную даю ему нужный мне IP адрес и
делаю симметричную настройку виртуального интерфейса на Windows.
В результате, Linux ходит в Интернет через NAT, а я на него с Windows хожу
напрямую через «Виртуальный адаптер хоста».
Если решение проблем с прямым доступом на виртуалку по сети для вас пока
непонятно, то я предлагаю посмотреть схему, которую я нарисовал. Однако, вы
можете и не вникать во все эти тонкости — просто пропустите этот абзац со
схемой, и переходите к пошаговой настройке. На схеме видно, что между Windows
хостом и VirtualBox Linux появляется ещё одна локальная сеть, состоящая
всего из двух IP-адресов. При этом, Linux и Windows продолжают ходить в
Интернет независимо друг от друга. Однако, как Linux может получить доступ
к любым сетевым службам Windows, так и Windows спокойно может ходить на любые
TCP/IP сервисы Linux. Меня, в частности, интересует как раз второе — возможность
с Windows напрямую подключаться по SSH с помощью PuTTY, тестировать
веб-приложения с броузера, и т.д.

Теперь, по шагам. Идём в настройки в секцию «Сеть». Включаем там второй адаптер,
выбираем тип «Виртуальный адаптер хоста», и указываем отличный от первого
тип адаптера, чтобы не путать их внутри Linux. Это не особо важно, так как я
ещё ни разу не видел, чтобы Linux мог их выводить не в том порядке, в каком
они перечислены в настройках. Но для пущей уверенности не помешает. Жмём ОК и
запускаем виртуальную машину кнопкой «Запустить». Начнётся обычная установка
Linux, ничего особенного в ней нет. Когда установщик увидит два сетевых
интерфейса и попросит выбрать основной, выбираем тот, на котором NAT — он
у нас первый в списке.

Пока Linux устанавливается, я настраиваю сетевой интерфейс на Windows. У меня
Windows7, поэтому я иду в Панель управления — Центр управления сетями
и общим доступом — Изменение параметров адаптера — Выбираю адаптер
«VirtualBox Host-Only Network» и присваиваю ему IP адрес 192.168.56.1/24. Вы,
естественно, можете выбрать любую другую приватную сеть, отличную от
10.0.2.0/24, которая используется VirtualBox для NAT интерфейса.
Для справки, всего есть три сети, которые зарезервированы для
подобного использования: 10.0.0.0/8, 172.16.0.0/12 и 192.168.0.0/16. Другие
адреса использовать не надо, т.к. скорее всего они в Интернете есть, и значит
мы потеряем доступ к этим ресурсам.

Итак, Linux поставился. Осталось только настроить второй сетевой интерфейс на
нём, и можно начинать работать. Настройка сети на Debian делается правкой
файлов в /etc/network/interfaces.d/. Я лично создаю там файл eth1 с таким
содержанием:
auto eth1
iface eth1 inet static
    address 192.168.56.2
    netmask 255.255.255.0
И отправляю виртуалку в reboot. После перезагрузки пробуем командной строки
Windows сделать ping 192.168.56.2 — всё должно работать. Теперь я могу
использовать этот IP адрес в броузере, PuTTY, моём SFTP клиенте и любых
других программах для работы с Linux сервисами.
Если в дальнейшем вам понадобится поднимать ещё один Linux VBox на этом же
Windows, то настройка
почти не отличается. Второй и последующий Linux VBox должны иметь на втором
интерфейсе IP-адреса из этой же сети (192.168.56.3, .56.4 и т.д.), а на Windows
донастраивать сеть уже не надо — всё будет работать.
Virtualbox 4.1, Ubuntu 10.10 https://www.virtualbox.org/manual/UserManual.html
Contents
- Install Virtualbox
- Run Virtualbox
- Create a VM
- Run VM and install Windows
- Install Guest Additions
- Add another virtual hard disk
- Resize the VM disk image file
- Access a Flask dev server running on the Ubuntu host from the Windows guest
Install Virtualbox
https://www.virtualbox.org/wiki/Linux_Downloads
- edit /etc/apt/sources.list.d/virtualbox.list
deb http://download.virtualbox.org/virtualbox/debian maverick contrib non-free
- install
$ wget -q http://download.virtualbox.org/virtualbox/debian/oracle_vbox.asc -O- | sudo apt-key add -
$ sudo apt-get update
$ sudo apt-get install virtualbox-4.1
$ sudo apt-get install dkms
Run Virtualbox
Create a VM
https://www.virtualbox.org/manual/ch01.html#gui-createvm My machine has 4GB ram and 225GB hdd. I chose 1GB ram and 30GB hdd for the guest to run MS SQL Server Management Studio. Windows 7 Professional 32-bit took 7.3GB after installing.
- click «New»
- follow the wizard
Run VM and install Windows
Need windows disc. Need to download driver? http://support.lenovo.com/en_US/research/hints-or-tips/detail.page?&DocID;=HT063291
- Put Windows disc in the drive
- click «Start»
Install Guest Additions
Info: https://www.virtualbox.org/manual/ch04.html Install instructions: https://www.virtualbox.org/manual/ch04.html#additions-windows Install Guest Addtions to allow sharing between guest/host, better screen resolution
- Run the Windows VM
- click «Devices» -> «Install Guest Additions…»
- click «Run VBoxWindowsAdditions.exe», click on stuff to install the stuff
Add another virtual hard disk
- create virtual hard disk file
- Shut down the guest VM
- In the Oracle VM VirtualBox Manager, click «Settings»
- Storage -> SATA Controller -> Add Hard Disk
- add the hard disk in windows http://windows.microsoft.com/en-us/windows7/install-or-remove-a-hard-disk-drive
- Open Computer Management by clicking the Start button Picture of the Start button, clicking Control Panel, clicking System and Security, clicking Administrative Tools, and then double-clicking Computer Management. Administrator permission required If you’re prompted for an administrator password or confirmation, type the password or provide confirmation.
- Right click on the new disk (e.g. Disk 1) and click «New Simple Volume..», run the wizard
Resize the VM disk image file
- resize the disk image file https://www.virtualbox.org/manual/ch08.html#vboxmanage-modifyvdi From the docs This command «currently works only for VDI and VHD formats, and only for the dynamically allocated variants, and can only be used to expand (not shrink) the capacity»
$ cd ~/VirtualBox VMs/Windows_7_1GB
$ VBoxManage modifyhd Windows_7_1GB.vdi --resize 20480
- resize partition in Windows
- Open Computer Management by clicking the Start button Picture of the Start button, clicking Control Panel, clicking System and Security, clicking Administrative Tools, and then double-clicking Computer Management. Administrator permission required If you’re prompted for an administrator password or confirmation, type the password or provide confirmation.
- Right click on the C: partition in Disk 0 -> «Extend Volume…»
Access a Flask dev server running on the Ubuntu host from the Windows guest
Reference: http://stackoverflow.com/questions/1261975/addressing-localhost-from-a-virtualbox-virtual-machine
In Ubuntu host:
- Run Flask dev server as normal on 127.0.0.1:5000
In Windows guest:
- Open cmd.exe and run «ipconfig». Find the «Ethernet adapter Local Area Connection» section. Find the «Default Gateway» is 10.0.2.2
- Point the web browser at http://10.0.2.2:5000
You need Guest Additions to be installed. See above. Reference: https://help.ubuntu.com/community/VirtualBox/SharedFolders Note: I did not need to do the mount step.
- Ubuntu host: mkdir /home/yourusername/share
- Windows guest: Boot the Guest operating system in VirtualBox.
- Windows guest: Select Devices -> Shared Folders…
- Windows guest: Choose the ‘Add’ button.
- Windows guest: Input the following:
- Folder Path: /home/yourusername/share
- Folder Name: share
- Optionally select the ‘Make permanent’ option
- Windows guest: Open cmd.exe and run:
net use x: \\vboxsvr\share
Setting up the Windows virtual machine on Linux gives you the flexibility of getting the benefits of both Operating systems on a single PC. If you want to learn the Linux but also don’t want to give up easy to use Windows 7, Windows 8 or Windows 10 OS then either you can install the Linux on Windows or Windows on Linux. Creating free virtual machines with help of some virtual software like Vmware or Oracle VirtualBox is called virtualization. The virtualization environment created by such kind of software is by emulating hardware and make it available for the operating system we about to install on it. We called it a Guest operating system and primary OS of the computer system known as Host.
So, let’s see how to install and create Windows 10/8/7 Virtual Machine on LinuxStep 1: Install VirtualBox on Ubuntu Linux hostStep 2: Run the Linux VirtualBoxStep 3: Create your first free Windows Virtual Machine on LinuxStep 4 Assign the Memory to your Windows virtual machineStep 5: Hard disk configurationStep 6: File location and sizeStep 7: Choose the Windows 7,8 or 10 ISO image to install.
So, let’s see how to install and create Windows 10/8/7 Virtual Machine on Linux
For performing this tutorial we are using the Ubuntu 18.01 Linux but you can perform these steps with any other Linux too. The only thing which might get change is the way of VirtualBox installation. Rest of the method to create free Windows 7/8/10 machine on Linux will be the same.
Step 1: Install VirtualBox on Ubuntu Linux host
First of all, we install the Oracle VirtualBox which is an open source & free software for creating a virtual machine on both Linux (link) and Windows (Link) machines. You can download it by using the given links, however, for Ubuntu, here, we are using the command line terminal to install. Please use the below commands:
Sudo apt-get install virtualbox
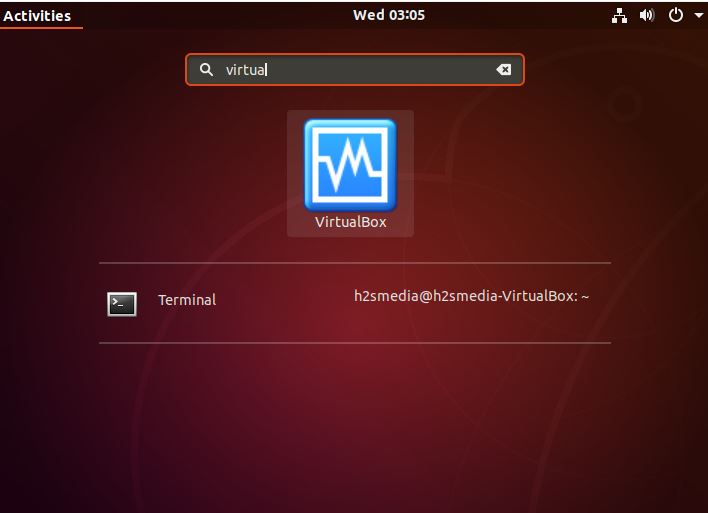
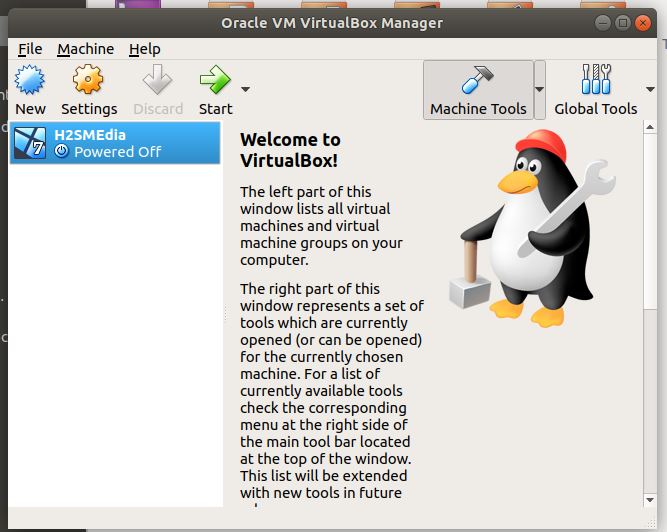
Step 2: Run the Linux VirtualBox
The above single command will install the VirtualBox on Ubuntu. Now search for the installed VirtualBox and run it
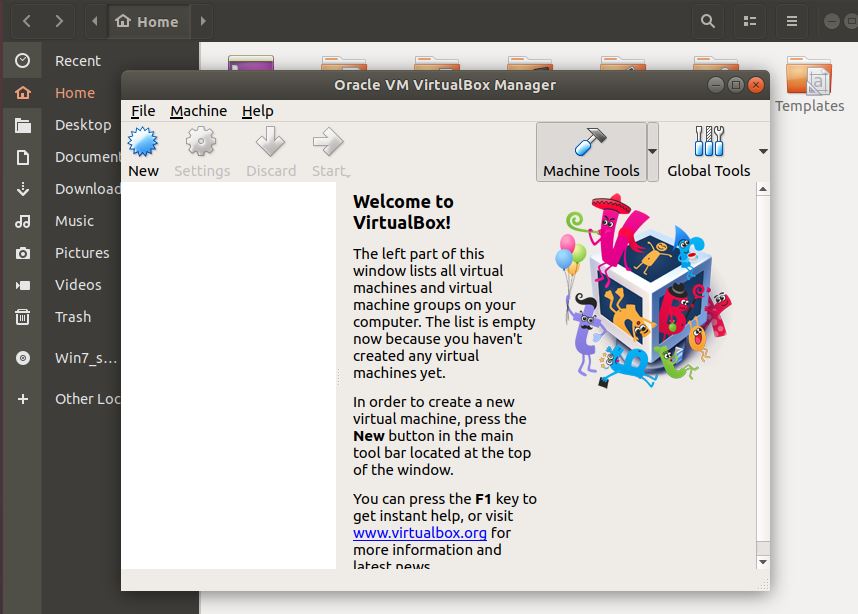
Step 3: Create your first free Windows Virtual Machine on Linux
1. Click on the New Button of the Virtualbox Linux.
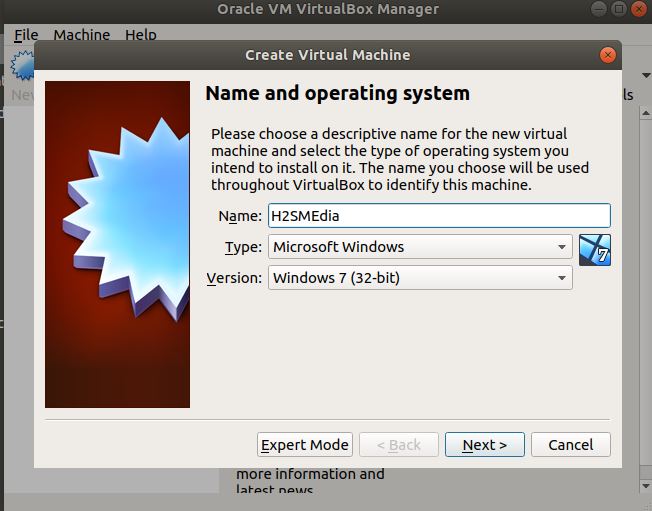
2. GIve some name to your Windows Virtual machine and select the Type of operating system include the version (32-bit or 64-bit).
Step 4 Assign the Memory to your Windows virtual machine
The availability of the memory (RAM) depends on the host system. Click on the Next button after selecting the RAM.

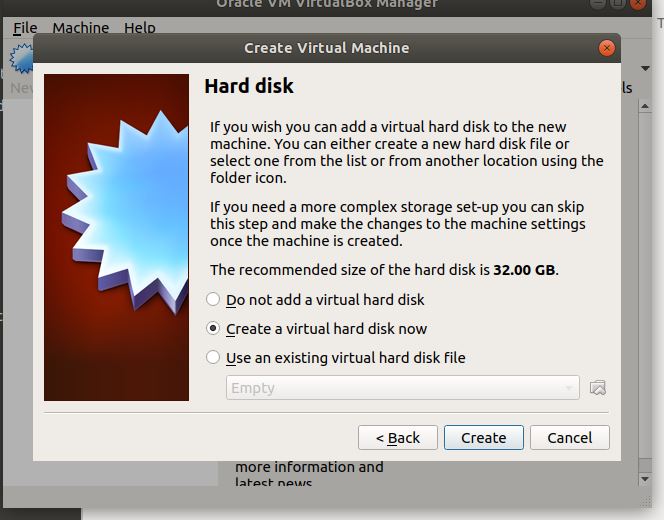
Step 5: Hard disk configuration
After adding the RAM, it is time to configure the hard disk for your Windows Virtual machine. Select the Create a Virtual hard disk now option and click on the Create button.
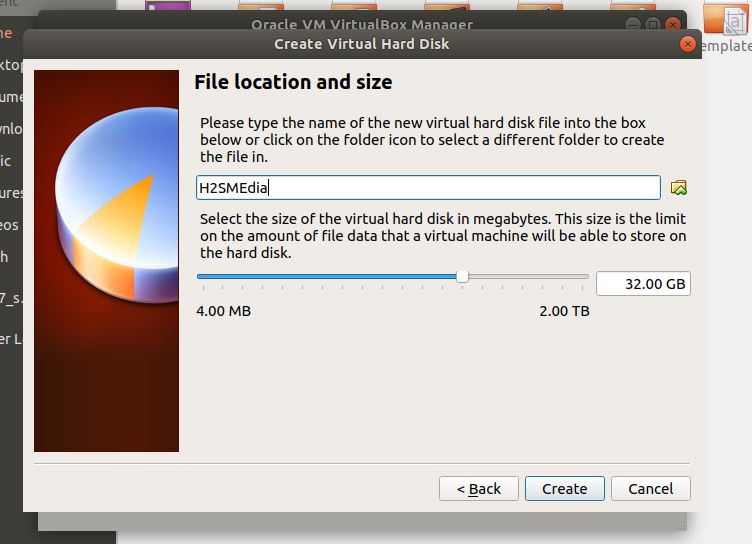
Step 6: File location and size
In this step, we need to give some name to our virtual hard disk and also need to assign the amount of hard disk storage you want to give to your virtual machine. For example, the amount which I have given is the 32GB but you can increase or decrease it as per your requirement. Also, by default, the virtual machine will consume the space of your primary partition, in case you want to instruct the Virtualbox to store all virtual files somewhere else, I mean in some other partition then click on the folder icon given in front of the name box and choose the destination.
Finally, click on the Create button.
Step 7: Choose the Windows 7,8 or 10 ISO image to install.
After the above step, you pushed back to the main screen of the Virtualbox from where select the created Virtual machine and then click on the Settings option.
From the settings option go to Storage-> Click on the Empty CD icon and then from the right side panel click on the CD icon. If you have the Windows ISO image then click on the click on Choose Virtual Optical Disk File and select the Windows 7/8/10 ISO image. However, if you have CD disk then put it into your computer’s optical drive and select the Host drive option.
After selecting the ISO image get back to the VirtualBox main screen and click on the START button.

Again click on the start button.

Finally, the VirtualBox will boot the Windows operating system and follow the rest of the Windows installation process on Linux host Virtual machine which is same as on any physical system.

Other Useful resources:
- Install OwnCloud on Virtual Machine- Appliance setup guide
- Connect Synology NAS directly to pc without router & external DHCP
- Install Ubuntu Minimal Server 18.04 “Bionic Beaver”: Just 64 MB
- How To install Portable Virtualbox on USB to Run Virtual Machines Anywhere
- Run Windows 95 app on a Windows, Mac or Linux
- How To Install Rockstor NAS On Ubuntu/Debian in Virtual Machine