

If you’re looking to run virtual machines on your Windows 10 or 11 PC, VirtualBox is a powerful and free option. This guide will walk you through the steps to download and install VirtualBox on your computer. By the end of this tutorial, you’ll have VirtualBox set up and ready to use.
Key Takeaways
- VirtualBox allows you to run multiple operating systems on a single machine.
- The installation process includes downloading the installer, setting it up, and enabling virtualization.
- Ensure you follow the on-screen instructions during installation for a smooth setup.
The first step to installing VirtualBox is to download the software.

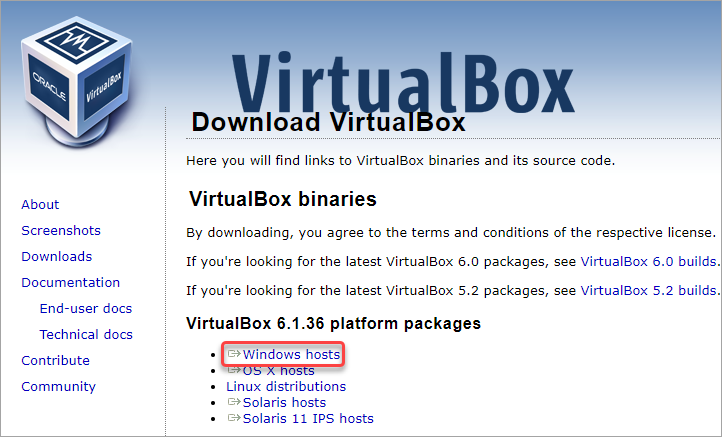
- Visit the VirtualBox Downloads page. You can also find the direct link in the description of the video.

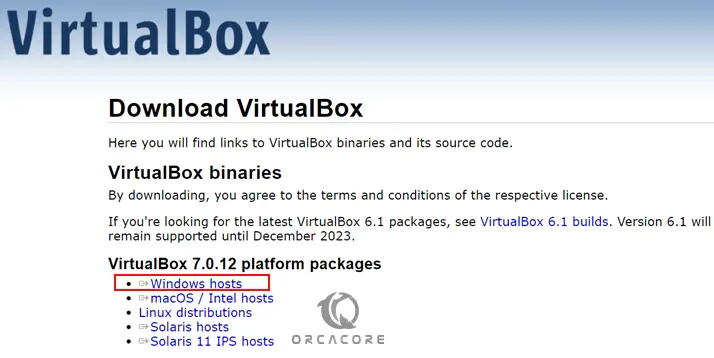
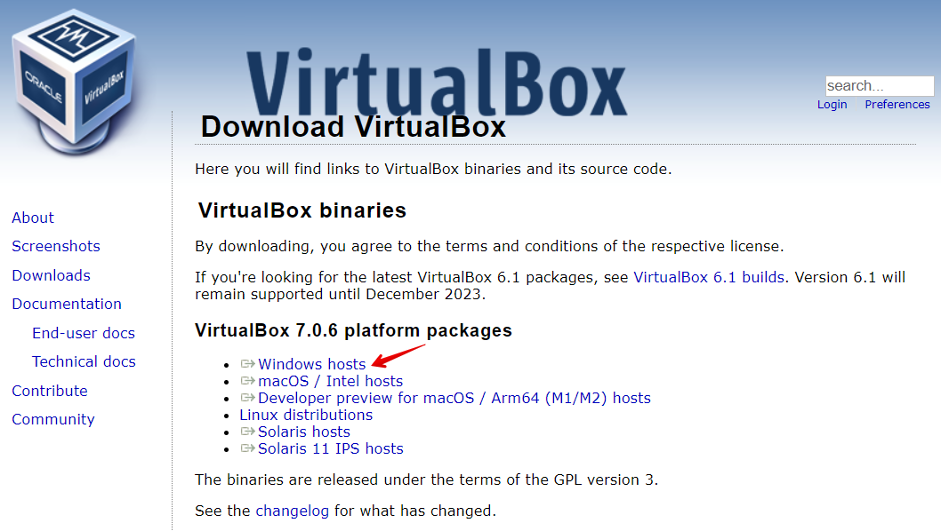
- Under the “VirtualBox platform packages,” select Windows hosts to download the installer for your Windows PC.

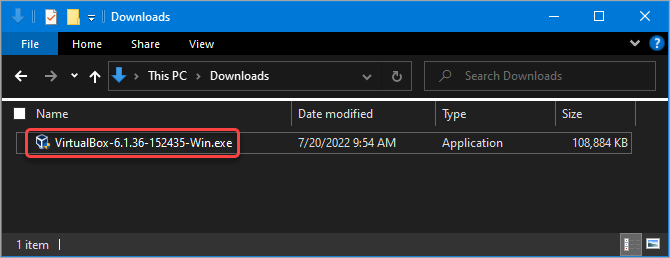
- Once the download is complete, locate the file and open it to start the installation process.
Step 2: Install VirtualBox
Once the download is complete, follow these steps to install VirtualBox on your computer:

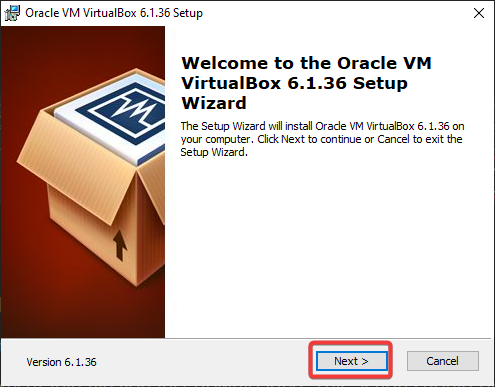
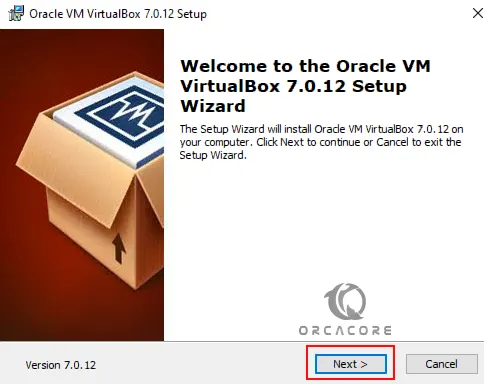
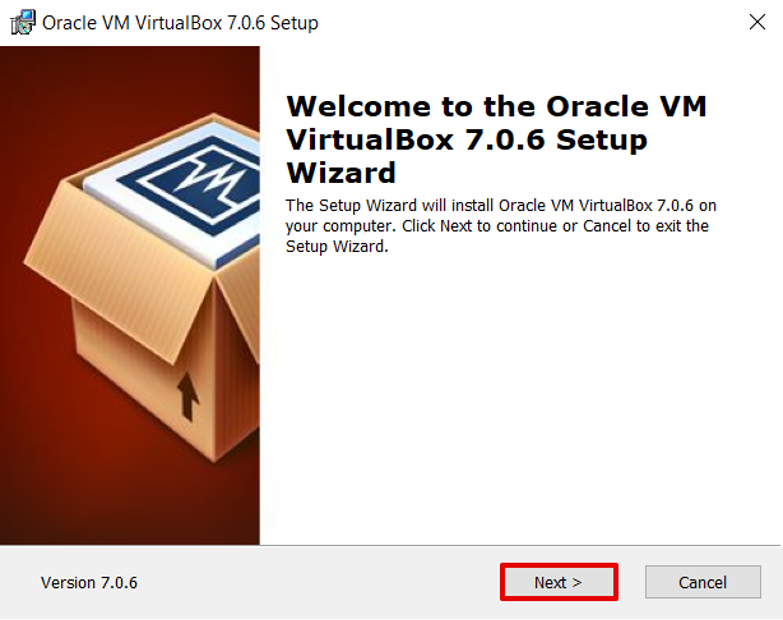
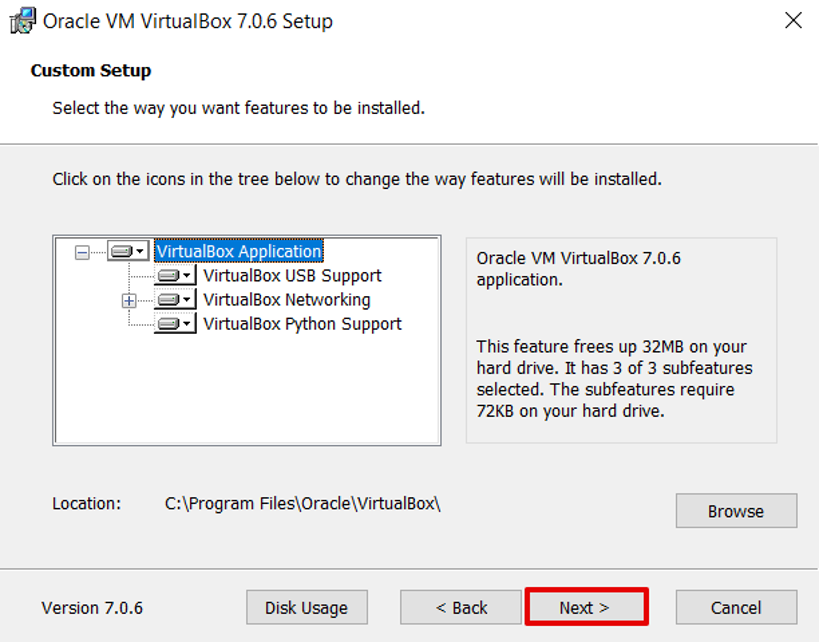
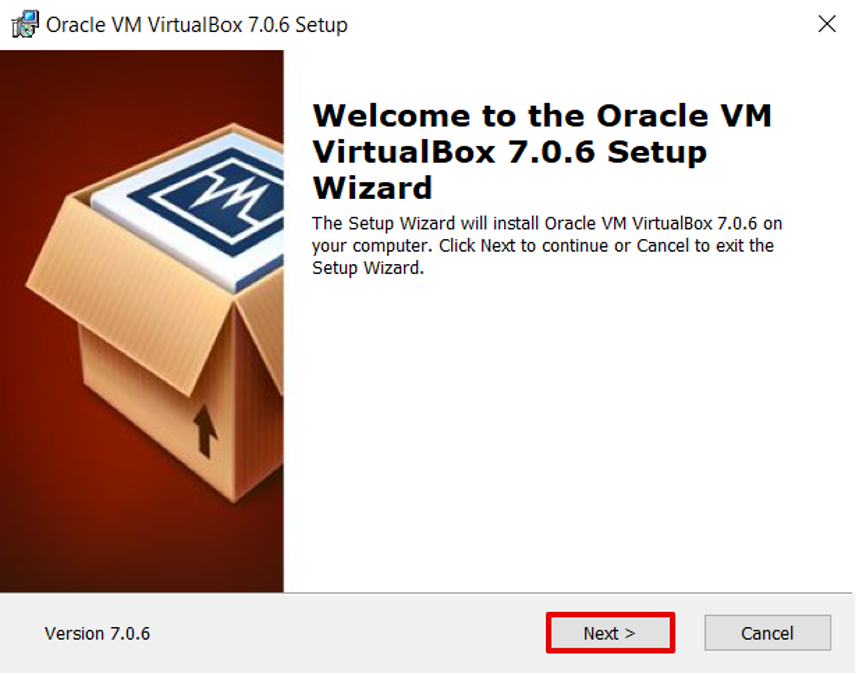
- Start the Setup Wizard: When you open the installer, the VirtualBox setup wizard will launch. Click Next to proceed.

- Choose Installation Location: You have the option to install VirtualBox in a custom location. Click Browse to select a different folder. If you’re fine with the default location, click Next to continue.

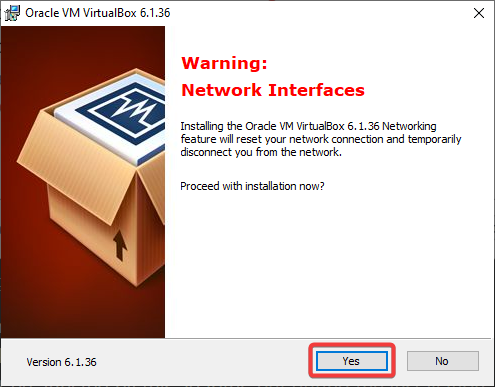
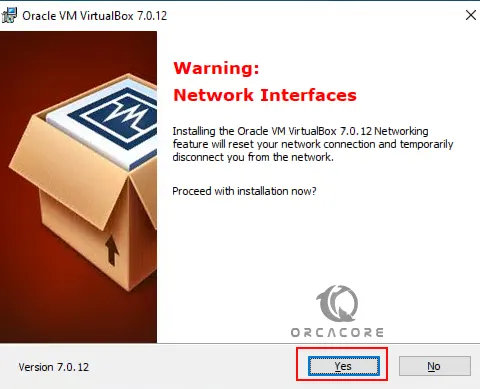
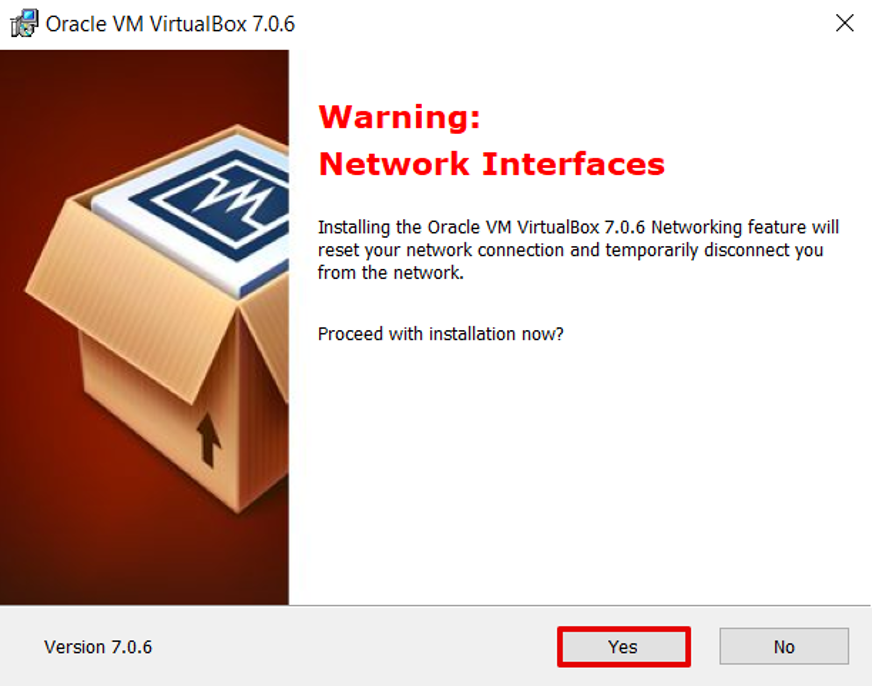
- Network Disconnection Warning: VirtualBox installation may briefly reset your network connection. If you’re okay with this, click Yes to proceed.

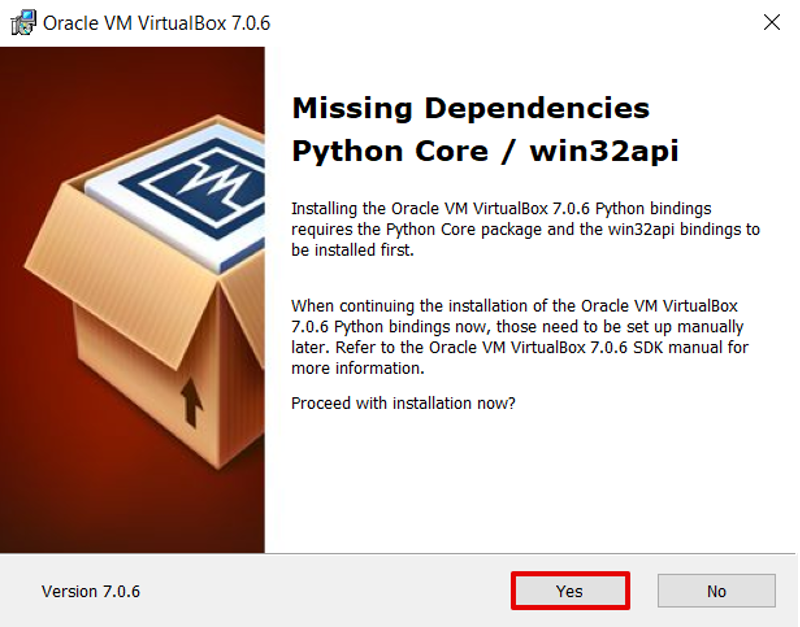
- Address Missing Dependencies: If any dependencies are missing, you’ll see a prompt. Click Yes to install them.

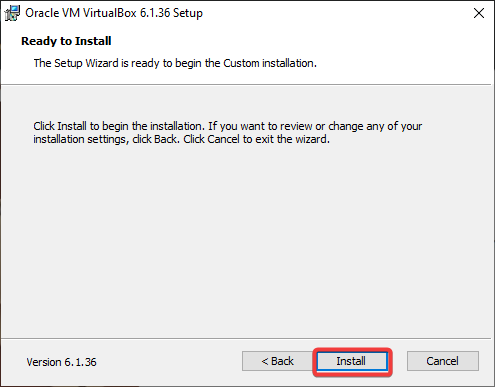
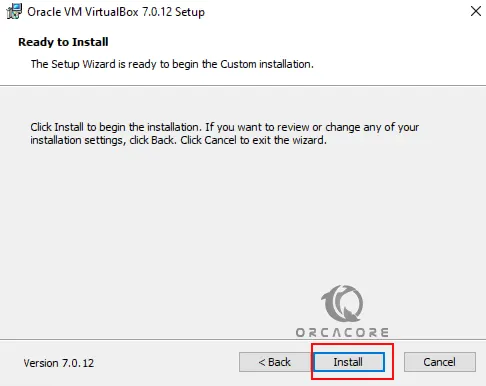
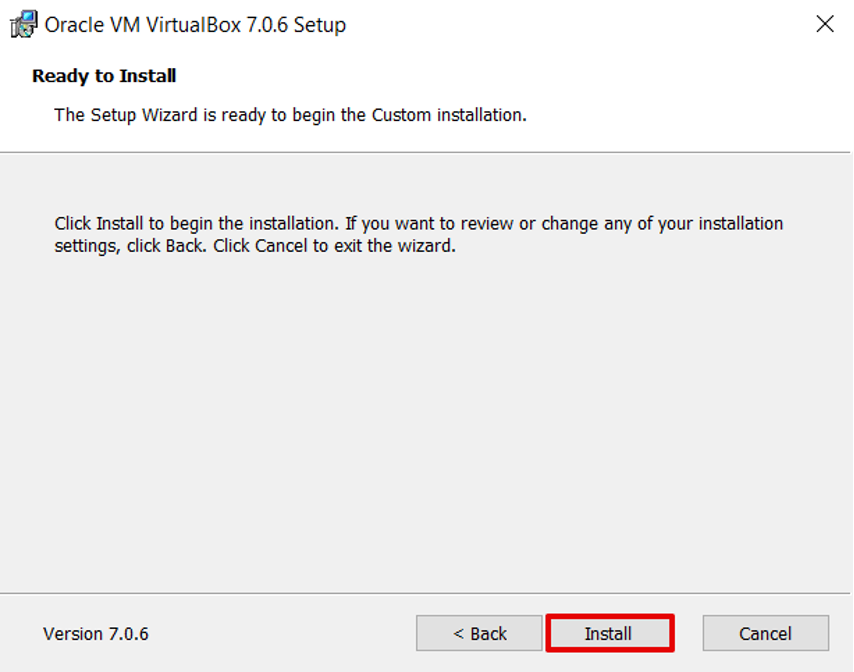
- Begin Installation: Click Install to start installing VirtualBox on your Windows machine. The installation process may take a few minutes.
Step 3: Complete the Installation
Once the installation is finished, you’ll be taken to a completion screen.

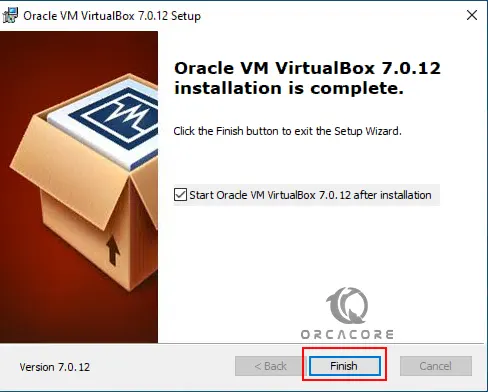
- Launch VirtualBox: By default, VirtualBox will start after the installation is complete. If you’d like to begin using it right away, leave the checkbox selected and click Finish.

- Enable Virtualization: Before you can create and run virtual machines, you’ll need to ensure that virtualization is enabled in your computer’s BIOS. If you haven’t done this yet, check out our separate guide on enabling virtualization for a step-by-step tutorial.

Conclusion
By following this guide, you should now have VirtualBox successfully installed on your Windows 10 or 11 PC. You can start experimenting with virtual machines and explore various operating systems without affecting your primary setup. If you found this tutorial helpful, consider subscribing for more VirtualBox tips and tutorials.
FAQ
How do I access the VirtualBox settings after installation?
To access VirtualBox settings, simply open the VirtualBox application and go to the “File” menu. From there, you can adjust global settings, preferences, and more.
What if my VirtualBox installation fails?
If your installation fails, ensure that your system meets the minimum requirements and that virtualization is enabled in your BIOS. You can also try running the installer as an administrator.
Is VirtualBox safe to install on Windows 10 or 11?
Yes, VirtualBox is a widely used and trusted virtualization tool developed by Oracle. As long as you download it from the official website, it’s safe to install.
Can I install VirtualBox on macOS or Linux?
Yes, VirtualBox supports multiple operating systems, including macOS and Linux. You can download the appropriate version for your OS from the VirtualBox website.
How do I uninstall VirtualBox if I no longer need it?
To uninstall VirtualBox, go to your Control Panel, click on “Programs and Features,” locate VirtualBox, and select “Uninstall.” Follow the prompts to complete the removal process.
Do you want to try a different operating system but don’t want to risk installing it on your main computer? Perhaps you need to test software on various platforms but don’t want to set up different computers? Don’t fret. You can install VirtualBox on Windows 10 and create guest VMs instead.
VirtualBox is a free virtualization program that makes it extremely convenient to set up virtual machines on different operating systems. This tutorial will teach you how to install VirtualBox on Windows 10 and the basics to get you started.
Prerequisites
This tutorial will be a hands-on demonstration. If you’d like to follow along, be sure you have the following.
- A Windows 10 computer. This guide uses Windows 10 21H2 64bit, but VirtualBox should work fine on any recent version of Windows 10 or 11.
- An ISO file for the operating system you want to install. This ISO could be of any VirtualBox-supported guest OSes.
- Free storage space. How much you need will depend on the size of the ISO you’re using, but in general, there should be at least 20 GB of free disk space.
- RAM. How much you need will depend on the operating system you want to install and how you plan on using it.
Installing VirtualBox on Windows 10
To install VirtualBox on Windows 10, you must first download the appropriate installation file for your host. From there, the installation process uses a Wizard interface, which should not be too complicated, even for a beginner.
1. Open a browser and open the VirtualBox downloads page and click the Windows hosts link. The latest VirtualBox version as of this writing is 6.1.36. Save the installer somewhere you can quickly locate it, like your Downloads folder.
2. Locate the VirtualBox installer file using your File Explorer. Double-click the file to launch the VirtualBox Setup wizard.
3. Click Next on the first screen. This action tells the Wizard that you want to install VirtualBox.
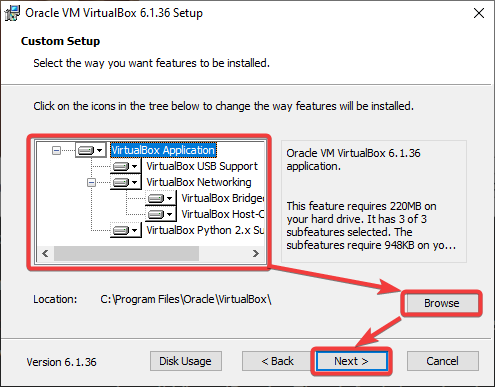
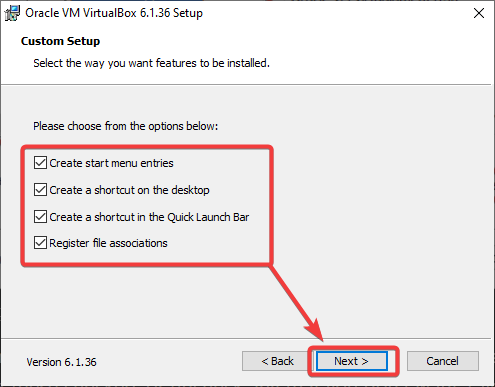
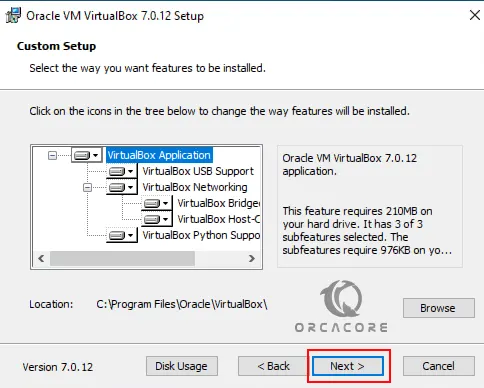
4. Do the following actions on the Custom Setup screen.
- You’ll see a list of the features the Wizard will install. In this example, leave the default selection.
- Browse and select the location you want to install VirtualBox in. The default location is fine, but feel free to change it if you prefer.
- Click Next when you’re ready to continue.
5. On the next screen, you’ll see a list of the shortcuts and file associations the installation will create. Check or uncheck the items you wish to include or exclude and click Next. This example leaves all options checked.
6. On the next screen, you’ll see a warning about networking. The setup process will install a virtual network adapter, which may cause your network connection to disconnect momentarily. Click Yes to continue.
7. Finally, you’ll see a screen asking you to confirm the installation. Click Install to install VirtualBox on Windows 10.
8. The installation process takes several minutes, depending on your system speed. Click Finish to close the Wizard after the installation and start using VirtualBox.

Creating Your First Virtual Machine
After you install VirtualBox on Windows 10, your can create your first virtual machine.
Windows 11 had compatibility issues with VirtualBox, such as VMs cannot start, crashing, and having corrupted displays. But Microsoft confirmed that such issues no longer exist in VirtualBox 6.1.28 and later versions, so you can also apply all the steps below on Windows 11.
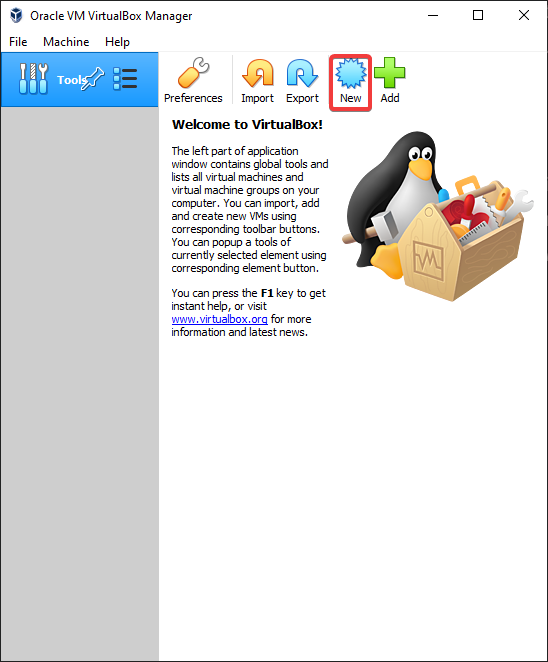
1. First, click the New button in the top-right corner of the VirtualBox window. This action brings up the Create Virtual Machine wizard. This Wizard lets you configure your new VM with the settings you want.
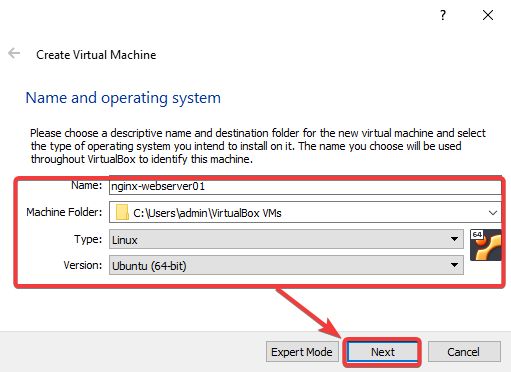
2. Configure the following on the Name and operating system page.
- Name: Give your VM a name. This name can be anything you want.
TIP: Name the VM based on its intended purposes, such as nginx-web-server or windows10-development, so you can better identify the VM later.
- Machine Folder: Specify the location to store your virtual machine files. You can leave the default location or click the Browse button to select a different one.
TIP: Ensure there’s enough space on your drive for your VM. A Linux VM can be as small as 4GB, but a Windows VM will need at least 20GB.
- Type: VirtualBox offers many different types of OSes. Select the operating system you want to install from the drop-down menu. This tutorial selects Linux for the type.
TIP: If the OS you want does not appear in the list, you can select Other at the bottom. This option tells VirtualBox to try to autodetect the features of your OS in the best possible way.
- Version: Select the version of the operating system you want to install from the drop-down menu. This tutorial goes with Ubuntu 20.04 LTS 64bit, so its version is Ubuntu (64-bit).
- Click Next to continue.
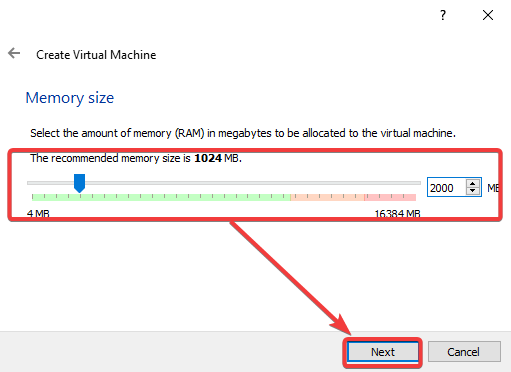
3. On the Memory size page, set how much memory (RAM) your VM will have. You can choose between 4MB (this value is too low for any OS) to 16384MB. The default is 1024MB, but you can increase it.
Generally, 2000MB is a good starting point for a Linux VM, while 4096MB for a Windows VM.
Be careful not to allocate too much memory to your VM. If you do, your host computer may start to lag or become non-responsive. On the other hand, if you set too little memory for the VM, your guest OS and apps may not have enough resources to run correctly. Choose the memory size wisely.
Click Next to continue.
4. On the Hard disk screen, decide whether to create a new hard disk for your guest VM or use an existing one. This example chooses to create a new hard disk since.
This virtual hard disk will be your guest VM’s primary hard disk that holds all the data, such as the guest OS, apps, and other files.
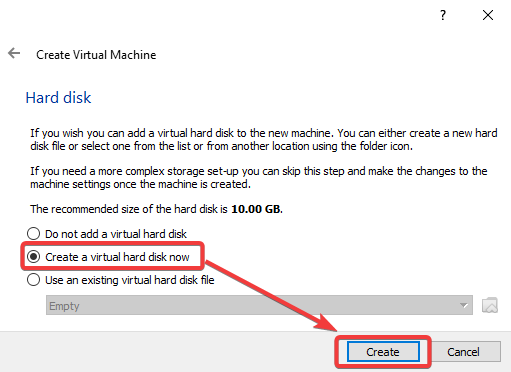
You can select Use an existing hard disk if you have an ISO image or VDI file that already contains a guest operating system.
5. On the Hard disk file type page, select VDI (VirtualBox Disk Image) and click Next to continue. This file type is the default for VirtualBox.
You may choose the corresponding option if you plan to use the virtual hard disk with other virtualization solutions, like VMware or Hyper-V.

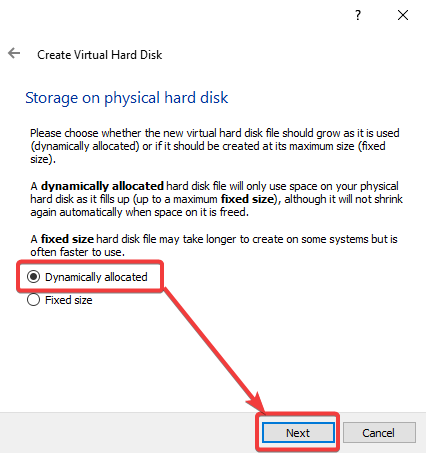
6. On the Storage on physical hard disk, select Dynamically allocated or Fixed size, depending on how you want to provision the virtual disk file size allocation. This example chooses the Dynamically allocated option. Click Next to continue.
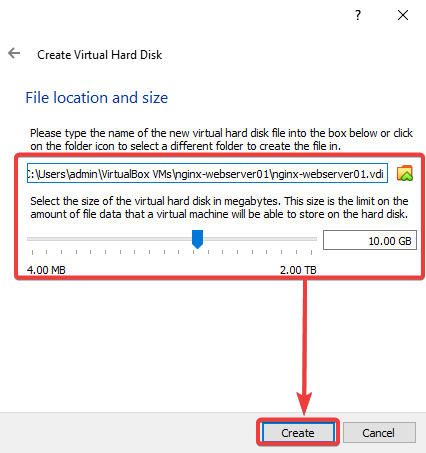
7. On the File location and size screen, specify the location and maximum size of the new virtual disk, and click Create.
A good rule of thumb is to allocate at least 10GB for a Linux VM and 40GB for a Windows VM.
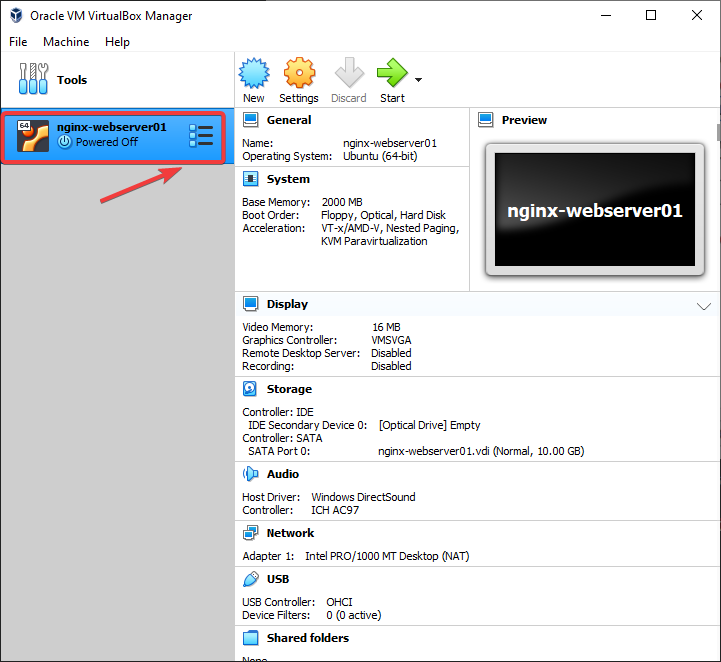
You have a new virtual VM, as shown in the VirtualBox Manager window below.
Installing the Guest Operating System
You’ve created a new virtual machine, but it’s useless without an operating system. In this section, you’ll learn how to install a guest operating system on your new VM.
You need an ISO file with the OS installation files to install the guest OS. You can download ISO files for many popular operating systems from the internet. For example, you can get a Ubuntu 20.04 ISO file from the Ubuntu official website.
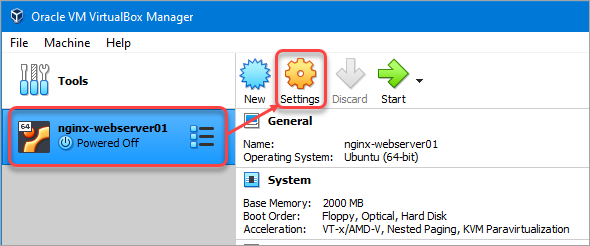
1. Click your VM on the list and click Settings.
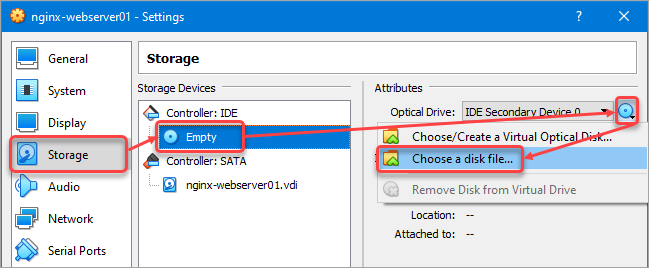
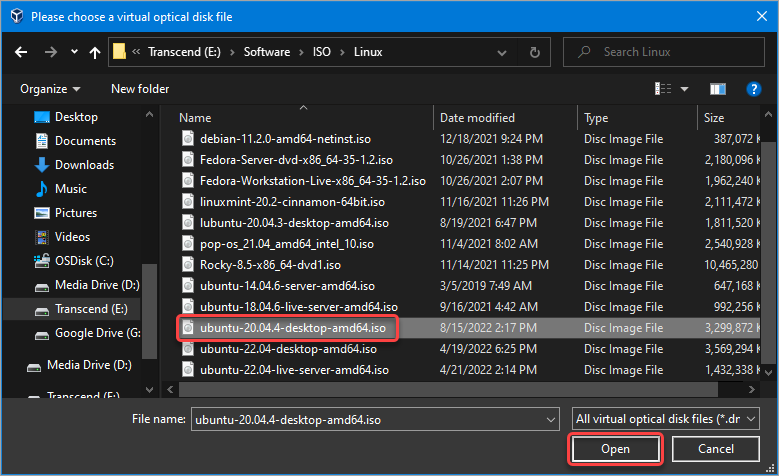
2. On the Settings window, click Storage → Empty disk → the Optical Drive icon → Choose a disk file.
3. Locate the ISO file and click Open. This example chooses the ubuntu-20.04.4-desktop-amd64.iso file.
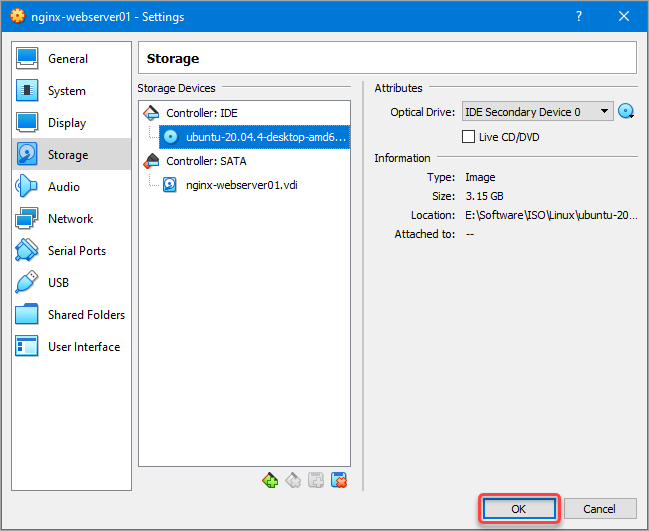
4. After loading the ISO file, click OK.
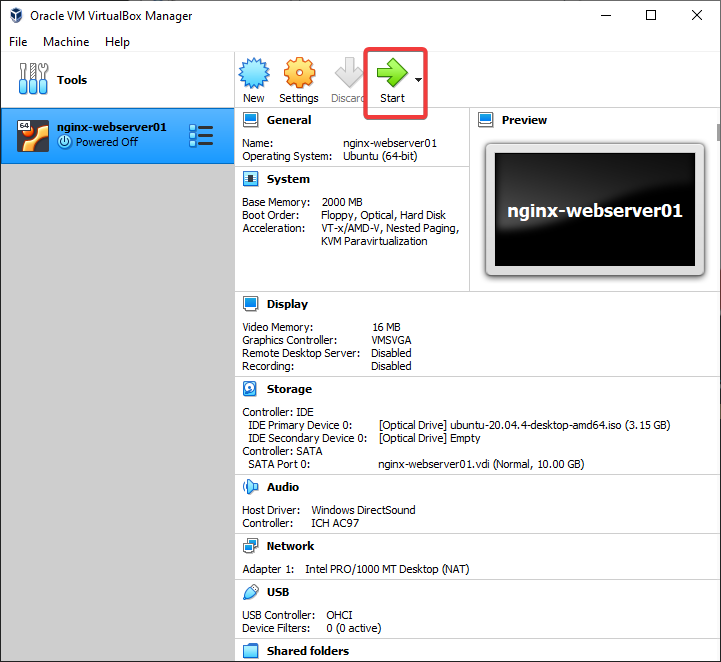
5. Start your VM by clicking the Start button in the VirtualBox Manager window. The VM will boot from the ISO file. Install the operating system as you would on a physical machine.
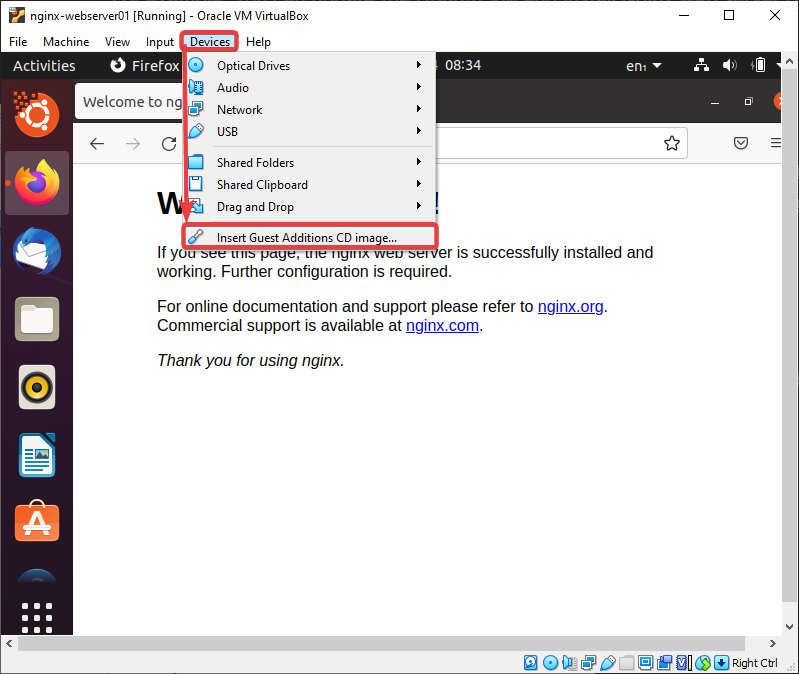
6. Once the installation is complete, one more task related to your new VM is to install the Virtual Box Guest Additions. The Guest Additions enable features like the shared clipboard, shared folders, mouse integration, display resize options, etc.
To install the Guest Additions, click the Devices menu and Insert Guest Additions CD Image. Doing so mounts the VBoxGuestAdditions.iso to your guest VM.
7. Provide your user password at the prompt and click Authenticate.
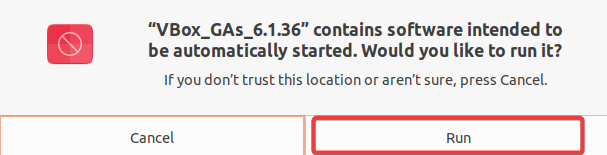
8. Next, click Run to allow the Guest Additions installation.
9. Follow the on-screen instructions to finish the installation. Once the installation is complete, reboot your VM for the changes to take effect.
Conclusion
This article taught you how to install VirtualBox on Windows 10 and create your first virtual machine. You also learned how to install the guest operating system on the VM and how to install the Guest Additions.
Now that you have a basic understanding of VirtualBox, you can experiment with different OSes and learn more about virtualization. With this new skill, why not create a WireGuard VPN connection inside a VM and access the internet safely from a public Wi-Fi network?
- Skip to content
- Accessibility Policy
Oracle VirtualBox: Base package source code and Extension Pack
Oracle VirtualBox Base package source code and Extension Pack are available from the community website at https://www.virtualbox.org/wiki/Downloads.
| Platform | File |
|---|---|
| For use with Version 7.1.8 only All Platforms (Windows, Mac OS X, Solaris and Linux) |
7.1.8 ExtPack |
Depending on your browser, you may need to right click and «Save As…» this file.
You might want to compare the SHA256 checksum or the MD5 checksum to verify the
integrity of downloaded packages.
Note: older Oracle VirtualBox 7.0 release downloads are available here.
Note: older Oracle VirtualBox 6.1 release downloads are available here.
In this guide, you will learn to Install VirtualBox on Windows 10 / 11 in the latest version. With VirtualBox, you can run multiple virtual machines in a single host OS. It is an open-source, free, and cross-platform software that is available for personal and business use. Also, with the Extension Pack, you can unlock advanced features for VirtualBox.
Now you can proceed to the rest of the article on the Orcacore website to see how you can install VirtualBox in the latest version on Windows and get the Extension Pack.
Table of Contents
Complete Guide To Install VirtualBox on Windows
Before you start, you must be sure that your Windows Client has enough space and storage. Also, you must have Distributable Code for Visual Studio installed on your server. To get this, you can visit this link.
Now follow the steps below to Install VirtualBox on Windows 10/11.
Step 1 – Download the Latest VirtualBox for Windows Hosts
At this point, you must get the latest VirtualBox Installer by visiting the Official website and clicking on Windows hosts.
Step 2 – Run the VirtualBox Installer
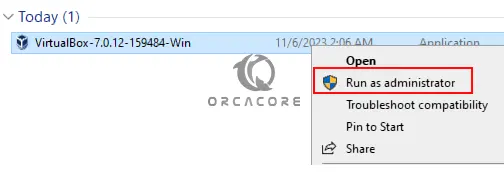
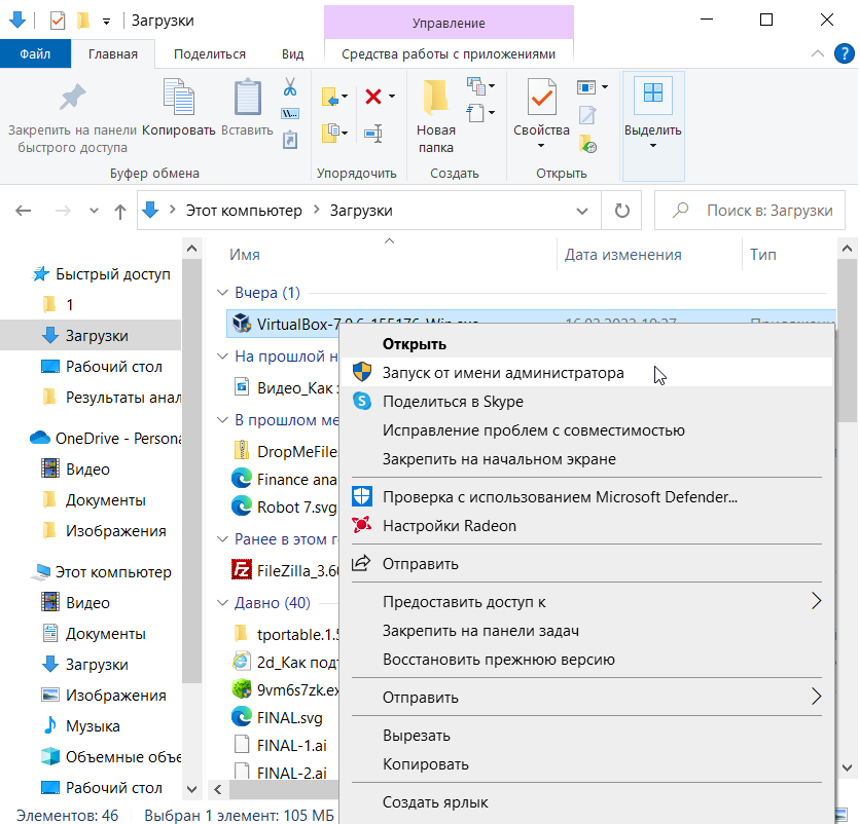
When your download is completed, you must run your installer by right-clicking on the file and running it as an administrator.
Step 3 – Start VirtualBox Setup Installation
First, you must click on Next on the Welcome VirtualBox setup wizard screen on Windows.
Next, you must select the all features that require 210MB of space and click Next. Also, it will be installed in the ‘C:\Program Files\Oracle\Virtualbox’ directory. You can choose another directory in which you have more space.
Then, you will get a warning message that Virtualbox network features will reset your network connection and will disconnect from the network temporarily. Simply click Yes to continue.
Missing Dependencies Python Core / win32api For VirtualBox
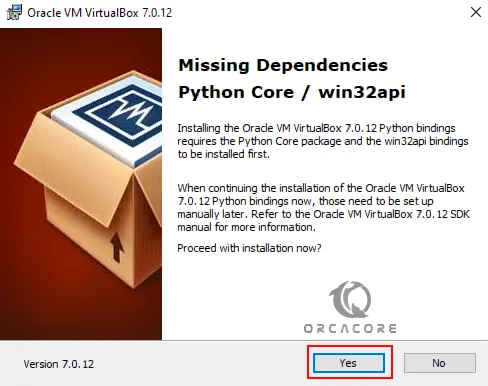
During the setup, you may get this missing dependencies message. Simply click Yes. After you are finished with the installation, you can resolve this by installing Python on Windows. Then, open your CMD and run the following command to get the win32api:
py -m pip install pywin32At this point, your VirtualBox is ready to install on Windows. Click on Install.
When it is completed, click on the Finish button.
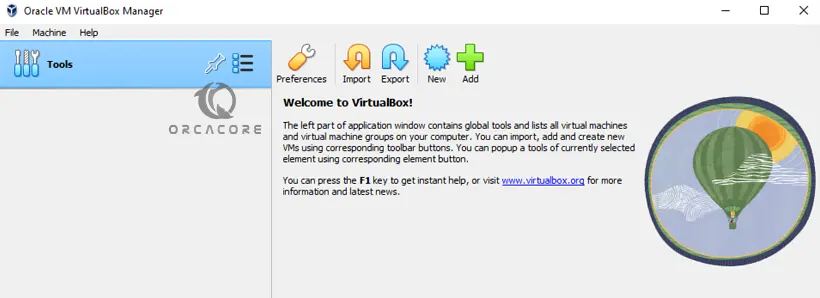
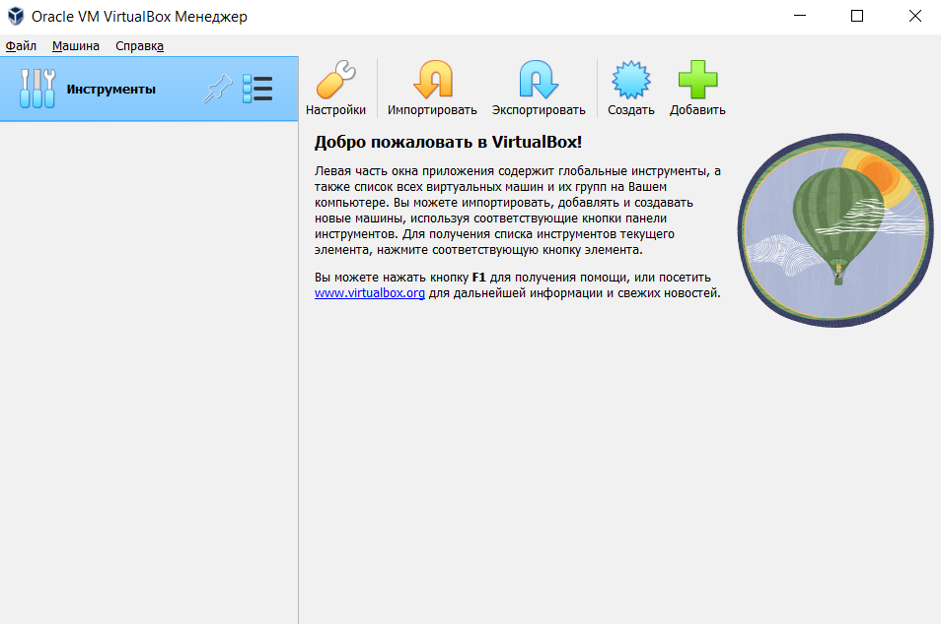
Now your VirtualBox manager dashboard will open on Windows.
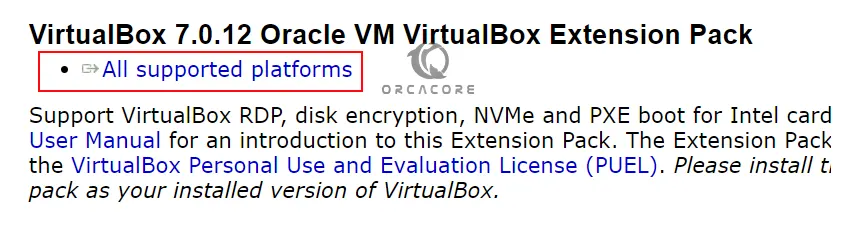
Step 4 – Download and Install the VirtualBox Extension Pack
At this point, you must download the latest extension pack from the official site.
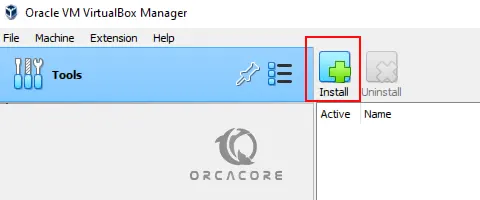
Then, from your VirtualBox manager, click on Tools and choose Extensions. From there, click on Install.
From there, select the Extension pack that you have downloaded and click Open.

Then, click on Install.
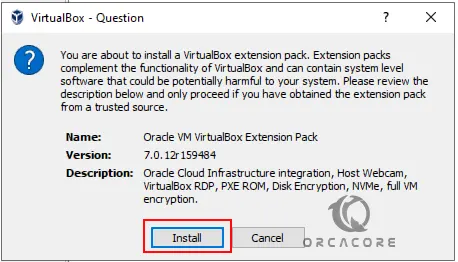
The installed extension packs will show in the Virtualbox ‘Extensions’ tab.
Finally, Oracle VirtualBox is ready to use. You can create a new Virtual machine using the ‘New’ option.
Conclusion
At this point, you have learned to Download and Install VirtualBox on Windows 10/11. From there, you can easily add your virtual machines and manage them from a single host server. Stay with us to tell you how you can add virtual machines to VirtualHost Manager in future guides.
Hope you enjoy using it. You may also like to read the following guides:
Windows Server 2025 – New Active Directory
5 Best Free Alternatives To Python
Установка Virtualbox на Windows
VirtualBox — это виртуальная машина, с помощью которой можно создать на одном компьютере еще один компьютер: он будет использовать ресурсы (диск, память, адаптеры) основного устройства, но при этом работать изолированно. С помощью Oracle Virtualbox можно запускать операционные системы для разных целей (экспериментов с программным обеспечением, тестирования несовместимых программ и утилит, эмуляции компьютерных сетей) в изолированной среде. Если виртуальная ОС будет повреждена, можно переустановить ее, что никак не повлияет на основную систему — это важное преимущество виртуализации.
В статье мы покажем, как установить Virtualbox на операционную систему Windows 10.
Как установить VirtualBox на Windows 10
Обратите внимание: несмотря на то, что установка проходит на английском языке, интерфейс программы VirtualBox полностью переведен на русский.
Чтобы скачать и установить VM VirtualBox на Windows 10, следуйте инструкции ниже:
1. Перейдите на официальный сайт, чтобы скачать программу.
2. В списке «VirtualBox (последняя версия) platform packages» кликните по пункту Windows hosts. Автоматически запустится загрузка файла.
3. Запустите программу от имени администратора. Для этого на компьютере кликните по файлу правой кнопкой мыши и выберите Запуск от имени администратора:
4. Чтобы запустить процесс установки, нажмите Next:
5. Выберите нужные компоненты для будущей BM. Мы рекомендуем подключить их все:
- VirtualBox USB Support — поддержка всех USB-устройств, которые будут подключены к виртуальной машине (прямо в операционной системе, установленной на виртуальную машину);
- VirtualBox Networking — создание виртуального сетевого адаптера и подключение виртуальной машины к интернету. Также будут установлены необходимые для полноценной работы драйверы;
- VirtualBox Python 2.x Support — поддержка скриптов на языке программирования Python. Скрипты позволяют расширять стандартный функционал программы.
Для этого нажмите на кнопку со знаком «минус»:
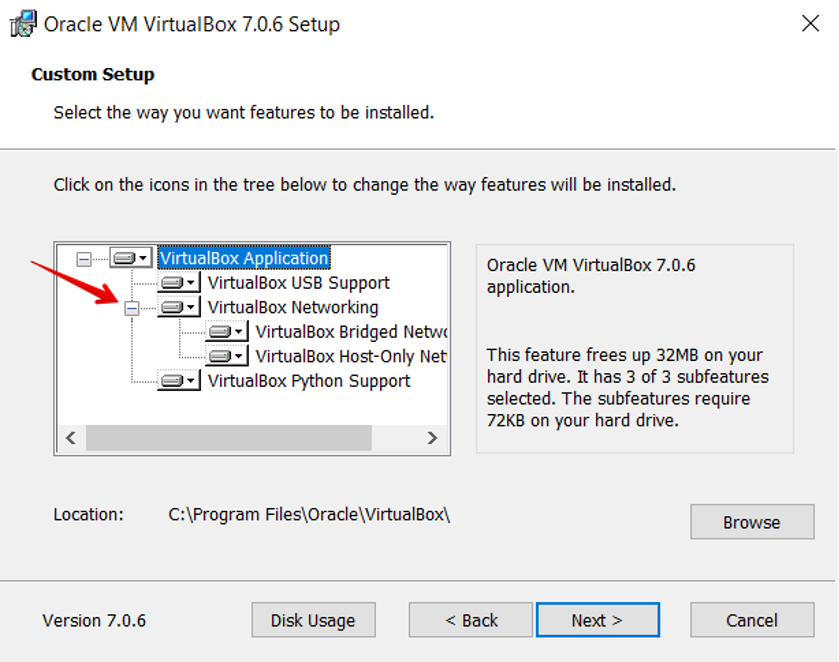
Затем нажмите Next:
6. На момент установки Virtualbox произойдет кратковременная потеря сети. Если это не критично в ближайшие 2-3 минуты, нажмите Yes:
7. Дайте согласие на установку пакета Python Core и win32api (иначе виртуальная машина для Windows 10 будет работать некорректно) — кликните Yes:
8. Чтобы перейти к установке, нажмите Next:
9. Затем нажмите Install.
Готово, вы установили виртуал бокс для виндовс 10.
Чтобы начать работу, скачайте образ нужной вам ОС (если вы новичок, подойдет готовая виртуальная машина) и настройте виртуальный виндовс. Например, в статье мы рассказали, как установить и настроить на Virtualbox ОС Linux.