
Есть несколько способов, как использовать Windows на Mac. Вероятно, самые популярные: традиционный Boot Camp и Boot Camp на внешнем диске. Но лично мне ближе установка второй системы на виртуалку. Это заметно проще и куда удобнее.
Да, сегодня Windows 10 бывает нужна даже бывалым маководам. Случается, разработчики «узкого» софта ленятся адаптировать его для macOS. Такой можно ставить на резервный PC, который лежит без дела, но проще на основной Mac через виртуалку. Это и обсудим.
Чем полезна виртуальная машина для Windows на Mac
«Виртуалкой» называют виртуальную машину. Это особенное программное обеспечение, которое нужно для запуска дополнительной операционной системы внутри базовой. Она подходит, чтобы использовать Windows в пределах macOS.
Такой софт дает возможность создать новый компьютер на базе старого. Даже технические характеристики выбрать получится. Но не нужно думать, что для работы с виртуалкой нужна сильно производительная машина. Даже мой MacBook Air 2019 справляется.
Есть несколько виртуальных машин, которые подойдут для установки дополнительной ОС на Mac. Про альтернативы расскажу в конце, а сам использую VirtualBox. Это бесплатное решение от Oracle, которое работает на macOS и поддерживает Windows. Этого достаточно.
С помощью VirtualBox Windows на Mac можно запустить в отдельном окне. Настройка виртуальной машины и установка дополнительной системы при этом не займет больше 30 минут. Почему бы не попробовать? Не вижу причин.
Кстати, с помощью VirtualBox приложения для Windows можно использовать и на Linux. Проходить требовательные AAA-игры так получится вряд ли. Но с обычным софтом данный прием сработает. Главное, не «промазать» с настройками.
➤ Скачать VirtualBox (бесплатно)
Для начала нужно создать виртуальную машину: 8 шагов
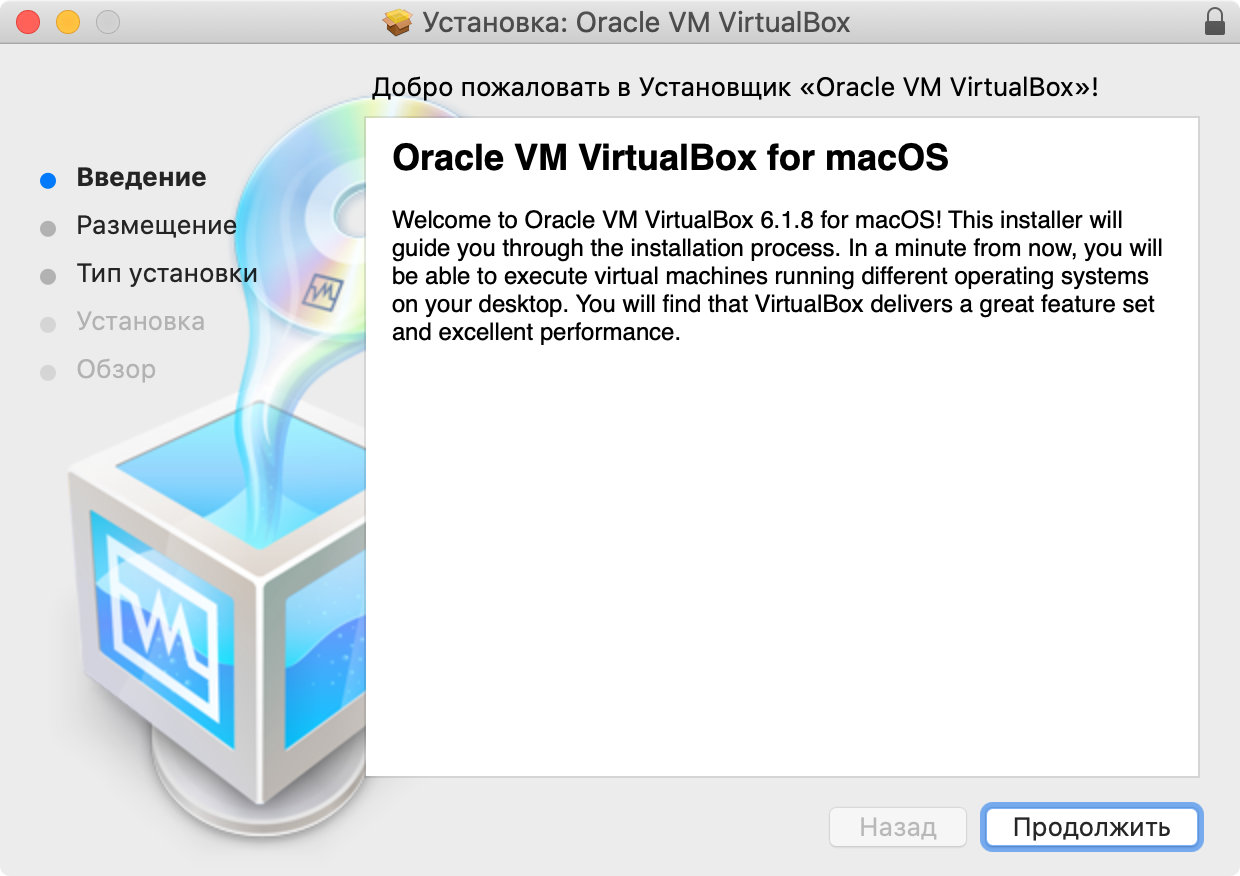
Шаг 1. Скачайте и установите VirtualBox.
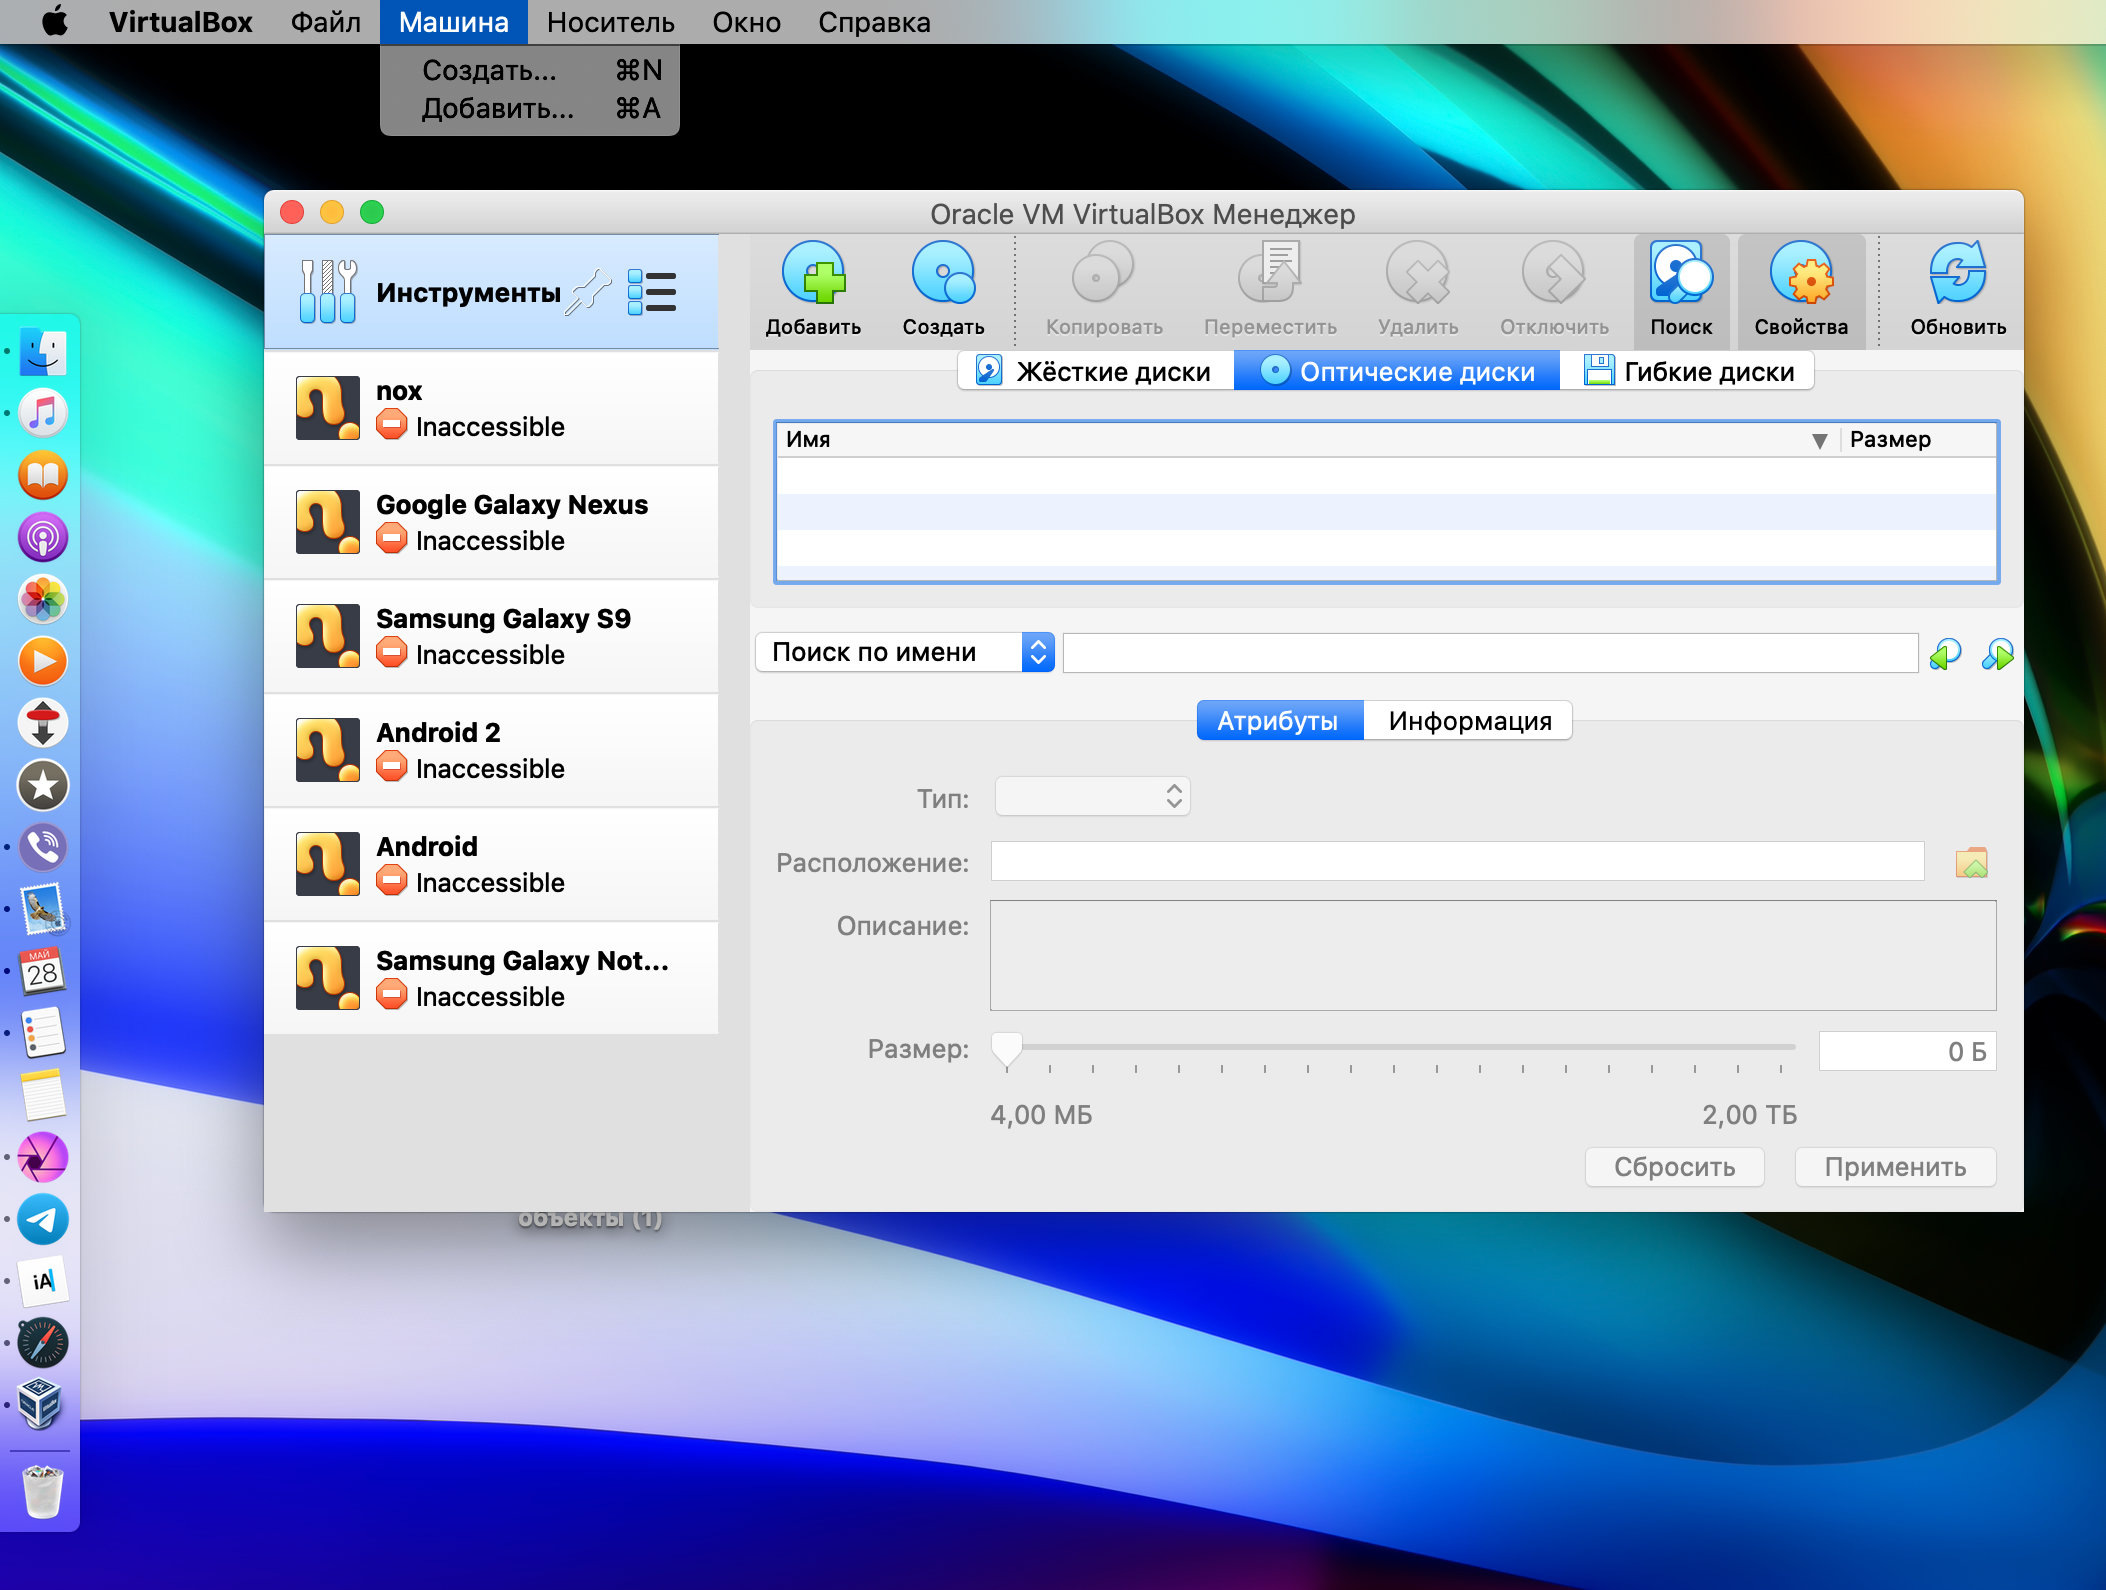
Шаг 2. Запустите VirtualBox, перейдите в пункт «Машина» в строке меню и выберите возможность «Создать».
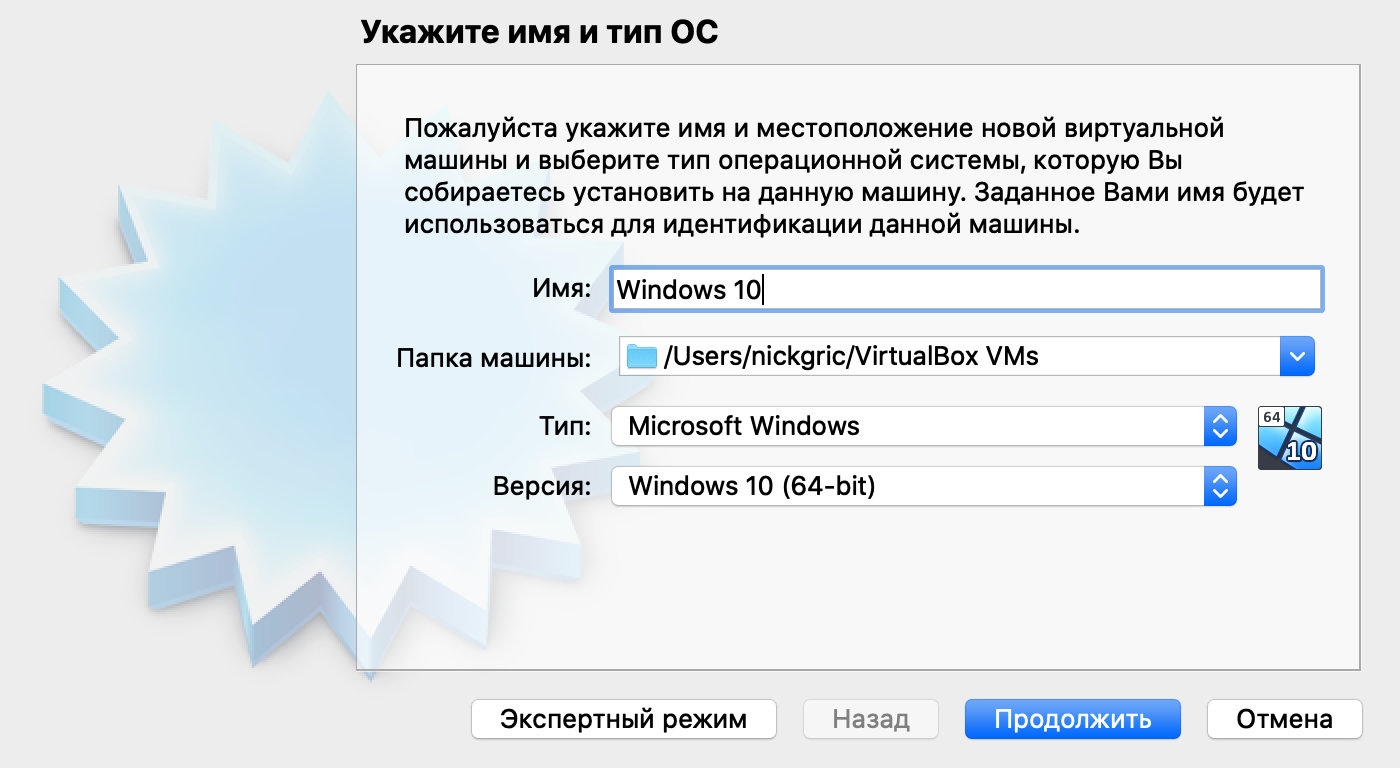
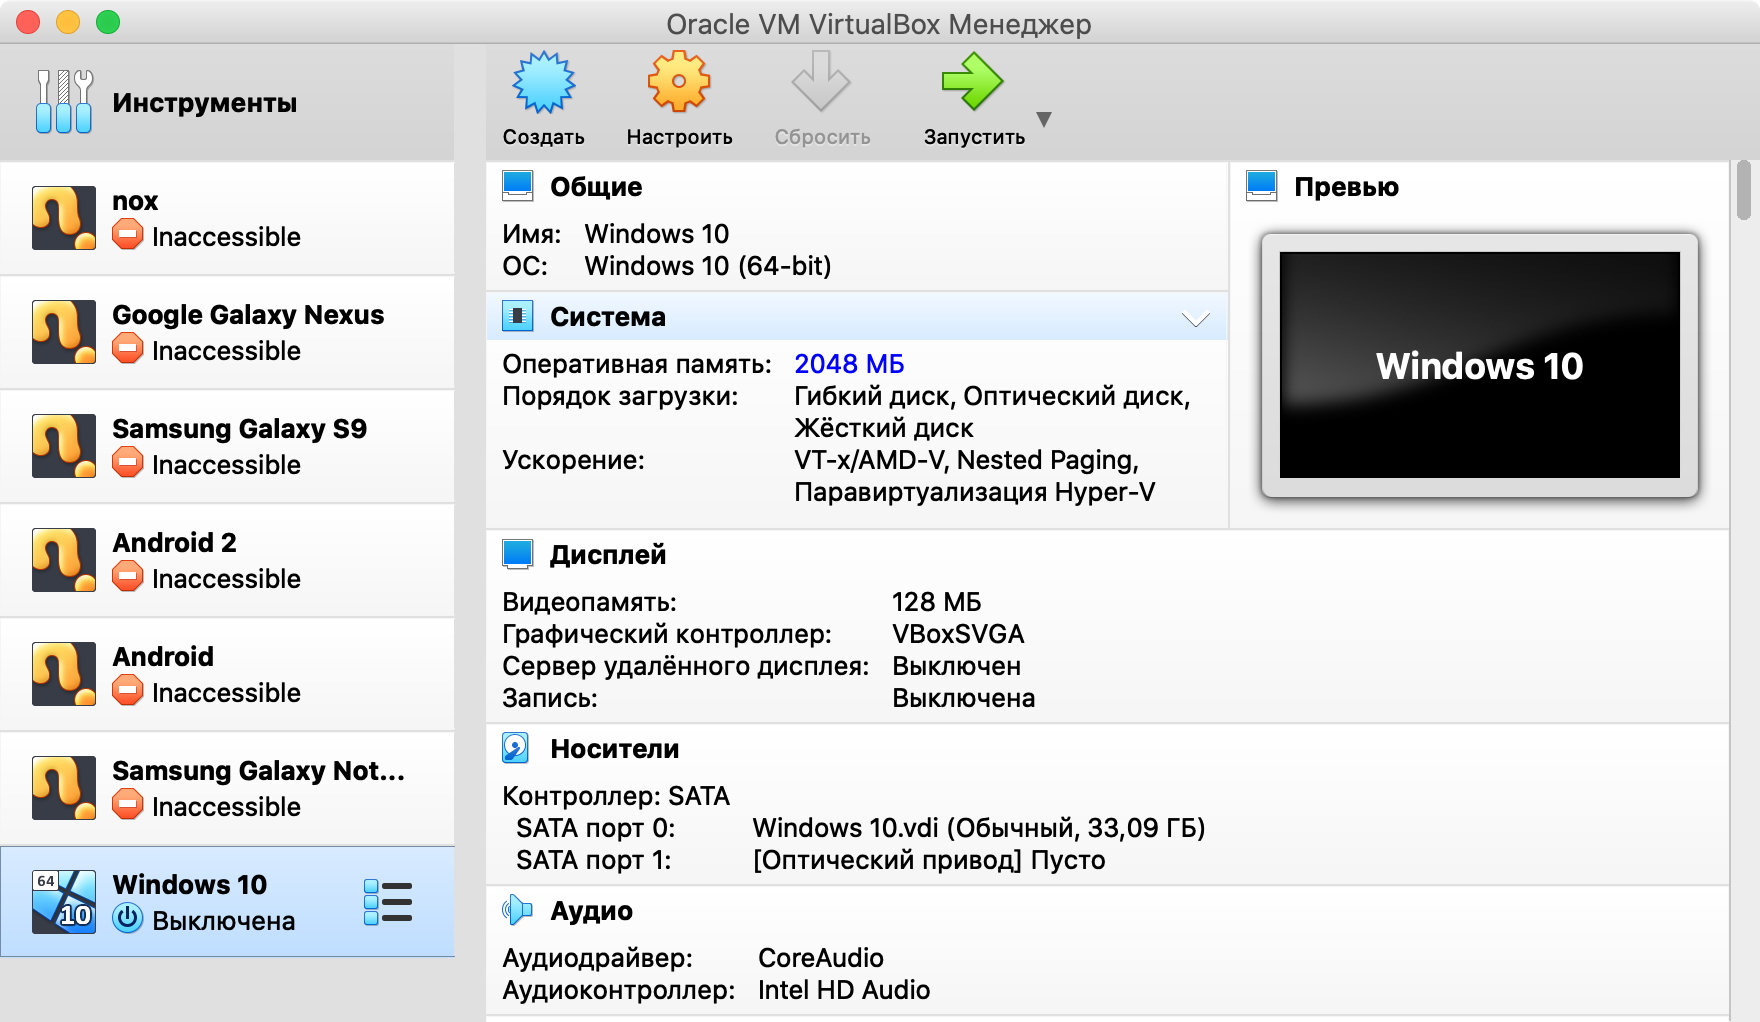
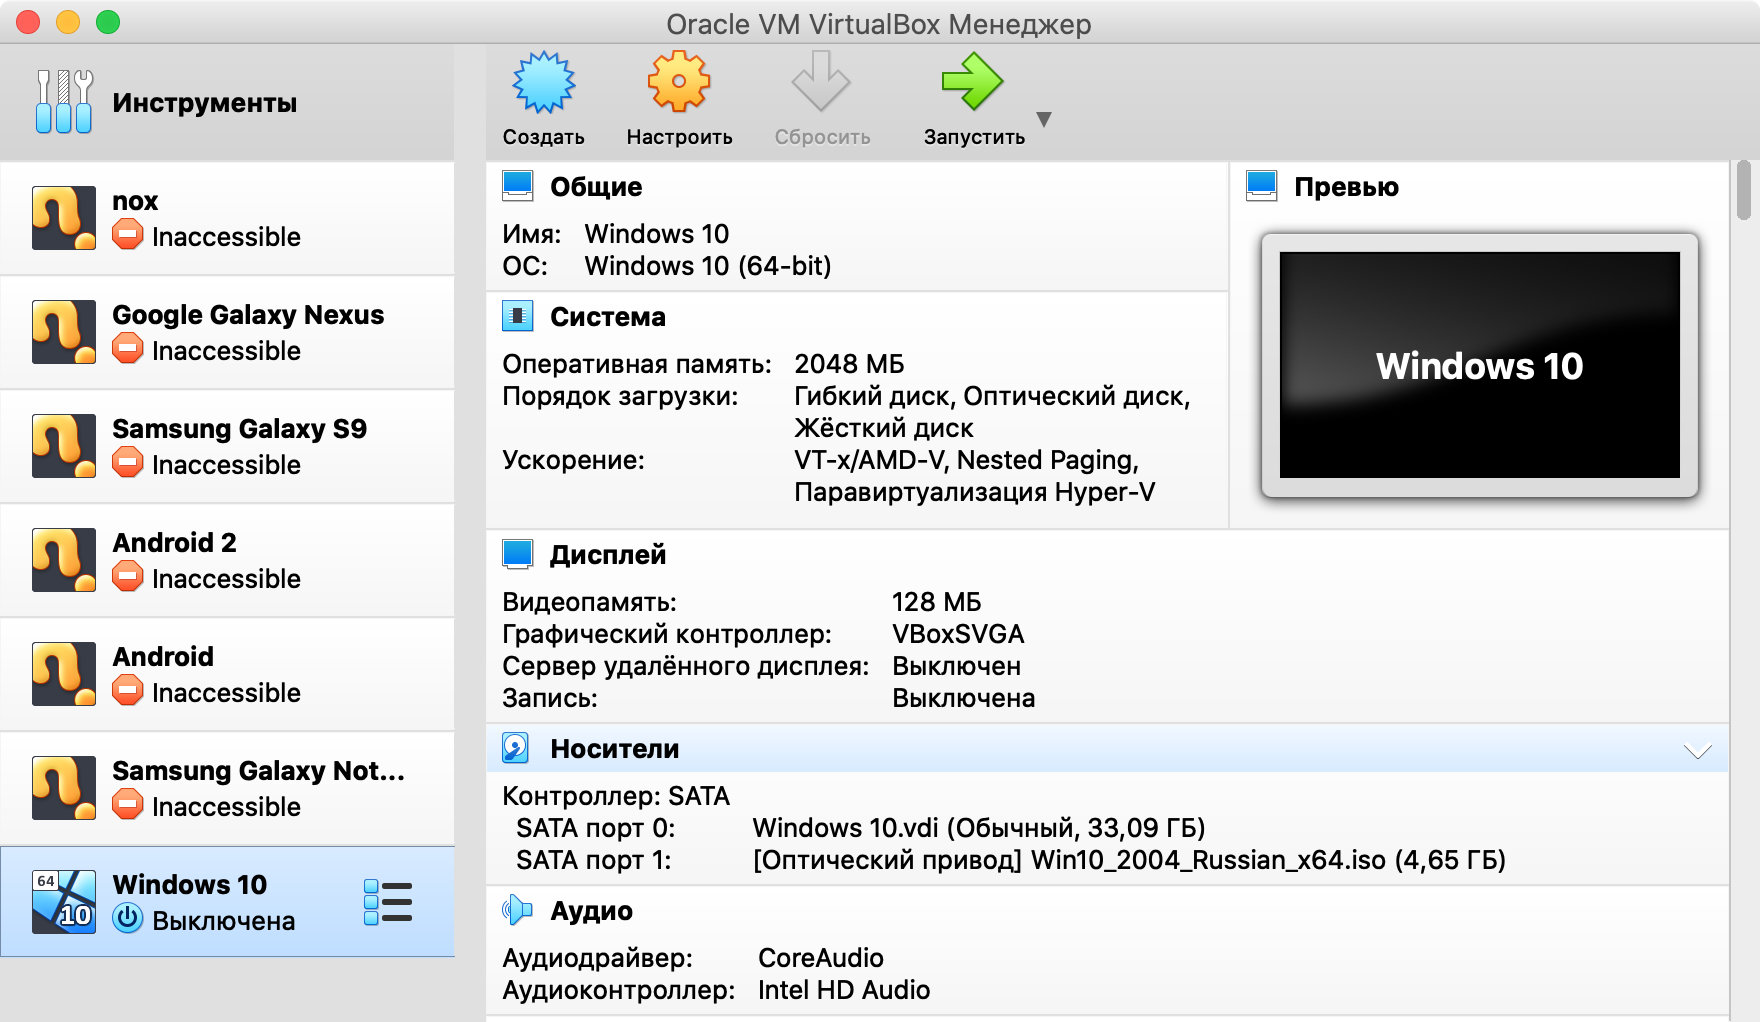
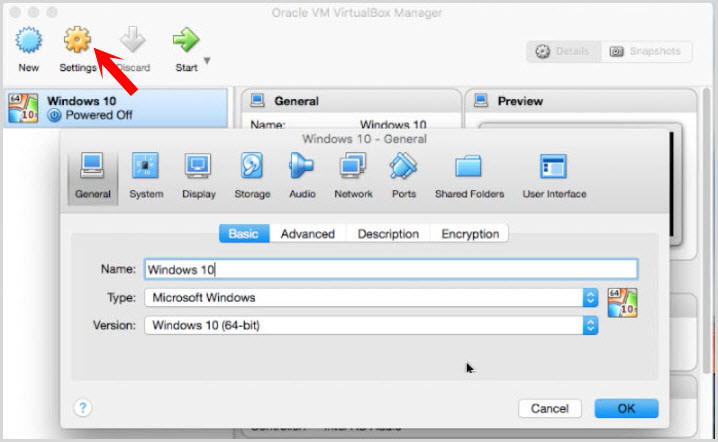
Шаг 3. Выберите название для виртуальной машины в поле «Имя», расположение в поле «Папка машины», Microsoft Windows в поле «Тип», а также Windows 10 (64-bit) в поле «Версия».
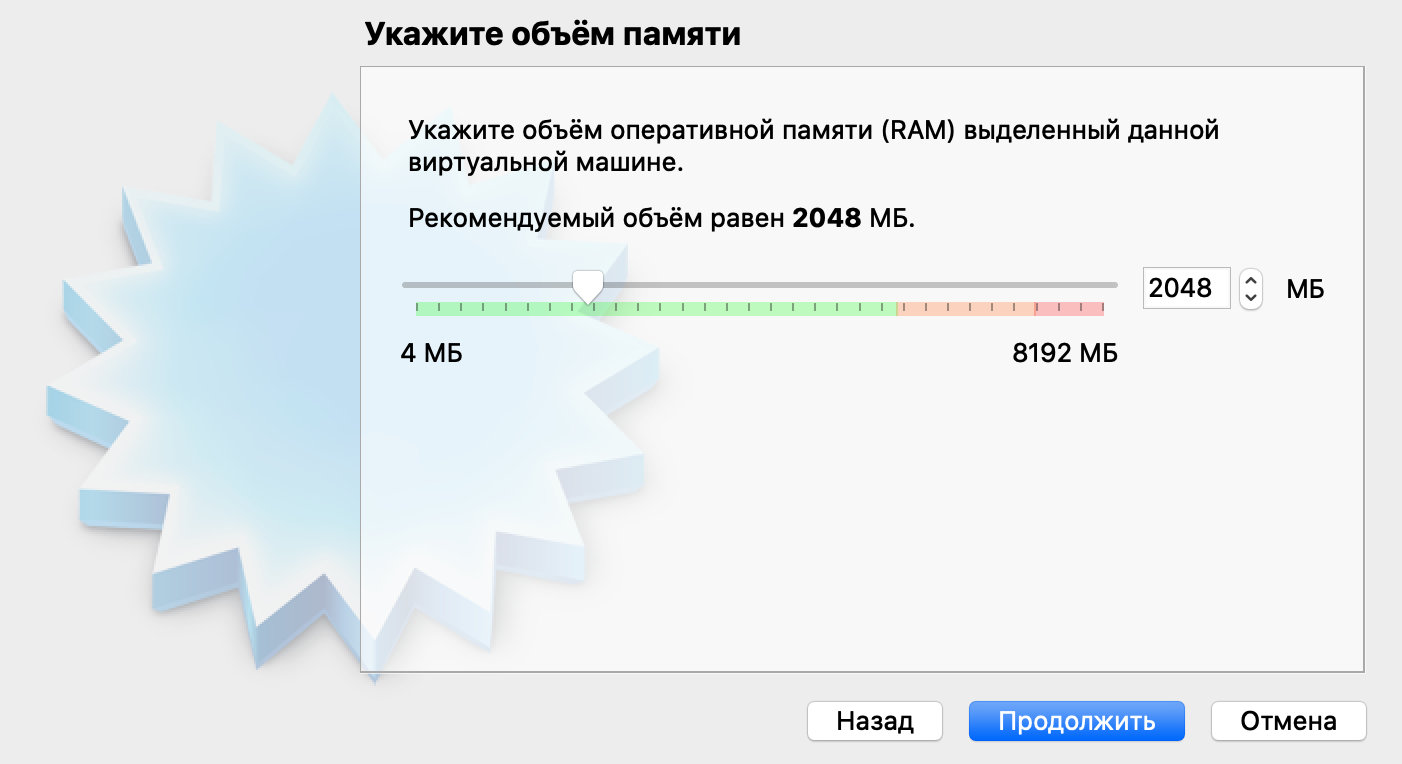
Шаг 4. Определите объем оперативной памяти, который сможет использовать операционной системы. 2048 МБ для несложных задач будет достаточно.
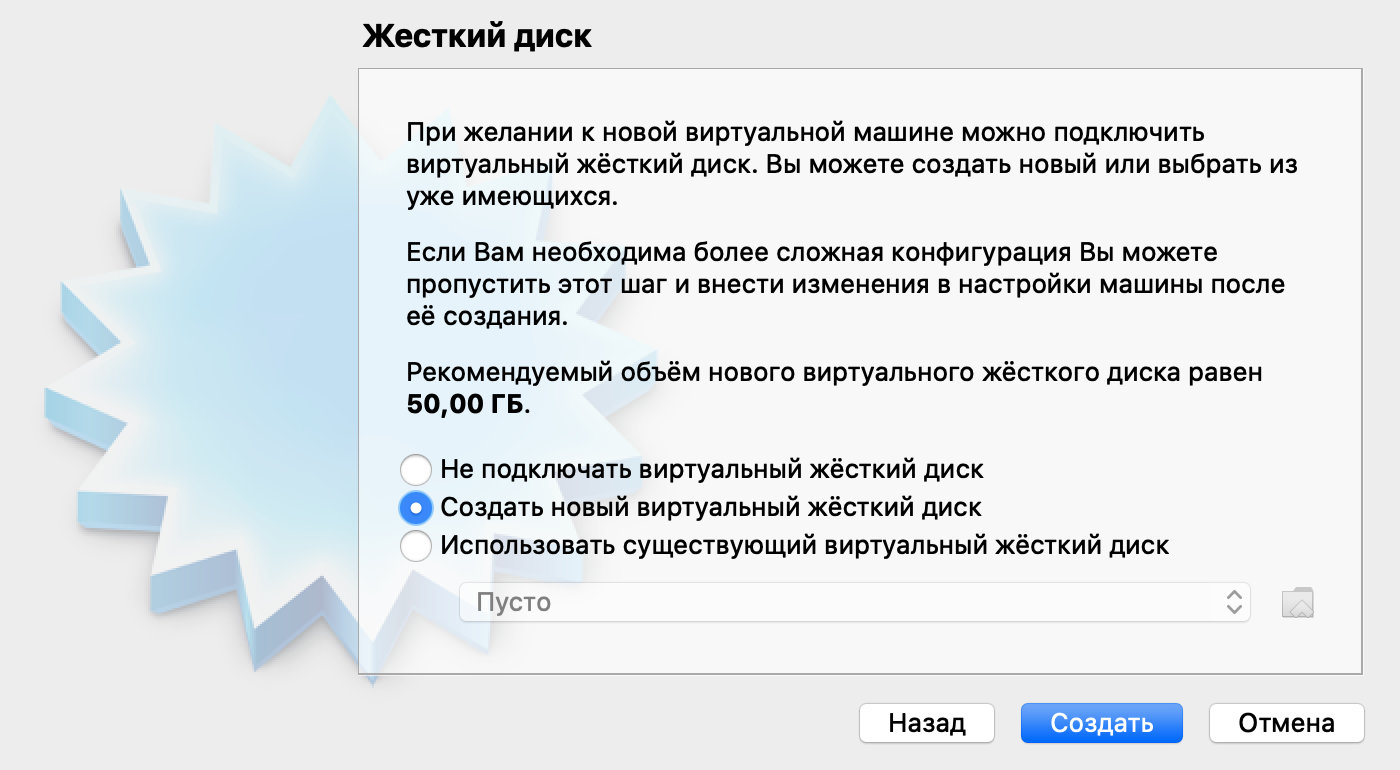
Шаг 5. Выберите вариант «Создать новый виртуальный жесткий диск» и нажмите «Создать».
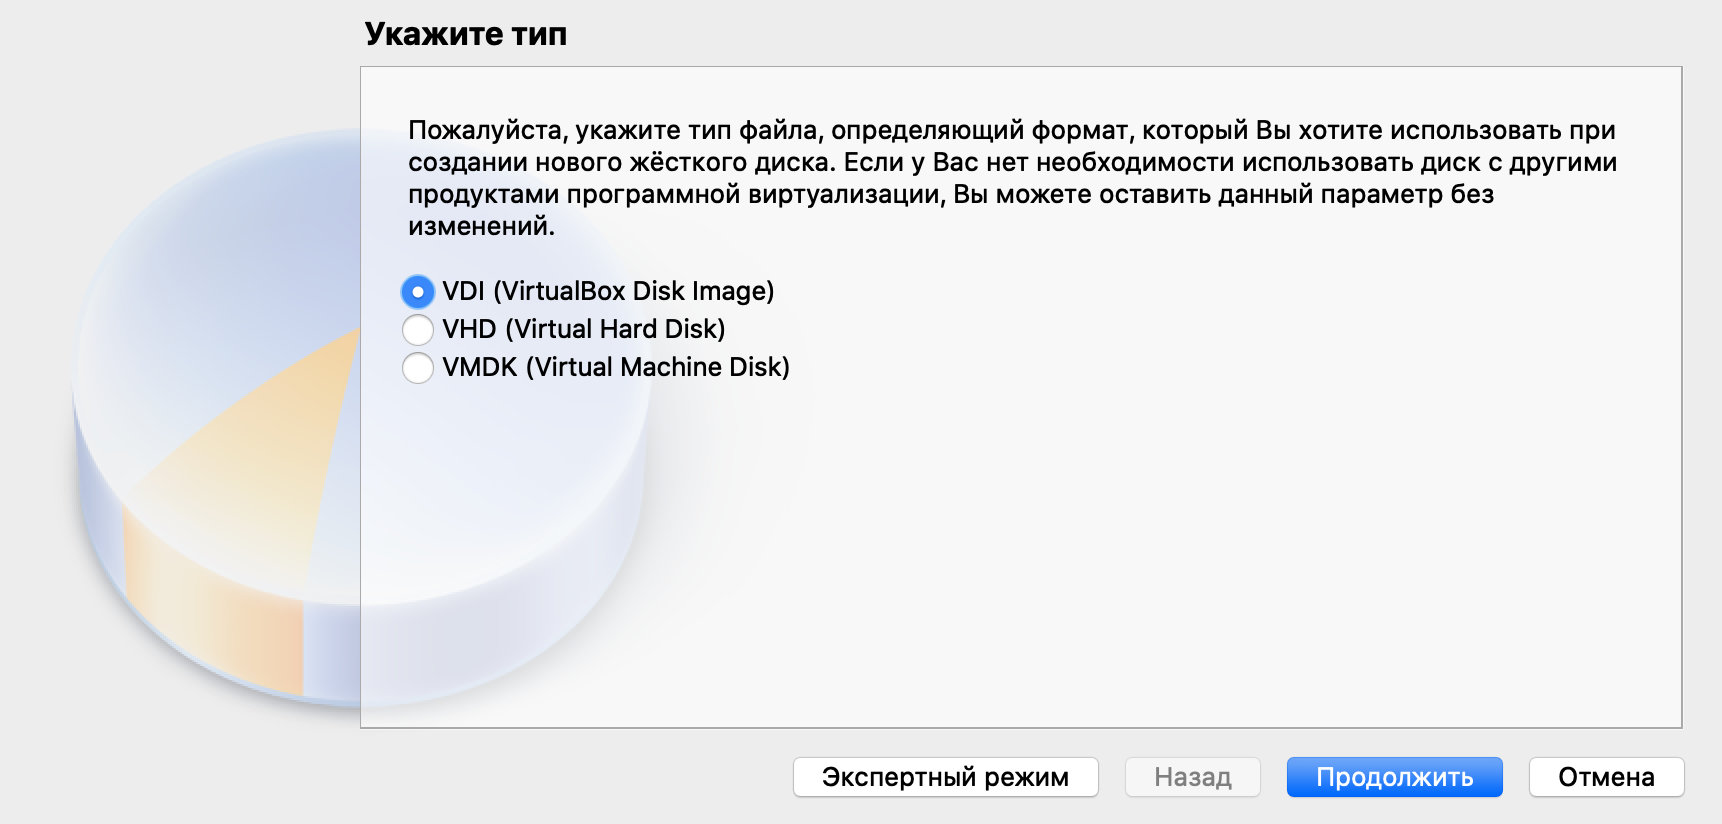
Шаг 6. Укажите формат файла виртуальной машины. Если никогда не делали подобного, оставляйте VDI.
Шаг 7. Определитесь с типом определения размера диска под виртуальную машину.
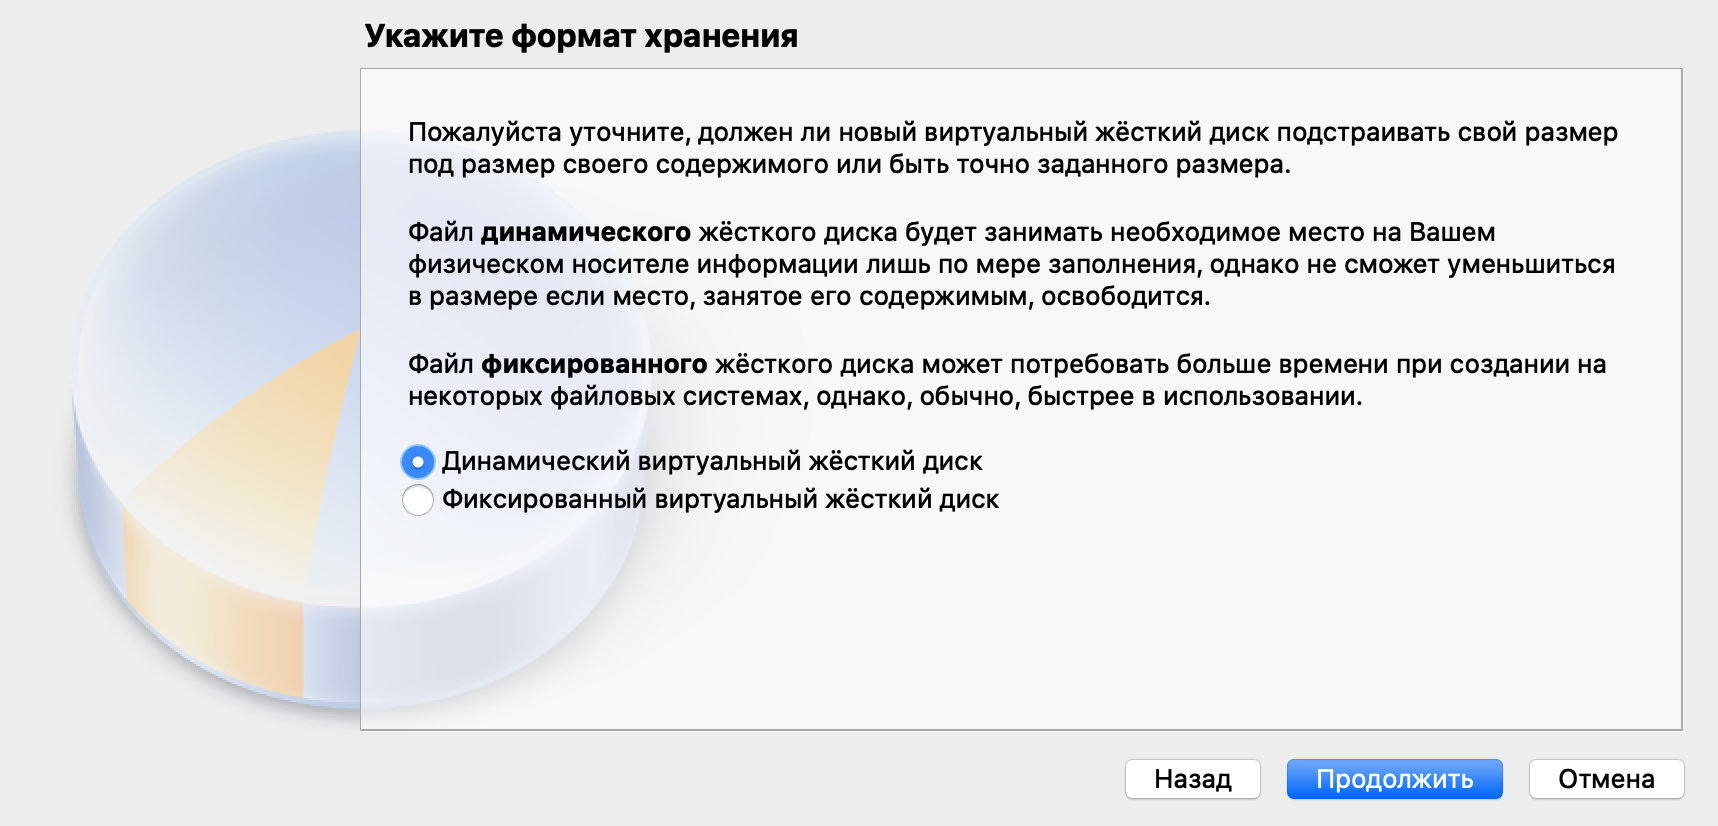
Можно задать фиксированный или выбрать динамический вариант. Во втором случае виртуальная машина сможет увеличиваться настолько сильно, насколько это будет нужно, но не будет уменьшаться даже после очистки данных.
Шаг 8. Укажите объем виртуального жесткого диска, который будет использовать Windows 10.
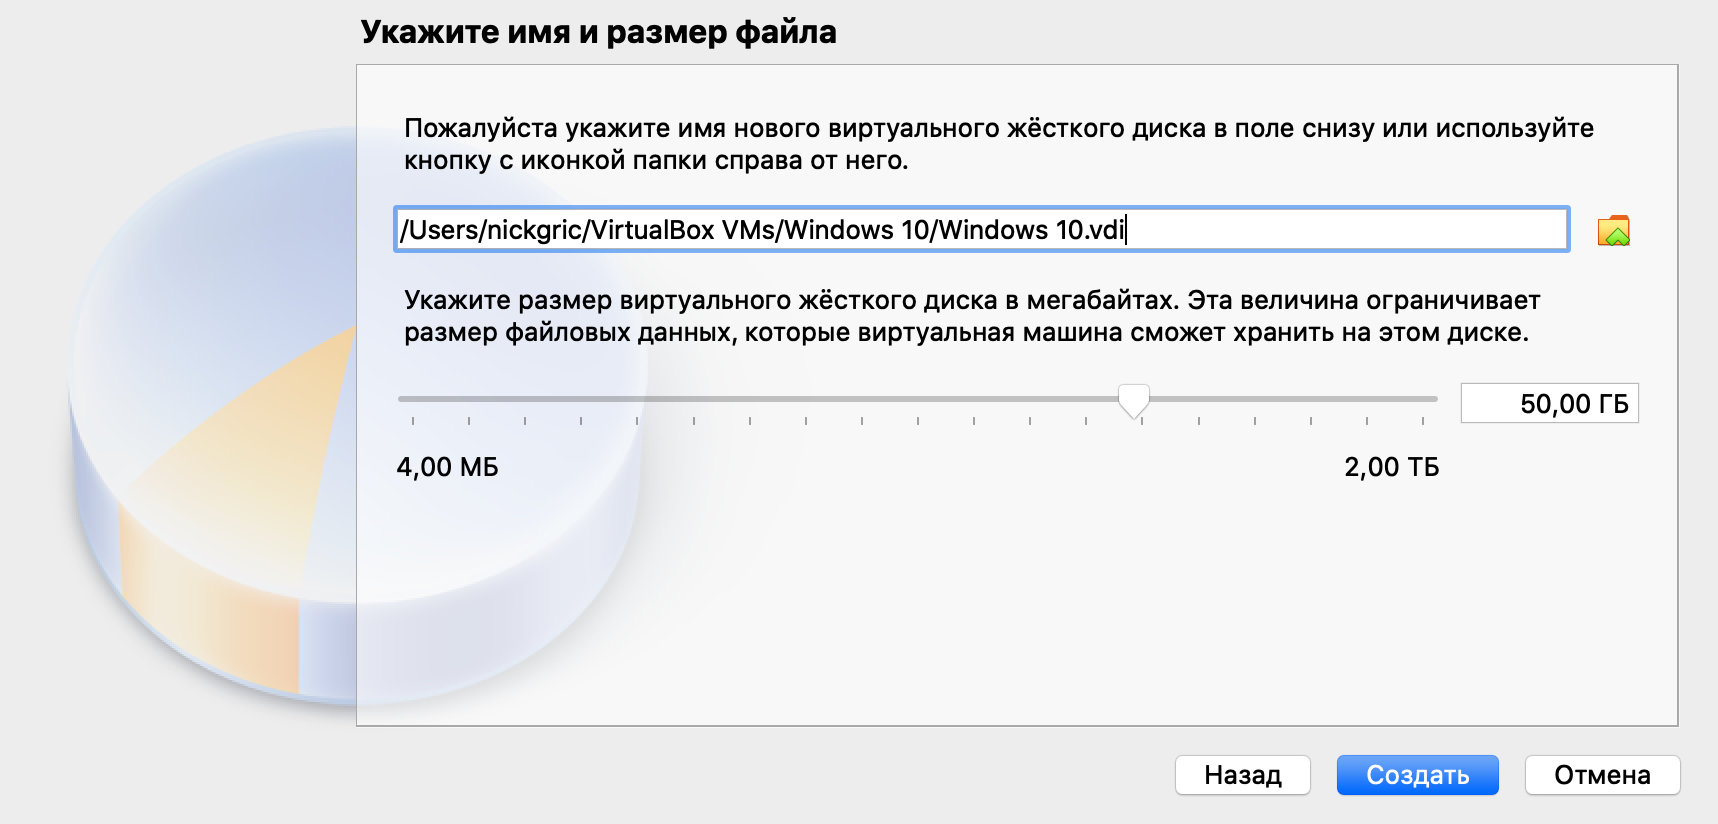
Для 64-битной Windows 10 будет достаточно 32 ГБ. Это значение при использовании динамического размера виртуальной машины можно будет увеличить в будущем.
Теперь у вас есть виртуальная машина c жестким диском, на который получится установить Windows 10. Пока операционная система не установлена, смысла в этом немного. Но и это не так сложно.
Устанавливаем Windows 10 на виртуальную машину: 5 шагов
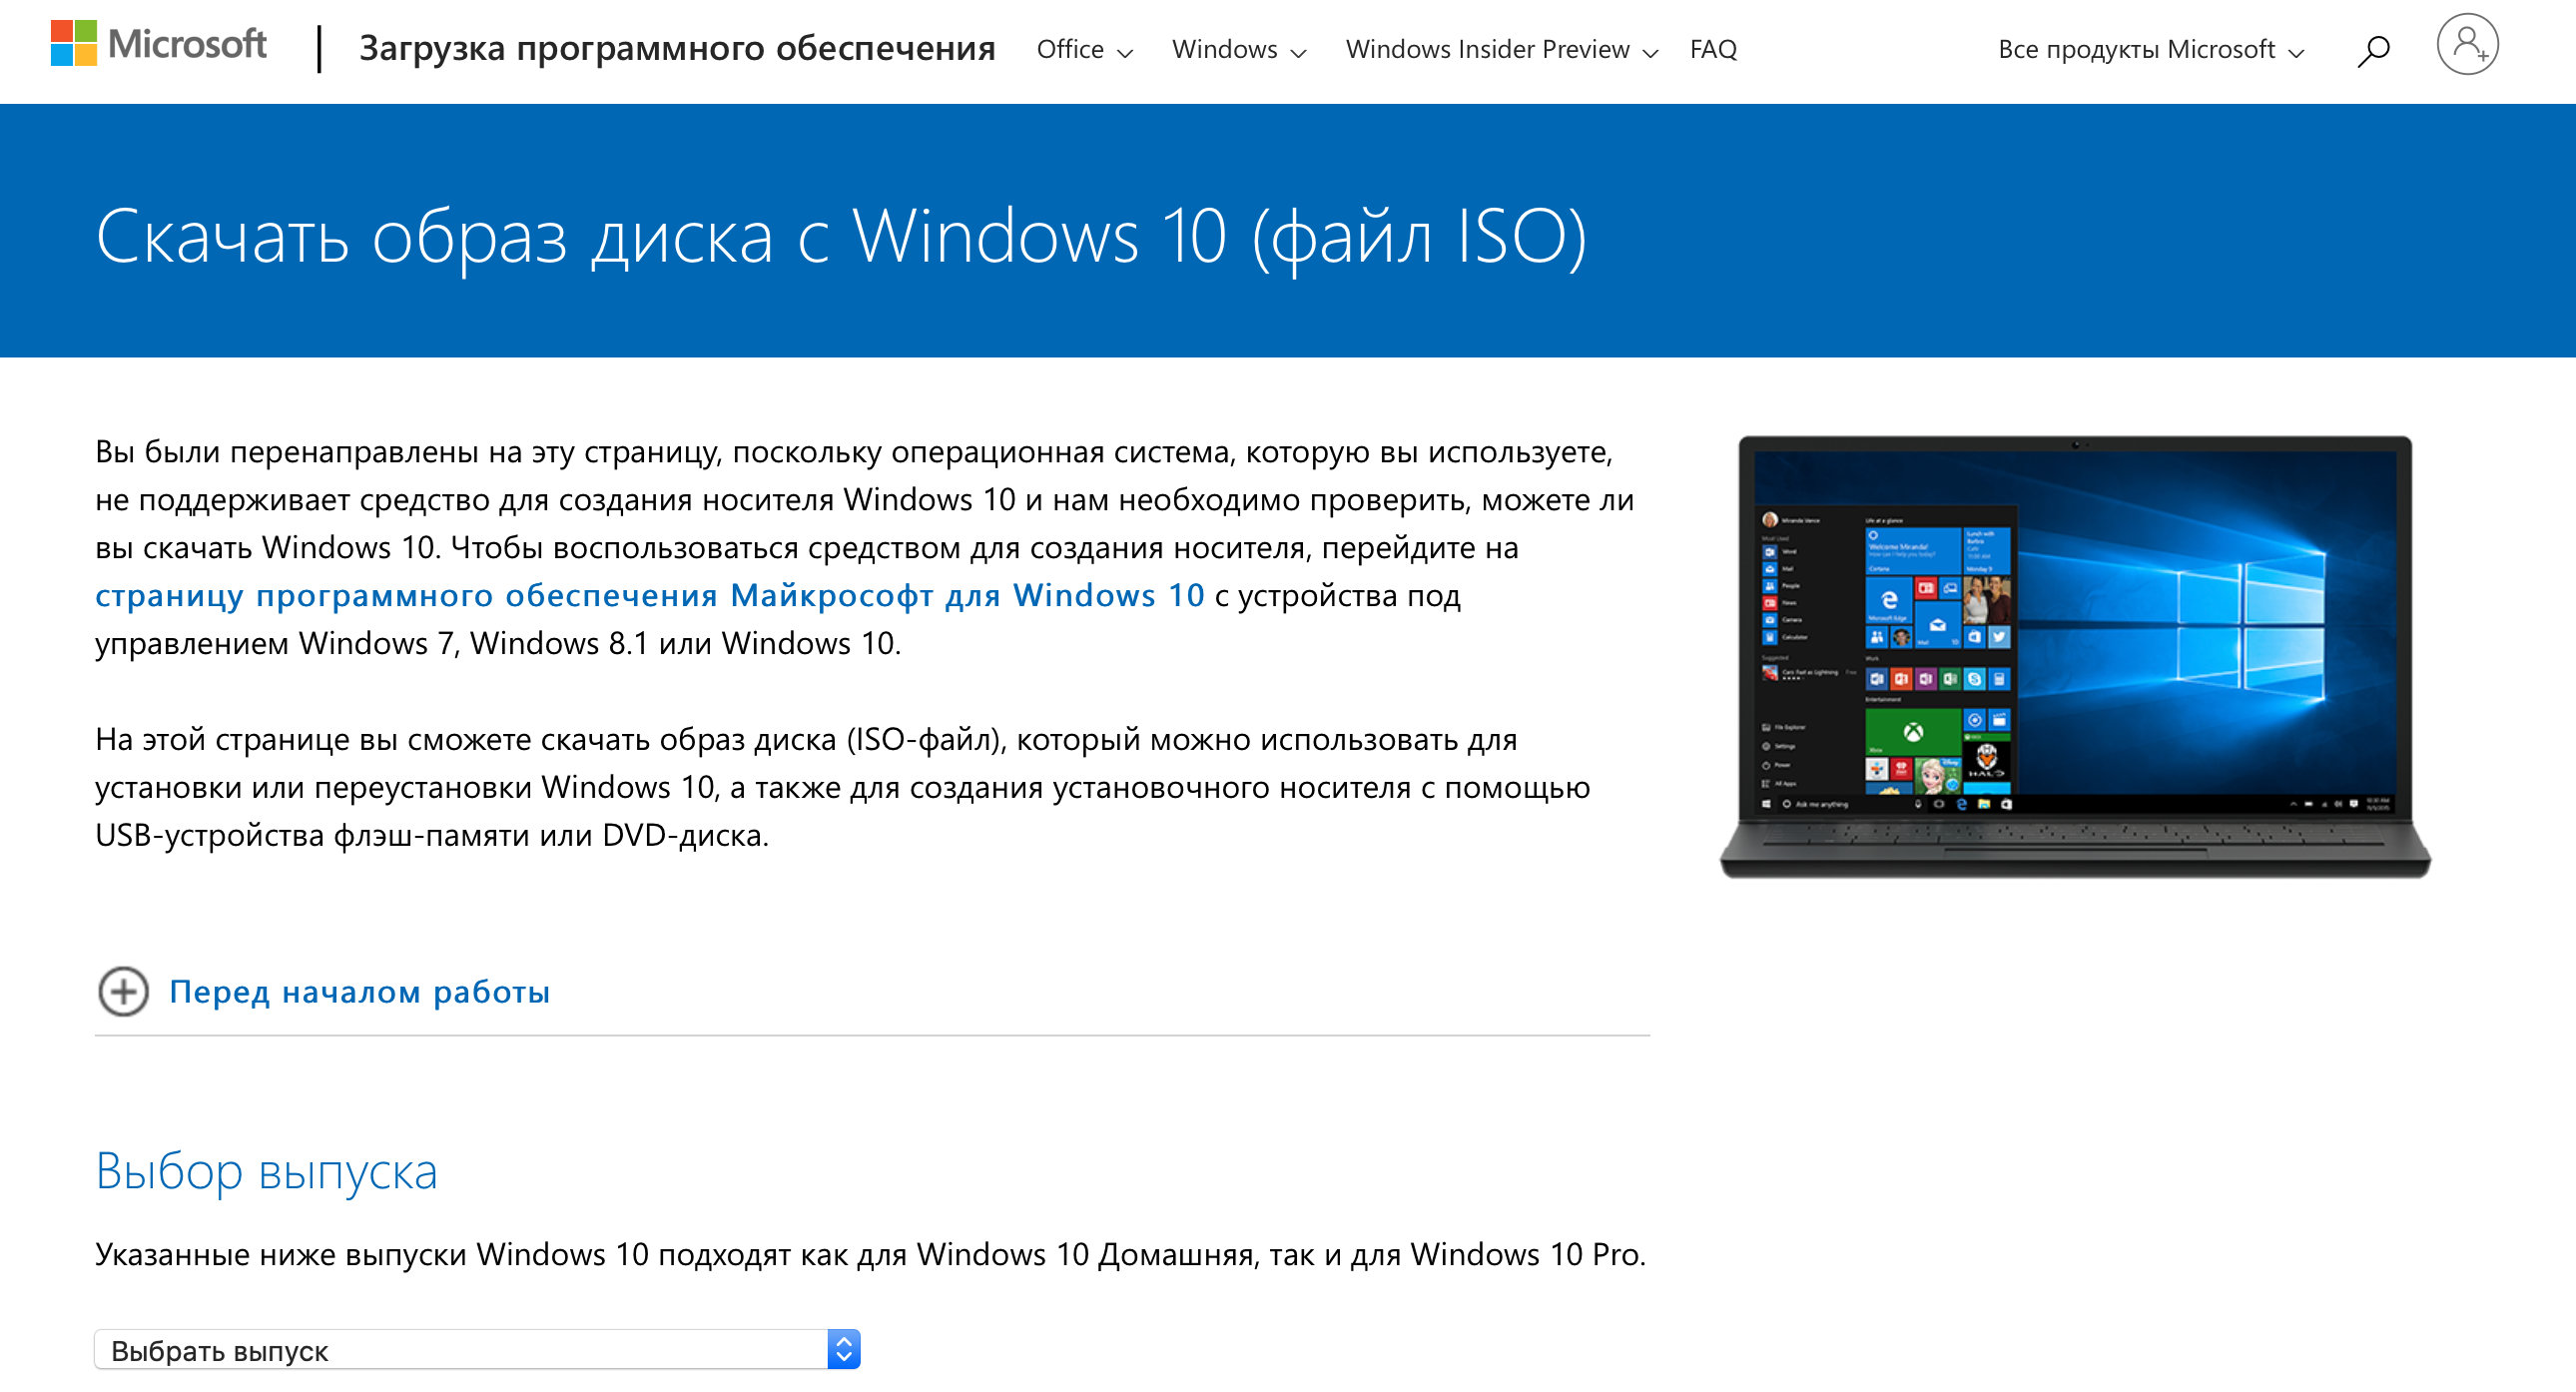
Шаг 1. Перейдите на страницу загрузки Windows 10 на официальном сайте Microsoft и скачайте систему. Установочный файл 64-битной русской версии весит около 5 ГБ.
Шаг 2. Откройте VirtualBox, выделите новую виртуальную машину, которую только что создали и нажмите «Настроить».
Шаг 3. Перейдите в раздел «Носители» и выделите носитель оптических дисков.
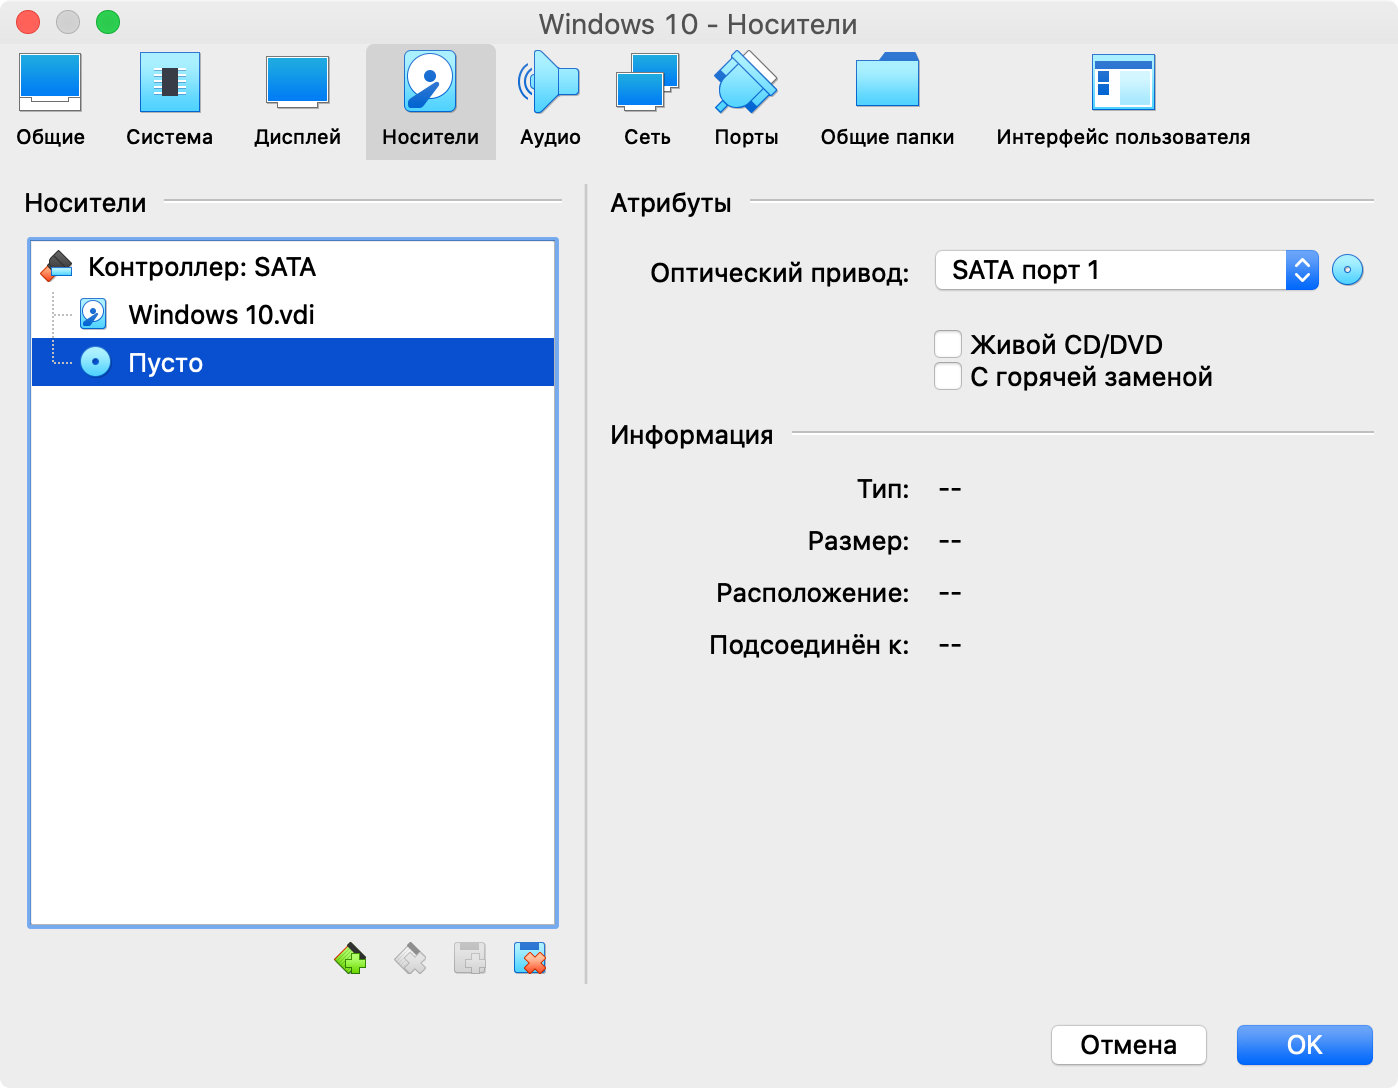
Шаг 4. Нажмите на значок оптического диска в правой части окна, кликните на вариант «Выбрать файл» диска, найдите установочный образ Windows 10 и нажмите «Открыть».


Шаг 5. Выделите виртуальную машину и нажмите кнопку «Запустить».
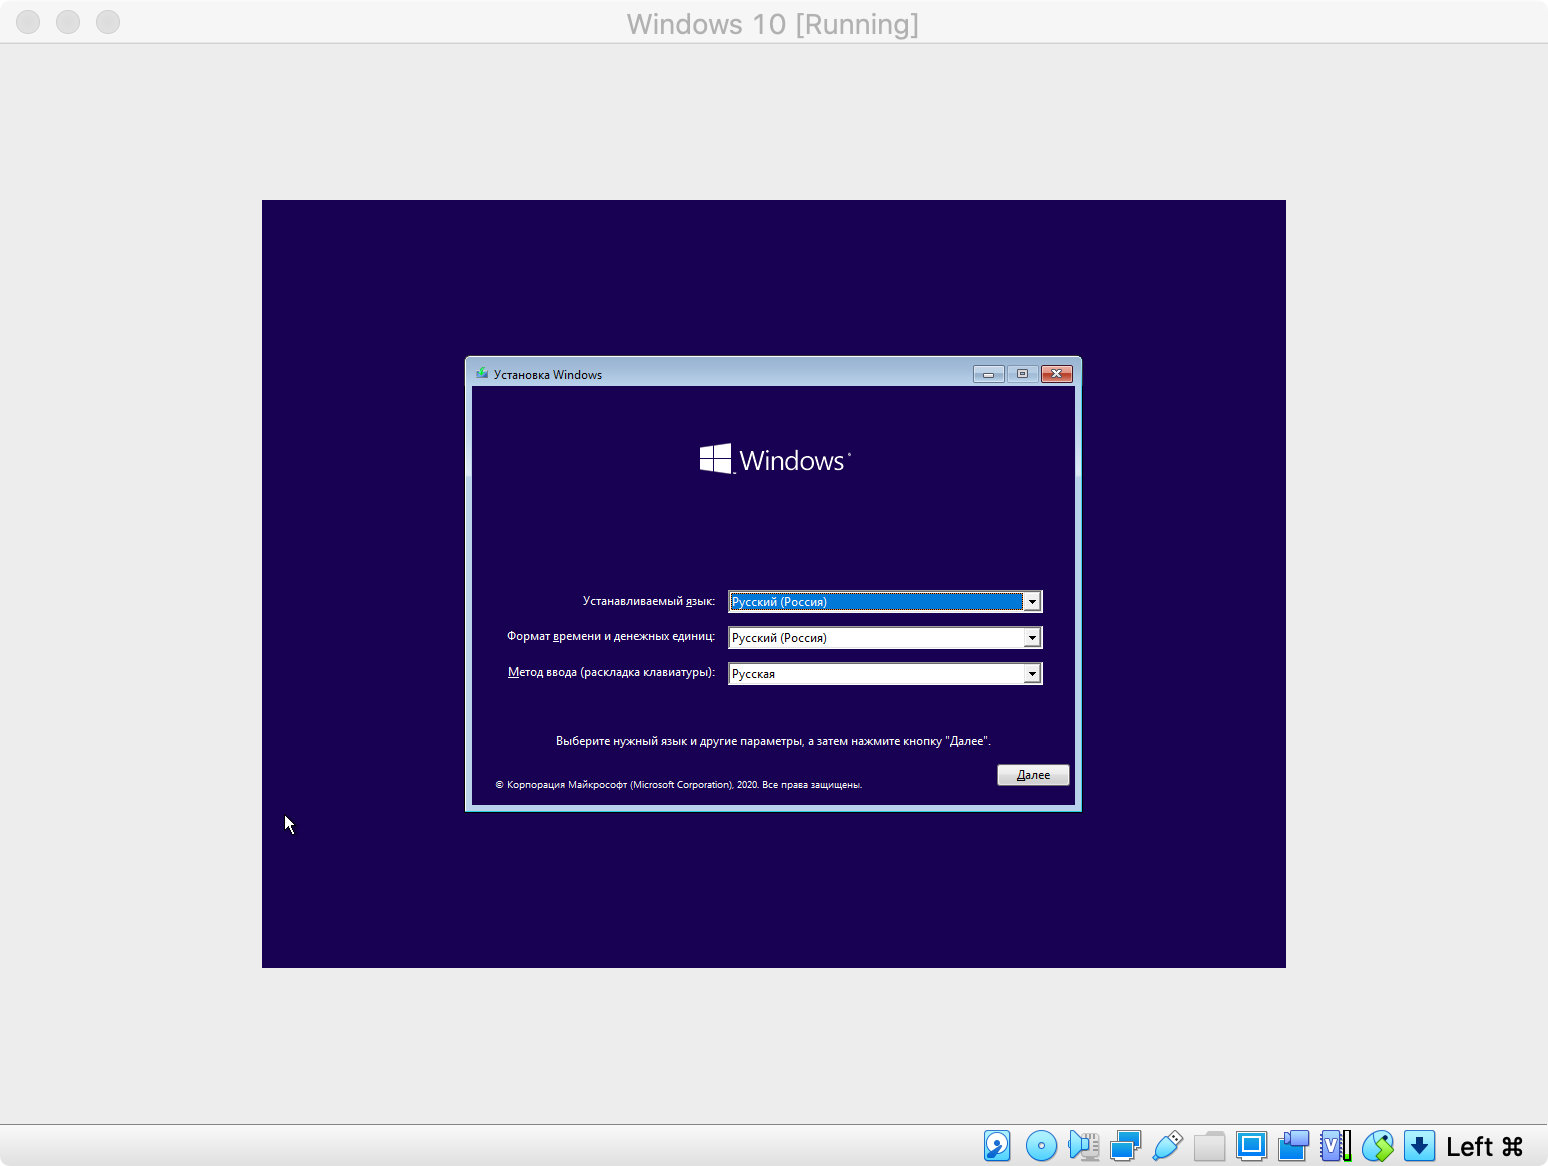
Шаг 6. VirtualBox предложит использовать оптический диск для запуска. Соглашайтесь и устанавливайте Windows 10 привычным образом.
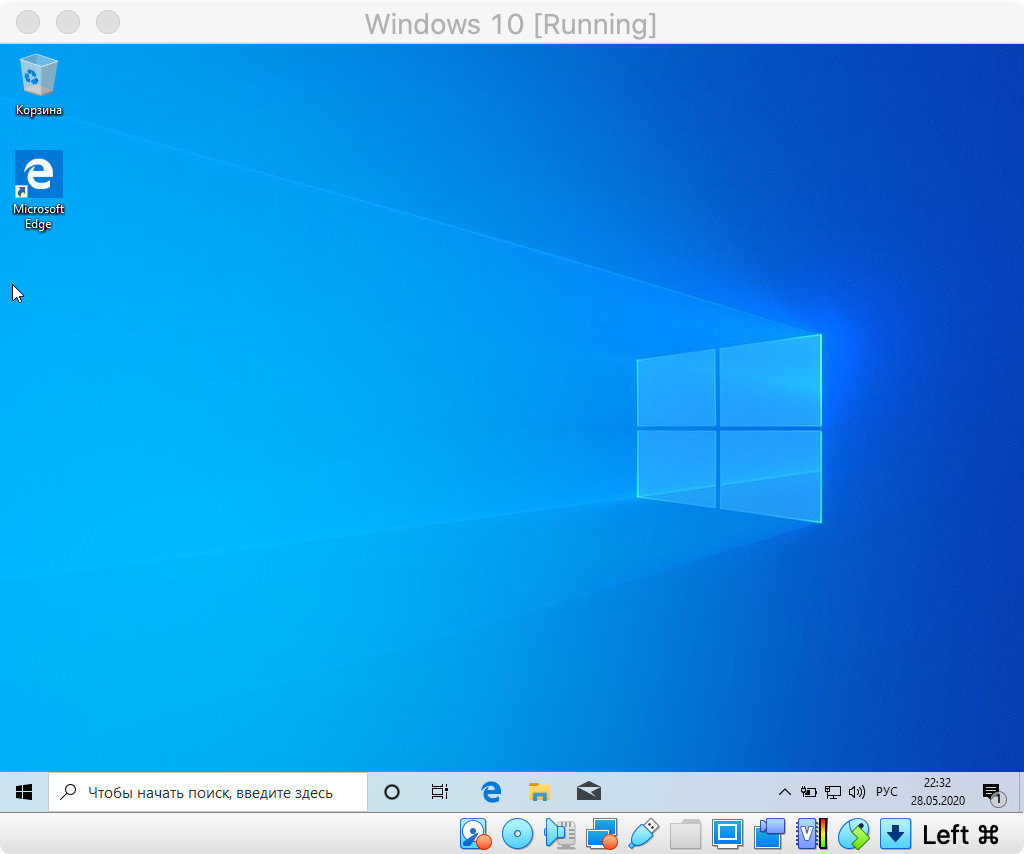
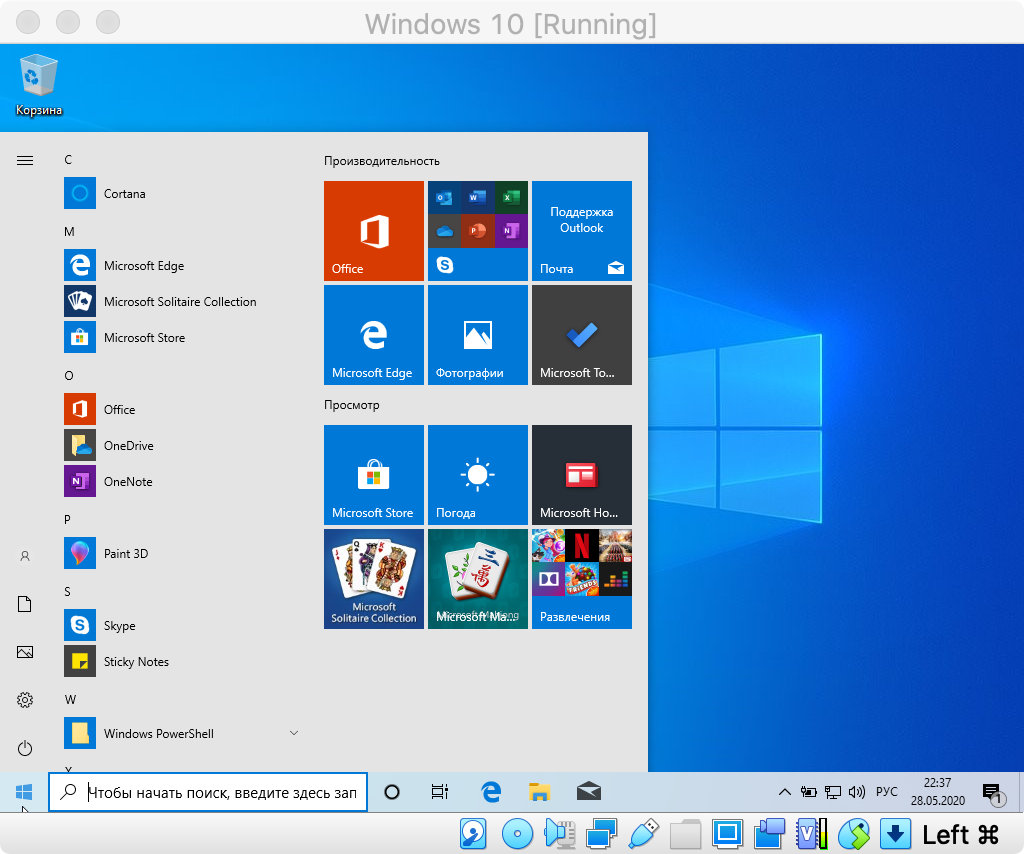
После окончания установки Windows 10 вы сможете использовать ее почти так же, как на отдельном компьютере. Тем не менее, она будет доступна на вашей основной рабочей машине.
Нюансы использования новой системы на виртуальной машине
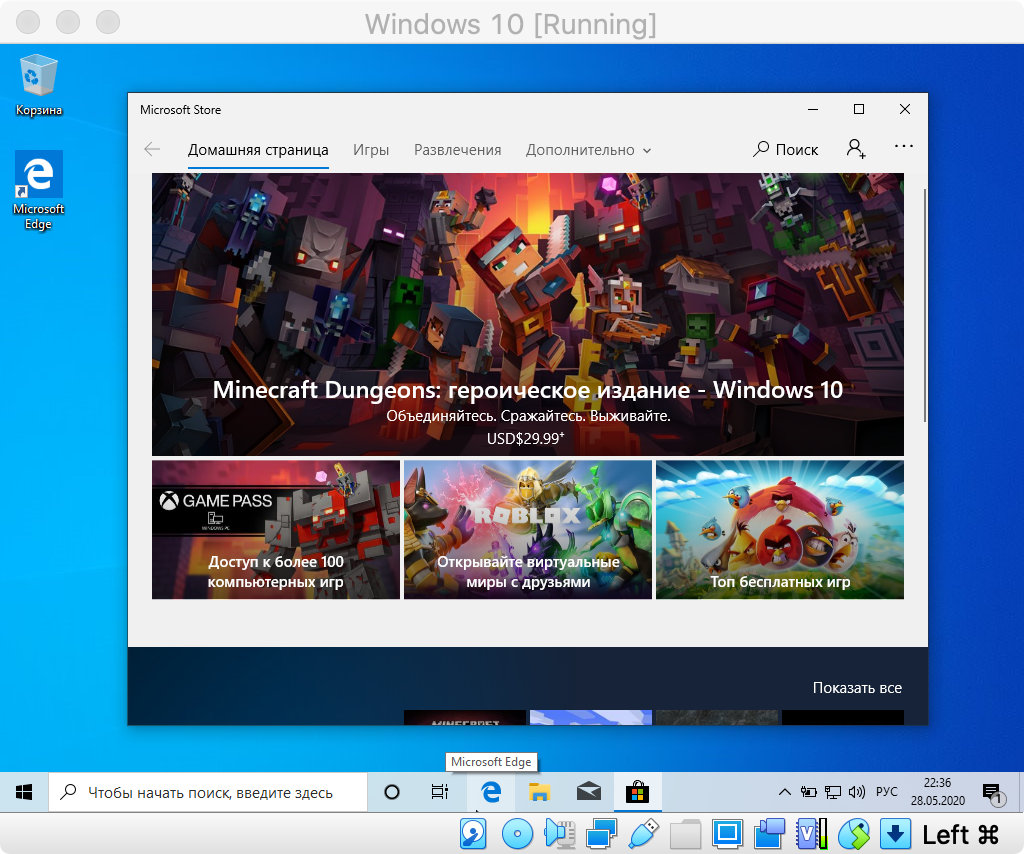
Установить приложение. Дополнительные приложения в рамках Windows 10 устанавливаются стандартным образом. Так, будто вы используется отдельное устройство на своей операционной системе.
Более того, ОС вообще не понимает, что работает в рамках виртуальной машины. Поэтому можете качать дистрибутивы из интернета прямо с Windows 10 или использовать встроенный магазин приложений.
Обменяться файлами. Для этого достаточно выбрать свою виртуальную машину, перейти в меню ее настроек, а потом добавить необходимую папку с диска Mac в меню общих данных. После перезапуска виртуалки каталог появится в «Моем компьютере».
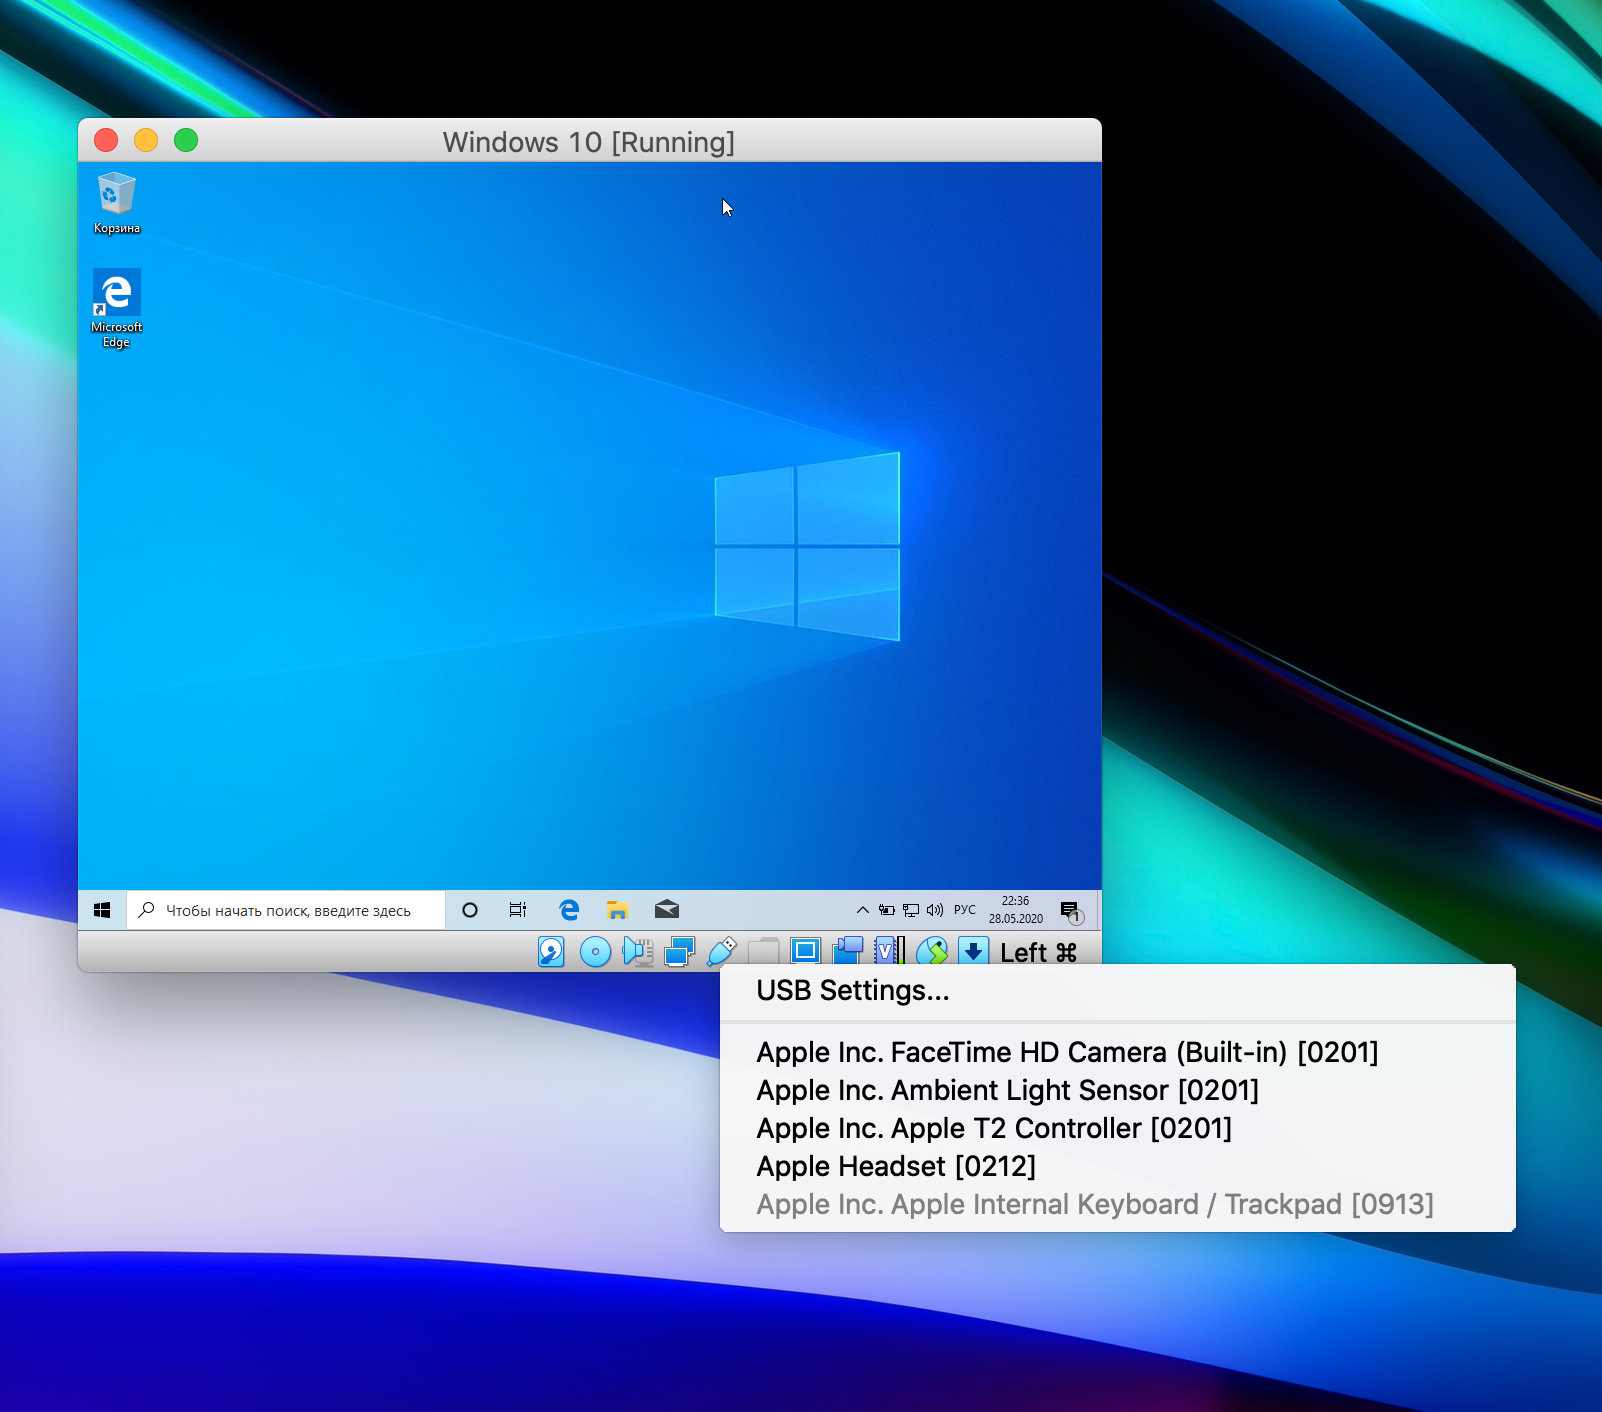
Подключить флешку. Чтобы подключить накопитель к виртуальной машине, нужно сначала «всунуть» его в компьютер, потом перейти в Finder и воспользоваться кнопкой извлечения.
После этого нужно нажать на значок USB на нижней панели VirtualBox и выбрать устройство, которое необходимо подключить к виртуалке.
Выключить виртуалку. Для этого достаточно просто закрыть окно виртуальной машины. VirtualBox предложит выключить ее, и вам останется только согласиться.
Какие движки для виртуальных машин еще можно попробовать
VMware Workstation/Fusion. Профессиональное решение для работы с виртуальными машинами. Учитывая стоимость, его можно порекомендовать профессионалам в области тестирования софта. Для обычных пользователей это лишнее.
Parallels Desktop. Вероятно, это одно из лучших решений для создания виртуальной машины на Mac. Основное его преимущество перед VirtualBox состоит в поддержке фирменных функций macOS. Тем не менее, за него придется немало заплатить.
Вместо вывода: как работает Windows 10 на виртуальной машине
Я использую Windows 10 через VirtualBox на базовом по процессору и оперативной памяти MacBook Air 2019 года. Про характеристики виртуальной машины писал выше: это 32+ ГБ постоянной и 2 ГБ оперативной памяти.
В рамках таких характеристик 64-битная Windows 10 не летает, как macOS 10.15 Catalina актуальной ревизии. Тем не менее, скорости вторичной операционной системы вполне достаточно, чтобы комфортно использовать небольшие приложения, которые не работают на Mac. Именно такая задача и ставилась.
В отличие от Boot Camp, компьютер не нужно перезагружать, прерывая текущие задачи, чтобы выполнить новые в другой ОС. Это безусловный плюс, который компенсирует не самую большую производительность затеи.
Стоит ли так заморачиваться? Или ради интереса, или по реальной нужде. Держать виртуалку, которая отъедает внушительную часть небольшого SSD, просто на всякий случай нет никакого смысла.
(54 голосов, общий рейтинг: 4.59 из 5)
iPhones.ru
Самый простой способ использовать вторую систему на Mac.
Николай
@nickgric
Кандидат наук в рваных джинсах. Пишу докторскую на Mac, не выпускаю из рук iPhone, рассказываю про технологии и жизнь.
Here I explain how to install Windows on a Mac using the (free) virtualization software, VirtualBox.
VirtualBox is free software that allows you to install different operating systems on your machine. By using VirtualBox, you can install Windows on your Mac. This enables you to run Windows-only applications on your Mac.
Here are the main steps involved in installing Windows on a Mac:
- Download and Install VirtualBox
- Create a Virtual Machine
- Download and Install Windows
Here they are in more detail.
Download and Install VirtualBox
To run Windows on a Mac, you need to use virtualization software such as VirtualBox. While there are other options available (such as Parallels and VMware Fusion), VirtualBox is free. And while Bootcamp is also a free option, it doesn’t let you run macOS and Windows simultaneously (you have to reboot the machine every time you want to switch to the other operating system). So with VirtualBox you get the best of both worlds — it’s free, and it allows you to run both Windows and macOS simultaneously so you can switch between them as required without having to reboot.
-
Download VirtualBox
Go to the VirtualBox download page and click OS X Hosts.

-
Install VirtualBox
Double-click the VirtualBox.pkg icon to install VirtualBox. This will enable you to run VirtualBox from your Applications folder.
Create a Virtual Machine
Now that you’ve installed VirtualBox, you can create a virtual machine. This virtual machine is where you’ll install Windows.
-
Launch VirtualBox
Launch VirtualBox via the Applications folder (just as you’d launch any other application).
-
Start the Wizard
Click New to start the process of creating a new virtual machine.
-
Name and Operating System
Enter a name for the virtual machine (make it descriptive, such as Windows 10 or similar).
Also choose Microsoft Windows and select the 64 bit version (unless you have reason to choose the 32 bit version).
Click Continue.
-
Set the Memory Allocation
Use the slider to specify how much memory is allocated to the virtual machine. I selected 4 GB (4000 MB), which should be sufficient to run SQL Server inside Windows. If your Mac has a lot more RAM, then you might be able to allocate more to the virtual machine.
Click Continue.
-
Hard Disk
Leave it at the default setting and click Create.
-
Hard Disk File Type
Leave it at the default setting and click Continue.
-
Storage on Physical Hard Disk
Leave it at the default setting and click Continue.
-
File Location and Size
Leave it at the default setting and click Create.
-
Done!
Your new virtual machine has been created. It appears in the left pane of the VirtualBox home screen.
This is where you launch your virtual machine from whenever you need to use Windows.


Download and Install Windows
-
Download the Windows Disk Image
Go to the Windows download page and select the latest version of Windows. Follow the prompts to download the ISO file to your Mac.
Alternatively, go to the Microsoft Evaluation Center and download a free evaluation trial. This is the option I used in this tutorial. This tutorial uses the Windows 10 Enterprise Evaluation edition (which is free to use for 90 days).
-
Start the Installation
Double-click on the virtual machine that you created previously.
-
Select the Windows Disk Image
Use the interface to browse to, and select, the Windows ISO file that you downloaded.
Click Start.
-
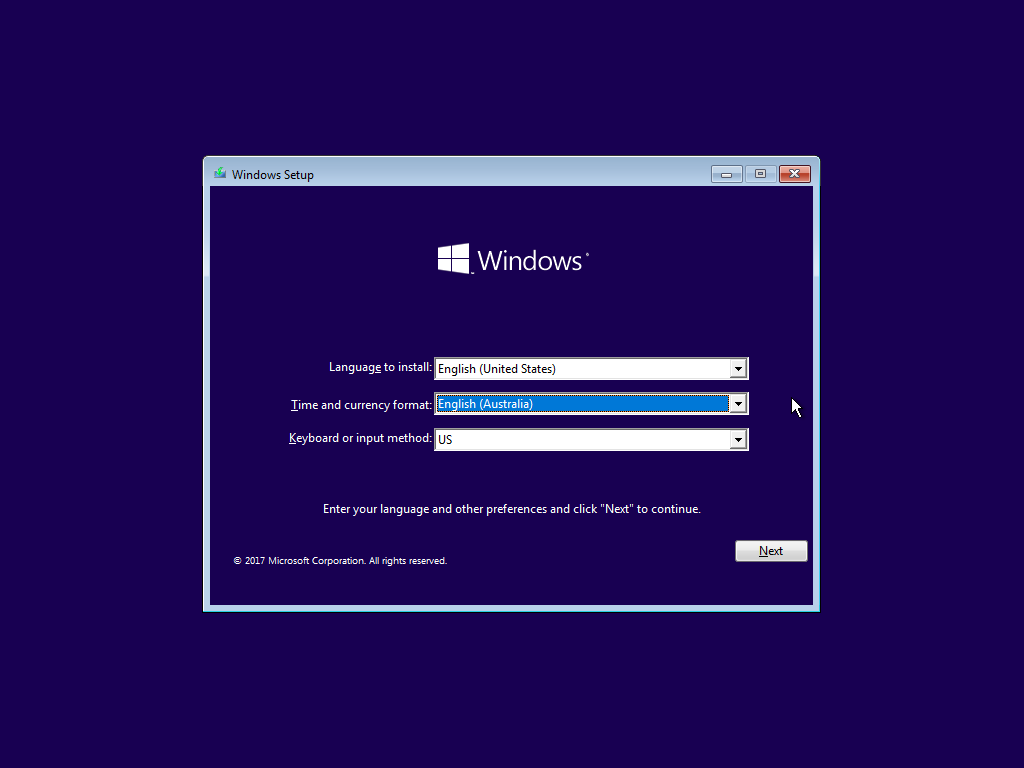
Select Language, etc
Select your language and other preferences, then click Next.
-
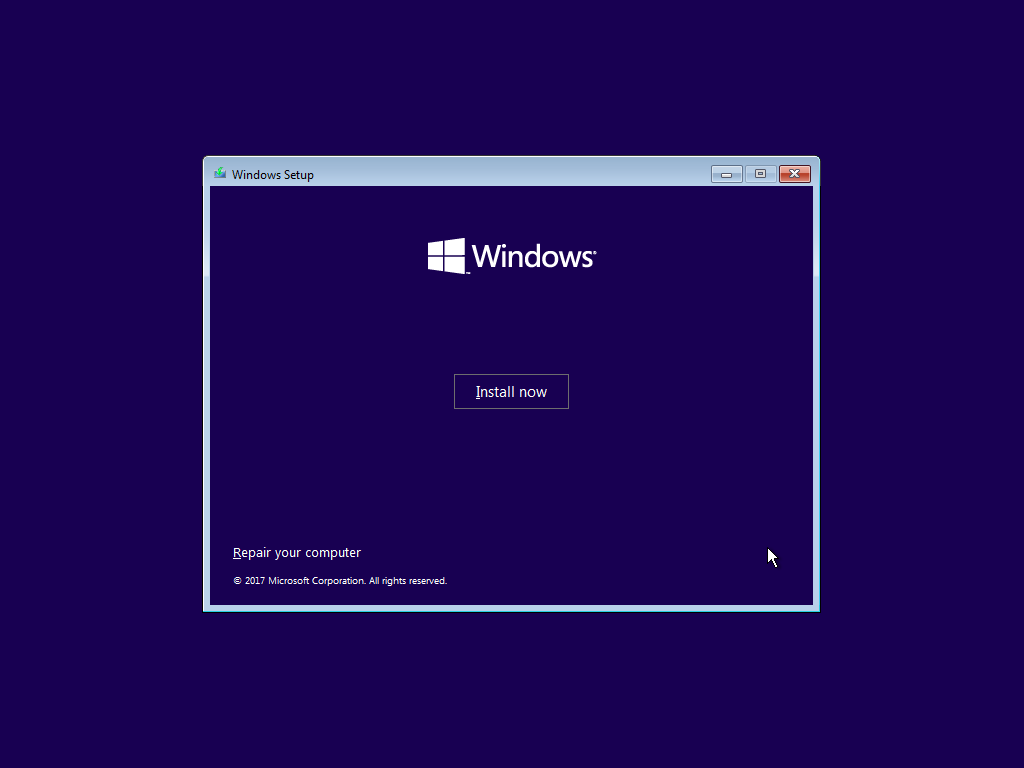
Start the Installation
Click Install now.
-
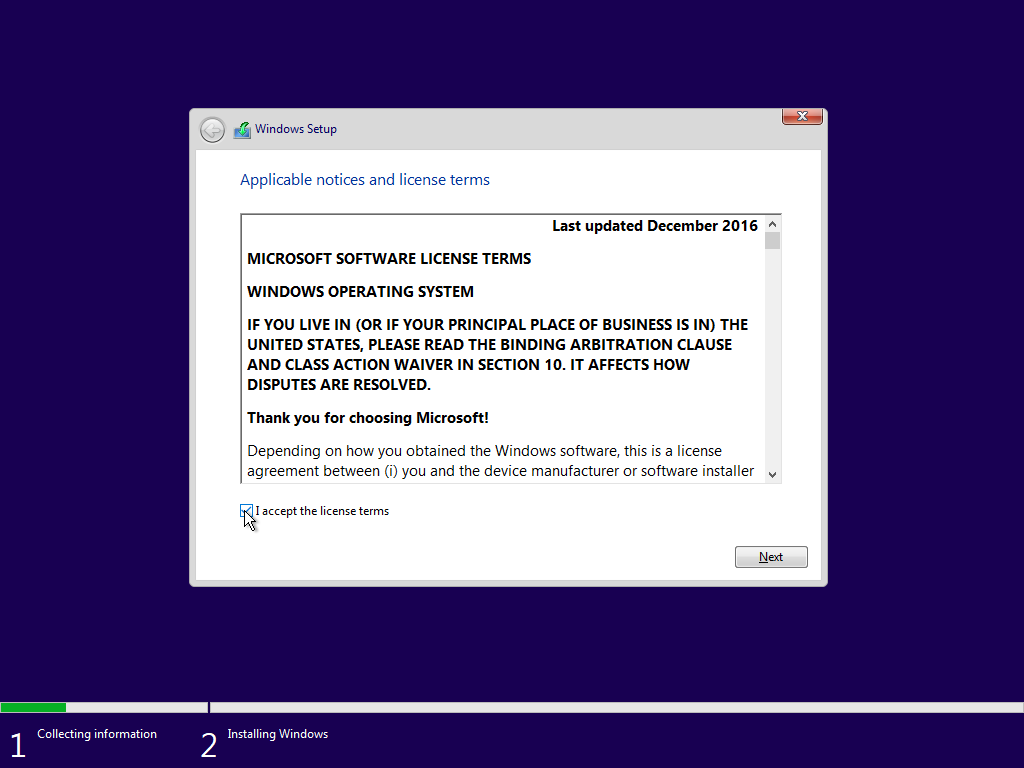
License Agreement
Select I accept the license terms and click Next.
-
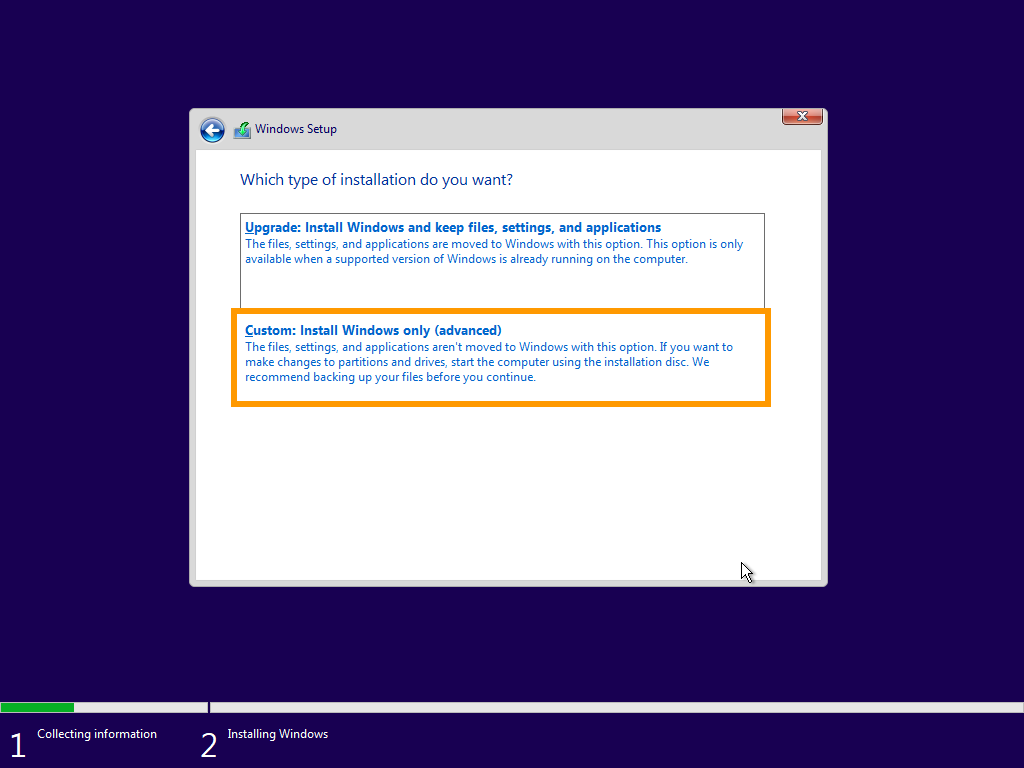
Installation Type
Select Custom: Install Windows only (advanced).
-
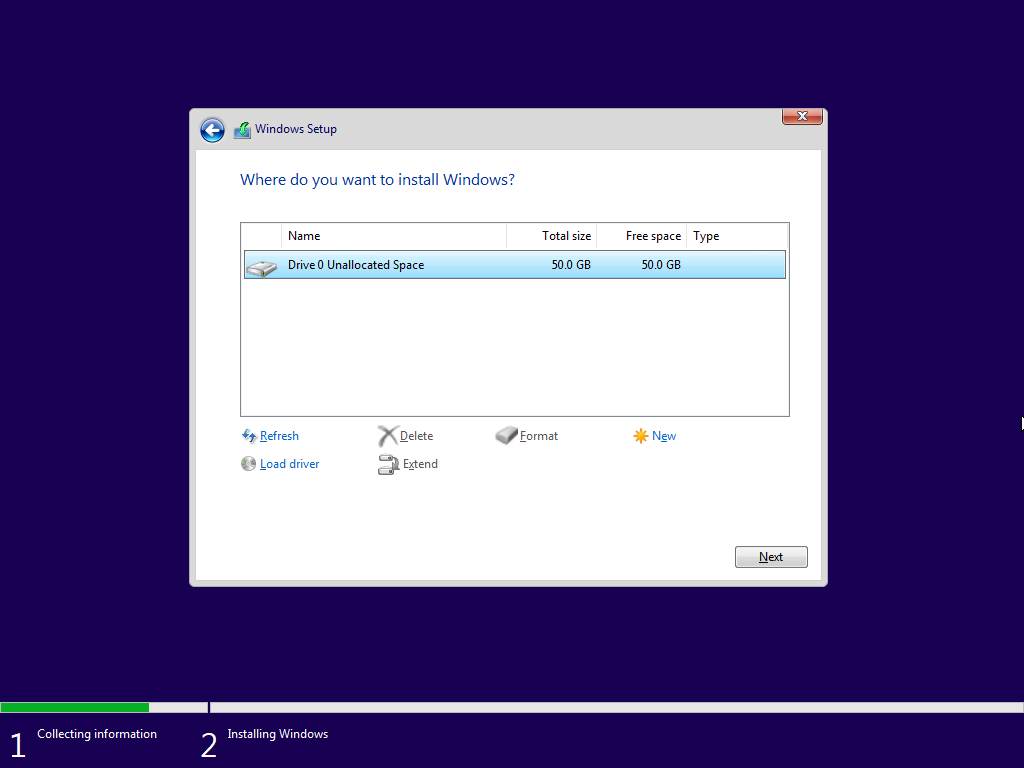
Select the Drive
Here, the 50 GB drive (that you created when you created your virtual machine previously) should already be selected. If not, select it.
Click Next.
-
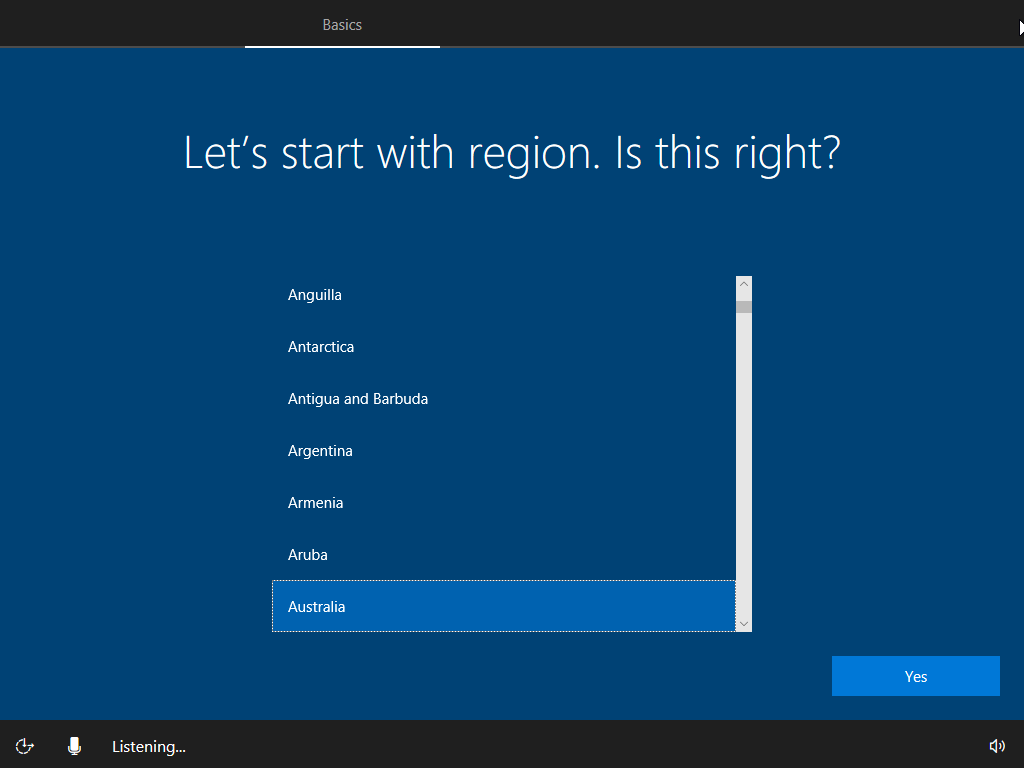
Select Region
Select your region and click Yes.
-
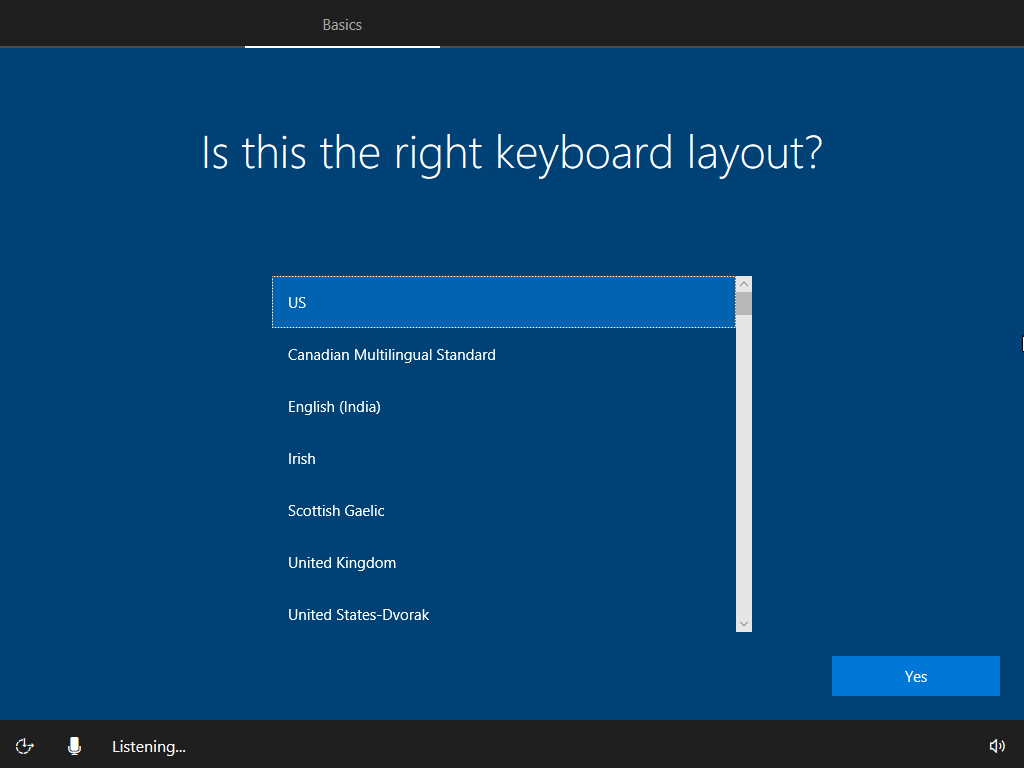
Select Keyboard Layout
Select your preferred keyboard layout and click Yes.
-
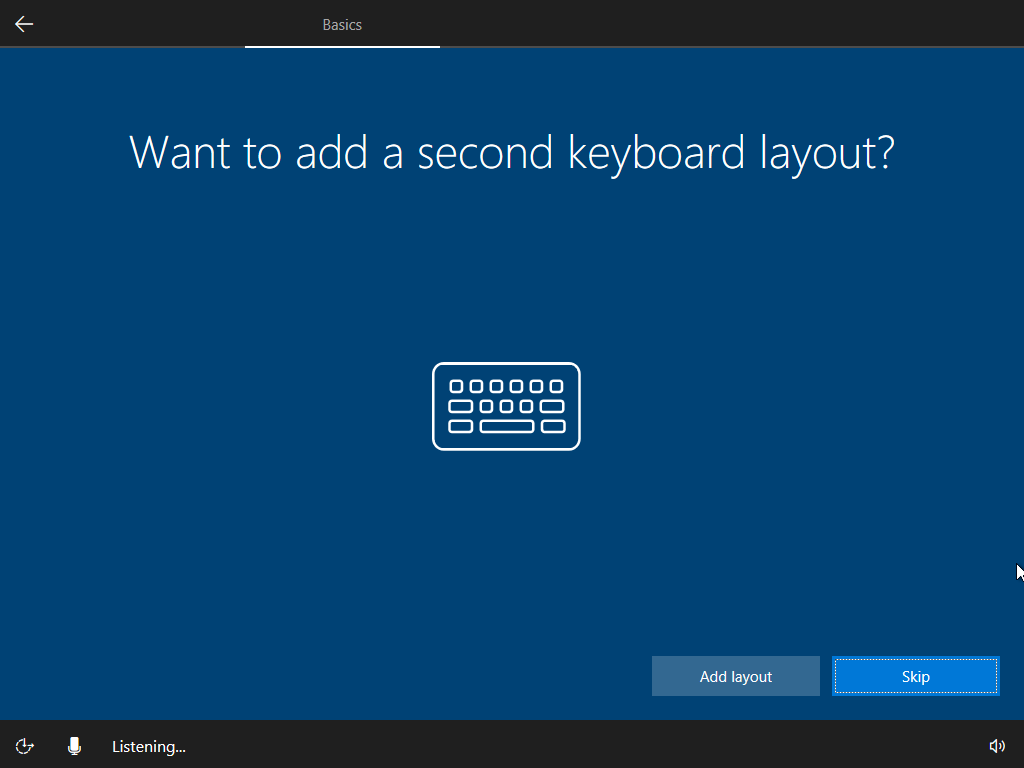
Add Another Keyboard?
Click Skip (unless you want to add another keyboard, in which case click Add layout and follow the prompts).
-
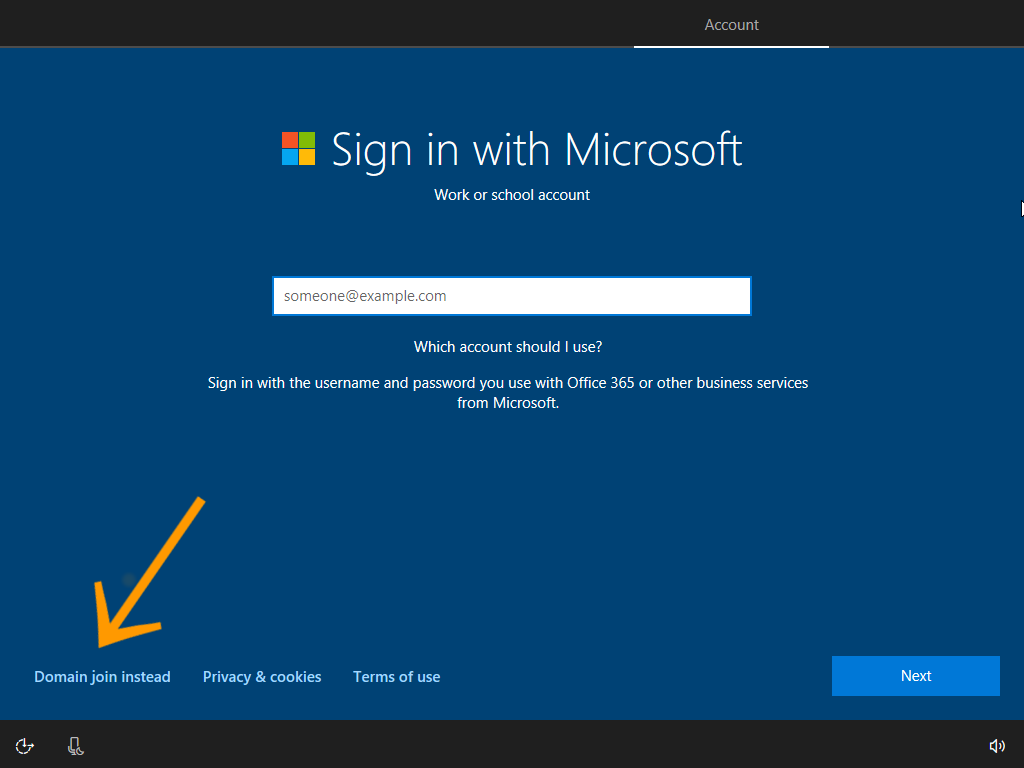
Join Domain
Microsoft wants you to sign in but for the purposes of this tutorial, we won’t be doing that.
For this tutorial, click Domain join instead.
-
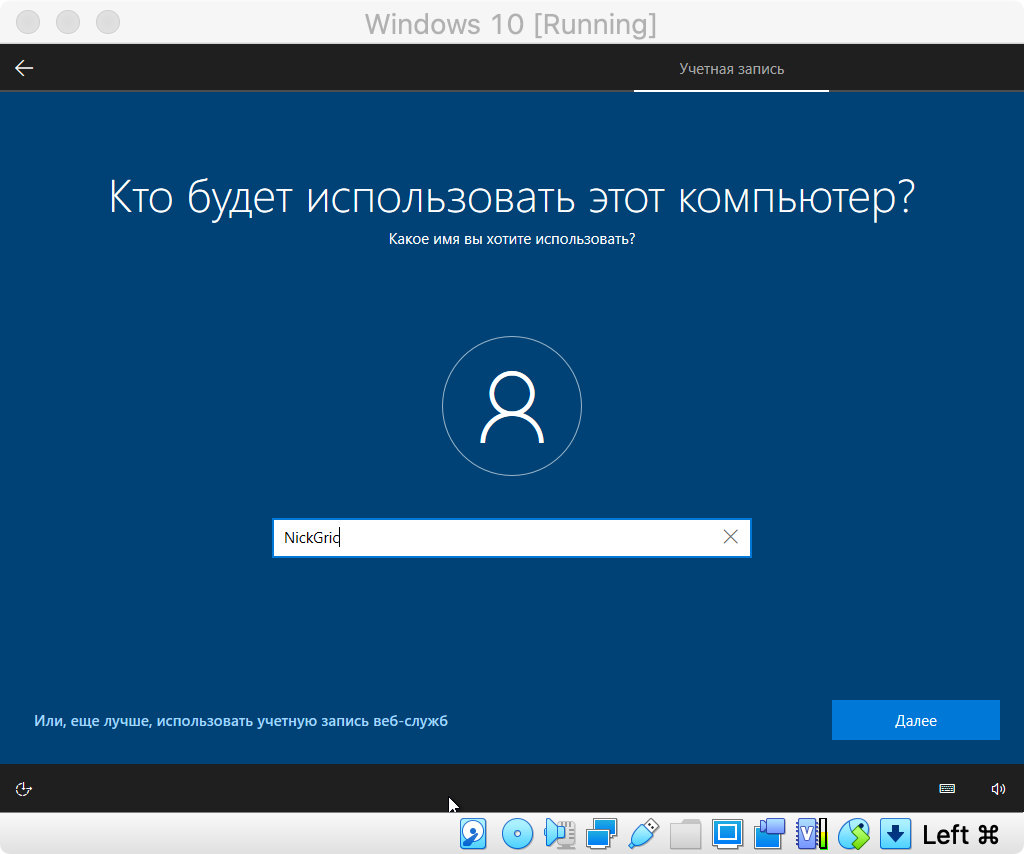
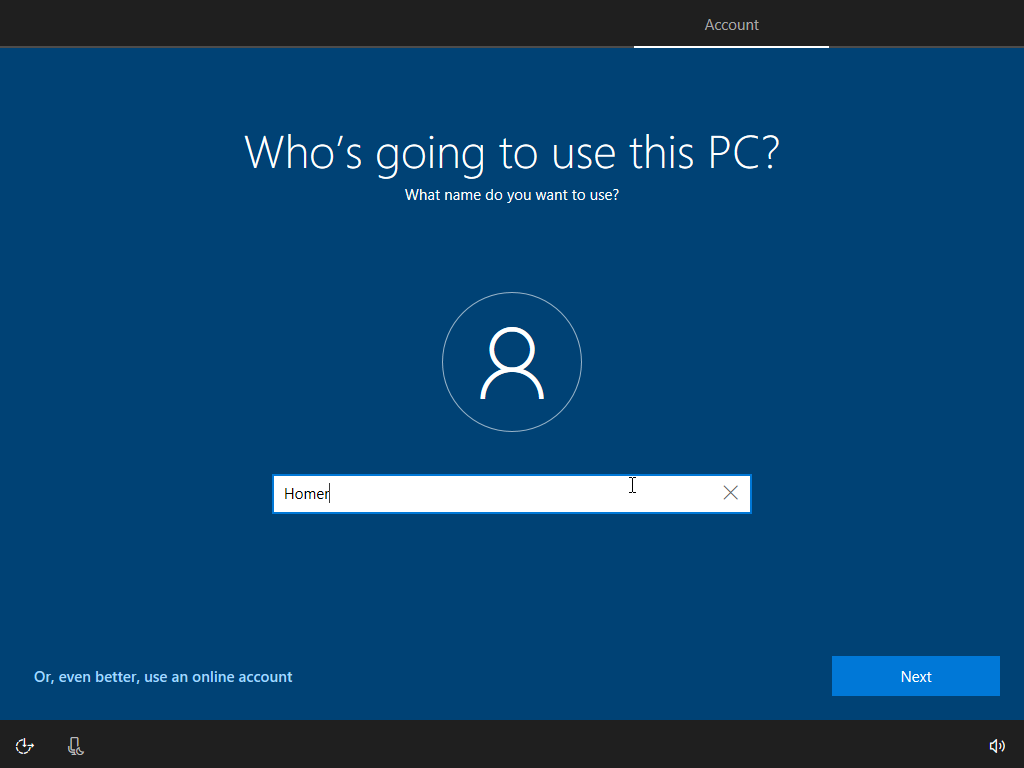
Add Name
Add your name (or pseudonym) and click Next.
-
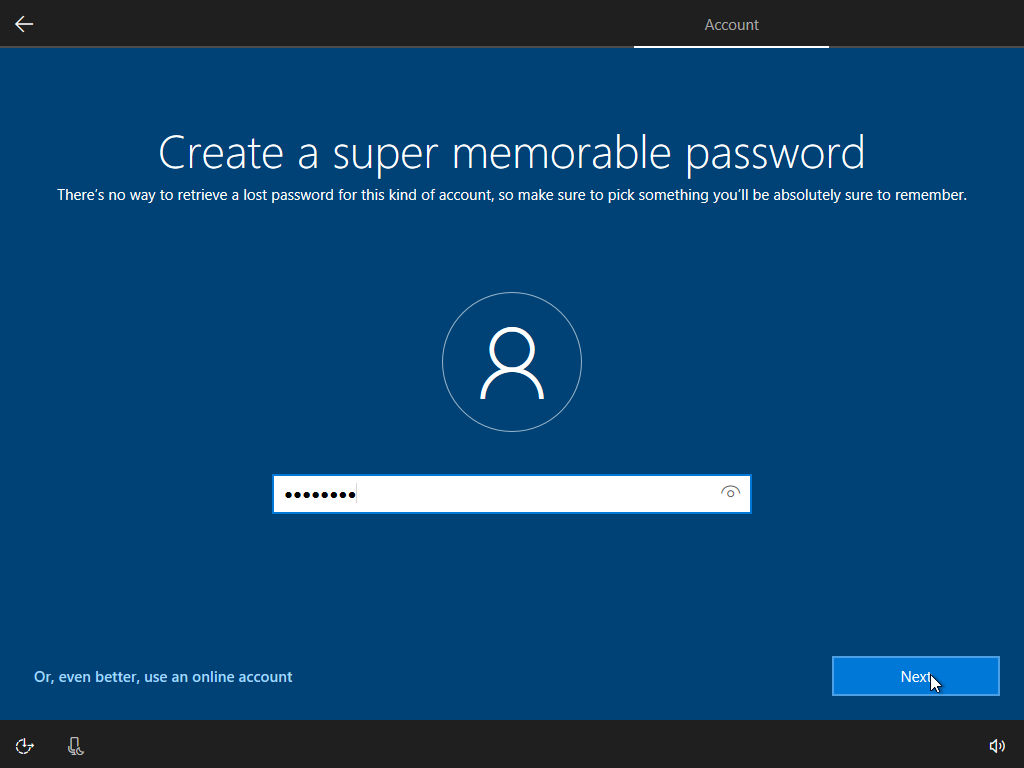
Create a Password
Enter a password and click Next.
-
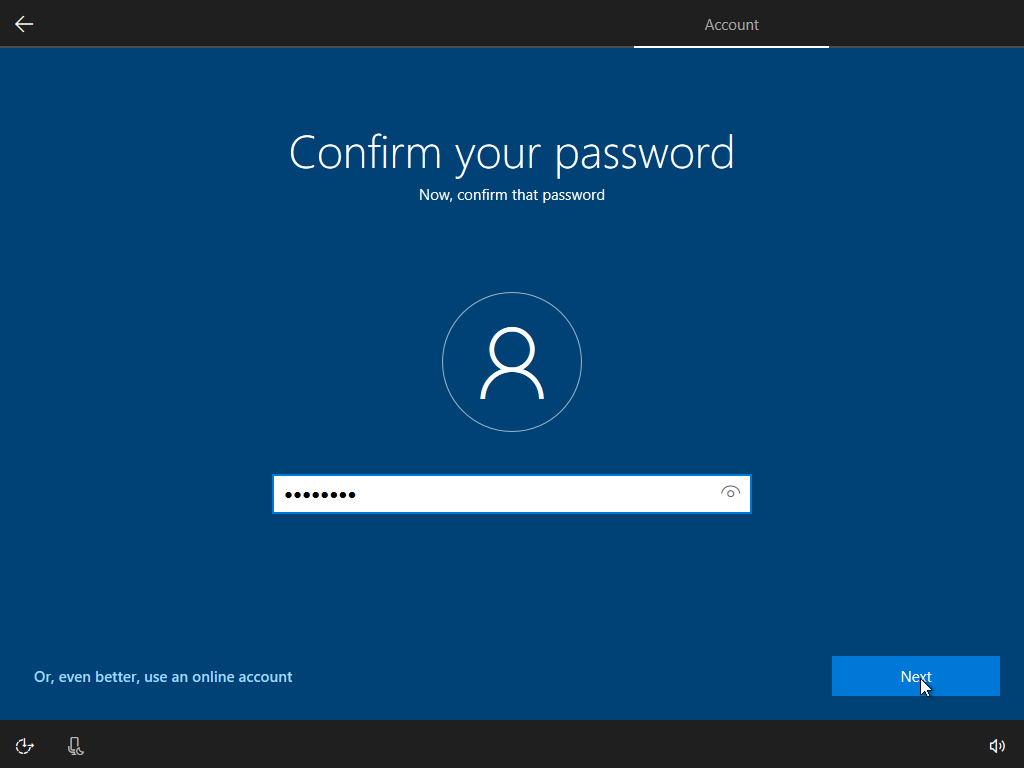
Confirm Password
Enter your password again to confirm and click Next.
-
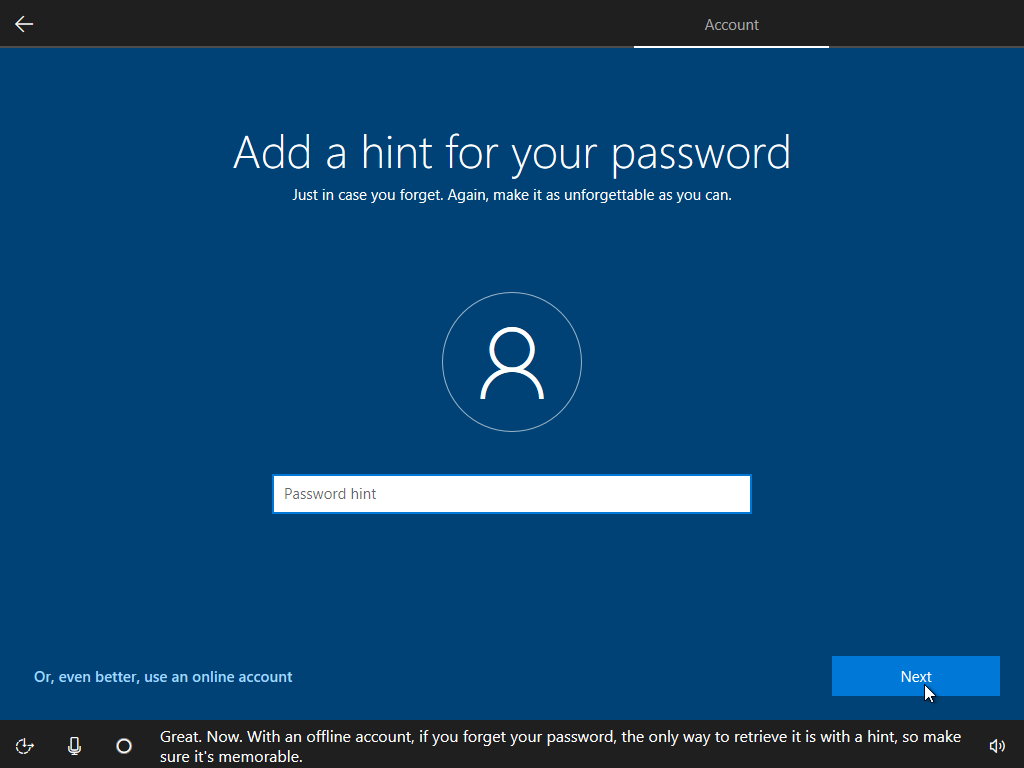
Password Hint
Add a password hint and click Next.
-
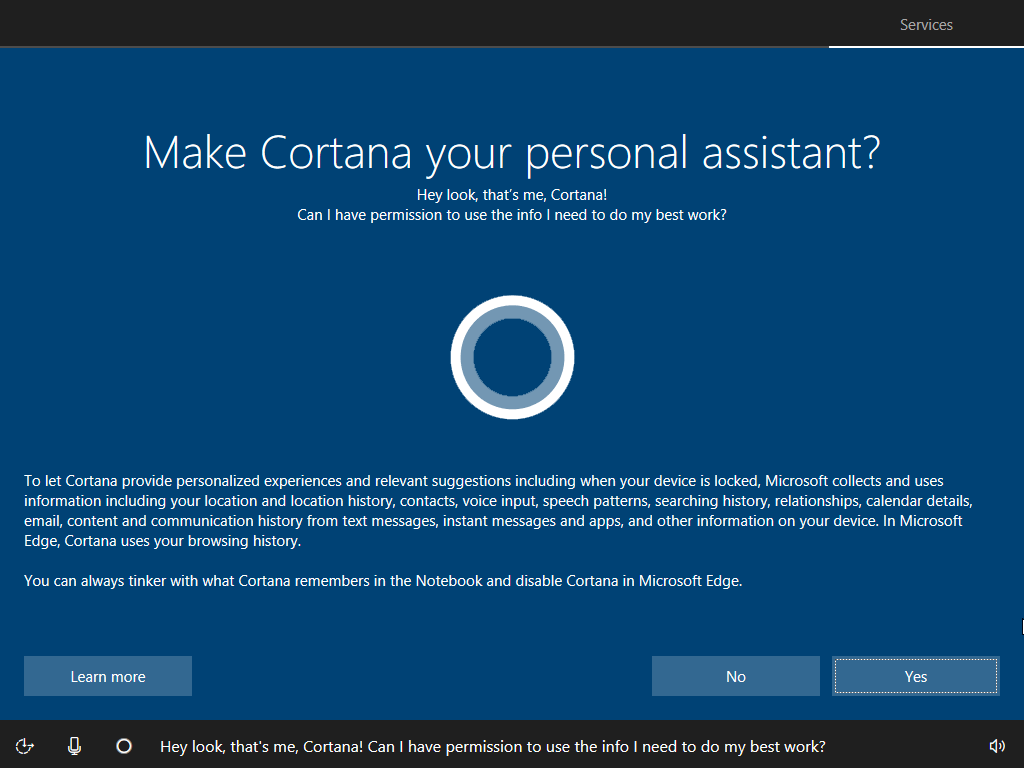
Cortana?
Click either Yes or No depending on whether you want to use the Cortana personal assistant. (In this case I chose No.)
-
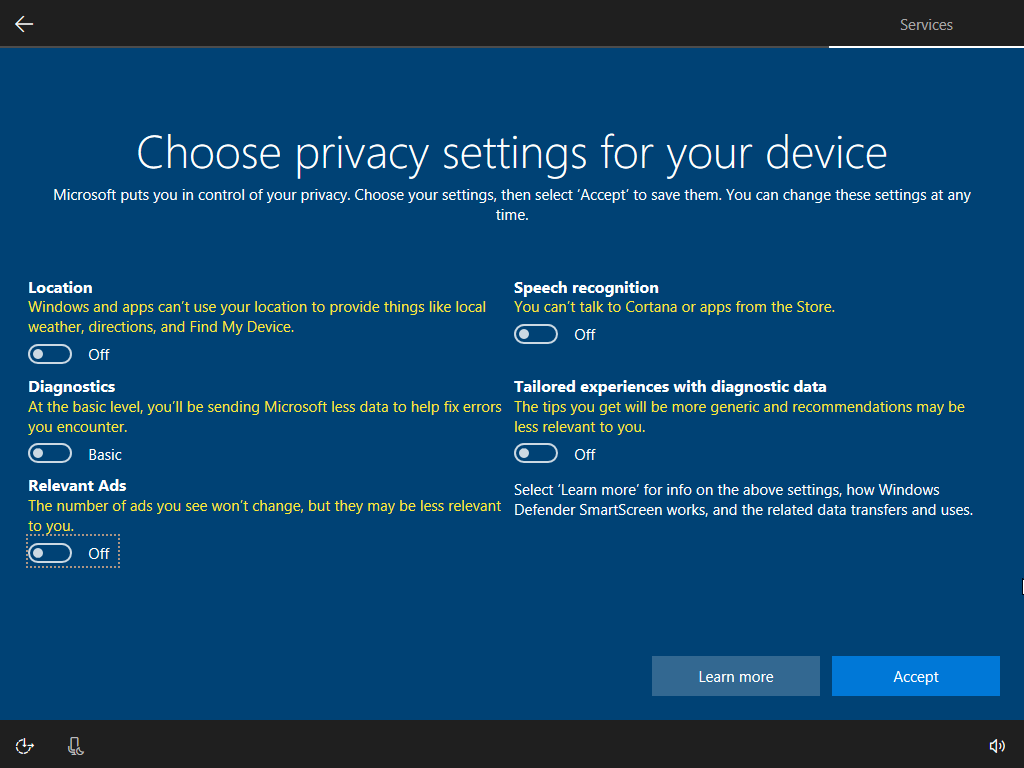
Privacy Settings
Disable any privacy settings you want to, then click Accept.
-
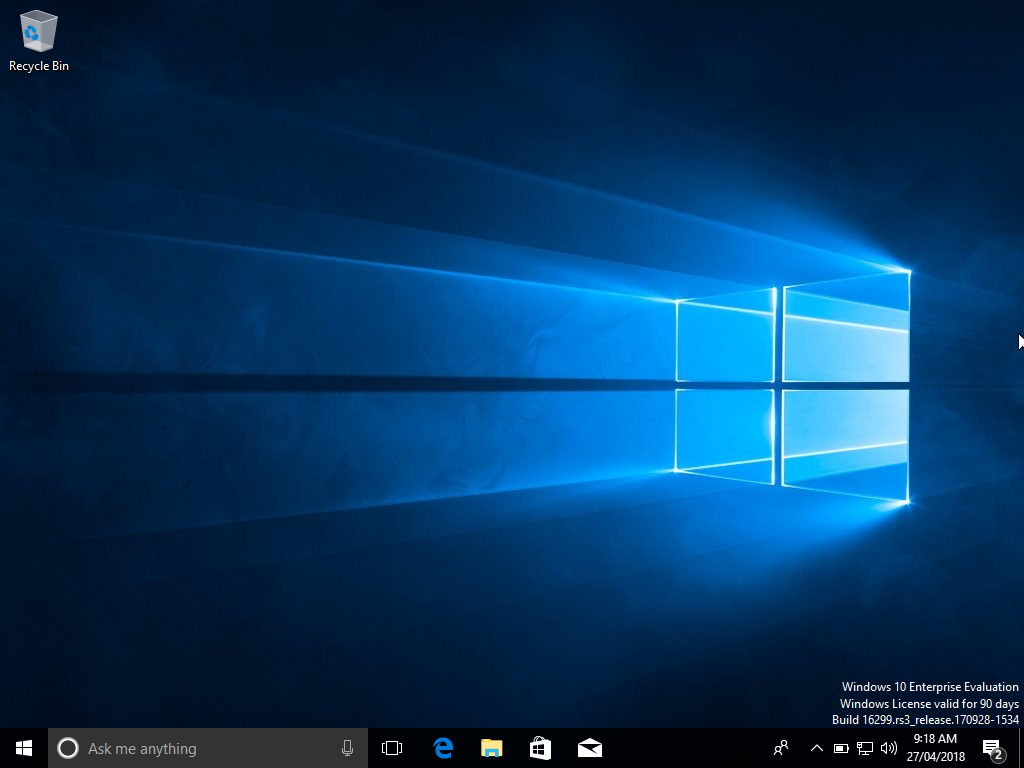
Finally… Done!
Windows is now installed. The Windows desktop is displayed, and you can now go ahead and start using Windows on your Mac!
Have you ever tried to install Windows operating system on Mac computer? However, Mac operating system is the best OS and Windows is more popular and well known for the people. You can install and run Windows 10 in OS X for free using VirtualBox. Because this installs Windows into a virtual machine atop existing Mac system software, running Windows is basically like running any other application, which makes it much easier than configuring Boot Camp for a native Windows experience. In this article, you will learn how to install Windows 10 on Mac using VirtualBox, create virtual machine on Mac, and how to edit virtual machine on Mac? with complete step by step guide.
If you would like to Install Mac OS X El Capitan on VirtualBox on PC so visits this article. How to install Mac OS X El Capitan on VirtualBox on PC.
Install Windows 10 on Mac with VirtualBox
Setting up Windows 10 to run on the Mac is quite simple and requirements are basic enough though the more resources the computer has the better the overall experience will be. To get started, you’ll first need to download Windows 10 ISO from Microsoft and get VirtualBox. The rest is just a matter of following the simple instructions, and soon you’ll have Windows running in OS X in no time.
Windows 10 Installation Requirements
- Processor: 1 gigahertz (GHz) or faster
- RAM: 1 gigabyte (GB) (32-bit) or 2 GB (64-bit)
- Free hard disk space: 16 GB
- Graphics card: Microsoft DirectX 9 graphics device with WDDM driver
Windows 10 Installation Requirements for VirtualBox
- Download VirtualBox from Oracle (free) – install this as like any other app
- Download Windows 10 ISO from Microsoft (free) – put this somewhere easy to locate, like the Mac Desktop
- At least 8GB of disk space to install Windows into the virtual machine
- A reasonably speedy computer with sufficient RAM and CPU
Now, let’s get started that how to install Windows 10 on Mac computer by using VirtualBox. Download the VB and Windows 10 ISO. Install the VirtualBox then open it. To install the VirtualBox on your Mac, simply click on the pkg file then click continue.

Install VirtualBox on Mac Computer
Create Virtual Machine on Mac
To create virtual machine on Mac, open the VirtualBox first, then tap on the “New“. Once you clicked on “New”, a small window will pop up. In this window. You should choose a name and operating system type. In the name field, type “Windows 10” then choose the Windows type and version. Once you are done. Click on the “Continue” button.

Create New Virtual Machine
Select the amount of memory or RAM in megabytes to be allocated to the virtual machine. At least 1 GB for 32-bit version and 2 GB for 64 version.
Choose Memory Size
If you wish you can add a virtual hard disk to the new machine. You can either create a new hard disk file or select one from the list or from another location using the folder icon. For this demonstration, click on the second option “Create a virtual hard disk now“.
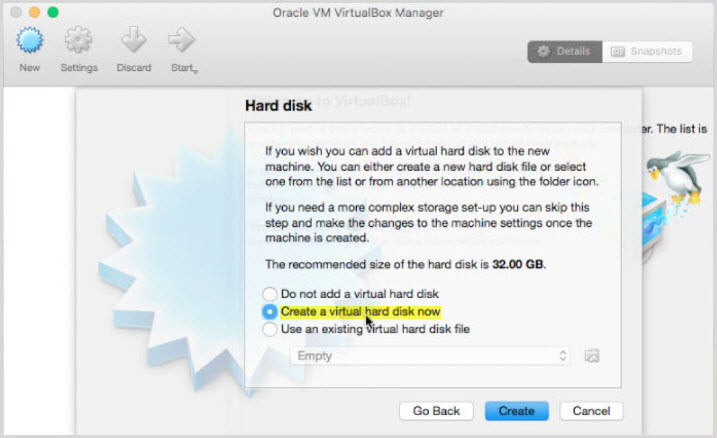
Create a Virtual Hard Disk
When clicked on create, a new window will be shown to you. Now, choose the first option “VirtualBox Disk Image” then hit the “Continue” button.
Hard Disk File Type
A dynamically allocated hard disk file will only use space on your physical hard disk as it fills up then it directly take space from your host computer. A fixed size hard disk file may take longer to create on some systems but is often faster to use. It depends on you that which type of disk you want to choose. I use here the “dynamically allocated“.
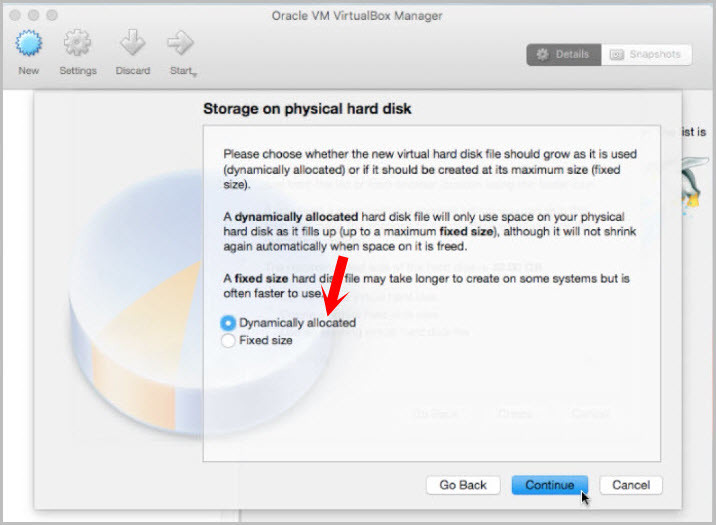
Dynamic Disk and Fixed Disk
Now, the name of the virtual machine hard disk file. Or click on the folder icon to choose a different folder. Don’t forget to select the size of the virtual machine hard disk in megabytes. This size is the limit on the amount of file data that a virtual machine will be able to store on the hard disk.
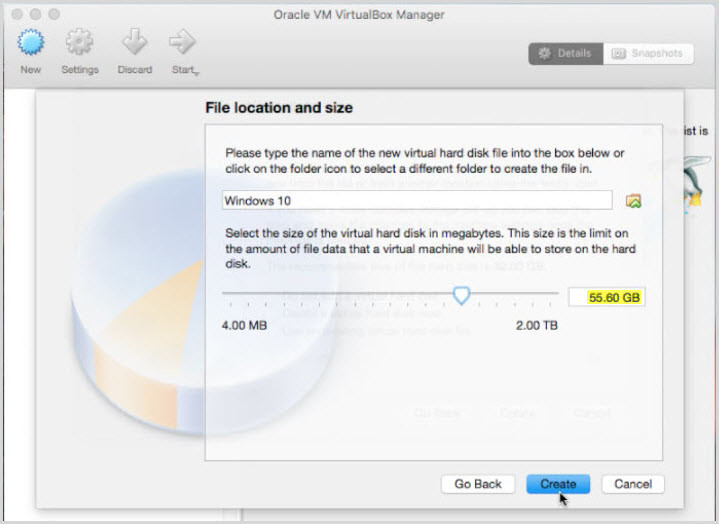
Choose File Location and Disk Size
How to Edit Virtual Machine on Mac?
When you create a brand new virtual machine so now it’s time to edit virtual machine. If you skip this process, you will not be able to install Windows 10 on Mac computer with VirtualBox. Now, click on the VirtualBox “Settings“.
Editing Virtual Machine on Mac
Now, you’ll see the some options ” General, System, Display, Storage, Audio, Network, Ports, Shared Folders, User Interface”. First, click on the system tab. Choose at least 2 GB of RAM for 64-bit version of Windows 10. Put the chipset to “PIIX3“.
VirtualBox System Settings
Now, Go the “Display” then setting everything like the screenshot below.
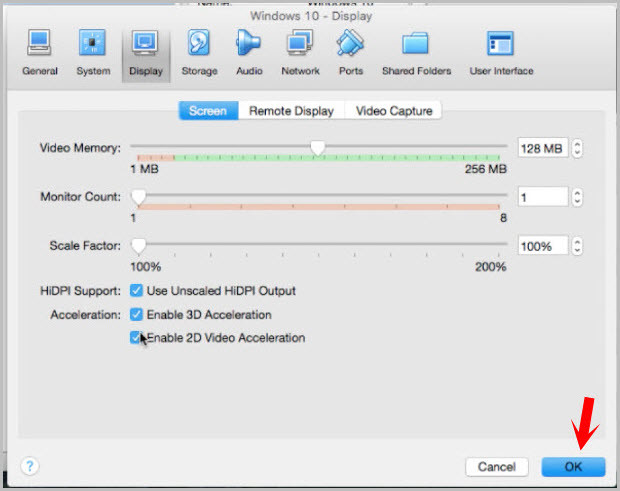
Create Virtual Machine on Mace
Go the “Storage tab“. Click on “Empty“. There is a small CD/DVD icon at top right hand-side. Click on that and choose Windows 10 ISO wherever it’s located. It’s done! tell here.
Choose Windows 10 ISO Image
Install Windows 10 on Mac by Using VirtualBox
Now, everything is ready for Windows 10 installation. To install Windows 10 on Mac, tap on green arrow icon “Start“. Automatically the Windows will start installing on VirtualBox.
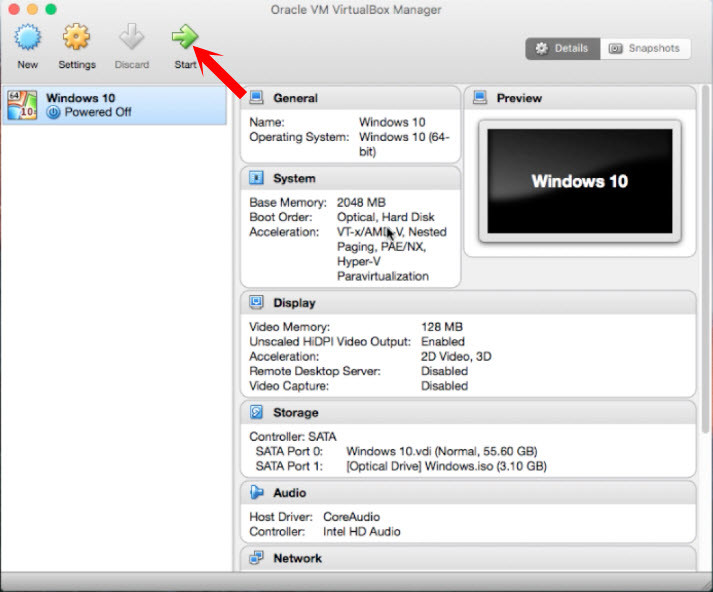
Start Virtual Machine
Now, the Windows 10 will start installing. Choose the keyboard and language and click next button.
Installing Windows 10 on Mac using VirtualBox
Choose “Install Now“. Check out the Microsoft software license terms then hit “Next” button. Choose ” Custome installation of Windows“. Now, You have to do some partitions on this device. Click “New” then apply. Hit next to start the Windows 10 Installation.
Create new Partition
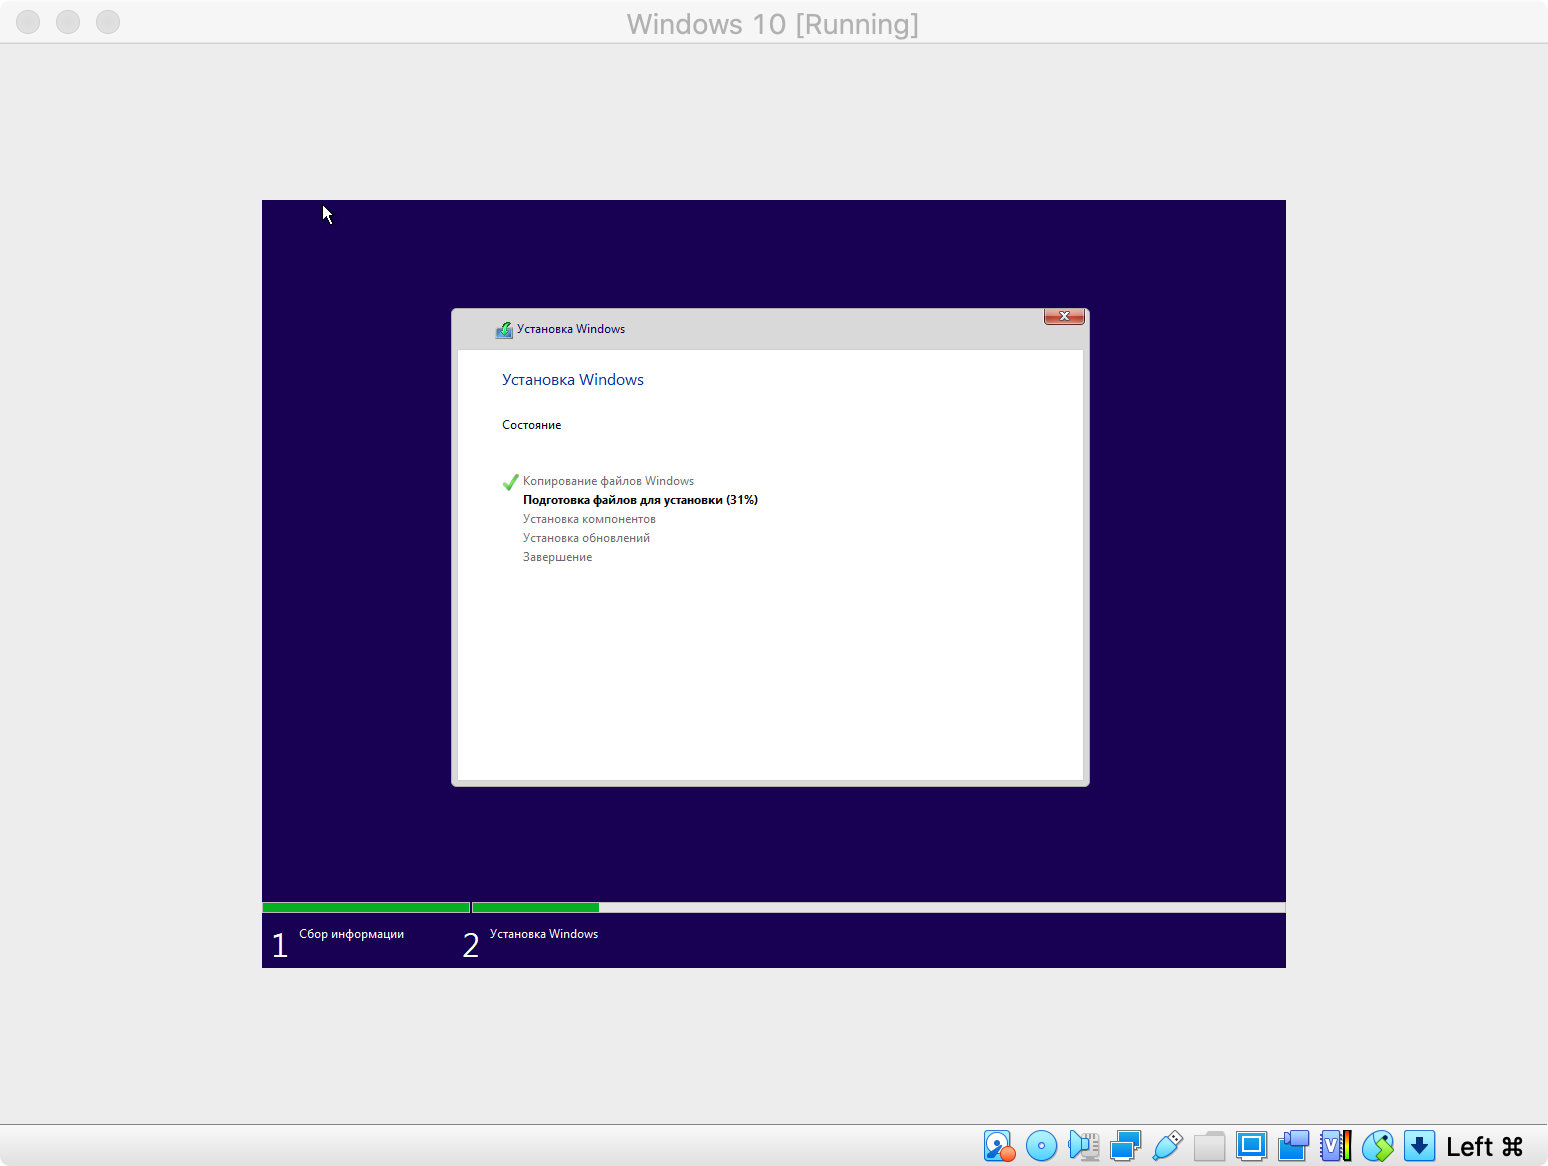
Wait for some minutes and get relaxed. This will take around 15 to 20 minutes to complete.
Install Windows 10 on VirtualBox
After several times restarting the below page will pop up for you. If you have the Windows 10 Product key, so type and hit enter otherwise, click on the “Do this later“.
Enter Windows 10 Product Key
Choose ” Use express settings“.
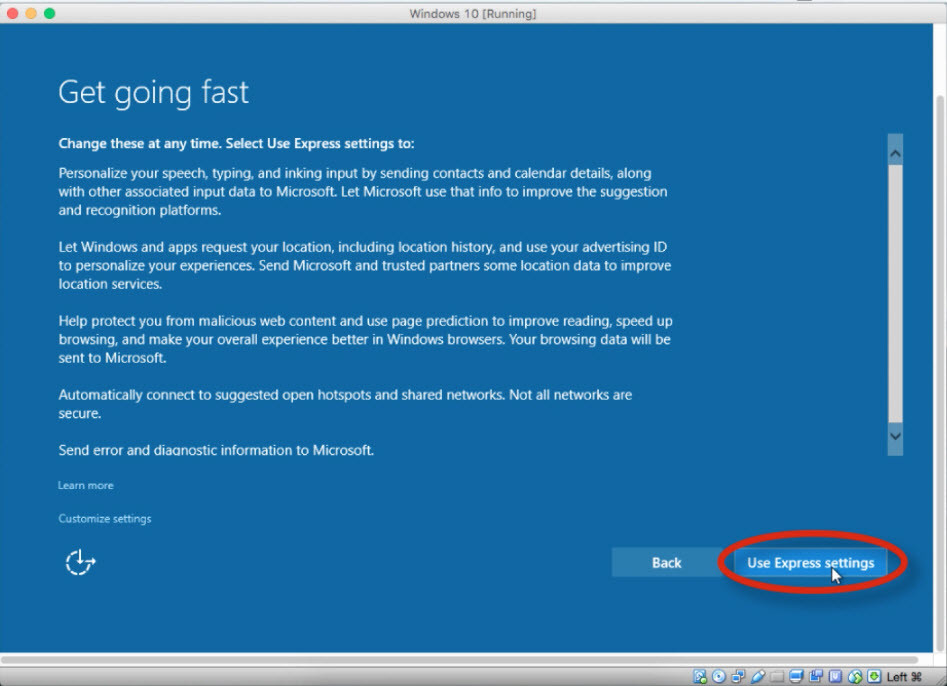
Use Express Account
Don’t create an account, just tap on “Skip this step“.
Sign up for Microsoft Account
Create an account for this PC. To create an account, type the username and password. Choose a proper hint for the password. If you don’t want to use the password for this device. Only type the username and click “Next” button.
Create New User account for Windows 10
It’s done now! This is the complete screenshot.
Installed Windows 10 Successfully on VirtualBox
Conclusion
Though this was somehow lengthy but we have covered everything. Again if you did not understand any point. Feel free to ask us just below this post. If you’re enjoying this VirtualBox experience, you may be pleased to discover that you can run many other operating systems in the virtual machine environment as well. Thanks for being with us.
Do you want to run Windows on your Mac computer but don’t want to go through the hassle of creating a separate partition or using Boot Camp? What if we told you that you could easily install and run Windows on your Mac using a virtual machine? At first glance, the idea of running a virtual machine on your Mac to install Windows seems daunting, but it’s not as difficult as it appears. In this blog post, we will guide you on how to install Windows on VirtualBox on your Mac computer.
Video Tutorial:
If you’re a Mac computer user, you might find it odd to install Windows on your Mac. However, some applications are only available on Windows, and sometimes, the only solution left is to use Windows software to fulfill tasks. In such cases, you’ll want to test Windows services on your Mac’s hardware, but instead of installing Windows as your computer’s primary operating system, you can install it on a virtual machine with VirtualBox.
VirtualBox is a type of virtualization software that allows you to create a virtual computer system within your Mac computer. You can use it to run other operating systems on your Mac like Windows, Linux, and more, without disturbing your computer’s primary operating system or making changes to its settings. Plus, it’s free!
Method 1: Installing VirtualBox on Your Mac
Before you can install Windows on VirtualBox, you need to have VirtualBox software installed on your Mac computer. Here are the steps to follow;
1. Go to the official VirtualBox website and click the «Downloads» section.
2. Locate and click the download link for «OS X hosts.«
3. Once the download is complete, double-click the VirtualBox disk image file to start the installation process.
4. Follow the on-screen instructions to complete the installation process.
5. Launch VirtualBox application once the installation is complete.
Pros:
– VirtualBox is free and open-source software.
– It supports many guest operating systems.
– You can run Windows on Mac without changing any settings in your computer.
Cons:
– You need sufficient hardware specs to run VirtualBox.
Method 2: Create a new virtual machine with Windows 10
Now that you have VirtualBox installed on your Mac computer, let’s create a new virtual machine and install Windows 10 OS. Here are the steps to follow:
1. Open VirtualBox on your Mac computer.
2. Click «New» to create a new virtual machine.
3. Enter a name for your virtual machine (e.g., «Windows 10«).
4. Choose «Microsoft Windows» as the type.
5. Select the version of Windows 10 you want to install and click «Next.«
6. Allocate at least 2 GB of RAM to your virtual machine and click «Next.«
7. Select «Create a virtual hard disk now» and click «Create.«
8. Choose «VDI» and click «Next.«
9. Select «Dynamically allocated» and click «Next.«
10. Allocate at least 20 GB of disk space to your virtual machine and click «Create.«
11. Click «Start» to boot your virtual machine.
12. Use the «Select a boot drive» dialog box to locate and select the Windows 10 ISO file you want to install.
13. Follow the on-screen instructions to complete the installation process of Windows 10 OS.
Pros:
– You can create multiple virtual machines on a single host.
– It is easy to set up and customize virtual machine options.
– You can run Windows 10 on a Mac computer alongside macOS.
Cons:
– Virtual machines can require a lot of resources, which can slow down your computer.
Method 3: Install VirtualBox Guest Additions
Now that you have Windows 10 running on a virtual machine on your Mac computer, you may want to improve its performance. VirtualBox Guest Additions is a software package that can be installed on a guest operating system and enhances its functionality and performance. Here are the steps to install VirtualBox Guest Additions on Windows 10:
1. Start up your Windows 10 virtual machine within the VirtualBox.
2. Click on the Devices menu in the VirtualBox window.
3. Click on “Insert Guest Additions CD image.”
4. A popup window will appear, prompting you to install VirtualBox Guest Additions automatically. Click the «Yes» button.
5. Once installed, click the «OK» button and restart the virtual machine.
Pros:
– Guest virtual machines can directly access your computer’s hardware.
– Enhances the performance of your virtual machine.
Cons:
– The installation process can be difficult for beginners.
What to Do If You Can’t Install VirtualBox Or Windows on VirtualBox Mac
If you find yourself unable to install VirtualBox or Windows on your virtual machine, there are a few things you can try. Here are the fixes:
– Make sure that your Mac computer meets the VirtualBox system requirements.
– Check that you have downloaded the correct version of VirtualBox for your computer’s operating system.
– Use a reliable Windows 10 ISO file.
– Try disabling SIP on your Mac computer.
– Run VirtualBox and Windows installation as an Administrator.
Bonus Tip
Here’s a bonus tip! To make it easier to switch back and forth between your Mac desktop and virtual machine, you can enable «Seamless Mode.» This mode makes the virtual machine’s desktop appear within a window on your Mac computer’s desktop. Here’s how to enable Seamless Mode:
1. Click on the «View» menu in the VirtualBox window.
2. Select «Switch to Seamless Mode.«
Pros:
– Seamless Mode makes it easier to access both your Mac and Windows desktops.
– You don’t have to constantly switch between two operating systems.
Cons:
– Seamless Mode can cause some performance lag for the virtual machine.
5 FAQs
Q1: Can you run Windows 11 on VirtualBox?
A: Yes, VirtualBox supports running Windows 11 virtualized.
Q2: How much RAM do I need to allocate to my Windows 10 virtual machine?
A: At least 2 GB of RAM is recommended to allocate to the virtual machine for the best performance.
Q3: Can I share files between my Mac and Windows on my virtual machine?
A: Yes, you can share files between your Mac and Windows virtual machine by setting up a shared directory or using cloud storage.
Q4: How can I boot from USB in VirtualBox?
A: You need to create a new virtual machine, attach the USB device as a disk, and then boot the virtual machine from that disk.
Q5: Can I use Windows on VirtualBox for gaming?
A: Running games on a virtual machine can diminish the gaming experience. We do not recommend gaming on a Windows virtual machine on your Mac.
Final Thoughts
VirtualBox is a powerful tool that enables you to run multiple operating systems on your Mac computer. You can install Windows on a virtual machine, thanks to VirtualBox, and use Windows software on your Mac without partitioning your computer’s hard drive. It’s a convenient solution that saves time and money. With this guide, you can install and set up a Windows 10 virtual machine on your Mac with ease.
Are you tired of having to use a separate Windows machine just to run a specific program or software? Well, as a Mac user, you don’t have to! By using virtual machine software like VirtualBox, you can easily run Windows on your Mac and seamlessly switch between operating systems.
But before you get started, there are a few things you need to gather. In this guide, I’ll take you through the essential tools and software you need to run Windows on your Mac using VirtualBox. This way, you will be able to run any Windows OS on your Mac. So, let’s get started!
Things you will need to run Windows on Mac in VirtualBox
Before you can start running Windows on your Mac using VirtualBox, you’ll need a few essential things:
Check your System Specs: Your Mac needs to be a relatively recent model and powerful enough to handle running both operating systems simultaneously. This way, there won’t be any reason to check your system specs. Most likely, you have all the specs to run both OS at a time.
Like running a virtual machine also requires a lot of RAM, so make sure your Mac has enough memory to handle it. A minimum of 8GB is recommended, but 16GB or more is ideal.
Download VirtualBox: VirtualBox is a free and open-source virtualization software that allows you to run multiple operating systems on your computer simultaneously. It’s a popular choice for running Windows on Mac or Linux systems. VirtualBox provides a user-friendly interface and a range of customization options, making it a flexible and powerful tool for virtualization.
Download Windows ISO: A Windows ISO is necessary to install the Windows OS on your virtual machine. It’s a disk image file that contains all the files and software needed to install and run Windows. Without a Windows ISO, you won’t be able to create a virtual machine to run Windows on your Mac using VirtualBox.
Enough storage space: Running a virtual machine requires a lot of storage space, so make sure your Mac has enough available storage to accommodate both operating systems. Make sure, you will have at least 50+ GB of free storage for your guest OS.
Once you have all of these things, you’re ready to start setting up your virtual machine and running Windows on your Mac.
Run Windows on Mac

Now let’s begin the procedure to run any version of Windows OS on your Mac inside VirtualBox. I have divided the entire process into three steps. With a single glance, you will understand what you are going to do.
- Install VirtualBox on Mac
- Create a new Virtual Machine
- Do the installation of Windows in Virtual Machine
Step 1: Install VirtualBox on Mac
As I mentioned above, you are going to download VirtualBox for your Mac.

- Once the download is complete, double-click on the VirtualBox disk image (.dmg) file to open it.
- Double-click on the VirtualBox.pkg file to start the installation process.
- Follow the on-screen instructions to complete the installation. You may be prompted to enter your Mac username and password.
- Once the installation is complete, you can launch VirtualBox from your Applications folder.
That’s it! You now have VirtualBox installed on your Mac and are ready to create a virtual machine to run Windows.
Step 2: Create a new Virtual Machine
Here’s how to create a new virtual machine in VirtualBox:

- Open VirtualBox on your Mac.
- Click on the New button in the top left corner of the VirtualBox.
- In the Create Virtual Machine, give your virtual machine a name and select the operating system you want to install (in this case, select Microsoft Windows).
- Choose the amount of memory (RAM) you want to allocate to the virtual machine. It’s recommended to allocate at least 8GB of RAM for a Windows virtual machine, but more is always better if your Mac can handle it.
- In the Hard Disk section, select Create a virtual hard disk Now and click Create.
- Choose the type of virtual hard disk you want to create (e.g., VDI or VHD) and select Dynamically allocated for the hard disk file type.
- Choose the amount of storage space you want to allocate to the virtual hard disk. It’s recommended to allocate at least 50GB of storage for a Windows virtual machine, but you can allocate more if you need it.
- Click Create to finish creating the virtual machine.
Now that you have created a new virtual machine. Let’s continue to the next step which is to install Windows in your new Virtual Machine in VirtualBox.
Step 3: Do the installation of Windows in Virtual Machine
From here you will install Windows in Virtual Machine:
- Start VirtualBox and select the Windows virtual machine you created in the previous step.
- Click on the Start button to start the virtual machine.
- In the Select Start-up disk window, click on the folder icon and select the Windows ISO file you downloaded.
- Click Start to begin the Windows installation process.
- Follow the on-screen instructions to install Windows. You’ll need to enter your Windows product key and select the installation options you prefer.
- Once the installation is complete, you can install any necessary drivers and software in the virtual machine.
- To switch between the Mac and Windows operating systems, you can simply pause or save the virtual machine and switch to the other operating system.
That’s it! You now have successfully installed Windows in a virtual machine on your Mac using VirtualBox.
Related: Install Ubuntu in VirtualBox
Related: Install High Sierra in VirtualBox
Related: Install Windows 10 in VirtualBox
Related: Install Windows 11 in VirtualBox