Virtual Box, Виртуализация
- 10.04.2020
- 184 536
- 21
- 06.05.2023
- 178
- 170
- 8

- Содержание статьи
- Установка гостевых дополнений VirtualBox
- Windows
- Linux
- Комментарии к статье ( 21 шт )
- Добавить комментарий
- Установка гостевых дополнений VirtualBox
Установка гостевых дополнений VirtualBox
Для улучшения работы с виртуальной машиной, и взаимодействия с ней, в виртуально установленной операционной системе нужно установить специальный набор инструментов, который называется «Гостевые дополнения» («Guest Additions»).
Данный набор инструментов поддерживает следующие операционные системы:
- Windows:
Операционная система Статус Примечание Windows 11 Требуется поддержка AMD-V или Intel VT-x. Windows Server 2019 Требуется поддержка AMD-V или Intel VT-x. Windows Server 2016 Требуется поддержка AMD-V или Intel VT-x. Windows 10 Требуется поддержка AMD-V или Intel VT-x. Windows Server 2012 R2 Требуется поддержка AMD-V или Intel VT-x. Windows 8.1 Требуется поддержка AMD-V или Intel VT-x. Windows Server 2012 Требуется поддержка AMD-V или Intel VT-x. Windows 8 Требуется поддержка AMD-V или Intel VT-x. Windows Server 2008 R2 Windows 7 Windows Server 2008 Windows Vista Windows Server 2003 R2 Windows Server 2003 Windows XP Windows 2000 Windows ME Не поддерживается Windows 98 Не поддерживается Windows NT 4.0 Требуется установленный Service Pack 6a Windows 95 Не поддерживается - Linux (официально поддерживаются Oracle Linux, Fedora, Red Hat Enterprise Linux, SUSE (в том числе openSUSE), Ubuntu);
- Oracle Solaris;
- OS/2.
Для установки гостевых дополнений VirtualBox необходимо выполнить следующие действия:
- Включаем виртуальную машину и ждем загрузки ОС.
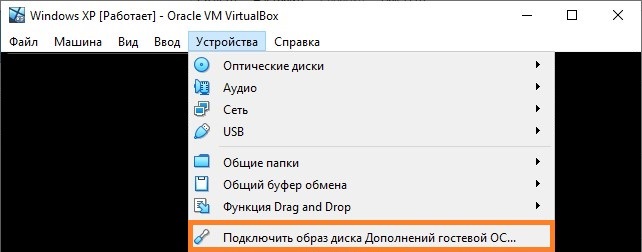
- В верхнем меню VirtualBox выбираем пункт «Устройства — Подключить образ диска Дополнений гостевой ОС…«.

Так же можно скачать отдельный образ с гостевыми дополнениями, перейдя по этой ссылке. После перехода по ссылке, нужно будет открыть директорию с нужной версией VirtualBox, и скачать файл, название которого будет начинаться на «VBoxGuestAdditions». После скачивания, данный файл нужно будет смонтировать вручную, как обычный ISO образ.
Дальнейшие действия зависят от того, какая операционная система установлена в VirtualBox:
Windows
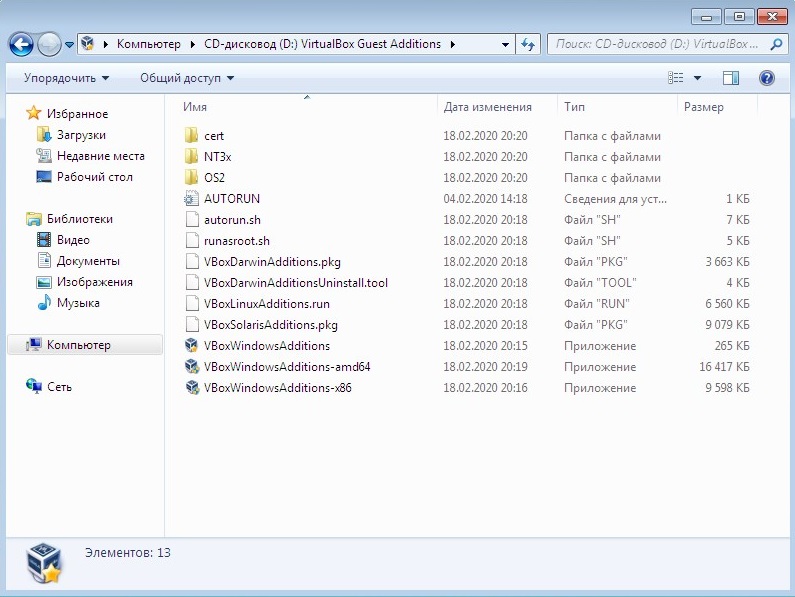
- Если в системе не отключен автозапуск, то должен запуститься установщик дополнений гостевой ОС. Если же в системе выключен автозапуск, нужно запустить установщик вручную, найдя его на подключившемся диске в виртуальной машине, под именем VBoxWindowsAdditions.exe.

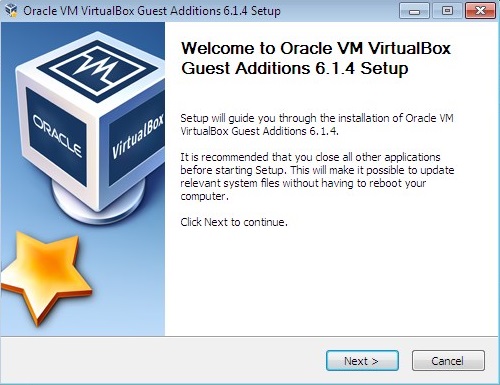
- Как и установка самого VirtualBox, установка гостевых дополнений максимально упрощена, и по сути представляет из себя нажатие кнопок «Next». С первым окном именно так и следует поступить.

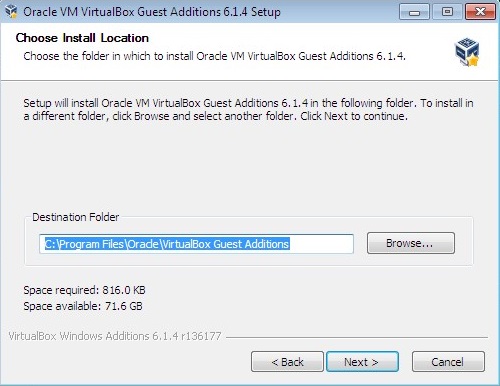
- На следующем будет предложено выбрать место для установки гостевых дополнений. По умолчанию, рассматривается обычная для всех программ директория Program Files.

- Последним шагом, перед непосредственно самой установкой, будет выбор устанавливаемых компонентов:
- VirtualBox Guest Additions — собственно, сами гостевые дополнения VirtualBox;
- Start menu entries — ярлыки в меню «Пуск».
- Direct3D Support — третий компонент, который не выбран по умолчанию, является экспериментальной функцией по включению полноценного 3D ускорения в виртуальной машине. Для «простой» работы он не нужен.
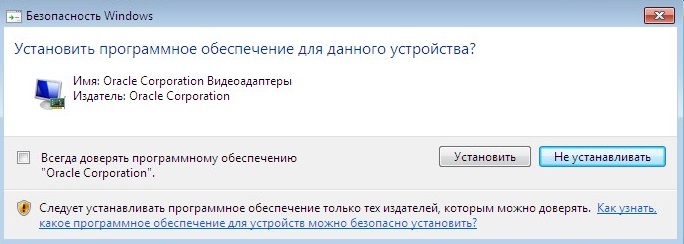
- После нажатия на кнопку «Next» начнется установка гостевых дополнений, во время которой может появится окно с запросом на разрешения установки программного обеспечения для устройства (драйвер), которую необходимо одобрить.

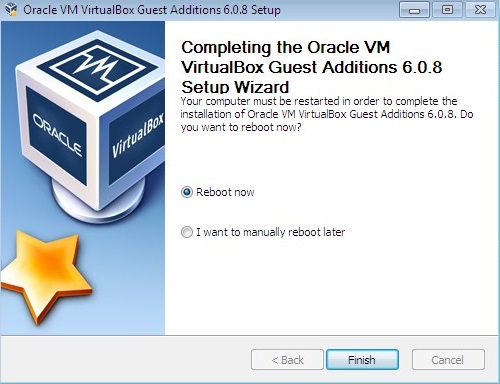
- После установки дополнений потребуется перезагрузка компьютера, которую можно выполнить сразу (оставив отмеченным пункт «Reboot now«), или выполнив её позже самостоятельно (для этого нужно отметить пункт «I want to manually reboot later«).

- После перезагрузки произойдет множество полезных изменений — появится поддержка двухстороннего буфера обмена (о том, как его включить можно прочитать здесь), функция drag-n-drop между основной операционной системой и операционной системой в виртуальной машине, автоматический выбор разрешения экрана на основе размера окна VirtualBox и т. д.
Linux
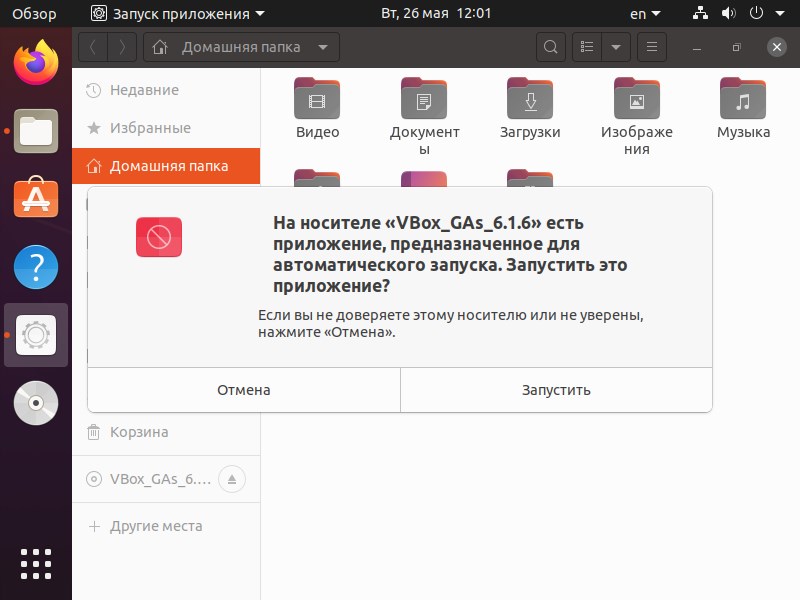
В операционных системах семейства Linux, графический установщик гостевых дополнений отсутствует, вся установка происходит через терминал. Современные дистрибутивы прекрасно сами распознают файл автозапуска на образе с гостевыми дополнениями, и предлагают его запустить автоматически.
Можно так же запустить файл установки гостевых дополнений вручную. Для этого, нужно открыть терминал, и перейти в каталог, куда смонтирован виртуальный образ с файлами установки дополнений. Там же, нужно выполнить команду запуска файла установки:
sudo ./VBoxLinuxAdditions.runЕсли в результате выполнения данной команды, появляется ошибка «Permission denied» (или «Отказано в доступе»), попробуйте выполнить следующую команду:
sudo sh VBoxLinuxAdditions.runПосле выполнения данной команды, начнется установка гостевых дополнений Linux, по завершению которой, понадобится перезагрузка системы.
Dear all,
we have a Windows XP Pro 32-bit VM here that originally had been set up under VMWare. In the meantime, we have migrated many VMs from VMWare Player to VirtualBox without any issue, but this one has already cost a lot of time and nerves, and now we’re completely stuck. What we did:
— Convert the VMDK to VDI -> SUCCESS.
— Create a new VM in VirtualBox, based on the VDI -> SUCCESS.
— Boot the new VM in VirtualBox -> SUCCESS.
— [ Amusing anecdote: Of course, XP then has detected changed hardware, so we had to activate it via phone, which still was possible to our surprise. ] -> SUCCESS.
— Uninstall all VMWare software via Control Panel -> Software -> SUCCESS.
— Remove all hidden and nonpresent devices from device manager (set DEVMGR_SHOW_NONPRESENT_DEVICES=1 as system environment variable, reboot the VM, open the device manager, check «Show Hidden Devices», and remove every device that was not currently present), and reboot again -> SUCCESS.
At this stage, everything was working in the VM, except the network adapter and the graphics adapter, and the guest additions were not installed. Here is where the problem begins:
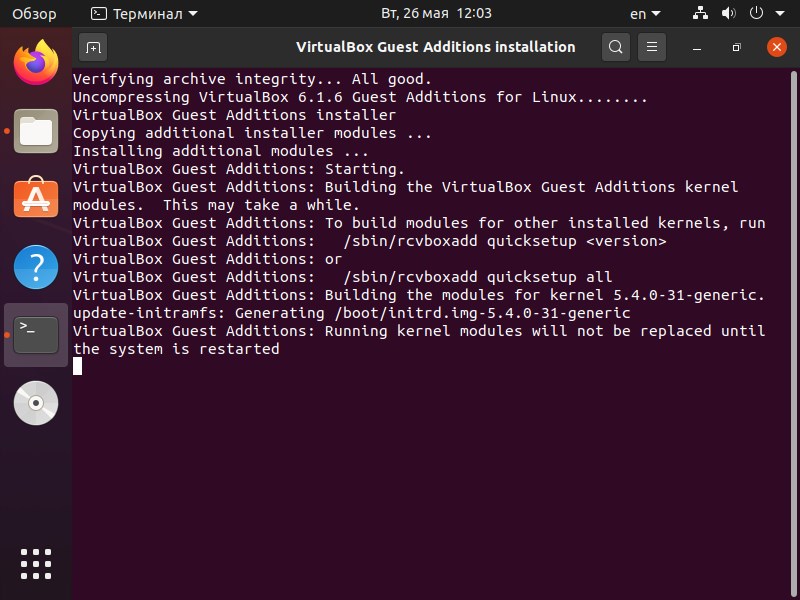
Installation of the guest addition every time hangs forever as shown in the attachment, always at the same place (please excuse the bad attachment quality, but the system didn’t allow me to post a picture bigger than 128 kB). Could somebody please give a hint how to solve the problem?
We have studied the messages shown in the attachment and have come to the conclusion that the problem may have something to do with certificates. We researched and found thread / topic 102393 here in this forum (sorry for the missing link, but the system doesn’t allow me to post URLs yet). We have read the posts in that other thread carefully and have carried out every step that is mentioned there to solve the problem, but to no avail.
We are using VirtualBox 7.0.6 and the guest additions that are part of it. Interestingly, when we instead try to install guest additions 6.1.30 (desperation can be a strong force …), the process hangs as well, literally at the very same place the screenshot in the other thread mentioned above shows.
Now we’re really out of ideas.
Thank you very much in advance!
-

- Clipboard01.jpg (85.63 KiB) Viewed 13101 times
-
Star
(2)
You must be signed in to star a gist -
Fork
(0)
You must be signed in to fork a gist
-
Clone this repository at <script src="https://gist.github.com/LizenzFass78851/5256e41ba6adfb40d9710730a3fef9f8.js"></script>
- Save LizenzFass78851/5256e41ba6adfb40d9710730a3fef9f8 to your computer and use it in GitHub Desktop.
Clone this repository at <script src="https://gist.github.com/LizenzFass78851/5256e41ba6adfb40d9710730a3fef9f8.js"></script>
last supported virtualbox guest additions for certain windows versions
Older Windows Versions
- unknown
Windows 2000 and XP
| version series | latest supported guest additions |
|---|---|
| 6.1.x | 6.1.42 and older |
| 7.0.x | 7.0.6 and older |
Windows 7 and 8.1
| version series | latest supported guest additions |
|---|---|
| 6.1.x | 6.1.50 and older |
| 7.0.x | 7.0.16 and older |
no guarantee of completeness
Item Preview
There Is No Preview Available For This Item
This item does not appear to have any files that can be experienced on Archive.org.
Please download files in this item to interact with them on your computer.
Show all files
100
Views
1
Review
DOWNLOAD OPTIONS
Uploaded by
SSJ9KDellboy1
on
SIMILAR ITEMS (based on metadata)
Though there are several ways to use Windows XP on Windows 10 and 11, using it with the pre-installed image for VirtualBox adds many advantages. We prepared a Windows XP image with VirtualBox guest additions to make things easy. It will allow you to attach and use the latest computer quickly.
You can avoid downloading the correct ISO file, doing every installation step (Unfortunately, the Windows XP installations take a longer time) and additional steps by using this pre-installed image.
You may have unique reasons to have Windows XP on VirtualBox with Windows 11. It could be something you need to check the old legacy applications, play games that support only Windows XP, or open a file that can work only on Win XP. Using Windows XP as a VirtualBox pre-installed image (VDI file) will be handy in any of the above cases.
System Requirements
We believe you have the latest suitable hardware if you are using Windows 11 or 10. It will definitely run Windows XP on it with Oracle VirtualBox.
Download Windows XP Preinstalled VirtualBox Image and use it on Windows 11.
1) Make sure you have the latest Oracle VirtualBox application. It is a desktop virtualization software you can download from the official website here.
2) Download the XP preinstalled image from our website here.

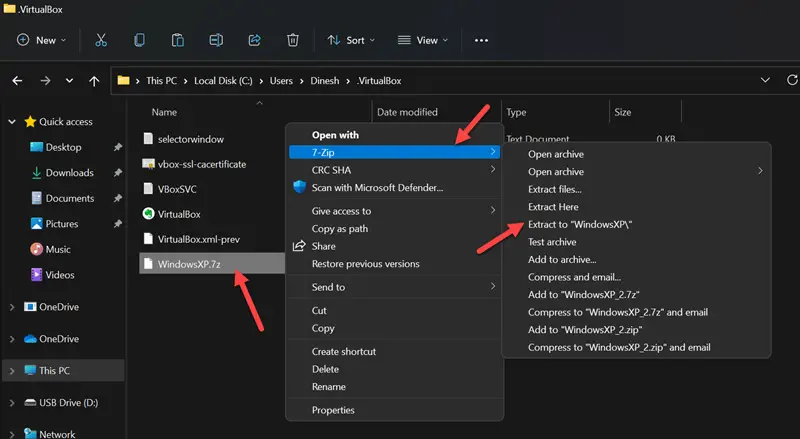
3) You need to have the 7-Zip program to extract this file. You can download 7-Zip from their website here.
4) After the pre-installed image is downloaded, extract it using the 7-Zip program.
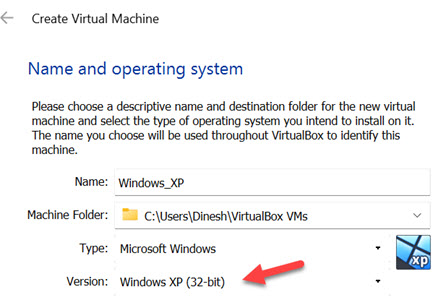
5) Open VirtualBox and create a new VM.
6) Give a name for VM and select the version as Windows XP (32bit).
7) Assign RAM size to 512MB.
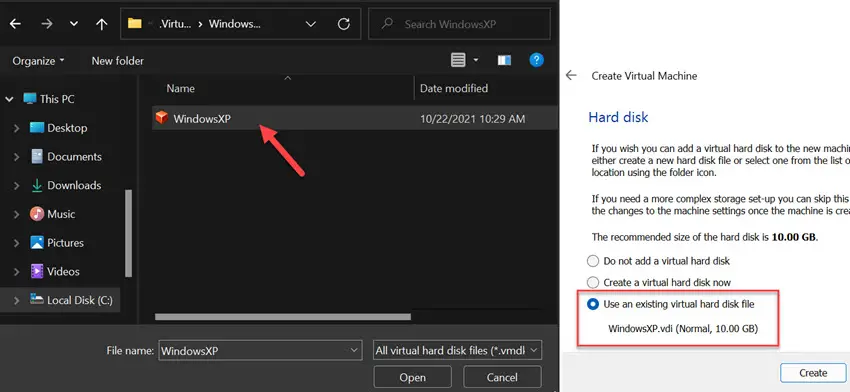
 Select ‘Use an existing virtual hard disk option’ on the hard disk creation screen. This will bring up a box where you can choose the available VDI file. We need to browse the Windows XP preinstalled image file we extracted in the earlier step.
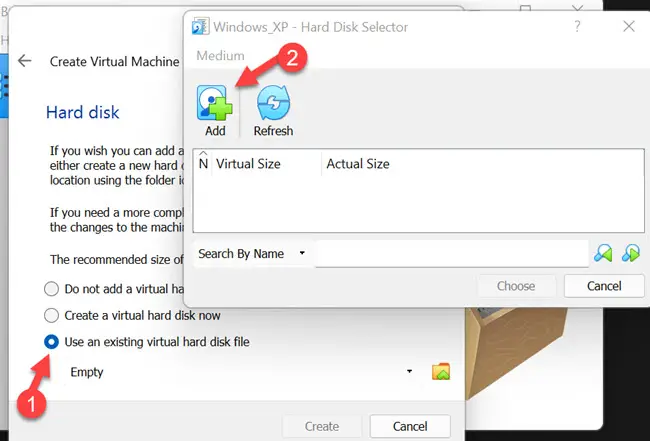
9) Click on the ‘Add’ button and locate the file as shown below.
After attaching the file, complete the VM creation steps.
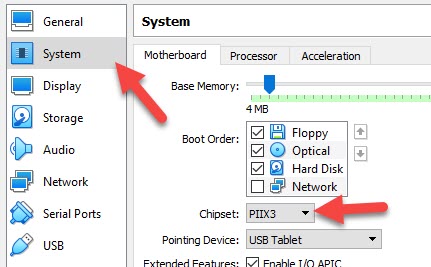
10) Before switching on the VM, let’s tweak a few settings to make the VM work better.
11) Open the VM settings and tick the ‘Enable I/O APIC’ under ‘System’ settings. This will enable us to allocate more the one processer core for the VM.
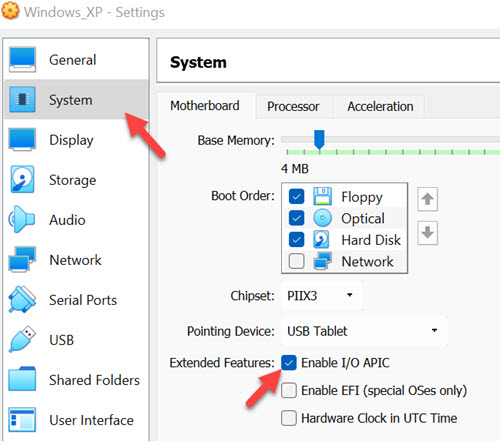
12) Then, in the ‘Processor’ tab, increase the processers to 2.

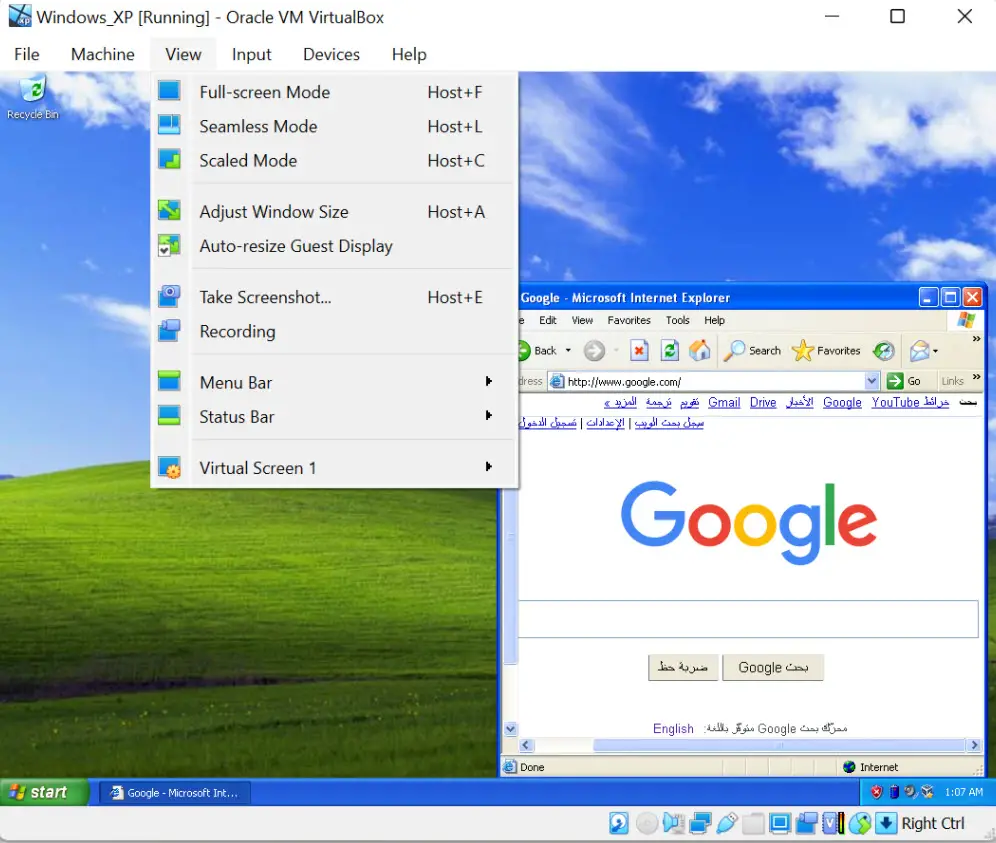
13) Power on the VM now. Since all installation steps are done, and VirtualBox guest additions are installed already, the Windows XP on VirtualBox virtual machine will boot and work smoothly.
Network connectivity (Internet), sound and multiple screen resolutions, including full-screen mode, will work perfectly.
You can change the user or Administrator password.
You should have a working Windows XP virtual machine on your Windows 11/10 physical computer. It is highly recommended to take a snapshot before you make any changes.
Since VirtualBox guest additions are installed on this VM, you can quickly transfer the files/folders between the host and the guest virtual machine. It should be easy to test the legacy applications, games and other activities requiring Windows XP on the latest Windows 11 computer.
Troubleshooting Tips for Windows XP on VirtualBox
Based on the user feedback and findings, here are some troubleshooting tips if your Windows XP virtual machine is not booting or is stuck with the black screen.
- As mentioned in system requirements, if your host computer is Windows 10 or 11, it already has virtualization technology enabled in the BIOS. But, if you are using Windows 8 or 7 without VT-x enabled, you need to enable VT-x in BIOS before trying these steps.
- You can change the chipset under the motherboard settings of the Windows XP virtual machine. It worked for me with PIIX3, but few users reported it worked with ICH9. So, it is better to change the try on your PC.