
The method with srvstart works pretty well, however it does not stop the service at shutdown properly, such that it stops with poweroff.
What however works nicely is the «net stop <service>» command.
I used it in the general shutdown script of my computer and looks like it works (savestate returns).
—————————-
Shutdown scripts can be accessed via gpedit.msc under computer configuration/windows settings/scripts.
I created a .bat file with a net stop command.
Furthermore is it possible to activate the output of that shutdown see script. gpedit.msc Administrative templates/system/scripts/
When you install the service with the windows service commander you can also modify the rights of common users (for example to start or stop the service) (security options)
——————————
Furthermore I intend to have a user that can use the VBoxmanage commands.
For that this user will have to have a console which runs under local service rights.
This can be done with the psexec tool from sysinternals (windows resource kit tools) with the -i -s options (but only from a shell with admin rights):
1. runas /user:<admin> cmd
2. psexec -i -s cmd (inside the new shell)
within this shell Virtualbox sees the machines running under localsystem.
———————————
Interesting could be also a service that runs a shell and can be started and stopped only by the user that manages the Virtualbox machines.
Anyway all this is slightly dangerous because of the localsystem rights (which are practically admin rights)
But probably the service could be also run under the useracount or the localservice account
The problem is only that Virtualbox sees its running virtual machine
———————————
For hiding the console window I used startx (which also allows you to set the priority better)
———————————
I realised that even Virtualbox.exe can be run under localsystem and it sees the running virtual machine!
It does neither shutdown the VBoxheadless.exe when it is closed. Interesting…
best
Sönke Schmachtel
VBoxVmService
1. What is VBoxVmService?
VBoxVmService is a Windows Service, that enables the host-system to run or shutdown VirtualBox Virtual Machines (VMs) without a user being logged on to the host-system running Windows (Win10/2012/2016, both x86 and x64 supported).
2. How to use VBoxVmService?
Check the detailed howto guide.
If you run into problem, please follow the TROUBLESHOOTING section in the guide first, most likely your issue has been addressed there. Check for known issues on the wiki before submitting new issue.
3. How does it work?
Basically, VBoxVmService is just a wrapper-service that calls VirtualBox COM API interfaces.
When windows starts up, the wrapper-service will start running. It will check for the settings in VBoxVmService.ini file, and call up the Virtual Machines as specified. Both the wrapper-service and Virtual Machines are run with the account specified in the VBoxVmService.ini file.
If RunWebService=yes is specified in VBoxVmService.ini file, the wrapper-service will also try to start VirtualBox web service automatically. This might be useful for people who use the web service a lot, like users of phpVirtualBox.
When windows shuts down, the wrapper-service will try to stop all the VMs configured in VBoxVmService.ini.
VmServiceControl.exe is the CLI (command line interface) client that sends control commands to VBoxVmService and display returned results.
VmServiceTray.exe is another client like VmServiceControl.exe, but comes with GUI interface and stays in system tray.
If you are interested in further details, feel free to browse the supplied source codes!
4. What are the plans for the future?
Actually, there are no plans for future releases of this software, other than keeping it updated so that it can always work with latest version of VirtualBox.
5. Which versions of Windows are supported?
Old Windows versions like Windows 7 are no longer supported.
It hasn’t been fully tested on systems other than Windows 10, but it is supposed to work on server systems like Win2012, Win2016, … etc, both 32bit and 64bit versions.
6. Will VBoxVmService run on Mac OS-X or Linux?
No. VBoxVmService is specially designed to suit the Windows operating system. And it doesn’t need to run on Mac OS-X or Linux because these platforms supply adequate features to accomplish the same effect.
7. Credits
First version of VBoxVmService, patching together the C++ code of VBoxVmService and the helper tool «sleep.exe», messing with some c# for «bcompile.exe» plus all the batch-scripting was done by Mathias Herrmann.
Only Fang joined the project in August 2010, and had become main contributor since then. He re-designed the service, added VmServiceControl.exe to do all the controlling job and changed VBoxVmService.exe to become a pure service program.
Runar Buvik joined the project in December 2010, bringing lots of creative improvements like two way communication between the service and control program, new commands to show current VM status and check service environment, etc.
Ensure that your VirtualBox VM starts immediately when your PC boots and is available 24/7. No login necessary!VirtualBox is a free, open-source virtualization platform that can host Windows, Linux, Mac OS and other operating systems. To run your VirtualBox VM with AlwaysUp:
VirtualBox not working properly as a Windows Service?
|


In this article, we will guide you through the process of installing VirtualBox as a Windows service using NSSM (Non-Sucking Service Manager) and starting a Virtual Machine automatically as a service. This can be useful for scenarios where you need a Virtual Machine to run in the background, even when the user is not logged in.
Prerequisites
Before we begin, ensure that you have the following prerequisites in place:
-
VirtualBox: You should have VirtualBox installed on your Windows machine. You can download it from the official VirtualBox website.
-
NSSM (Non-Sucking Service Manager): NSSM is a tool that allows you to create and manage Windows services. We recommend installing it via Chocolatey (Choco), a popular package manager for Windows. If you haven’t installed Choco, you can download and install it from the Chocolatey website.
To install NSSM using Chocolatey, open a Command Prompt with administrator privileges and run the following command:
Now, let’s proceed with installing VirtualBox as a Windows service:
-
Open Command Prompt as Administrator: Right-click on the Command Prompt icon and select “Run as administrator” to ensure you have the necessary privileges.
-
Install VirtualBox as a Service: Run the following NSSM command to install VirtualBox as a service. Replace
<VIRTUAL-MACHINE_NAME>with the name of your Virtual Machine:1nssm install VirtualBoxVM -
Configure Service Parameters:
-
Application Path: Set the path to the VBoxHeadless.exe executable. By default, it’s located in “C:\Program Files\Oracle\VirtualBox\VBoxHeadless.exe.”
1Path: C:\Program Files\Oracle\VirtualBox\VBoxHeadless.exe -
Arguments: Specify the
-startvmparameter followed by the name of your Virtual Machine.1Arguments: -startvm <VIRTUAL-MACHINE_NAME>
-
-
Save Configuration: Click on the “Install service” button to save the configuration. You should see a message indicating that the service has been installed.
-
Start the Service: You can start the service immediately using the following command:
This command will start your Virtual Machine as a service.
Managing the VirtualBox Service
You’ve successfully installed VirtualBox as a Windows service using NSSM. To manage the service, you can use standard Windows service management tools or commands, such as:
-
To start the service:
-
To stop the service:
-
To check the status of the service:
Now, your Virtual Machine will run as a service, allowing you to use it without the need for manual intervention, even when you are not logged into the system.
VirtualBox — замечательный во многих отношениях бесплатный гипервизор, обладающий, между прочим, рядом скрытых возможностей вроде быстрого увеличения размера динамического виртуального диска в командной строке с помощью встроенного модуля VBoxManage. Но по сравнению с платными продуктами его функционал всё же ограничен, например, он не умеет работать как служба Windows, в фоновом режиме.
Чтобы реализовать такую возможность, понадобится сторонняя утилита VBoxVmService. Для чего? Чтобы иметь возможность запускать виртуальные машины без входа пользователя в учетную запись на хостовом компьютере.
Несмотря на свое «серверное» предназначение, утилита VBoxVmService достаточно проста в использовании.
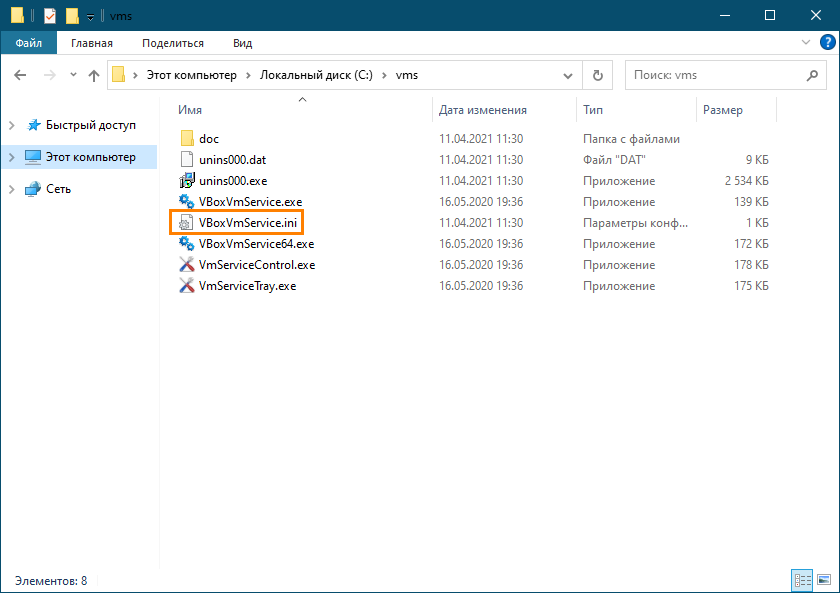
Установив тулзу, перейдите в расположение установки C:\vms и откройте расположенный там файл VBoxVmService.ini любым текстовым редактором.
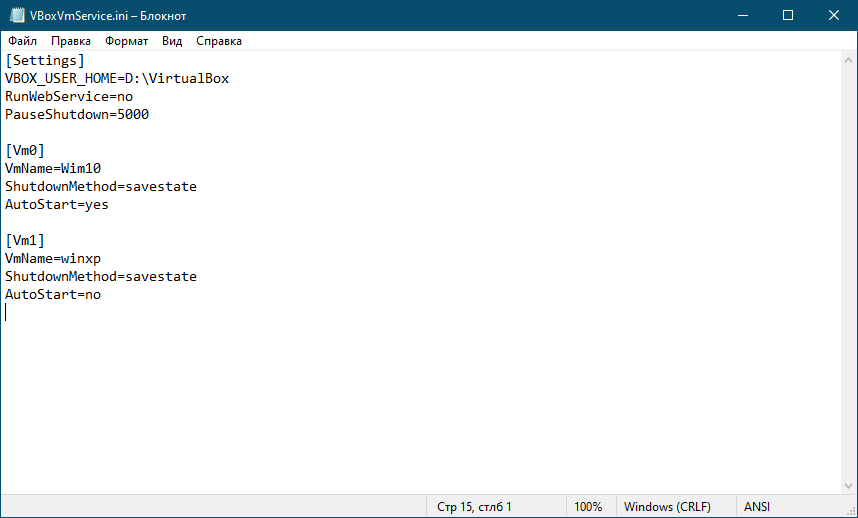
В этом файле имеются три блока настроек: [Settings], [Vm0] и [Vm1].
- Settings — Основная настройка. Здесь в качестве параметра VBOX_USER_HOME вам нужно указать путь к каталогу с вашими виртуальными машинами.
- Vm0 — Настройки конкретной виртуальной машины. В качестве параметра VmName задаем имя этой VM, параметр ShutdownMethod определяет метод завершения ее работы. По умолчанию используется savestate, означающий автоматическое сохранение виртуальной машины, если же вы выставите acpipowerbutton, то VM будет выключена полностью. Параметр AutoStart отвечает за автозапуск виртуальной машины при загрузке хостового компьютера. Может принимать два значения yes и no. По умолчанию, естественно, выставлено «yes», ведь вы не входите в свою учетную запись Windows.
- Vm1 — Всё то же самое, что и Vm0, только эта гипотетически существующая WM отключена. Если вам нужно запустить две виртуальные машины, тогда редактируем этот блок соответствующим образом и меняем AutoStart с no на yes.
Теперь, чтобы запустить утилиту, а вместе с ней и виртуальные машины, в меню значка VBoxVmService в трее выбираем «Start VBoxVmService».

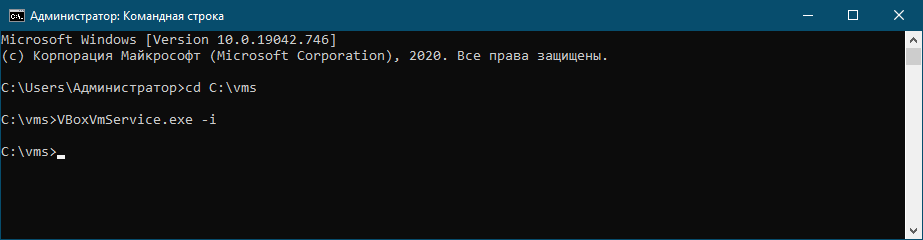
Или запускаем сервис через командную строку командой VBoxVmService.exe -i, предварительно перейдя в папку с исполняемым файлом.
Перезагружаем компьютер.
Указанные виртуальные машины должны запуститься.
Скачать последнюю версию утилиты можно на странице разработчика github.com/onlyfang/VBoxVmService/releases.
Программа совместима с Windows 10 и Windows Server 2012/2016, обычной десктопной «восьмерке» приложение работать не будет.
На данный момент утилита совместима с VirtualBox 6.1, поддержка в будущем новых версий разработчиком не гарантируется.