
🛠️ Virtual Display Driver Development Team
| 👤 Developer | 🏷️ Role | 💖 Support Us |
|---|---|---|
| MikeTheTech | Project Manager, Lead Programmer | Patreon 💎 / GitHub Sponsors 💖 |
| Jocke | Programmer, Concept Design | GitHub Sponsors 💖 |
💡 We appreciate your support—every contribution helps us keep building amazing experiences!
Virtual Display Driver
This project creates a virtual monitor in Windows that functions just like a physical display. It is particularly useful for applications such as streaming, virtual reality, screen recording, and headless servers—systems that operate without a physical display attached.
Unlike traditional monitors, this virtual display supports custom resolutions and refresh rates beyond hardware limitations—offering greater flexibility for advanced setups. You can also use custom EDIDs to simulate or emulate existing hardware displays.
⬇️ Download Latest Version
- Driver Installer (Windows 10/11) — Check the Releases page for the latest version and release notes.
Important
Before using the Virtual Display Driver, ensure the following dependencies are installed:
- Microsoft Visual C++ Redistributable
If you encounter the errorvcruntime140.dll not found, download and install the latest version from the Microsoft Visual C++ Redistributable page.
🛠️ Installation
-
Step 1: Download the Installer
- You can download the installer directly from the Releases page.
-
Step 2: Run the Installer
- Launch the installer.
- Follow the on-screen instructions to complete the installation.
-
Step 3: Verify the Installation (Optional)
- Check if the Virtual Display Driver is correctly installed by running the following:
- Device Manager: Check «Device Manager» under «Display Adapters.»
- Settings: Check display settings under system settings and see if the virtual displays show.
Manual installation can be found in the wiki
🤔 Comparison with other IDDs
The table below shows a comparison with other popular Indirect Display Driver
projects.

¹ ARM64 Support in Windows 11 24H2 or later may require test signing be enabled.
HDR Support Now Available for Windows 11 23H2+
▶️ Videos and Tutorials
Installation Video

More Videos and Resources
- 24.12.24 (Stable): MikeTheTech: How to install the New Virtual Display Driver
- 24.12.24 (Stable): MikeTheTech: How to manually install the New Virtual Display Driver
- 24.12.24 (Stable): Bud3699: How to configure the VDD using the new Companion App
- 24.10.27 (Beta): MikeTheTech: How to install a virtual display

🤝 Sponsors
Developers
- Shoutout to MikeTheTech Project Manager, Owner, and Programmer!
- Shoutout to Bud Old Lead Programmer and author of a ton of features, the companion & installer work.
- Shoutout to zjoasan Programmer. For scripts, EDID integration, and parts of installer.
Acknowledgements
- Shoutout to Roshkins for the original repo.
- Shoutout to Baloukj for the 8-bit / 10-bit support. (Also, first to push the new Microsoft Driver public!)
- Shoutout to Anakngtokwa for assisting with finding driver sources.
- Microsoft Indirect Display Driver/Sample (Driver code)
- Thanks to AKATrevorJay for the hi-res EDID.
- Shoutout to LexTrack for the MiniScreenRecorder script.
Star History

Disclaimer:
This software is provided «AS IS» with NO IMPLICIT OR EXPLICIT warranty. It’s worth noting that while this software functioned without issues on our systems, there is no guarantee that it will not impact your computer. It operates in User Mode(Session0), which reduces the likelihood of causing system instability, such as the Blue Screen of Death. However, exercise caution when using this software.
После подключения компьютера с Windows 11 к внешним дисплеям вы можете настроить параметры для каждого из них.
Перед началом работы
Перед изменением параметров внешних мониторов обеспечьте правильное подключение. Вот что можно сделать:
-
Правильно подключите кабели к компьютеру или док-станции.
-
Проверьте наличие обновлений Windows. Чтобы проверить наличие обновлений, выберите Пуск , затем найдите параметры. Выберите Параметры > Центр обновления Windows > Проверить наличие обновлений.
Совет: Если вы используете адаптер беспроводного дисплея, подключите адаптер к порту HDMI на новых телевизорах, а затем подключите к нему компьютер по беспроводной сети. После подключения адаптера беспроводного дисплея к телевизору перейдите на Windows 11 компьютер, нажмите клавишу с логотипом Windows+ K, чтобы открыть приведение, а затем выберите адаптер беспроводного дисплея.
Изменение порядка мониторов
Этот параметр отображается, если Windows обнаруживает несколько мониторов. Каждый монитор будет пронумерован для упрощения идентификации.
Идентификация монитора
Чтобы узнать, какой номер соответствует дисплею, выберите Пуск , а затем найдите параметры. Выберите Параметры > Система > Дисплей > Идентифицировать. На экране монитора появится номер, который ему назначен.
Обнаружение монитора
Если вы подключили другой дисплей и он не отображается в настройках, выберите Пуск > Параметры > Система > Дисплей > Несколько дисплеев > Обнаружить.
Подключение беспроводного дисплея
Если вы подключили беспроводной дисплей и он не отображается в разделе Параметры, выберите Пуск > Параметры > Система > Дисплей > Несколько дисплеев > Подключиться.
Упорядочение мониторов
Если у вас несколько мониторов, вы можете изменить их порядок. Это удобно, если вы хотите, чтобы ваши мониторы соответствовали их настройке у вас дома или в офисе. В разделе параметров «Дисплей» выберите и перетащите монитор, куда хотите. Проделайте это для всех мониторов, которые нужно переместить. После получения нужного расположения нажмите Применить. Протестируйте свое новое расположение, перемещая указатель мыши на разных мониторах, чтобы убедиться в их правильной работе.
Совет: Используйте параметр Определить при упорядочении дисплеев, чтобы увидеть номер дисплея на экране.
Несколько параметров отображения
При отстыковке компьютера окна на внешнем мониторе сворачиваться. При повторной закреплении компьютера к монитору Windows помещает все точно так же, как раньше.
Чтобы настроить это поведение, выполните следующие действия:
-
Выберите Пуск > Параметры > Отображение системных >.
-
Прокрутите вниз и выберите Несколько дисплеев , чтобы развернуть этот раздел.
-
Установите флажки в соответствии со своими предпочтениями:
-
Запоминать расположения окон на основе подключения монитора
-
Свертывание окон при отключении монитора.
-
Изменение параметров мониторов
-
Изменение яркости и цвета дисплея
-
Изменение разрешения, масштабирования и макета дисплея
-
Изменение частоты обновления отображения
Выбор варианта отображения
Чтобы изменить то, что отображается на дисплеях, нажмите клавишу с логотипом Windows+ P. Вот параметры, которые можно выбрать.
|
Если необходимо: |
Выберите |
|
Просматривать элементы только на одном мониторе. |
Только экран компьютера |
|
Просматривать одинаковые элементы на всех мониторах. |
Повторяющийся |
|
Просматривать рабочий стол на нескольких экранах. При расширении мониторов вы можете перемещать элементы между двумя экранами. |
Расширить |
|
Просматривать все только на втором мониторе. |
Только второй экран |
Introduction
Sometimes it could be very helpfully to have a Virtual Monitor, but please note not to be confused with a Virtual Desktop, i.e. a monitor which is recognized by the system as physical device. The big advantage of a Virtual Monitor is that it has a valid canvas which is available despite it is not visible. In contrast to it, a Virtual Desktop has no valid canvas as long it is not visible. So we can use the Virtual Monitor as like as a physical device with only one difference, we cannot see it, we cannot touch it. What can we do with such a Virtual Display? Here are two examples :
(1) You want test the behaviour of own applications, e.g. on a 4k Monitor despite there is not a physical 4k Monitor connected. You can do this task by a Virtual Monitor because it offers all resolutions which are available in the current system, dependent on the installed graphic.
(2) You have to continuously observe one or more application windows, e.g. windows of a monitoring solutions, and maybe you want share the screen to remote locations or other devices – then you can use the tool CaptShare from dtvTools. By using this tool you can capture and share the screen of a Virtual Monitor and your physical Monitor(s) are available completely for your daily work.
Installation
Windows 7
For Windows 7 / 8.1 it is quite easy to create a Virtual Monitor:
- Right click on the desktop and click ‘Screen Resolution’
- Click ‘Detect’ on the next screen
- Click ‘Another display not detected’ and under the ‘multiple displays’ option select ‘Try to connect anyway on: VGA’
- Click ‘Apply’
- You can now enable your desktop to be extended as if you have a second monitor plugged on your computer.
Windows 10 / Server 2019/2022
Unfortunately, the solution as described for Windows 7 – see on left – is not longer available for Windows 10, so we need another solution. Thanks a driver provided for free by Amyuni Technologies Inc. we can realize a Virtual Monitor also in Windows 10 – Thank for this great work! This driver allows to create up to 4 Virtual Monitors on your system.
Identify and Access the Virtual Monitor
After successful installation the question is now: How can I identify and access my new Virtual Display on my system?
E.g. on Windows 10 right click on the desktop and click ‘Display settings’ then you will get a dialog as shown on right. The Virtual Monitor is identified by index ‘3’. The colour profile is empty, this is the hint that is the Virtual Monitor. You can setup now the desired resolution, the scaling and further properties.
You can experiment with options ‘Multiple Displays’ but it is not a good idea to set ‘Make this my main display’ for the Virtual Monitor, it will not work as expected. But how can I control the Virtual Monitor on my local system and, above all, how can I see what is happening on this monitor. So there are two possibilities, the local control or the remote control by using further tools.
Local Control
On your local system you need a tool which is able to move application windows from a physical monitor to the Virtual Monitor and vice versa and furthermore, to move, resize or close windows on there. The Monitor-Manager application – MonMan – a little free tool provided by decontev, will do these tasks.
In order to monitor your Virtual Display you have to capture the screen and have to display these captures on a physical monitor of your system. For that task you can use the free tool CaptShare from dtvTools. CaptShare is able to create a HTTP Live Stream (HLS) or snapshot sequences from the screen of your Virtual Monitor. HLS can be played back by free tools, e.g. SAMplayer from dtvTools or VLC media player.
Remote Control
Of course, the Virtual Monitor can be controlled via remote access, but you need another machine.
Remote Desktop (Windows)
Access via Remote Desktop does not work, because the Virtual Monitor will not be recognized as an additional device.
AnyDesk, TeamViewer & Co
The access of a Virtual Monitor via remote desktop application like TeamViewer or AnyDesk works perfectly, so that you control your Virtual Monitor very comfortable. But note, there are several disadvantages:
– you need a second machine
– you have to install a remote desktop application on both machines
– this SW is not free for professional usage or feature reduced for private usage
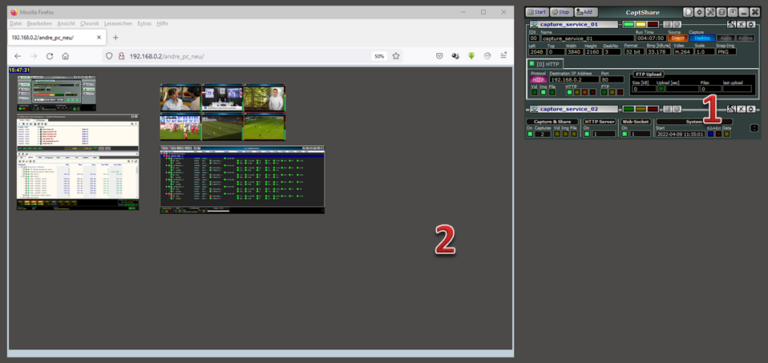
[1] CaptShare from dtvTools – capturing the Virtual Monitor screen
[2] display the captured screen of the Virtual Monitor in a Web-Browser
,
In Windows 10 and Windows 11, Microsoft added the Miracast feature that lets you use your laptop screen as a second monitor on another computer. Miracast technology, allows you to wirelessly transmit or receive content between devices that support it.
Performing multiple tasks on a single computer screen can be counterproductive and less efficient. Imagine that as a data analyst, you are expected to gather data using Excel spreadsheet, query the data with SQL to find consistency, and use Tableau to visualize your findings. Performing all of these tasks on a single screen will lead to delay and burnout.
Setting up your laptop as a secondary monitor of another computer is a convenient and useful solution that will give you many advantages. For example, it will give you more working space and allow you to run several programs at the same time by moving the mouse from one screen to another.
If you’re interest to learn how to use your laptop as a second monitor on your main computer, continue reading below. (The instructions can be applied to both Windows 10/11 OS)
How to Use Laptop’s screen as a Second monitor on another computer.
* Important: To use your laptop screen as a secondary display on another computer, both computers must be wirelessly connected to the same network, be running Windows 10 or 11, and support Miracast. **
** Note: To find out if your devices support Miracast:
1. Press Windows + K keys to open the Connect options.
2. If you see the option «Connect to a wireless display» at the bottom, this means your device supports Miracast.
Step 1. Setup your laptop as a second monitor.
To be able to use your laptop’s monitor as a second monitor on another PC you have to enable the «projecting to this pc» feature on your laptop. To do that:
1. From Start menu click Settings and select System.
2. At the right pane, scroll down and click Projecting to this PC.

3. At ‘Projecting to this PC’ options:
a. Select Available Everywhere on secure networks under Some Windows and Android devices can project to this PC when you say it’s OK. This will ensure that only secured networks from your home will be able to project to the laptop.
b. At Ask to project to this PC options: select Every time a connection is requested, or choose First time only if don’t want to get a prompt each time you use the laptop as a monitor.
c. Require PIN for pairing: Set a PIN to prevent other devices from projecting on your laptop screen. (This is recommended if you’re connected to a public network, otherwise leave it to «Never»).
d. This PC can be discovered for projection only when it’s plugged in: Set it to ON if you want to save battery power.*
* Note: After you have configured all of the above, note the name of the computer (PC name) at the bottom, because you will need it when you choose which device to connect to on the other computer.

4. When done with the above settings, type Connect at the search bar and click Open. This will get the laptop ready to connect to it from the other PC.

Step 2. Connect to your laptop’s monitor from other PC.
On the other PC that you want to project to your laptop’s monitor:
1. Press the Windows + P keys to open the Project widget and select Duplicate or Extend.
- Duplicate: The PC and the external monitor will display the same thing.
- Extend: This option allows you to extend the desktop to the connected monitor. Extending the screen allows you to have more screen space and different open windows on each of the screens.

2. Finally, select the laptop with the «shared monitor» from the devices available and connect to it. *
* Notes
1. An additional way to connect to the laptop’s monitor, is to press the Windows + K keys and then to select your laptop to connect to it.
2. If you have selected the «Extend» option, then after connecting to laptop’s monitor, you can «rearrange» the monitors to meet your needs, or to set the laptop’s monitor as your main display, from the Display settings. To do that:
a. Go to Start menu > Settings and select Display on the left.
b. Locate and click the Identify button. This will display the number on each display to help you identify them.
c. Drag and drop displays to rearrange them if you want (and select Apply), or select the laptop’s monitor and check the box «Make this my main display» at the end of this page, to set the laptop’s monitor as your primary monitor.

That’s it! Let me know if this guide has helped you by leaving your comment about your experience. Please like and share this guide to help others.
If this article was useful for you, please consider supporting us by making a donation. Even $1 can a make a huge difference for us in our effort to continue to help others while keeping this site free:
- Author
- Recent Posts
Konstantinos is the founder and administrator of Wintips.org. Since 1995 he works and provides IT support as a computer and network expert to individuals and large companies. He is specialized in solving problems related to Windows or other Microsoft products (Windows Server, Office, Microsoft 365, etc.).