

Рекомендуем популярное
NetBalancer 12.2.4.3626
NetBalancer — небольшая программа для контроля и управления интернет-трафиком на ПК. Можно…
NetLimiter Pro 5.3.20.0
NetLimiter — эффективная утилита для контроля и управления сетевым трафиком, с возможностью…
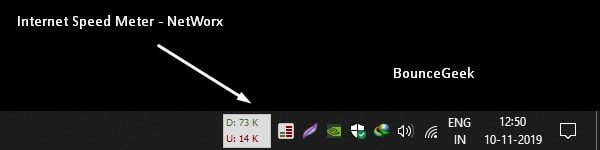
NetWorx 7.2.1
NetWorx — утилита, ведущая учет вашего интернет-трафика и мониторинг скорости…
TMeter 18.0.875
TMeter — это средство учета трафика и организации доступа в Интернет для операционных систем…
NetTraffic 1.71.0
NetTraffic — небольшая полезная утилита для мониторинга сетевого трафика и учета статистики на выбранных интерфейсах…
-
Размер
28.99 Kb
-
Скачиваний
8 128
-
Язык
-
Платформа
Windows 7
-
Категория
-
Лицензия
-
Добавлено
13 сентября 2012
Простой и компактный гаджет, который показывает вашу сетевую активность. Сделано приложение в виде небольшого окошка с графиком. Показывает скорость загрузки входящего и исходящего трафика. Также показывает, на сколько процентов занят канал. Для того, чтобы гаджет заработал, надо выбрать в настройках сетевую карту. Для ноутбука можно выбрать WiFi. Кроме того, в настройках можно выбрать масштаб графика, и как часто будут обновляться данные. Интерфейс на английском языке.
Похожие гаджеты
- 8
- 2
Небольшой гаджет, который выдает информацию о местоположении IP адресов.
IP to Location
- 8
- 2
Простое приложение рабочего стола, которое показывает состояние подключения
Индикатор WiFi сетей
- 8
- 2
Русифицированная версия гаджета Network Meter, показывающего состояние загрузки
Мониторинг сети
Информация
Посетители, находящиеся в группе Гость, не могут оставлять комментарии к данной публикации.
Recently, Microsoft released Windows 11 stable build for the general public. But still, Windows 11 doesn’t come with an Internet Speed Meter. Like, we get in the Android status bar. Yes, by going into Task Manager > Performance > Wi-Fi (Or Ethernet). You can check your current Internet speed. But, there isn’t any option to get a real-time internet speed meter in the Windows Taskbar. That means, there isn’t any way to check, how much your Computer is consuming the internet in real-time.
In this situation, third-party network speed indicator Software comes in handy. There are many free and paid tools available to show internet speed in the Taskbar. But, In this post, I will suggest to you some best tools. These tools will show you real-time internet upload and download speed on your Windows PC.
How Internet Speed Meter is helpful?
Network Speed Meter is very helpful if you don’t have a high-speed or stable Internet connection. In Windows, updates get downloaded automatically. And, if you have a slow connection, then, it can affect the work that you’re doing. Also, If your Internet speed fluctuates. Then, keeping an eye on real-time Internet speed is useful. Basically, it will help you to track connection problems.
Best Internet Speed Meter for Windows.
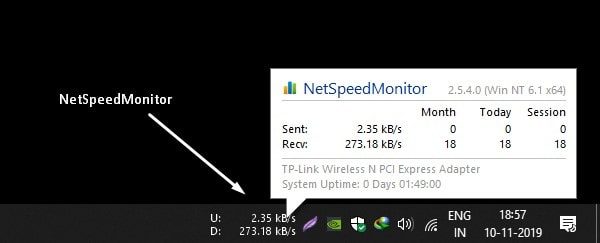
NetSpeedMonitor. (Free)
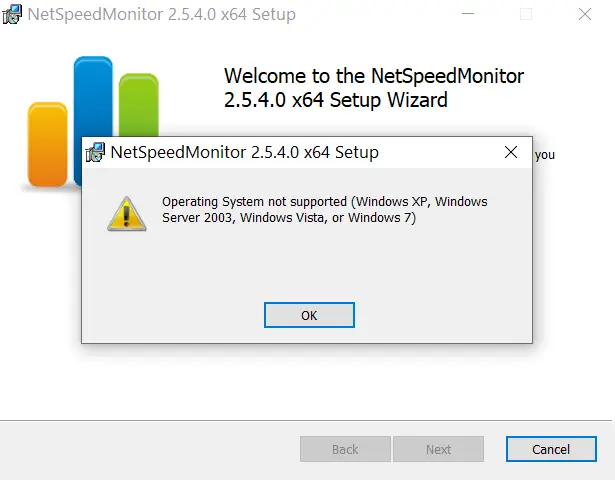
If you’re looking for free Internet Speed Monitor software. That can show you real-time download and upload speed. Then, this is the best tool, which you can use. There isn’t any specific site to download this software. You can download it from Softpedia for free. Though, this tool is designed to run only on Windows XP, Vista, and 7. So, it might not work directly in Windows 8 and 10, and Windows 11. You have to run the installer in compatibility mode.
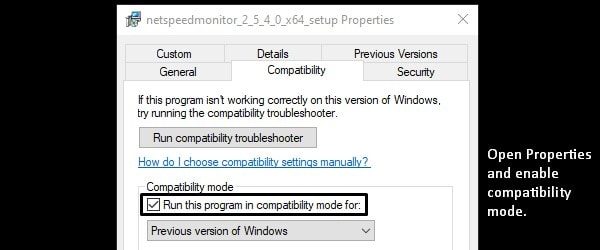
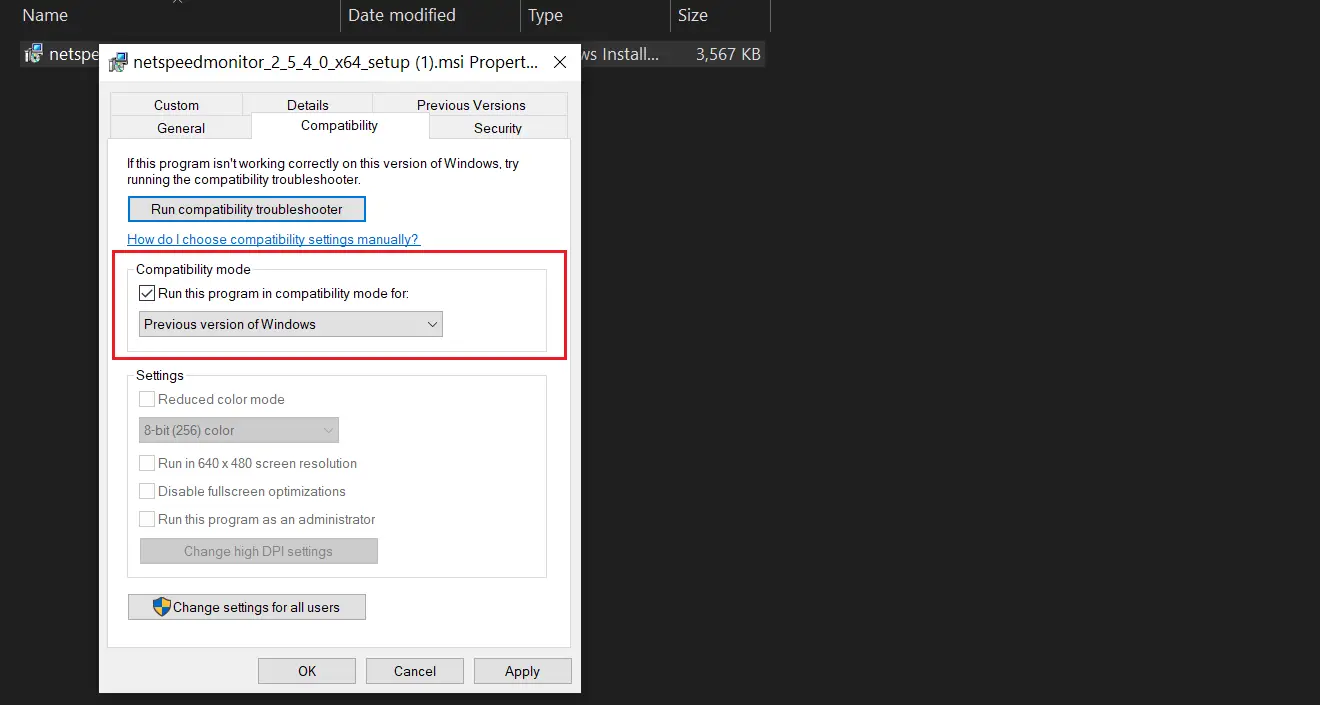
1. Download NetSpeedMonitor from Softpedia. Right-Click on the installer > Click on Properties.
2. Click on the Compatibility tab > Mark the “Run this program in compatibility mode for” and click on OK.
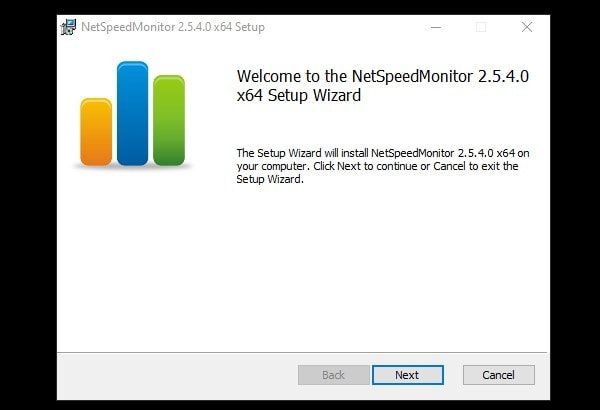
3. Now, you can install it and you will not get any compatibility error.
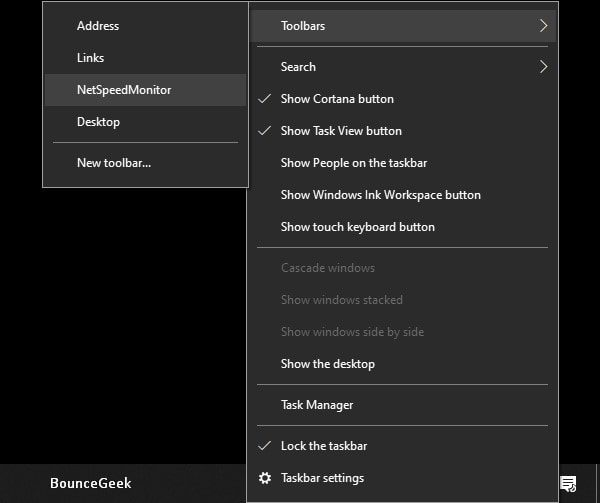
4. After installing NetSpeedMonitor, Right-click on the taskbar. Go to Toolbars and click on “NetSpeedMonitor”.
Note: In Windows 11 you won’t find the Toolbars option. So, scroll down, and you will find a tool to enable Toolbars.
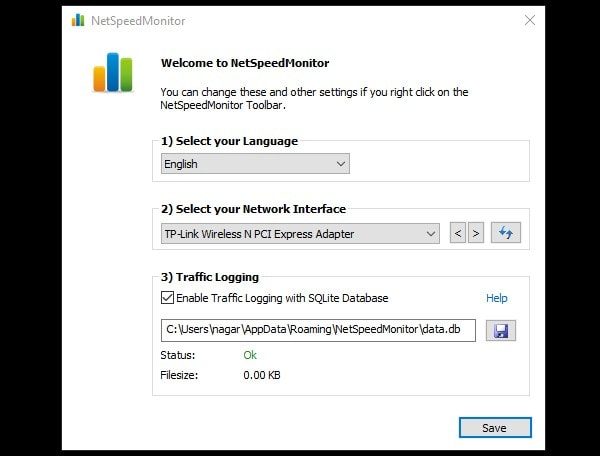
5. NetSpeedMonitor one-time setup window will now appear. Select the right network interface from it. And, click on save.
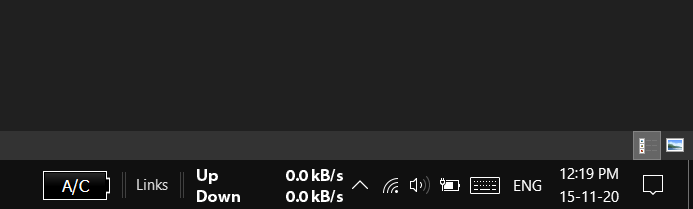
6. That’s it. You will now be able to see the speed meter by NetSpeedMonitor in Taskbar.
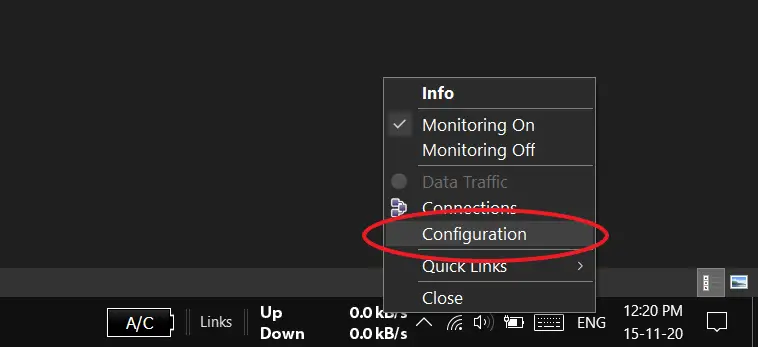
7. Right-Click on Net Speed Meter, and choose the “Configuration” option. You can select Bitrate and customize it.
NetWorx (Windows, macOS, and Linux.)
NetWorx is one of the most powerful tools to measure Internet Speed. It also helps to track suspicious activity on the network, like, hacker attacks and trojan horses. You can also use it as a bandwidth monitor if you have limited Internet. NetWorx also can identify the possible reasons or sources of network issues. The Software also can send you a visual and sound alert when the connection is down. Or, when some suspicious activity is occurring in Windows. With Networx, You can always see statistics of monthly and weekly bandwidth usage.
And, yes, you can enable Internet Speed Meter in Windows Taskbar or Toolbar. And, the speed meter will show you real-time upload and download speed. You can also customize the speed indicator graph. There are multiple graph types available to select. Like, histograms, numeric, polylines, and columns. You can also select the transfer rate unit between Bytes and Bits. But, I suggest you select Bytes/s.
Install Networx and Show Internet Speed Meter in Taskbar.
1. First, download the latest version of Networx and install it like normal Windows software. (During installation select recommended settings only.)
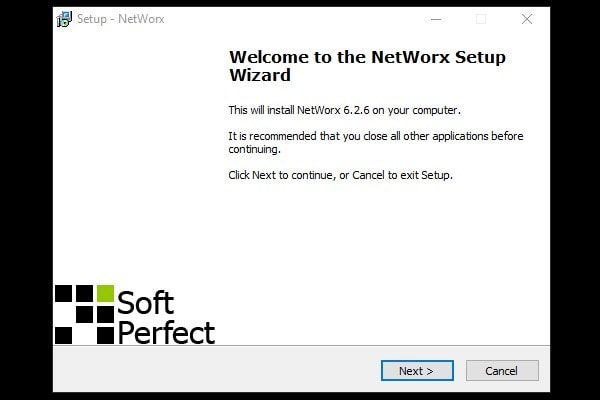
2. After installing it successfully, NetWorx welcome window will appear. Select Language and Click on Next.
3. Now NetWorx will ask you to select your Internet Connection. You can either select a specific connection or can keep it on “All Connections”.
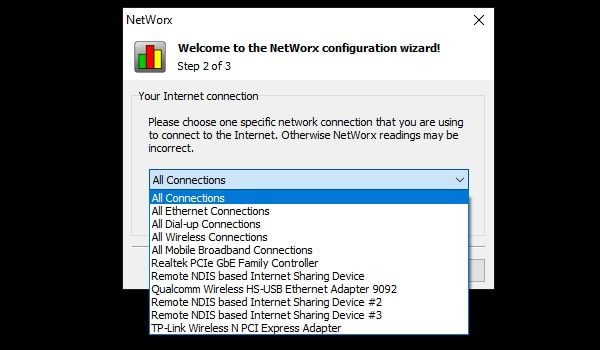
4. Click on Next, and then click on Finish.
5. To show the Internet speed meter now in the toolbar. Right-Click anywhere in the taskbar. And then, take the mouse pointer over Toolbars. And, mark the “NetWorx Desk Band” option.
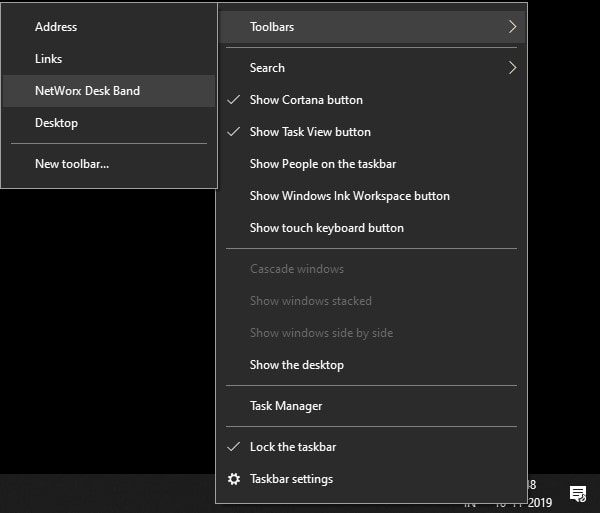
6. That’s it. You will be able to see real-time download/upload speed in Taskbar.
7. And, to customize graph settings, Right-Click on the Networx icon, and then click on Settings. (Don’t forget to select Bytes/s in the transfer unit rate. And, Apply the settings.)
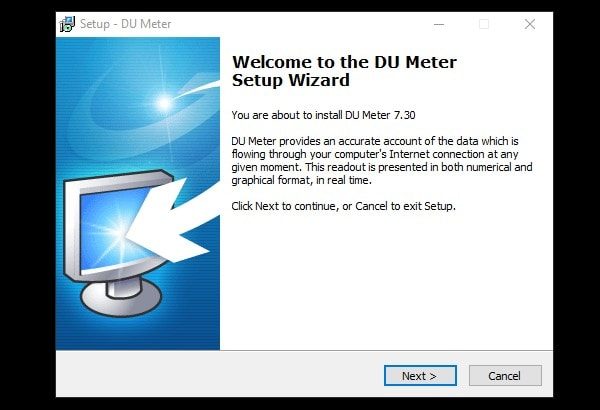
DU Meter.
After NetWorx, DU Meter is the best Internet Speed Meter for Windows 10 and Windows 11. DU Meter comes with 30 days of free trial. And, if you find it useful then you can buy its license. There are two license plans available to choose from. Single-user and business licenses and Family Pack. Currently, for Indian users, it is available for $9.95. DU meter also allows adding a speed meter in the taskbar. And, that’s all you wanted.
You can customize the color & sound of the DU Meter. So basically, you can do audible network monitoring. Also, you can customize the traffic monitor Graph. Apart from the taskbar or toolbar, you can enable a floating window of the DU Speed monitor. The data transfer rate unit option is also available. It also shows the highest Internet speed.
1. Download DU Meter and install it on your Windows PC.
2. To enable Network Speed Monitor in the taskbar. Right-Click on the toolbar. Take the mouse pointer on Toolbars > Click on “DU Meter” to enable.

3. That’s it, now you will be able to see upload and download speed in Taskbar.
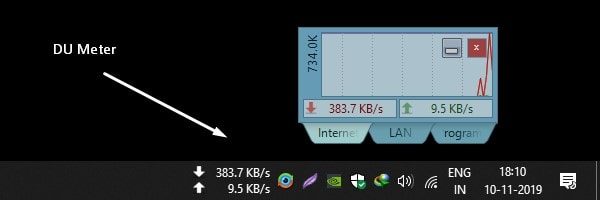
4. To enable or disable the floating Internet speed Monitor, Right-Click on the DU Meter icon. And, click on the Show/Hide DU Meter option. And, by clicking on “User options”, you can access settings. Can customize DU Meter.
Get Back Windows 11 Quick Launch Toolbar.
Microsoft has removed Quick Launch Toolbar in its latest version of Windows 11. And, all the mentioned Network speed monitor work with the Toolbar option. So, if you want to get back the toolbar option, then you have to install Explorer Patcher from Github. It’s a free and open-source add-on for Windows 11, that enables Windows 10 toolbar in Windows 11.
1. Simply download ExplorerPatcher from GitHub. Click on the Assets section to get the setup file.
2. Run the setup. Windows Protected screen might appear, click on More Info > Run Anyway.
3. UAC window will appear, click on Yes.
4. The screen will go black for a minute. And, after that, when you right-click on the taskbar you will get the toolbar option.
Yes, if you like you can uninstall it from Control Panel.
Summing-up
So, these are some of the best speed-tracking software for Windows 10/11. Personally, I found “NetSpeedMonitor” best. Because it’s free and offers what exactly you want. DU Meter and Networx come with a trial period. But, offers many other features, that’s why you need to buy a subscription. Though, if you don’t want to spend to get some extra features. Then, NetSpeedMonitor is best for you.
Quick Answer
- So this was a quick guide on how you can show internet upload and download speed in the taskbar on your Windows 10 computer.
- However, there’s no such native option in Windows, and you’ll have to rely on third-party software to add a net speed monitor.
- In this article, let’s see how you can show internet speed in the taskbar on Windows 10.
Showing internet speed on Android devices is quite easy. In fact, most manufacturers bundle it as a built-in feature. However, there’s no such native option in Windows, and you’ll have to rely on third-party software to add a net speed monitor. In this article, let’s see how you can show internet speed in the taskbar on Windows 10.
Show Internet Speed on Windows 10 Taskbar
Here, we’ll be using third-party software called NetSpeedMonitor to show internet speed in the taskbar. The tool will help you monitor your real upload and download speeds on your Windows computer.
Now, while it works without any hitches on older versions of Windows, Windows 10 users may find it tricky to install and set up the software. Below we’ve mentioned a step-by-step guide through which you can show internet speed on the taskbar using NetSpeedMonitor.
1] To start with, download NetSpeedMonitor from the link given below. The software is free to use and needs to be installed in compatibility mode on Windows 10.
NetSpeedMonitor 64-bit NetSpeedMonitor 32-bit
2] Once downloaded, click the setup and install it normally. If you’re on Windows 10, right-click the setup > Properties > Compatibility and tick the Compatibility mode for previous versions of Windows. Hit Apply to save changes.
3] You can now double-click the setup file to install the software normally on Windows 10.
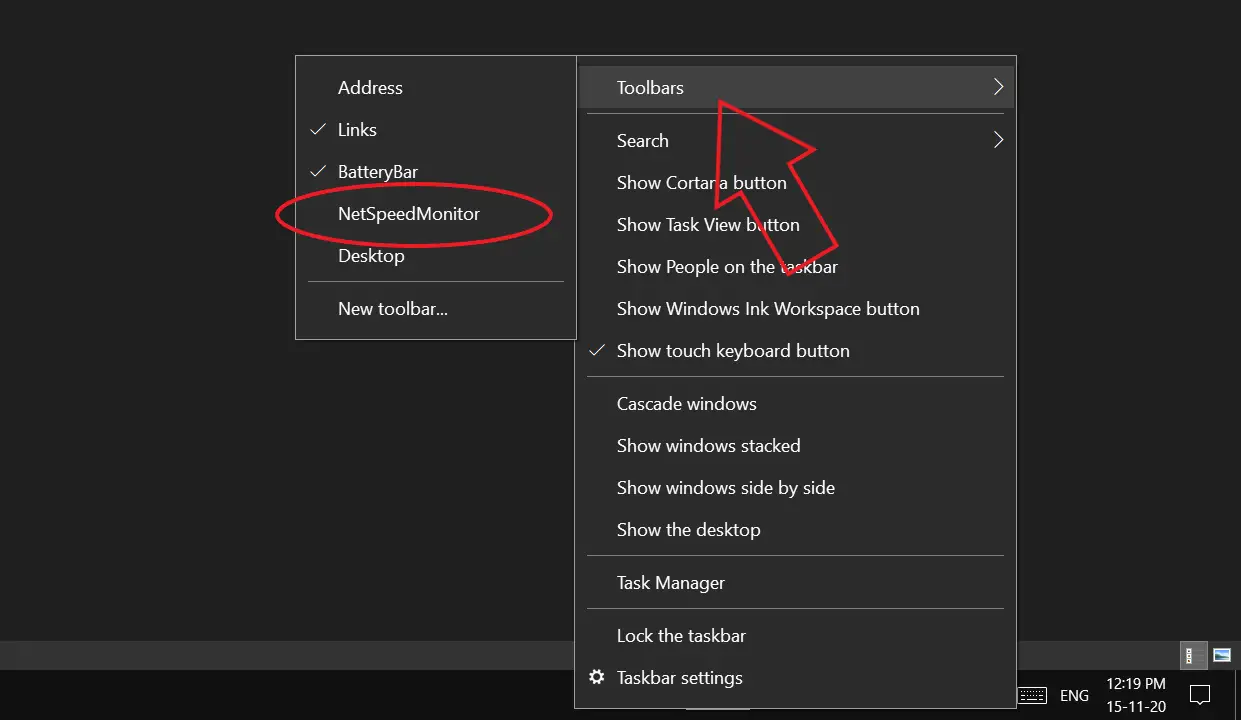
4] After you’ve installed the tool, right-click on the Windows toolbar, and select Toolbars from the available options.
5] Click on NetSpeedMonitor to enable it. As you select it, your internet upload and download speed will automatically start showing in the taskbar at the bottom right.
NetSpeedMonitor Doesn’t Work?
As it was with my case, it’s likely that the NetSpeedMonitor will be stuck at zero and won’t display any speed, even if you’re connected to the internet. In that case, you can follow the easy fix below.
- Right-click on the NetSpeedMonitor meter at the toolbar.
- Select Configuration.

- Once the configuration window opens, click the network interface drop-down menu and select a different interface to see if the meter starts working.

- If it doesn’t, try selecting another interface. Also, make sure that monitoring is enabled.
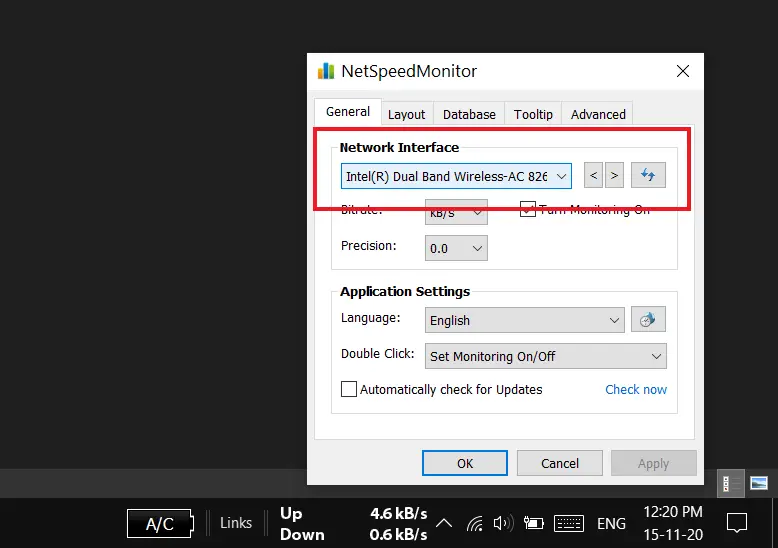
By default, NetSpeedMonitor shows speeds in kB/s (Kilobits per second). You can change it to KB/s or MB/s or the Bitrate of your choice through the given option. Also, you can turn on/ off the internet speed meter by double-clicking the same in the toolbar.
Wrapping Up
So this was a quick guide on how you can show internet upload and download speed in the taskbar on your Windows 10 computer. We’ve also mentioned a quick fix for NetSpeedMonitor not working issue. Do try it and let us know your experience in the comments below. Feel free to reach out in case of any related doubts or queries.
Also, read- How to Install macOS Dynamic Wallpapers on Windows 10
Was this article helpful?
YesNo