
,
Several users report that they can’t open Viber on Windows 11 because Viber is crashing immediately after opening it, with no indication of the cause of the problem. In other cases, the strange thing is that while Viber works normally after uninstalling and reinstalling it, after restarting or shutting down the computer, Viber stops working and won’t open again.
Viber may be not opening and closes on Windows 10/11 for various reasons, like software issues, corrupted files or outdated graphics drivers.
If you are unable to open the Viber app on Windows 11 because it keeps crashing while trying to open it, then in this guide you will find the most reliable methods that can fix the problem.
How to FIX: Viber Open and Closes Immediately on Windows 11.
Method 1. Change the Compatibly Mode to Windows 7 or Windows Vista.
One of the common workarounds to solve the Viber crashing issue on Windows 10/11 is to run Viber in compatibility mode for Windows 7 or Windows Vista.
1. Right-click on Viber app and choose Properties.

2. At Compatibility tab, check the option Run this program in compatibility mode for and select Windows 7 below. Then click Apply > OK
3. Now try to open Viber again. If again, Viber does not open, then perform the same steps but this time choose Windows Vista in Compatibility Mode.
Method 2. Set Power of Graphics Adapter to High Performance.*
* Note: This method usually works on laptops with a discrete graphics adapter.
Viber sometimes does not work properly on laptops where the graphics adapter’s power is not set at high performance. To fix this issue, do the following:
1. Press Windows + R keys to open the Run command box.
2. Type control powercfg.cpl and press OK (or Enter) to open the Power Options settings.

3. In Power Options, click Change Plan settings.

4. Then click Change advanced power settings.

5. In Power Options, scroll down, expand Switchable Dynamics Graphics and under Global Settings set both On Battery & Plugged in to Maximize performance.
6. When done, click Apply > OK and then try to start the application.

Method 3. Install an older version of Viber.
Another method to fix Viber not opening and crashing problems, is to install a previous version of the Viber app. *
* Caution: This method has been tested on several Windows 11 PCs with successful results, but it requires downloading an older version of Viber from a third-party website because Viber’s official website does not offer the old versions or the program. So, proceed at your own risk.
1. Go to Start > Settings > Apps and click Installed apps on the right.

2. Locate the Viber in the list of installed apps, and then click on on three dots next to it and click Uninstall. (Click Uninstall again to remove the program).

3.After uninstalling Viber, search the net and download the version 20.7.0.1 of Viber from any third party that offers it for download (e.g. «downzen.com», «filehippo.com», etc.).
4. When the download its completed, scan the downloaded file with your antivirus program to ensure that is clean from viruses.
5. Then open the downloaded file to install the older version of Viber.
* Caution: During installation avoid to install any additional program that comes with the installer.

5. Finally, open Viber and scan the QR code with your phone.
6. After launching Viber, restart your computer and see if the issue is resolved.
Method 4. Fix Viber problems by Updating the Graphics Drivers.
If after applying the above steps, you are still unable to open Viber on Windows 11, proceed and update the display drivers as instructed below.
1. Press Windows + R keys to open the run command box.
2. Type: devmgmt.msc & click OK to open the Device Manager.

3. In Device Manager, double-click to expand the Display Adapters.
4. Right-click on the installed display adapter(s) and select Uninstall device. *
* Note: For laptops with two display adapters uninstall both the display adapters.

5. At the next window, check the option «Delete the driver software for this device» and then click Uninstall to completely remove the graphics drivers.

6. Restart your PC and go to Windows Update & Check for Updates. Then, let Windows to download and reinstall the latest Windows drivers for your graphics adapter(s) and then check if the problem is fixed.
* Note: If Windows doesn’t automatically find the required drivers for your Graphics card, or if the problem is not fixed after installing the latest Windows drivers, download and install the latest display drivers, from the Graphics adapter manufacturer’s website.
- NVIDIA drivers
- AMD drivers
- Intel drivers
That’s all folks! Did it work for you?
Please leave a comment in the comment section below or even better: like and share this blog post in the social networks to help spread the word about this solution.
If this article was useful for you, please consider supporting us by making a donation. Even $1 can a make a huge difference for us.
- Author
- Recent Posts
Konstantinos is the founder and administrator of Repairwin.com. Since 1995 he works and provides IT support as a computer and network expert to individuals and large companies. He is specialized in solving problems related to Windows or other Microsoft products (Windows Server, Office, Microsoft 365, etc.).
A lot of users complain about Viber not installing on Windows 10/11 PC. Why can’t you install Viber on PC? How to fix this problem? If you are also trying to figure them out, this post from MiniTool is worth reading.
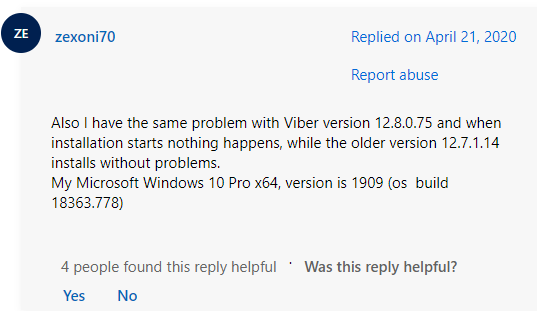
Viber is a popular instant chat messaging application available on multiple platforms, but lots of users encounter Viber not installing on Windows 10/11 PC. Here’s a true example from the answers.microsoft.com forum:
Can’t install Viber on computer. Since I upgraded the last Viber version on my laptop, I cannot open Viber anymore. I uninstalled Viber, then installed it again, but I cannot run the installation program. I click on the vibersetup.exe button and nothing happens on my screen.https://answers.microsoft.com/en-us/windows/forum/all/cant-install-viber-on-my-laptop/a83c9529-fef0-48f1-9fb5-34f3b48732d2?page=3
Why Can’t You Install Viber on PC
What causes the Viber not installing on Windows 11/10 PC? According to a survey, the problem often occurs when your PC doesn’t meet the Viber minimum system requirements. Besides, insufficient disk space, antivirus interference, outdated OS, poor network connection, unofficial version, and regional restriction is also responsible for Viber not installing on PC.
How to fix it if you cannot install Viber on Windows 11/10 PC? Here we summarize 6 proven ways to fix the problem after investigating extensive user reports from different forums. Let’s try them in order until you get the issue resolved.
Note: Before trying other methods, you can perform simple restarts of your PC and network connection to clear temporary glitches. If
# 1. Make Sure You Have Enough Disk Space
First of all, you need to make sure your hard drive has enough space to download and install Viber. If not, you can’t install Viber on PC. How to free up disk space on Windows 10/11? You can delete all unnecessary files, uninstall some programs, or run disk cleanup. However, this process will delete some data on your hard disk.
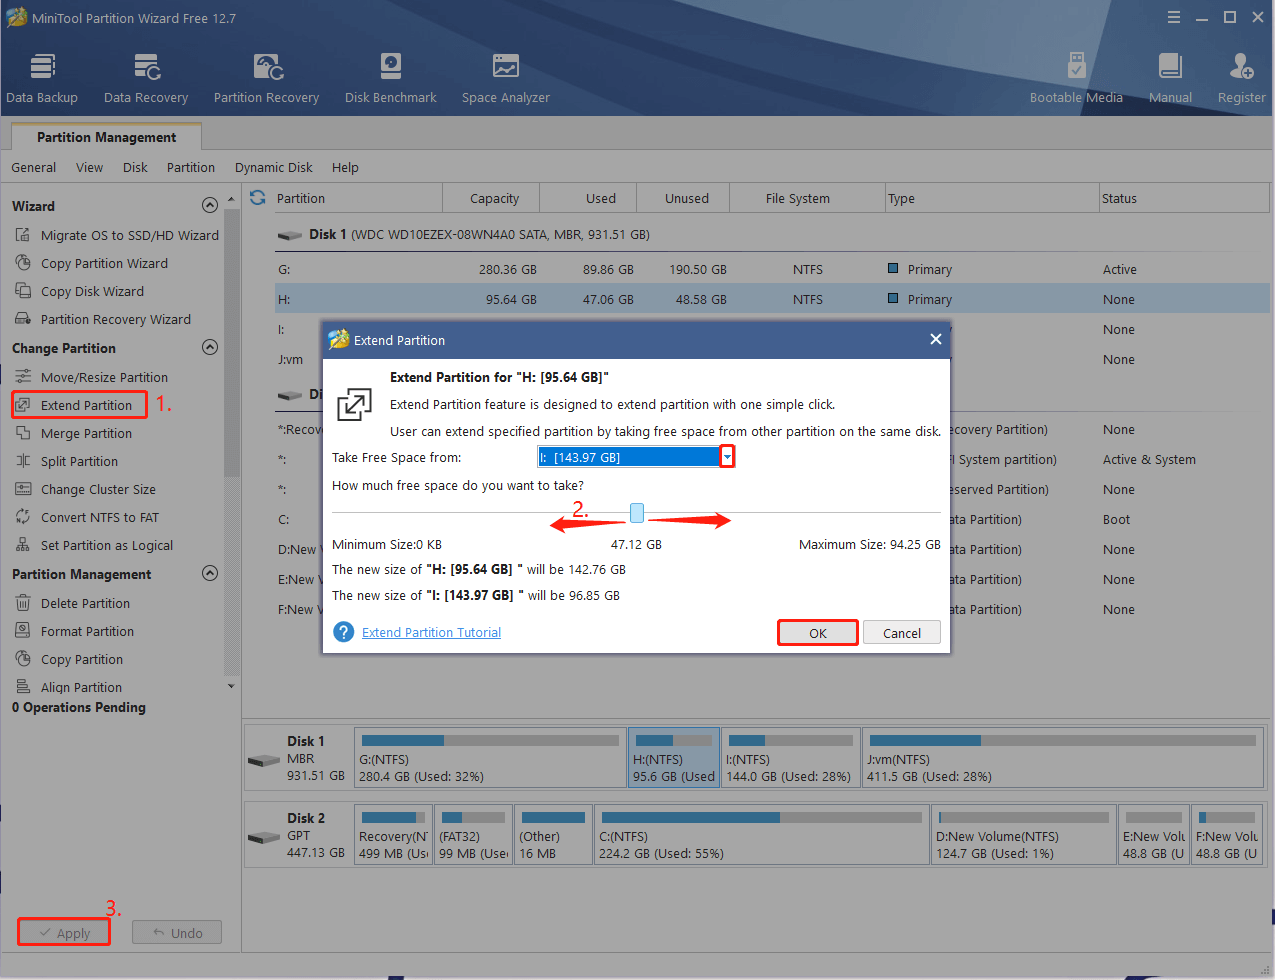
So, we highly recommend you extend the partition that you will install Viber on. MiniTool Partition Wizard can help you extend partitions to even non-contiguous free space easily. Moreover, this powerful partition software can also migrate OS to SSD, convert MBR to GPT without data loss, recover lost data, rebuild MBR, etc.
MiniTool Partition Wizard FreeClick to Download100%Clean & Safe
Step 1. Run MiniTool Partition Wizard to enter its main interface, select the partition you want to install Viber on, and click on Extend Partition from the left pane.
Step 2. Select unallocated space or a partition from the drop-down menu, drag the sliding bar to occupy the space, and click on OK.
Step 3. Click on Apply to execute the process.
Once done, you can restart your PC and check if the Viber not installing on Windows 10/11 issue disappears.
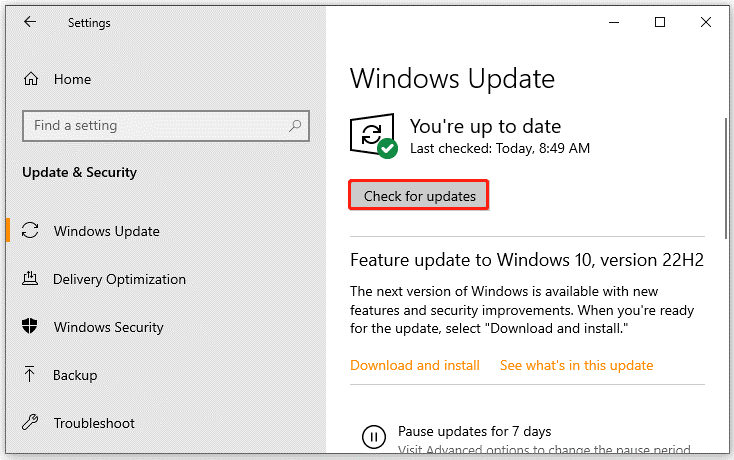
# 2. Check for Windows Updates
Sometimes you can’t install Viber on computer if the Viber version is not compatible with your current Windows version. In this case, you can check for Windows updates and install the latest version.
Step 1. Press the Win + I keys to open the Settings app and navigate to the Update & Security section.
Step 2. Click on the Check for updates button to scan for the latest updates. If there are any available Windows updates, install them. After that, you can restart your system and see if the Viber not installing on Windows 11/10 problem gets fixed.
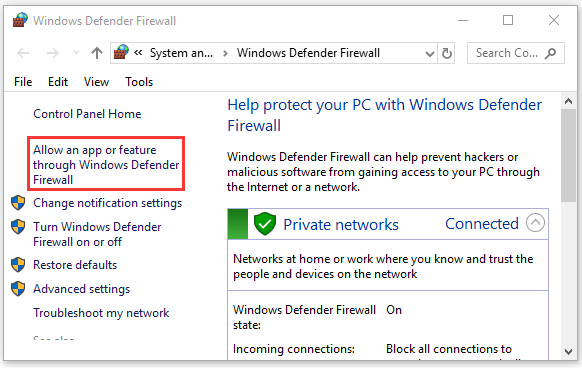
# 3. Allow the Software Through Your Firewall or Antivirus Security
Sometimes your antivirus software and even Windows firewall can block Viber from installing on PC. If you still cannot install Viber on Windows 11/10, try allowing the installation through your firewall and antivirus software.
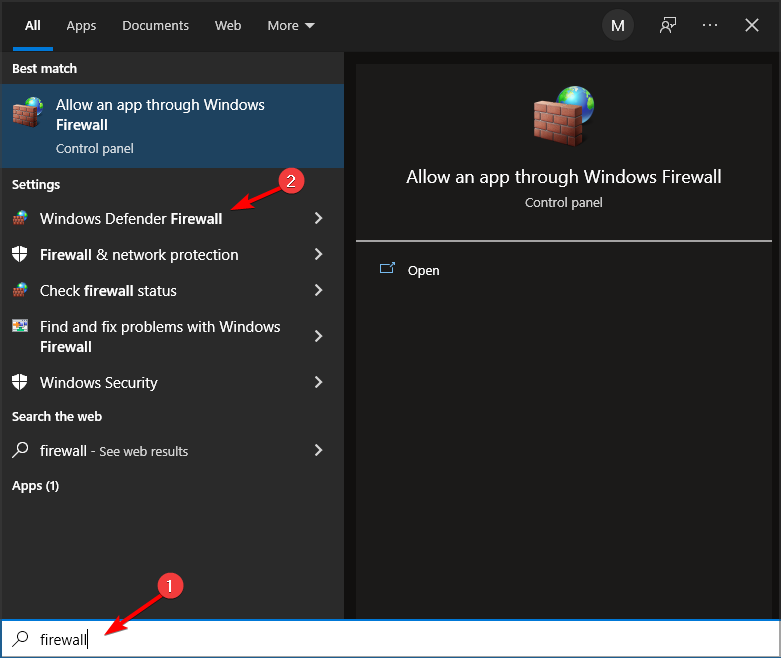
Step 1. Type firewall in the search box and then select the Windows Defender Firewall from the context menu.
Step 2. Click on Allow an app or feature through Windows Defender Firewall from the left pane.
Step 3. Click on Change settings and then on Allow another app.
Step 4. Select the checkbox for Viber from the list of programs, tick the checkbox for both Private and Public networks, and click OK to save the change.
Tips:
If you are using Avast on your computer, read this post to add an exception to Avast. For AVG antivirus, navigate to Home > Settings > Components > Web Shield > Exceptions to add the game to the exceptions list. If you are using Kaspersky, navigate to Home > Settings > Additional > Threats and Exclusions > Exclusions > Specify Trusted Applications > Add.
If you still can’t install Viber on PC, try disabling Windows Defender Firewall temporarily or antivirus software.
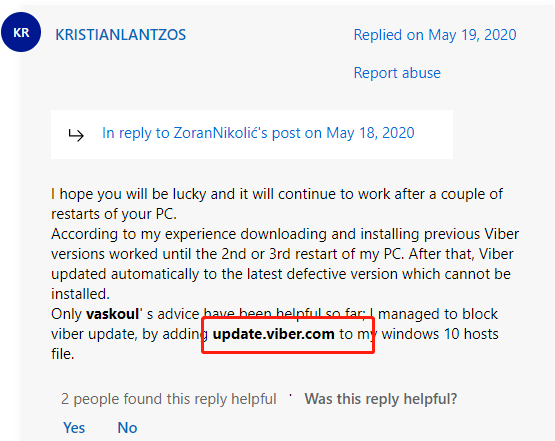
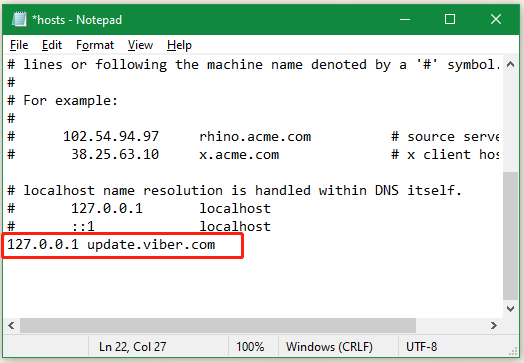
# 4. Add update.viber.com to the Hosts File
Some users from the answers.microsoft.com forum reported that Viber not installing on Windows 11/10 can be solved by adding the update.viber.com line to the Windows hosts file. It may seem strange but worth trying.
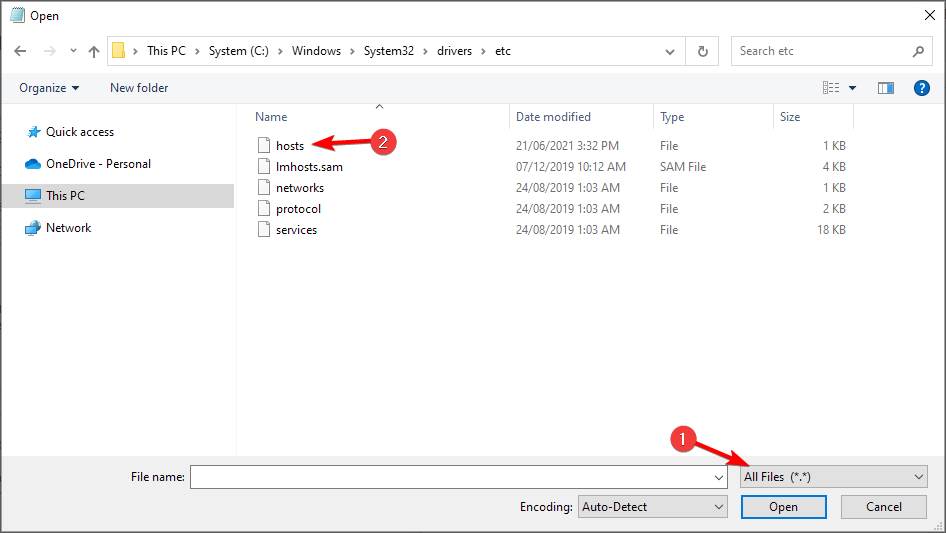
Step 1. Press Win + R keys to open the Run box, and then type the following content in it and press Enter.
C:\Windows\System32\drivers\etc
Step 2. In the pop-up window, right-click the hosts file and open it with Notepad.
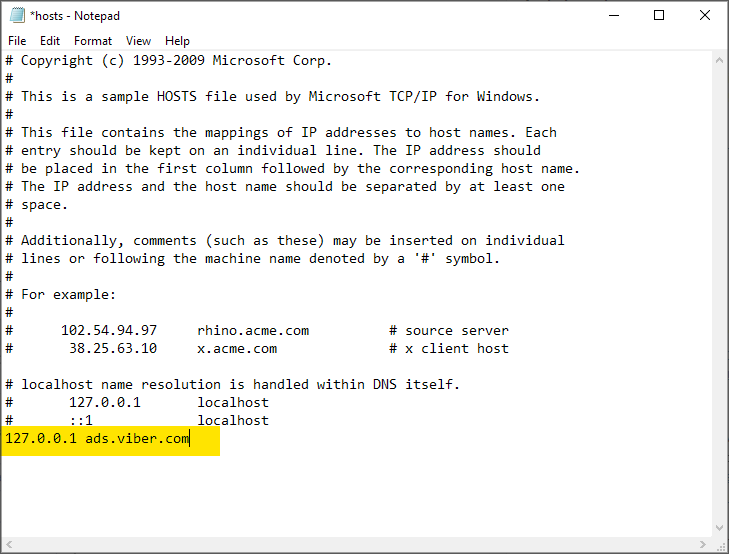
Step 3. Go to the bottom section of Notepad, add the following line, and press Ctrl + S keys to save the changes.
127.0.0.1 update.viber.com
# 5. Install an Older Version of Viber
Some other people reported that the “cannot install Viber on Windows 11/10” issue often appears on the newer version. In this case, you can try installing the older version like Viber 12.7.1.14, and see if it works.
# 6. Use a VPN
As mentioned above, some applications are only available for certain regions and countries. If you cannot install Viber on Windows 10/11 PC, try using a VPN that breaks the region’s limitations. To know more details, you can refer to this post “How to Set Up a VPN on Your Windows 10 PC”.
Readers help support Windows Report. We may get a commission if you buy through our links.
Read our disclosure page to find out how can you help Windows Report sustain the editorial team. Read more
For some users, Viber is not opening on Windows 11. It goes like this: You attempt launching it and get an This app can’t open error.
That’s not an entirely unusual error for UWP apps, but you have to fix it. Here’s how:
How can I fix Viber if not opening in Windows 10?
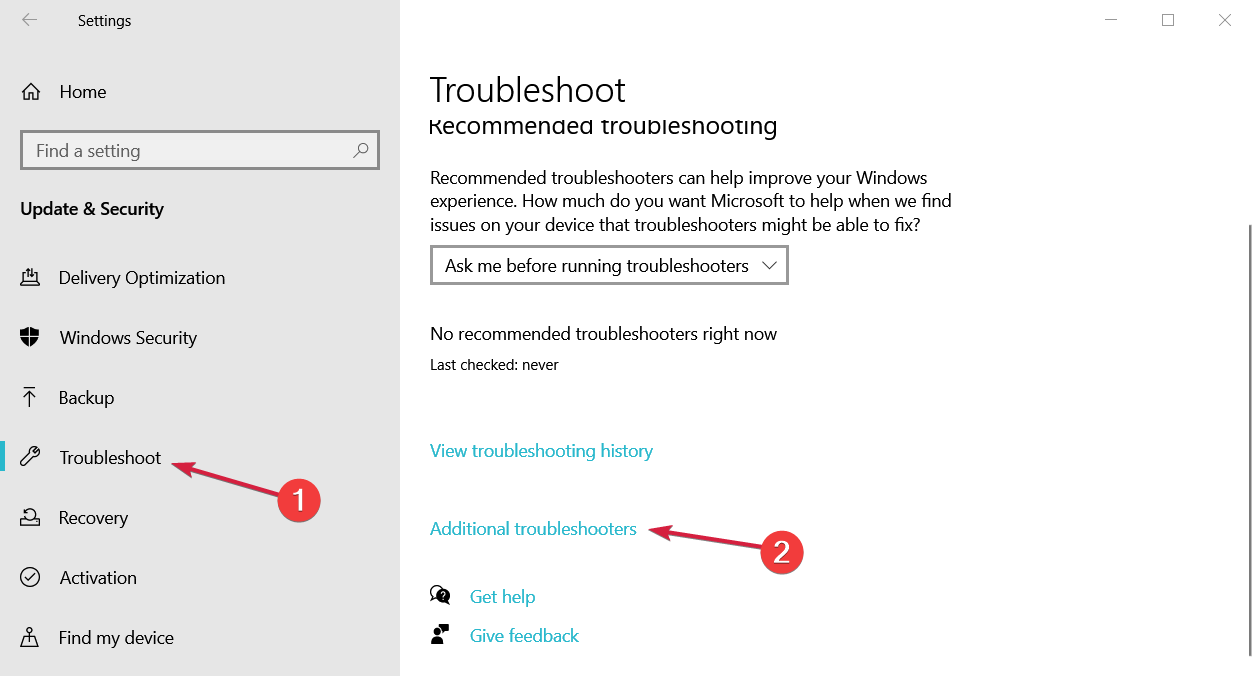
1. Open the Windows Store App Troubleshooter
- Press Windows key + S.
- Input troubleshoot in the search box, and click Troubleshoot settings.

- Navigate to Additional troubleshooters.

- Select the Windows Store Apps troubleshooter listed and click the Run the troubleshooter button.

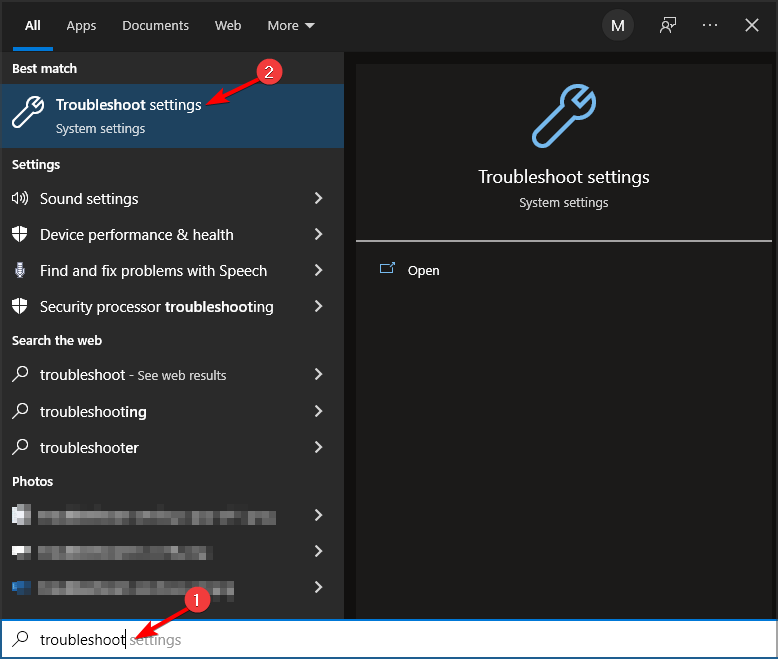
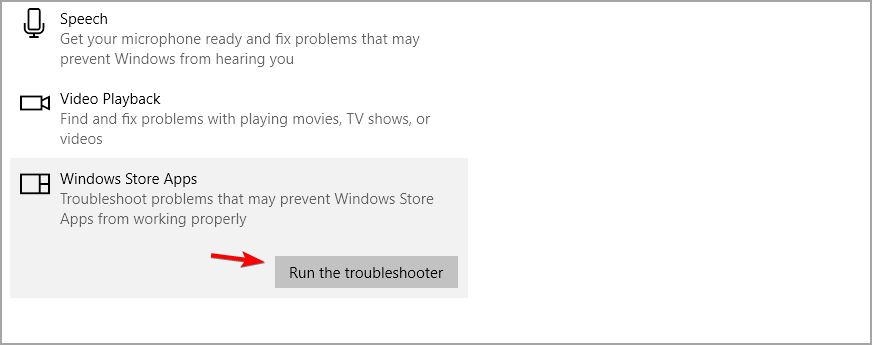
If Viber is running but not opening on your PC, you can run the troubleshooter to detect and fix the issues blocking it.
Alternatively, you can try software specialized in finding and solving issues like this. If you want to avoid incompatibilities and errors, you may use a simple and smart tool that scans your PC and repairs any damaged or corrupted registries and system files.
2. Run Viber as an Administrator
- Open the Start menu.

- Locate the Viber app.
- Right-click it and choose Run as administrator.

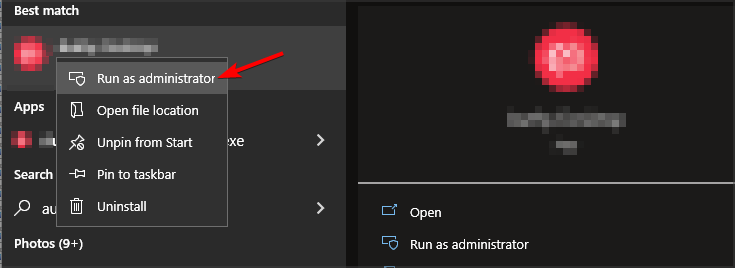
Sometimes, Viber keeps crashing on your PC because you don’t have administrative privileges. Running it as admin should fix the issue.
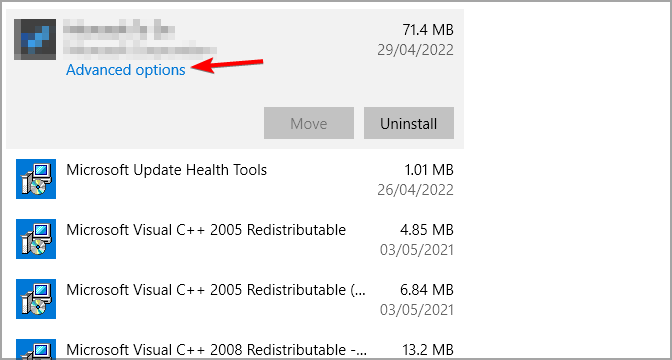
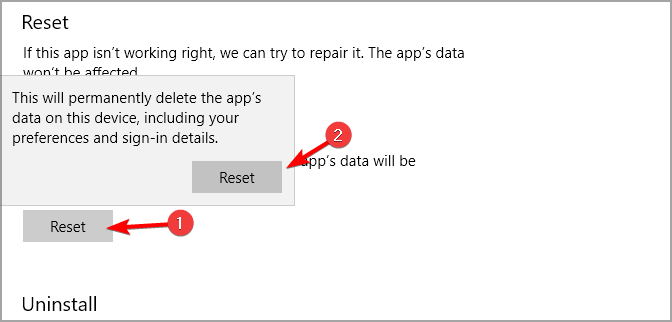
3. Reset Viber
- Press Windows key + X and select Apps & Features.

- Select Viber on the list and click on Advanced options.

- Click the Reset button.
- Click Reset again to confirm further.


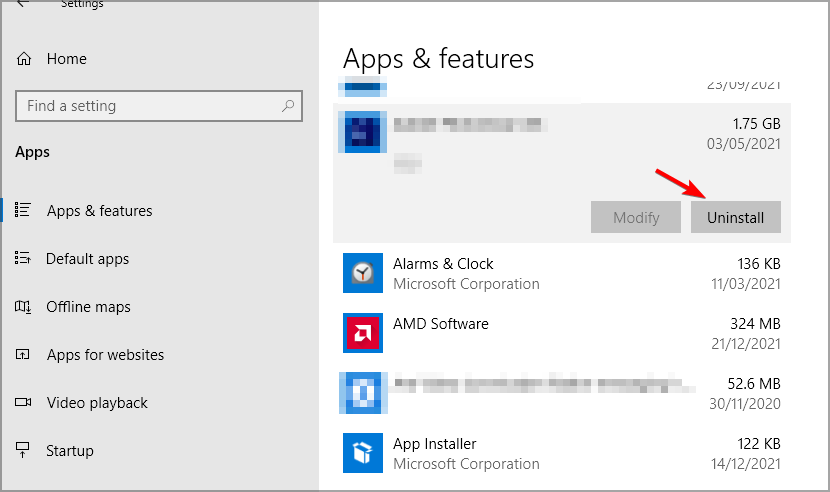
4. Reinstall Viber
- Press Windows key + X and select Apps and Features.
- Now select Viber and click on Uninstall.

- Follow the instructions on the screen to complete the process.
- Once the application is removed, install it again.
5. Reset the MS Store Cache
- Press Windows key + R.
- Enter wsreset.
- Press Enter.
- A Command Prompt window will briefly open to reset the MS Store cache.
- After that, restart Windows.
- Windows 10/11 Settings won’t open/crashing
- Microsoft Store won’t open in Windows 10/11 [Full Fix]
- Recent Windows 11 update lets you disable profanity filter in voice typing
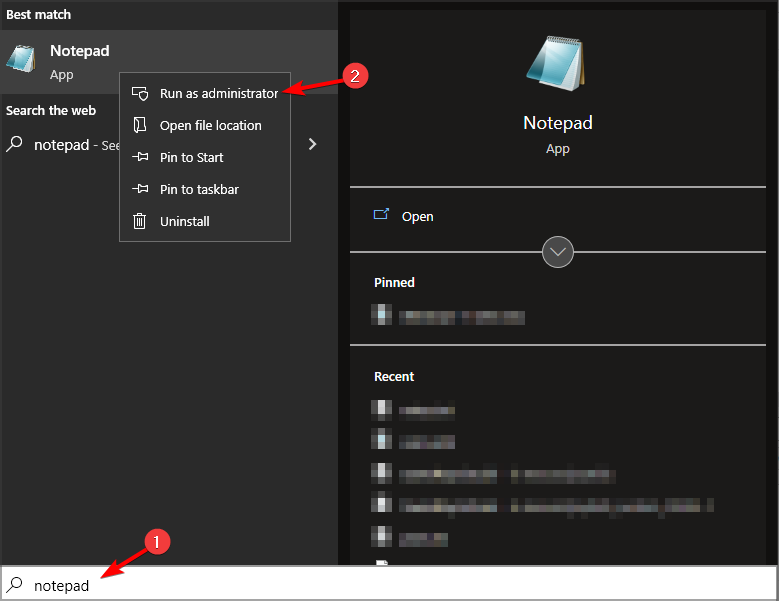
6. Modify the hosts file
- Press Windows key + S and type notepad. Right-click Notepad and select Run as administrator to launch it.

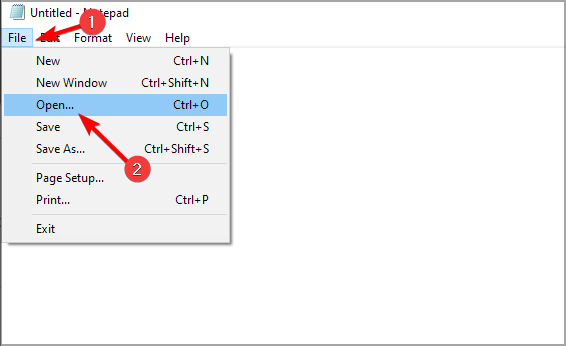
- Click File and then Open.

- Then navigate to the following directory:
C:\Windows\System32\Drivers\etc\ - Change Text Documents to All files and select hosts.

- Then add 127.0.0.1 ads.viber.com to the last line of the hosts file.

- Save changes.
7. Temporarily turn off Windows Defender Firewall
NOTE
Disabling your firewall can put your device at risk. This is just a temporary test to see if Windows Security is blocking Viber. If that’s the case, you can whitelist it.
- Press Windows key + S and type firewall. Choose Windows Defender Firewall.

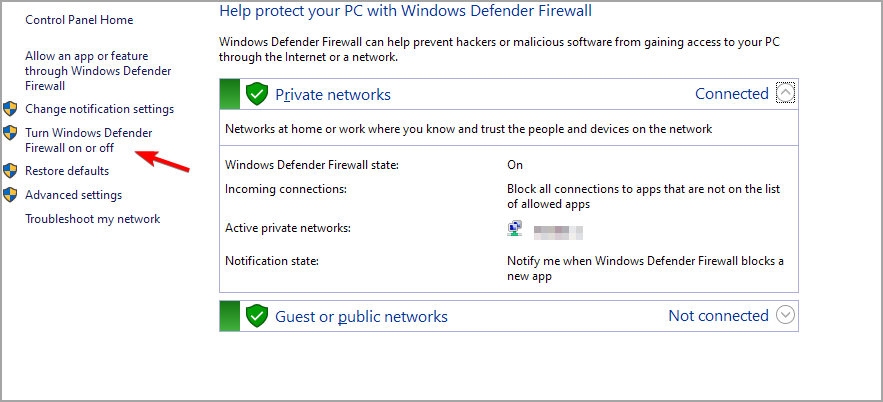
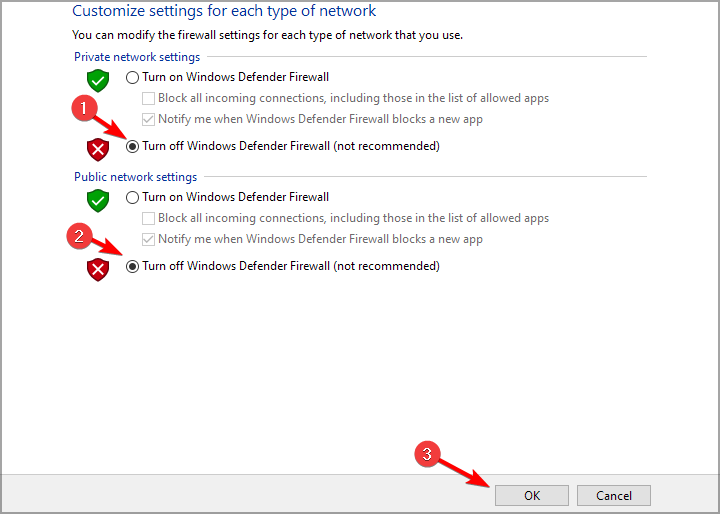
- Select Turn Windows Defender Firewall on or off.

- Now select Turn off Windows Defender Firewall for both types of connections and click OK.

In addition, turn off any third-party antivirus utilities that might include firewalls. Right-click an antivirus utility’s system tray icon to select a disable or turn-off option on its context menu.
Some of the most common reasons why Viber is not opening on Windows are glitches within the software, cache problems, or interfering security apps. With the steps above, you’ll fix it.
Were you able to fix Viber not working on Windows? Let us know which solution worked for you and don’t hesitate to ask if you have any questions.
Matthew Adams
Windows Hardware Expert
Matthew is a freelancer who has produced a variety of articles on various topics related to technology. His main focus is the Windows OS and all the things surrounding it.
He is passionate about the tech world, always staying up-to-date with the latest and greatest. With an analytical view, he likes problem-solving, focusing on errors and their causes.
In his free time, he likes to read and write about history and tries to always develop new skills.
Попробуйте следующие варианты:
1) Перезагрузите компьютер: Иногда проблему можно решить простой перезагрузкой компьютера. Закройте все программы, перезагрузите компьютер и попробуйте открыть Viber еще раз.
2) Убедитесь, что на вашем компьютере установлена последняя версия Viber. Чтобы проверить наличие обновлений, откройте приложение Microsoft Store, нажмите на фотографию своего профиля в правом верхнем углу и выберите «Загрузки и обновления». Если обновление доступно для Viber, нажмите «Получить обновления», чтобы установить его.
Или просто удалите вайбер, а затем переустановите его с офиц. сайта: https://www.viber.co
3) Проверьте наличие обновлений Windows. Чтобы проверить наличие обновлений, перейдите в Настройки > Обновление и безопасность > Центр обновления Windows и нажмите «Проверить наличие обновлений». Если есть какие-либо доступные обновления, установите их и перезагрузите компьютер.
4) Запустите Viber от имени администратора: щелкните правой кнопкой мыши на ярлыке Viber и выберите «Запуск от имени администратора». Это даст Viber необходимые разрешения для правильной работы.
Либо пишите в тех поддержку Вайбера.
Подключили VPN и перестал работать Viber – есть решение этой проблемы.
Имеем Windows 11 на которой не работает «Вайбер» при подключении виртуальной сети VPN, которая настроена на ноутбуке для возможности работать во время путешествий и в командировках. Viber пишет – нет подключения к интернету, хотя оно есть, если например зайти через браузер на любую интернет-страницу, она открывается.

Решение оказалось очень простым:
Переходим в раздел «Параметры», далее «Конфиденциальность и защита».
Затем открываем раздел «Безопасность Windows» и переходим в раздел «Брандмауэр и безопасность сети».
Далее находим внизу строку «Разрешить работу с приложением через брандмауер» и там, в списке находим Viber. Нажимаем на Viber, а затем жмем «Изменить параметры» после чего становиться активной кнопка «Удалить» — удаляем Viber из списка и перезагружаем компьютер.
После этого Вайбер должен работать и при включении VPN.
Кстати, в этом списке приложений Вайбер оказался после последнего обновления.