
To avoid this error when you remotely managing another servers virtual disks (From “Server Management” you need to follow some steps
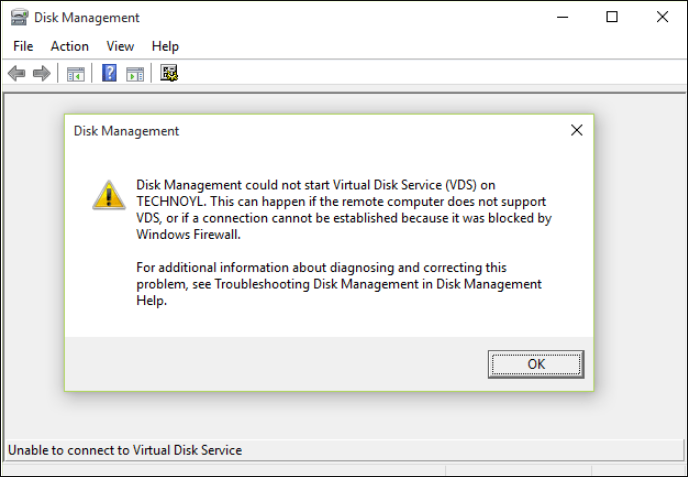
Disk Management could not start Virtual Disk Service (VDS) on SERVER-NAME. This can happen if the remote computer does not support VDS, or if a connection cannot be established because it was blocked by Windows Firewall.
For additional information about diagnosing and correcting this problem, see Troubleshooting Disk Management in Disk Management Help.

Step1:
Check Virtual Disk Service is started on BOTH the local and remote system

Powershell:
Start-Service -Name "vds"
CMD:
net start vds
Step2:
Add firewall exceptions on BOTH the local and remote system. VOILA! WORKING WITHOUT ANY ERRORS 🙂

netsh advfirewall firewall set rule group="Remote Volume Management" new enable=yes
Step3:
Use “Server Manager” to connect remotely and access the disk management properties on the remote machine.
no images were found
Do you frequently receive prompts showing «unable to connect to virtual disk service» on Windows 10 or 11? Also, When attempting to access Disk Management in Windows 7, it may become stuck in «connecting to the virtual disk service» or «loading disk configuration information.»
Here, we outline the steps you can take to solve this issue, as it is a Windows service that controls and makes information available on the virtual disk.
Why Unable to Connect to Virtual Disk Service
You are wondering why your Disk Management cannot connect to the virtual disk service. Here are some of the reasons why.
- The remote computer does not support VDS.
A computer won’t connect to a virtual disk service if it doesn’t support it. So always check to know if the laptop supports it before connecting.
- The connection is blocked by Windows Firewall.
The Windows Firewall monitors network traffic into and out of the computer and determines which network traffic to block or allow based on the security rules. So, the Windows Firewall may be responsible for the coming errors.
- Other reasons, such as faulty devices.
You could check on external storage devices like an external hard drive, a card reader, or a USB drive, as they could be faulty and responsible for the errors. These devices could also be incompatible with Disk Management.
To get this virtual disk service error fixed, look at the next part of this article. The fixes would help with the error on either a Windows PC or a Windows Server.
How Do I Fix the «Unable to Connect to Virtual Disk Service» Error
Outlined here are the possible ways you can get the «unable to connect to virtual disk service» prompt fixed. We present to you six ways to fix the error. They are as follows:
Fix 1. Use Alternative Software for Disk Management
Fix 2. Disable Windows Defender
Fix 3. Enable Virtual Disk Service
Fix 4. Use SFC or DISM to Fix the Error
Fix 5. Unblock Windows Firewall
Fix 6. Check All External Storage Devices
Now, let’s learn the fixes in detail and start with the first one.
Fix 1. Use Alternative Software for Disk Management
What if I told you that you could use an alternative software for Disk Management that would serve the same purpose without any issues? Interesting right? EaseUS Partition Master Free serves this purpose well, and yes, it can completely replace disk management in all aspects.
It is more efficient and safer than disk management and has other exciting features. Here are some reasons why it is an ideal alternative.
- Create/Delete partition: You can delete/create partitions on USB drive, SD cards, and other drives.
- Resize/Move partition: This tool can resize encrypted partition or move unallocated space to C drive
- Extend system partition: You can make the most of available or unallocated space. To speed up the PC, use the «Extend» feature.
- Merge partitions: With its help, it is easy to merge partitions on SSD or a USB.
- Format/Wipe Partition: You can format a disk or delete a partition using the free EaseUS Partition Manager.
You can’t wait to try it out with the features listed. You can click the button below to download.
Fix 2. Disable Windows Defender
Sometimes disabling the built-in Windows Defender antivirus can prevent the error from occurring.
To disable them, follow these steps.
Step 1: Press the «Windows + R» keys and type in «gpedit.msc» in order to open Local Group Policy Editor.
Step 2: Navigate to Computer Configuration > Administrative Templates > Windows Components > Windows Defender Antivirus.
Step 3: Highlight Windows Defender Antivirus and double click Turn off Windows Defender Antivirus.
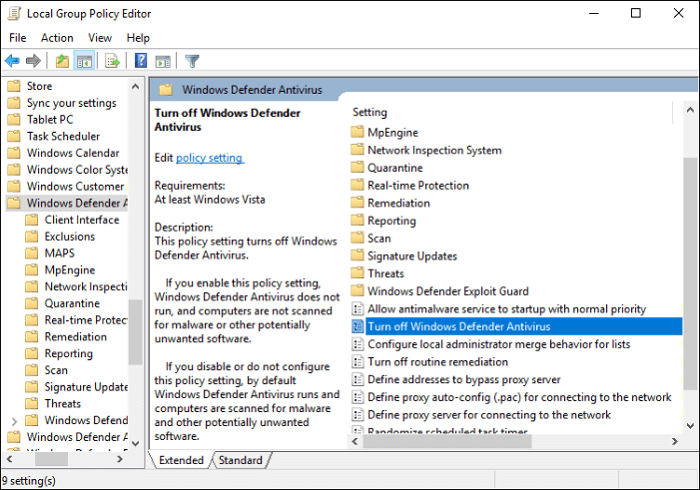
Step 4: Mark «Enabled,» then «Apply,» and «OK» to save the changes.
Step 5: Reboot the computer to effect the changes.
Fix 3. Enable Virtual Disk Service
The virtual disk services might not be enabled; to enable them, follow this guide.
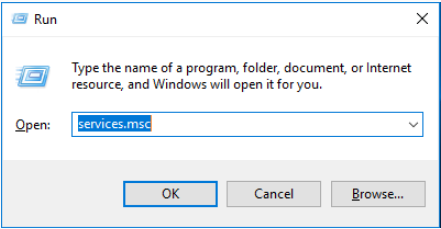
Step 1: Press the «Windows + R» keys simultaneously to call out the Run box.
Step 2: Type «services.msc» in the Run box, and after, press Enter to open Windows Services Manager.
Step 3: Scroll down to find the Virtual Disk Service. Double-click this service to open it.
Step 4: Choose Automatic/Manual for the startup type. Then, click «OK» to save the changes.
Fix 4. Use SFC or DISM to Fix the Error
Step 1: Open the Command Prompt window. Enter «command prompt» in Search. Right-click the Command Prompt icon and Run as administrator.
Step 2: Type «sfc /scannow» and press the Enter key. Then, wait until the procedure ends.
You can start Disk Management to see if it can be loaded as usual. If the SFC command fails to fix this problem, you can try the DISM command.
The steps for running the DISM command are given below.
- Similarly, launch Command Prompt as an administrator.
- Type this:
exe /Online /Cleanup-image /Scanhealth
exe /Online /Cleanup-image /Restorehealth
- Close the Command Prompt window after the procedure ends and test whether the error is solved.
Fix 5. Unblock Windows Firewall
Based on its security rules, the Windows Firewall often acts as an obstacle. Follow the steps below to unblock the Windows Firewall.
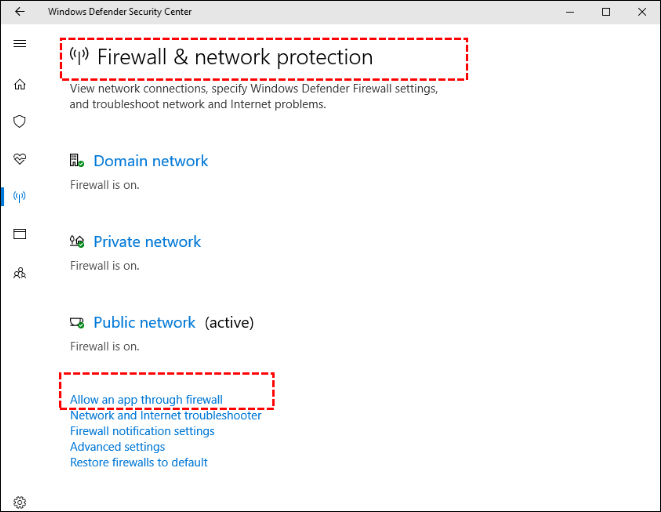
Step 1: Select the Start button > Settings > Update & Security > Windows Security and then Firewall & network protection
Step 2: Select «Windows Defender» and click «Open Windows Defender Security Center.»
Step 3: Click «Firewall & network protection» and «Allow an app through firewall.»
Step 4: In the new window, click «Change settings.»
Step 5: Find «Remote Volume Management» and tick both squares, then click the «OK» button to save changes.
Fix 6. Check All External Storage Devices
Troubleshooting external storage devices can sometimes fix this. removing all external devices one by one to determine if any are defective. The external storage devices can be a card reader, a USB drive, or a hard drive. Also, the universal serial bus drivers should be updated.
Conclusion
With the virtual disk service, it is possible to execute management functions for disks, file systems, volumes, and storage arrays, and mistakes would be prevalent.
The causes of this have been covered in this article; now, we need to determine whether the remote computer is capable of using it, whether any external storage devices are broken, or whether the Windows firewall has blocked the connection. There are six ways to resolve the issues, regardless of whether a Windows PC or Windows Server is involved.
There are some other disk partition issues you may run into when you use Disk Management. Click the links to help:
FAQs Related to Unable to Connect to Virtual Disk Service
Some of the frequently asked questions with answers related to being unable to connect to virtual disk service are provided here.
1. What is the Virtual Disk Service?
This Microsoft Windows service performs queries, configuration tasks, and volume and disk management functions as end users, scripts, and programs are requested.
2. How do I enable virtual disk services?
Information on how to enable virtual disk services has been given in this article.
3. Can I restart the virtual disk service?
Yes, you can. Below are a few steps to do this.
Step 1. Press the Windows key + R on the Keyboard.
Step 2. Type services.MSC and hit Enter.
Step 3. In the Services Window, look for Virtual Disk service and stop it.
Step 4. Restart the computer, Start the Virtual Disk Service, and set it to Automatic.
Материал из 1GbWiki.
Перейти к: навигация, поиск
На наших VDS по умолчанию запрещены все входящие подключения из интернета, кроме RDP. Для того чтобы ваш сайт или какая-то другая служба смогли обслуживать клиентов или чтобы сервер начал отвечать на пинги нужно добавить разрешающее правильно во встроенный Firewall Windows.
На примерах показано добавление правила для работы сайтов, настроенных на стандартный порт и для разрешения ответов на пинги.
Содержание
- 1 Windows Server 2003 HTTP
- 2 Windows Server 2003 Ping
- 3 Windows Server 2008 HTTP
- 4 Windows Server 2008 Ping
Windows Server 2003 HTTP
Windows Server 2003 Ping
Windows Server 2008 HTTP
Windows Server 2008 Ping
How to prevent applications on VPS from being blocked by the Firewall? This article will show you how to allow an app to bypass Firewall VPS.
What do you know about Firewall?
Define
The term Firewall is a borrowed word in construction design techniques to prevent and limit fires. In information technology, a Firewall is a technique integrated into the network system. It has the function of controlling access. It protects information and internal data. At the same time, limit the intrusion from outside. Of course, as the name suggests. The Firewall is a firewall that protects computers, servers, etc. From the dangers of accessing the Internet.

The effect of Firewall
- The firewall prevents unauthorized access to the private network. So it acts as a gatekeeper, checking all data entering or leaving the private network.
- The firewall helps prevent network attacks.
- Firewalls act as security checkpoints by filtering information connected via the internet to a network or personal computer.
- Easily control connections to your website or restrict some unwanted users.
- You can customize the firewall according to your needs by setting appropriate security policies.
Why is it necessary to turn off Firewall VPS sometimes?
To prevent the risk of Viruses entering, you should turn on the firewall to make your computer more secure. The principle of operation of Firewalls is to separate data into secure connections and unsafe connections. However, this will make it difficult for computer users to install additional third-party software and utilities. Then the system will ask the user to turn off the firewall to install this software.

With Windows VPS Server, most providers will set up VPS to always run Firewall automatically to ensure VPS avoids viruses or spyware. However, some applications need to run on VPS, but the Firewall mistook them for viruses and blocked them. So how to allow an application to bypass the Firewall but still run with other applications? With a Firewall on Windows VPS, turning it off is the same as the computer. You can follow the steps below.
How to allow an application to bypass Firewall VPS
Step 1. Go to Start. Then search for Windows Firewall with Advanced Security. Firewall VPS appears.
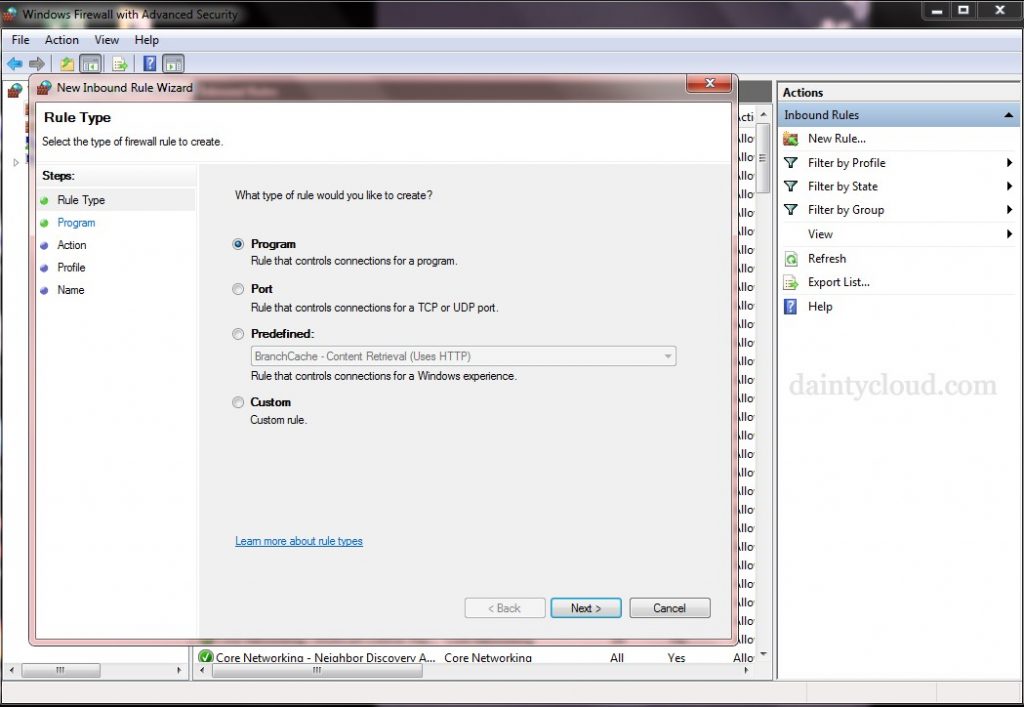
Step 2. In the window that appears, select Inbound Rules => New Rule. In the Rule type section, select Program => Next.
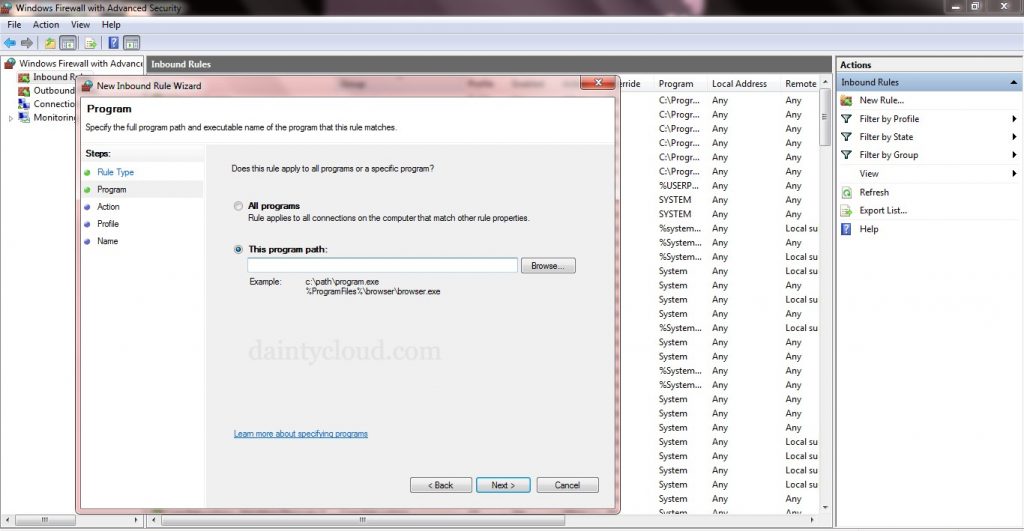
Step 3. On the next window, you select the application want the Firewall to ignore. Then select Next.
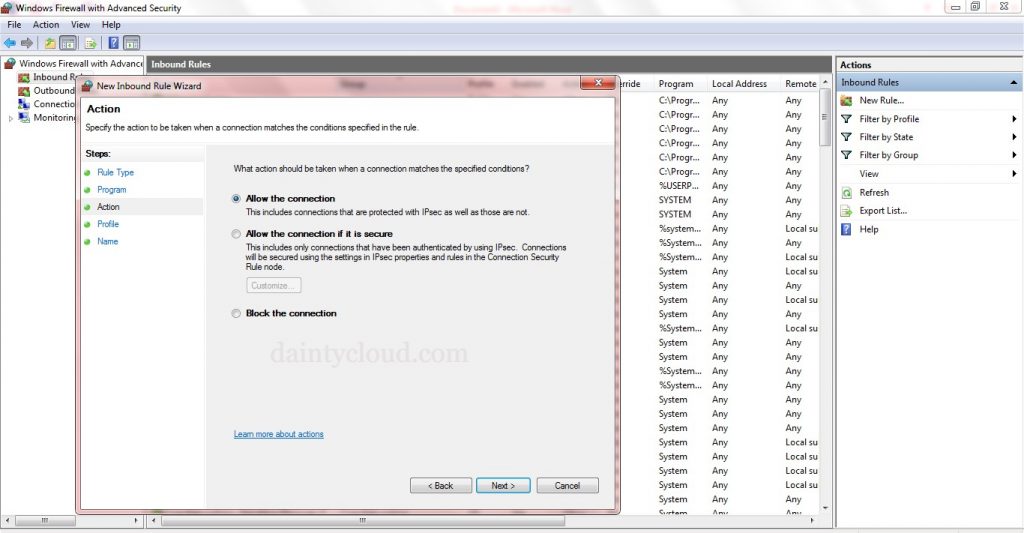
Step 4. Next in the Action section, select Allow the connection. Then choose Next.
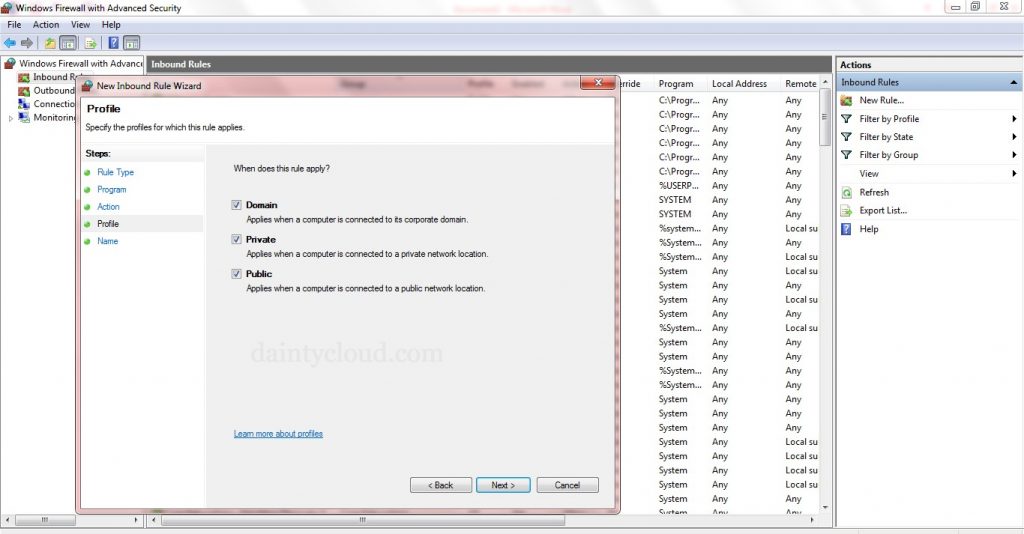
Step 5. In the Profile section, integrate three parts: Domain, Private, Public.
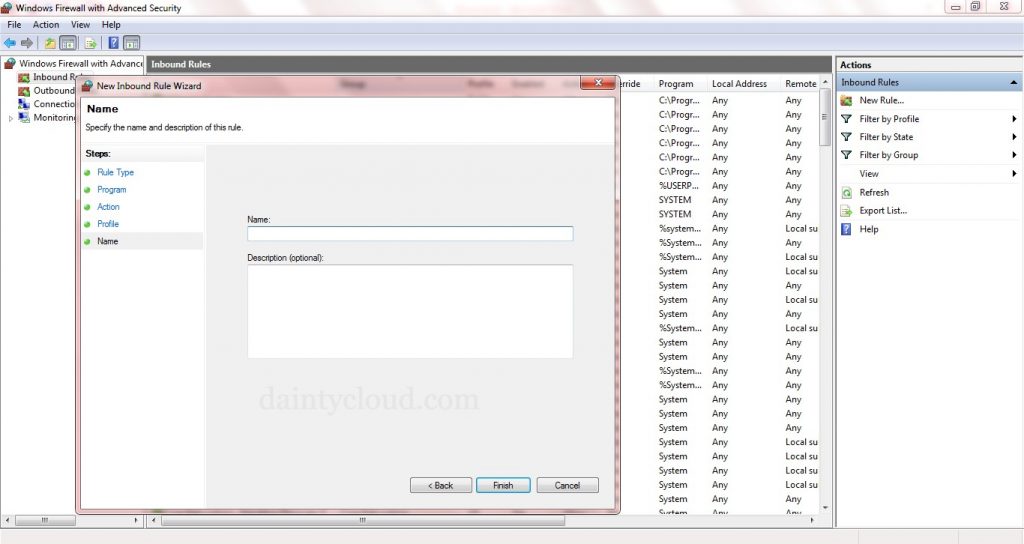
Step 6. In the Name section, save the name. Finally, select Finish, and you have successfully allowed the application to bypass the Firewall VPS.
If you have any questions or are wondering about using VPS for online business, website operation, or game server,… Don’t hesitate, send them to us. Dainty Cloud is always ready to answer all your requests.
The Windows VPS firewall is a critical component of your server’s security. It acts as a barrier, preventing unauthorized access to your server. However, there are situations where you need to allow access through specific ports to run applications, services, or host a website. In this guide, we’ll walk you through the process of allowing access through a port in the Windows VPS firewall.
To allow the program or process to communicate via a port, we must open a port on the Windows VPS firewall. Ports, as the name implies, are the gateway for server input and should thus be watched. Furthermore, due to the possibility of unwanted access to the server, only the necessary ports should be inside the server.
Understanding Windows VPS Firewall
Before we dive into the specifics, let’s clarify what the Windows VPS firewall is. The Windows Firewall is a built-in security feature that regulates incoming and outgoing network traffic. It’s designed to protect your server from potential threats and unwanted network access.
Identifying the Port to Be Opened
The first step in allowing access through a port is identifying which port you need to open. Ports are like virtual doors that applications and services use to communicate over the network. Common ports include 80 for HTTP, 443 for HTTPS, and 22 for SSH.
Methods for Opening a Port on a Windows VPS
There are three methods for opening a port on the Windows VPS firewall, and they will be examined one by one in this topic.
- CMD (Command Line)
- Windows Firewall
- Microsoft PowerShell
CMD is used to open a port on the Windows VPS Firewall.
- Open Run by pressing Windows key + R, then input CMD and press OK.
2 .Now, try this code.
<code>netsh advfirewall firewall add rule name=”Port 20875″ dir=in action=allow protocol=TCP localport=20875
In the name area, type your preferred port name, and in the local port part, type the number of the port you want to open.
ALSO READ : How to Execute a Command on Linux After Boot or Startup?
3.Reboot the server to have the changes take effect.
Open A Port On The Windows VPS Firewall Using The Windows Firewall GUI
Understanding Windows Firewall
Windows Firewall is a built-in security feature that plays a crucial role in safeguarding your Windows VPS. It acts as a barrier between your server and the internet, monitoring incoming and outgoing network traffic. Properly configuring the Windows Firewall is vital for allowing specific services and applications to communicate while blocking unauthorized access.
Accessing Windows Firewall GUI
To begin configuring your Windows VPS firewall, you need to access the Windows Firewall GUI. Follow these steps:
- Click the Start Button: In the Windows taskbar, click the Start button, typically located in the lower-left corner.
- Search for “Windows Defender Firewall”: Begin typing “Windows Defender Firewall” in the search bar.
- Select “Windows Defender Firewall with Advanced Security”: Click on the search result to open the Windows Firewall GUI.
Identifying the Port to Open
Before proceeding, you must identify the specific port you want to open on your Windows VPS. Ports are essential for communication between your server and various services or applications. Some common ports include 80 for web traffic (HTTP) and 443 for secure web traffic (HTTPS).
Adding a New Inbound Rule
To open a port, you need to create a new inbound rule in the Windows Firewall GUI:
- In the Windows Firewall GUI: On the left-hand side, select “Inbound Rules.”
- Click “New Rule…”: In the Actions pane on the right, click “New Rule” to open the New Inbound Rule Wizard.
- Choose “Port” as the Rule Type: Select “Port” and click “Next.”
Configuring Rule Settings
Now, configure the rule settings:
- Specify the Port Number: Enter the port number you want to open (e.g., 80 for HTTP).
- Choose the Action: Select “Allow the connection” to permit traffic through the specified port.
- Specify Protocols: Decide whether the rule applies to TCP, UDP, or both. It’s advisable to configure rules for the specific protocol your application uses.
Testing the Port
Once you’ve created the rule, it’s essential to verify if the port is open and functioning correctly. There are various tools and methods available for testing, ensuring that your server is accessible through the specified port.
PowerShell is used to open a port on the Windows VPS Firewall.
- To begin, hit Windows key + R, type PowerShell, and then press OK.
2. You should use this command to open the port.
<code>New-NetFirewallRule -DisplayName “Port 20875” -Direction inbound -LocalPort 20875 -Protocol TCP -Action Allow
You should enter your chosen port name in the -DisplayName area, and the number of the port you wish to open in the -LocalPort part.
3.The server should then be restarted to apply the changes.
Security Considerations
While opening ports is necessary for certain applications, it’s essential to follow security best practices. Limit access to ports only to trusted sources, regularly review and update your firewall rules, and monitor network traffic for unusual activity.
ALSO READ : How to Download any Video from any Website on Chrome for FREE 2023
Third-Party Firewall Software
In addition to the built-in Windows Firewall, you may choose to use third-party firewall software for more advanced features and control over your server’s security. Popular options include ZoneAlarm, Norton, and McAfee.
Conclusion
Allowing access through a port in the Windows VPS firewall is a fundamental skill for server administrators. By following the steps outlined in this guide, you can ensure that your applications and services function as intended while maintaining the security of your server.
There are three methods for opening a port on the Windows VPS firewall. You can use any of the steps listed above to accomplish this. Remember that ports are sensitive gateways on the server, therefore secure any ports you open and shut any ports you don’t require.