
In this article, we will mention all the steps on how to install VMware vCenter on Windows Server. These steps contain step by step guidelines on how to install VMware vCenter v6.7 on Windows. Before you continue to install the vCenter server for Windows, it is necessary to understand the requirements and the necessary steps to ensure successful deployment of the vCenter VMware server on Windows.
Table of Contents
Hardware Requirements for Windows vCenter Server
When you need to install the vCenter Server or Platform Services Controller on a physical server or virtual machine running Microsoft Windows, your system hardware meets Specific Requirements.
Download VMware vCenter Server for Windows
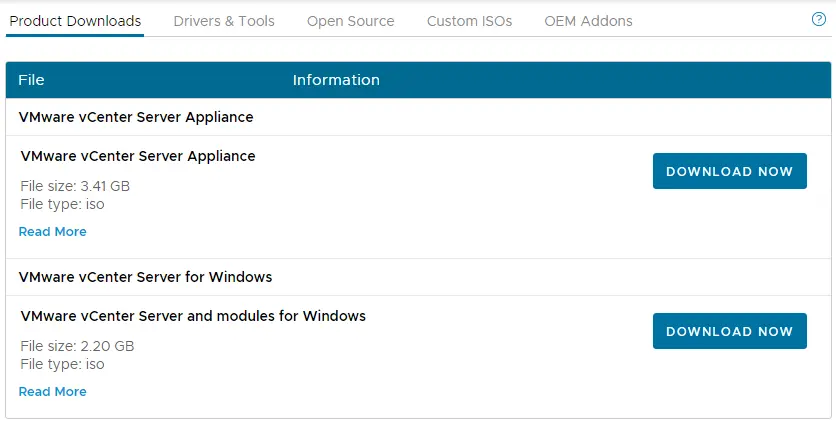
Download the VMware vCenter Server for Windows 6.7 ISO image from VMware’s Website.
Install VMware vCenter on Windows
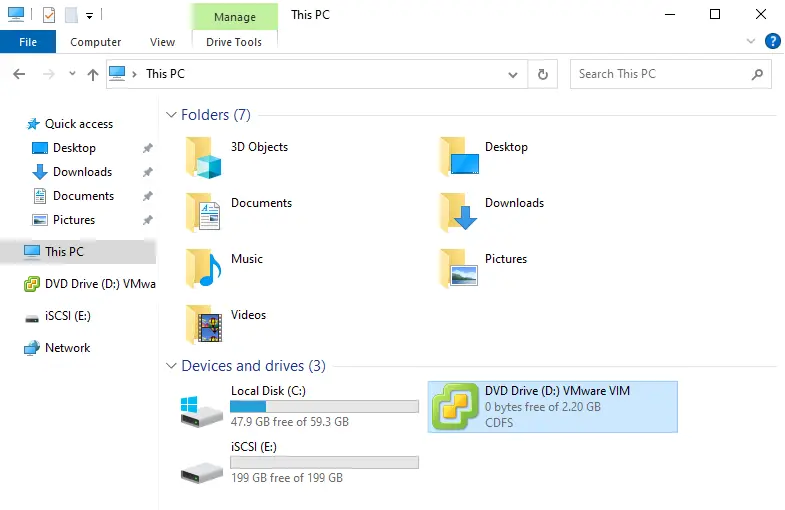
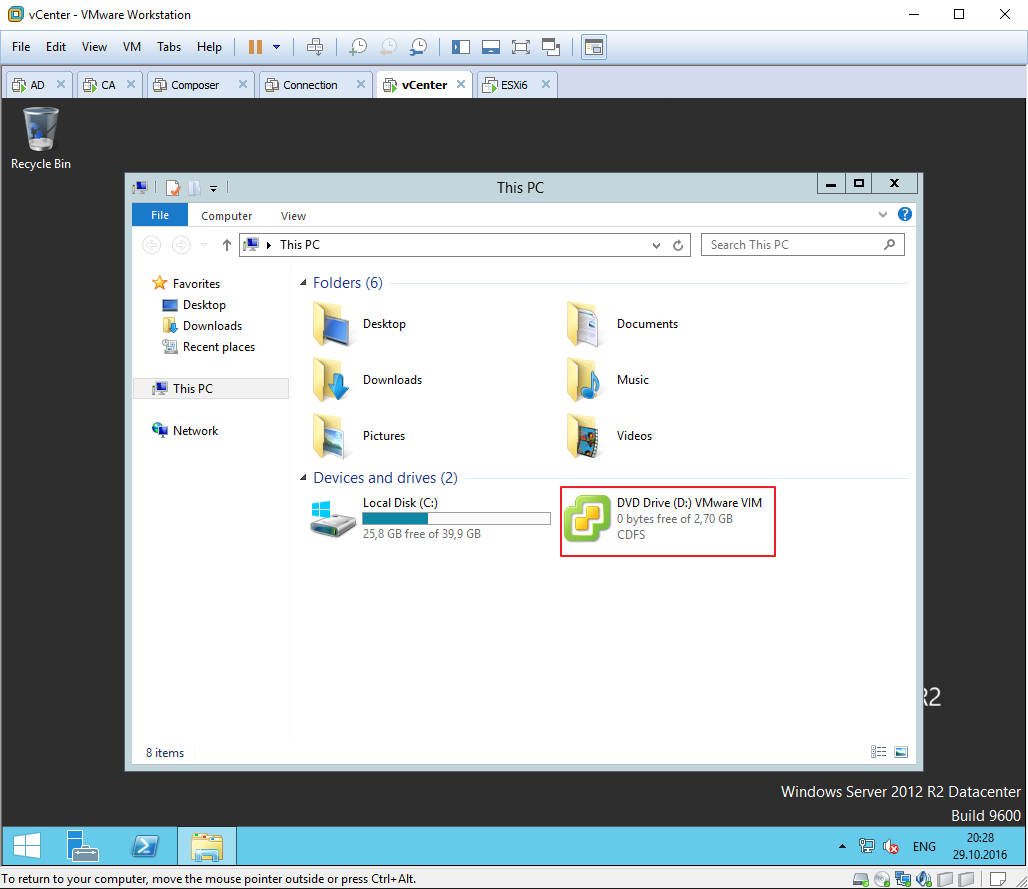
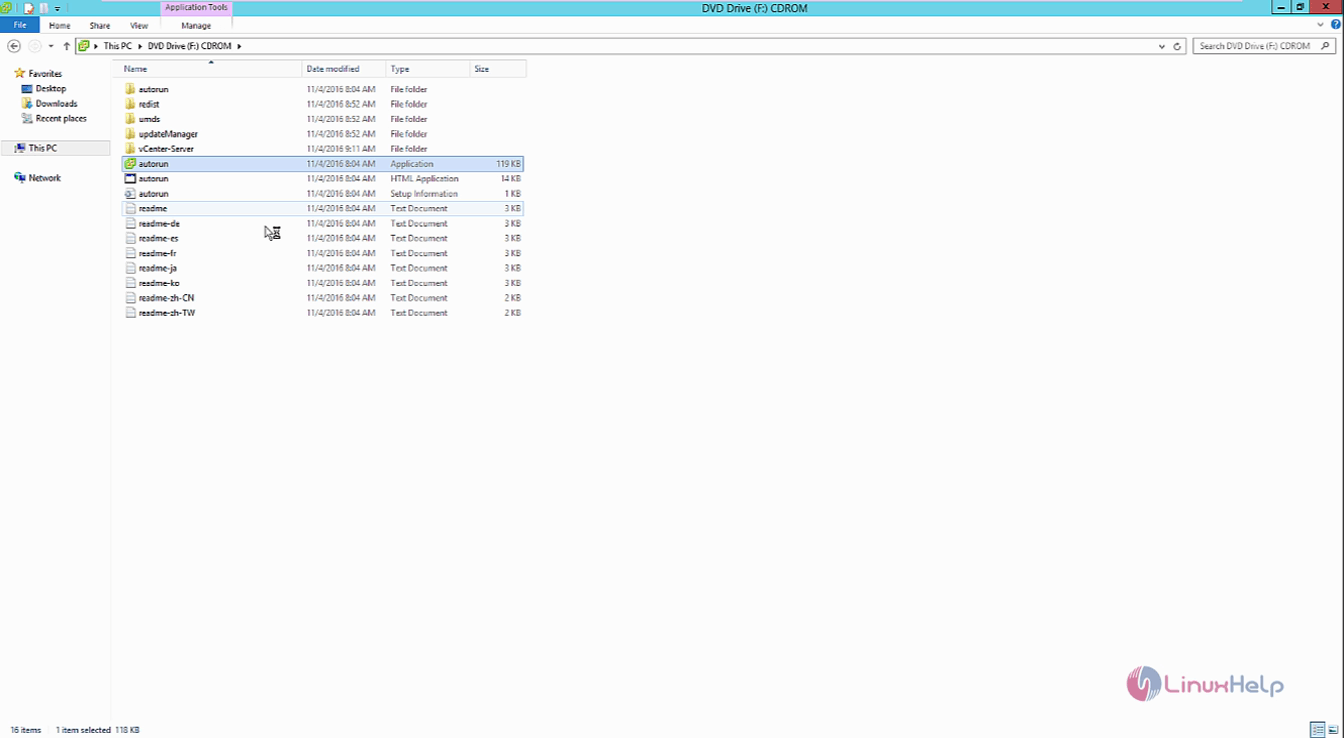
After downloading the VMware vCenter 6.7 ISO file, mount your vCenter Server 6.7 ISO image, and then start the installation.
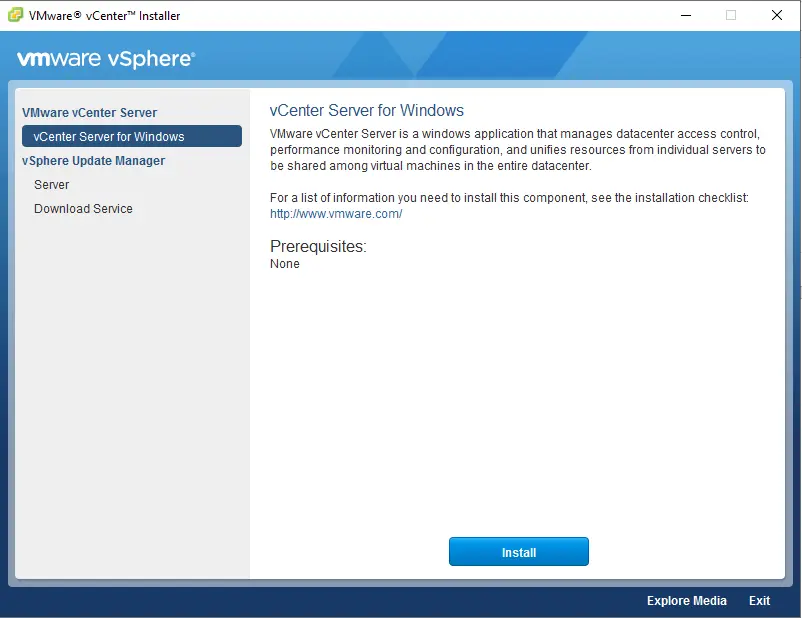
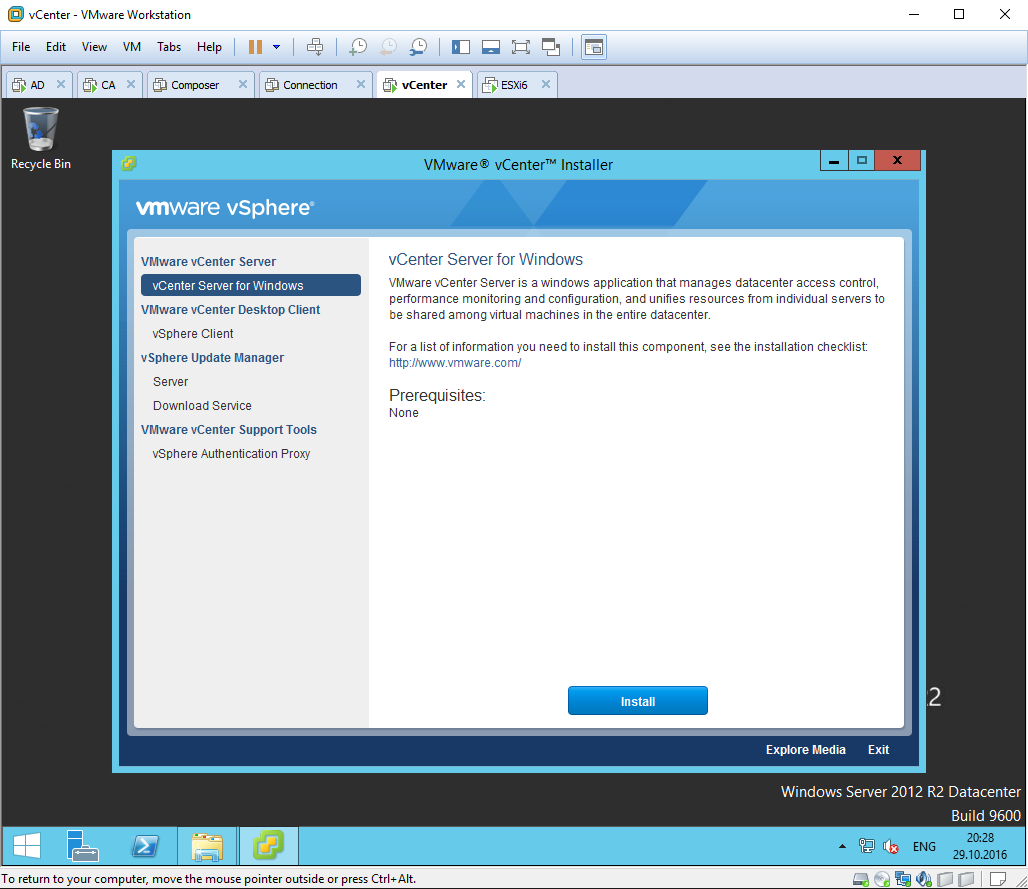
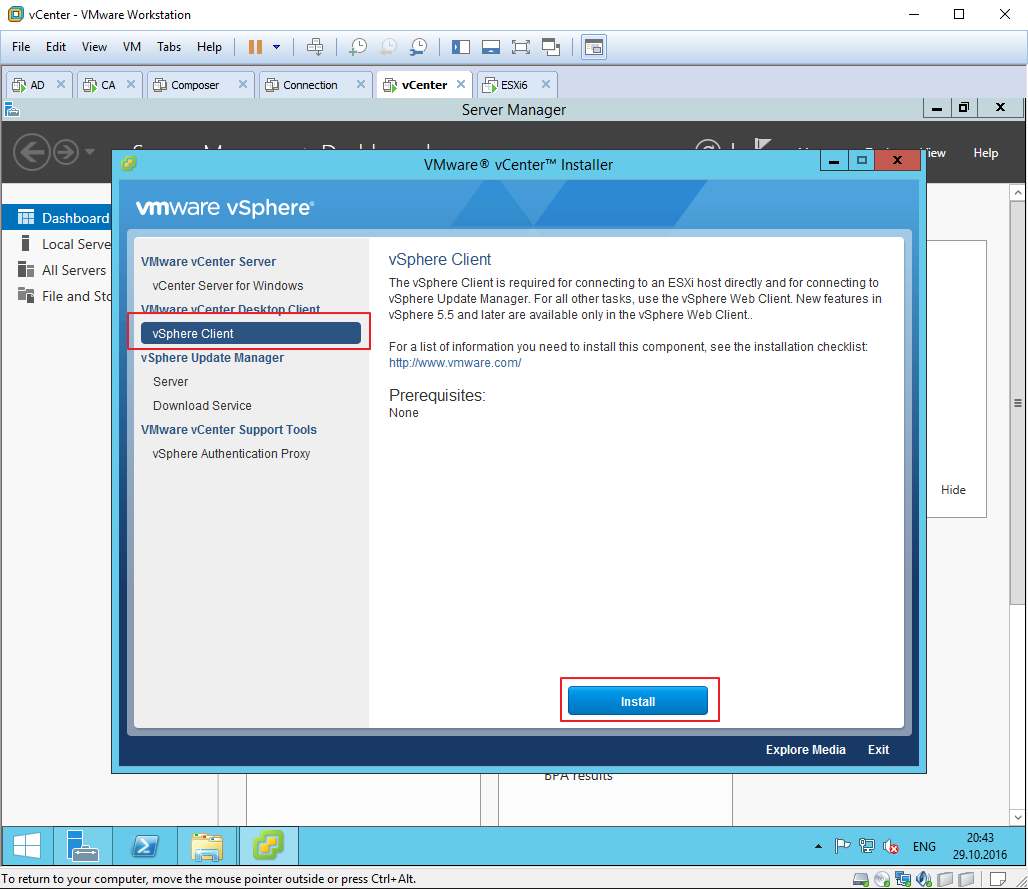
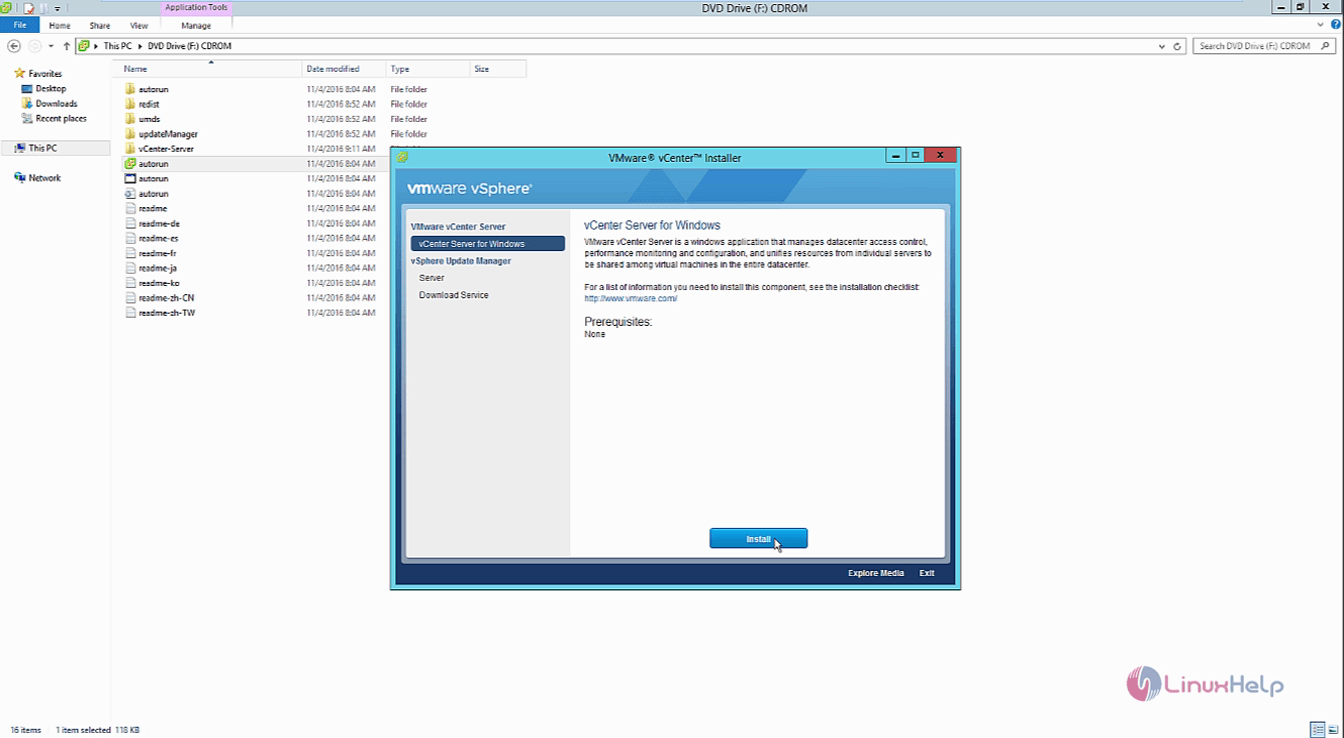
The VMware vCenter Installer will open. Click on vCenter Server for Windows, and then click on the Install button.
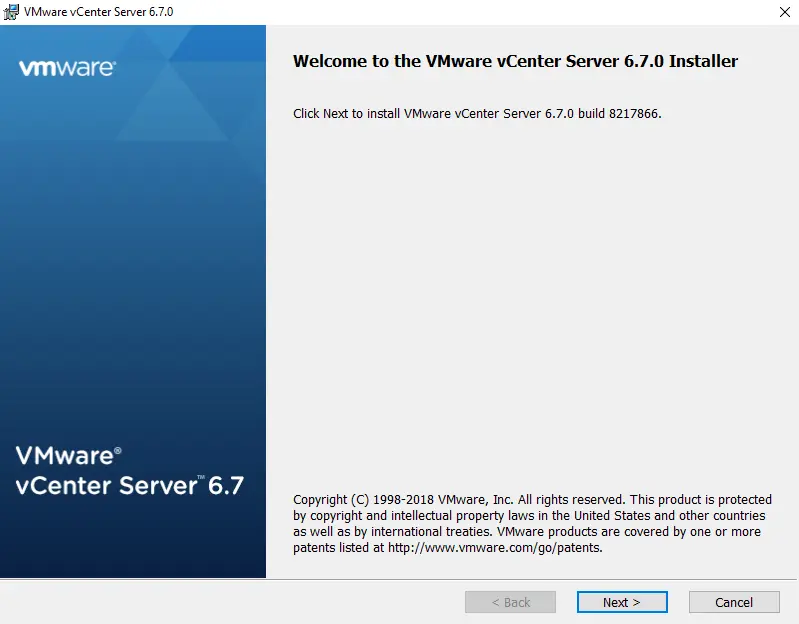
Welcome to the VMware vCenter 6.7 Installer. Choose next.
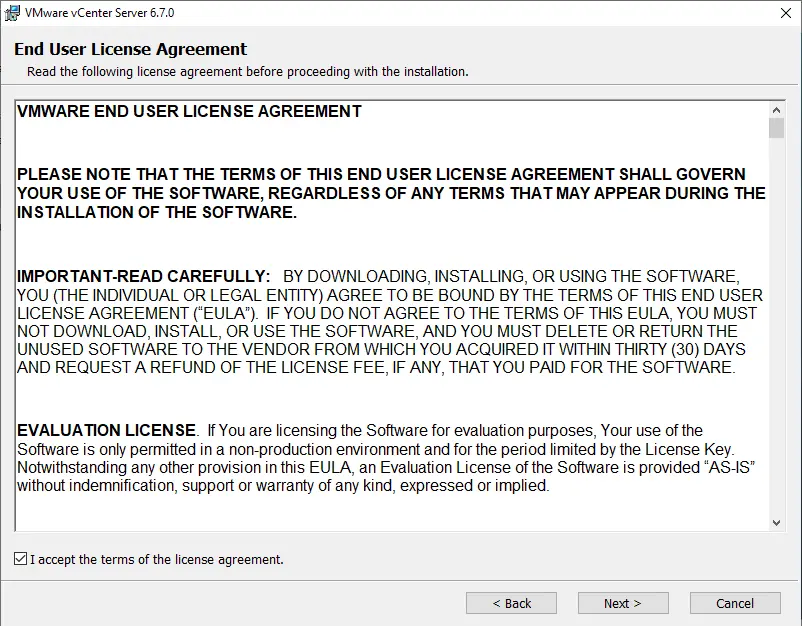
Accept the end user license and choose next.
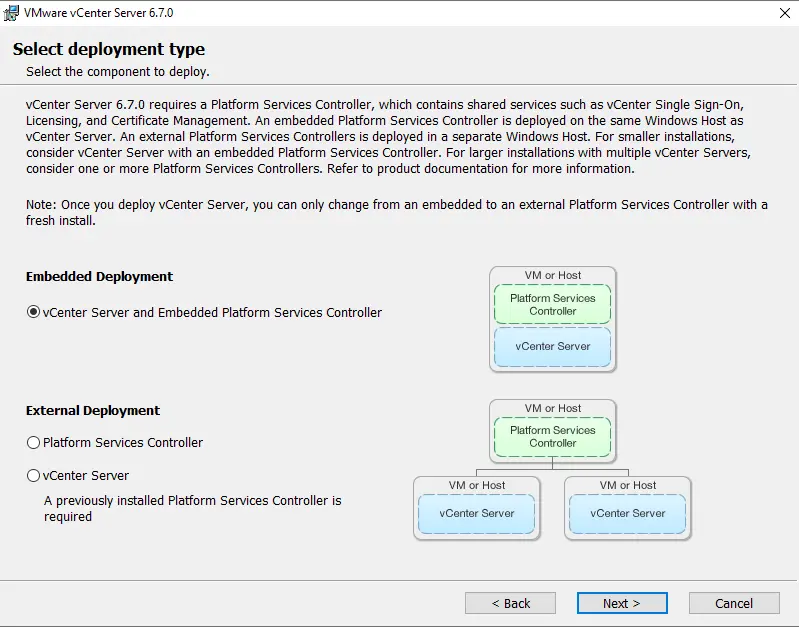
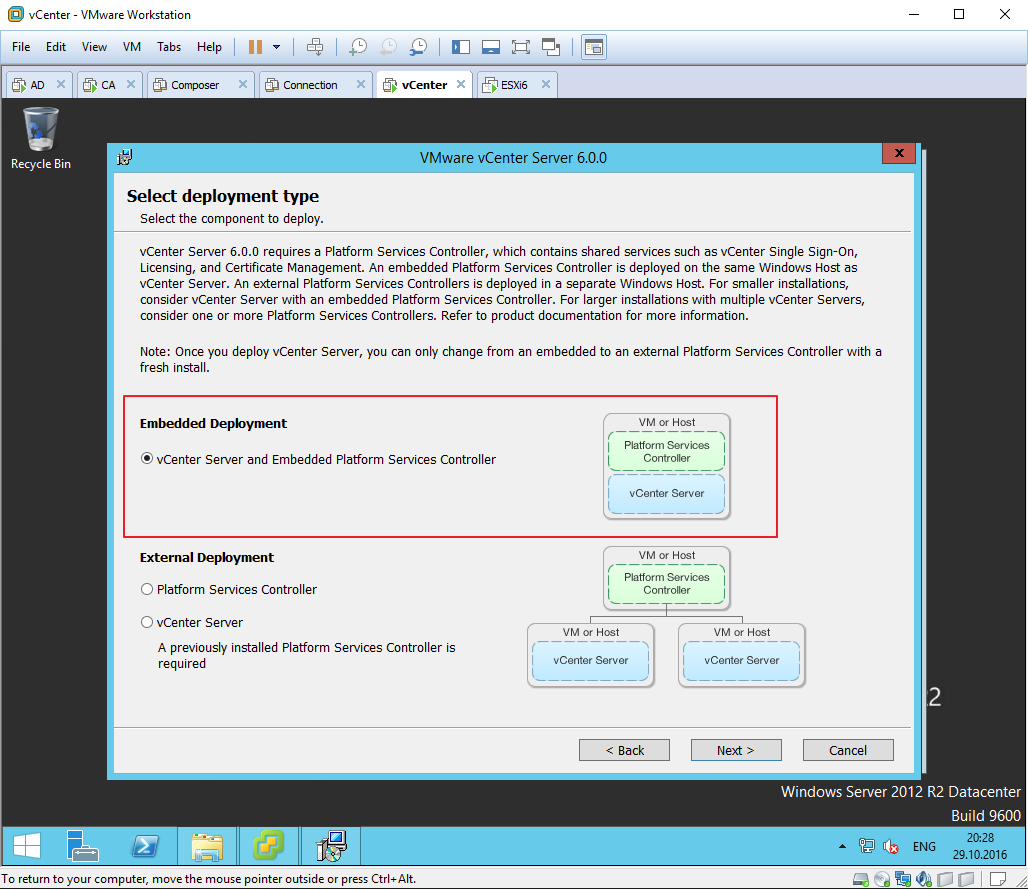
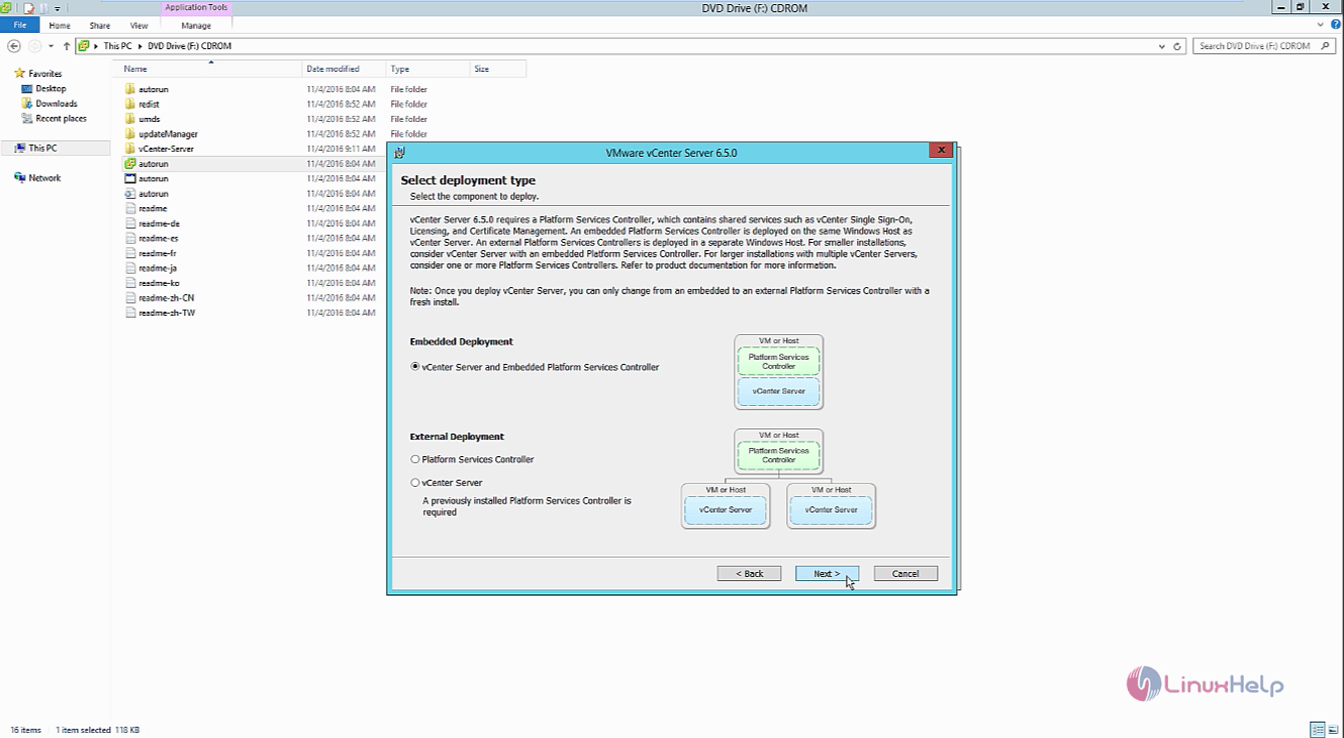
Select the deployment type, choose “Embedded Deployment” and then click next.
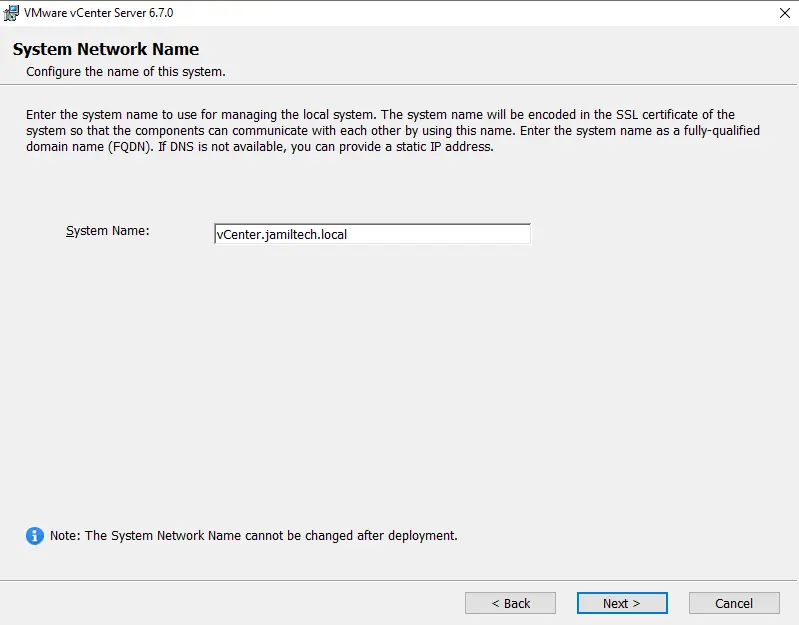
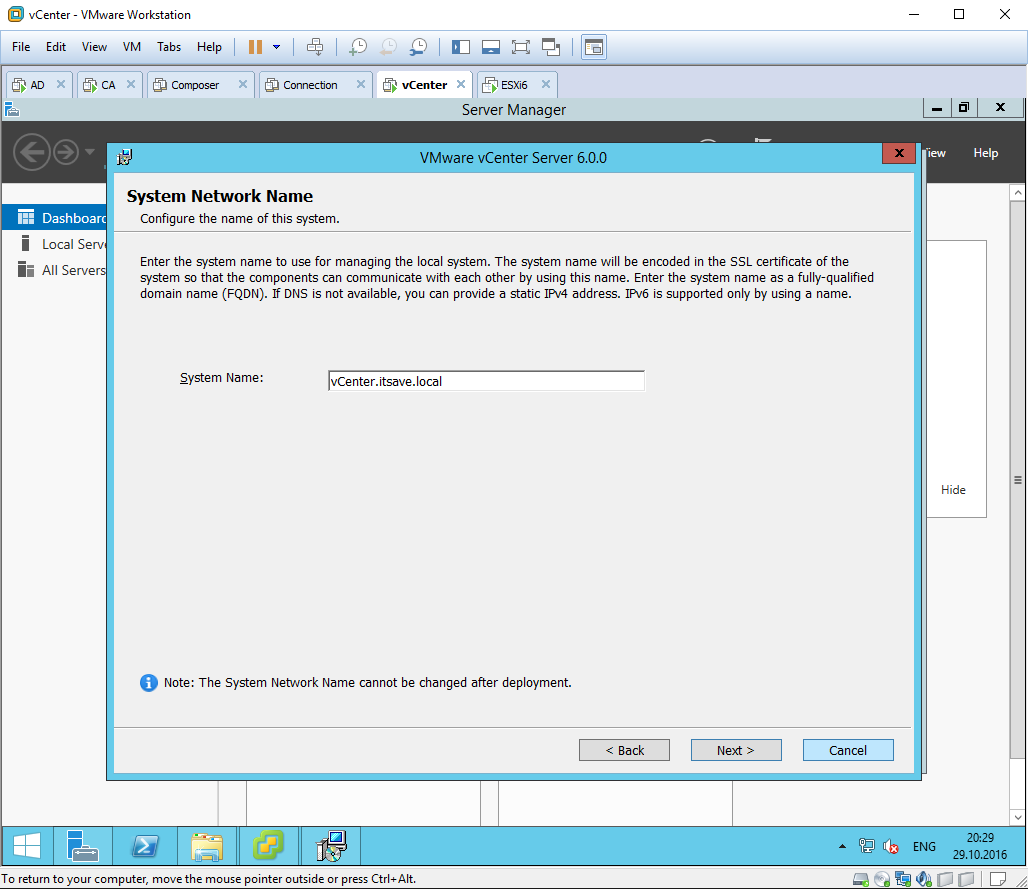
Enter the FQDM in the System Name field, and then click Next.
vCenter Single Sign-On Configuration
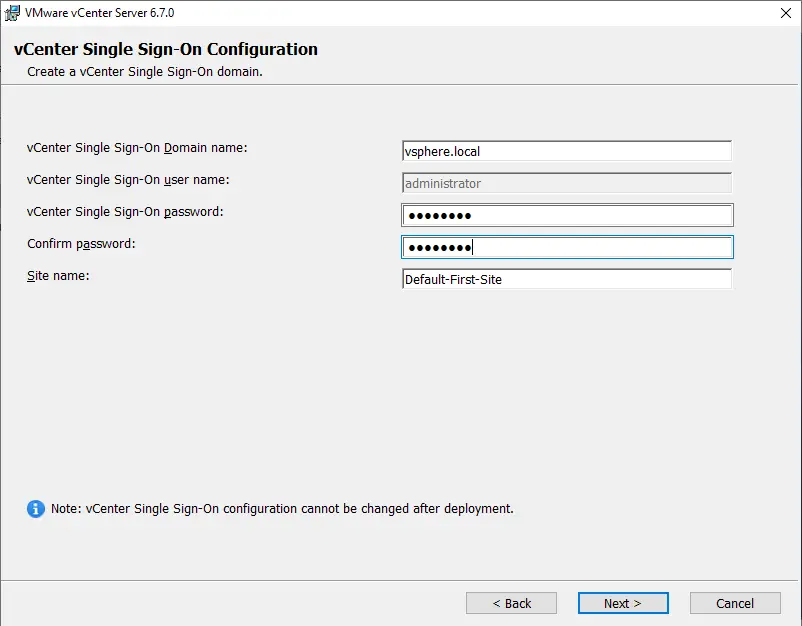
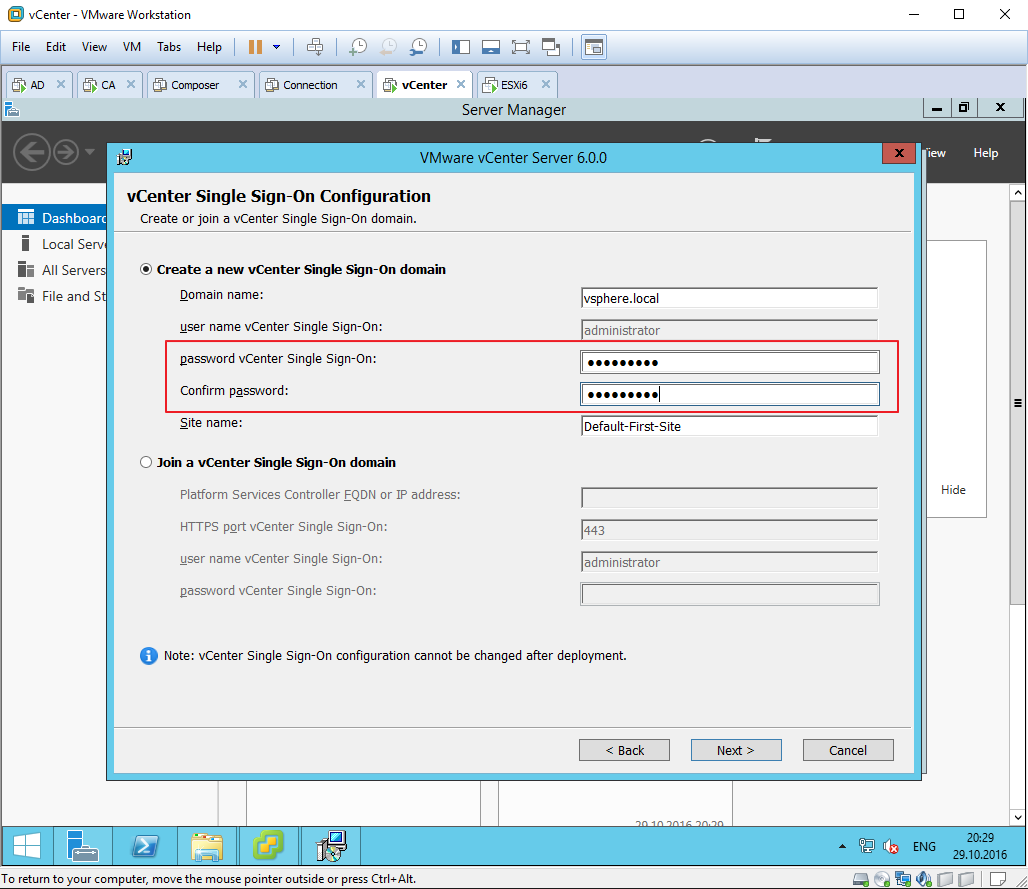
Leave it as the default vsphere.local, enter the password for the SSO administrator account, and then click next.
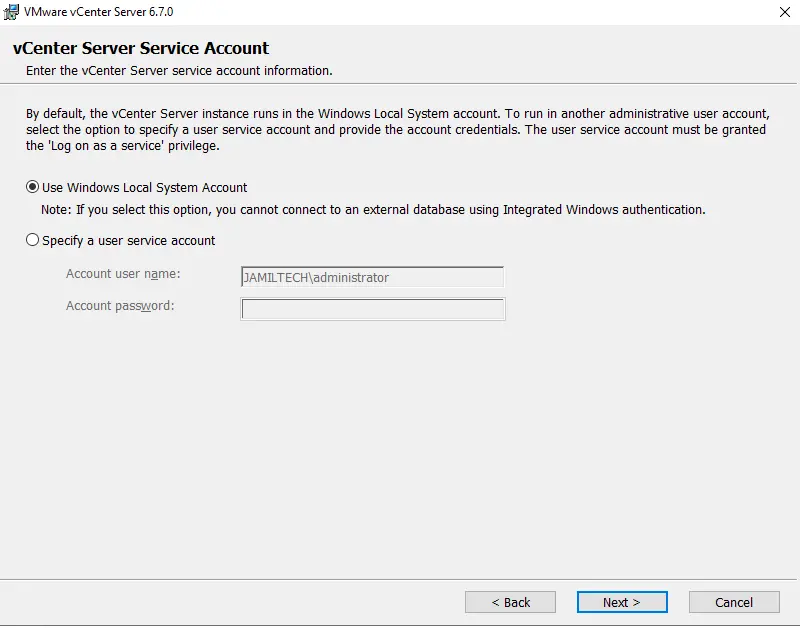
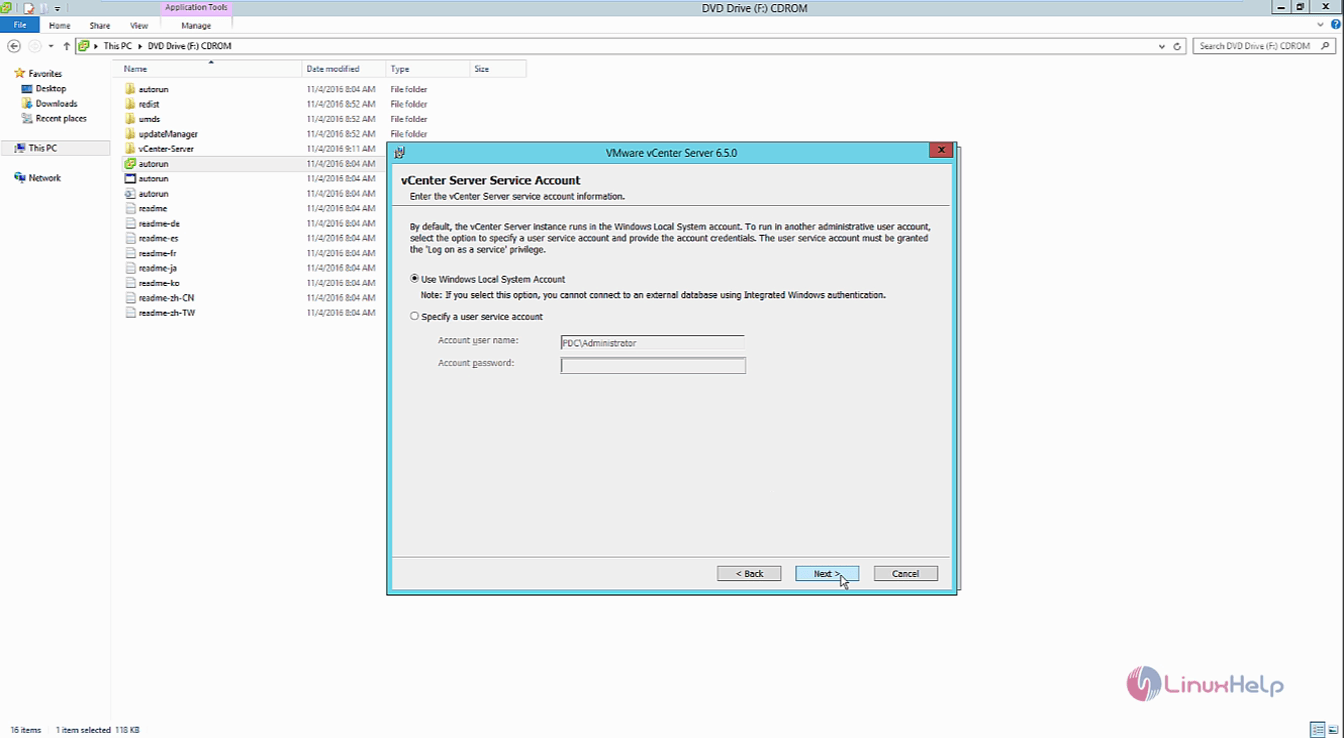
Choose to use a Windows local system account, and then click next.
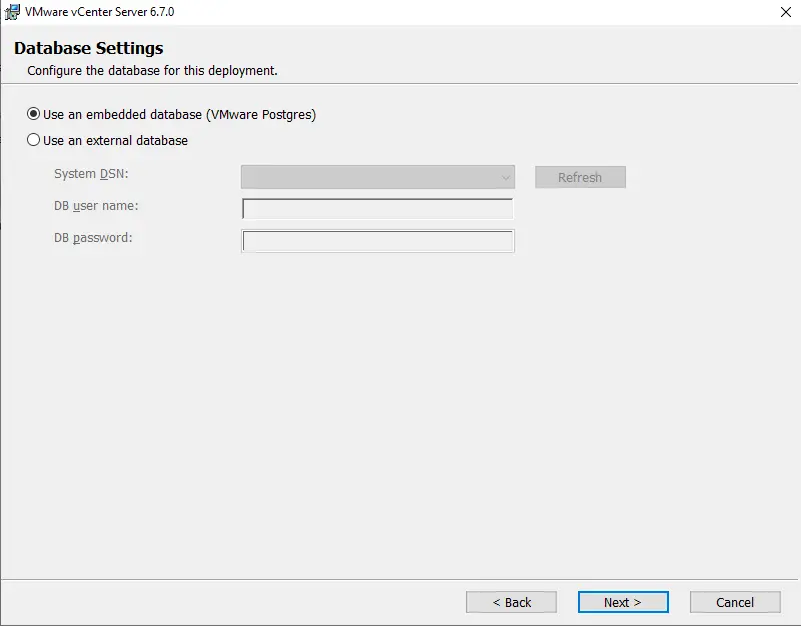
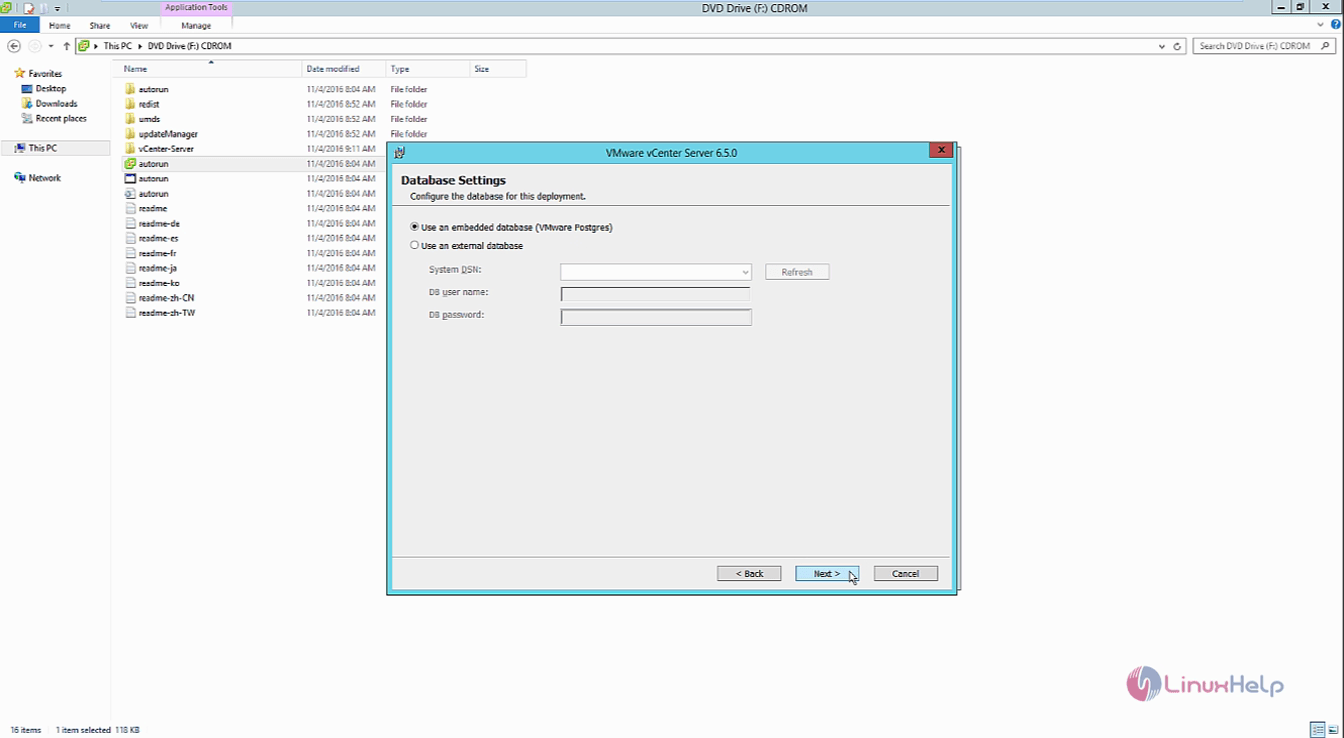
Configure database settings and click next.
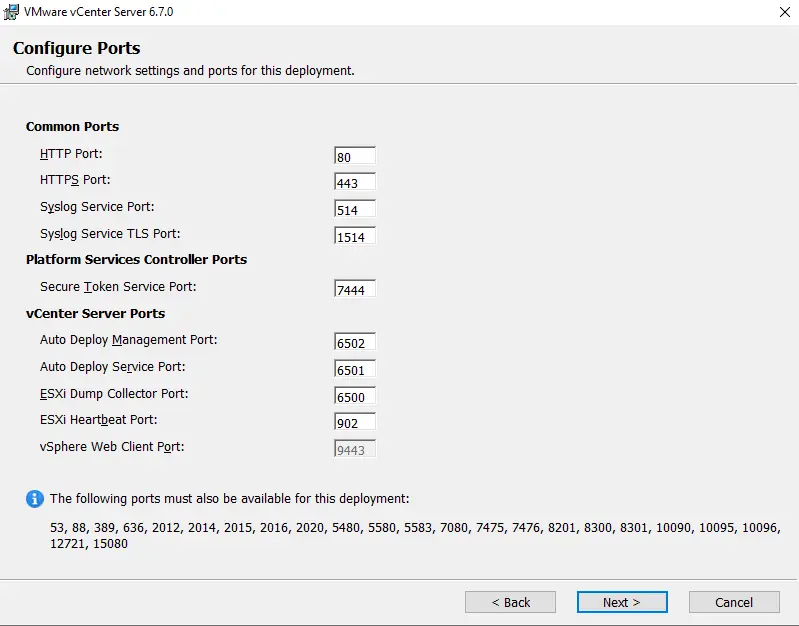
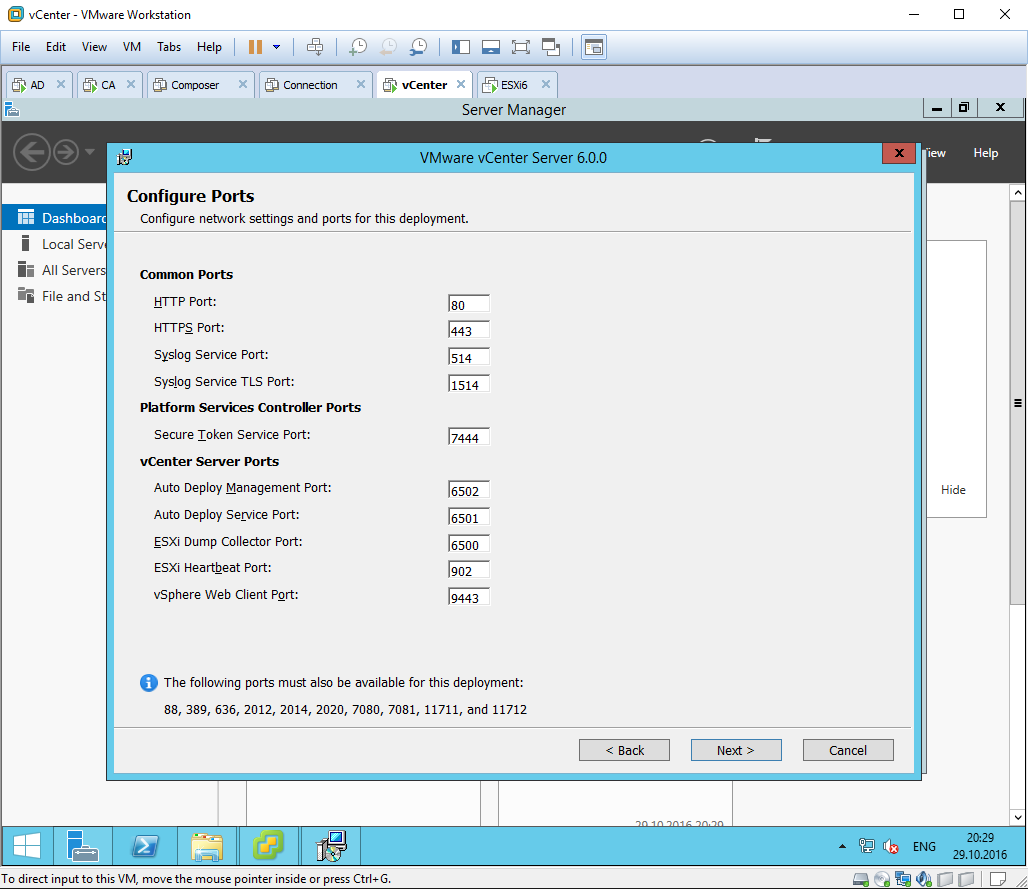
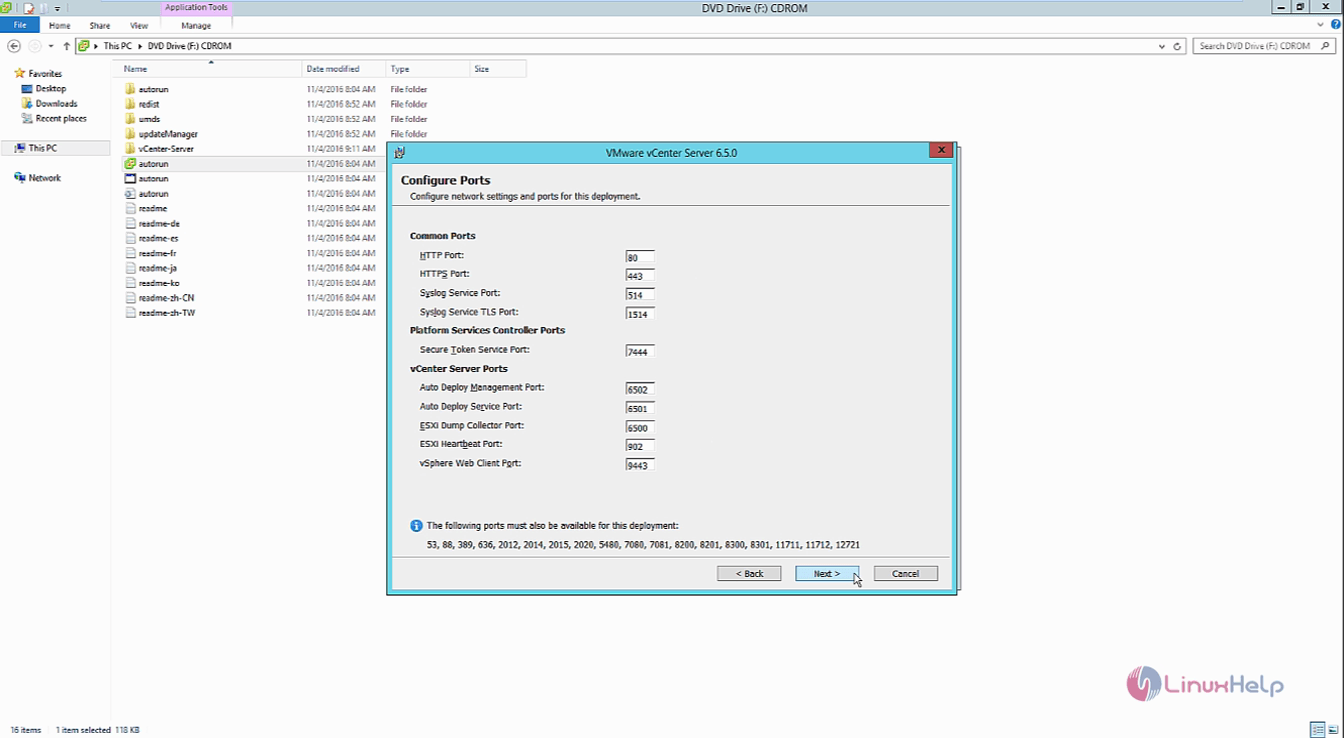
Keep the default port configuration, and then click next.
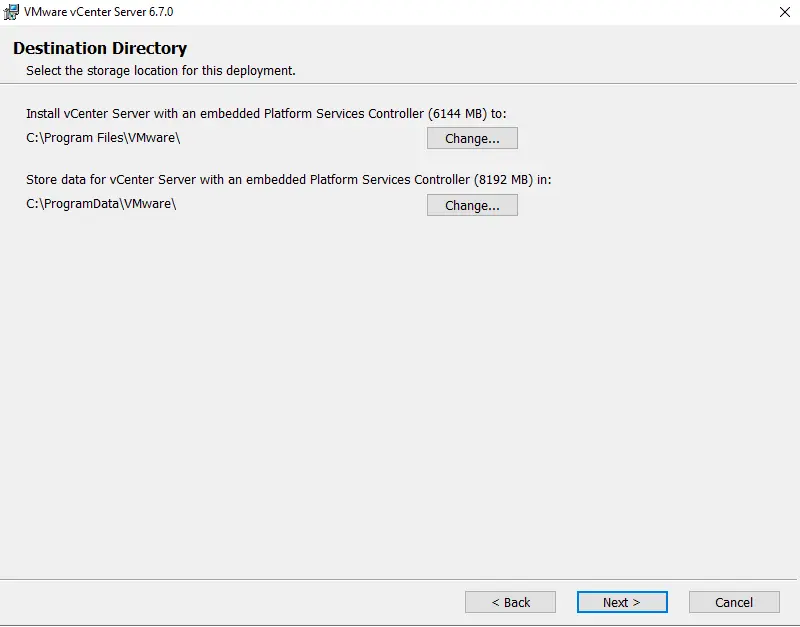
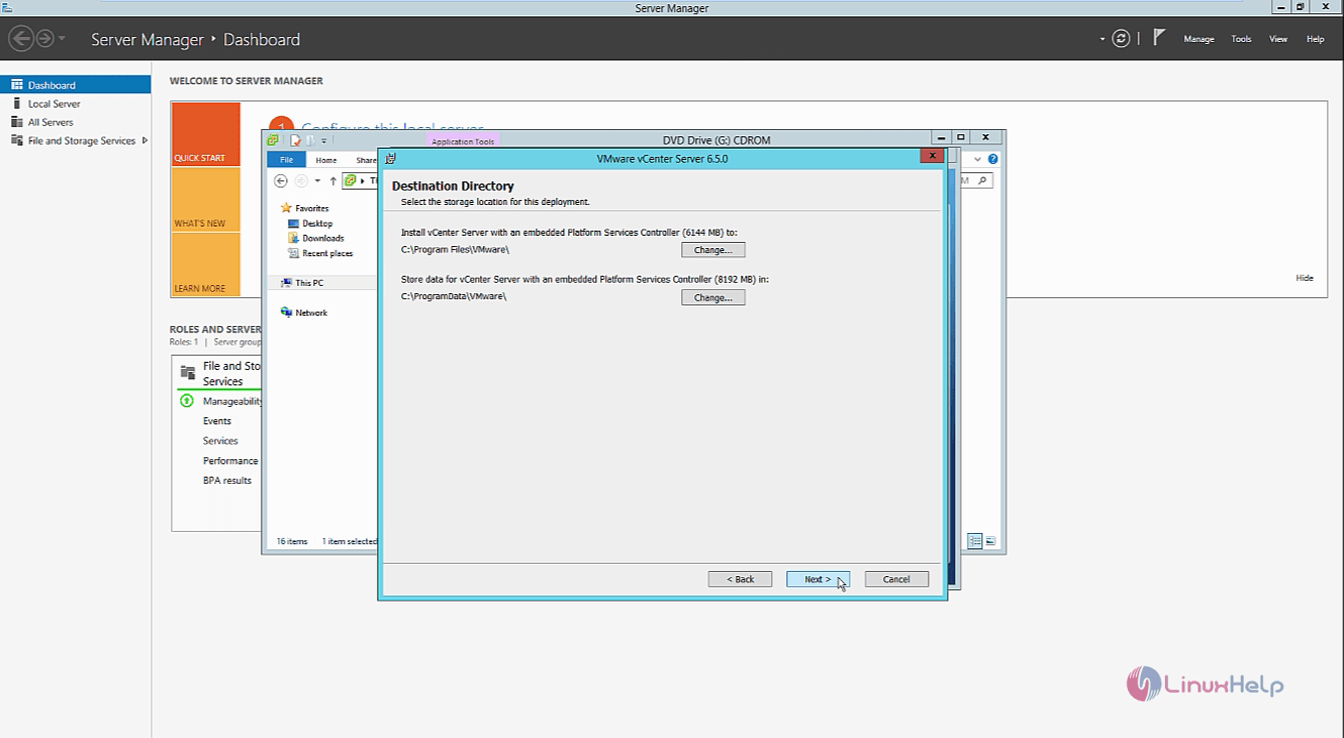
Select the storage location where you wish to install vCenter services, and then click next.
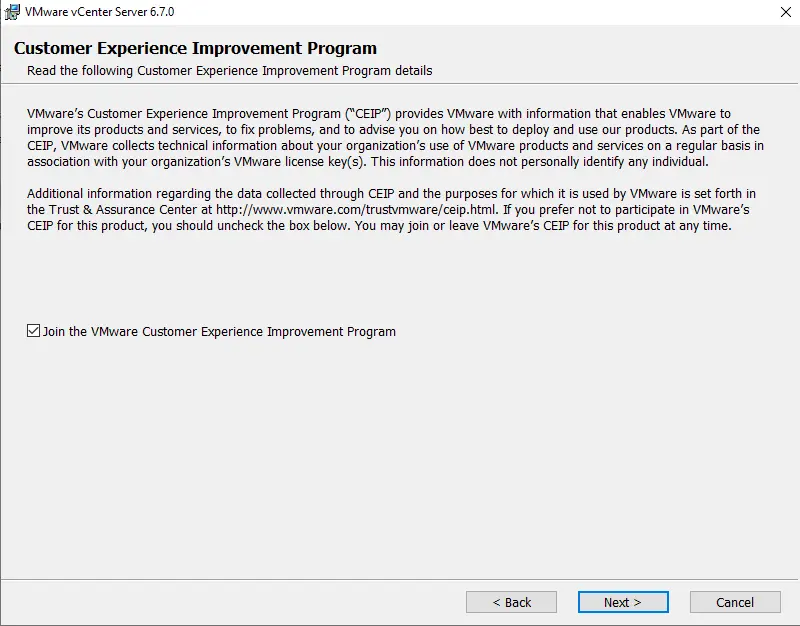
VMware Customer Experience Improvement Program, choose next.
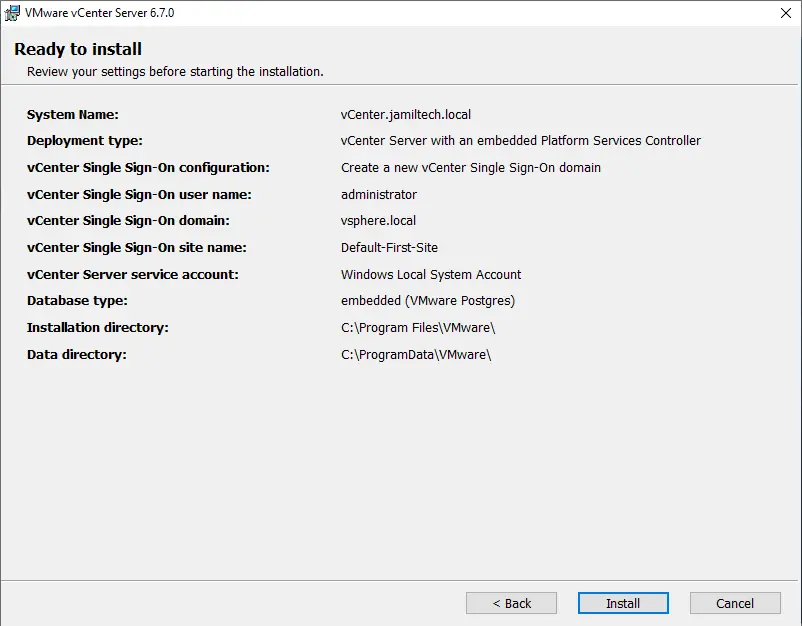
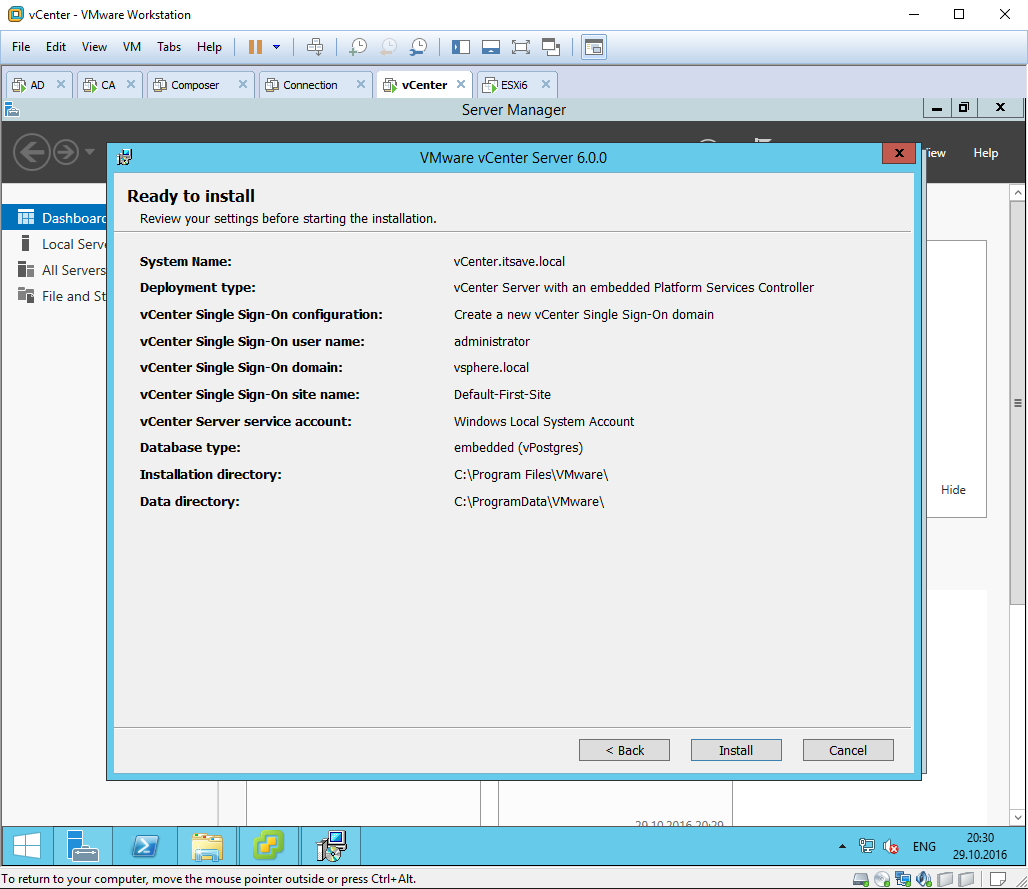
Review the Windows vCenter Server configuration, and then click on the Install button to start the process.
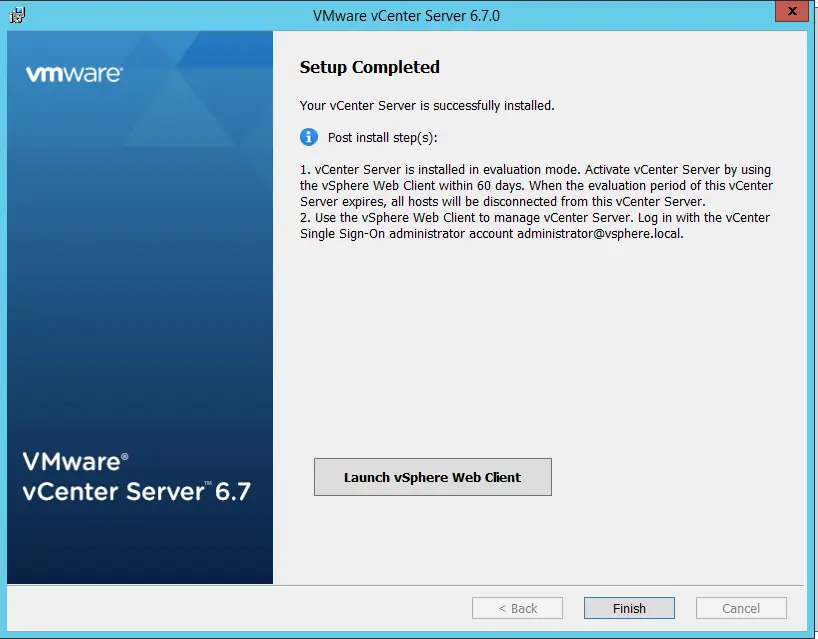
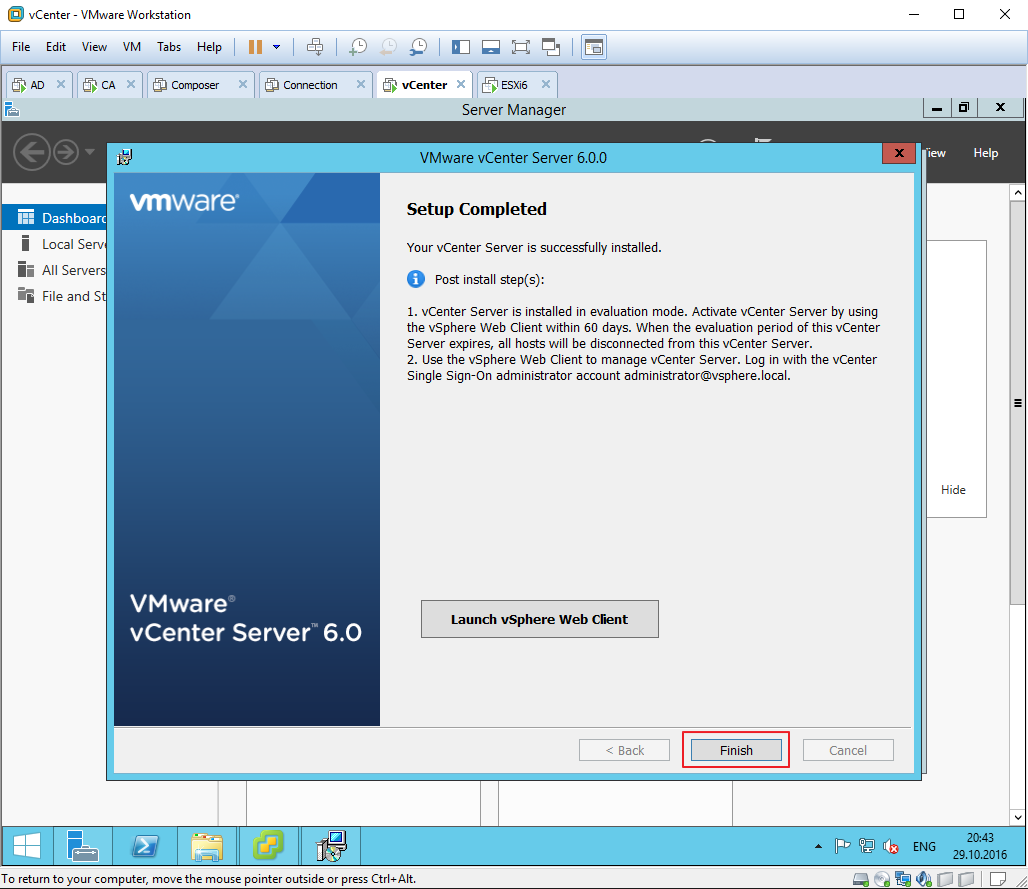
Your vCenter Server for Windows is successfully installed; choose Finish.
VMware vCenter for Windows Post-Installation
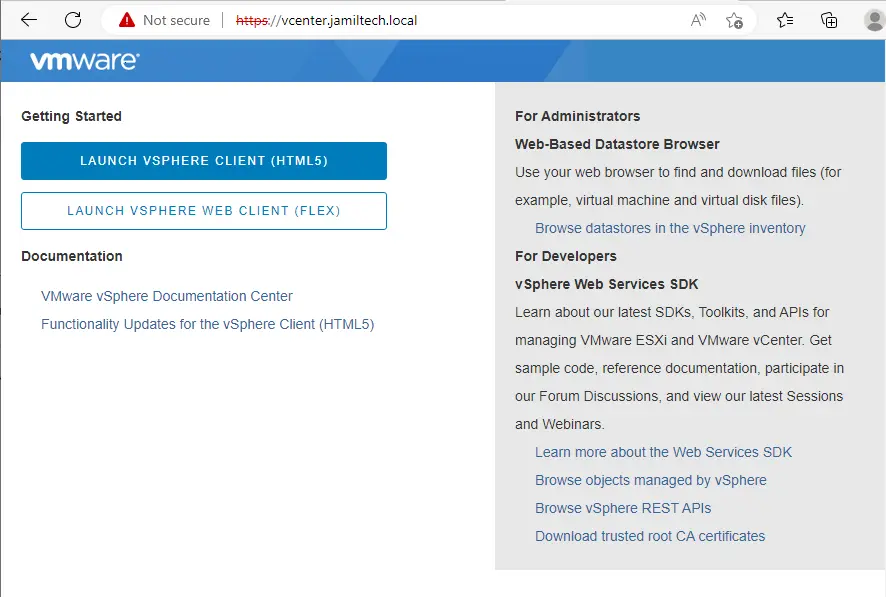
Open any browser, type the vCenter IP or FQDN, and then hit enter. Click on Launch vSphere Client.
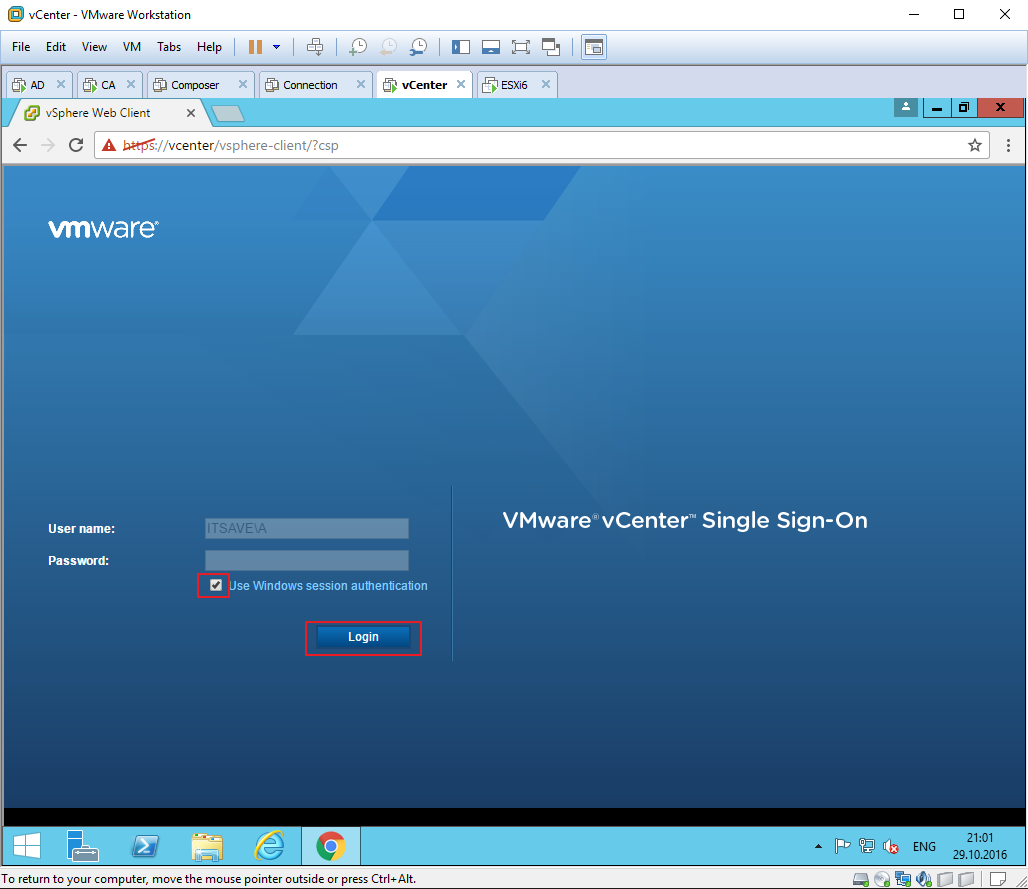
Log in with your credentials, and then hit login.
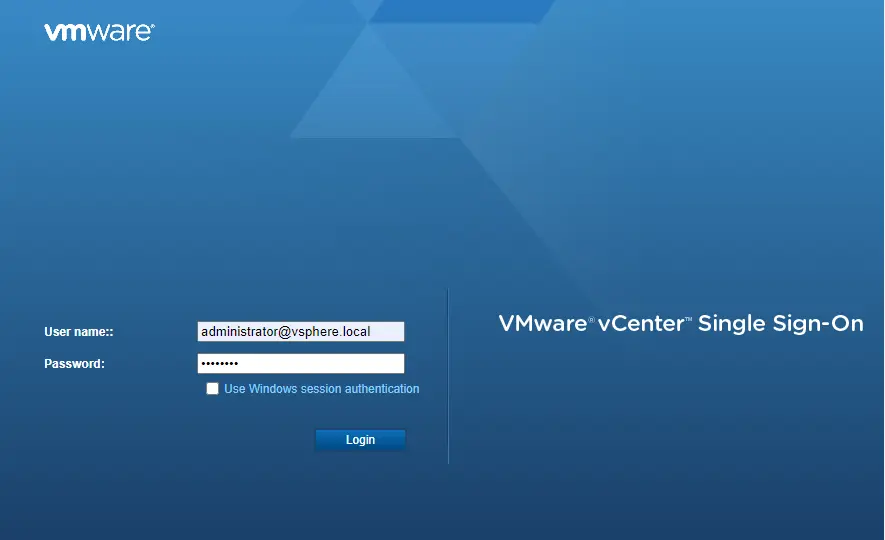
VMware vCenter for Windows 6.7 login with a 60-day trial period.
Related: How to Migrate Windows vCenter to VCSA 8.0
Jamilhttp://jamiltech.com
A Professional Technology Blog Writer | An energetic professional with more than 20+ years of rich experience in Technology, Planning, Designing, Installation, and Networking.
Установка vCenter Server 6.0.0 под операционную систему Windows server стала значительно проще и быстрее, чем была на предыдущих версиях. Есть основанное на опыте мнение, что администрирование Windows версии vCenter на порядок понятнее, чем vCenter Server Appliance. Работа Windows версии, опять же, по опыту стабильнее. Так или иначе, для стенда по Horizon 7 необходима установка vCenter, т.к. он используется VMware Connection сервером для создания пользовательских виртуальных машин под VDI. Другой гипервизор и другой сервер управления для VMware Horizon не подходит, только ESXi и только vCenter.
Приступаем к установке vCenter server 6.0.0
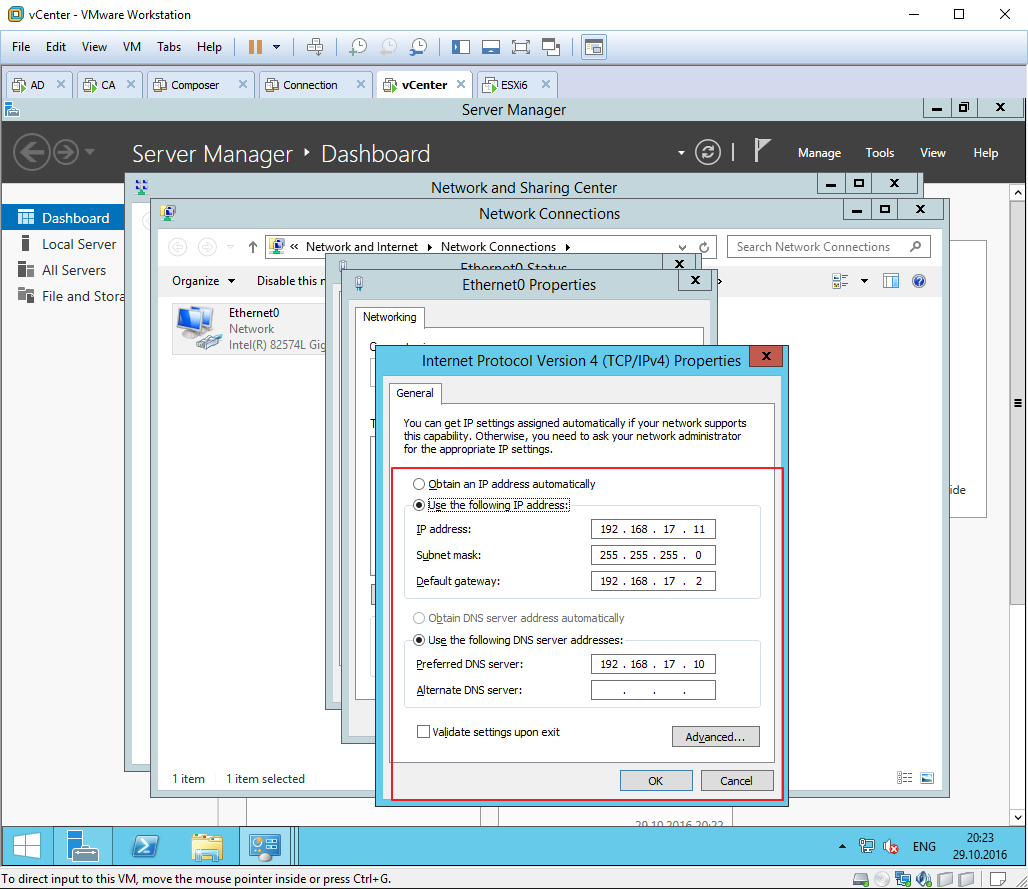
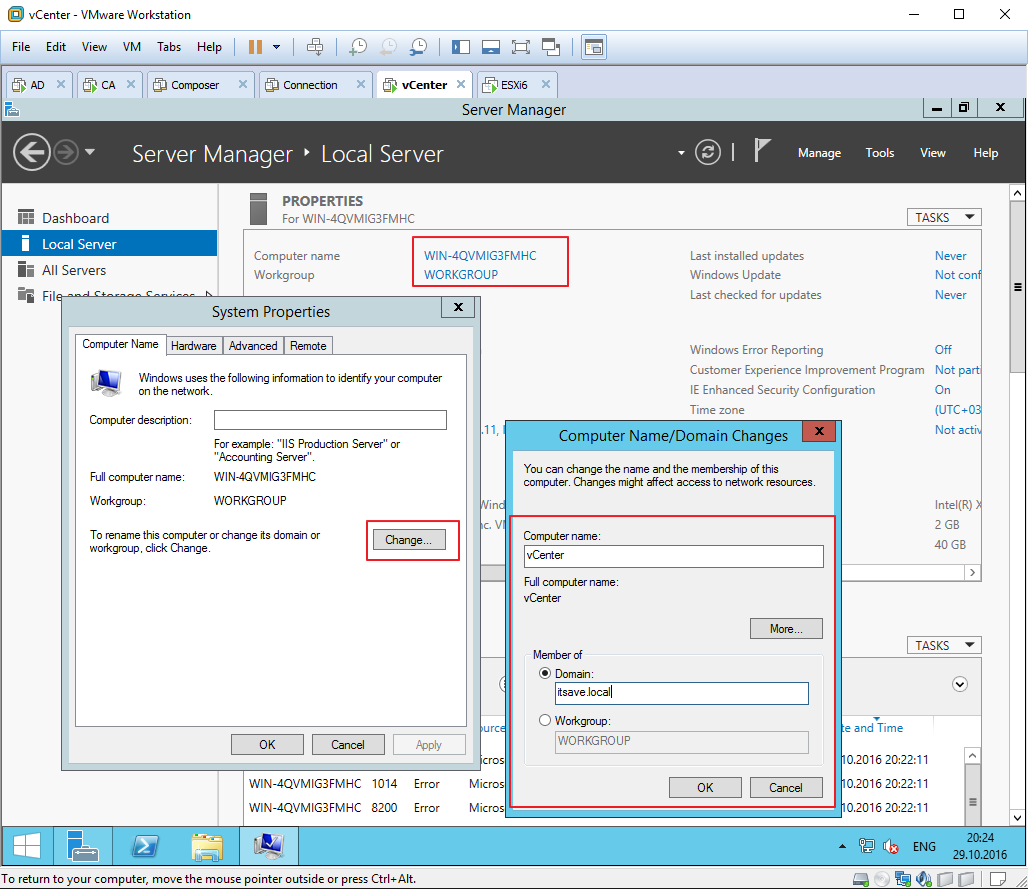
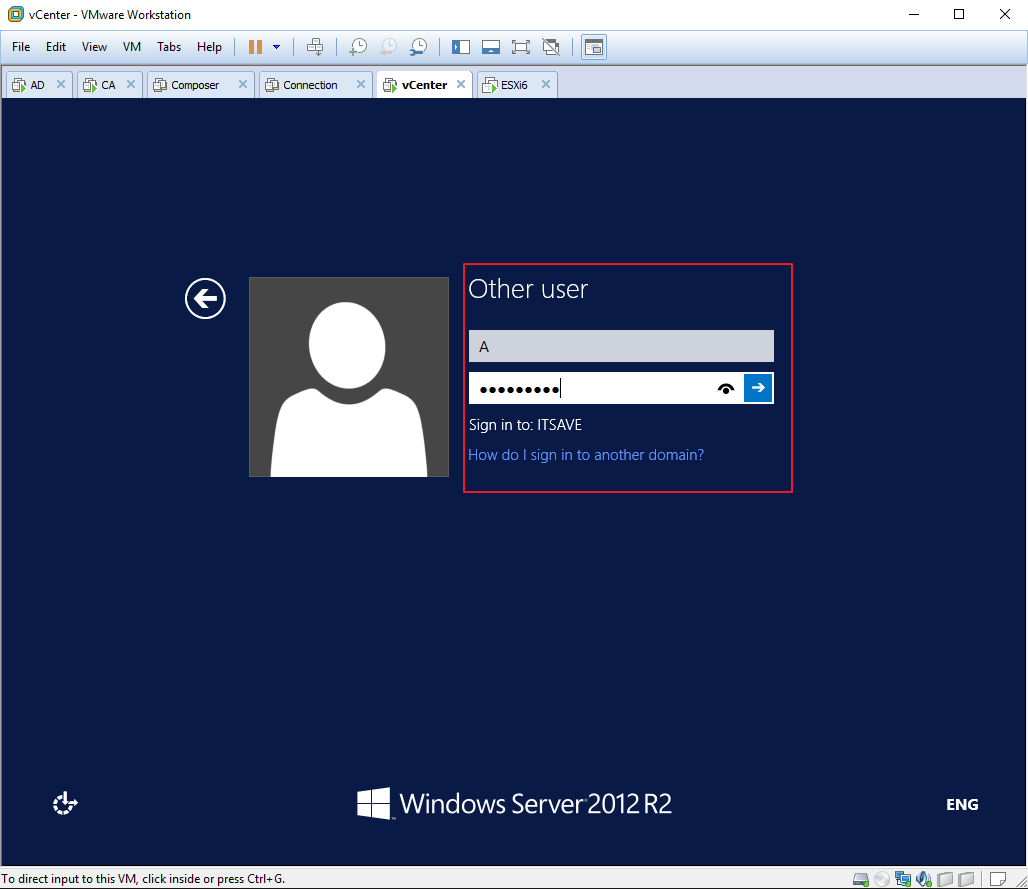
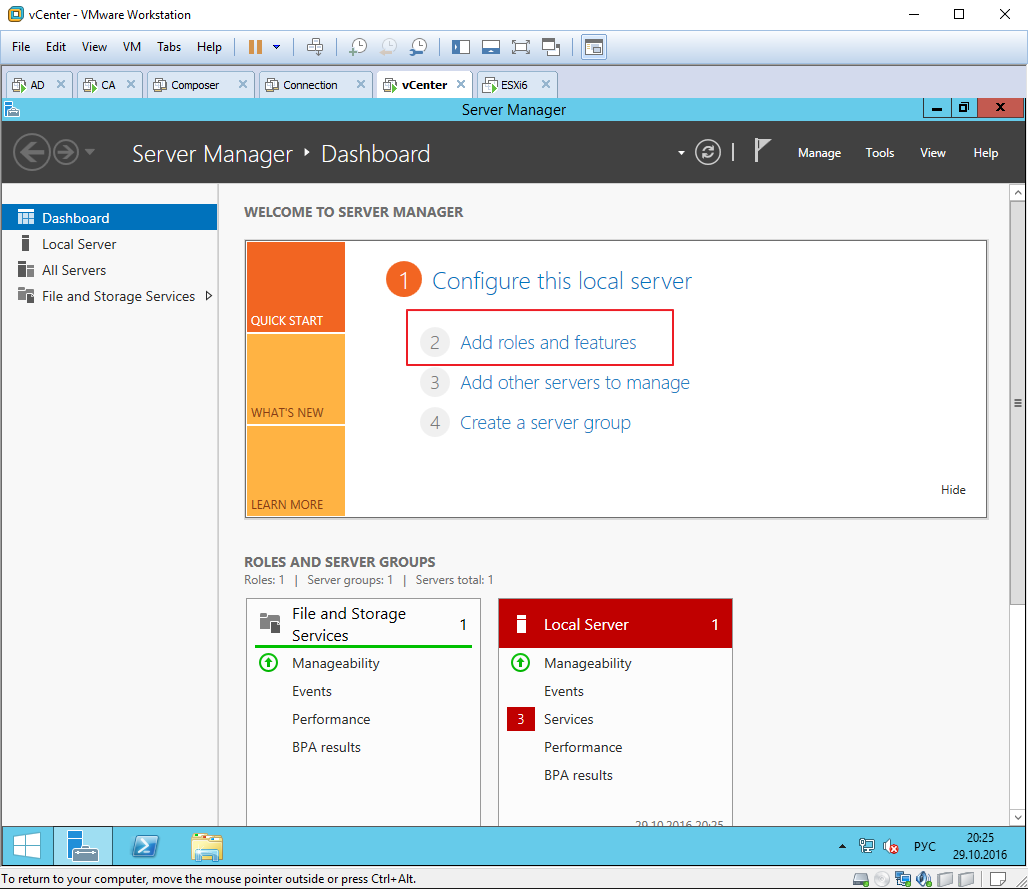
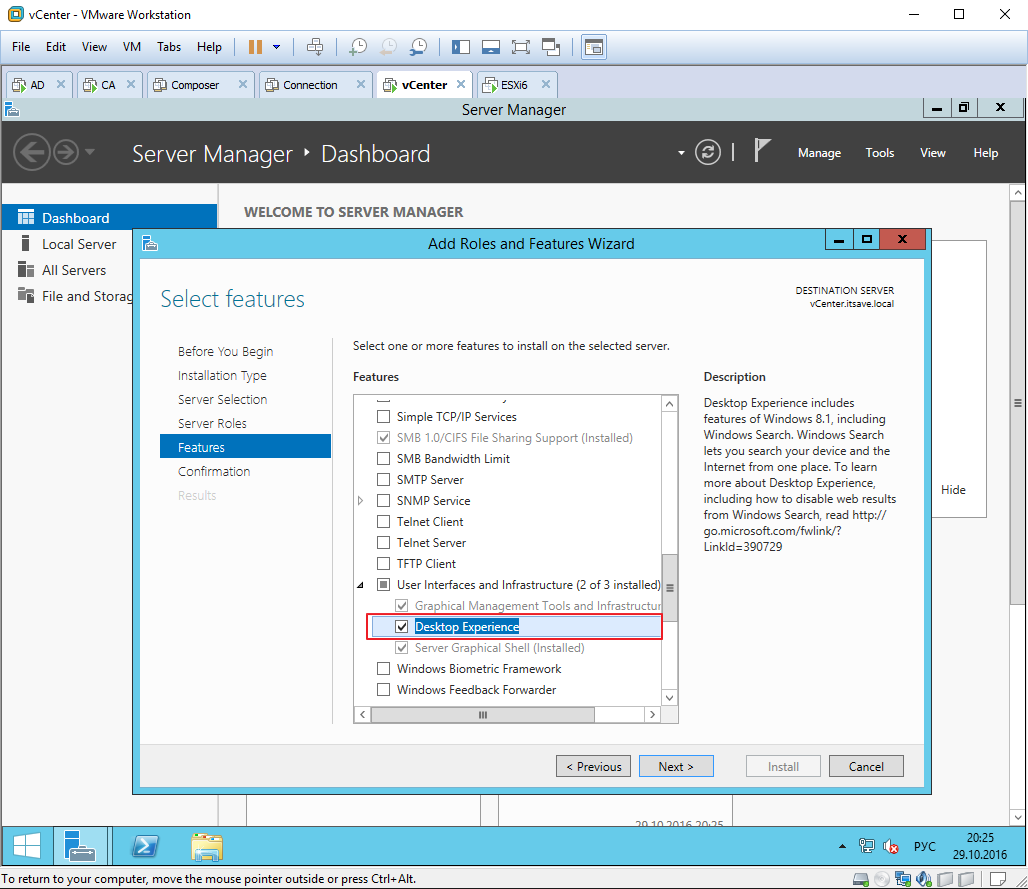
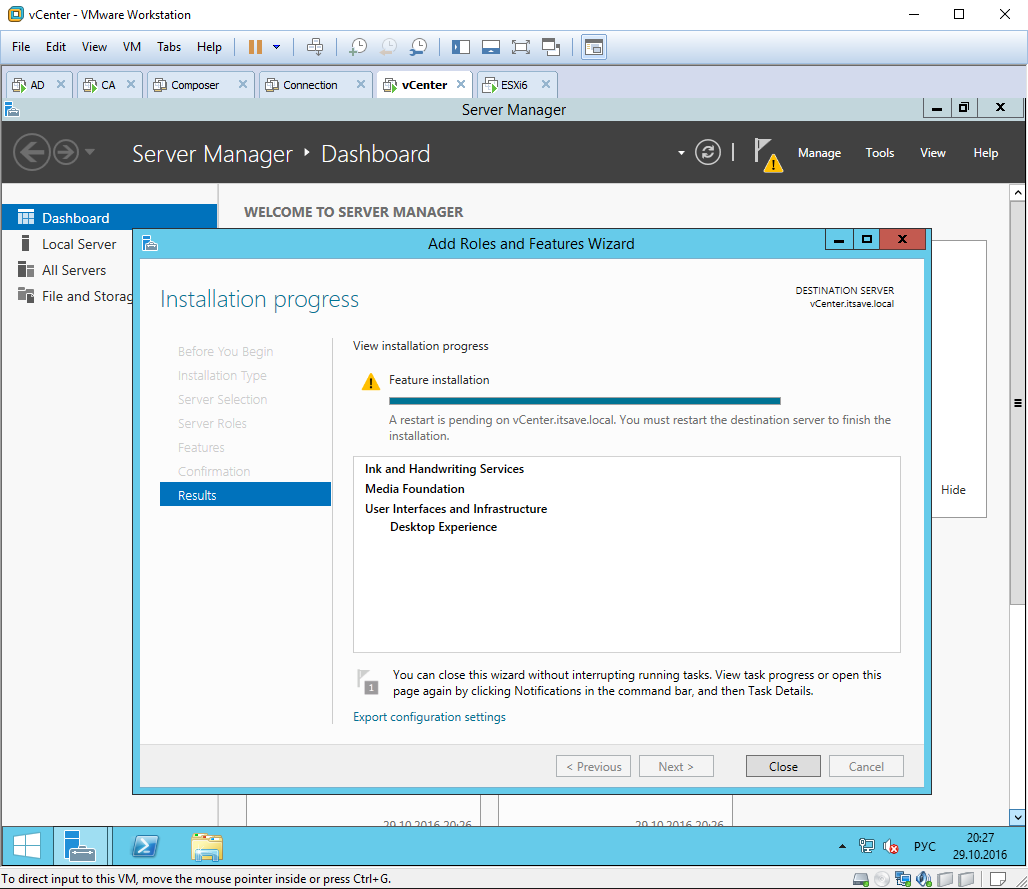
1 -6 Из шаблона развернута операционная система Windows server 2012 R2. На нее уже установлены последние обновления и .NET 3.5 В сетевых настройках рекомендуется прописать статический IP адрес, после чего машина вводится в домен itsave.local Для работы с уже установленным vCenter server через Web консоль управления потребуется браузер с поддержкой Adobe Flash. По умолчанию Windows server 2012 R2 в IE 11 не поддерживает Flash, чтобы это исправить нужно установить компонент «Desktop Experience»
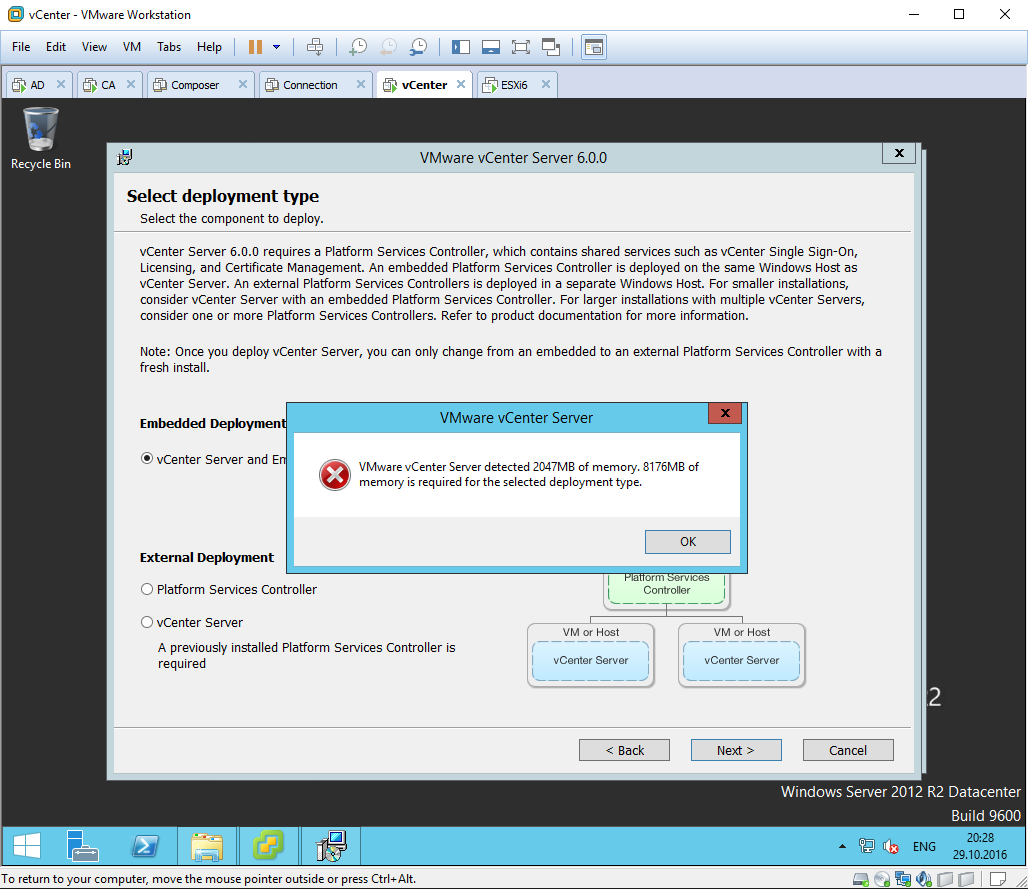
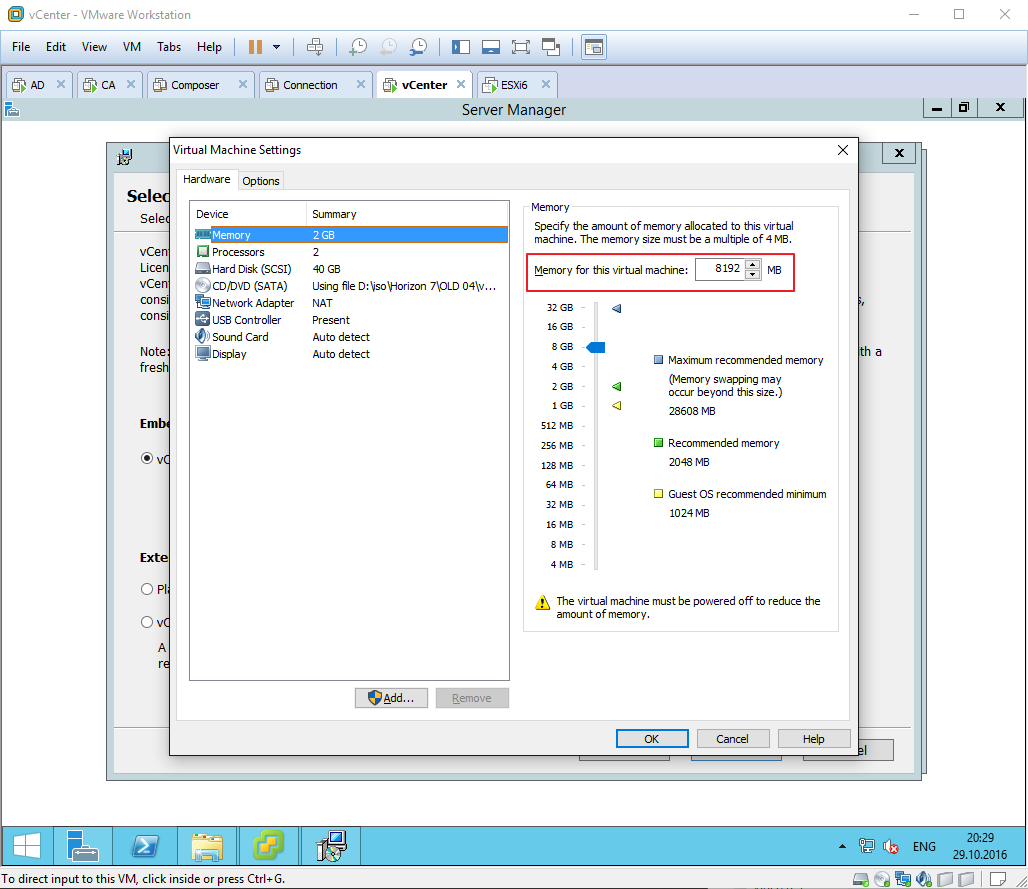
7 — 16 Можно приступать к установке vCenter server 6.0.0 Для этого к виртуальной машине монтирую установочный дистрибутив, скачанный с официального сайта VMware. Критичным для установки является объем оперативной памяти, — не менее 8 Гб ОЗУ. В противном случае продолжить установку законным способом не получится.
Для тех, кто переходит на 6-ую версию VMware vSphere будет любопытно узнать, что по умолчанию для vCenter server используется база данных Posgres SQL, причем как для Linux версии vCenter, так и для Windows. Теперь сервисы vCenter server разделены на 2 основные части: Platform Services Controller и vCenter Server. Эти части можно разделять, разносить по разным виртуальным, создавать отказоустойчивые кластеры, что актуально для больших распределенных инфраструктур.
В Platform Service Controller есть служба единого входа Single Sign-On, которая позволяет для учетной записи внутреннего домена (по умолчанию vsphere.local) давать доступ к различным сервисам vSphere. На этапе первоначальной установки необходимо задать пароль для учетной записи administrator@vsphere.local, у которой будут глобальные неограниченные права на доступ.
17 — После установки vCenter server можно поставить «толстый» vSphere client. Для привыкших к его интерфейсам администраторам, работать в нем намного проще, чем в Web клиенте. Особенно удобно реализована в толстом клиенте консоль подключения к виртуальной машине.
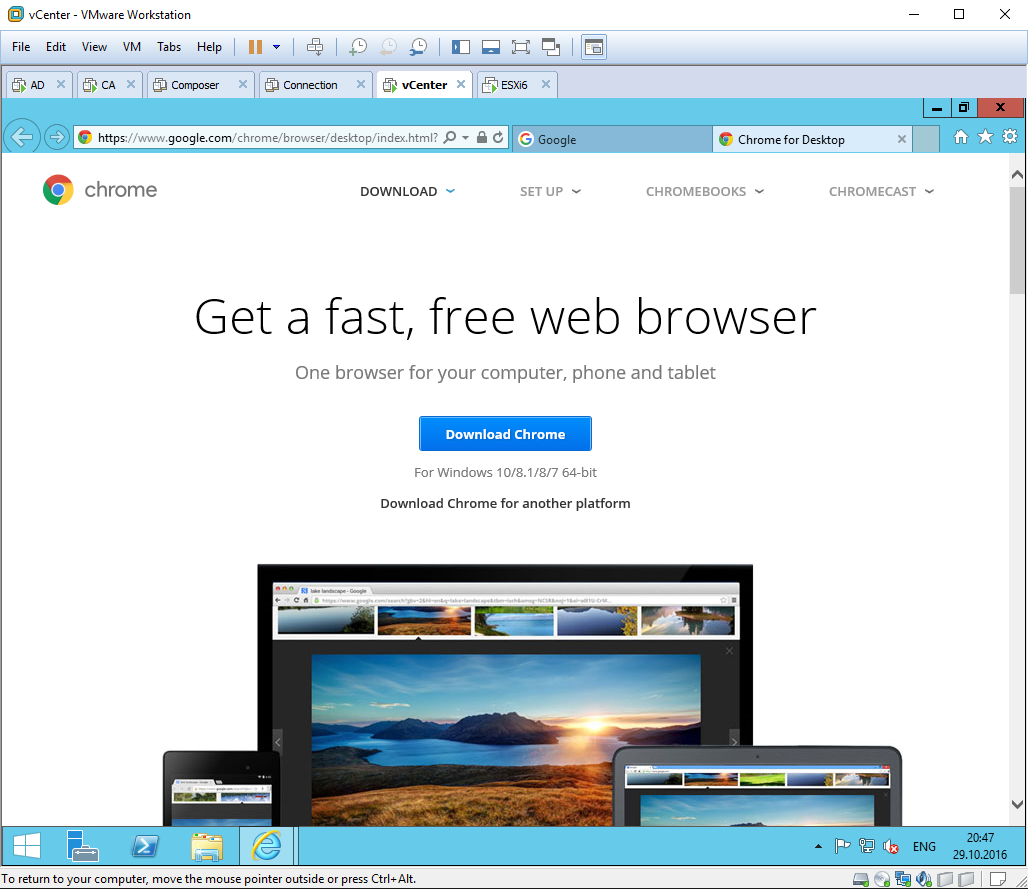
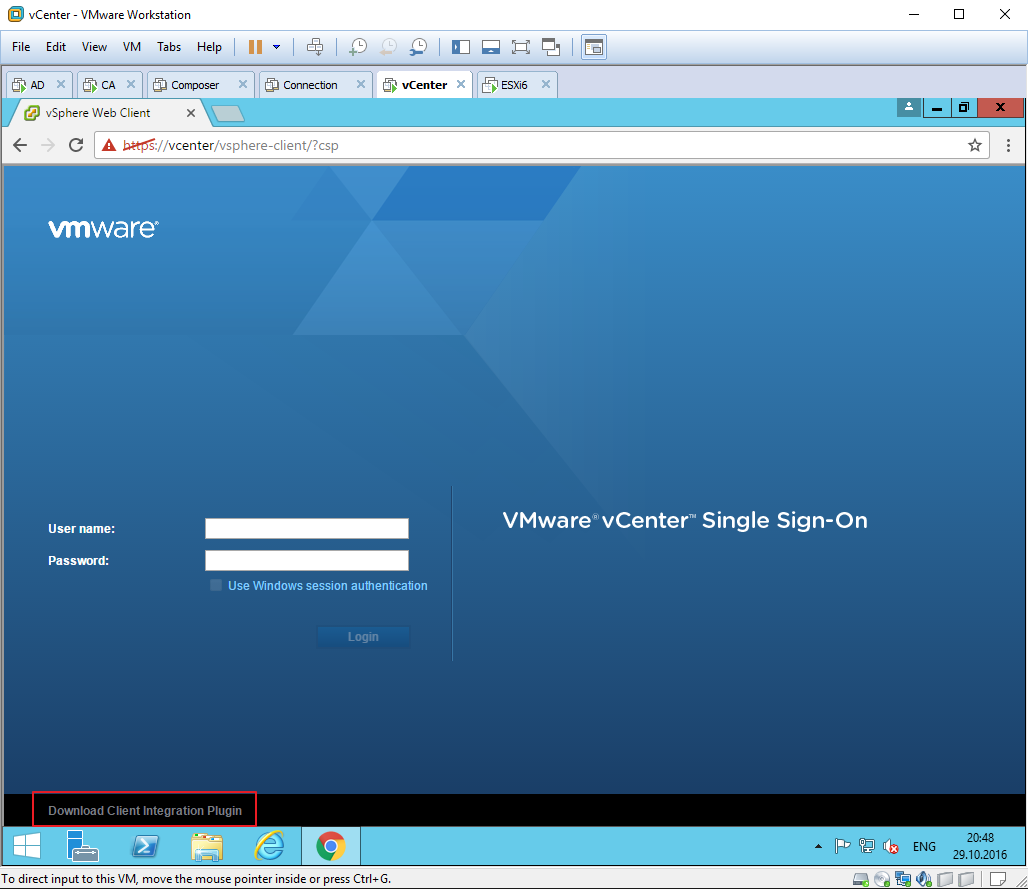
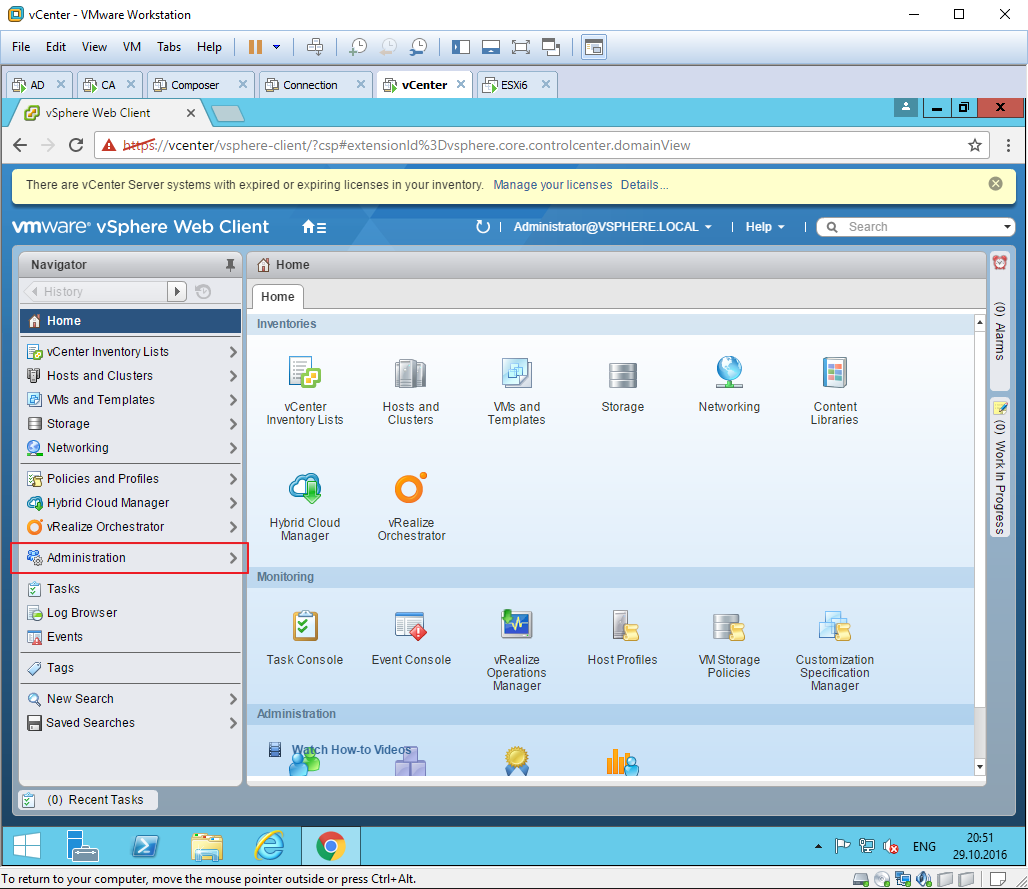
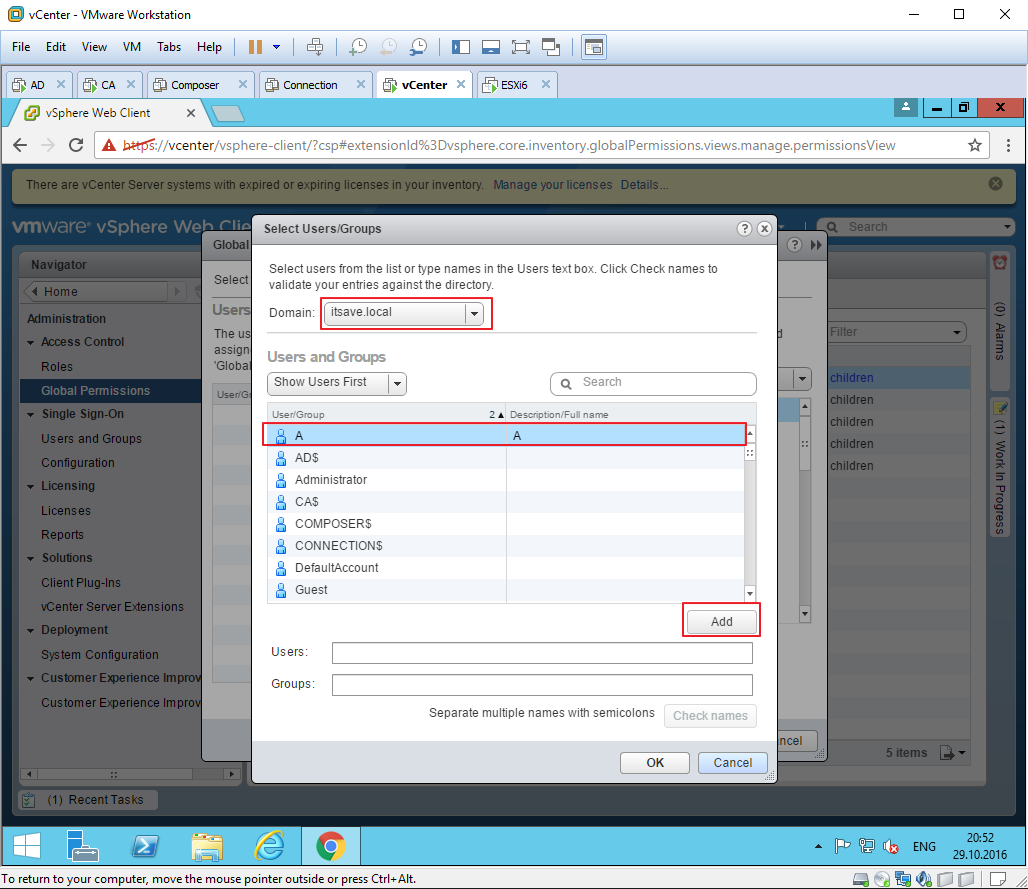
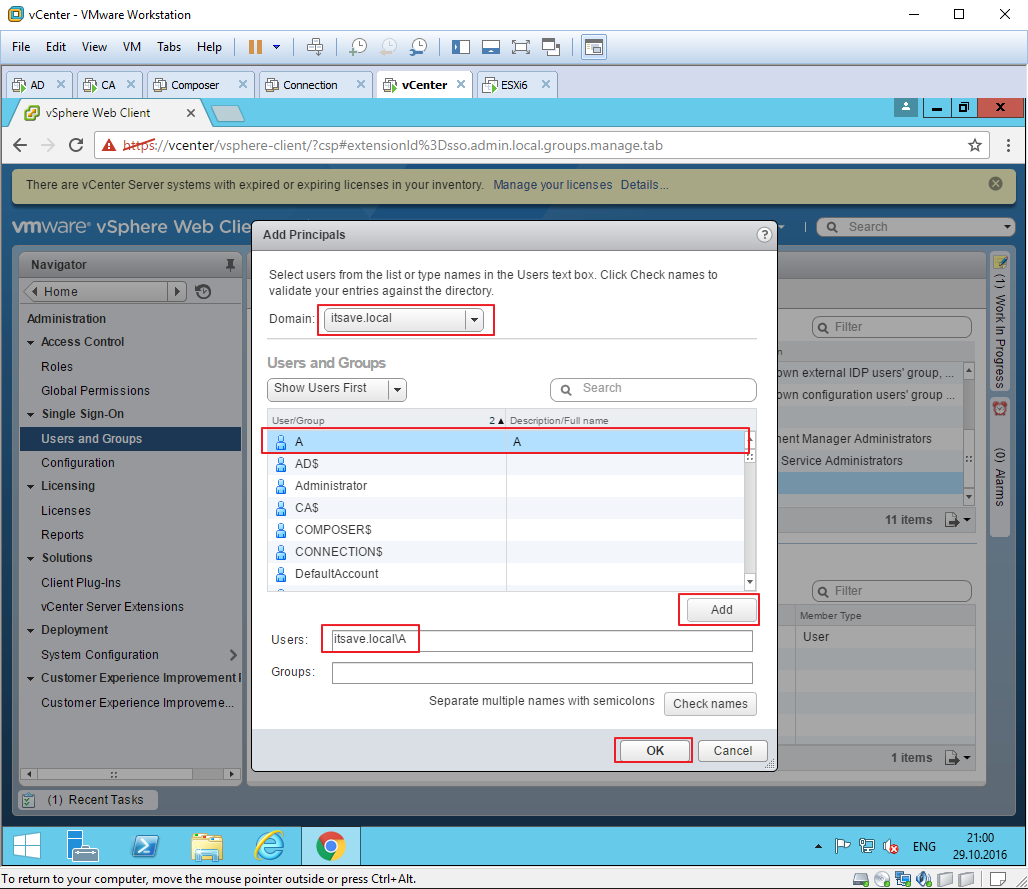
18 — 33 Первая задача дать права администратора доменной учетной записи a@itsave.local . Internet Explorer так и не дал мне доступ к Web клиенту vSphere, поэтому в пару кликов устанавливаю Google Chrome и перехожу по адресу https://vcenter.itsave.local/vsphere-client
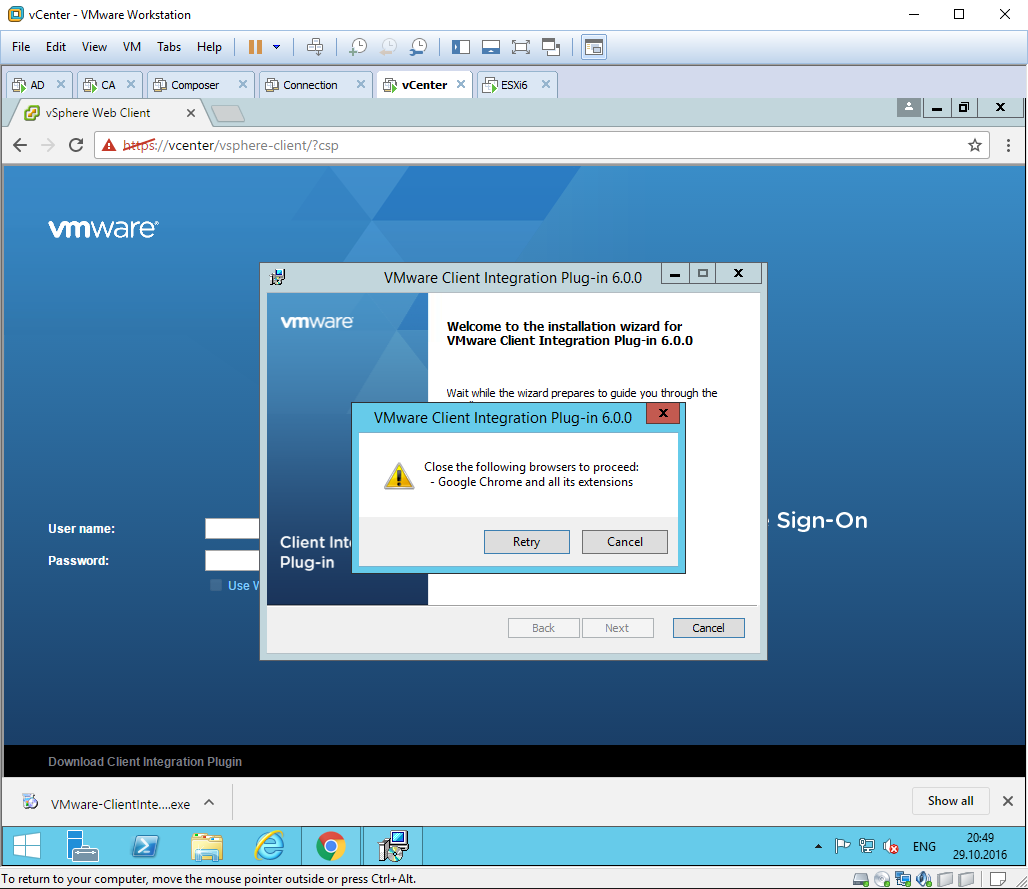
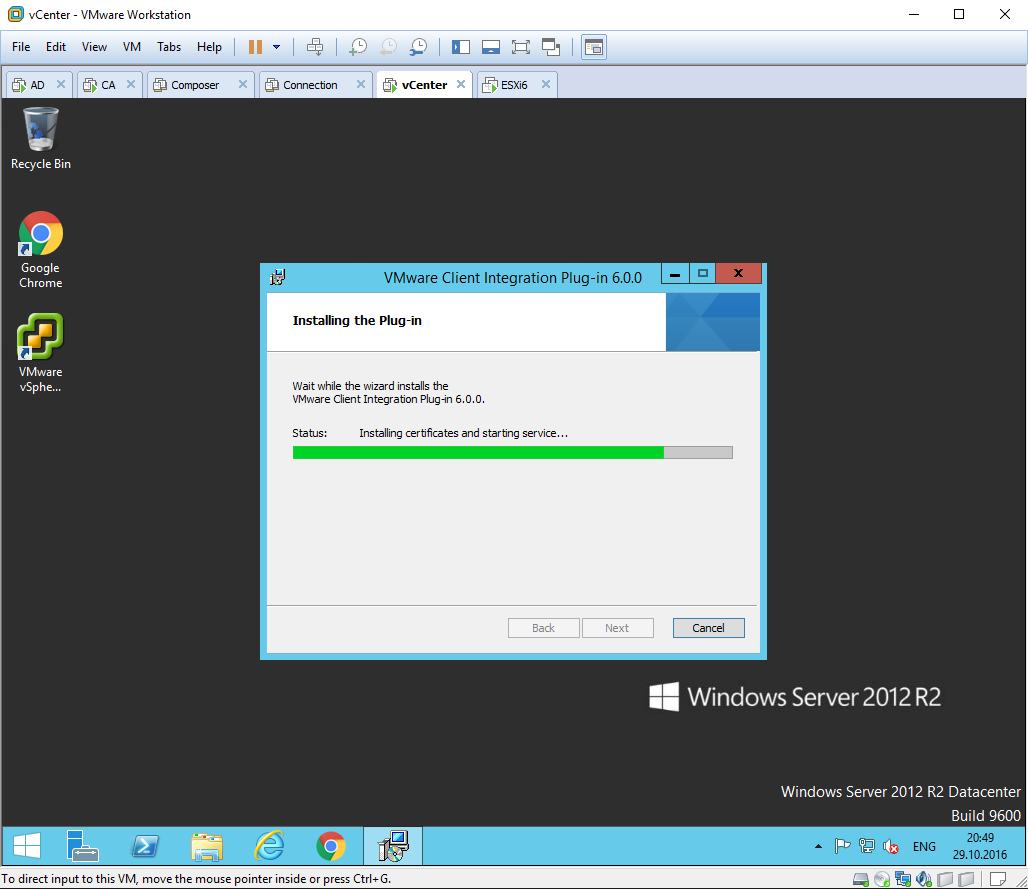
Для получения всех возможностей от работы с Web клиентом необходимо установить VMware Client Integration Plugin. Например, он нужен для того, чтобы иметь возможность передавать файлы на datastore с локального компьютера.
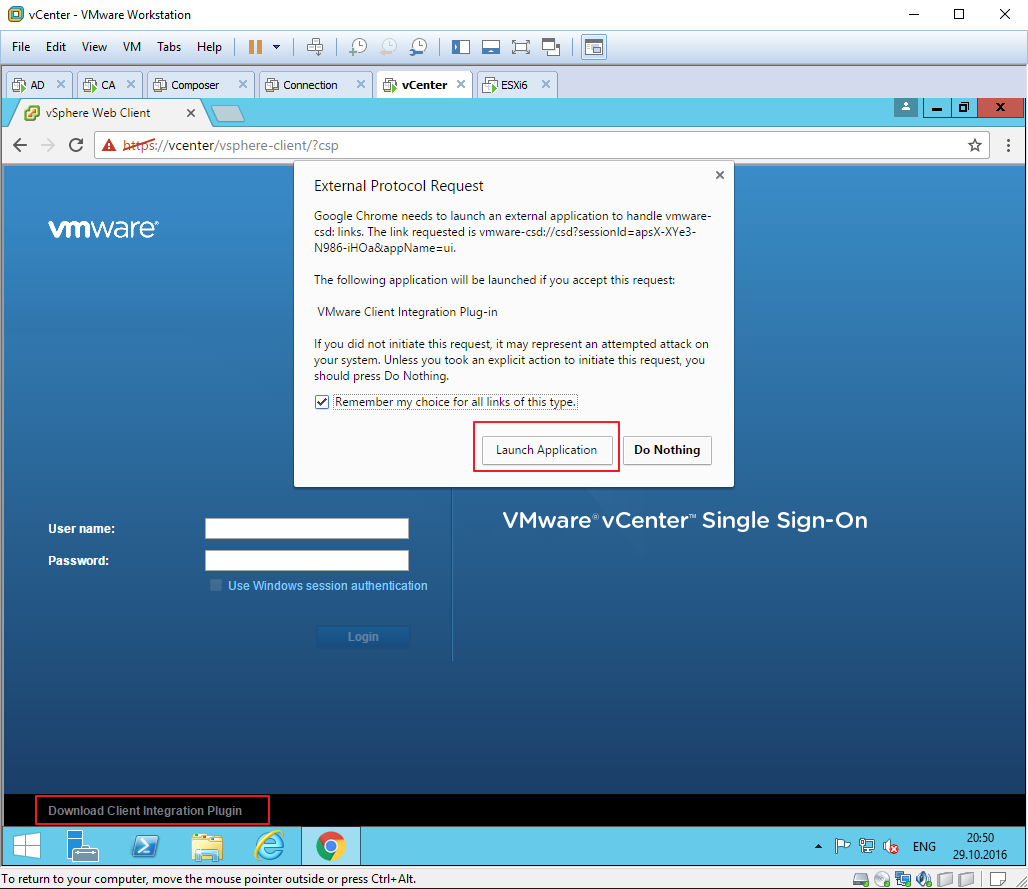
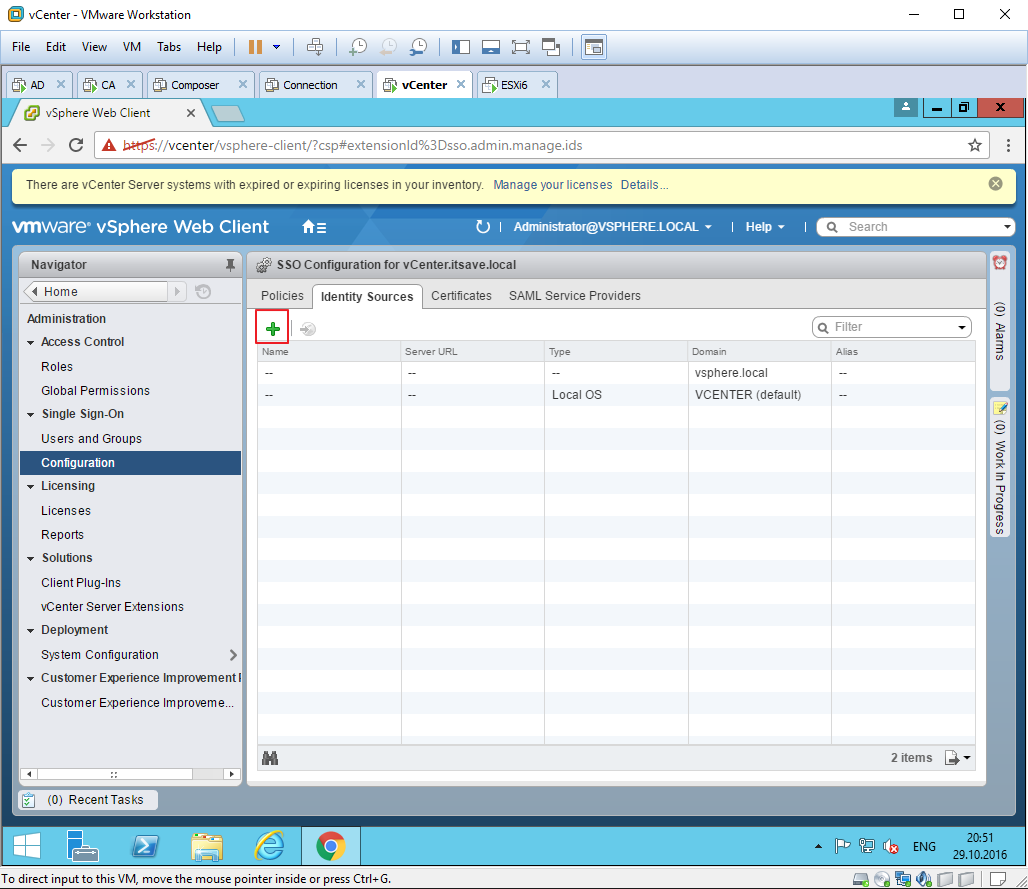
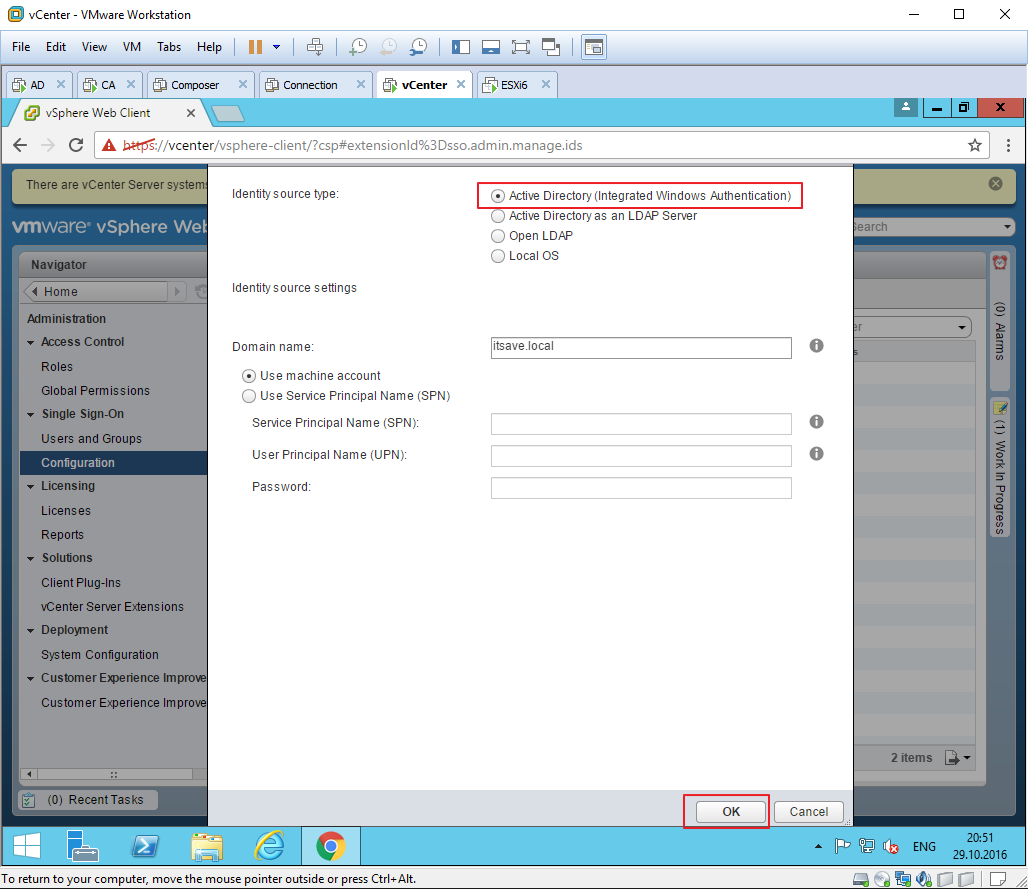
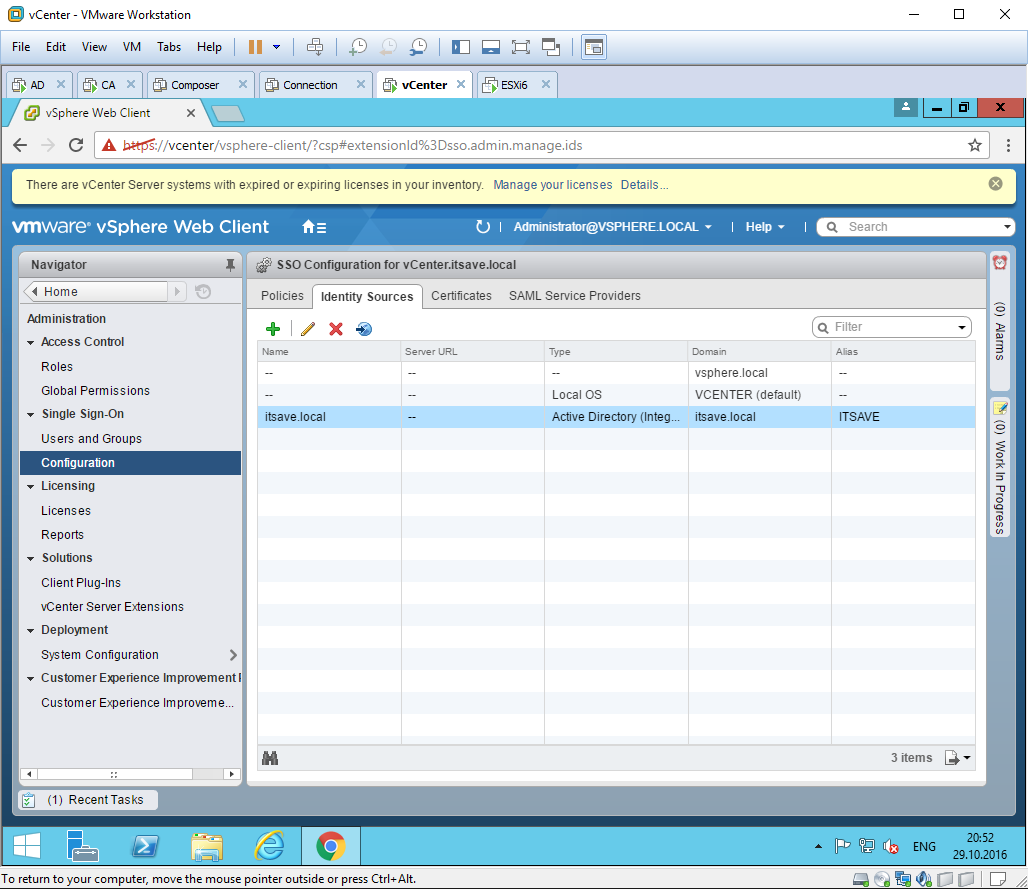
После установки плагина, входим под учетной записью administrator@vsphere.local В левом меню выбираем пункт Administration -> Configuration -> Identity Sources Для добавления домена itsave.local в качестве источника учетных записей, жмем на зеленый плюс.
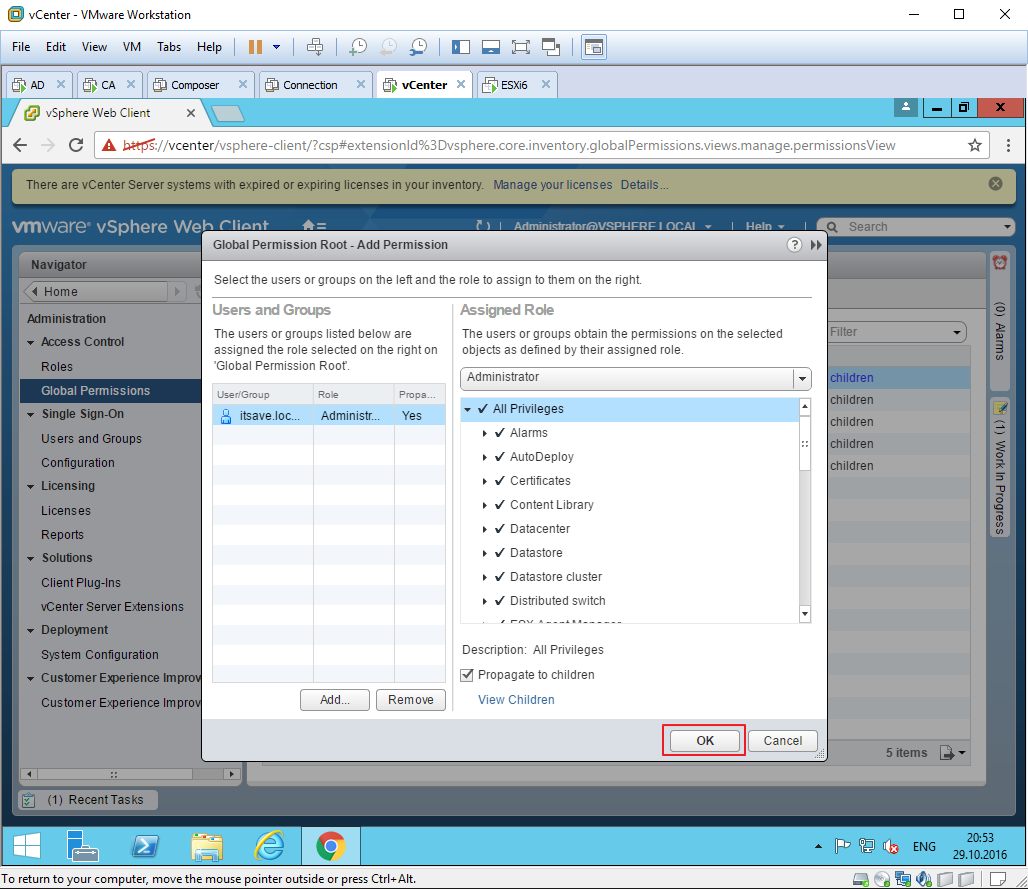
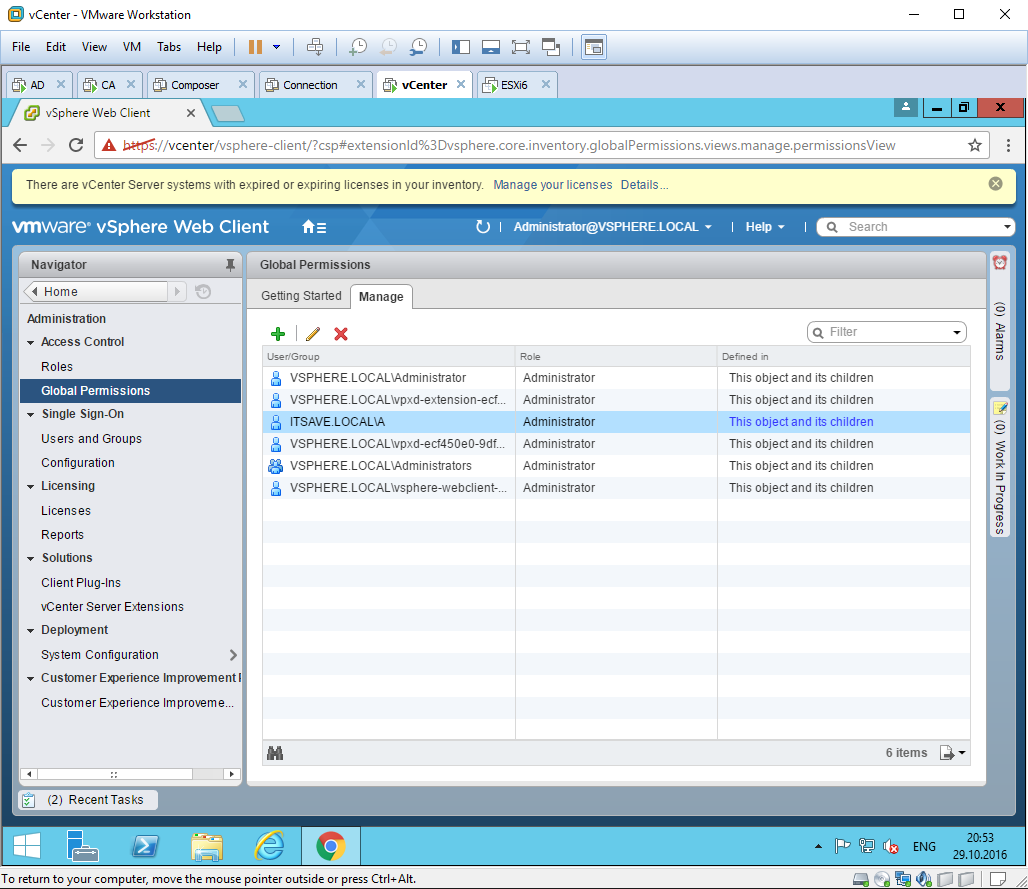
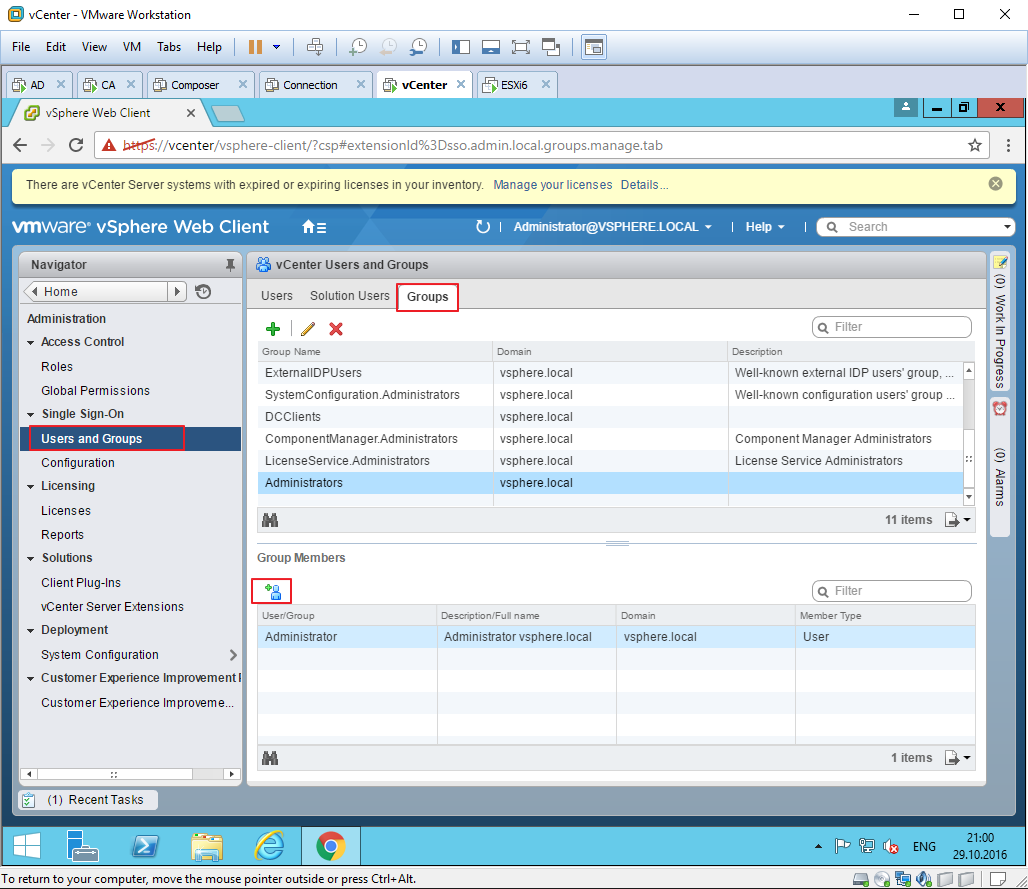
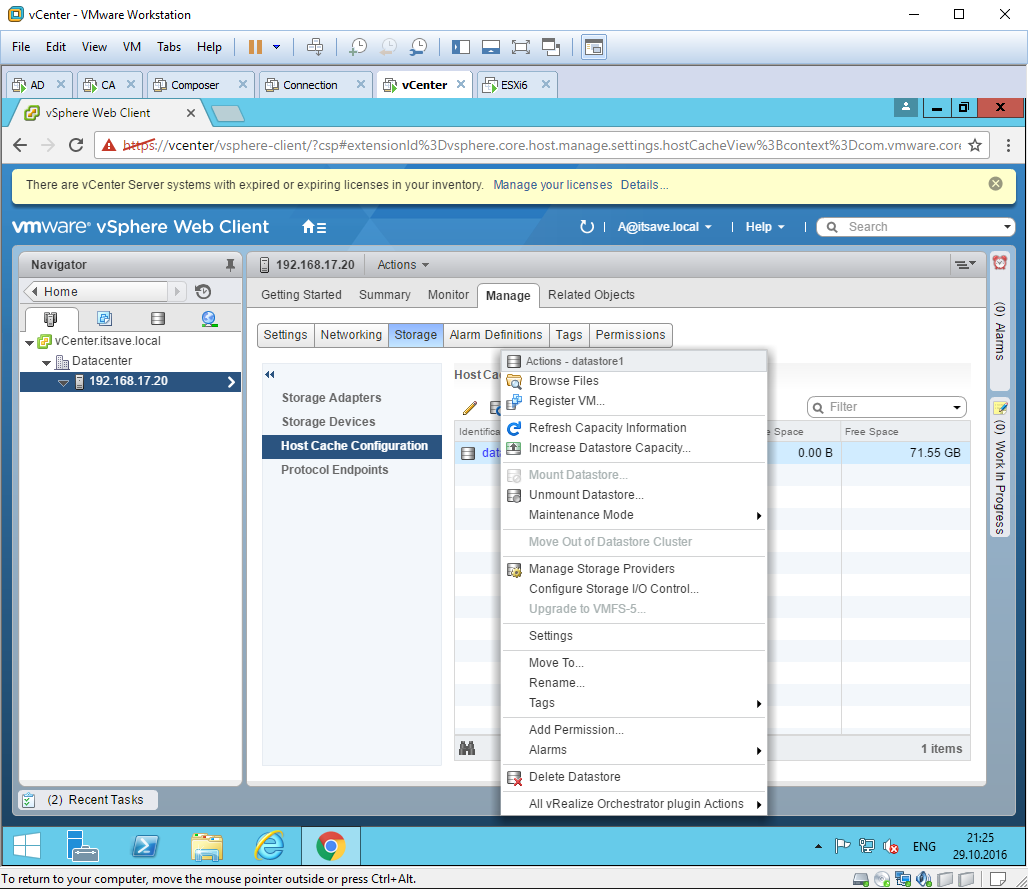
После чего даю учетной записи доменного администратора роль глобального администратора vsphere.local и администратора vCenter server.
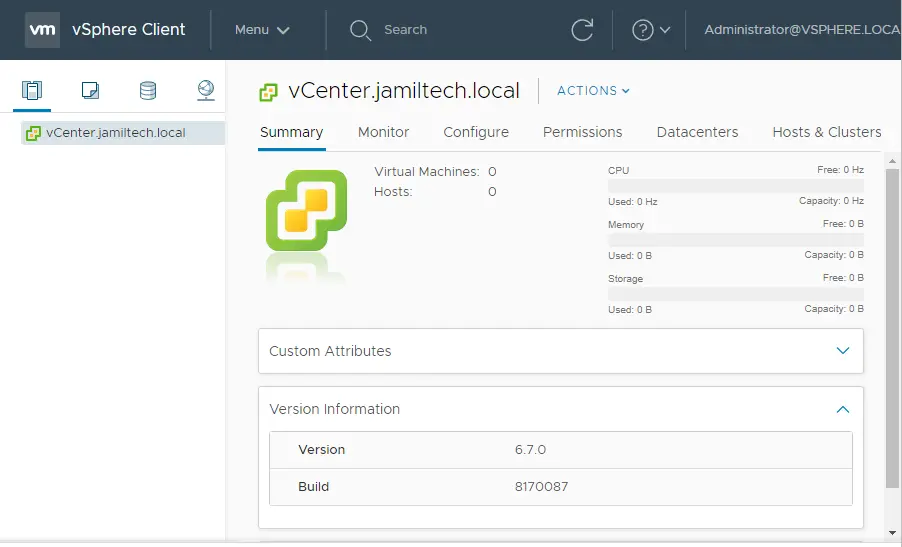
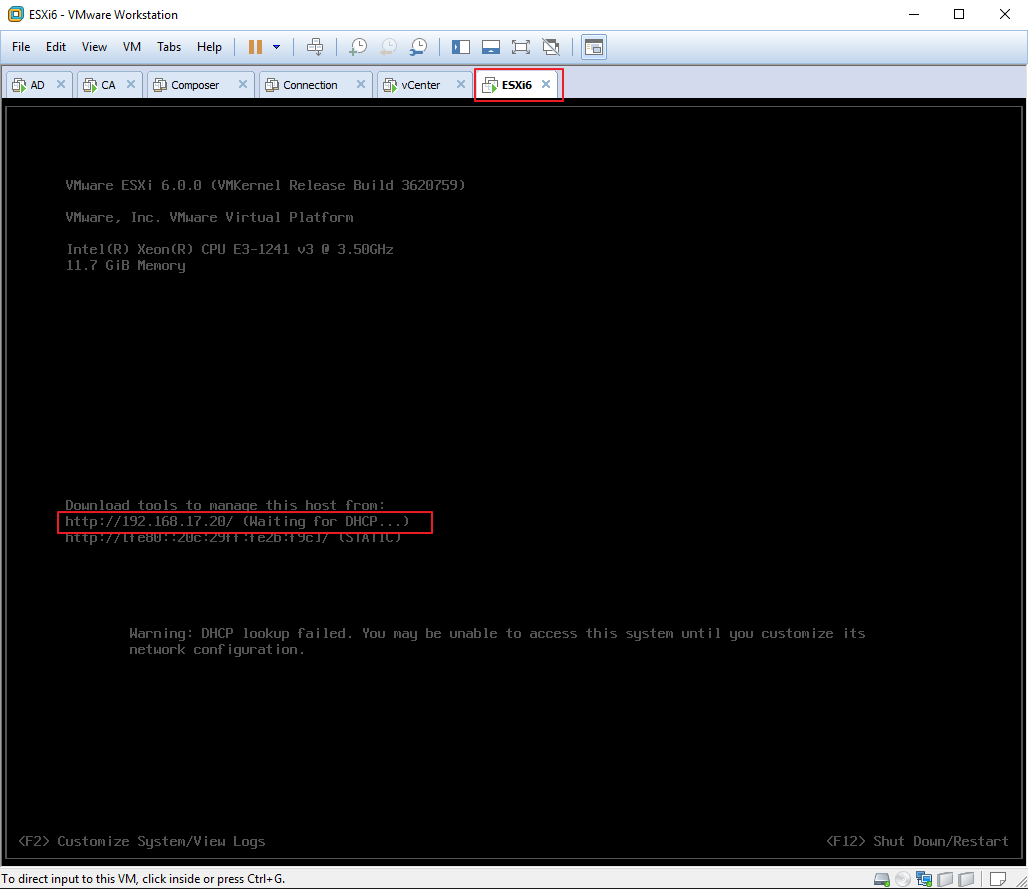
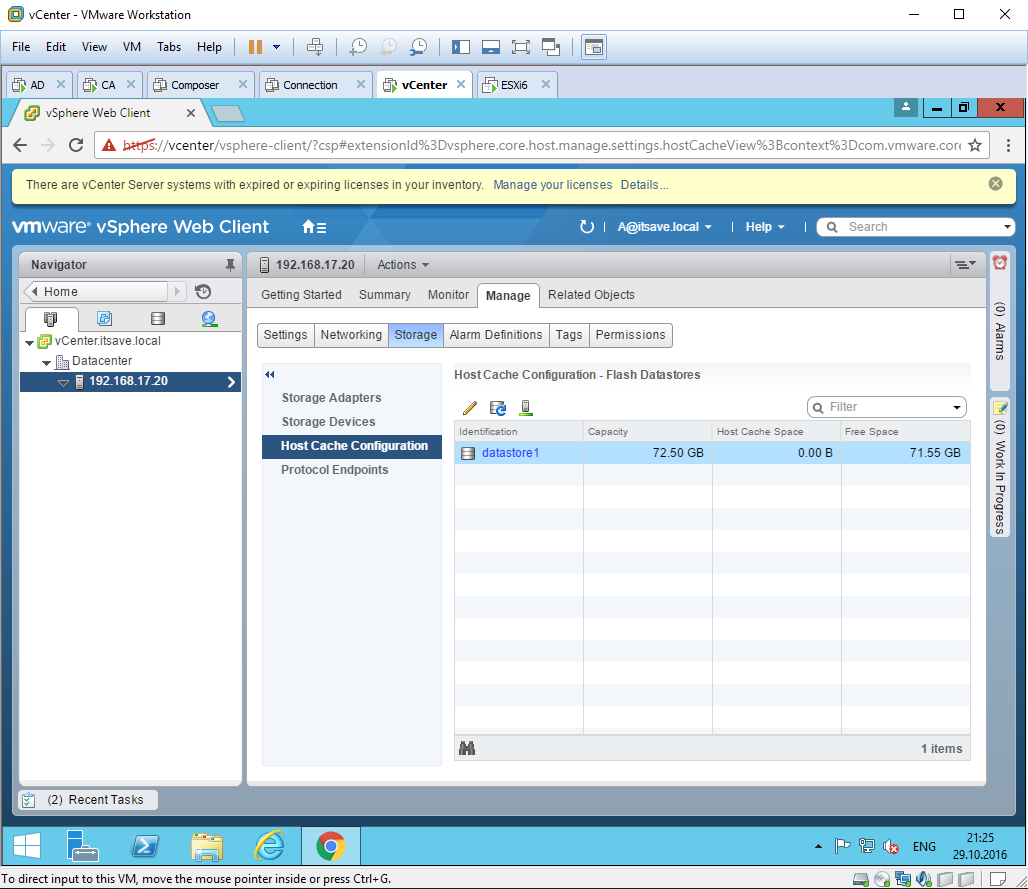
34 — 47 Логинимся под доменным администратором в vCenter serever. Добавляем хост ESXi через пункт меню Hosts and Clusters. Проверяю, что на хосте ESXi доступны 4 виртуальных ядра процессора, 12Gb оперативной памяти и локальное хранилище на 71Gb
1
2
3
4
5
6
7
8
9
10
11
12
13
14
15
16
17
18
19
20
21
22
23

24
25
26
27
28

29
30
31
32
33
34
35

36
37
38
39
40
41
42
43
44
45

46
47
,
This tutorial contains step by step instructions on how to install VMware vCenter Server v6.7 on Windows. Before, you continue to install vCenter for Windows, it is essential to understand the requirements, options, and the steps necessary to ensure successful deployment of vCenter server on Windows.
The two core components in any VMware vSphere infrastructure are VMware vSphere ESXi and VMware vSphere vCenter server. ESXi provides a layer of virtualization that abstract the physical server’s hardware resources like the CPU, memory, network, and storage, and allocates them to multiple virtual machines. It provides capabilities of creating and running virtual machines and virtual appliances. VMware vCenter Server is a tool that allows you to manage all your ESXi hosts and their respective virtual machines from a central location.
There are two deployment options for vCenter Center supported by VMware. The first one is installing vCenter Server on a Windows virtual or physical machine, and the second one is deploying the Linux vCenter Server Appliance (VCSA) on ESXi host.
In this article, we will mention all the steps you need to follow, to successfully install vCenter Server on a Windows Server.
About the vCenter Server on Windows
The vCenter Server installed on Windows Server was the first and only deployment option available for the vCenter server until the Linux appliance was introduced.
VMware has however made a lot of enhancements on the VCSA and recommends migrating any vCenter Server Windows installation to the Linux VCSA. VMware also recently announced that vCenter version 6.7 would be the last version of vCenter on windows and any new features will only be released on the VCSA.
vCenter Server on Windows pre-installation considerations.
Before installing the vCenter server, you will need to have the following minimum requirements covered:
- A 64-bit Windows Server 2008 service pack 2 operating system and above.
- The system you are installing the vCenter server on, should not be an Active Directory Domain controller.
- There are three database options supported:
- PostgreSQL database which is bundled with the installer.
- Microsoft SQL Server 2008 R2 SP2 database and above.
- Oracle 11g or 12c database.
- Synchronize the clocks for all the vSphere components, including the windows virtual machine you will be using. An NTP server is recommended for this.
- Review the hardware requirements for vCenter Server and Platform Services Controller on Windows.
- Review the storage requirements.
- The windows server must have the most recent patches and updates. You can review the software requirements for vCenter Server and Platform Services Controller on Windows here.
- If you plan to run the vCenter Server services with a user that is not the local system account, then it has to be a member of the administrator’s group.
- A pre-install check runs when you start the installer to ensure that all the requirements have been met for the installer to complete successfully. If any of the conditions have not been met, then you will not be able to do the installation until the issue is resolved.
It is highly recommended to visit VMware Compatibility Guide for a more comprehensive link of all supported options.
How to install vCenter Server 6.7 on Windows.
1. Download the vCenter Server 6.7 ISO image file from the VMware product download website.
2. When the download is completed, mount the ISO file on the Windows server you will be using for the installation.
3. Right-click at autorun.exe (located on the root directory of the ISO image) and run as administrator.
4. The VMware vCenter Server for Windows installation wizard, will start. Click Install.

5. At «Welcome to VMware vCenter Server 6.7 installer» window, click Next.

6. Accept the terms of the license agreement and then click Next to continue with the installation.

7. At the next screen you ‘ll be prompted to choose between the Embedded Platform Services Controller Deployment Model and the External Platform Services Controller Deployment Model. Leave the default option and click Next. *
* Note: We are using the embedded option in our guide. If you wish to use the external option, then the PSC must be deployed before installing the vCenter Server.

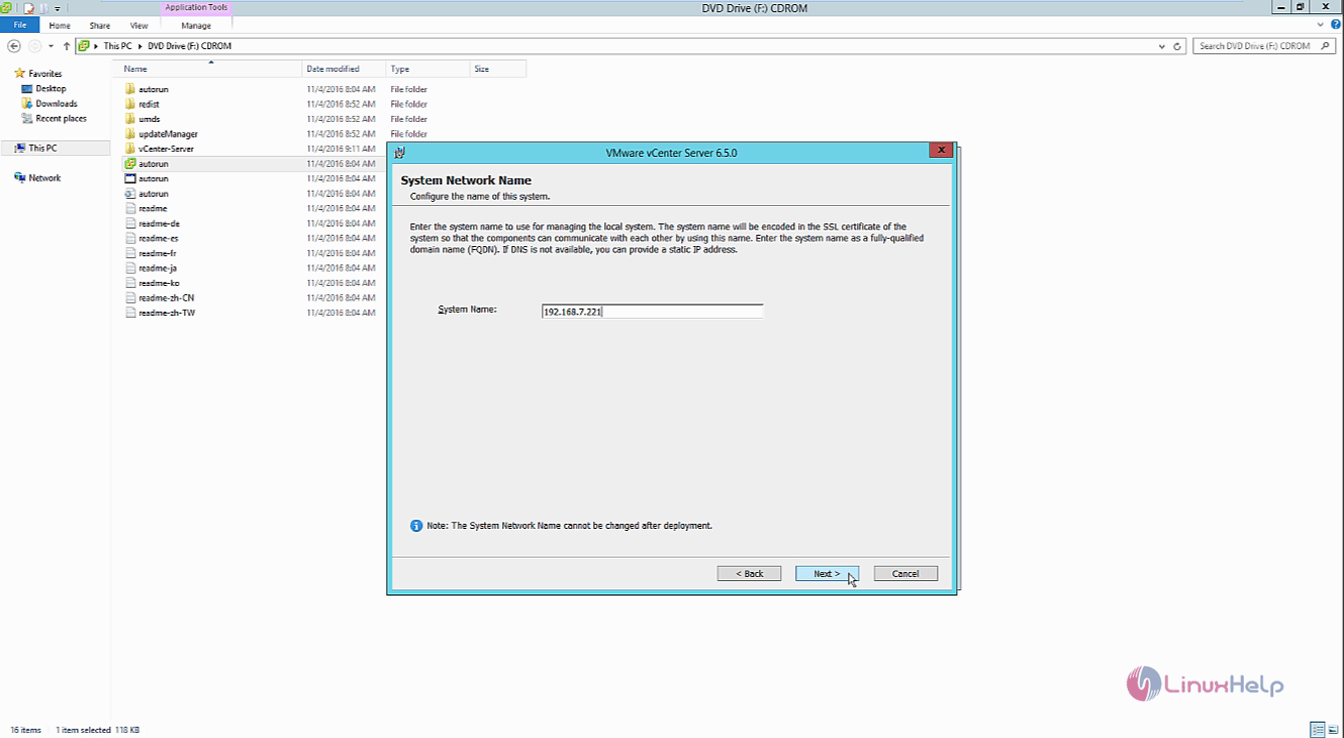
8. Type the IP Address or the FQDN of your vCenter Server in the System Name field. *
* Note: The value configured here is permanent, and you will not be able to change it after the installation.

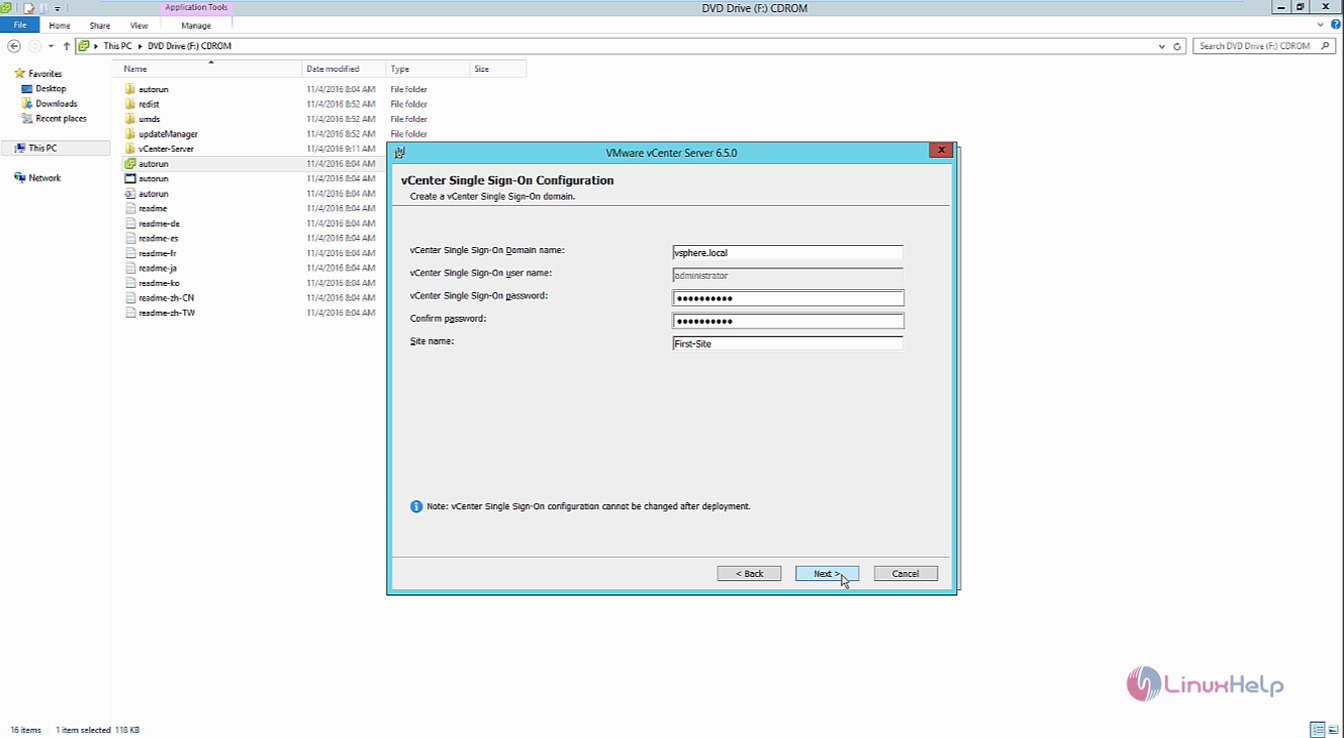
9. At «vCenter Simple Sign-On Configuration» settings: *
a. At «vCenter Single Sign-on Domain Name»: type your existing SSO Domain name or create a new domain, or leave the default SSO Domain which is the «vsphere.local».
b. Enter the SSO username, password, and leave the default site name.
c. Click Next to continue.
* Note: the SSO configuration cannot be changed after the installation.

10. At the next screen, leave the default setting, to use the «Windows Local System Account» to start the vCenter Server instance, and click Next.

11. At the next screen, we are going to configure a database to be used for our vCenter server instance. At this point, select «Use the embedded VMware Postgres», or, give the details of the external database,) and click Next.

13. At «Configure ports» settings, leave the default port configuration, or change the default values according your choice, and click Next.

14. Leave the default destination directory, (or click ‘Change’ to specify a different destination directory), for installing the vCenter services, and click Next to continue.

15. Select the corresponding checkbox, if you want to «Join the Customer Experience Improvement Program» and then click Next to continue.

16. Review all the configured settings and if everything is okay, click Install.

17. Once the installation completes, you can Launch the vSphere Web Client immediately, or click Finish to close the installer.

18. Once the setup is complete, you can log in to your new vCenter server from a web browser of your choice, by typing its IP address or the DNS name. *
* Note: By default, you will get a 60-day evaluation period for vCenter. After that, you will need to buy a license in order to use the vCenter server.

That’s it! Let me know if this guide has helped you by leaving your comment about your experience. Please like and share this guide to help others.
If this article was useful for you, please consider supporting us by making a donation. Even $1 can a make a huge difference for us in our effort to continue to help others while keeping this site free:
- Author
- Recent Posts
Konstantinos is the founder and administrator of Wintips.org. Since 1995 he works and provides IT support as a computer and network expert to individuals and large companies. He is specialized in solving problems related to Windows or other Microsoft products (Windows Server, Office, Microsoft 365, etc.).
VMware vSphere 6.5 and 6.7 reaches end of general support 15 October 2022, both referenced in the VMware Lifecycle Matrix. See also How to Install vSphere 7.0. Upgrade to vSphere 7 can be achieved directly from vSphere 6.5.0 and above, for more information see the VMware Upgrade Matrix. Finally, the Windows vCenter Server and external PSC deployment models are now depreciated and not available with vSphere 7.0.
VMware vCenter Server pools ESXi host resources to provide a rich feature set delivering high availability and fault tolerance to virtual machines. The vCenter Server is a centralised management application and can be deployed as a virtual appliance or Windows machine. It should be noted that vCenter 6.7 is the final release where Windows modules will be available, see here for more information. All future releases will only be available in VCSA form, if you have not already started planning migration to VCSA see vCenter Server Appliance 6.7 Install Guide and Migrating Windows vCenter Server to VCSA 6.7. This post gives a walk through on a clean installation of vCenter Server 6.7 on Windows Server 2016.
vCenter 6.7: Download | Release Notes | What’s New | VMware Docs | vSphere Central
Software Considerations
- The operating system should be 64 bit and Windows Server 2008 SP2 or above.
- For environments with up to 20 hosts and 200 VMs the bundled internal PostgreSQL database can be used.
- If an external database is used it should be Microsoft SQL Server 2008 R2 SP2 or above, or Oracle 11g or 12c. You can review a full list of compatible versions at the Database Interoperability Matrix.
- The account used for external database authentication requires Oracle DBA role, or SQL sysadmin server role, or db_owner fixed database role. For a full list of explicit permissions review the Database Permission Requirements.
- You must check compatibility of any third party products and plugins that might be used for backups, anti-virus, monitoring, etc. as these may need upgrading for vSphere 6.7 compatibility.
- Any hosts you want to add to vCenter 6.7 should be running version 6.0 or above, 5.5 and earlier will not work and do not have a direct upgrade path to 6.7.
- To check version compatibility with other VMware products see the Product Interoperability Matrix.
- The points above are especially important since at the time of writing vSphere 6.7 is new enough that other VMware and third party products may not have released compatible versions. Verify before installing vSphere 6.7 and review the Release Notes and Important information before upgrading to vSphere 6.7 KB.
Architectural Considerations
- As noted above the Windows modules will not be included for future versions, therefore the recommended installation method for vCenter 6.7 is the vCenter Server Appliance (VCSA).
- When implementing a new vSphere 6.7 environment you should plan your topology in accordance with the VMware vCenter Server and Platform Services Controller Deployment Types.
- A series of videos covering vCenter Server and Platform Services Architecture can be found here. If you require further assistance with vCenter planning see also the vSphere Topology and Upgrade Planning Tool here,
- Most deployments will include the vCenter Server and PSC on one server, following the embedded deployment model, which I will use in this guide.
- Greenfield deployments of vSphere 6.7 can take advantage of Embedded PSC with Enhanced Linked Mode, providing native vCenter Server HA support, and removal of SSO site boundaries.
Hardware Considerations
- A Windows based vCenter Server can be installed on either a physical or virtual machine. Windows vCenter Server with embedded PSC requires the following hardware resources:
- Tiny (up to 10 hosts, 100 VMs) – 2 CPUs, 10 GB RAM.
- Small (up to 100 hosts, 1000 VMs) – 4 CPUs, 16 GB RAM.
- Medium (up to 400 hosts, 4000 VMs) – 8 CPUs, 24 GB RAM.
- Large (up to 1000 hosts, 10,000 VMs) – 16 CPUs, 32 GB RAM.
- X-Large (up to 2000 hosts, 35,000 VMs) – 24 CPUs, 48 GB RAM – new to v6.5.
- Where the PSC is deployed on a separate machine this requires 2 CPUs, 4 GB RAM.
- Environments with ESXi host(s) with more than 512 LUNs and 2048 paths should be sized large or x-large.
- The Windows vCenter Server requires the following free disk space for installation: (the first 2 may not necessarily be the system drive depending on installation location) Program Files 6 GB, Program Data 8 GB, System folder 3 GB. The PSC machine requires; Program Files 1 GB, Program Data 2 GB, System folder 1 GB.
- There are a number of Intel and AMD CPUs no longer supported with vSphere 6.7, review the Release Notes for a full list of unsupported processors.
Other Considerations
- It may be necessary to temporarily stop any third party software which could interfere with the installer, such as anti-virus scanner.
- If the vCenter Server services are running as a user other than the Local System account then the user must be a member of the administrators group and have the following permissions; log on as a service, act as part of the operating system.
- Verify that the local machine policy allows assigning Log on as a batch job rights to new local users.
- All vSphere components should be configured to use the same NTP server.
- FQDN resolution should be in place when deploying vCenter Server.
- A list of Required Ports for vCenter Server and PSC can be found here.
- The configuration maximums for vSphere 6.7 can be found here.
- In vSphere 6.7 TLS 1.2 is enabled by default. TLS 1.0 and TLS 1.1 are disabled by default, review the Release Notes for more information.
Create Data Source
Before beginning if you intend to use vCenter Server with an external SQL database you must configure a 64-bit ODBC data source for external databases. You may also need to install the Microsoft ODBC Driver for SQL Server. ODBC Data Source Administrator can be accessed via Control Panel > Administrative Tools. Click System DNS, Add and input the details for the external database, test the data source before continuing. If you are using the internal Postgres database then the System DSN is added automatically during installation.

Installation
Download the VMware vCenter Server and Modules for Windows ISO from VMware downloads: v6.7.0.
Mount the ISO and right click autorun.exe, select Run as administrator. The VMware vCenter Installer will open. Ensure vCenter Server for Windows is selected and click Install.

The vCenter Server 6.7 Installer will open in a separate window, click Next.

Accept the end user license agreement and click Next.

In this guide we will be using an embedded deployment model. If you are using an external deployment model the PSC component must be installed first before the vCenter. Select the deployment type and click Next. If the Windows server does not have sufficient resources allocated the installer will error at this stage.

Enter the FQDN in the System Name field and click Next.

Create a new Single Sign-On domain, or join the vCenter to an existing SSO domain. If you are creating a new SSO domain either leaves as the default vsphere.local or create a new SSO domain name, (not the same as your Active Directory name). Configure a password for the SSO administrator account and a vCenter specific site name, click Next. Note: vCenter 6.7 is the last release where a SSO site name will need to be provided.

Select whether to run vCenter services as the local system account or enter details of a service account and click Next. Ensure the account running vCenter services has been granted permissions as per the other considerations section of this guide.

Select an embedded Postgre database or point the installer to the DSN for an external database, click Next.

Accept the default port configuration and click Next.

Select the directory to install vCenter services and click Next.

Tick or untick the VMware Customer Experience Improvement Program as appropriate and click Next.

Check the configuration on the review page and click Install to begin the installation process.

Once the installation has completed click Finish.

Post-Installation
Connect to the vCenter post install using the IP or FQDN of the vCenter. Access vSphere by clicking either Launch vSphere Client (HTML5) or Launch vSphere Web Client (FLEX). As the web client will be depreciated in future versions, and the HTML5 client is now nearly at full feature parity, we will use the HTML5 vSphere client.

You must apply a new vCenter license key within 60 days. If you have purchased vCenter Server then log into your licensing portal here. If the license key does not appear then check with your VMware account manager. Log in to the vSphere Web Client using the SSO administrator login. From the Menu drop-down click Administration,

Under Licensing select Licenses. First we need to add a new license key, click Add New Licenses. Enter the new license key for vCenter Server, click Next. If applicable assign a name to the licence, click Next. Click Finish to add the license key.

Switch to Assets, the vCenter Server is listed in evaluation mode. Highlight the vCenter and click Assign License. Select the license key and click Ok.

If you have an Active Directory domain then vCenter can use this as an identity source. First ensure the vCenter is joined to the domain; from the Menu drop-down click Administration. Under Single Sign On click Configuration. Select the Active Directory Domain tab and verify the vCenter is domain joined. Change to the Identity Sources tab and click Add Identity Source. Fill in the Active Directory details for your domain and click Ok.

You can now add permissions to vCenter objects such as datacenters, clusters, folders, individual virtual machines, etc. for Active Directory users and groups. To learn more about vSphere permissions click here.
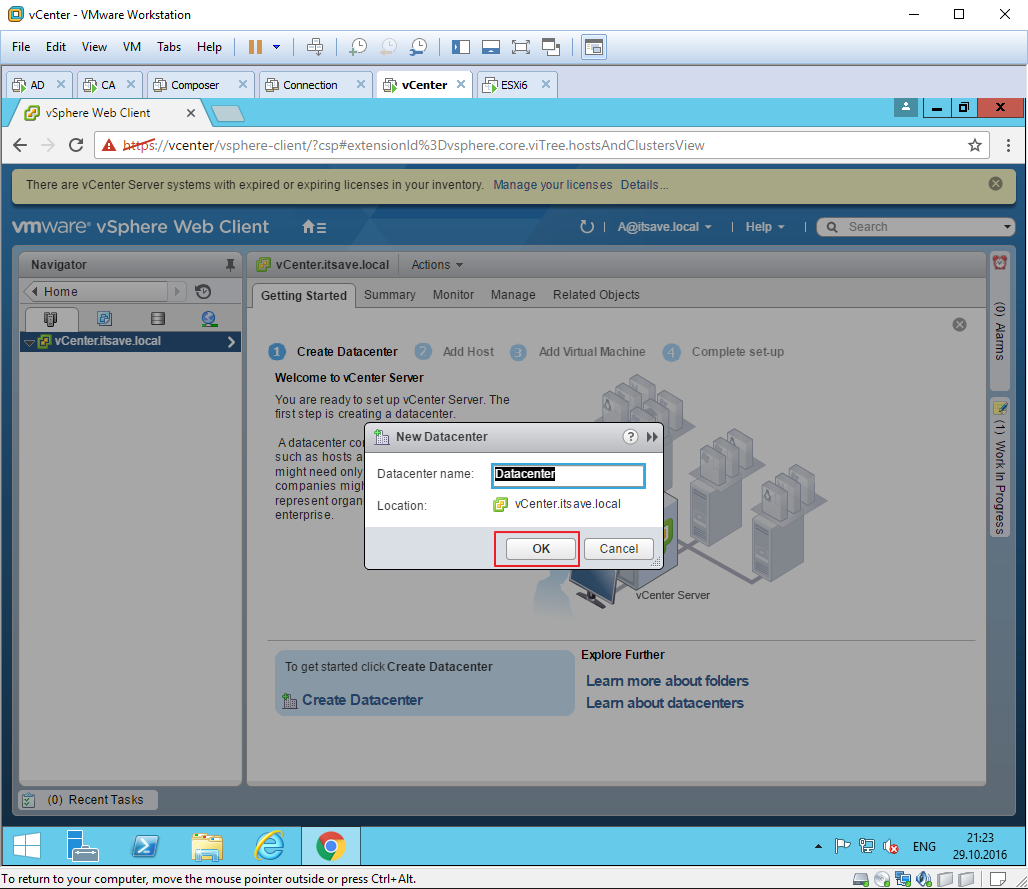
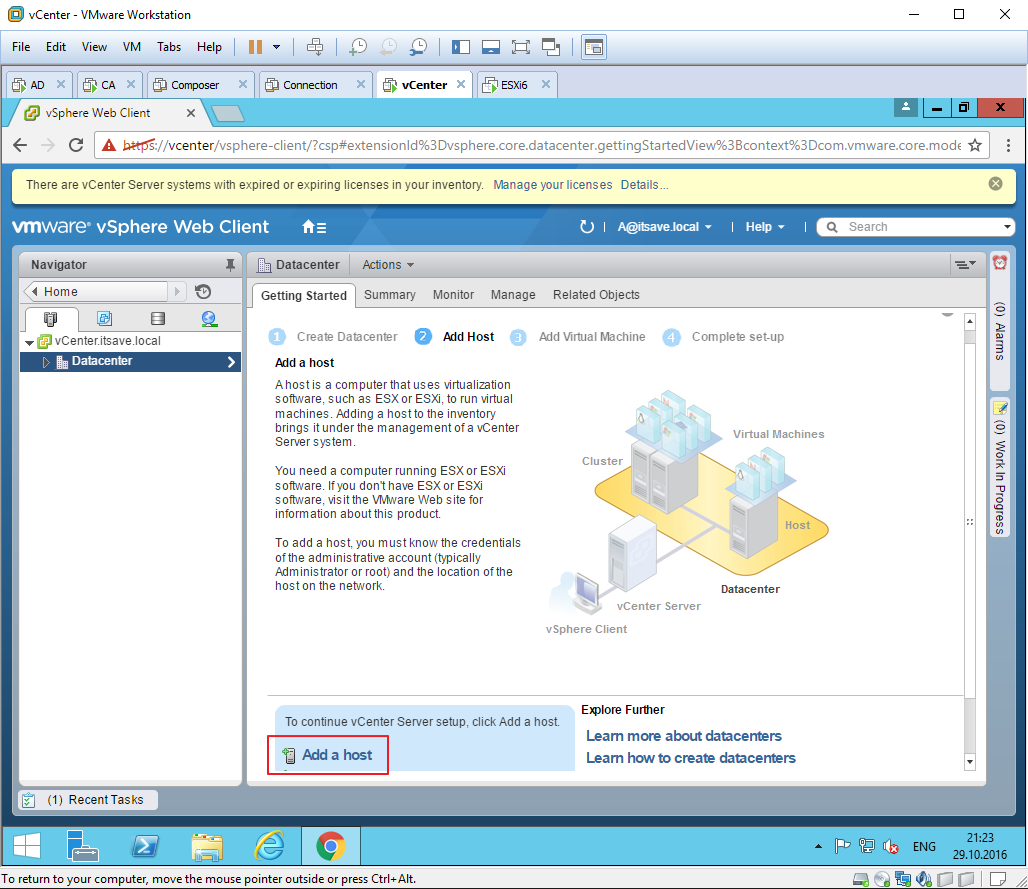
To start adding ESXi hosts to vCenter click the Menu drop-down and select Hosts and Clusters. Right click the vCenter and select New Datacenter, give the datacenter a name and click Ok. Right click the datacenter and select Add Host. Follow the onscreen wizard to add a host. Creating clusters and configuring vCenter is beyond the scope of this post, for assistance follow the documentation links at the top of the page.

How to install vCenter server in Windows server 2012 R2 and add ESXi host in vCenter server
vCenter is a type of server installed in Windows or Linux server. It is a centralized management application that lets the user to manage virtual machines and ESXi hosts centrally. This tutorial covers the ground on the installation process of vCenter server running in Windows 2012 R2 and to add ESXi hosts in the server.
Installation procedure
To install vCenter server, first download the vcenter server image file from the vmware official site and copy the image file to the windows server 2012 R2. Next mount the image file.

After mounting the image file, double-click the autorun to start the installation process.
The Vmware vCenter installer opens. Click install option.
Now Accept the license agreement and click next.
Select the deployment type and continue.
Configure the name for the system,enter the ip address or the fully qualified domain name that you are going to use.
Configure the vCenter single sign-on by entering the system network name.
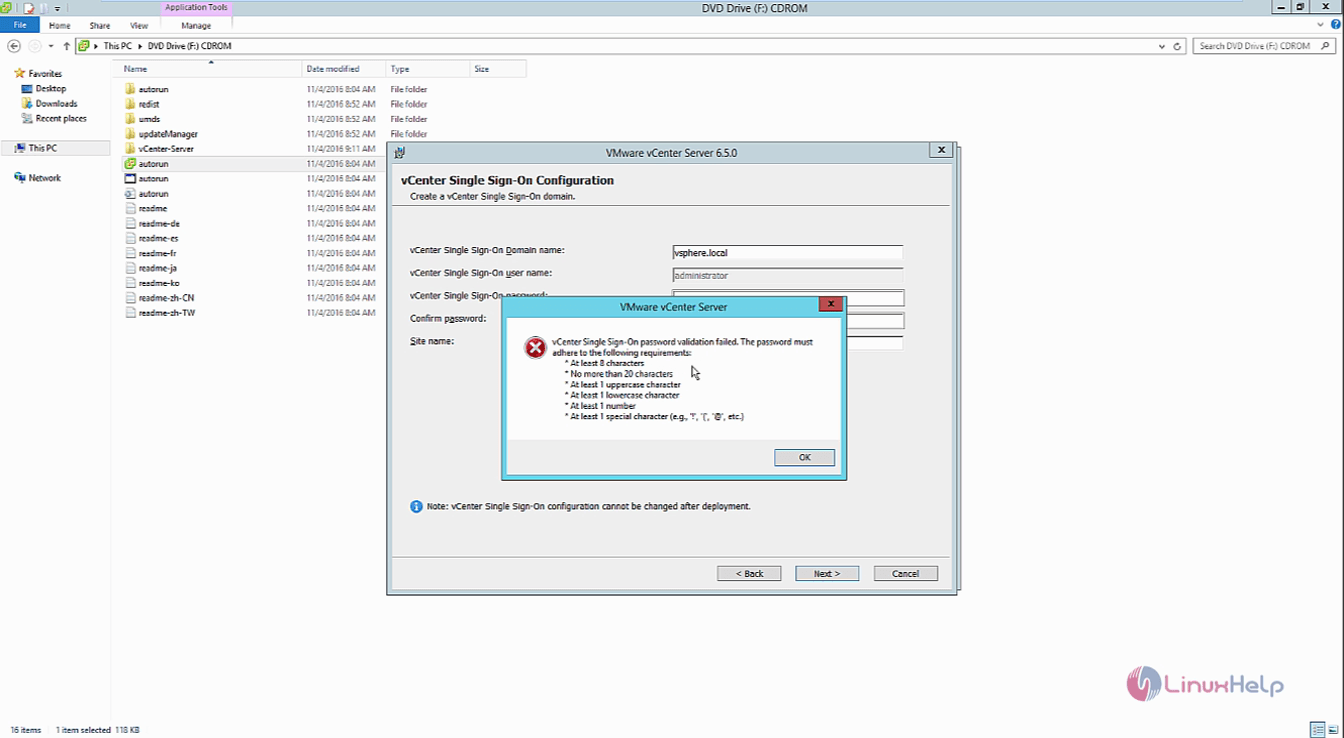
Enter the following requirements to set the administrator password and click next.
If the password does not match the requirements, a pop up window appears to change the password according to its requirements.
Select the vcenter server service account and click next.
Now configure the database settings and click next.
Next configure the ports for the vCenter server.
Select the destination directory for the vCenter server.
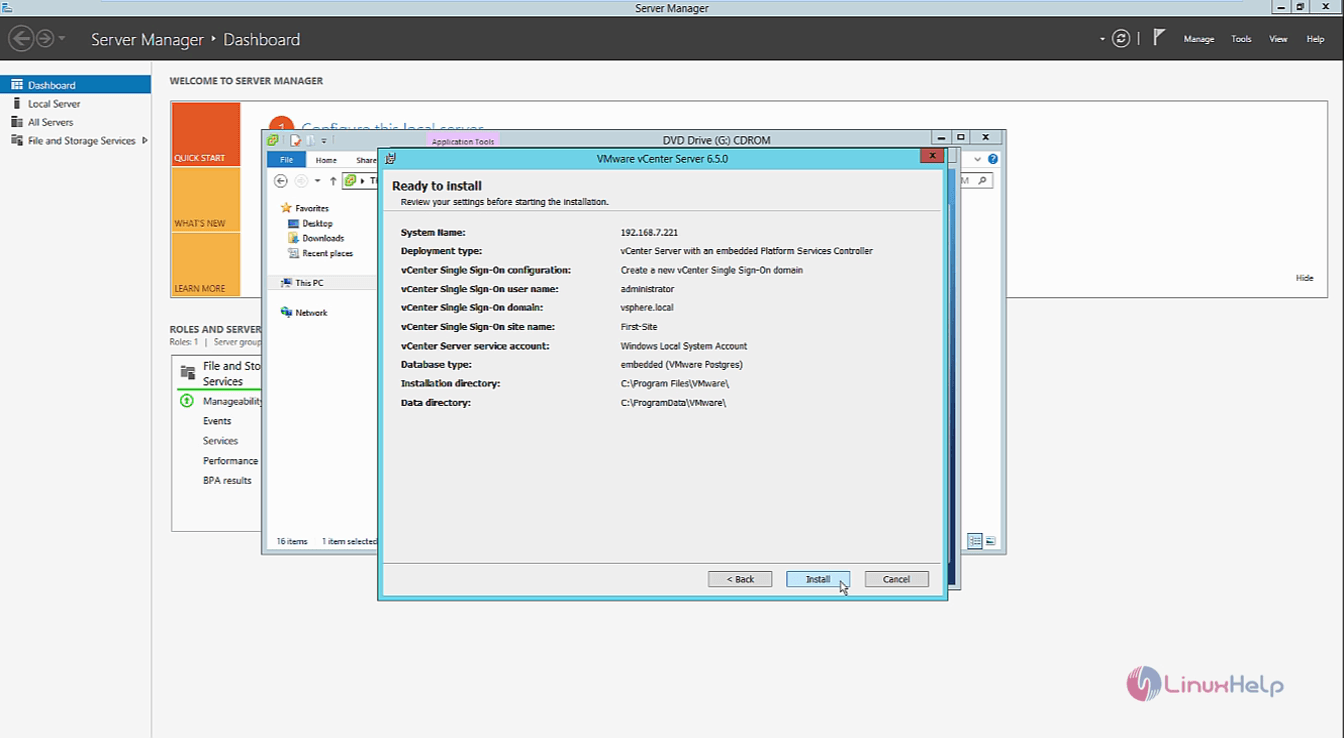
Now you can review your settings before installing. Click install to start the installation process
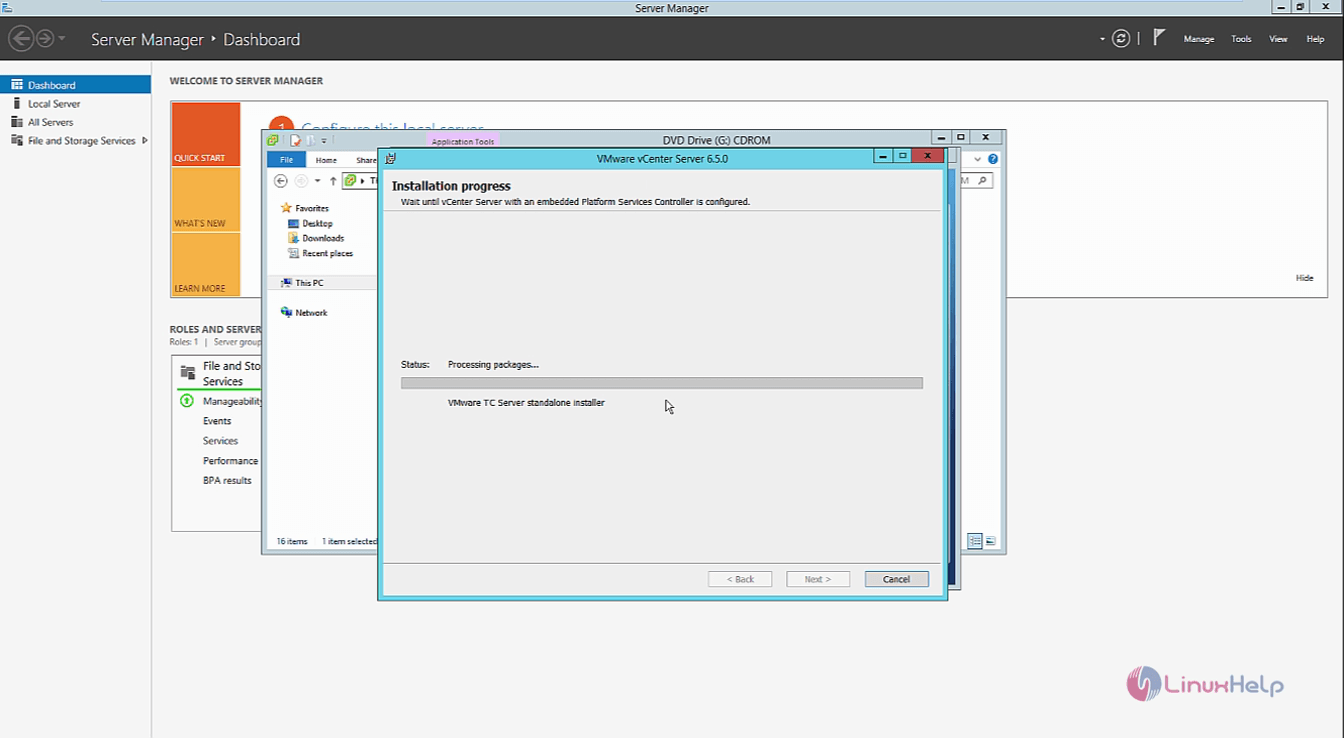
The installation progresses and it will take some time.
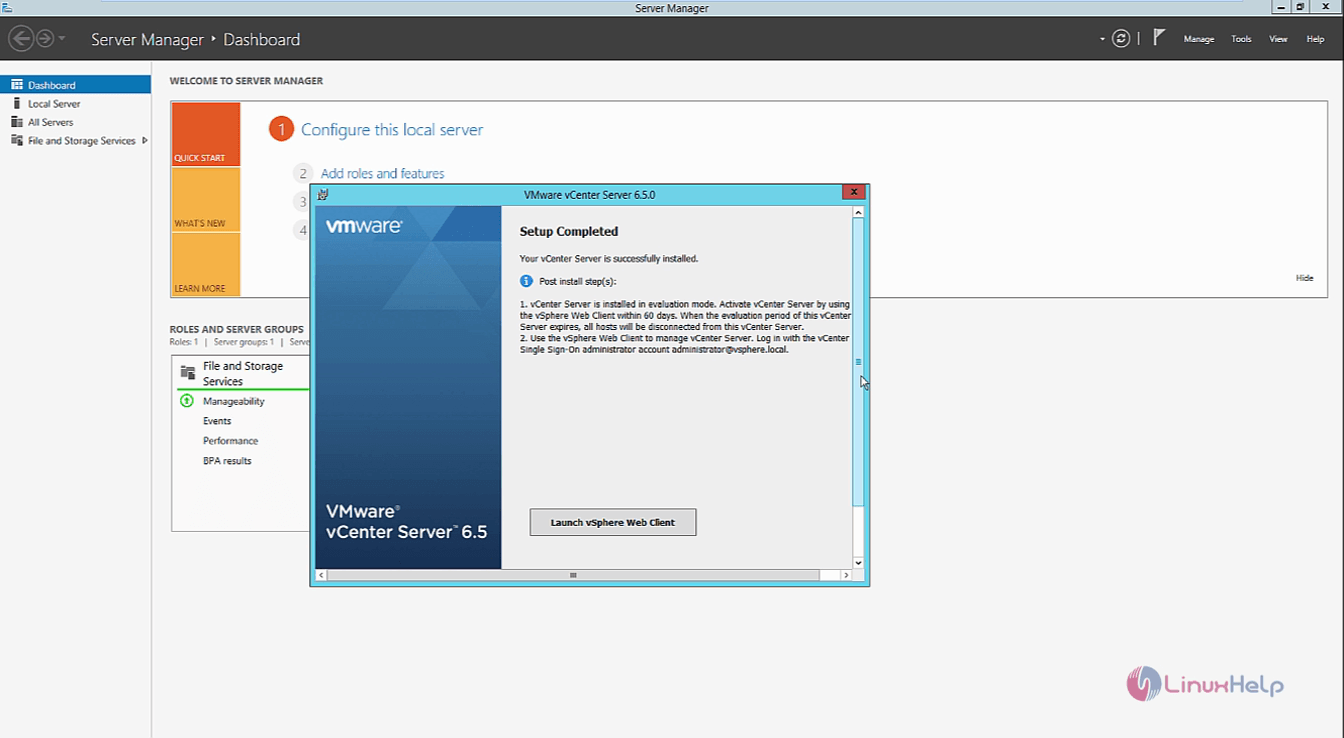
The installation is completed. Click finish to continue. Now you can launch the vSphere web client.
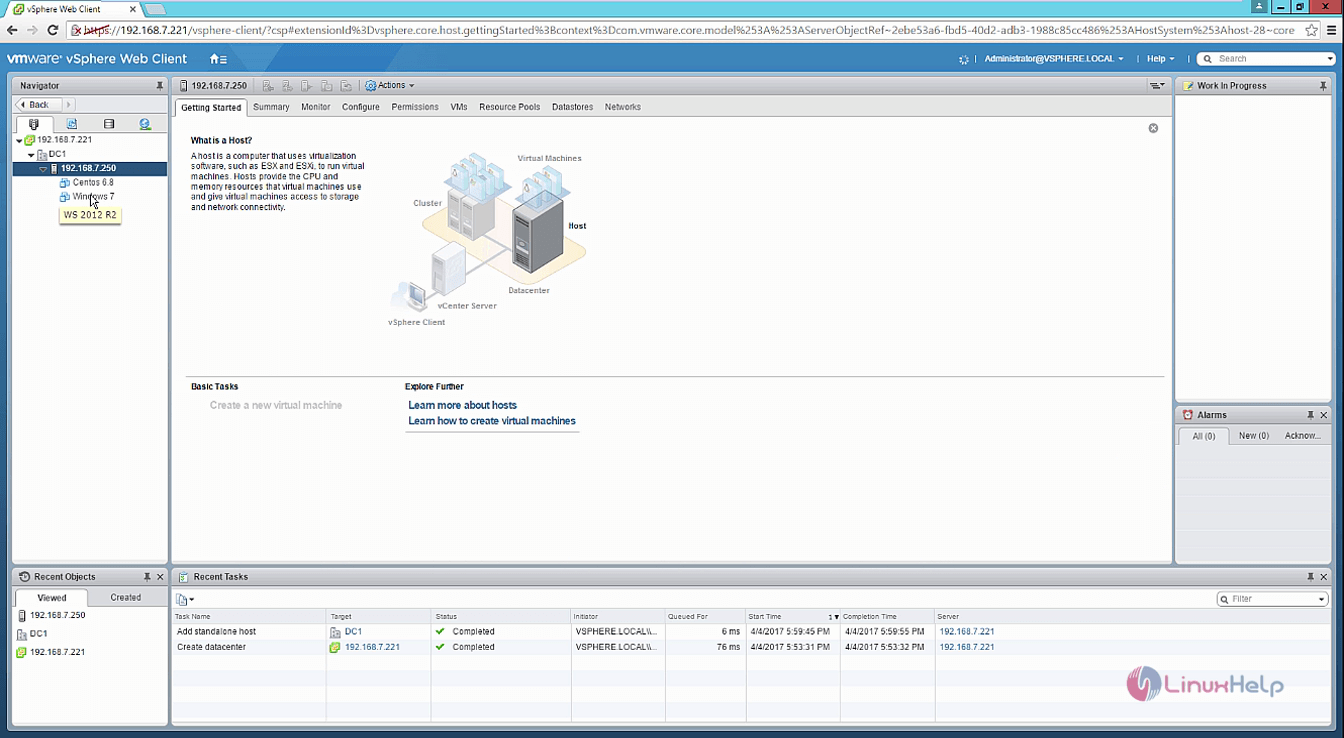
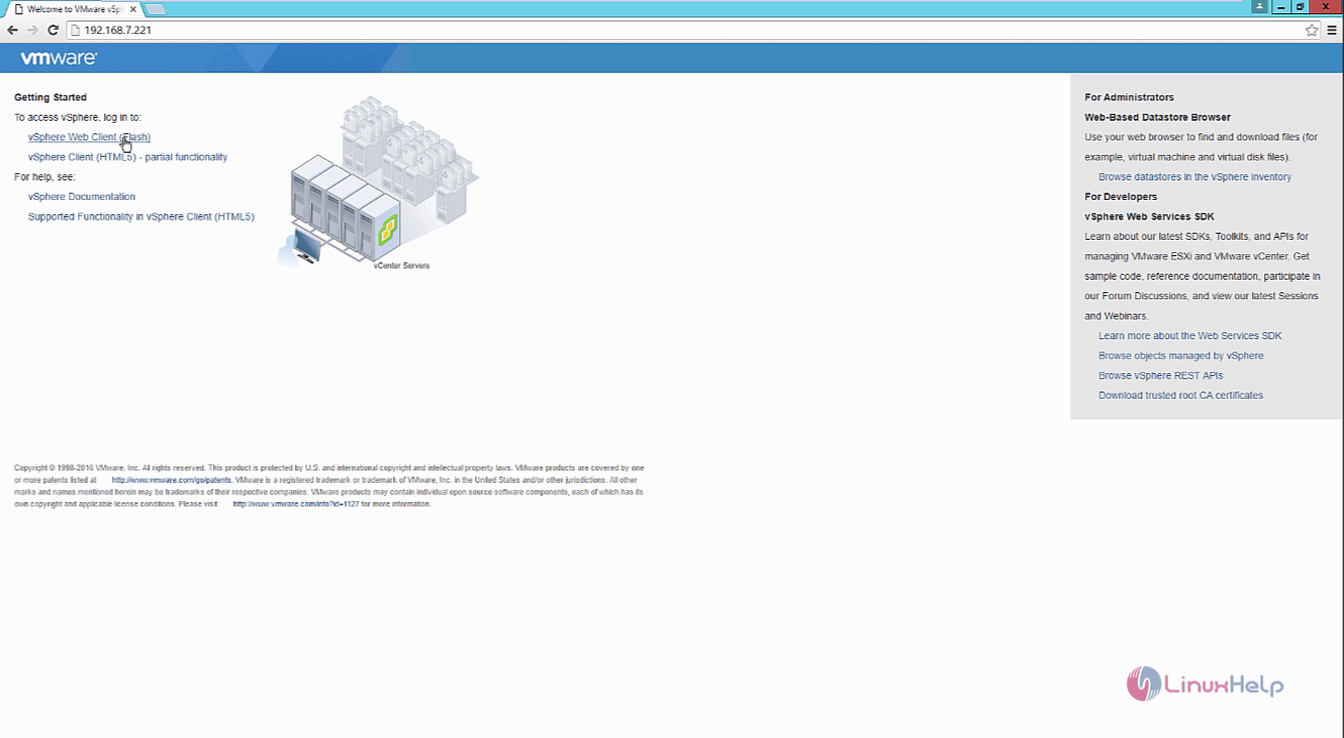
Now open a web browser and naviagate to http://192.168.7.221 and continue.
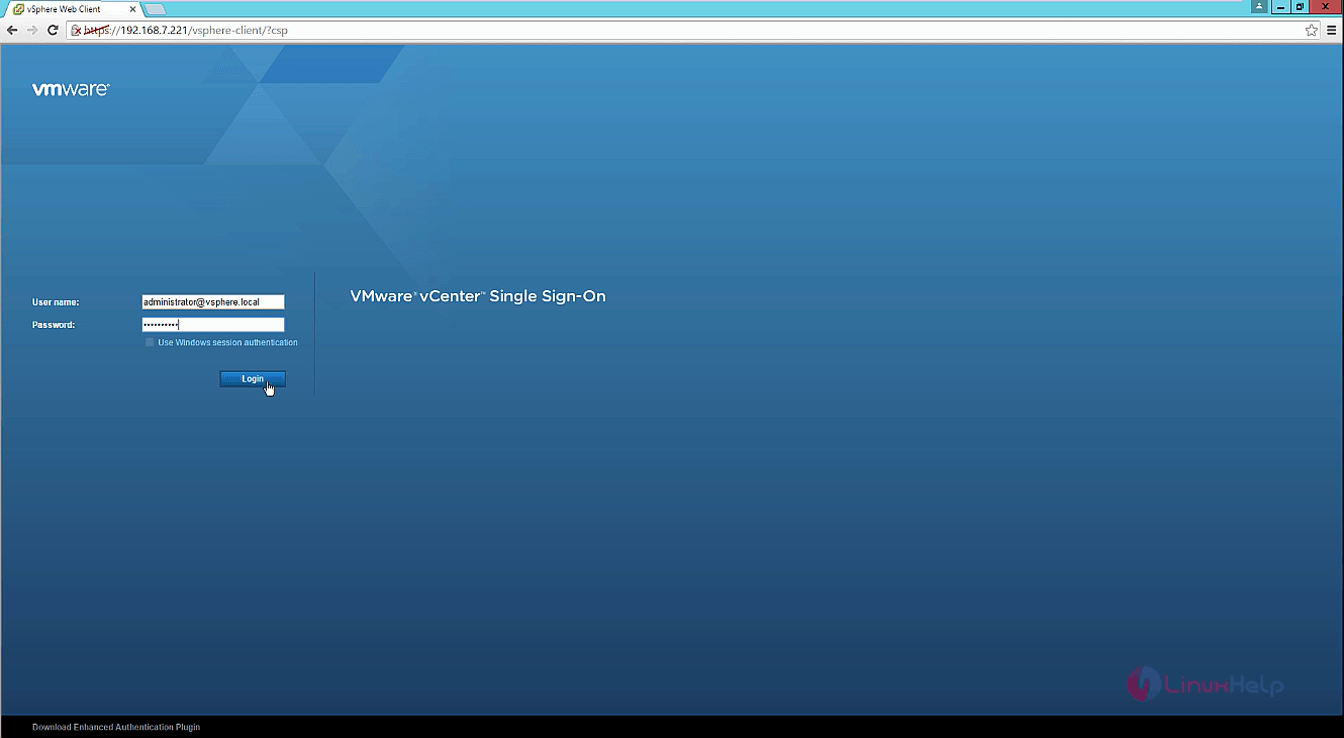
The Vmware vsphere homepage appears. Select the vSphere web client option and continue.
The Vmware vCenter single sign-on login page appears and enter the valid credentials to login.
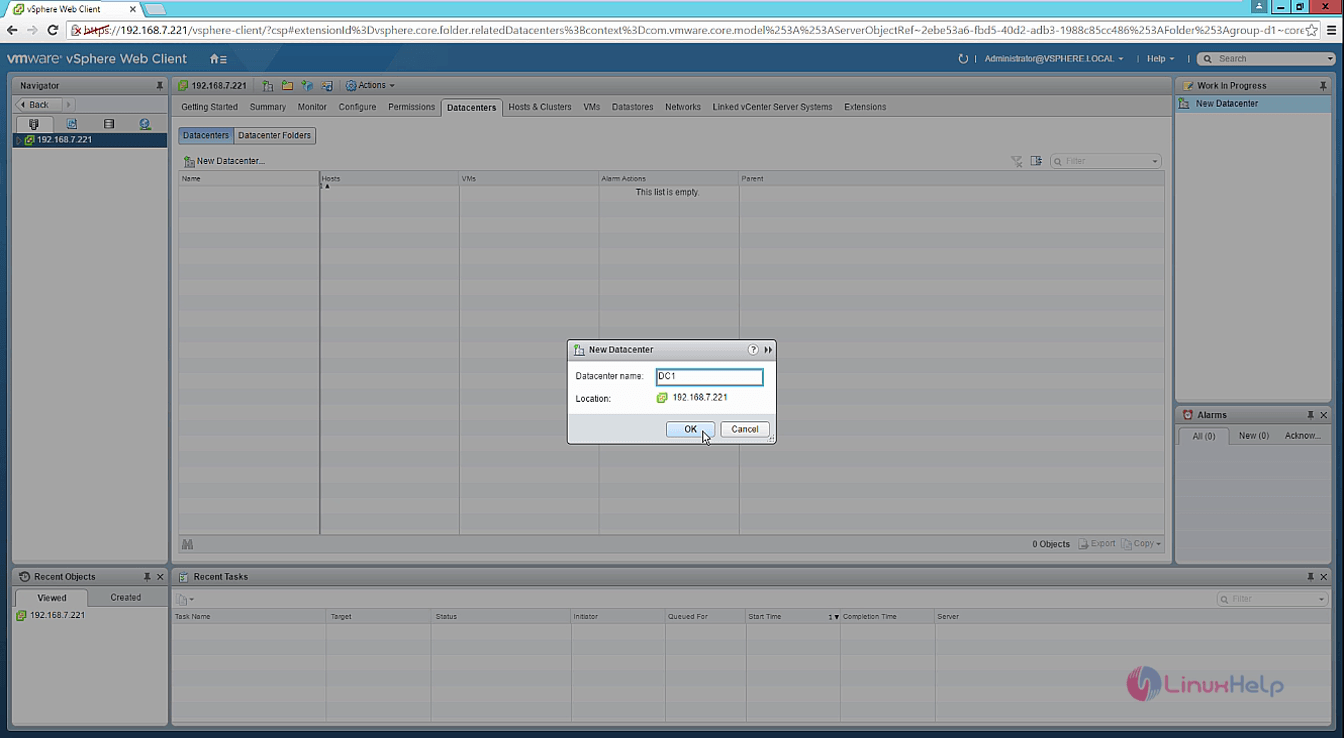
To add the esxi hosts to the vcenter server first you need to create a datacenter. Select datacenters tab and click new datacenter option.

Enter any name for the datacenter and the location that is about to be used.
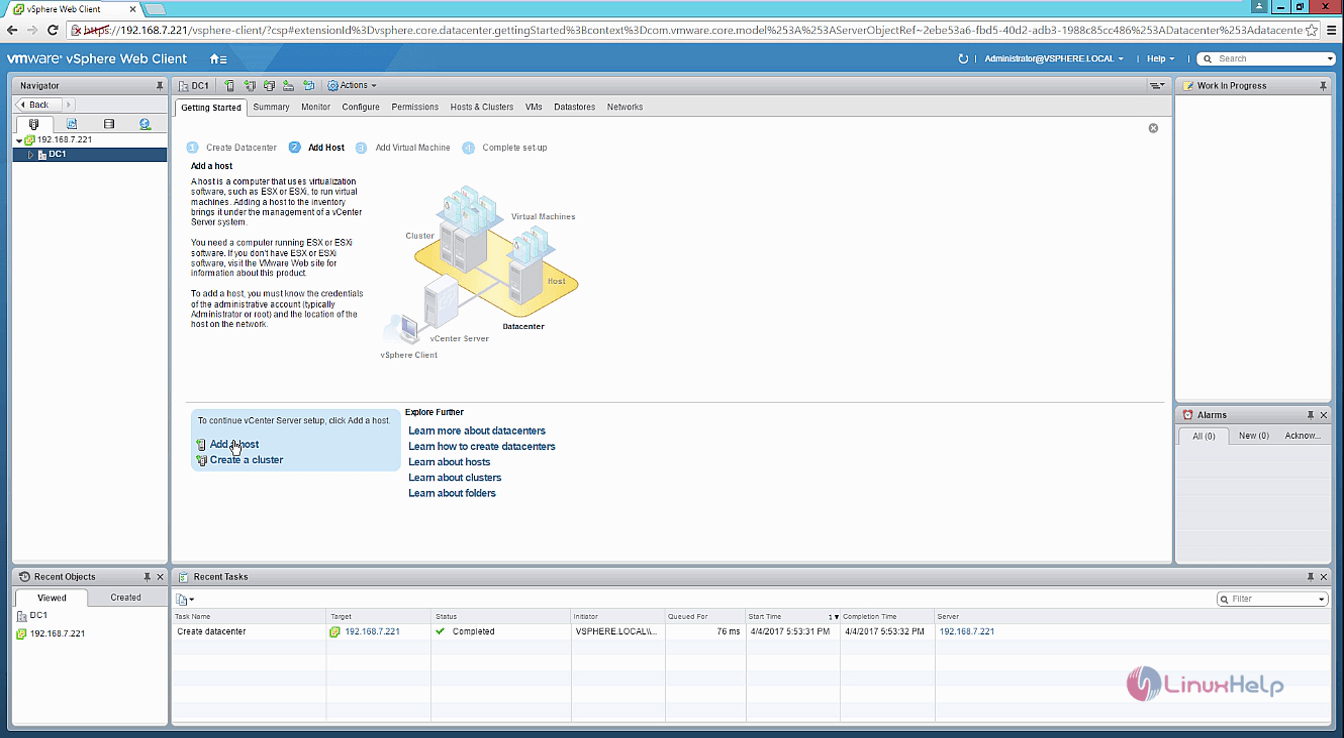
Select the Add a host option.
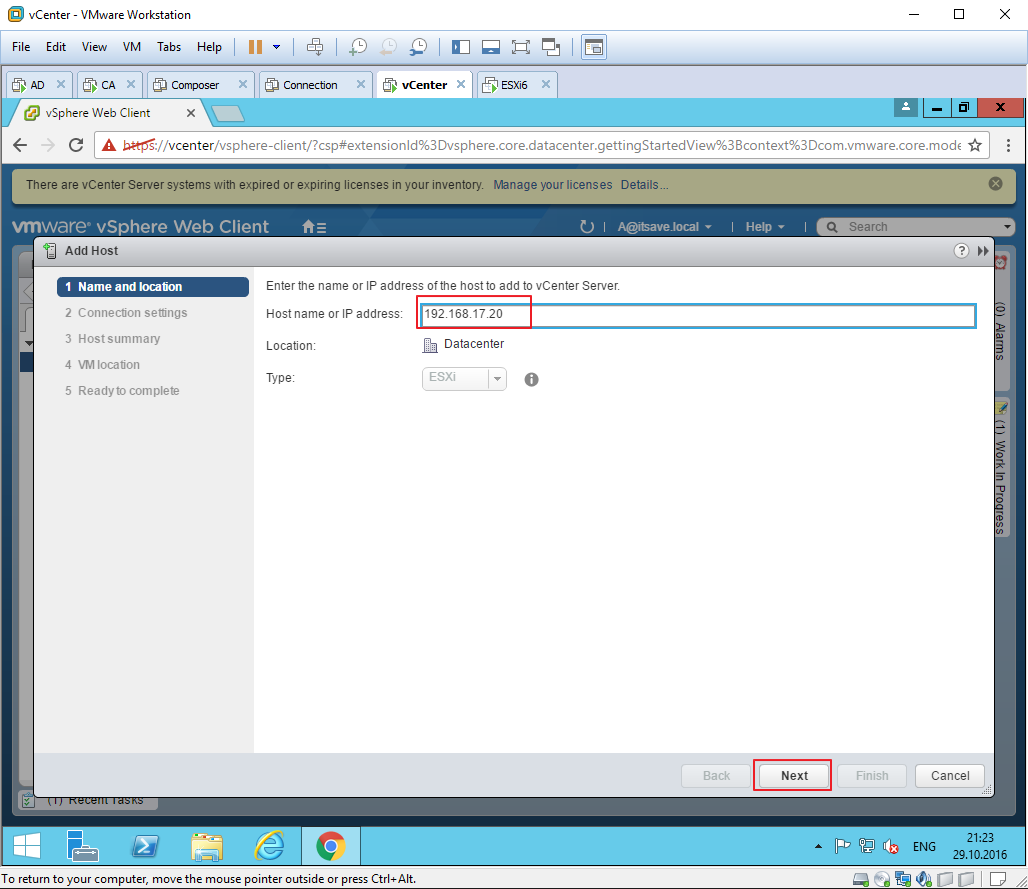
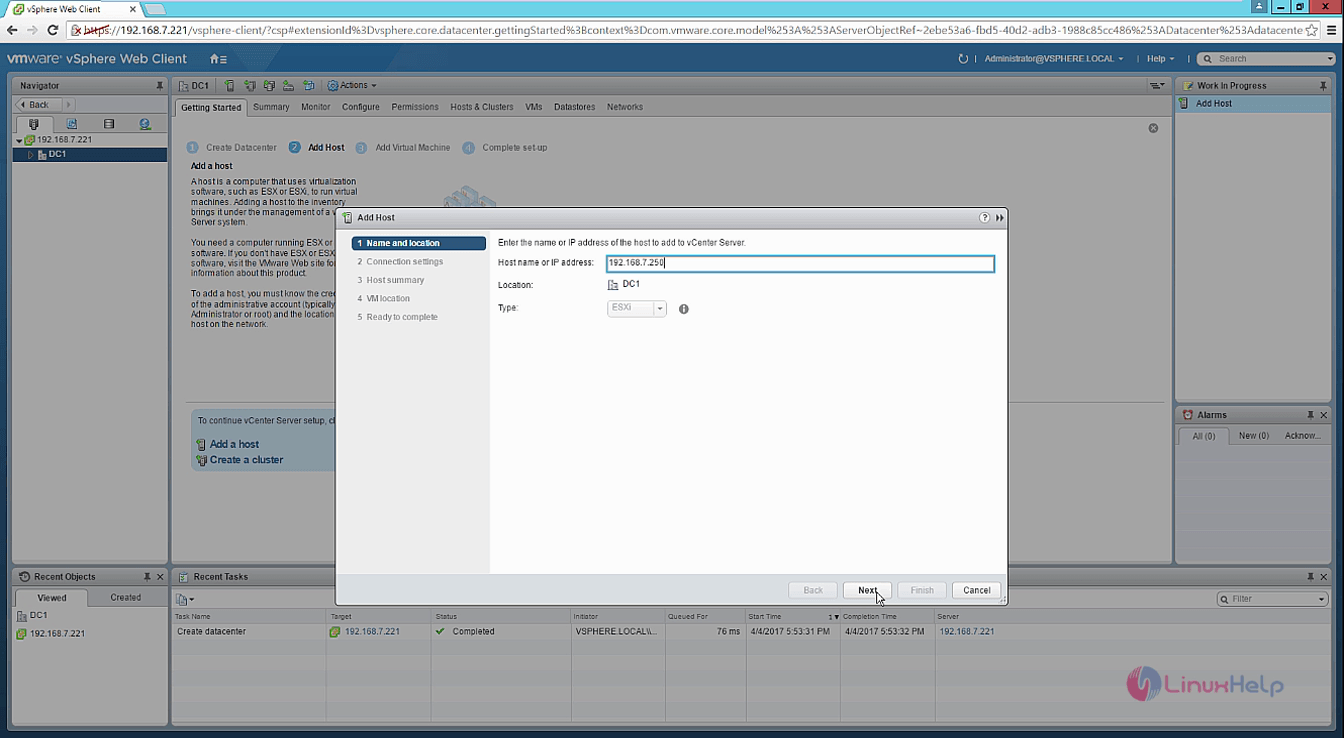
Enter the ip address or host name and location and click next.
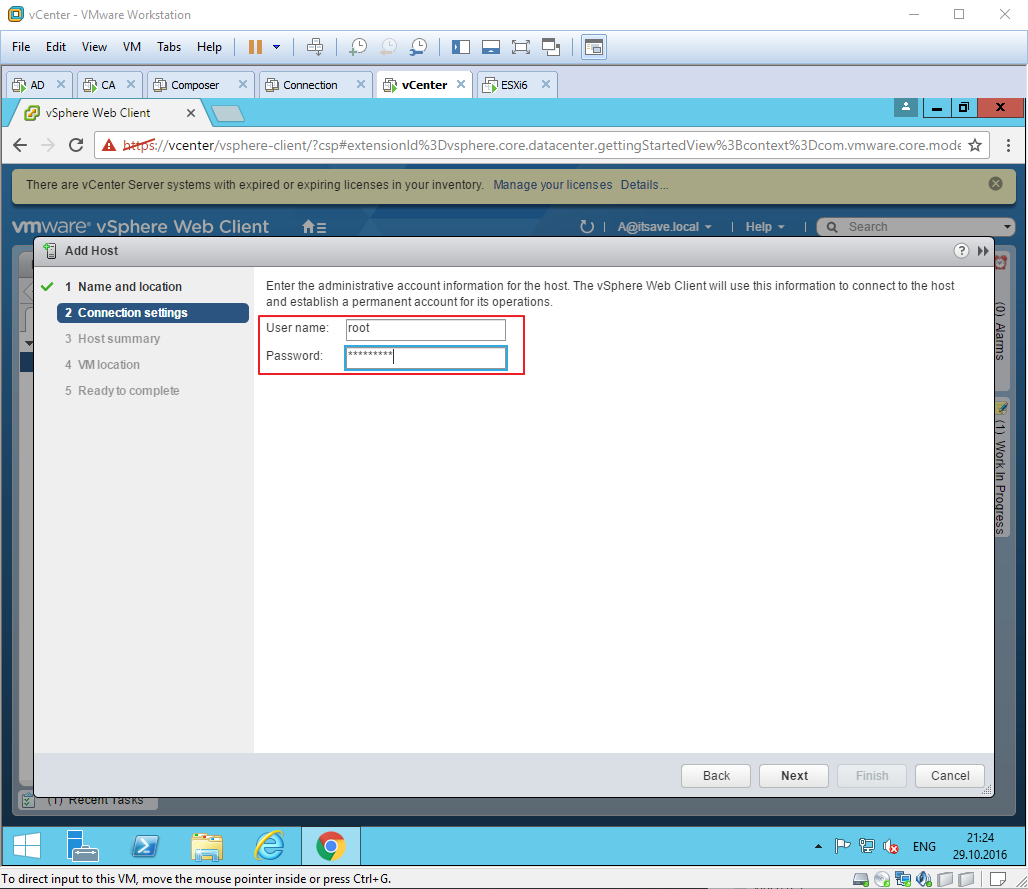
Enter the credentials for the esxi host and click next.
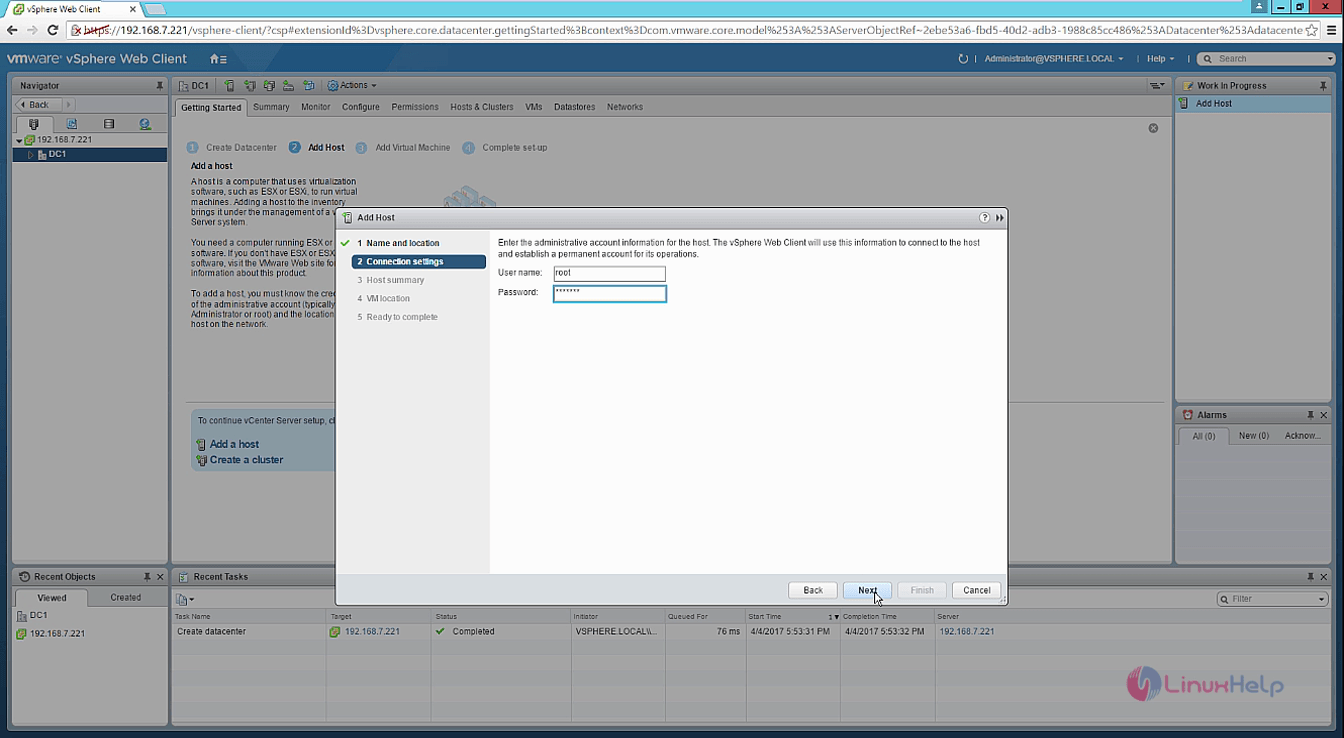
Give yes for the security alert.
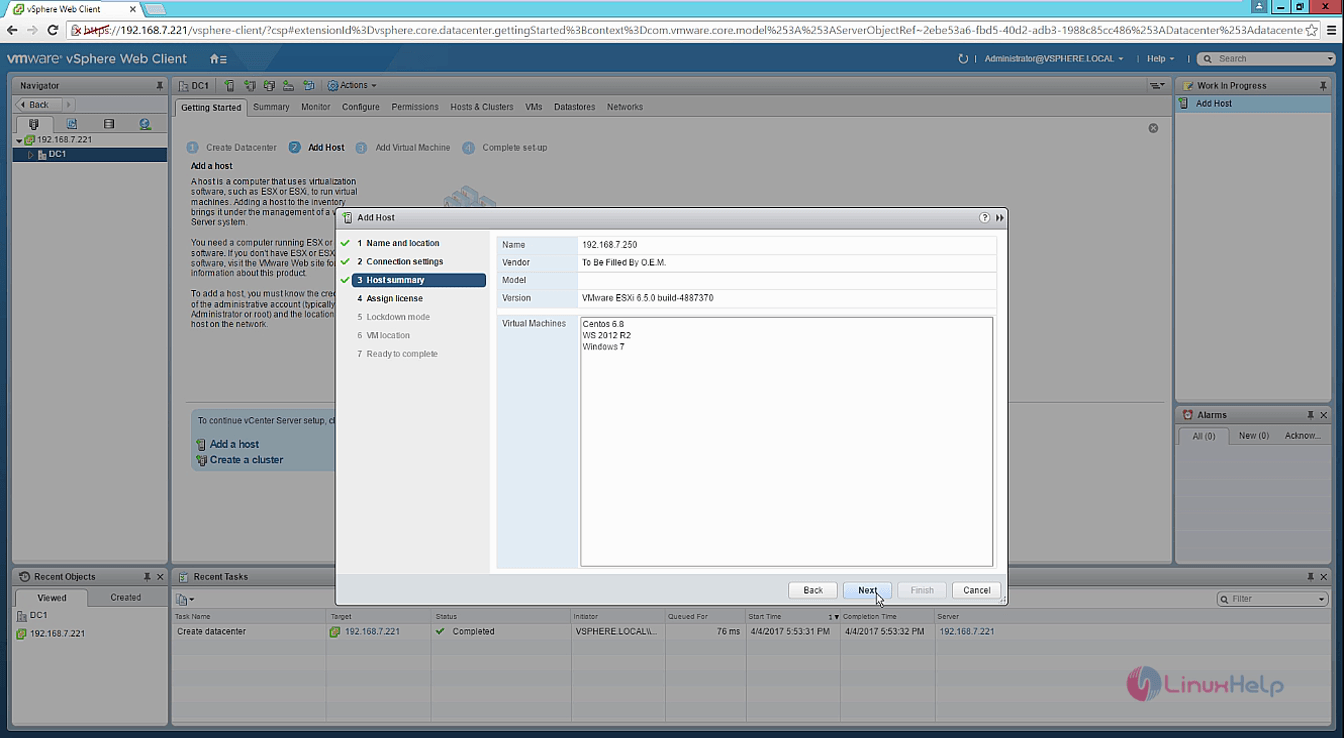
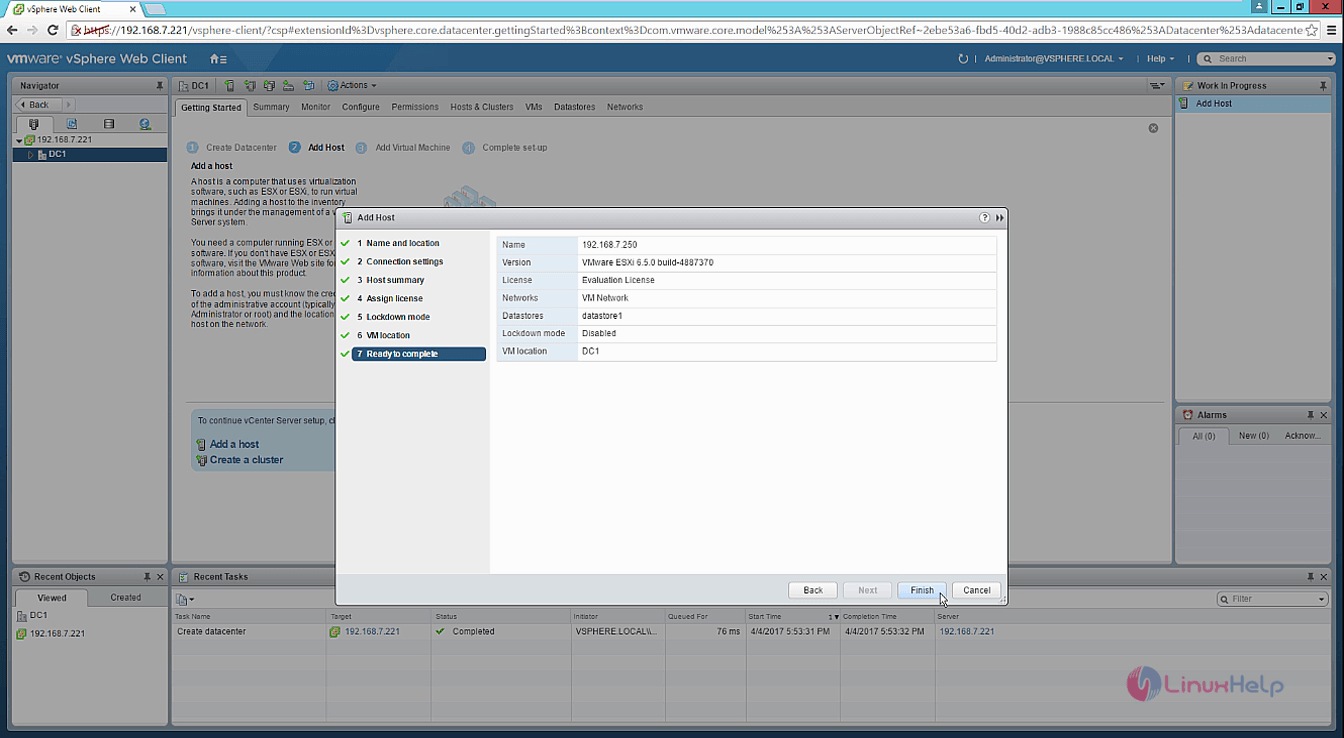
Now you can see the review the host summary window. check if it is correct and click next.
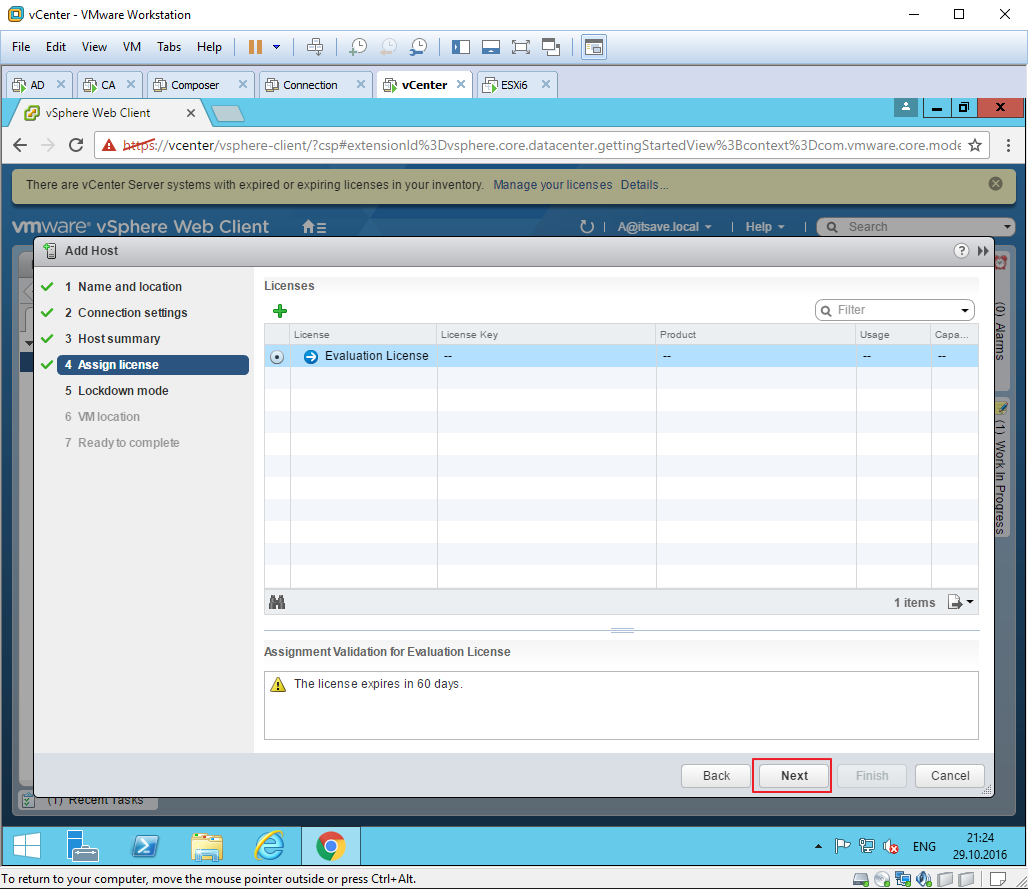
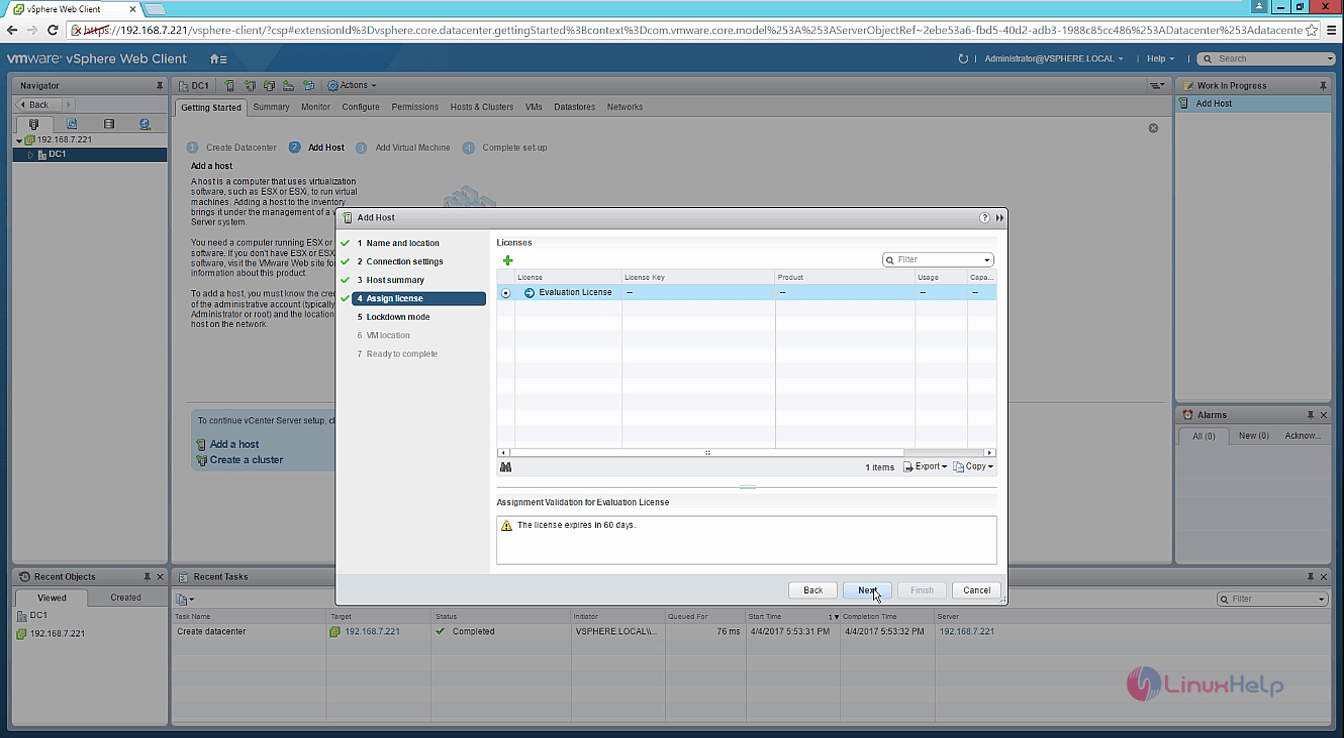
Assign the license for the esxi host and click next.
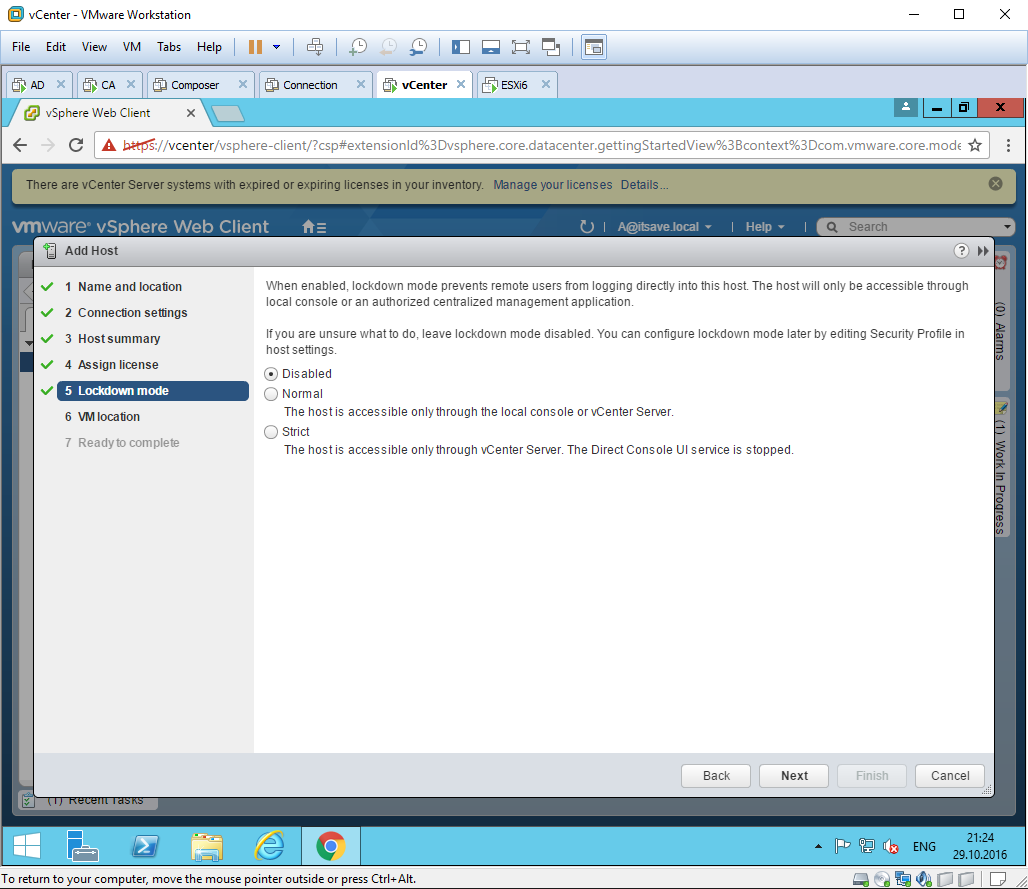
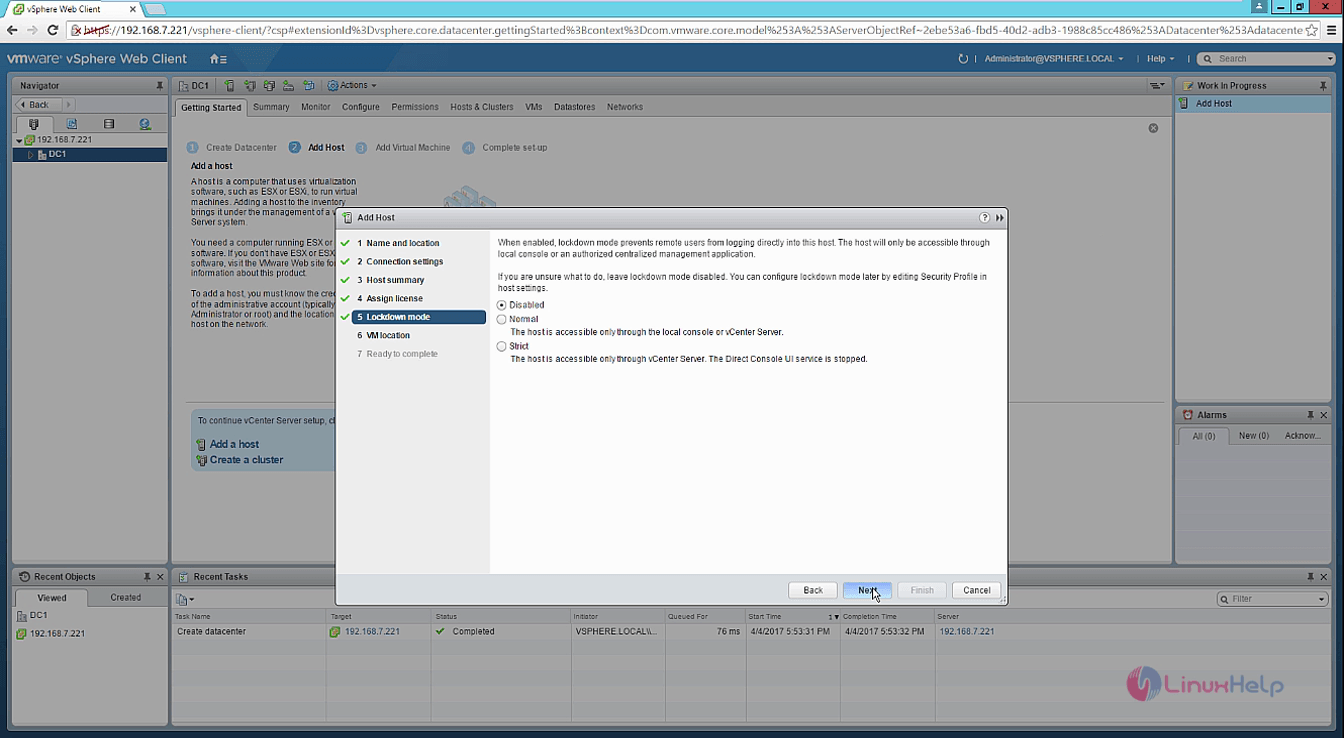
Now configure the lockdown mode and select it disabled.
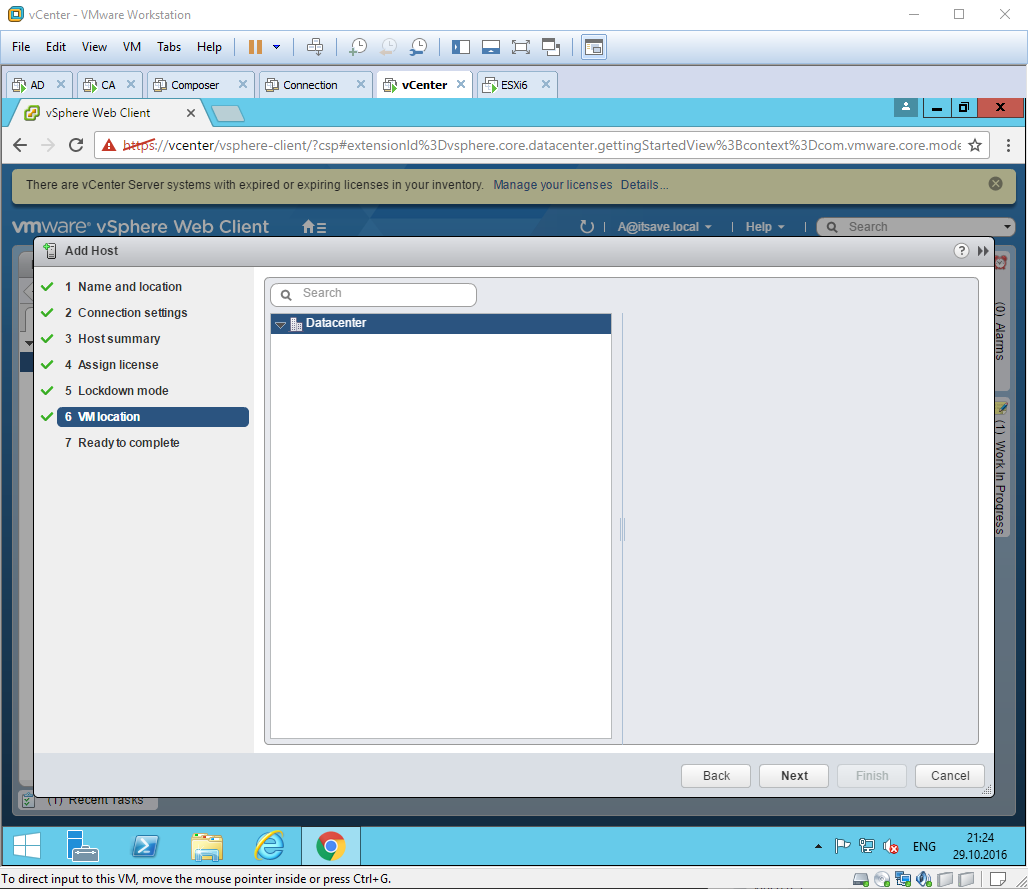
Select the VM location and click next.
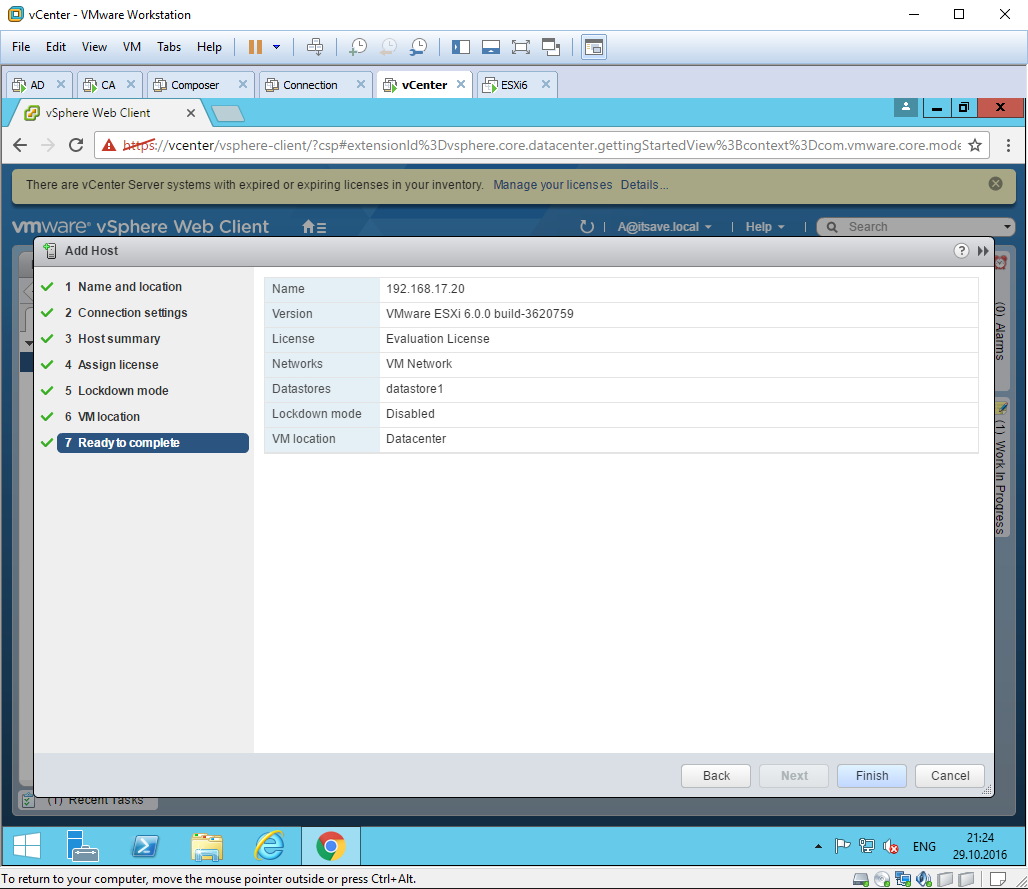
Review the settings and click finish. Now you can see the esxi host is successfully added to the vcenter server.
Wasn’ t that an easy installation? vCenter uses the vSphere client to manage the ESXi servers.