
В Windows 11, как и в предыдущих версиях системы есть встроенные функции удаленного доступа к компьютеру, одна из них — «Удаленный рабочий стол» или Microsoft Remote Desktop, позволяющая легко подключаться к компьютеру с другого устройства с ОС Windows, MacOS, Android или iOS.
В этой инструкции подробно о том, как включить удаленный рабочий стол в Windows 11, в том числе в Домашней редакции, подключиться к удаленному рабочему столу и решить возможные проблемы с подключением.
Включение удаленного рабочего стола в Windows 11 Pro
Модули удаленного рабочего стола представлены в двух частях:
- Сервер (Хост) — для устройства, к которому выполняется подключение. Есть только в Windows 11 Pro и Enterprise (но есть обходной путь и для Home, который также будет рассмотрен далее). Эта функция по умолчанию отключена и её требуется включить.
- Клиент — для устройства, с которого выполняется подключение. Этот модуль по умолчанию доступен в Windows, независимо от редакции.
Чтобы включить удаленный рабочий стол (возможность подключаться к этому компьютеру) в Windows 11 можно использовать один из следующих способов.
Параметры
Базовый вариант — включение удаленного рабочего стола в Параметрах Windows 11:
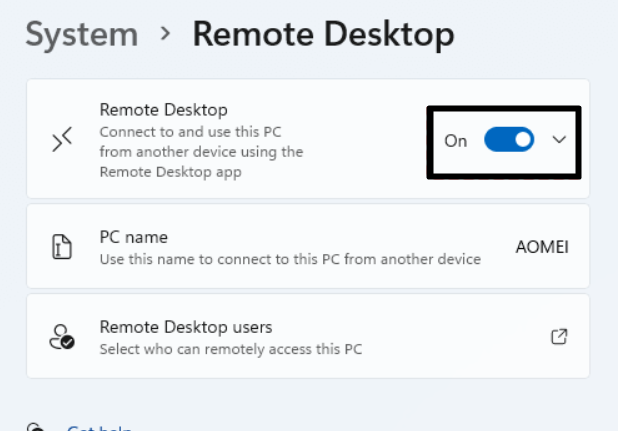
- Откройте Параметры — Система — Удаленный рабочий стол.

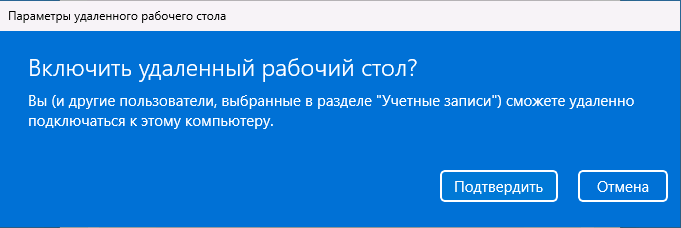
- Включите переключатель «Удаленный рабочий стол».
- Подтвердите включение удаленного рабочего стола.


Здесь же можно настроить другие параметры: в частности, включить или отключить аутентификацию на уровне сети.
Свойства системы
Второй способ — окно «Свойства системы»:
- Нажмите клавиши Win+R на клавиатуре, введите sysdm.cpl в окно «Выполнить» и нажмите Enter.
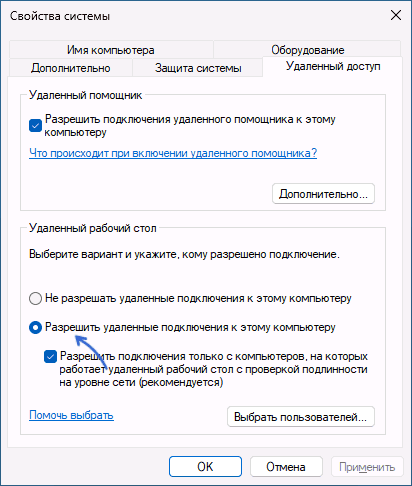
- В открывшемся окне перейдите на вкладку «Удаленный доступ».
- Включите опцию «Разрешить удаленные подключения к этому компьютеру», при необходимости задайте пользователей компьютера, под аккаунтами которых возможен вход в систему с использованием удаленного рабочего стола.

Командная строка или PowerShell
Включение удаленного рабочего стола возможно и посредством команд, выполненных от имени администратора.
Далее — команды командной строки и Windows PowerShell соответственно, и в том и другом случае команда изменяет значение параметра реестра, отвечающего за включение и отключение удаленного рабочего стола:
reg add "HKEY_LOCAL_MACHINE\SYSTEM\CurrentControlSet\Control\Terminal Server" /v fDenyTSConnections /t REG_DWORD /d 0 /f
Set-ItemProperty -Path "HKLM:\System\CurrentControlSet\Control\Terminal Server" -name "fDenyTSConnections" -value 0
Как включить удаленный рабочий стол в Windows 11 Home (Домашняя)
Несмотря на то, что в Windows 11 редакции Home или Домашняя отсутствует возможность включить сервер удаленного рабочего стола Microsoft Remote Desktop, сами компоненты для этой функциональности в системе присутствуют. Задача — их активировать. Для этого можно использовать сторонний инструмент RDP Wrapper Library, который можно скачать с GitHub разработчика https://github.com/stascorp/rdpwrap/releases
Достаточно загрузить архив, распаковать в удобное расположение и запустить Install.bat для установки, по завершении которой рекомендуется перезагрузить компьютер.
Удаленный рабочий стол будет включен и подключение к компьютеру с Windows 11 Домашняя станет возможным. Настройки хоста Microsoft RDP будут доступны в утилите RDPConf, находящейся в том же архиве:

Как подключиться к удаленному рабочему столу
Подключение к удаленному рабочему столу возможно:
- Из встроенной утилиты «Подключение к удаленному рабочему столу» в Windows, которую можно найти через поиск на панели задач, либо запустить с помощью Win+R — mstsc.exe
- Для Windows 11 и Windows 10 также можно использовать приложение «Удаленный рабочий стол (Майкрософт)» из магазина Microsoft Store.
- Через приложение Удаленный рабочий стол (Microsoft Remote Desktop), которое доступно бесплатно в официальных магазинах приложений для Android, iPhone или Mac.
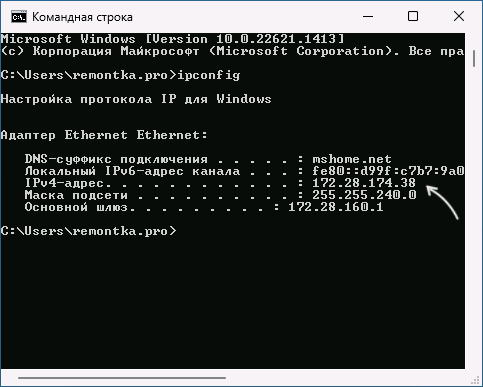
Для подключения к компьютеру в локальной сети потребуется его IP-адрес (IPv4) в этой сети, к которому выполняется подключение (можно посмотреть с помощью командной строки и команды ipconfig), либо имя компьютера, а также учетные данные для входа.
Сам процесс подключения с другого компьютера Windows с использованием встроенного инструмента состоит из следующих шагов:
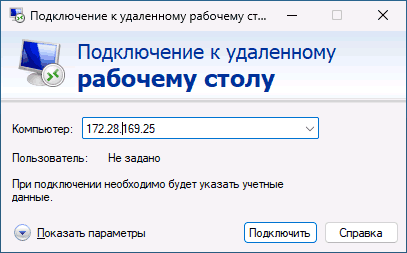
- Запустите подключение к удаленному рабочему столу (Win+R — mstsc) и введите IP-адрес или имя удаленного компьютера.

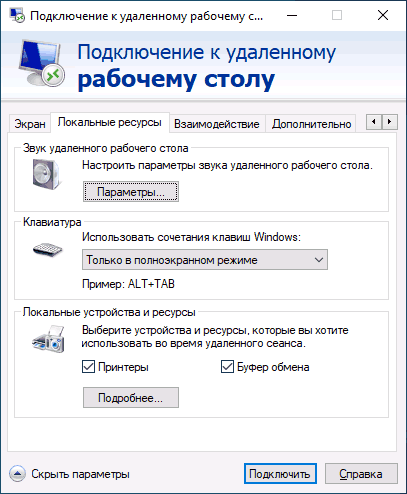
- При необходимости, нажав кнопку «Параметры» вы можете настроить параметры экрана при удаленном подключении и изменить дополнительные параметры взаимодействия.

- После установки подключения вам будет предложено ввести имя пользователя и пароль для входа в удаленную систему — это должен быть аккаунт пользователя именно на удаленном компьютере, которому разрешен вход через RDP, обязательно с паролем (если пароль у учетной записи отсутствует, создайте его). По умолчанию доступ есть у пользователей группы «Администраторы», других пользователей можно добавить в настройках удаленного доступа в свойствах системы (Win+R — sysdm.cpl).

- Если всё прошло успешно, соединение будет установлено, и вы увидите рабочий стол удаленного компьютера.


Подключение с устройств на других ОС выполняется тем же образом: добавление компьютера, ввод IP-адреса и данных аккаунта для подключения и последующая установка соединения.
Для подключения к удаленному рабочему столу через Интернет вам потребуется:
- Знать ваш IP-адрес в Интернете. Если компьютер подключен кабелем и без роутера, обычно этого достаточно и можно выполнить подключение по этому IP-адресу (однако учитывайте, что он может меняться, если у вас не включена услуга выделенного IP у провайдера).
- Если подключение выполняется через роутер, в настройках роутера, к которому подключен удаленный компьютер потребуется пробросить подключения к порту 3389 на соответствующий порт компьютера, подключенного к этому роутеру по его IP в локальной сети (который тоже имеет смысл сделать статическим в настройках подключения). Более простой метод — настройка виртуальной локальной сети между компьютерами (даже за роутером и в Интернете), например, с помощью Meshnet.
Решение проблем при подключении по RDP к удаленному рабочему столу
Если при подключении к удаленному рабочему столу сообщается об ошибках, подключение выполняется бесконечно или возникают иные проблемы, можно попробовать следующие подходы к решению:
- Проверьте, что служба «Службы удаленных рабочих столов» (Remote Desktop Services) не отключена. Тип запуска для неё следует установить «Вручную».

- Попробуйте снять отметку «Требовать использование устройствами аутентификации на уровне сети для подключения» на хосте (компьютере, к которому выполняется подключение).
- При подключении вы можете увидеть сообщение о том, что не удается проверить подлинность удаленного компьютера из-за проблем с сертификатом безопасности. Если речь идет о вашем компьютере в локальной сети, переживать не о чем — можно выполнять подключение.
- Убедитесь, что порт 3389 открыт в текущем профиле брандмауэра защитника Windows (Как открыть порт в Windows), либо проверьте, чтобы для всех правил группы «Дистанционное управление рабочим столом» в брандмауэре защитника Windows подключение было разрешено. В крайнем случае можно попробовать полностью отключить брандмауэр и посмотреть, решит ли это проблему, а при наличии стороннего ПО для защиты компьютера в сети — проверить, не является ли оно причиной ошибок подключения.
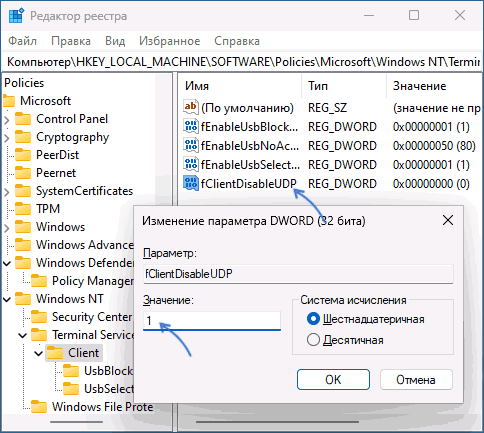
- Попробуйте отключить использование протокола UDP для подключения. Для этого в реестре перейдите к разделу
HKEY_LOCAL_MACHINE\SOFTWARE\Policies\Microsoft\Windows NT\Terminal Services\Client
и создайте параметр DWORD с именем fClientDisableUDP и значением 1

- Подключение по UDP можно отключить в редакторе локальной групповой политики (Win+R — gpedit.msc). В разделе Конфигурация компьютера — Административные шаблоны — Компоненты Windows — Службы удаленных рабочих столов — Клиент подключения к удаленному рабочему столу дважды нажмите по параметру «Отключение UDP на клиенте» и установите значение «Включено» (именно это значение отключит UDP).

- Проверьте используемые для RDP номера портов в разделе реестра
HKEY_LOCAL_MACHINE\SYSTEM\CurrentControlSet\Control\Terminal Server\WinStations\RDP-Tcp
имя параметра — PortNumber на случай, если они по какой-либо причине были изменены и отличаются от стандартного 3389.
- Если проблема возникла после обновлений Windows, можно попробовать удалить обновления, либо использовать точки восстановления системы.


Если остаются вопросы или есть чем поделиться, ниже открыты комментарии. Также в контексте темы может пригодиться: Как отключить удаленный рабочий стол в Windows 11 и 10, Программы для удаленного доступа к компьютеру.
К Windows 11 Home нельзя подключиться по RDP, эта функция заблокирована.
Включаем RDP в Windows Home
Работает для версий Windows 10 и 11.
Для разблокировки:
Скачиваем RDP Wrapper 1.6.2 и распаковываем в директорию на диске.
Скачиваем обновление rdpwrap.ini в эту же директорию.
Открываем командную строчку CMD как администратор в этой директории
Запускаем
RDPWinst -u -kЗапускаем
RDPWinst -iНе используем install.bat

Для проверки запускаем RDPConf, если статус лицензии — лицензирован, все работает
Можно подключаться к компьютеру с правами администратора, если у вас пользователь имеет права администратора, дальнейшее можно не делать.
Если RDP Wrapper — проблема Not listening [not supported] проявится опять, нужно повторить все шаги
Включение входа не администраторов
Изучаем статью как добавить не администраторов в RDP в Windows 7
Качаем или создаем файл реестра
Windows Registry Editor Version 5.00

[HKEY_LOCAL_MACHINE\SAM\SAM\Domains\Builtin\Aliases\0000022B]
"C"=hex:2b,02,00,00,00,00,00,00,b0,00,00,00,02,00,01,00,b0,00,00,00,28,00,00,\
00,00,00,00,00,d8,00,00,00,7a,00,00,00,00,00,00,00,54,01,00,00,00,00,00,00,\
00,00,00,00,01,00,14,80,90,00,00,00,a0,00,00,00,14,00,00,00,44,00,00,00,02,\
00,30,00,02,00,00,00,02,c0,14,00,13,00,05,01,01,01,00,00,00,00,00,01,00,00,\
00,00,02,c0,14,00,ff,ff,1f,00,01,01,00,00,00,00,00,05,07,00,00,00,02,00,4c,\
00,03,00,00,00,00,00,14,00,0c,00,02,00,01,01,00,00,00,00,00,01,00,00,00,00,\
00,00,18,00,1f,00,0f,00,01,02,00,00,00,00,00,05,20,00,00,00,20,02,00,00,00,\
00,18,00,1f,00,0f,00,01,02,00,00,00,00,00,05,20,00,00,00,24,02,00,00,01,02,\
00,00,00,00,00,05,20,00,00,00,20,02,00,00,01,02,00,00,00,00,00,05,20,00,00,\
00,20,02,00,00,52,00,65,00,6d,00,6f,00,74,00,65,00,20,00,44,00,65,00,73,00,\
6b,00,74,00,6f,00,70,00,20,00,55,00,73,00,65,00,72,00,73,00,4d,00,65,00,6d,\
00,62,00,65,00,72,00,73,00,20,00,69,00,6e,00,20,00,74,00,68,00,69,00,73,00,\
20,00,67,00,72,00,6f,00,75,00,70,00,20,00,61,00,72,00,65,00,20,00,67,00,72,\
00,61,00,6e,00,74,00,65,00,64,00,20,00,74,00,68,00,65,00,20,00,72,00,69,00,\
67,00,68,00,74,00,20,00,74,00,6f,00,20,00,6c,00,6f,00,67,00,6f,00,6e,00,20,\
00,72,00,65,00,6d,00,6f,00,74,00,65,00,6c,00,79,00,00,00

[HKEY_LOCAL_MACHINE\SAM\SAM\Domains\Builtin\Aliases\Names\Remote Desktop Users]
@=hex(22b):
Скачиваем psexec
Запускаем PsExec.exe с правами администратора в командной строке
PsExec.exe -s -i regedit.exe
В редакторе реестра импортируем файл реестра
Проверить, что появилась группа «Пользователи удаленного рабочего стола», для этого качаем Local User and Group Management

Группа «Пользователи удаленного рабочего стола» находится во вкладке «Группы»

Добавляем нашего пользователя в группу «Пользователи удаленного рабочего стола»
Проверяем, все должно работать.
Мне помогли в телеграм чате помощи по RDP Wrapper
The Remote Desktop feature is a powerful tool that allows users to access and control their PC from a different location. This functionality is particularly useful for professionals who need to access their work computer from home or for tech enthusiasts managing multiple systems. However, if you’re using the Home edition of Windows 11, you might have noticed that Remote Desktop isn’t available. This can be a frustrating realization, but there are several alternatives and solutions to help you achieve remote access. In this article, we’ll explore why Your Home Edition of Windows 11 Doesn’t Support Remote Desktop, and what steps you can take to enable remote access to your PC.
Windows 11 Home is designed primarily for casual users and home environments. It includes a variety of features that cater to everyday tasks, multimedia consumption, and basic productivity needs. However, some advanced features, such as Remote Desktop, are reserved for the Pro and Enterprise editions. This decision by Microsoft aims to differentiate the Home edition from its more feature-rich counterparts, providing a simpler, more streamlined experience for the average user.
Differences Between Windows 11 Home and Pro
The key differences between Windows 11 Home and Pro editions include:
- Remote Desktop: Only available on Windows 11 Pro and Enterprise.
- BitLocker Device Encryption: Offers enhanced security features on Pro.
- Hyper-V: Virtualization feature available only on Pro.
- Group Policy Management: Advanced system management for Pro users.
- Enterprise-level Security: More robust security features in Pro.
While these features are beneficial for business and professional environments, they are not typically necessary for home users, which is why they are excluded from the Home edition.
Alternatives to Remote Desktop on Windows 11 Home
Even though Remote Desktop isn’t available on Windows 11 Home, there are several alternatives that you can use to achieve remote access. Here are few of the best options:
1. Microsoft Remote Desktop App
Although the built-in Remote Desktop feature is not available, you can still use the Microsoft Remote Desktop app. This app allows you to connect to a PC running Windows 10 or 11 Pro or Enterprise from another device. Here’s how to set it up:
- Install Microsoft Remote Desktop: Download and install the Microsoft Remote Desktop app from the Microsoft Store.
- Configure the Host PC: Ensure the PC you want to connect to is running Windows 11 Pro or Enterprise and has Remote Desktop enabled.
- Connect: Open the Microsoft Remote Desktop app, enter the IP address or the name of the host PC, and connect.
2. Third-Party Remote Access Software
Several third-party applications offer robust remote access capabilities, often with more features than the built-in Remote Desktop. Here are some popular options:
TeamViewer
TeamViewer is a widely used remote access tool that is easy to set up and use. It supports cross-platform connections, meaning you can connect from a Windows, macOS, Linux, or mobile device.
- Installation: Download and install TeamViewer on both the host and client devices.
- Setup: Create an account and log in to both devices.
- Connect: Use the provided ID and password to establish a connection.
AnyDesk
AnyDesk is another popular choice known for its high performance and low latency. It is suitable for both personal & professional use.
- Installation: Download and install AnyDesk on both devices.
- Setup: Launch AnyDesk and note the AnyDesk address of the host device.
- Connect: Enter the AnyDesk address on the client device to connect.
Chrome Remote Desktop
Chrome Remote Desktop is a free tool from Google that allows remote access through the Chrome browser.
- Installation: Install the Chrome Remote Desktop extension from the Chrome Web Store.
- Setup: Set up remote access on the host device using your Google account.
- Connect: Use the Chrome Remote Desktop website to connect from the client device.
3. Enabling RDP with RDP Wrapper Library
For users comfortable with modifying system settings, the RDP Wrapper Library provides a workaround to enable Remote Desktop on Windows 11 Home. This method involves installing a third-party utility that enables the built-in Remote Desktop feature.
Steps to Enable RDP with RDP Wrapper
- Download RDP Wrapper: Visit the RDP Wrapper Library GitHub page and download the latest release.
- Extract Files: Extract the downloaded ZIP file to a folder on your PC.
- Install RDP Wrapper: Run the install.bat file as an administrator.
- Check Installation: Run RDPConf.exe to verify that RDP Wrapper is working correctly.
- Enable Remote Desktop: Go to System Properties, select the Remote tab, and enable Remote Desktop.
4. Using a VPN for Secure Remote Access
A Virtual Private Network (VPN) can provide a secure way to access your home network from a remote location. By setting up a VPN, you can connect to your home network as if you were physically present, allowing access to files and devices on your network.
Setting Up a VPN
- Choose a VPN Provider: Select a reputable VPN service that supports the devices you plan to use.
- Install VPN Software: Install the VPN client on both the host and client devices.
- Configure the VPN: Follow the provider’s instructions to set up and configure the VPN connection.
- Connect: Use the VPN client to connect to your home network from a remote location.
Conclusion
While your home edition of Windows 11 doesn’t support Remote Desktop natively, there are several effective alternatives to achieve remote access. Whether you opt for third-party software like TeamViewer or AnyDesk, use the Microsoft Remote Desktop app with a Pro or Enterprise host, or set up a VPN for secure access, you can still enjoy the benefits of remote connectivity. For those comfortable with advanced configurations, the RDP Wrapper Library provides a viable workaround to enable Remote Desktop on Windows 11 Home.
By exploring these alternatives, you can find the solution that best fits your needs, ensuring you stay productive and connected, no matter where you are. Remember to prioritize security when setting up remote access to protect your personal information and devices. With the right tools and precautions, remote access can be a seamless and efficient part of your daily routine.
Remote Desktop is a great feature in Windows 11 that lets us connect our PC to someone else’s PC, of course, with their permission, and access the content on it. It saves a lot of time and effort since we don’t have to be physically present at their place to access someone else’s Windows 11 PC. However, for some users, it’s currently not working properly.
If you’re also experiencing similar issues with Remote Desktop on your PC, try all the fixes we’ll share in this troubleshooting guide. So read ahead and quickly fix Remote Desktop not working on your Windows 11 PC and make the Remote Desktop quickly work.
Why Is Remote Desktop Not Working in Windows 11?
Various reasons could cause Remote Desktop not working in Windows 11. In this section, we’ll list out all the common reasons for this issue. So check all the possible reasons below:
- Remote Desktop Isn’t Enabled
- RDP Isn’t Allowed Through Defender Firewall
- Issues With the Remote Desktop Services
- Network Discovery Is Disabled
- Antimalware Software
- Conflicting Windows Update
- Missing Values in Registry Editor
- Enabled UDP
- Remote Desktop Port Forwarding
- Temporary Issues
- Outdated Windows 11
Fix Remote Desktop Not Working in Windows 11
There are several fixes to fix Remote Desktop not working in Windows 11. Here in this section, we’ll share all the potential solutions in detail. So read ahead, try all the mentioned fixes, and check what resolves this common issue on your Windows 11 PC or laptop:
1. Ensure the Remote Desktop Function Is Enabled
It may be possible that the Remote Desktop functionality isn’t enabled on your PC, which is why the Remote Desktop not working issue is appearing on it. Therefore, we suggest you ensure it’s enabled on your PC. So, follow the below steps to easily make sure the same:
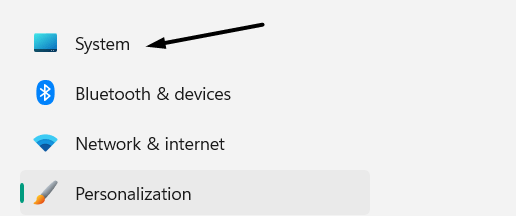
1. Using Windows + I, open the Settings app on your computer and click System on the left.
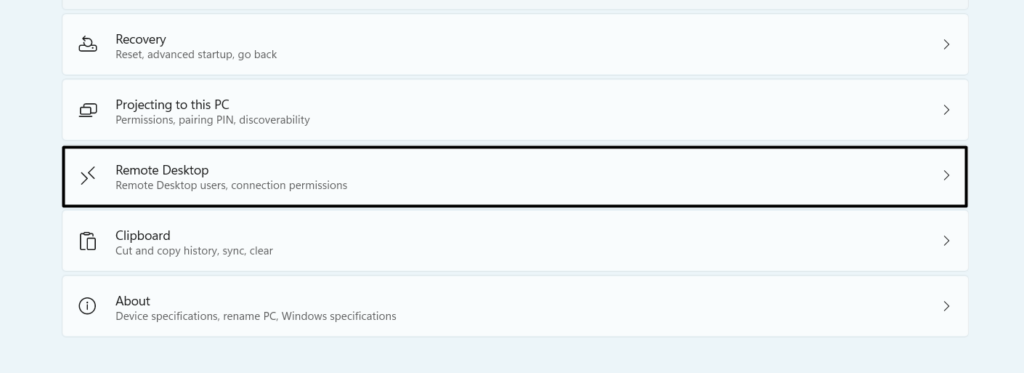
2. On the right, choose the Remote Desktop option to access the remote desktop options.
3. On the next screen, toggle on Remote Desktop to turn on the Remote Desktop option.
Note: To enable the Remote Desktop feature on your PC, you must have a Windows 11 Pro edition.
2. Allow RDP through Windows Defender Firewall
Your computer’s Windows Defender Firewall may be stopping the Remote Desktop function from working properly for some privacy reasons. As a result, this issue is occurring. Considering this, we suggest you allow RDP through Windows Defender Firewall in the Control Panel. You can do so by following the below prompts on your PC:
1. To permit RDP through Windows Defender Firewall, open the Windows Security app on the PC.
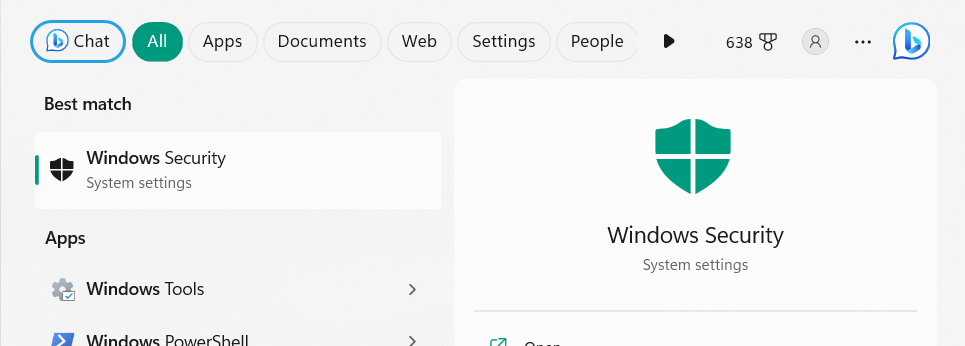
2. In the next window, choose Firewall & network protection and click Allow an app through firewall.

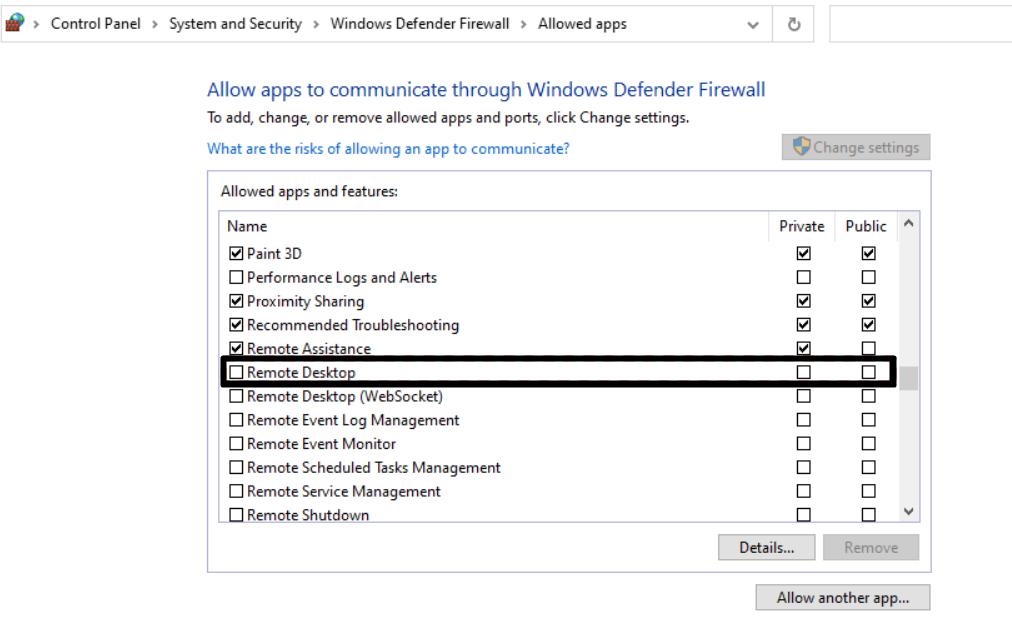
3. In the Control Panel window, look for Remote Desktop in the box and make sure it’s checked. If it isn’t checked, click on the Change settings button at the top and check them.
3. Check That Remote Desktop Services Are Enabled
To let the Remote Desktop function work properly on your computer, make sure that the “Remote Desktop Services” service is operating properly. So, ensure the same on your PC. You can do the same with ease by following the below-mentioned steps on your PC or laptop:
1. Open the Run program on your PC, type services.msc in its search box, and hit the Enter key.
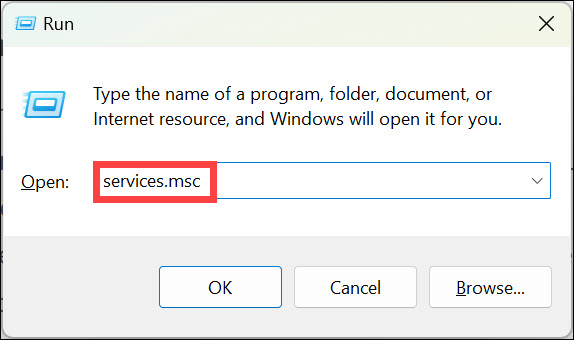
2. In the Services window, find the “Remote Desktop Services” service, and double-click it to open its properties.
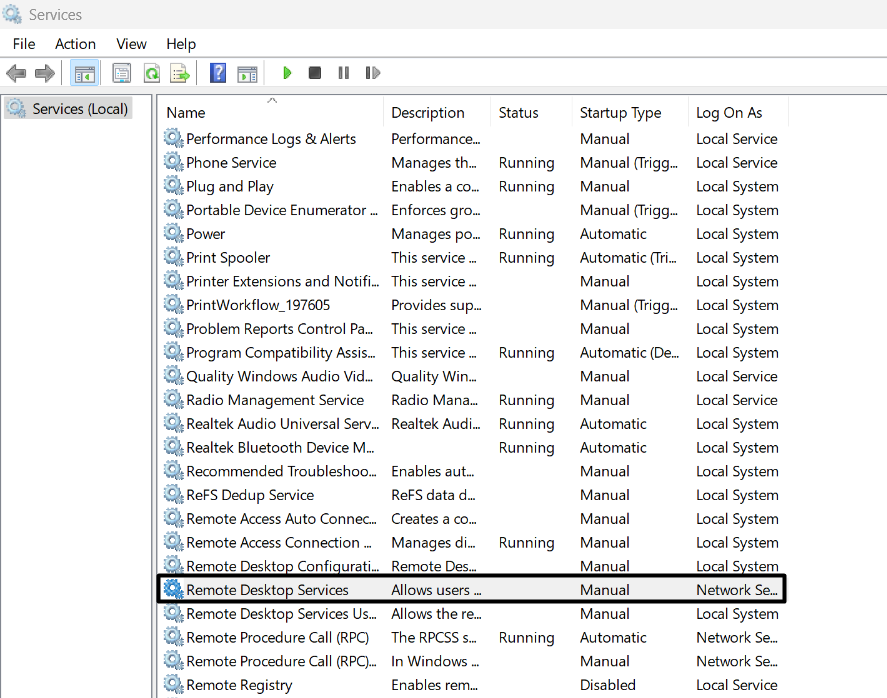
3. In the next window, click Start to start the “Remote Desktop Services” service on the device. If it’s already enabled, stop it, and restart it to refresh it and fix temporary issues with it.
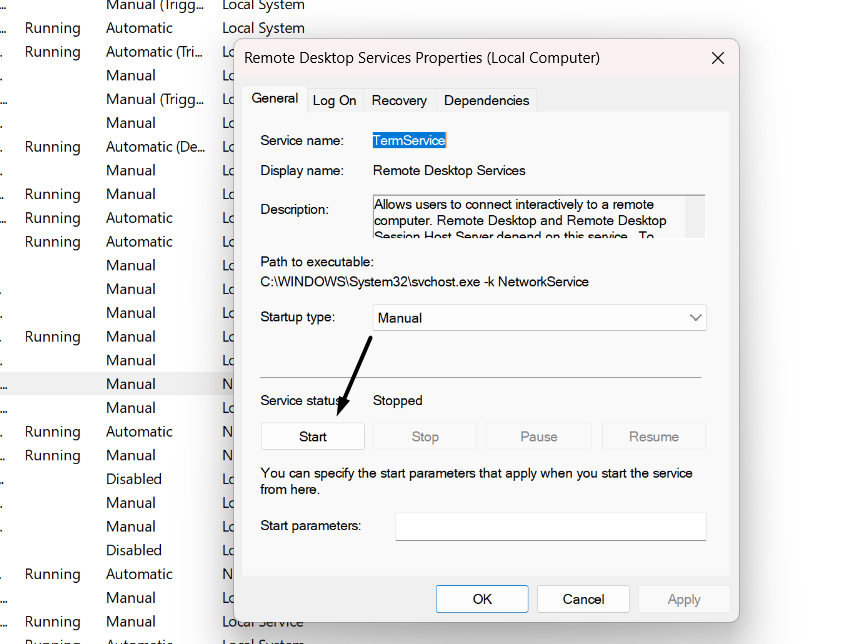
4. Click the OK button to save the change and close the window to check the issue’s status.
4. Check the Startup type in Remote Desktop Services
It could be possible that the “Remote Desktop Services” service that helps the Remote Desktop function properly isn’t automatically starting at the PC’s boot. Hence, Remote Desktop isn’t working well. Thus, we suggest you check the startup settings of the above service in the Services app. To check the same, follow the below-mentioned steps:
1. Open the Run utility on your PC, type services.msc in its search box, and hit the Enter key.

2. In the Services window, search for Remote Desktop Services and check if the Startup Type is set to Automatic. If it isn’t, right-click it, and select Properties from the menu.
3. In the next window, set Startup type: to Automatic, and click the Apply button to apply the change.
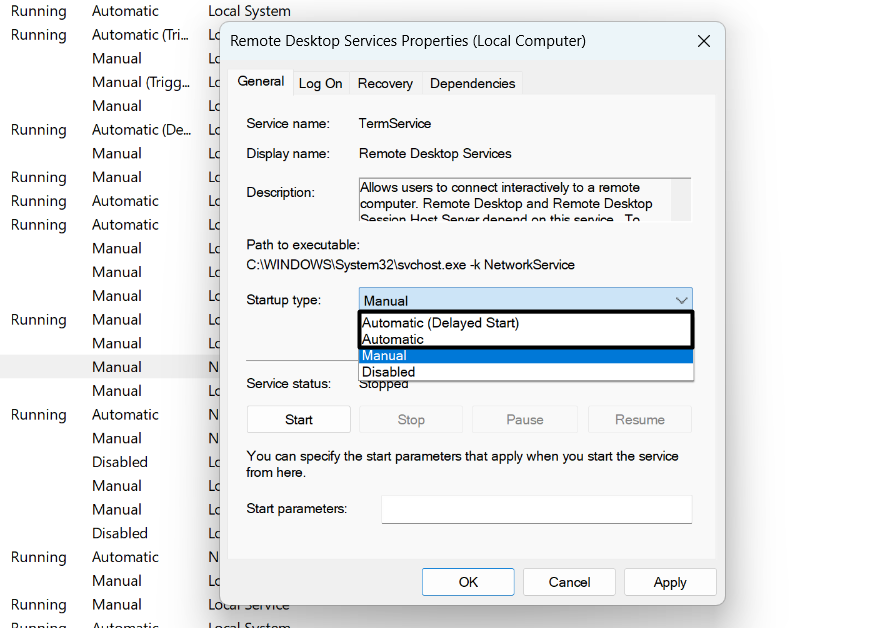
4. After making the above change, close the window, and restart your PC to get rid of this issue.
5. Enable the Network Discovery Option
To let the Remote Desktop function work on your PC, the Network Discovery option must be enabled on it. This is because this option helps the other PCs discover your PC to connect to. Follow the prompts to learn how to turn on Network Discovery in Windows 11:
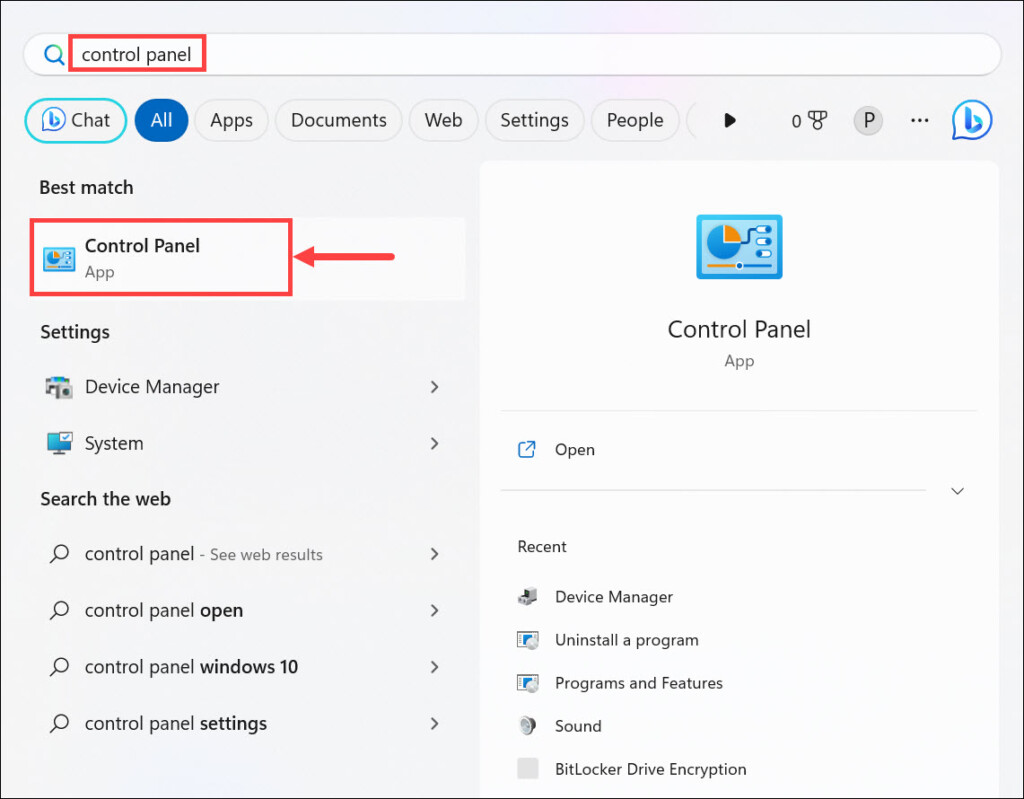
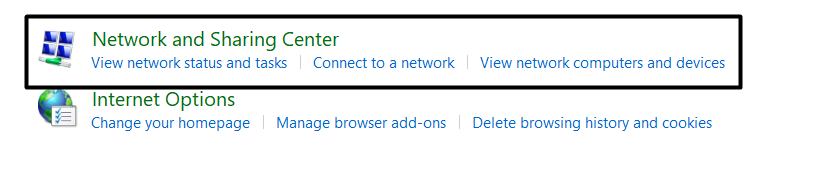
1. To enable the Network Discovery option, open the Control Panel app using any way you want.
2. Choose Network and Internet, and on the next screen, select Network and Sharing Centre.
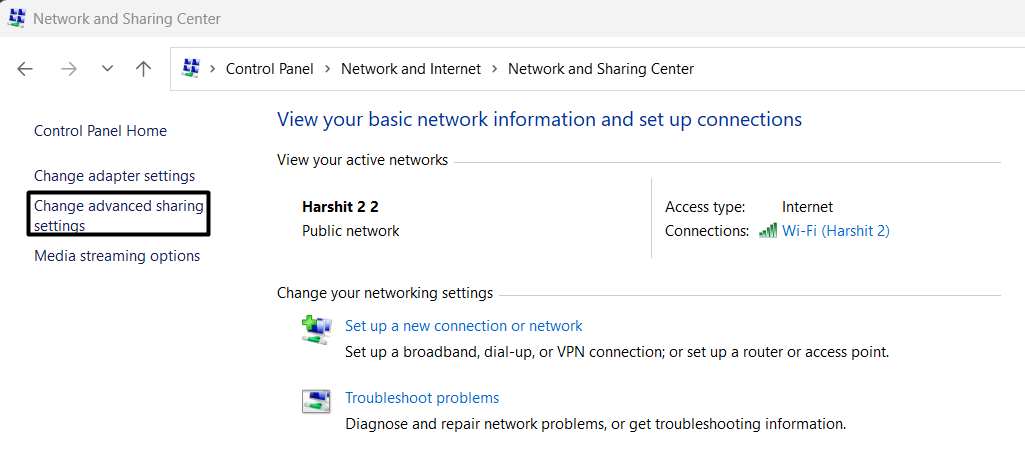
3. On the next screen, click Change advanced sharing settings on the left to move ahead.
4. Next to Network discovery under Public networks, turn on the toggle and exit the window.
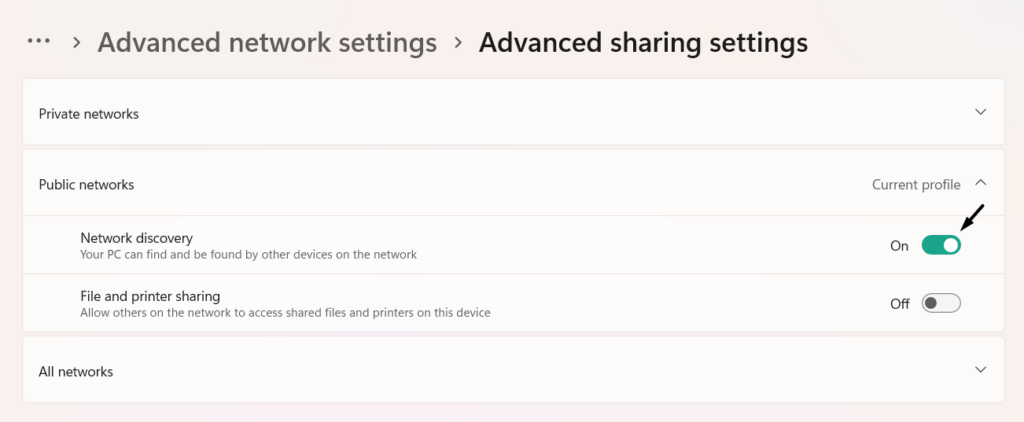
5. After executing the above steps, check if the Remote Desktop option is now working properly.
6. Add the Host PC’s IP Address
Some users in the online forums mentioned that they fixed the Remote Desktop not working issue on their Windows 11 PC by adding the host PC’s IP address in the Hosts file. So, do the same to fix it on your PC. We’ve mentioned the steps to do the same below:
1. Open the File Explorer app on your computer, and once opened, go to the below location:
C:/Windows/System32/Drivers/etc
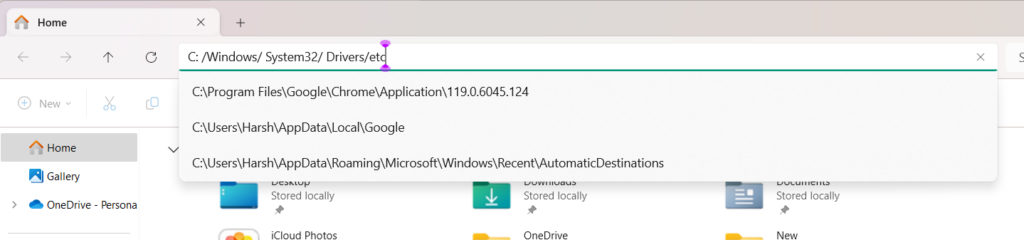
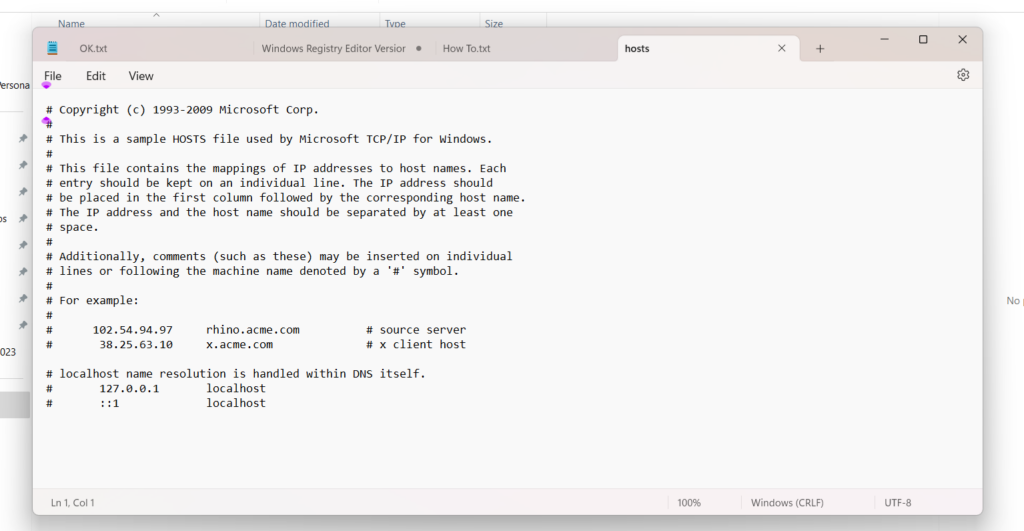
2. Find the hosts file, right-click it, and select Open with > Notepad from the context menu.
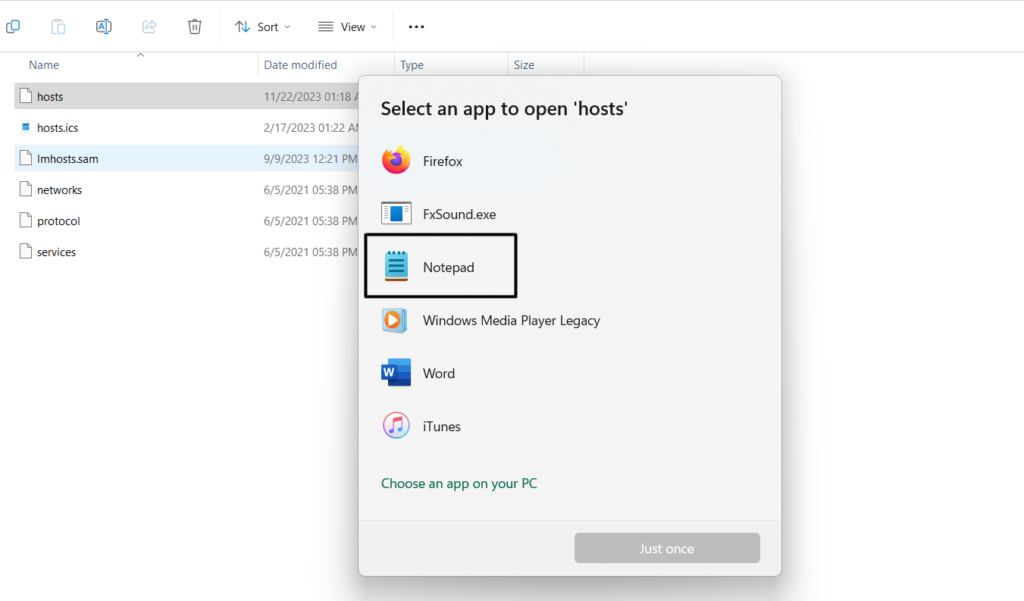
3. In the Notepad window, type the IP address of the host PC and press Windows + S to save it.
4. After entering the host’s IP address, reboot the PC, and confirm the problem’s status on it.
7. Disable Antimalware Software
A Microsoft community user recommended users disable any antimalware software on the PC, as it could be the one causing this issue. So if you also have an antimalware app on your Windows 11 PC, consider disabling or uninstalling it for a while. Once done, check whether the Remote Desktop not working issue is fixed on your Windows 11 PC or laptop.
8. Make the Following Change In the Registry Editor
During the research, we found that making changes to the Remote Desktop associated values and keys in the Registry Editor could also make this function work again. So, we suggest you follow the below steps and make the following edits in your PC’s Registry Editor:
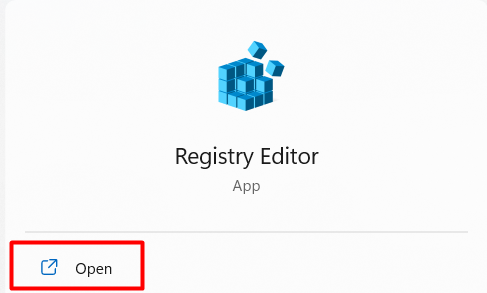
1. Launch the Registry Editor app on your computer and go to the following path using the search:
Computer\HKEY_LOCAL_MACHINE\SOFTWARE\Policies\Microsoft\Windows NT\Terminal Services\Client
2. Look for fClientDisableUDP on the right, and then double-click it to open its properties.
Note: In our case, there’s no value like this. If that’s the same with you, create a new value on the PC.
3. Type 1 in the Value data: text field, and then choose the OK button to save the change.
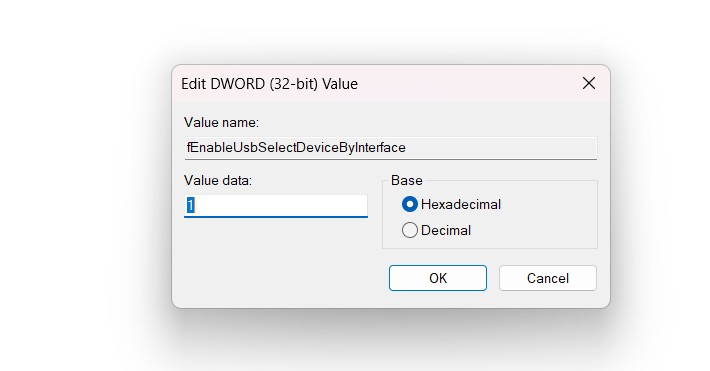
4. Close the window, and reboot the PC to check if it resolved Remote Desktop not working.
9. Turn Off the UDP Option in Group Policy
One way to fix issues with Remote Desktop in Windows 11 is to turn off UDP or User Datagram Protocol (UDP) in the Group Policy Editor. If your Windows 11 version has the Group Policy Editor, try the same. You can check the below steps to know how to do so:
1. Open the Run box, type gpedit.msc in it, and press the Enter key to open the Group Policy Editor.
2. In the Group Policy Editor, go to the below location and choose Turn Off UDP On Client on the right.
Computer Configuration > Administration Templates > Windows Components > Remote Desktop Services > Remote Desktop Connection Client
3. In the Turn Off UDP On Client window, choose Enabled and click OK to make the change.
4. After making the above-mentioned changes, close the program and confirm the issue’s status on your PC.
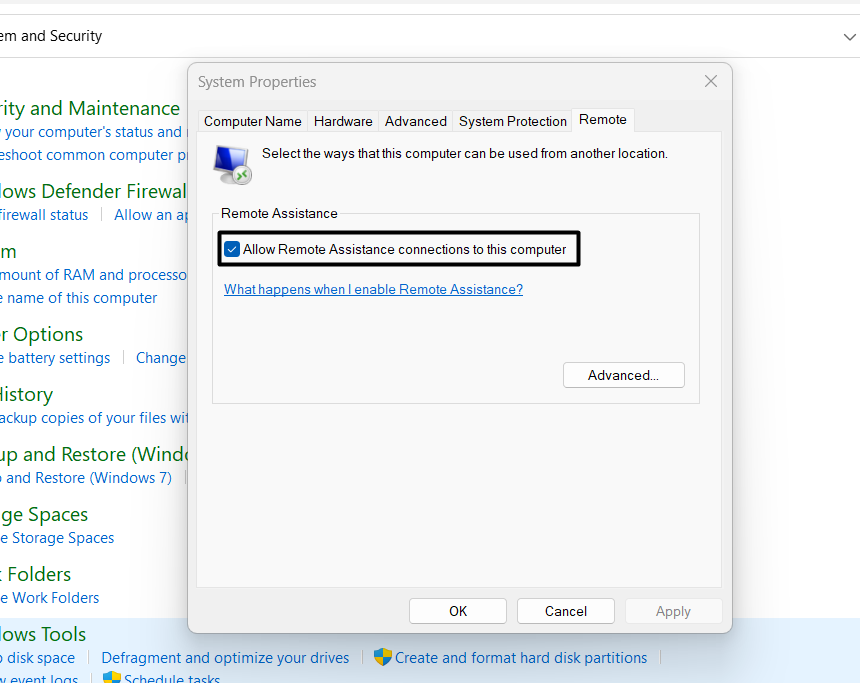
10. Check Remote Assistance Is Enabled in System Properties
Besides the Network Discovery option, you also need to make sure the Remote Assistance is enabled on the PC. This is because it plays an essential role in the working of Remote Desktop. Follow the below-mentioned steps to check the same on your PC:
1. Open the Control Panel app on your device and set the View: dropdown to Category.
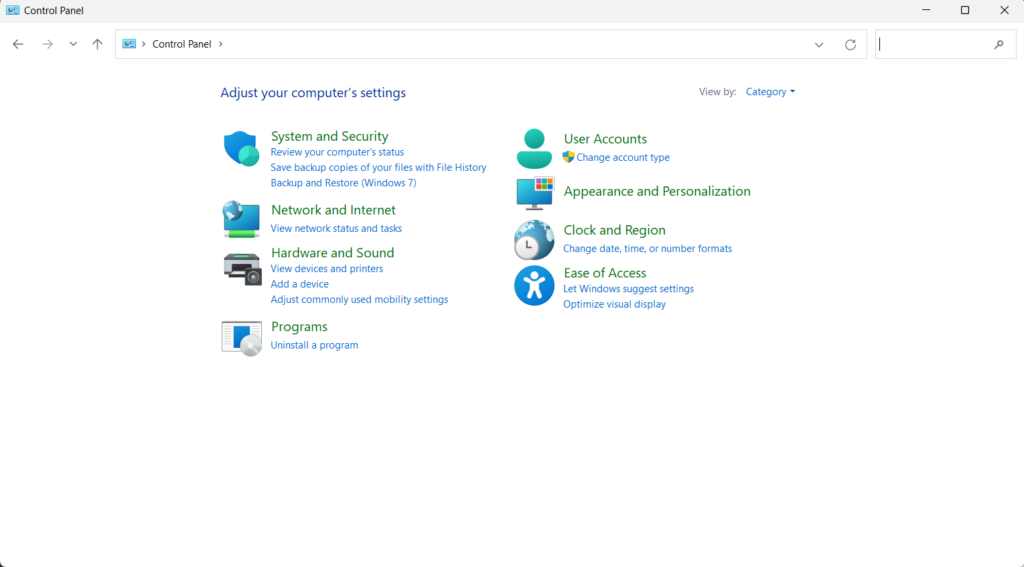
2. Choose the Allow remote access option under System and tick the below option on the screen:
Allow Remote Assistance Connections to this Computer
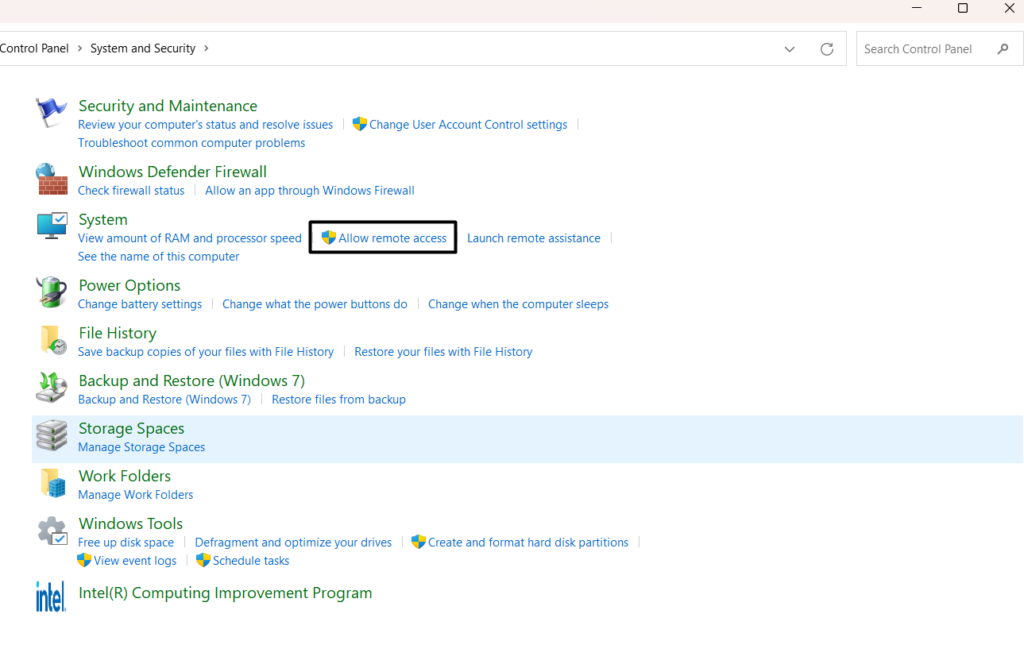
3. Lastly, choose the Apply button and then OK to apply the above change and close the window.
11. Verify Remote Desktop Port Forwarding
Some users in the online forums suggested users verify the Remote Desktop port forwarding. Considering this, you also need to forward the TCP port – 3389, which is the default Remote Desktop port to the internal IP address of your remote Windows 11 PC. So cross-check the same and check whether it’s causing the issue on your PC or laptop.
12. Uninstall the Recent Windows Update
For some users, this problem started appearing after installing a Windows update. If that’s the same with you, find the conflicting update, and then uninstall it. It’s very easy to uninstall conflicting updates in Windows 11, and the below-mentioned steps explain the same:
1. Open the Windows Search Box, type Uninstall updates in it, and select it from the search results.
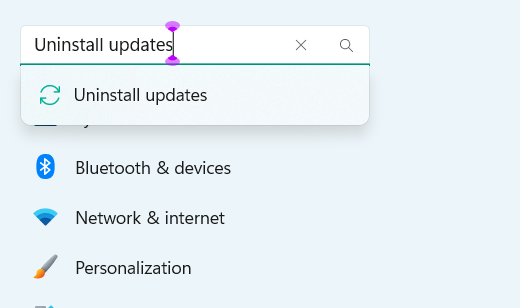
2. In the Uninstall updates window, locate the conflicting update, and choose Uninstall next to it.
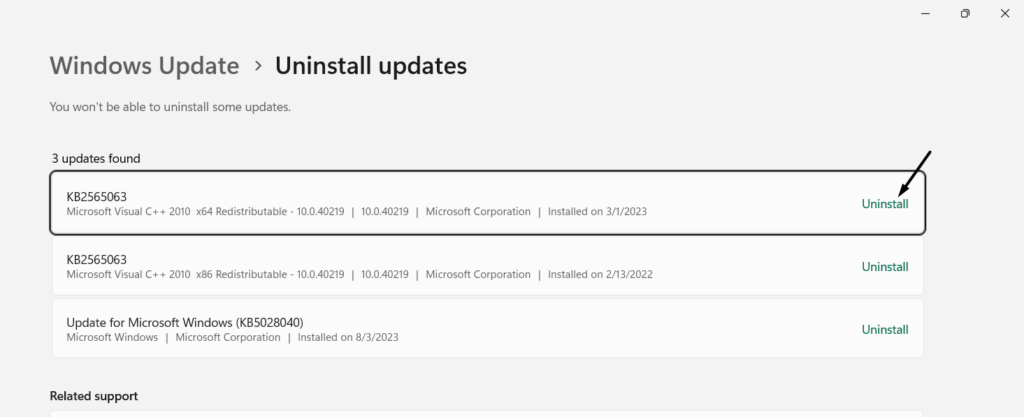
3. Again click the Uninstall button in the new prompt to remove it from your Windows 11 PC.
13. Use a Third-party Remote Desktop App
If none of the above-mentioned workarounds help you resolve the Remote Desktop not working in Windows 11, we suggest you use a third-party remote desktop app until the issues with the integrated Remote Desktop functionality get fixed on your Windows 11 PC.
FAQs
Why Remote Desktop Is Not Connecting in Windows 11?
There could be several reasons for the non-functioning of Remote Desktop in Windows 11, like outdated Windows 11 OS, conflicting updates, disabled Network Discovery, bugs, etc.
How Can I Enable Remote Desktop in Windows 11?
You can enable Remote Desktop on your Windows 11 PC from the Remote Desktop area of the Settings app.
How Do I Reinstall Remote Desktop on Windows 11?
To reinstall Remote Desktop on your computer, go to the Apps section in the Settings app, search for the functionality, and then simply uninstall it by selecting Uninstall from its menu.
Why My Remote Desktop Is Not Working?
It may be possible that your PC’s current Windows OS has some bugs, which is why Remote Desktop isn’t working. Another reason could be antimalware software installed on the PC.
How to Enable Remote Desktop in Windows 11 Using CMD?
To enable the Remote Desktop option on your Windows PC using CMD, run the listed commands in it:
reg add "HKEY_LOCAL_MACHINE\SYSTEM\CurrentControlSet\Control\Terminal Server" /v fDenyTSConnections /t REG_DWORD /d 0 /fnetsh advfirewall firewall set rule group="remote desktop" new enable=YesFinal Words
Remote Desktop is a great feature that improves experience with Windows 11. But for some users, it’s currently not working properly. According to them, they aren’t able to discover other computers on their PC to connect to them.
In case that was the same with you, we hope the fixes we shared in this Remote Desktop not working in Windows 11 in-depth fixes guide help you fix it. If yes, then do let us know which fix helped you resolve it.