
Все способы:
- Шаг 1: Проверка функций
- Статус Secure Boot
- Статус TPM-модуля
- Шаг 2: Активация функций
- Включение Secure Boot
- Включение TPM
- Шаг 3: Настройка технологии шифрования ОС
- Вопросы и ответы: 5
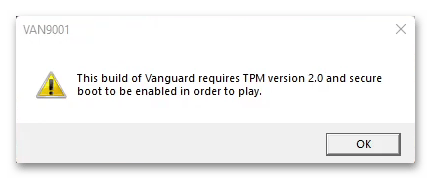
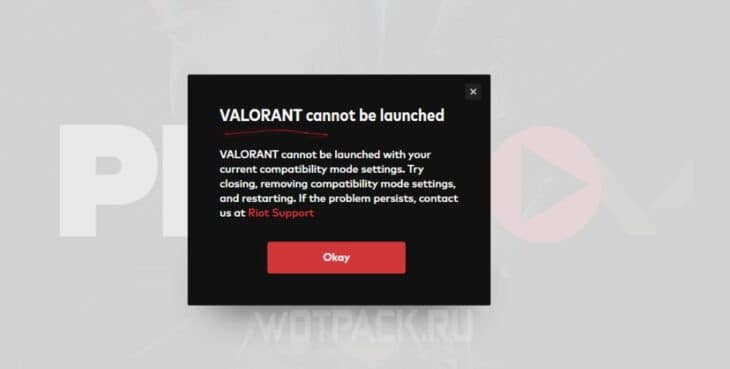
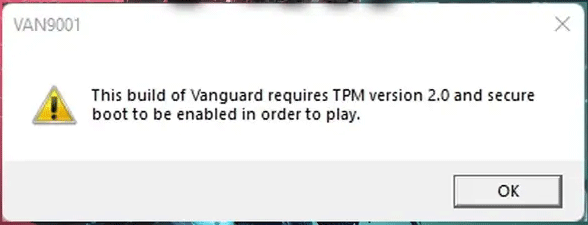
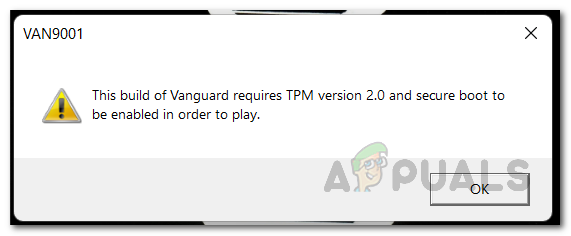
Обратите внимание! Окно с ошибкой «VAN 9001» обычно появляется на компьютерах с ОС Windows 11 и сообщает о том, что безопасная загрузка и доверенный платформенный модуль, необходимые для запуска Valorant, отключены. Мы разделим инструкцию по решению этой проблемы на несколько шагов, но если какой-нибудь из них вы уже выполнили, пропустите его.
Шаг 1: Проверка функций
TPM-модуль и Secure Boot должны быть на всех компьютерах с Windows 11, где запускается Valorant. И даже несмотря на то, что эти требования можно обойти прямо во время установки системы, технологию безопасности «Vanguard», видимо, не обманешь, а значит, в первую очередь нужно убедиться, что компьютер поддерживает эти функции, а заодно проверить их текущий статус.
Статус Secure Boot
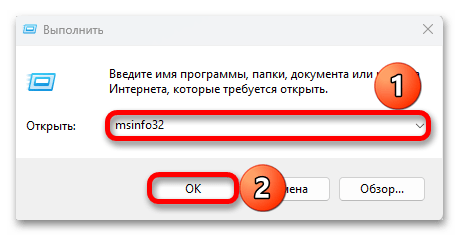
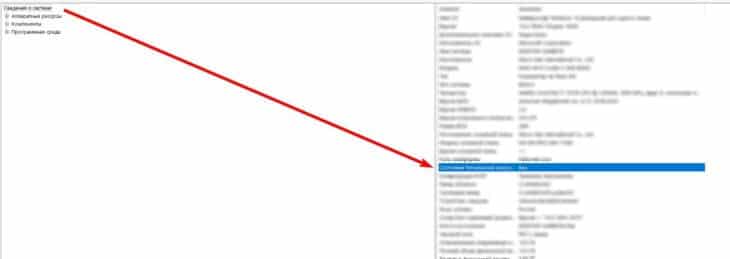
- Нажимаем «Windows+R», вводим команду
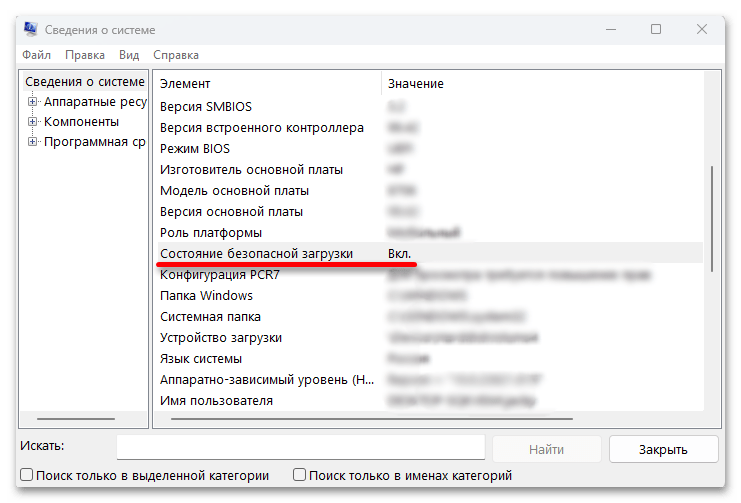
msinfo32и жмем «Enter». - В открывшемся окне находим позицию «Состояние безопасной загрузки» и смотрим статус справа от нее. У нас функция активна, но если у вас она выключена, переходите к следующему шагу.
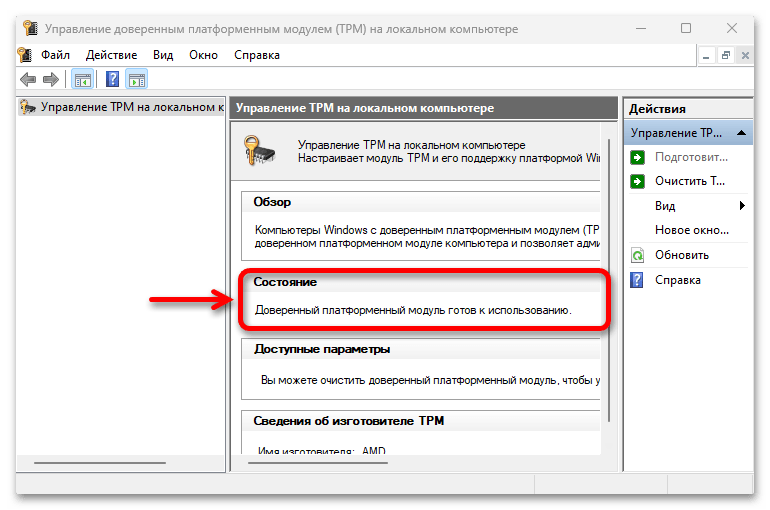
Статус TPM-модуля
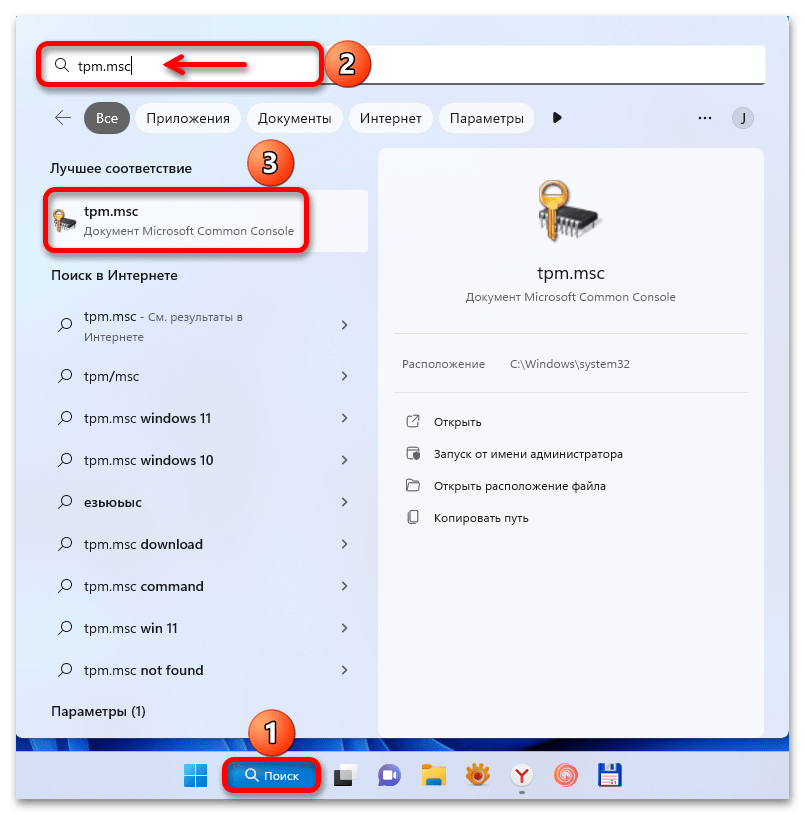
- В поиске Виндовс 11 вводим
tpm.mscи открываем консоль. - Проверяем состояние доверенного модуля. Скриншот ниже показывает ситуацию, когда он включен. Если TPM 2.0 не обнаружен, значит, он не поддерживается или его нужно включить в BIOS.
Шаг 2: Активация функций
Включение технологий будем рассматривать на примере ноутбука HP, но и в моделях других брендов нужно будет действовать похожим образом.
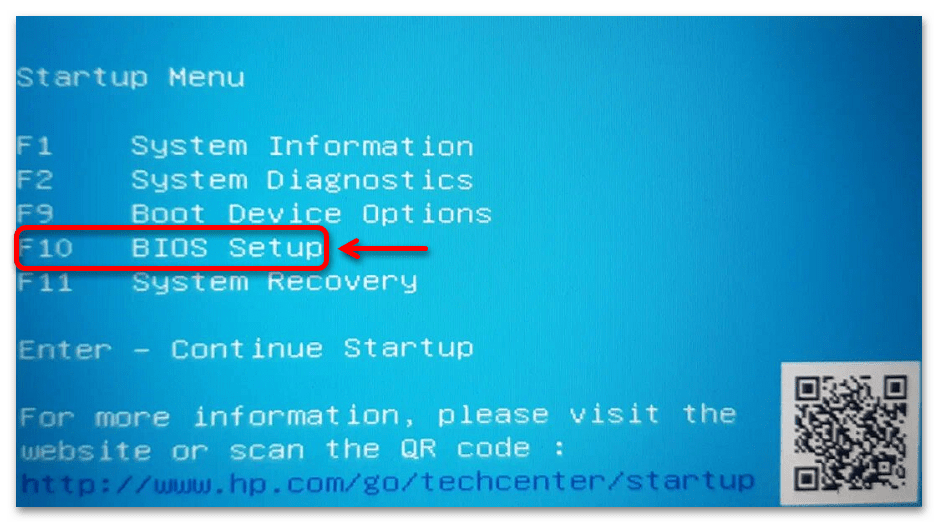
В обоих случаях необходимо войти в BIOS. На нашем устройстве это делается через загрузочное меню. Перезагружаем систему, несколько раз жмем клавишу «Esc», а затем «F10».
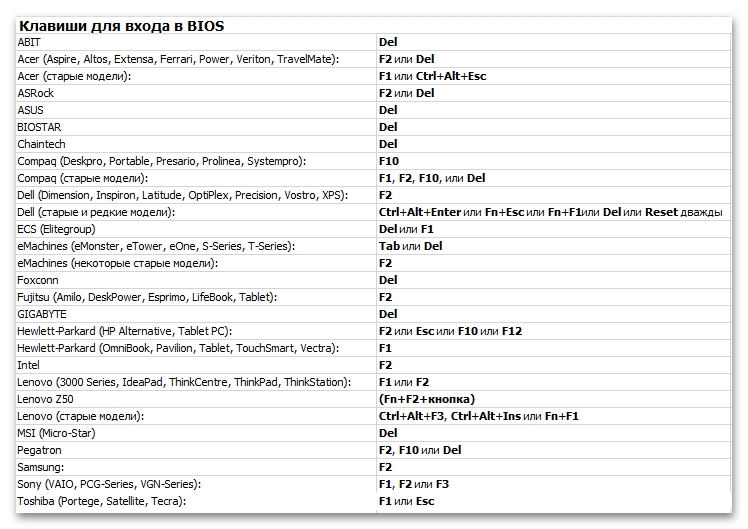
На других ноутбуках и персональных компьютерах процедура будет немного отличаться. Получить подробную информацию можно на сайте производителя или в наших специальных статьях на эту тему.
Подробнее:
Как попасть в BIOS на компьютере
Как попасть в BIOS на ноутбуке
Включение Secure Boot
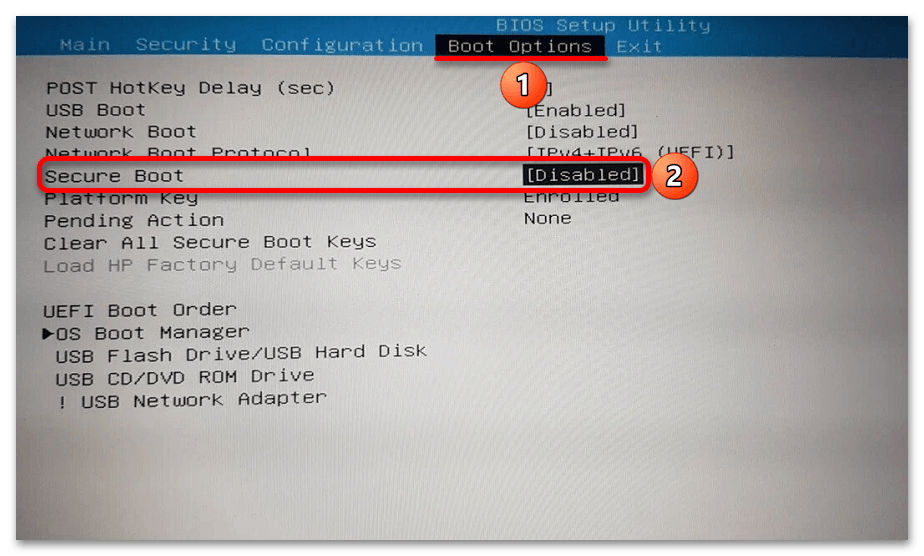
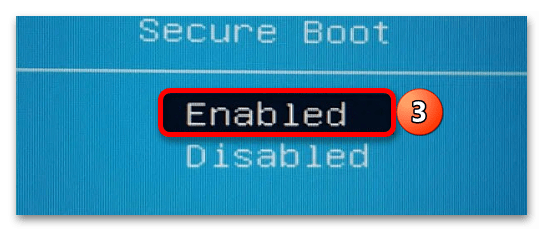
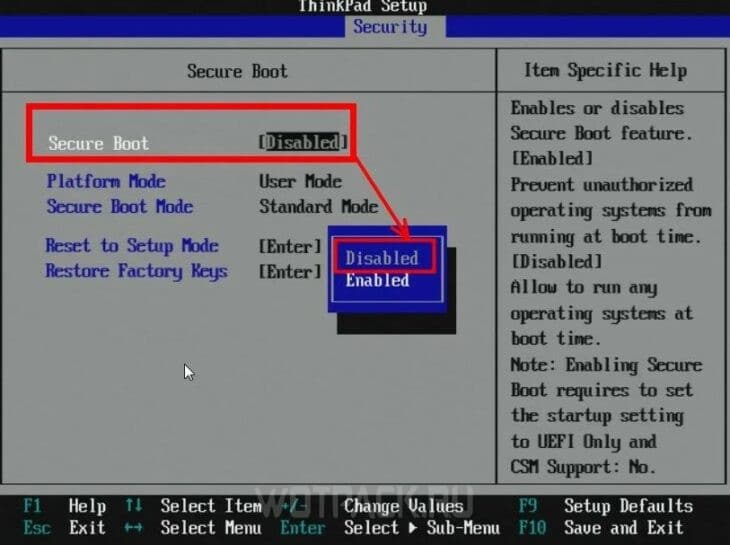
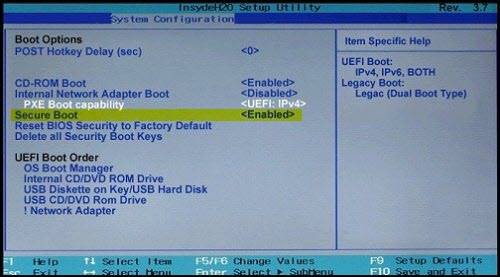
- Учитывая, что Secure Boot защищает устройство от запуска несанкционированных образов, следует в первую очередь искать разделы «Boot Option», «Security» и т.д. Если стоит значение «Disabled», как на скриншоте ниже, вызываем меню функции

и включаем ее.
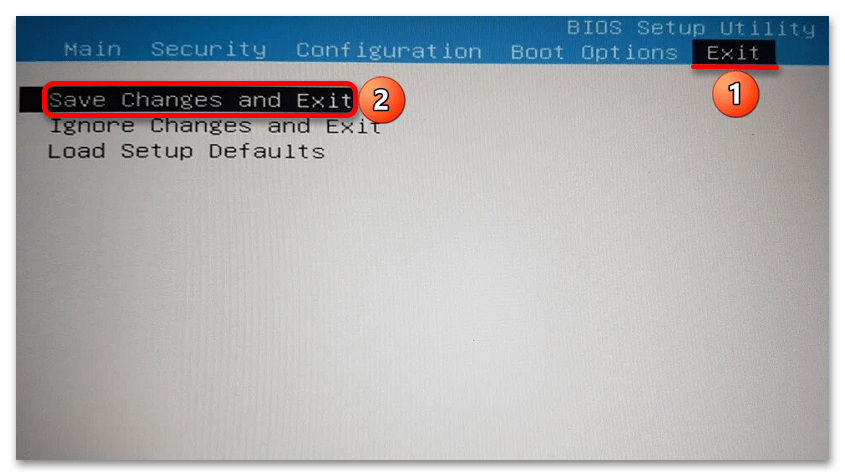
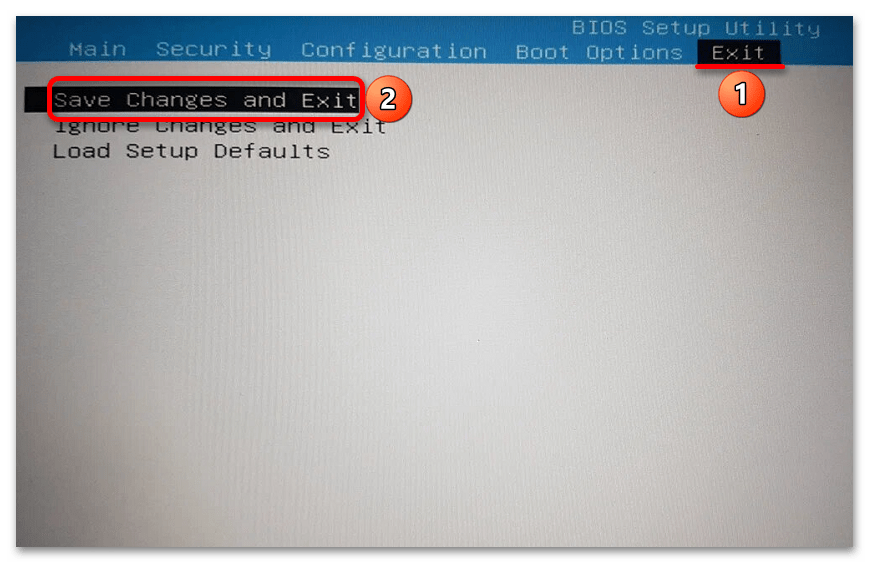
- Теперь переходим во вкладку «Exit», которая должна быть во всех BIOS/UEFI, жмем «Save Changes and Exit»

и подтверждаем перезагрузку в штатном режиме.

Если вы до сих пор не нашли, как включить безопасную загрузку, вам может пригодиться наша статья с инструкциями по ее отключению на ноутбуках разных производителей и материнской плате Gigabyte.
Подробнее: Как отключить Secure Boot в BIOS
Включение TPM
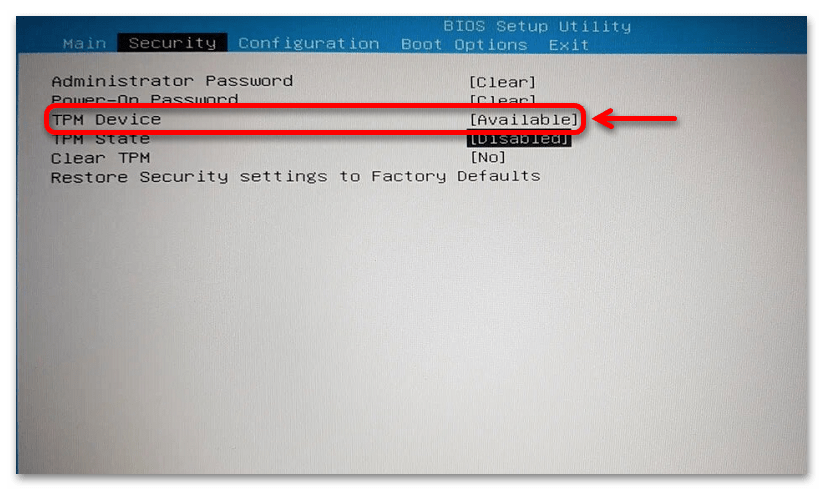
- Trusted Platform Module – еще одно средство обеспечения безопасности компьютера, поэтому также ищем раздел «Security» или что-то похожее. Если обнаружите пункт «TPM Device» со значением «Hidden», значит, опция управления доверенным модулем скрыта. В этом случае выбираем эту запись, нажимаем «Enter» и устанавливаем значение «Available».
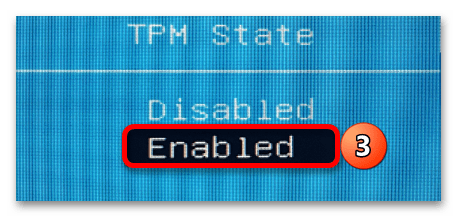
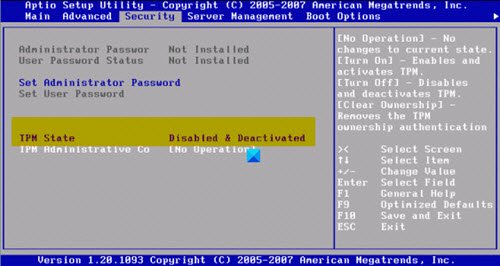
- В любом случае ищем пункт «TPM State», «Security Chip», «fTPM», «Trusted Platform Module» и похожие,

а затем убеждаемся, что установлено значение «Enabled».
- После этого сохраняем изменения и перезагружаем ПК.

Если вы самостоятельно не нашли, как включить TPM 2.0, подробные инструкции, а также информация о поддержке модуля должны быть на официальном сайте производителя вашего ноутбука или материнской платы.
Шаг 3: Настройка технологии шифрования ОС
Обычно после первых двух шагов все начинает работать, но бывают случаи, когда даже при включенном в BIOS TPM-модуле Windows, а, следовательно, и Vangard не могут его определить. Этот способ подходит только для системы версии «PRO» и выше, так как функция шифрования «Битлокер» и «Редактор локальной групповой политики», где будем менять ее параметры, домашнее издание не поддерживает.
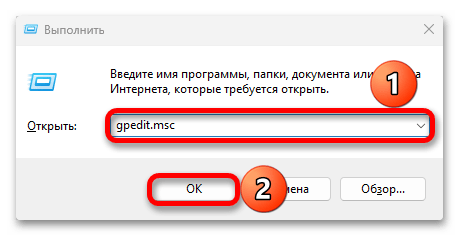
- Снова вызываем оснастку «Выполнить» («Windows+R») вводим
gpedit.mscи нажимаем «OK».
Читайте также: Запуск «Редактора локальной групповой политики» в Windows 11
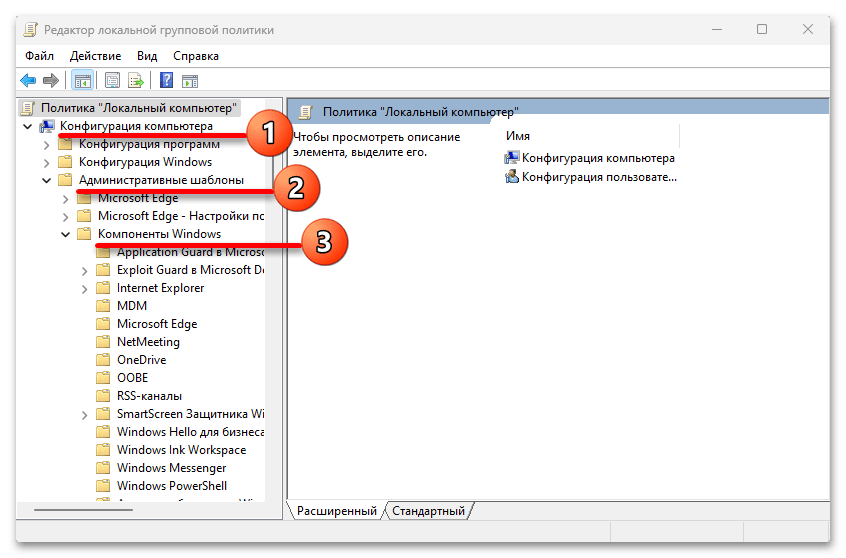
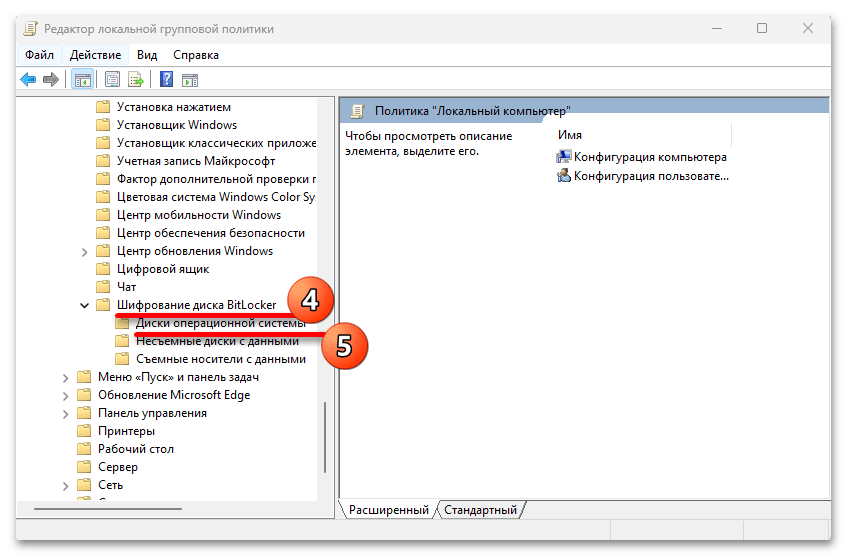
- Переходим в раздел с компонентами Windows так, как показано на скриншоте ниже:
Конфигурация компьютера/Административные шаблоны/Компоненты Windows
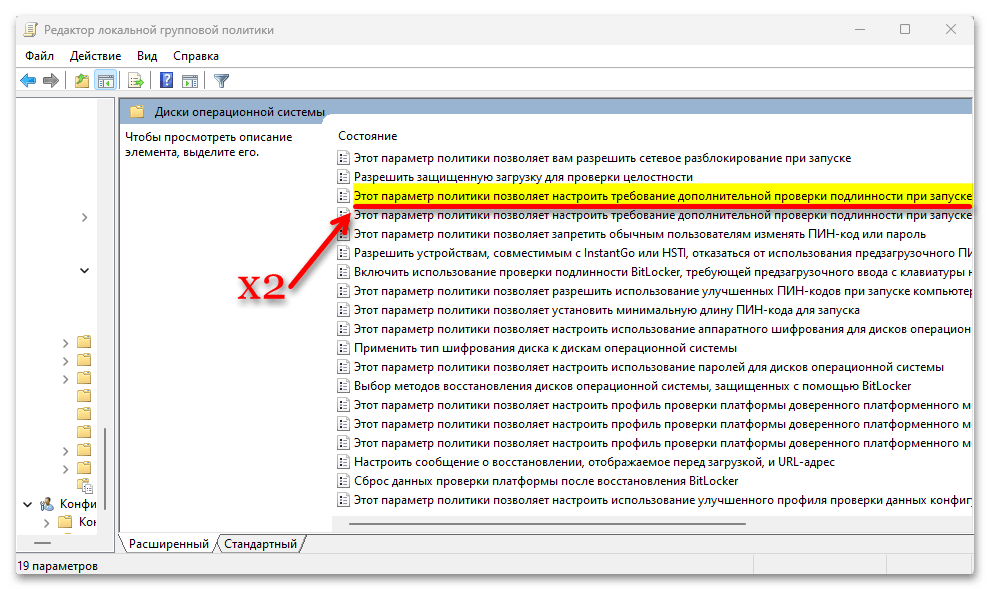
находим папку «Шифрование диска Битлокер» и кликаем «Диски операционной системы».
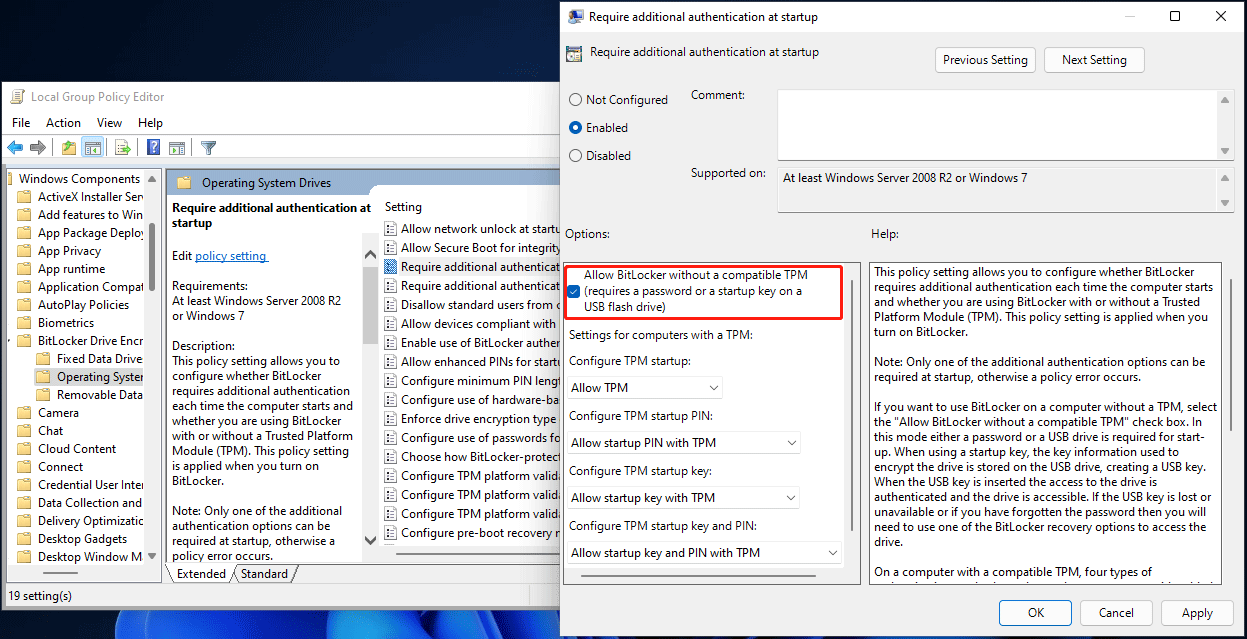
- Здесь нас интересует параметр для настройки требования дополнительной проверки подлинности при загрузке. Находим его и открываем двойным кликом.
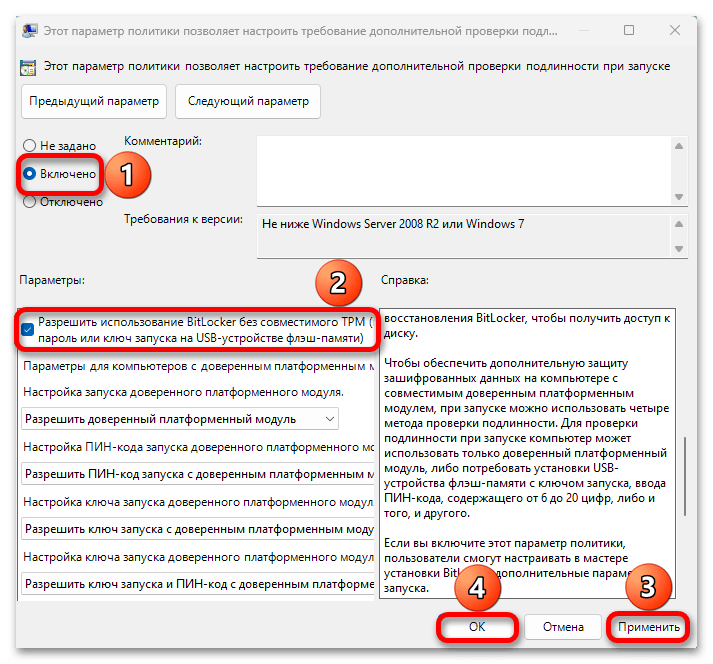
- Включаем опцию, затем в ее параметрах ниже разрешаем использовать Битлокер без совместимого TPM-модуля, принимаем новые настройки, закрываем окно, сам «Редактор» и перезагружаем ОС.
Наша группа в TelegramПолезные советы и помощь
Предоставляем решение основных ошибок в Valorant, возникающих из-за проблем в системе, работы анти-чита или других причин.

Ошибки в Valorant зачастую не просто мешают играть, а даже не позволяют запустить игру. Большая часть проблем вызвана некорректной работой собственного античита Riot Games — Vanguard, который работает с системой напрямую и очень чувствителен к любому софту. Чтобы разобраться со сложностями, стоит знать коды ошибок.
В руководстве предоставим решение ошибок в Valorant с объяснением причин их возникновения.
Решение всех ошибок в Валорант
Далее предоставим подробное решение ошибок в Валорант, которые чаще всего встречаются, а также объяснение каждого из наиболее популярных кодов.
Ошибка VAN

Ошибка VAN в Valorant — конкретный тип набора ошибок, которые могут возникать в игре по разным причинам: ошибки клиента или соединения, но зачастую связаны с античитом Vanguard. Чтобы решить ошибку, важно смотреть инструкцию для конкретного номера после кода «VAN», далее разберем наиболее популярные из них.
Ошибка VAN9003
Ошибка VAN9003 в Valorant зачастую появляется на ноутбуках с ОС Windows 11 и вызвана отключенной безопасной загрузкой. Сперва стоит проверить, действительно ли она выключена:
- Зажмите сочетание клавиш «Win+R». В открывшемся окне впишите «msinfo32» и нажмите «Enter».

- Кликните на «Сведения о системе», затем в правой части окна, примерно в середине», отыщите пункт «Состояние безопасной загрузки».
Если рядом написано «Выкл», следуйте инструкции:
- Включая компьютер, войдите в BIOS или UEFI. Комбинация и порядок действий для открытия биоса отличается от производителя к производителю.

- Перейдите в раздел «Security», после чего найдите пункт «Secure Boot», затем установите значение «Enable», либо же «Available».

- Нажмите клавишу рядом с «Save and Exit». Настройки сохранятся, после чего произойдет перезапуск системы. Проблема должна быть решена.
Ошибка при запуске
Ошибок при запуске Valorant может быть множество. Большинство из них чинится простым перезапуском клиента и всех процессов Riot. Если же это не помогло, стоит попробовать следующее:
- Запустите процесс от имени администратора.
- Проверьте целостность игровых файлов: перейдите в «Библиотеку», выберите Валорант, а затем кликните на три точки рядом с логотипом. Затем открывайте «Управление» и «Проверить файлы».
- Очистите логи игры: для этого перейдите в расположение запускаемого файла и удалите временные файлы.
- Убедитесь, что Vanguard не блокируется другими программами.
Ошибка Windows 11
На Windows 11 чаще всего возникает две ошибки: VAN 9001 и VAN 9003. Вторая была разобрана в пункте выше. Ошибка VAN9001 в Valorant возникает как из-за выключенной функции безопасной загрузки, так и из-за выключенного TPM 2.0. Для решения проблемы требуется:
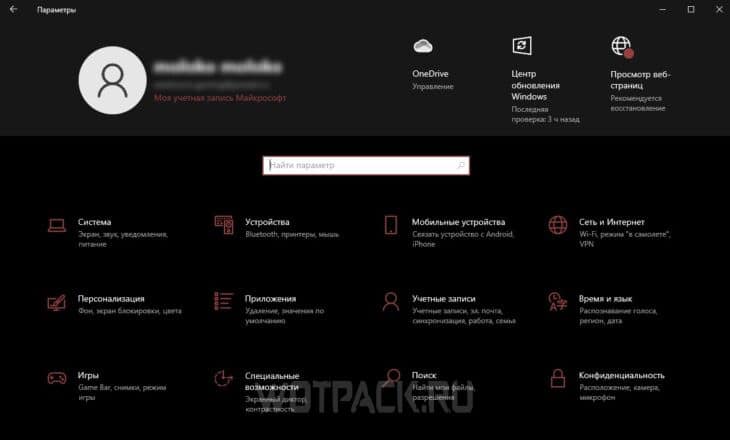
- Откройте параметры Windows.

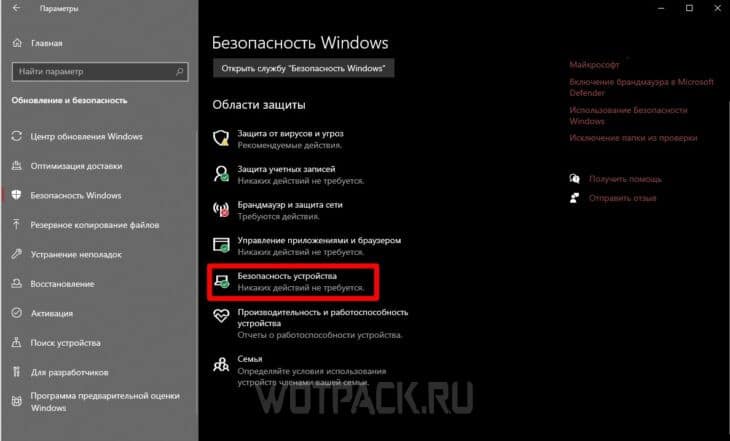
- Перейдите в раздел «Безопасность Windows». Там необходимо найти раздел «Безопасность устройства».

- Если в этом пункте отсутствует раздел «Обработчик безопасности», значит, TPM недоступен. Если он есть, перейдите туда и убедитесь, что версия спецификации — 2.0. В противном случае устройство не соответствует требованиям Windows 11.
Чтобы включить TPM, необходимо зайти в BIOS/UEFI, делается это различными способами, в зависимости от производителя:
- Перейдите в «Настройки», затем «Обновление и безопасность», кликайте «Восстановление», после чего «Перезапустить сейчас».
- На следующем этапе выбирайте «Устранение неполадок», после этого выбирайте «Дополнительные параметры» и «Настройки прошивки UEFI». Перезапускайте устройство.
- Настройки могут содержаться в разделах «Расширенные», «Безопасность» или «Доверенные вычисления». Сама опция TPM может называться «Устройство безопасности», «Поддержка устройств безопасности» или в виде длинного текста с припиской «TPM» или «PTT» в конце.
Ошибка 128
Ошибка VAN128 в Valorant напрямую связана с античитом Vanguard. Он работает с ядром, из-за чего ряд программ может вмешиваться в работу защитного ПО Riot. Сперва проверьте и обновите драйвера и перезагрузите античит, клиент и, если не помогло, компьютер. Альтернативное решение проблемы осуществляется следующим способом:
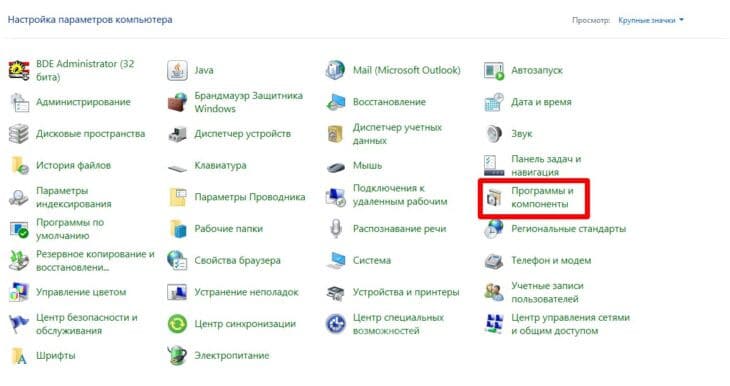
- Откройте панель управления. Затем перейдите в «Программы и компоненты».

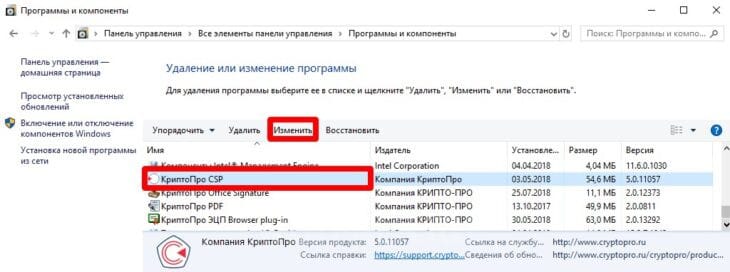
- Найдите приложение «КриптоПро CSP», затем кликните на «Изменить» сверху.

- В мастере установок жмите «Далее», после чего выбирайте «Изменить». В пункте «Совместимость с продуктами Microsoft» установите параметр «Данный компонент будет недоступен».
Теперь остается перезагрузить ПК, если проблема сохранится, необходимо будет удалить ПО. Существуют и альтернативные способы решения ошибки:
- Откройте командную строку «Win+R».
- Введите два набора команд: «bcdedit -set TESTSIGNING OFF» и «bcdedit -set NOINTEGRITYCHECKS OFF».
- Откройте Valorant и перезапустите компьютер.
Кроме того, стоит проверить и восстановить файлы Valorant.
Ошибка Vanguard

Ошибка Vanguard в Valorant вызвана проблемами в работе античита. Исправить их можно рядом способов:
- Отключить антивирусы, а также добавить игру в исключения включенных антивирусов и брандмауэра.
- Установить последние обновления Windows. Если сидите на 7-й версии, обратите внимание на обновления KB4474419 и KB4490628. В случае сохранения ошибки установите пакет Visual C++.
- Переустановить Vanguard и проверьте его на наличие обновлений.
Ошибка VAN79


Ошибка 79 в Valorant зачастую связана с ошибкой в соединении. Исправить ее можно следующими действиями:
- Обновить Windows.
- Перезапустить клиент Riot и сам Valorant.
- Перезапустить Vanguard. Для этого нажмите «Win+R» и введите «services.msc». Найдите службу «vgc» и нажмите по ней правой кнопкой мыши. В пункте «Тип запуска» поставьте «Автоматический».
Ошибка 57
Ошибка 57 в Valorant также связана с проблемами в работе античита Vanguard. Легче всего исправить ее банальным удалением:
- Откройте диспетчер задач, зажав «Ctrl + Shift + Esc». Найдите Vanguard и завершите процесс, а также все связанные с ним.
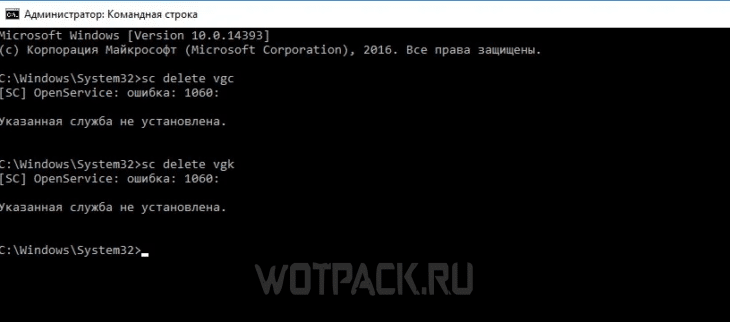
- Запустите командную строку, нажав «Win+R» и вписав «cmd». Далее введите две команды: «sc delete vgc» и «sc delete vgk».

- Закройте консоль и через проводник найдите папку «Riot Vanguard» в «Program Files». Удаляйте каталог и перезагрузите устройство.
- Запустите установщик Валоранта от имени администратора. Согласитесь загрузить новую версию античита и вновь перезагрузите устройство.
Ошибка 43

Ошибка 43 в Valorant связана с истечением времени ожидания. Проблема может быть как на стороне Riot, так и на стороне пользователя. В первом случае нужно просто ждать, во втором можно попробовать несколько решений:
- Перезагрузить игру и компьютер.
- Проверить целостность файлов, а также открыть клиент и установить обновление.
- Удалить клиентские файлы игры. Для этого зажмите «Win+R» и введите «%AppData%». Вернитесь в папку «AppData», затем в «Local». Найдите «Riot Games», в этом каталоге перейдите в «Riot Client» и «Data». Там удалите файл «RiotGamesPrivateSettings».
Ошибка 185
Ошибка VAN185 в Valorant также связана с работой античита. Починить ее можно стандартными способами:
- Перезагрузить клиент и Vanguard.
- Обновить драйвера видеокарты.
- Проверить стороннее обеспечение и отключить оверлеи, антивирусы и оптимизаторы системы.
- Переустановить Riot Vanguard и саму игру.
- Отключить IPv6 и перезагрузить службу vgc в списке служб Windows.
Коды ошибок в Valorant
Если не смогли найти свою ошибку в пунктах выше, стоит посмотреть на официальном сайте поддержки Riot. Там разобраны почти все коды ошибок в Valorant с советами по решению.
Надеемся, что наша статья помогла разобраться с тем, как исправить ошибки в Валорант. Если остались какие-либо вопросы — задавайте их в комментариях, мы обязательно ответим.
-
Home
-
News
- Here’s How to Fix Valorant Error Code VAN 9001 in Windows 11
Here’s How to Fix Valorant Error Code VAN 9001 in Windows 11
By Vera | Follow |
Last Updated
If you are a player of Valorant, you may encounter a Valorant TPM 2.0 error – VAN9001 in Windows 11. This issue always happens, making you annoyed. How can you fix the Windows 11 Valorant TPM error code? MiniTool will show you some useful methods in this post and now let’s go to see them.
VAN 9001 Valorant Windows 11
Valorant is a free first-person hero shooter that comes from Riot Games. It is compatible with Microsoft Windows, including Windows 11/10/8/7 and this game is popular with many players all over the world.
However, when you play this game in Windows 11, some issues always appear, for example, error code VAN 1067, Valorant FPS drops, etc. In addition, you may run into another common Valorant Windows 11 error – VAN 9001. This is the topic we will focus on here.
This is because Valorant starts to enforce both TPM and Secure Boot in Windows 11 to make sure a trusted platform when playing this game. Valorant is not working on Windows 11 PCs without TPM. You can encounter this Valorant TPM 2.0 error if Trusted Platform Module and Secure Boot are not enabled.
Well then, how can you fix VAN 9001 error code? Solutions will be introduced in the following part. Just try them to solve your issue.
Enable TPM 2.0 and Secure Boot
To play Valorant without this Windows 11 Valorant TPM error, the first thing you should do is to enable TPM and Secure Boot.
Based on different manufacturers and computers, the process varies a little. Here are the steps you should follow:
Step 1: Restart your Windows 11 PC and rapidly press a key like DEL or F2 to boot the PC to the BIOS menu.
Step 2: In BIOS, make sure the PC is in advanced mode.
Step 3: Look for TPM. On the Intel processor, the TPM is known as PTT. For AMD processors, the TPM is called fTPM in BIOS. Then, enable it.
Step 4: Next, go to the secure boot option to look for Secure Boot and enable it. Note that you should change the setting of Secure Boot from custom to standard
Step 5: Save all the changes and boot Windows 11 to the desktop. Then, you can play Valorant without any TPM error.
Related articles:
- Windows 11 UEFI: Everything You Should Know Is Here!
- How to Check if Your PC Has TPM for Windows 11? How to Enable It?
Edit Group Policy Editor
According to users, there is another solution to fix Valorant VAN 9001 error code and it is to enable Require additional authentication at Startup. See what you should do.
Step 1: Go to the Windows search bar, type Edit Group Policy and click the result to open this editor.
Step 2: Go to Computer Configuration > Administrative Templates.
Step 3: Click Windows Components and expand BitLocker Drive Encryption.
Step 4: Click Operating System Drives and find Require additional authentication at startup from the right side.
Step 5: Double-click this setting and choose Enabled in the pop-up window. Make sure the checkbox for Allow BitLocker without a compatible TPM (requires a password or a startup key on a USB flash drive is ticked.
Step 6: Click Apply and then OK to save the change.
Final Words
After reading this post, you know how to fix Valorant error code VAN 9001 in Windows 11. If you are bothered by this issue, try these two solutions at once to get rid of the trouble.
About The Author
Position: Columnist
Vera is an editor of the MiniTool Team since 2016 who has more than 7 years’ writing experiences in the field of technical articles. Her articles mainly focus on disk & partition management, PC data recovery, video conversion, as well as PC backup & restore, helping users to solve some errors and issues when using their computers. In her spare times, she likes shopping, playing games and reading some articles.
Here is a complete guide on how you can fix the error VAN9001 on Valorant in Windows 11/10. Valorant is a free and popular first-person hero shooter by Riot Games. It is loved by millions of gaming enthusiasts across the globe. While you are likely to have a good experience playing it, it is not uncommon to run down different error codes. One such error code is VAN9001. A lot of users have reported of being experiencing the VAN9001 error code when trying to launch the Valorant game. When triggered, the users experience the following error message:

VAN9001, This build of Vanguard requires TPM version 2.0 and secure boot to be enabled in order to play.
If you are one of those who are facing the same error, we got you covered. You can learn various fixes that will enable you to fix the error.
What causes the error VAN9001 on VALORANT?
Windows 11 has some built-in security requirements including enabled Secure Boot and TPM 2.0. Now, Valorant is also enforcing the same security requirements to make sure you are on a trusted platform. You are required to have TPM 2.0 and secure boot enabled on your BIOS configuration to open the game. So, when you are on the latest Windows 11, Valorant’s anti-cheat system called Vanguard will check for the competitive integrity of the game using the TPM module.
Apparently, some Windows update (KB5006050) makes tweaks to your BIOS settings and disables the secure boot option. So, users might think that they have secure boot enabled while in fact, a Windows update has turned it off in the background. This affects Valorant and you are likely to encounter the VAN9001 error when trying to open the game. The same goes for TPM. In case it is disabled, you will encounter the same error when launching the game.
Do note that to enable secure boot, you need to have UEFI. In case your hard drive is partitioned in MBR, you can convert MBR to GPT before you go ahead with enabling secure boot.
Now, let us have a look at the solutions that will help you resolve the error.
Does Valorant need Secure Boot?
Yes, Valorant needs the secure boot requirement to run without any error. As reported by many users, the error VAN9001 is triggered in case you don’t have secure boot and TPM 2.0 enabled. So, make sure you have both the requirements turned on before trying to play the game.
How do I check my TPM in Windows 11/10?
To check whether your PC has a Trusted Platform Module (TPM) chip, you can check it through TPM Management or on your BIOS or UEFI. Other than that, you can do so using the Security Node in Device Manager. You can also WMIC command in the Command Prompt to check if you have a TPM chip.
Here are the methods that you can try to fix error VAN9001 on Valorant in Windows 11/10:
- Enable Secure Boot and TPM.
- Edit Group Policy.
- Restore Factory Keys.
- Delete Valorant Cache and Temporary Files.
Let us explain the above methods in detail!
1] Enable Secure Boot and TPM
When you encounter this error, the first thing you should do is make sure that secure boot and TPM are enabled from the BIOS settings page. There have been instances where some Windows updates have turned off secure boot and TPM in the BIOS configuration. Some users have reported being experiencing the problem after installing Windows update KB5006050. Now, if the scenario applies, you should be able to fix the issue simply by enabling secure boot and TPM in BIOS configuration.
The process of enabling secure boot and TPM may differ for individuals based on your motherboard manufacturer. Also, do remember that you will be required to enable UEFI mode to be able to enable secure boot.
Secure Boot is usually enabled in almost all system that supports it, but sometimes, an update or a third party can disable it without your knowledge. So, let us start by enabling Secure Boot as mentioned in the error code itself.
Here is the step-by-step procedure to enable Secure Boot on your Windows PC:
- First of all, press Windows + I hotkey to launch the Settings app and then go to the System > Recovery section and tap on the Restart button associated with the Advanced startup option.
- Now, on the advanced startup screen, click on the Troubleshoot option and then select Advanced options.
- Next, click on the UEFI Firmware settings option and press the Restart button.
- You can now go to the advanced, security, or boot settings page (depending upon your motherboard) and then enable the Secure boot option.
- Look for Secure Boot, it will be under Security / Boot / Authentication Tab (It depends on the OEM).
- Now, Enable Secure Boot and save changes, but make sure to not exit
After enabling Secure Boot, we need to enable TPM or Trusted Platform Module.
- So, while you are in the BIOS you can navigate to the advanced, security, or boot settings page and make sure the TPM or TPM State option is enabled.
- When done, restart Windows and then try playing VALORANT and see if the error in hand is now fixed.
In case you have TPM and secure boot enabled on your BIOS and still, receive the same error, there might be some other underlying issue that is causing the error. Hence, move on to the next potential fix the get rid of the error.
See: Fix VALORANT connection error codes VAN 135, 68, 81.
2] Edit Group Policy
As per some users, the error can also be fixed by enabling the Require additional authentication at Startup policy in Group Policy Editor. You can also try the same and see if it enables you to fix the error or not.
Here are the steps to make a Group Policy tweak to get rid of error VAN 9001 on Valorant:
- Firstly, press the Windows + R key to evoke the Run dialog box and then enter gpedit.msc to launch Group Policy Editor.
- Now, simply move to the Computer Configuration > Administrative Templates section.
- After that, click on Windows Components and then expand the BitLocker Drive Encryption option present under it.
- Under the BitLocker Drive Encryption drop-down, you will find the Operating System Drives option; simply double-click on it.
- You will now see various policies at the right-side panel. From available policies, double-click the Require additional authentication at startup policy.
- In the next dialog window, select the Enabled option and also ensure the Allow BitLocker without a compatible TPM (requires a password or a startup key on a USB flash drive) is selected.
- Finally, click on the Apply > OK button to save changes.
After enforcing the above policy, restart your PC and then launch VALORANT. Hopefully, you won’t see the error VAN 9001 anymore.
Read: VALORANT: This game is not available on your Operating System.
3] Restore Factory Keys
In case the above methods fail to fix the error for you, you can try restoring your secure boot keys in your BIOS configurations to check whether or not the issue is gone. You should be able to find the option to restore keys under the Secure Boot option in your BIOS configuration. On newer motherboards or BIOS versions, the option might be hidden under the Key Management list. After resetting the keys, apply and save changes and then reboot your system. On the next startup, try playing VALORANT and see if the error is now fixed.
Read: Error VAN9003, This build of Vanguard requires secure boot to be enabled in order to play
4] Delete Valorant Cache and Temporary Files
You may also see the error code in question if Valorant game cache files are corrupted. In that case, we need to flush them and allow the game to create new ones. To do the same, follow the prescribed steps.
- Hit Win + R, type “AppData”.
- Go to Local > Valorant > Saved.
- Next, select the Crashes folder and press the Delete button to clear it.
- After that, open the webcache folder, and delete the GPUCache folder.
- Then, delete the Cache folder.
Finally, restart Valorant and see if the issue persists.
See: How to fix Valorant Vanguard Not initialized error?
How do I fix my Van 1067?
To fix the error Van 1067 on Valorant, make sure you have enabled secure boot and TPM 2.0. Other than that, you can select Windows UEFI in BIOS, reset Secure Boot Keys in BIOS, disable CSM, or reset BIOS/UEFI settings to fix the error.
Read: Fix VALORANT DirectX Runtime error.
Can I play Valorant on Windows 11 without TPM?
No, you cannot play Valorant on Windows 11 without TPM. More specifically, you must have TPM 2.0 to play Valorant on your computer. However, if it displays an error, you need to enable TPM and Secure Boot. But this has not been the case for most users, they have enabled the feature but still were not able to play the game. You should check the solutions mentioned in this article to get rid of the issue.
Read Next:
- Fix VALORANT Vanguard error codes 128, 57
- Fix VALORANT connection error codes VAN 135, 68, 81.
Multiple users have been experiencing the “This build of vanguard requires tpm version 2.0 and secure boot to be enabled in order to play” error message which is represented by the error code VAN9001 while trying to open up Valorant. The error message is specific to Windows 11 which is due to the fact that Windows 11 requires you to have TPM 2.0 and Secure Boot enabled on your BIOS. The reason you experience the issue in question is obvious from the error message itself. Fortunately, there is a really easy fix to the problem here so don’t worry as we will take you through the process in this article.
As it turns out, Valorant is enforcing the TPM 2.0 and secure boot requirements of Windows 11 in order to ensure a trusted platform. Thus, if you are running Windows 11 on your system, the Vanguard anticheat system will be using the TPM module to further ensure the competitive integrity of the game. In addition to that, a Windows update i.e. KB5006050 apparently changes some BIOS settings on your computer which as a result turns off secure boot. Therefore, often users think they have enabled secure boot from their BIOS configuration without knowing that a Windows update has actually disabled it in the background. When this happens, Valorant is not able to start as the Vanguard anticheat application requires secure boot to be enabled.
In addition to that, TPM may have been disabled in which case you will have to enable that. To resolve this problem, you will have to make sure that both Secure Boot and TPM are enabled in your BIOS. In some cases, if your hard drive is partitioned in MBR, your BIOS will be set to CMS while you need to have UEFI in order to enable secure boot. In such a scenario, you will have to convert your MBR hard drive to GPT before being able to enable secure boot. If you enable secure boot without converting your partition table, you might experience issues where your computer will not boot up. In such a scenario, you will have to reset your CMOS battery and then start over. With that said, we can finally get started with showing you the solutions available to resolve the problem in question. So, without further delay, let us get right into it.
Enable Secure Boot
As it turns out, the first thing that you should do when you encounter the error message in question is to make sure that secure boot is enabled from the BIOS. There has been a recent Windows update KB5006050 which apparently disabled secure boot in the BIOS configuration. Now, knowing this, users may try to simply uninstall the Windows update via the Control Panel, however, that does not work as the update is installed automatically again on a restart. The fix here would be to simply head to your BIOS configuration and then enable Secure Boot from there. Secure boot is essentially a security feature that protects your computer from malware and virus infections. It does that by looking for any changes in the boot loader or important system files by validating the digital signatures of the files.
The process of enabling secure boot on your BIOS may vary a little depending on your motherboard manufacturer. However, the changes are usually very slight as the main procedure remains the same.
Before we begin, it is important to note that you need to enable UEFI mode in order to enable Secure Boot. In case you aren’t using UEFI mode, it is likely that your hard drive is also not partitioned in GPT but rather MBR. If that is the case, you might experience issues booting up after enabling Windows UEFI mode. In case you are on CMS, we would recommend switching to UEFI mode and then exiting out of your BIOS configuration while saving the changes. Perform a restart and then get into BIOS config again to enable secure boot. The option for changing to UEFI mode can be usually found under Advanced > Windows OS Configuration. It is usually referred to as BIOS UEFI/CSM Mode while on older BIOS versions, it may be labelled as Windows 10 WHQL Support. Make sure to perform a reboot after enabling this before you enable secure boot.
To enable secure boot on your computer, follow the instructions down below:
- First of all, go ahead and restart your computer.
- As your computer is restarting, press the respective key for getting into BIOS setup. This can vary depending on the motherboard’s manufacturer. However, usually the keys are DELETE, F9, F2 etc.
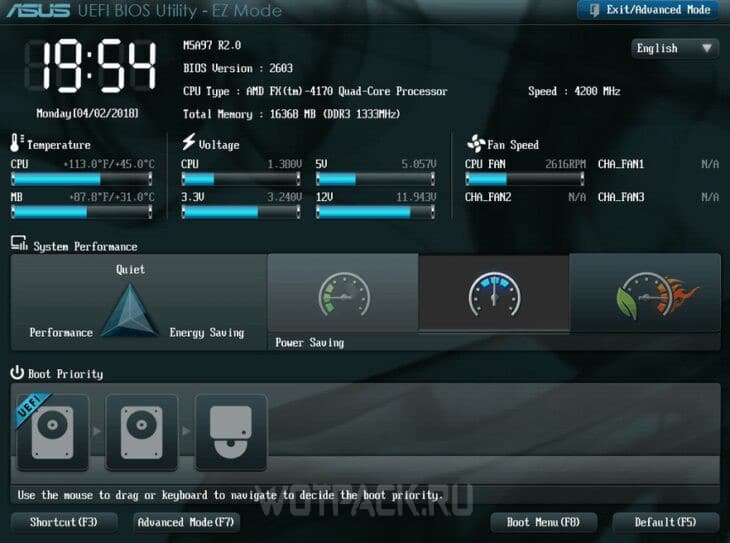
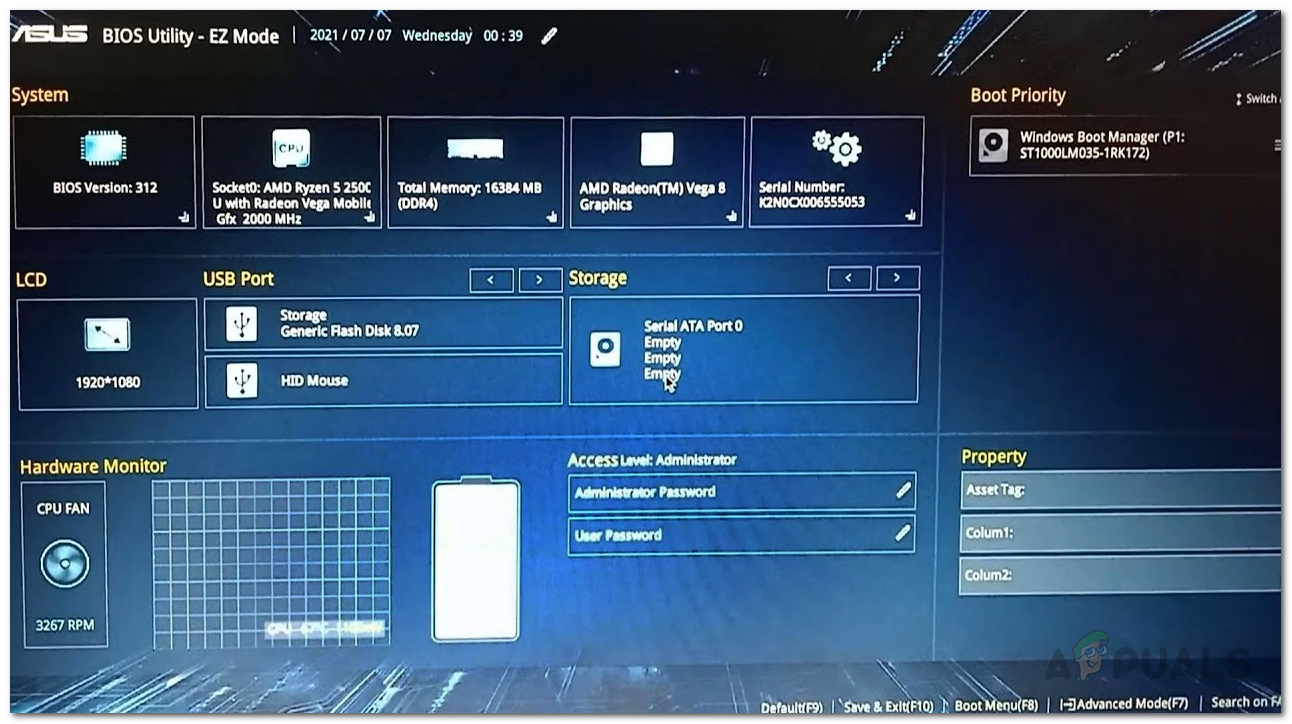
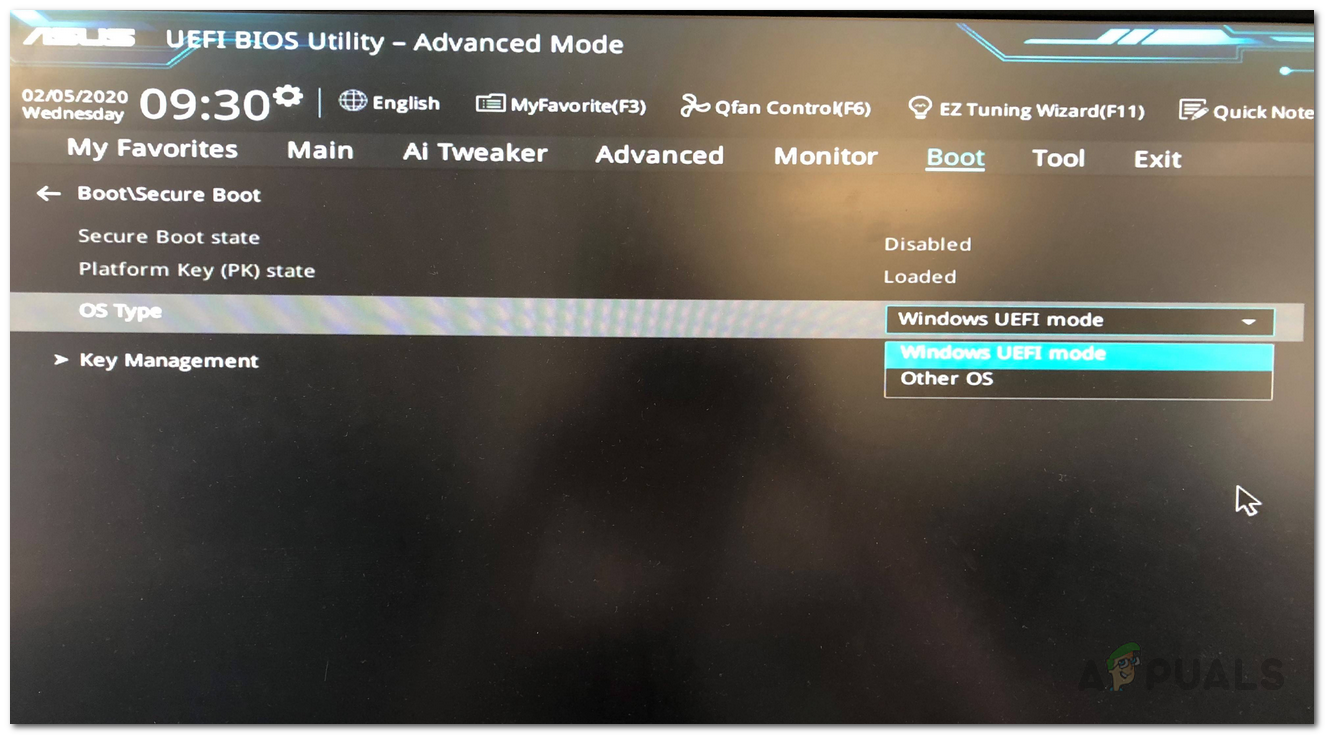
- Once you are in BIOS config, make sure you are not in EZ Mode. This especially applies to ASUS motherboards as it takes you to EZ Mode by default. Tap the F7 key on your keyboard to switch to Advanced Mode.

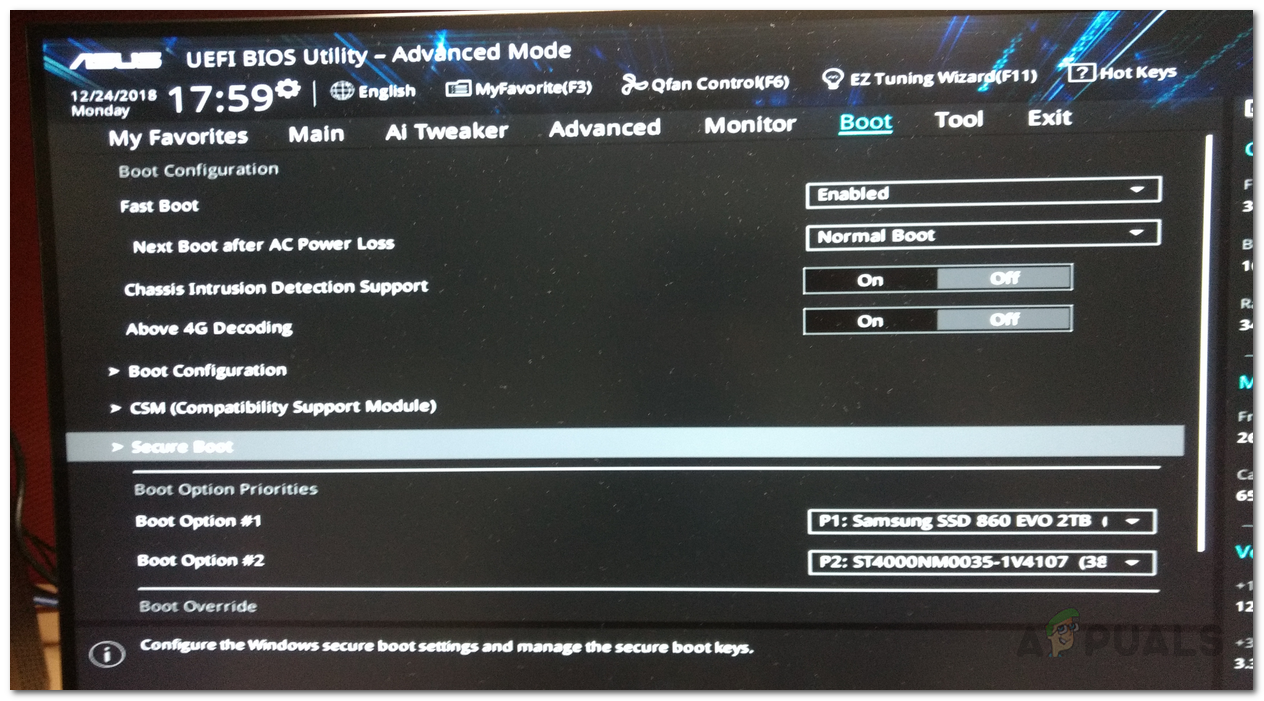
ASUS EZ Mode - Now, on some motherboards, the Secure Boot option can be found under the Boot tab. For example, on ASUS motherboards, you will find the Secure Boot option under the Boot tab.

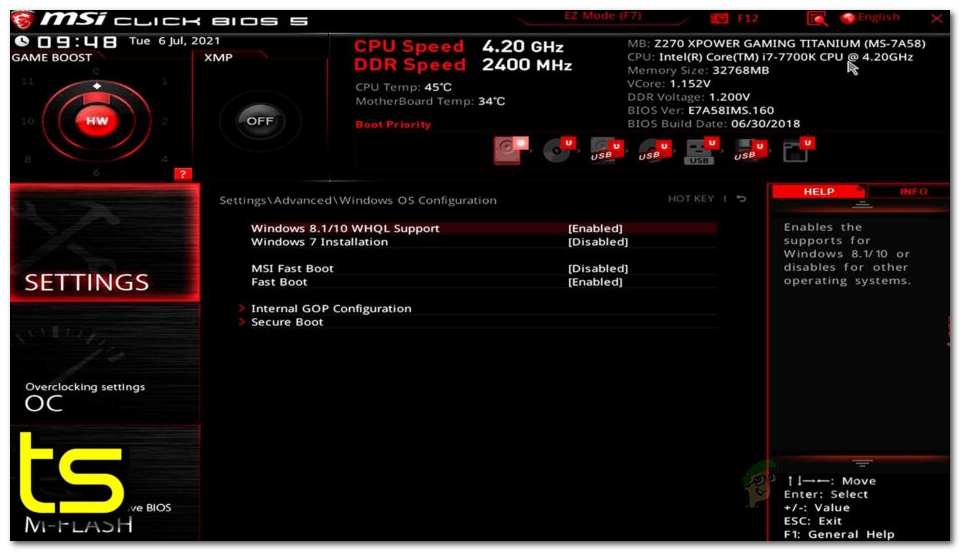
Accessing Secure Boot Option on ASUS Motherboards - However, on other motherboards like MSI, the Secure Boot option may be located under Advanced > Windows OS Configuration.

Enabling Secure Boot on MSI Motherboards - Once you have located the option, make sure it is set to Windows UEFI instead of Other OS and Secure Boot is Enabled.

Secure Boot on ASUS Motherboards - You may not have these options depending on your motherboard again. Instead, you might have Standard or Custom options. Keep it on standard and perform a reboot.
- After your computer starts up, login into your account and open up Valorant to see if the error message is still there.
Enable TPM
In addition to TPM, you will have to also make sure that TPM is enabled in your BIOS configuration in order to play Valorant. This is important as the Vanguard anticheat system enforces TPM on Windows 11 machines for keeping the competitive integrity of the game. If you have bypassed Windows 11 requirements, and you don’t have a TPM module on your computer, then, unfortunately there is no workaround for you just yet and you will have to go back to Windows 10 if you wish to keep playing Valorant.
The TPM option can usually be found under the Security tab on your BIOS configuration. If you are using an AMD processor, TPM will be known as fTPM for you. Do not worry about the slight change in name as it is basically the same thing. Once you have enabled TPM, perform a restart to see if the error message still appears.
Restore Factory Keys
In some cases, users experience the error message in question even when they have Secure Boot and TPM enabled in their BIOS configuration. In such a scenario, you will have to restore your secure boot keys in your BIOS config and then see if the issue has been resolved. As it turns out, secure boot uses public and private keys that are used to digitally sign and verify the authenticity of the code. This method can resolve the issue for you especially if you are using a laptop.
The option to restore secure keys is located right under the Secure Boot option in your BIOS configuration. It may be hidden under the Key Management list on newer motherboards and BIOS versions. Once you have reset the keys, save the changes and perform a restart. Check if the problem is still there after your computer boots up.
Kamil Anwar
Kamil is a certified MCITP, CCNA (W), CCNA (S) and a former British Computer Society Member with over 9 years of experience Configuring, Deploying and Managing Switches, Firewalls and Domain Controllers also an old-school still active on FreeNode.